SSANGYONG MUSSO 2003 Service Manual
MUSSO 2003
SSANGYONG
SSANGYONG
https://www.carmanualsonline.info/img/67/57511/w960_57511-0.png
SSANGYONG MUSSO 2003 Service Manual
Page 638 of 1574
1F3-28 OM600 ENGINE CONTROLS
Tools Required 001 589 65 09 00 Socket Wrench Insert000 589 00 68 00 Cleaning Set Repair Procedure
1. Clamp the nozzle holder (1) in a vice and remove the nozzletensioning nut (8). Notice Use protective jaws for clamping.
2. Disassemble the fuel injection nozzle.
Socket Wrench Insert 001 589 65 09 00
3. Clean the nozzle needle (6) and nozzle body (7) with an abradant.
4. Clean the nozzle seat with cleaning cutter.
Cleaning Set 000 589 00 68 00
5. Immerse nozzle needle (6) and nozzle body (7) in filtered diesel fuel. When the nozzle body is held vertical, the weight of the nozzle needle must cause it to slide down toward thenozzle needle seat.
6. Assemble the injection nozzle so that the tip of the thrust (4) pin is facing toward the nozzle holder.
Tightening Torque 80 Nm
Notice Nozzle needle (6) and nozzle body (7) should always be
replaced as a pair.
Page 639 of 1574
OM600 ENGINE CONTROLS 1F3-29
7. Check the fuel injection nozzle and adjust opening pressureif necessary. Opening pressure adjustment Disassemble the fuel injection nozzle and replace the steel washer (2). Notice Each 0.05mm thickness of the washer results in a pressure
difference of approx. 3bar.
Page 640 of 1574
1F3-30 OM600 ENGINE CONTROLS
REMOVAL AND INSTALLATION OF INJECTION TIMING DEVICE Preceding Work : Removal of vacuum pump
1 Cylinder Head Cover
2 Bolt ............................................................ 10Nm
3 Gasket ................................................... Replace
4 Fuel Injection Pump
5 Seal ....................................................... Replace
6 Screw Plug ................................................. 30Nm
7 Oil Pan
8 Locking Pin
9 Injection Timing Device 10 Washer
11 Bolt (Left-Hand Thread) .............................46Nm
12 Camshaft Sprocket
13 Washer
14 12-Sided Stretch Bolt ............Check, 25Nm + 90 °
15 Timing Chain
16 Seal
17 Chain Tensioner ......................................... 80Nm
Page 641 of 1574
OM600 ENGINE CONTROLS 1F3-31
Tools Required 601 589 00 08 00Flange
601 589 05 21 00 Locking Screw
116 589 20 33 00 Sliding Hammer
116 589 02 34 00 Threaded Bolt
667 589 04 63 00 Retaining Plate Removal & Installation Procedure
1. Remove the bolts (2) and then remove the cylinder head cover (1) and gasket (3). Installation Notice
Tightening Torque 10 Nm
Notice Replace the gasket.Rotate the engine 1 revolution by hand and check TDC marking of the crankshaft and camshaft.
2. Loosen the camshaft sprocket bolt (14). Notice Do not remove the bolt. Installation Notice Notice If max. length of bolt exceeds 53.6mm, replace it.
Tightening Torque 25Nm + 90 °
3. Loosen the bolt (11) (left-hand thread).
Notice Do not remove the bolt.
Page 642 of 1574
1F3-32 OM600 ENGINE CONTROLS
5. Remove the plug (6) and seal (5) from the fuel injection pump and collect oil in a suitable vessel. Installation Notice
Notice Replace the seal.
Tightening Torque 30 Nm
6. Install the locking screw (18) into the injection pump. Notice Before tightening the bolts for the injection timing device and the camshaft sprocket, always remove the locking screw from the injection pump and reinstall the plug.
Locking Screw 601 589 05 21 00
7. Place alignment marks (arrow) on the timing chain (12) and camshaft sprocket (15).
4. Position the no.1 cylinder at A
TDC 15°.
Notice Do not rotate the engine with camshaft sprocket bolt or opposite direction of the engine rotation.
Page 643 of 1574
OM600 ENGINE CONTROLS 1F3-33
9. Pull out the 12-sided stretch bolt (14) and washer andremove the camshaft sprocket (12).
Tightening Torque 46 Nm
11. Using special tool (24, 25), remove the locking pin (8). Sliding Hammer 116 589 20 33 00Threaded Bolt 116 589 02 34 00
8. Remove the chain tensioner (17).
Installation Notice
Tightening Torque 80 Nm
Notice Replace the seal (16).
10. Pull out the bolt (11) and washer (10). Notice Be careful that the bolt is left-hand thread. Installation Notice
Page 644 of 1574
1F3-34 OM600 ENGINE CONTROLS
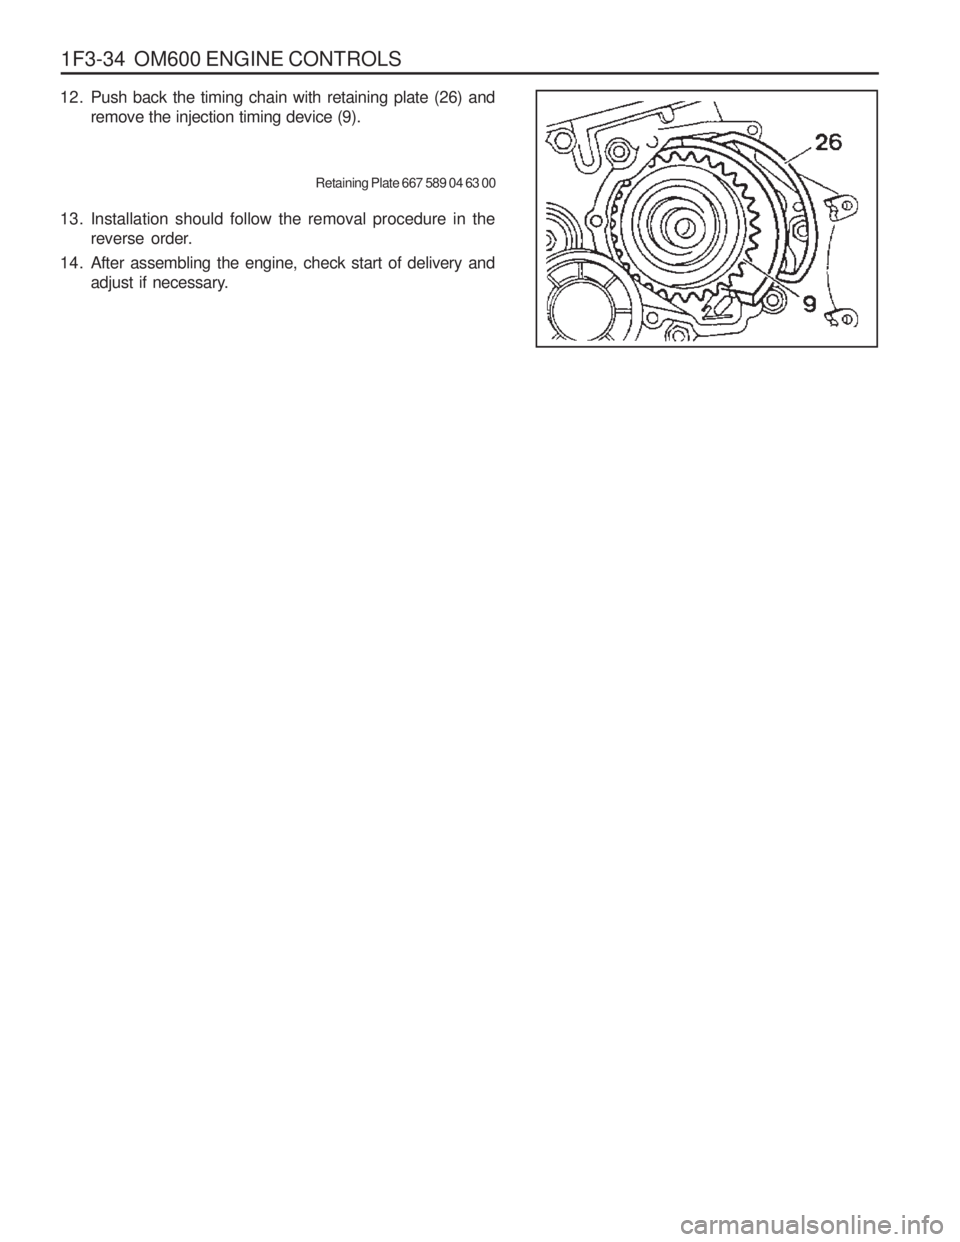
12. Push back the timing chain with retaining plate (26) and remove the injection timing device (9).
Retaining Plate 667 589 04 63 00
13. Installation should follow the removal procedure in the reverse order.
14. After assembling the engine, check start of delivery and adjust if necessary.
Page 645 of 1574
OM600 ENGINE CONTROLS 1F3-35
INJECTION TIMING DEVICE Preceding Work : Removal of injection timing device
1 Cam Sprocket........................................... Check
2 Bushing .................................................... Check
3 Governor Weights 4 Segment Flange and Drive Hub
5 Compression Springs
Page 646 of 1574
1F3-36 OM600 ENGINE CONTROLS
Disassembly & Assembly
1. Remove the governor weights (3).
2. Pull out the compression springs (5) and cam sprocket (1)from the segment flange (4).
3. Knock out the bushing with a proper drift.
4. Installation should follow the removal procedure in the reverse order.
Page 647 of 1574
OM600 ENGINE CONTROLS 1F3-37
START OF DELIVERY TEST (POSITION SENSOR, RIV METHOD)1 Position Sensor
2 Battery
3 Fuel Injection Pump 4 Seal
....................................................... Replace
5 Screw Plug ................................................. 30Nm
Service Data
Start of Delivery (RIV) ATDC 14° - 16 °


