SUBARU BRZ 2016 1.G Navigation Manual
Manufacturer: SUBARU, Model Year: 2016, Model line: BRZ, Model: SUBARU BRZ 2016 1.GPages: 336, PDF Size: 10.83 MB
Page 271 of 336
Audio and Visual 269
How to Operate Portable Audio Devices
Using Aha Application in your vehicle
If you connect a smartphone to this unit after starting a supported Aha
app on the smartphone, you can display and operate the Aha app
displayed on the smartphone on the screen of this unit.
Connect the iPhone/iPod touch to the USB TERMINAL or connect the
Android device by utilizing the Bluetooth wireless communication
technology.
Search and download the Aha application from your smartphone app
store.
•iPhone and iPod touch �J Apple App Store via iTunes.
•Android device �J Google Play Store.
For details on connecting an iPhone/iPod touch, see “Using the iPod
Player” on Page 248.
For details on registering or connecting an Android device, see “Using
Bluetooth Audio” on Page 255.
When iPhone and iPod touch and Android devices are connected at the
same time, select the smartphone which you want to use on the
Settings screen. For details of Aha Radio Setting, see “Aha Setting” on
Page 32.
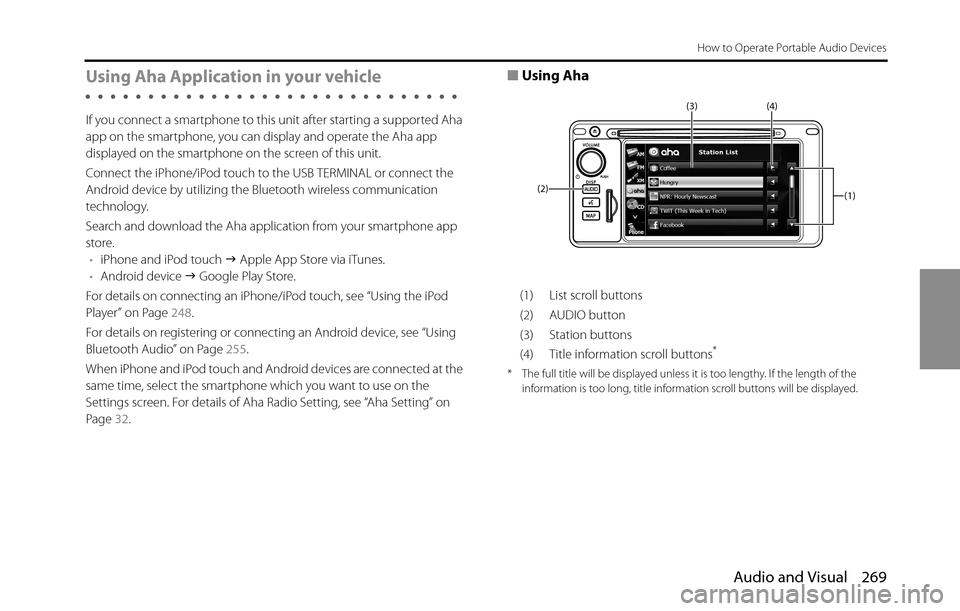
■Using Aha
(1) List scroll buttons
(2) AUDIO button
(3) Station buttons
(4) Title information scroll buttons
*
* The full title will be displayed unless it is too lengthy. If the length of the
information is too long, title information scroll buttons will be displayed.
(1) (4) (3)
(2)
Page 272 of 336
270 Audio and Visual
How to Operate Portable Audio Devices
■Operating the Aha Application
Before performing this operation, first install the supported Aha app in
the smartphone at iTunes, an App Store or Google Play Store.
•Create an account and login to the Aha application on the
smartphone.
1Run the Aha application on your smartphone. The app
must be started on your device first, before connectivity
will be enabled on this unit.
• When the Aha application is installed on the smartphone, the
Aha icon becomes brighter.
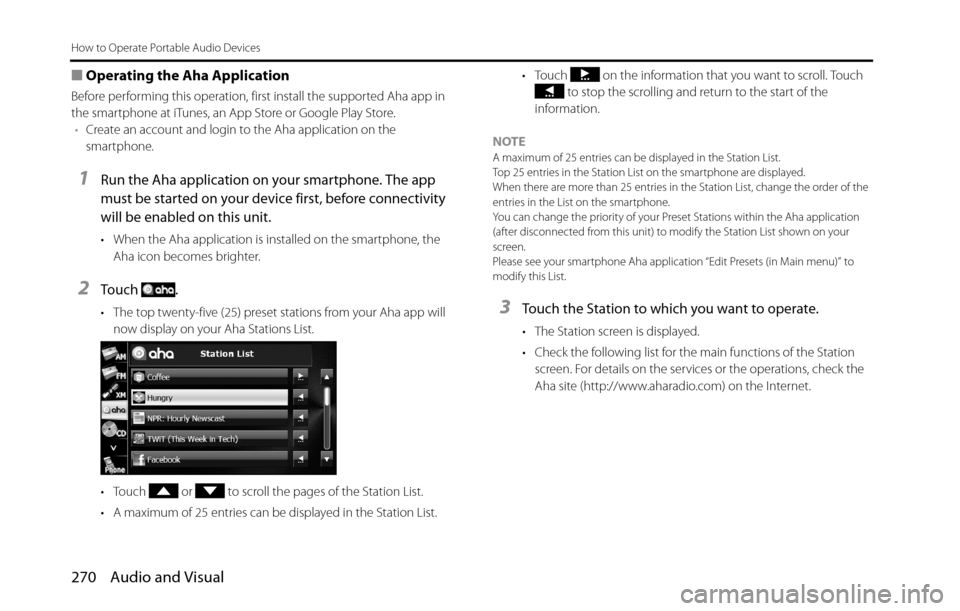
2To u c h .
• The top twenty-five (25) preset stations from your Aha app will
now display on your Aha Stations List.
• Touch or to scroll the pages of the Station List.
• A maximum of 25 entries can be displayed in the Station List.• Touch on the information that you want to scroll. Touch
to stop the scrolling and return to the start of the
information.
NOTE
A maximum of 25 entries can be displayed in the Station List.
Top 25 entries in the Station List on the smartphone are displayed.
When there are more than 25 entries in the Station List, change the order of the
entries in the List on the smartphone.
You can change the priority of your Preset Stations within the Aha application
(after disconnected from this unit) to modify the Station List shown on your
screen.
Please see your smartphone Aha application “Edit Presets (in Main menu)” to
modify this List.
3Touch the Station to which you want to operate.
• The Station screen is displayed.
• Check the following list for the main functions of the Station
screen. For details on the services or the operations, check the
Aha site (http://www.aharadio.com) on the Internet.
Page 273 of 336
Audio and Visual 271
How to Operate Portable Audio Devices
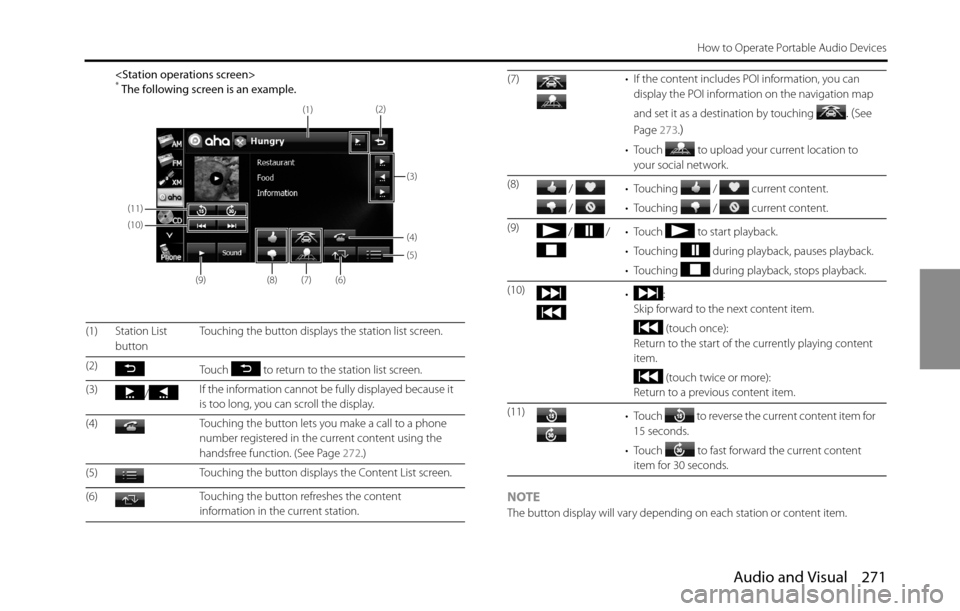
NOTEThe button display will vary depending on each station or content item. (1) Station List
buttonTouching the button displays the station list screen.
(2)
Touch to return to the station list screen.
(3)
/If the information cannot be fully displayed because it
is too long, you can scroll the display.
(4) Touching the button lets you make a call to a phone
number registered in the current content using the
handsfree function. (See Page 272.)
(5) Touching the button displays the Content List screen.
(6) Touching the button refreshes the content
information in the current station.
(11)
(10)
(9)
(8)(7)(6)
(5) (4)
(3) (2)
(1)
(7) • If the content includes POI information, you can
display the POI information on the navigation map
and set it as a destination by touching
. (See
Page 273.
)
• Touch to upload your current location to
your social network.
(8)
/
/ • Touching / current content.
• Touching / current content.
(9)
/ / • Touch to start playback.
• Touching during playback, pauses playback.
• Touching during playback, stops playback.
(10)
•:
Skip forward to the next content item.
(touch once):
Return to the start of the currently playing content
item.
(touch twice or more):
Return to a previous content item.
(11)
• Touch to reverse the current content item for
15 seconds.
• Touch to fast forward the current content
item for 30 seconds.
Page 274 of 336
272 Audio and Visual
How to Operate Portable Audio Devices
■Selecting from the content item list
1To u c h .
2Touch the content item which you want to listen to.
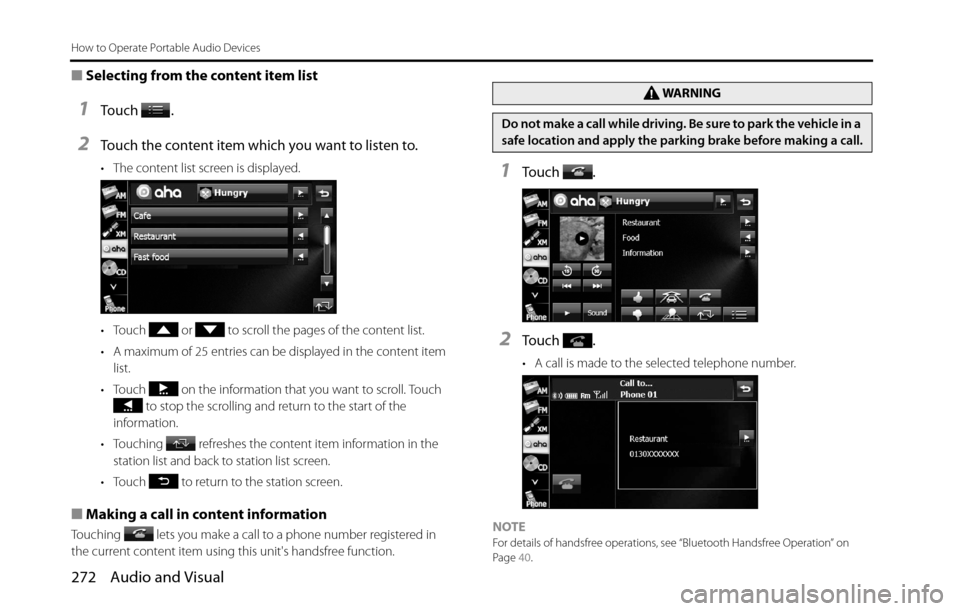
• The content list screen is displayed.
• Touch or to scroll the pages of the content list.
• A maximum of 25 entries can be displayed in the content item
list.
• Touch on the information that you want to scroll. Touch
to stop the scrolling and return to the start of the
information.
• Touching refreshes the content item information in the
station list and back to station list screen.
• Touch to return to the station screen.
■Making a call in content information
Touching lets you make a call to a phone number registered in
the current content item using this unit's handsfree function.
1To u c h .
2To u c h .
• A call is made to the selected telephone number.
NOTE
For details of handsfree operations, see “Bluetooth Handsfree Operation” on
Page 40.
WA R N I N G
Do not make a call while driving. Be sure to park the vehicle in a
safe location and apply the parking brake before making a call.
Page 275 of 336
Audio and Visual 273
How to Operate Portable Audio Devices
■Functions coupled with Aha and the navigation system
Depending on the Stations, functions coupled with the Aha application
and the navigation system may be available.
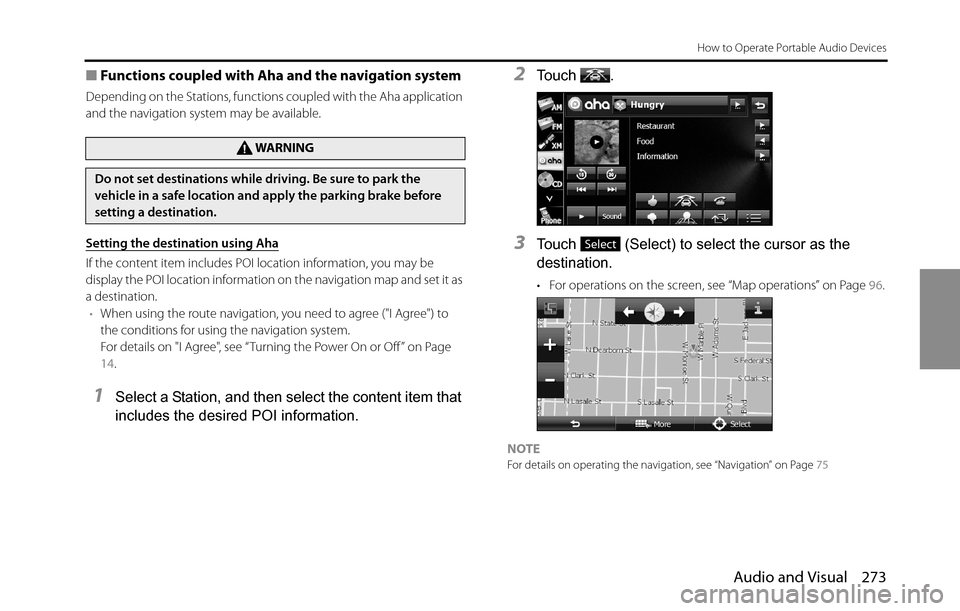
Setting the destination using Aha
If the content item includes POI location information, you may be
display the POI location information on the navigation map and set it as
a destination.
•When using the route navigation, you need to agree ("I Agree") to
the conditions for using the navigation system.
For details on "I Agree", see “Turning the Power On or Off ” on Page
14.
1Select a Station, and then select the content item that
includes the desired POI information.
2To u c h .
3Touch (Select) to select the cursor as the
destination.
• For operations on the screen, see “Map operations” on Page 96.
NOTEFor details on operating the navigation, see “Navigation” on Page 75
WA R N I N G
Do not set destinations while driving. Be sure to park the
vehicle in a safe location and apply the parking brake before
setting a destination.
Select
Page 276 of 336
274 Audio and Visual
How to Operate Portable Audio Devices
Using AUX
Using AUX
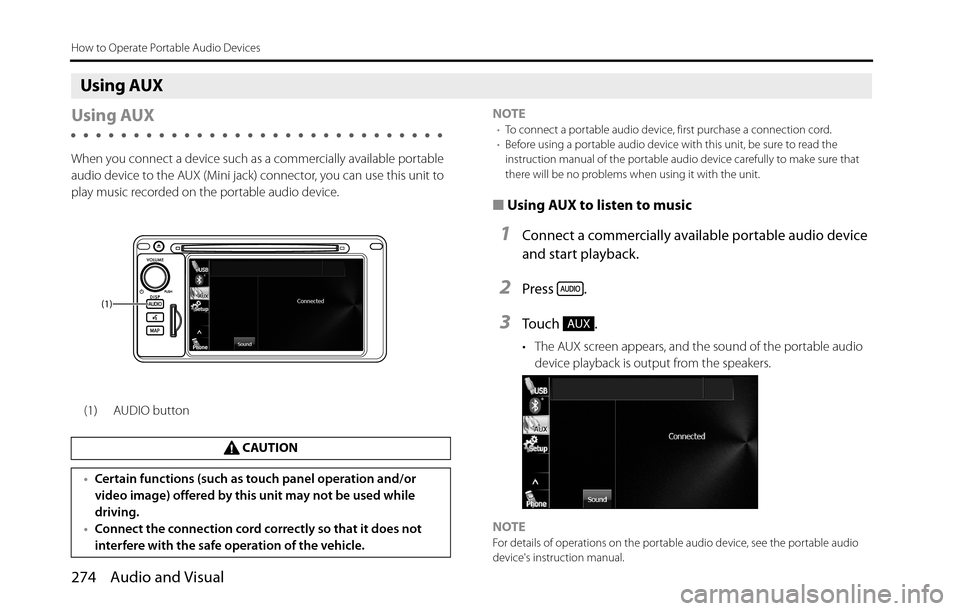
When you connect a device such as a commercially available portable
audio device to the AUX (Mini jack) connector, you can use this unit to
play music recorded on the portable audio device.
(1) AUDIO buttonNOTE
•To connect a portable audio device, first purchase a connection cord.
•Before using a portable audio device with this unit, be sure to read the
instruction manual of the portable audio device carefully to make sure that
there will be no problems when using it with the unit.
■Using AUX to listen to music
1Connect a commercially available portable audio device
and start playback.
2Press .
3To u c h .
• The AUX screen appears, and the sound of the portable audio
device playback is output from the speakers.
NOTE
For details of operations on the portable audio device, see the portable audio
device's instruction manual.
CAUTION
•Certain functions (such as touch panel operation and/or
video image) offered by this unit may not be used while
driving.
•Connect the connection cord correctly so that it does not
interfere with the safe operation of the vehicle.
(1)
AUX
Page 277 of 336

Page 278 of 336
276 Other
Other Operations
Picture Function Operations
Using the Picture Function
If you insert an SD memory card that contains image data, you can play
a slide show of the images, or set an image as the Opening screen.
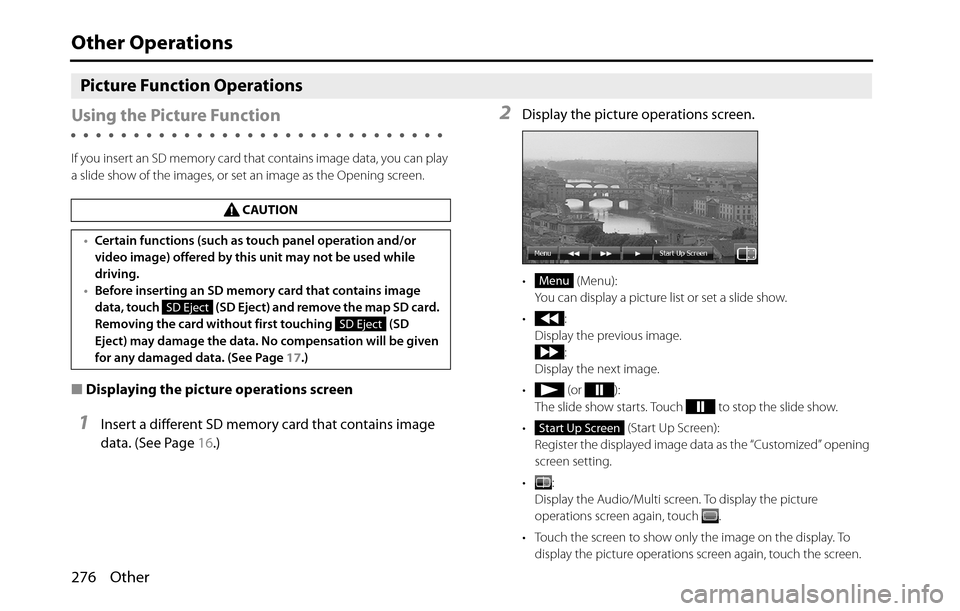
■Displaying the picture operations screen
1Insert a different SD memory card that contains image
data. (See Page 16.)
2Display the picture operations screen.
• (Menu):
You can display a picture list or set a slide show.
•:
Display the previous image.
:
Display the next image.
• (or ):
The slide show starts. Touch to stop the slide show.
• (Start Up Screen):
Register the displayed image data as the “Customized” opening
screen setting.
•:
Display the Audio/Multi screen. To display the picture
operations screen again, touch .
• Touch the screen to show only the image on the display. To
display the picture operations screen again, touch the screen. CAUTION
•Certain functions (such as touch panel operation and/or
video image) offered by this unit may not be used while
driving.
•Before inserting an SD memory card that contains image
data, touch (SD Eject) and remove the map SD card.
Removing the card without first touching (SD
Eject) may damage the data. No compensation will be given
for any damaged data. (See Page 17.)
SD Eject
SD Eject
Menu
Start Up Screen
Page 279 of 336
Other 277
Other Operations
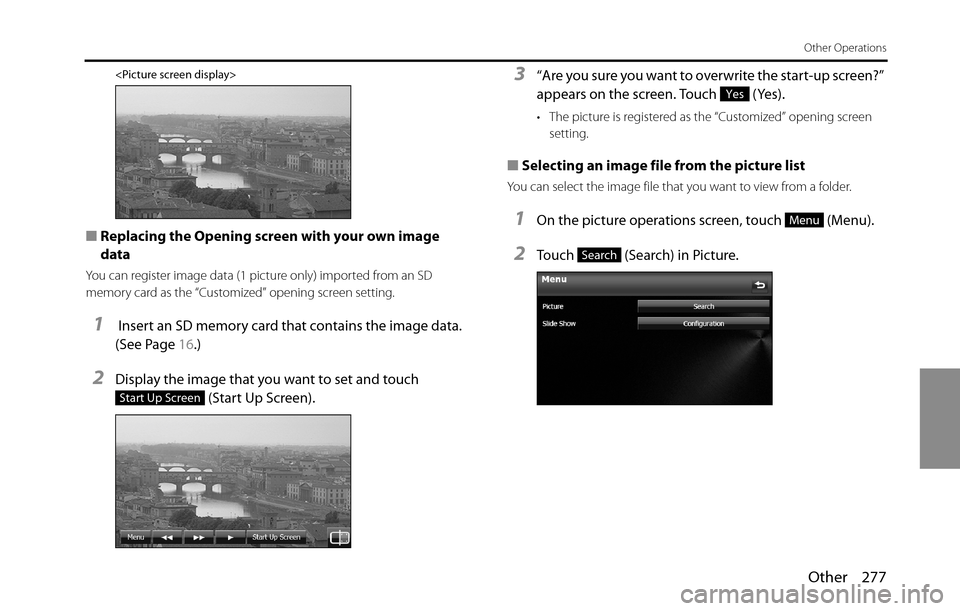
■Replacing the Opening screen with your own image
data
You can register image data (1 picture only) imported from an SD
memory card as the “Customized” opening screen setting.
1 Insert an SD memory card that contains the image data.
(See Page 16.)
2Display the image that you want to set and touch
(Start Up Screen).
3“Are you sure you want to overwrite the start-up screen?”
appears on the screen. Touch (Yes).
• The picture is registered as the “Customized” opening screen
setting.
■Selecting an image file from the picture list
You can select the image file that you want to view from a folder.
1On the picture operations screen, touch (Menu).
2Touch (Search) in Picture.
Start Up Screen
Yes
Menu
Search
Page 280 of 336
278 Other
Other Operations
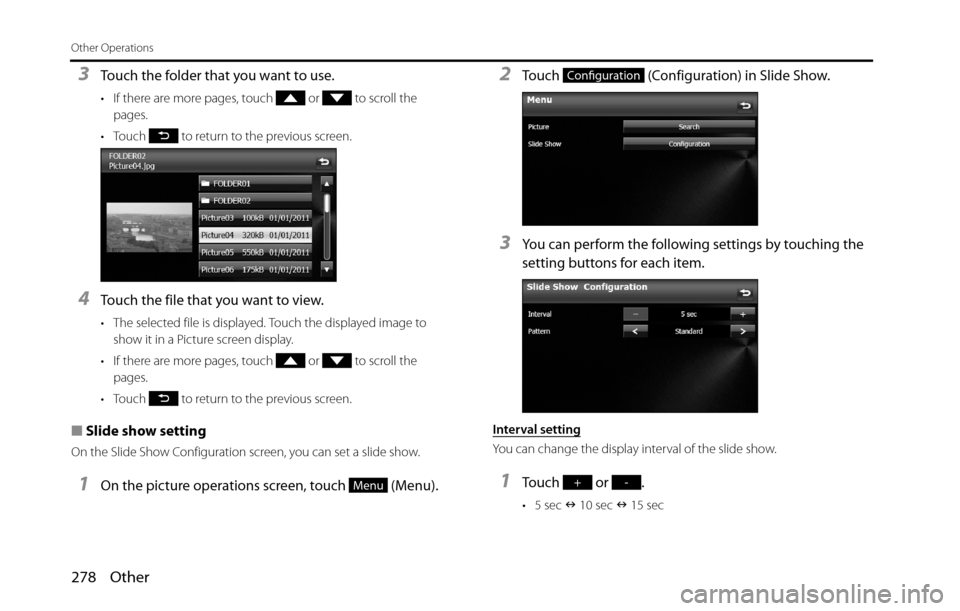
3Touch the folder that you want to use.
• If there are more pages, touch or to scroll the
pages.
• Touch to return to the previous screen.
4Touch the file that you want to view.
• The selected file is displayed. Touch the displayed image to
show it in a Picture screen display.
• If there are more pages, touch or to scroll the
pages.
• Touch to return to the previous screen.
■Slide show setting
On the Slide Show Configuration screen, you can set a slide show.
1On the picture operations screen, touch (Menu).
2Touch (Configuration) in Slide Show.
3You can perform the following settings by touching the
setting buttons for each item.
Interval setting
You can change the display interval of the slide show.
1Touch or .
• 5 sec �Q 10 sec �Q 15 sec
Menu
Configuration
+-