replace SUBARU FORESTER 2004 Service Owners Manual
[x] Cancel search | Manufacturer: SUBARU, Model Year: 2004, Model line: FORESTER, Model: SUBARU FORESTER 2004Pages: 2870, PDF Size: 38.67 MB
Page 253 of 2870
FUJI HEAVY INDUSTRIES LTD. G8080GE7
2004 FORESTER SERVICE MANUAL QUICK REFERENCE INDEX
BODY SECTION
This service manual has been prepared
to provide SUBARU service personnel
with the necessary information and data
for the correct maintenance and repair
of SUBARU vehicles.
This manual includes the procedures
for maintenance, disassembling, reas-
sembling, inspection and adjustment of
components and diagnostics for guid-
ance of experienced mechanics.
Please peruse and utilize this manual
fully to ensure complete repair work for
satisfying our customers by keeping
their vehicle in optimum condition.
When replacement of parts during
repair work is needed, be sure to use
SUBARU genuine parts.
All information, illustration and specifi-
cations contained in this manual are
based on the latest product information
available at the time of publication
approval.HVAC SYSTEM
(HEATER, VENTILATOR AND A/C)AC
HVAC SYSTEM (AUTO A/C)
(DIAGNOSTIC)AC
AIRBAG SYSTEM AB
AIRBAG SYSTEM (DIAGNOSTIC) AB
SEAT BELT SYSTEM SB
LIGHTING SYSTEM LI
WIPER AND WASHER SYSTEM WW
ENTERTAINMENT ET
COMMUNICATION SYSTEM COM
GLASS/WINDOW/MIRROR GW
BODY STRUCTURE BS
INSTRUMENTATION/DRIVER INFO IDI
SEAT SE
SECURITY AND LOCK SL
SUNROOF/T-TOP/CONVERTIBLE TOP
(SUNROOF)SR
EXTERIOR/INTERIOR TRIM EI
EXTERIOR BODY PANEL EB
Page 267 of 2870
LI-13
LIGHTING SYSTEM
Headlight Assembly
11.Headlight Assembly
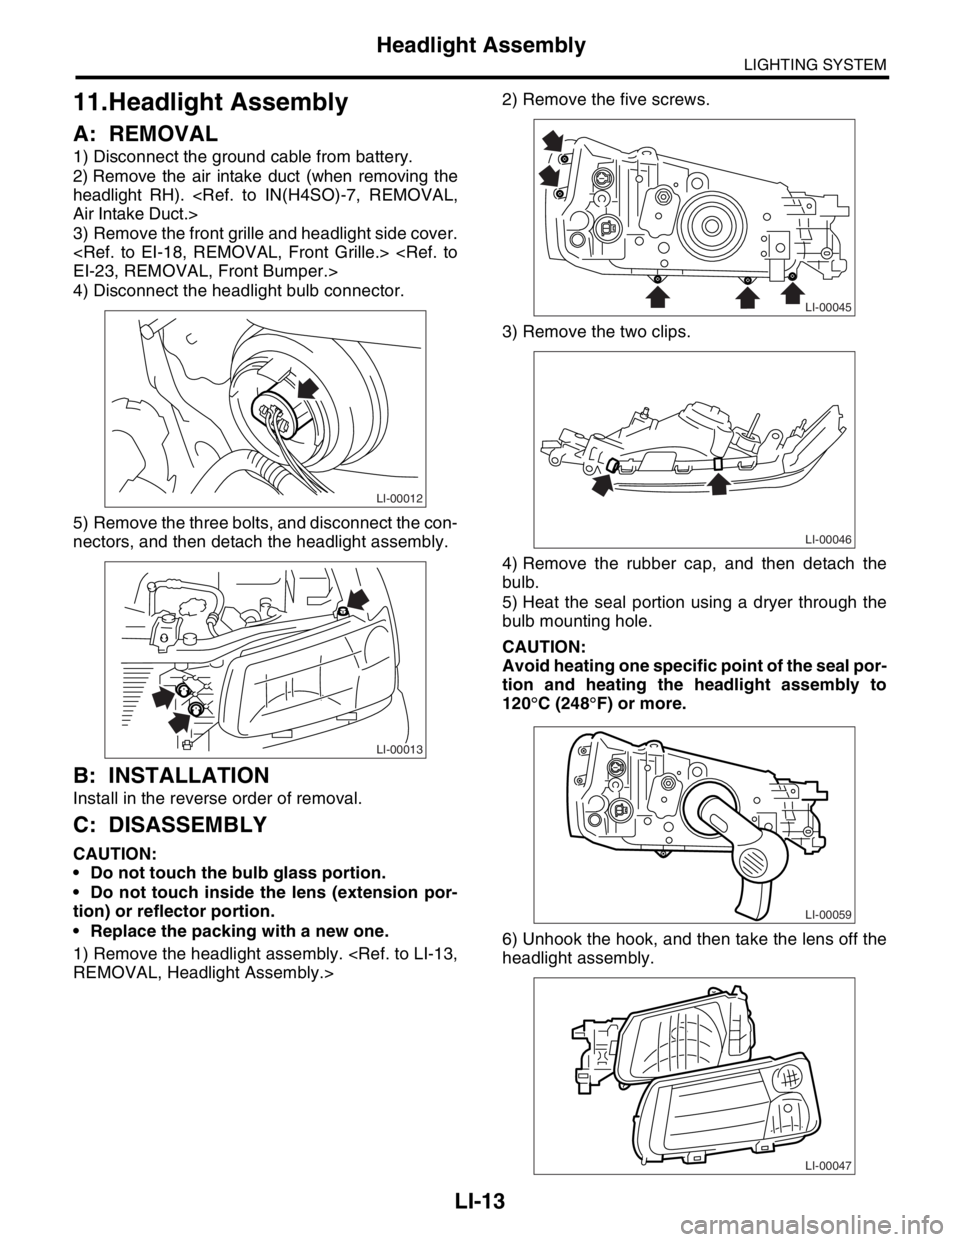
A: REMOVAL
1) Disconnect the ground cable from battery.
2) Remove the air intake duct (when removing the
headlight RH).
3) Remove the front grille and headlight side cover.
4) Disconnect the headlight bulb connector.
5) Remove the three bolts, and disconnect the con-
nectors, and then detach the headlight assembly.
B: INSTALLATION
Install in the reverse order of removal.
C: DISASSEMBLY
CAUTION:
Do not touch the bulb glass portion.
Do not touch inside the lens (extension por-
tion) or reflector portion.
Replace the packing with a new one.
1) Remove the headlight assembly.
3) Remove the two clips.
4) Remove the rubber cap, and then detach the
bulb.
5) Heat the seal portion using a dryer through the
bulb mounting hole.
CAUTION:
Avoid heating one specific point of the seal por-
tion and heating the headlight assembly to
120°C (248°F) or more.
6) Unhook the hook, and then take the lens off the
headlight assembly.
LI-00012
LI-00013
LI-00045
LI-00046
LI-00059
LI-00047
Page 270 of 2870
LI-16
LIGHTING SYSTEM
Headlight Bulb
12.Headlight Bulb
A: REMOVAL
CAUTION:
Because the halogen bulb operates at a high
temperature, dirt and oil on the bulb surface re-
duces the bulb’s service life. Hold the flange
portion when replacing the bulb. Never touch
the glass portion.
Do not leave the headlight without a bulb for
a long time. Dust, moisture, etc. entering the
headlight may affect its performance.
1) Disconnect the ground cable from battery.
2) Remove the air intake duct (when removing the
headlight RH).
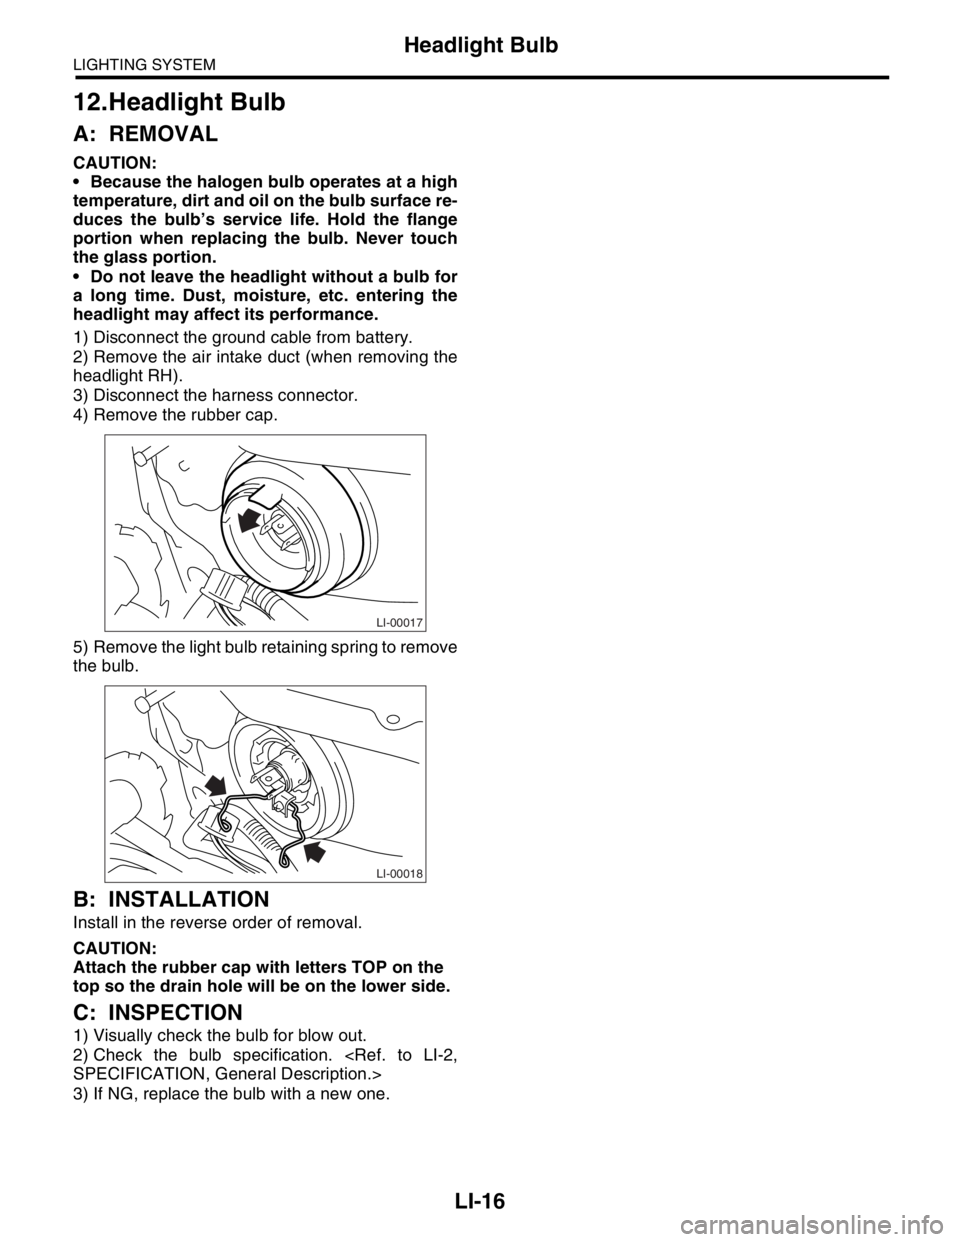
3) Disconnect the harness connector.
4) Remove the rubber cap.
5) Remove the light bulb retaining spring to remove
the bulb.
B: INSTALLATION
Install in the reverse order of removal.
CAUTION:
Attach the rubber cap with letters TOP on the
top so the drain hole will be on the lower side.
C: INSPECTION
1) Visually check the bulb for blow out.
2) Check the bulb specification.
3) If NG, replace the bulb with a new one.
LI-00017
LI-00018
Page 271 of 2870
LI-17
LIGHTING SYSTEM
Front Turn Signal Light Bulb
13.Front Turn Signal Light Bulb
A: REMOVAL
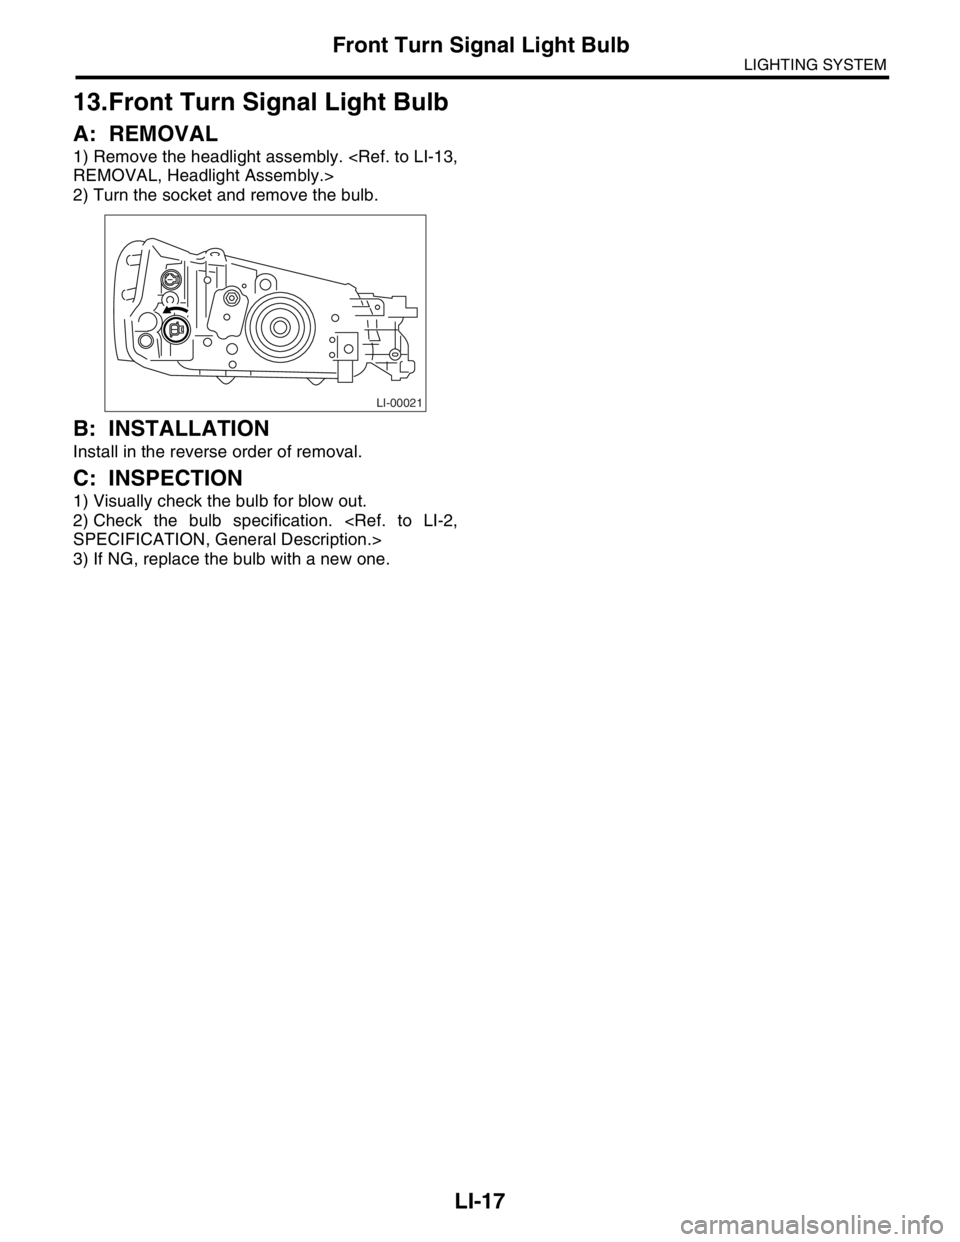
1) Remove the headlight assembly.
2) Turn the socket and remove the bulb.
B: INSTALLATION
Install in the reverse order of removal.
C: INSPECTION
1) Visually check the bulb for blow out.
2) Check the bulb specification.
3) If NG, replace the bulb with a new one.
LI-00021
Page 272 of 2870
LI-18
LIGHTING SYSTEM
Clearance Light Bulb
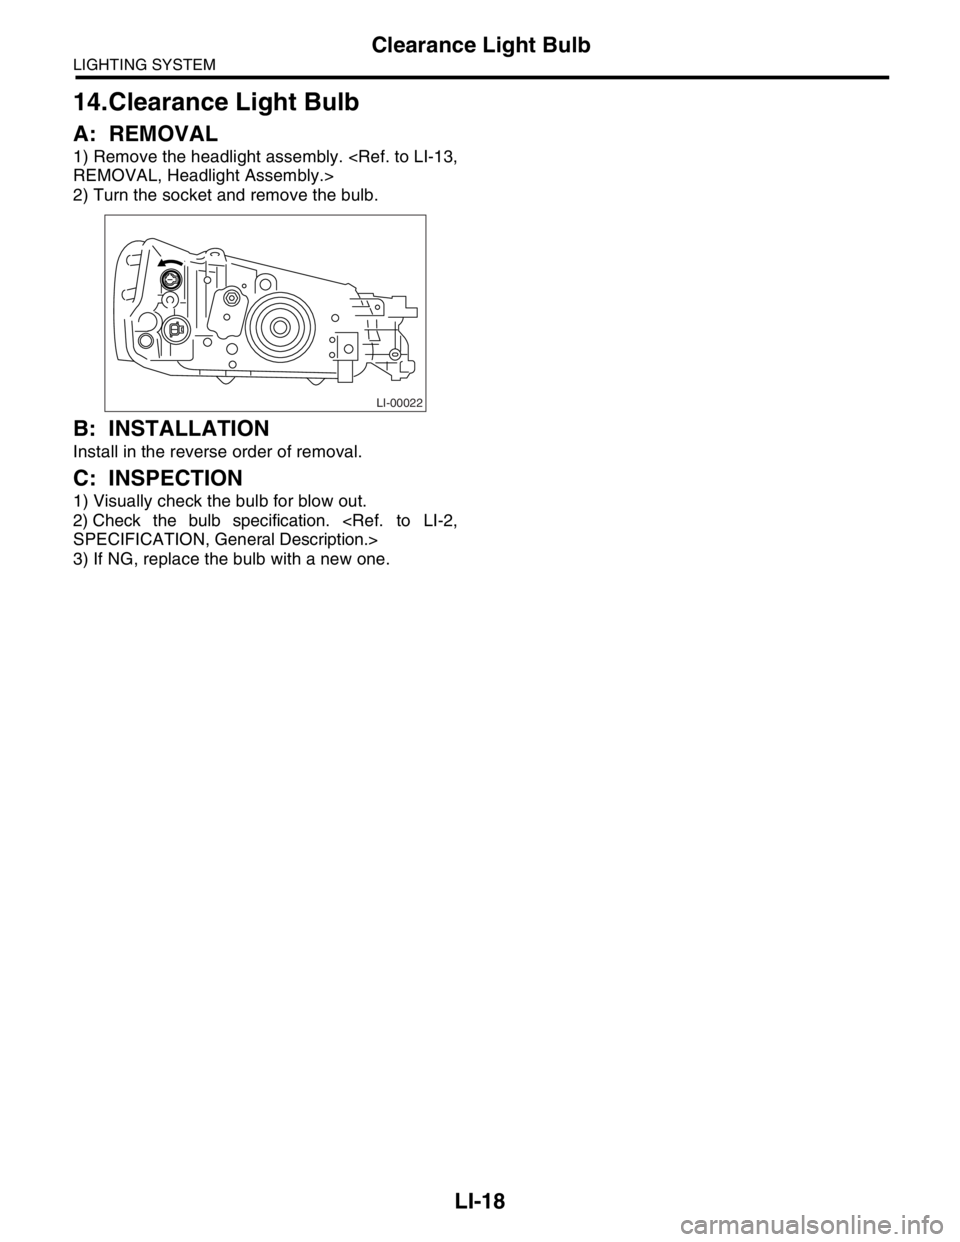
14.Clearance Light Bulb
A: REMOVAL
1) Remove the headlight assembly.
2) Turn the socket and remove the bulb.
B: INSTALLATION
Install in the reverse order of removal.
C: INSPECTION
1) Visually check the bulb for blow out.
2) Check the bulb specification.
3) If NG, replace the bulb with a new one.
LI-00022
Page 274 of 2870

LI-20
LIGHTING SYSTEM
Front Fog Light Bulb
16.Front Fog Light Bulb
A: REMOVAL
1) Remove the front fog light assembly.
2) Remove the back cover.
3) Remove the spring retainer, and then detach the
fog light bulb.
B: INSTALLATION
Install in the reverse order of removal.
C: INSPECTION
1) Visually check the bulb for blow out.
2) Check the bulb specification.
3) If NG, replace the bulb with a new one.
LI-00026
LI-00027
Page 276 of 2870

LI-22
LIGHTING SYSTEM
Tail/Stop Light Bulb
18.Tail/Stop Light Bulb
A: REMOVAL
1) Remove the rear combination light assembly.
2) Turn the socket and remove the bulb.
B: INSTALLATION
Install in the reverse order of removal.
C: INSPECTION
1) Visually check the bulb for blow out.
2) Check the bulb specification.
3) If NG, replace the bulb with a new one.
LI-00056
Page 277 of 2870

LI-23
LIGHTING SYSTEM
Back-up Light Bulb
19.Back-up Light Bulb
A: REMOVAL
1) Remove the rear combination light assembly.
2) Turn the socket and remove the bulb.
B: INSTALLATION
Install in the reverse order of removal.
C: INSPECTION
1) Visually check the bulb for blow out.
2) Check the bulb specification.
3) If NG, replace the bulb with a new one.
LI-00032
Page 278 of 2870

LI-24
LIGHTING SYSTEM
Rear Turn Signal Light Bulb
20.Rear Turn Signal Light Bulb
A: REMOVAL
1) Remove the rear combination light assembly.
2) Turn the socket and remove the bulb.
B: INSTALLATION
Install in the reverse order of removal.
C: INSPECTION
1) Visually check the bulb for blow out.
2) Check the bulb specification.
3) If NG, replace the bulb with a new one.
LI-00031
Page 279 of 2870
LI-25
LIGHTING SYSTEM
Rear Fog Light Bulb
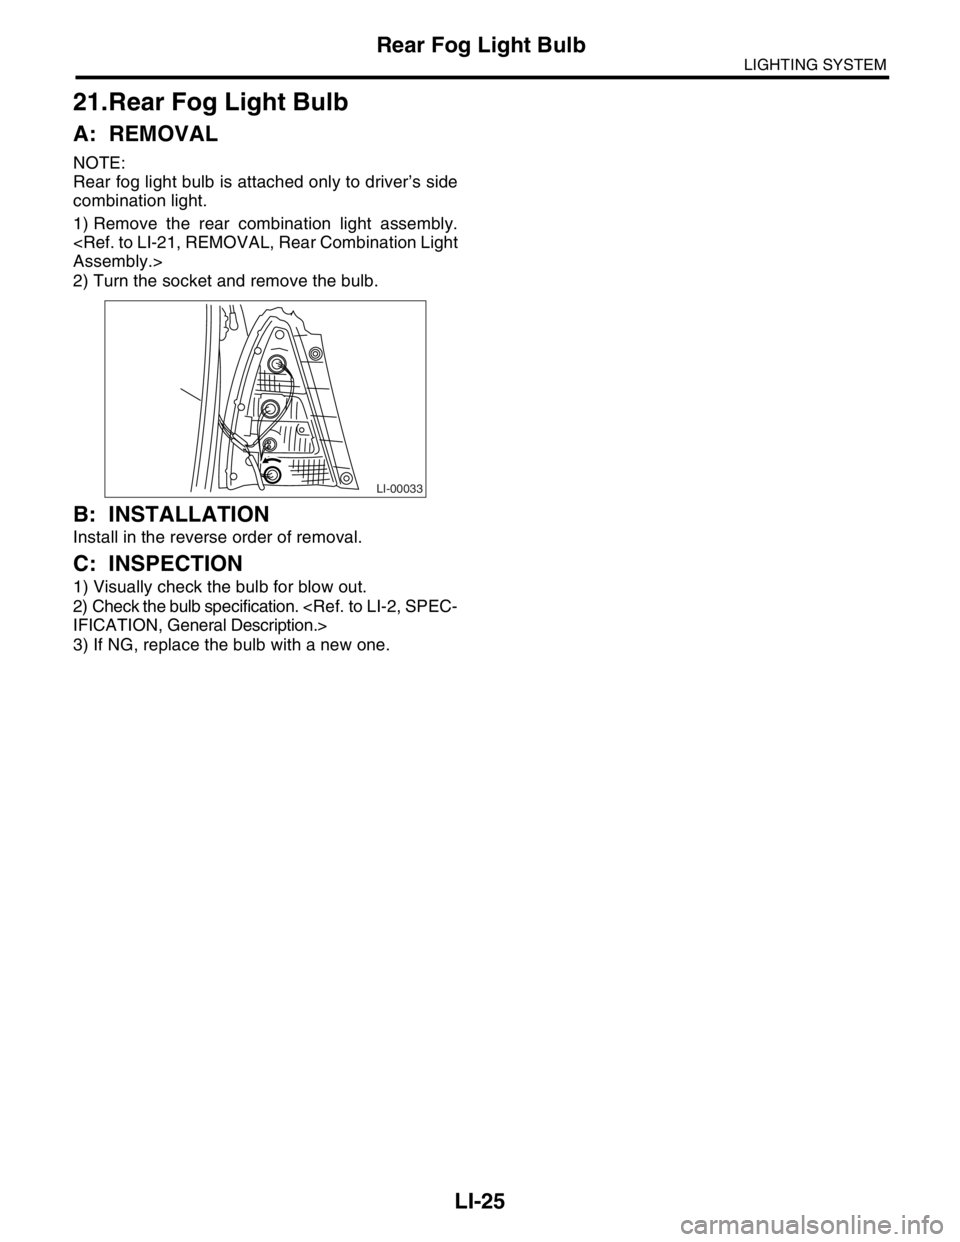
21.Rear Fog Light Bulb
A: REMOVAL
NOTE:
Rear fog light bulb is attached only to driver’s side
combination light.
1) Remove the rear combination light assembly.
2) Turn the socket and remove the bulb.
B: INSTALLATION
Install in the reverse order of removal.
C: INSPECTION
1) Visually check the bulb for blow out.
2) Check the bulb specification.
3) If NG, replace the bulb with a new one.
LI-00033