SUBARU FORESTER 2004 Service Repair Manual
FORESTER 2004
SUBARU
SUBARU
https://www.carmanualsonline.info/img/17/57426/w960_57426-0.png
SUBARU FORESTER 2004 Service Repair Manual
Trending: air conditioning, differential, belt, service indicator, ad blue, catalytic converter, fuse box diagram
Page 491 of 2870
EI-15
EXTERIOR/INTERIOR TRIM
General Description
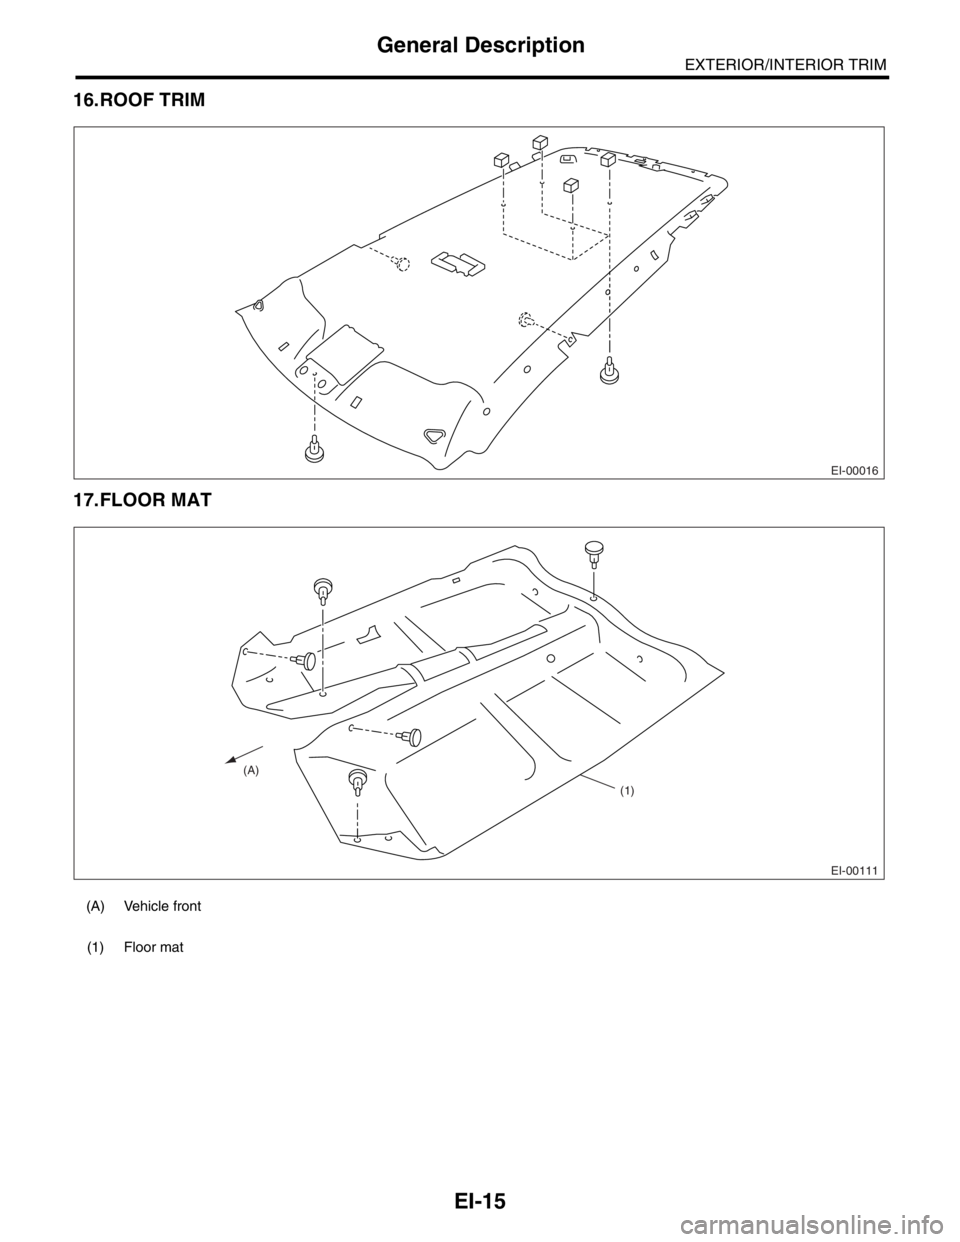
16.ROOF TRIM
17.FLOOR MAT
(A) Vehicle front
(1) Floor mat
EI-00016
EI-00111
(A)
(1)
Page 492 of 2870
EI-16
EXTERIOR/INTERIOR TRIM
General Description
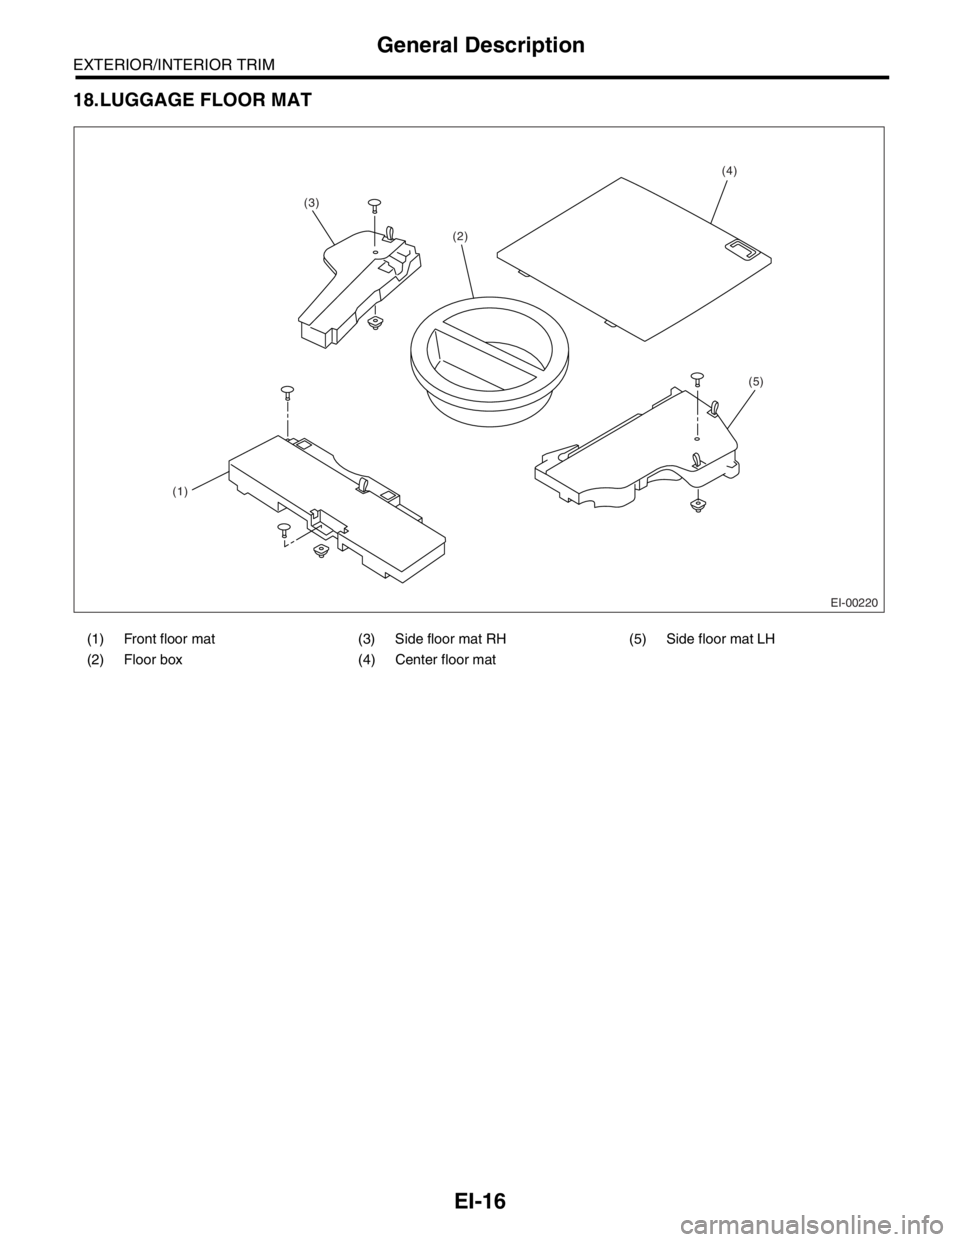
18.LUGGAGE FLOOR MAT
(1) Front floor mat (3) Side floor mat RH (5) Side floor mat LH
(2) Floor box (4) Center floor mat
EI-00220
(3)
(2)
(4)
(5)
(1)
Page 493 of 2870
EI-17
EXTERIOR/INTERIOR TRIM
General Description
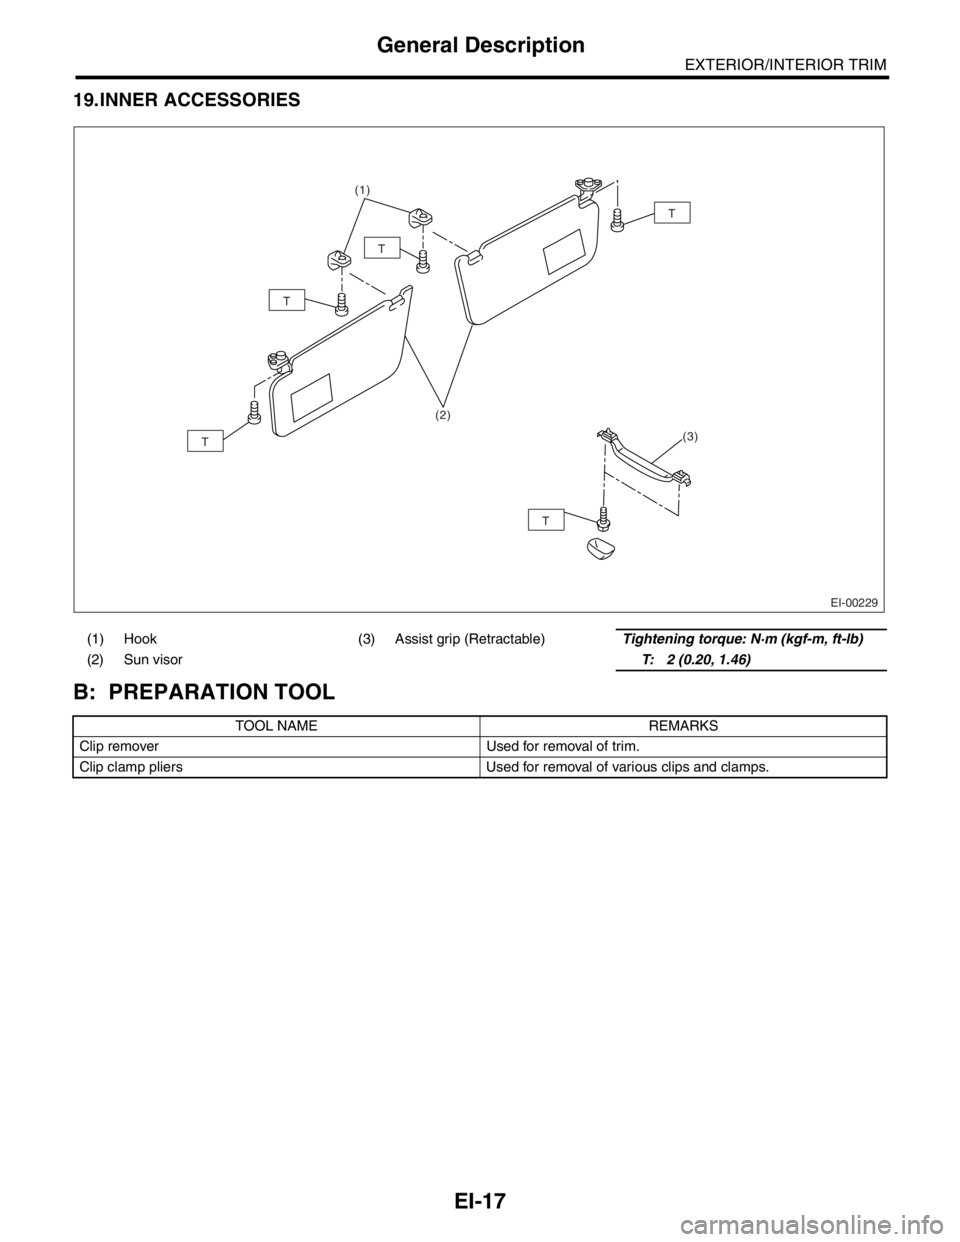
19.INNER ACCESSORIES
B: PREPARATION TOOL
(1) Hook (3) Assist grip (Retractable)Tightening torque: N·m (kgf-m, ft-lb)
(2) Sun visorT: 2 (0.20, 1.46)
TOOL NAME REMARKS
Clip remover Used for removal of trim.
Clip clamp pliers Used for removal of various clips and clamps.
EI-00229
(2) (1)
T
T
T
T
T
(3)
Page 494 of 2870
EI-18
EXTERIOR/INTERIOR TRIM
Front Grille
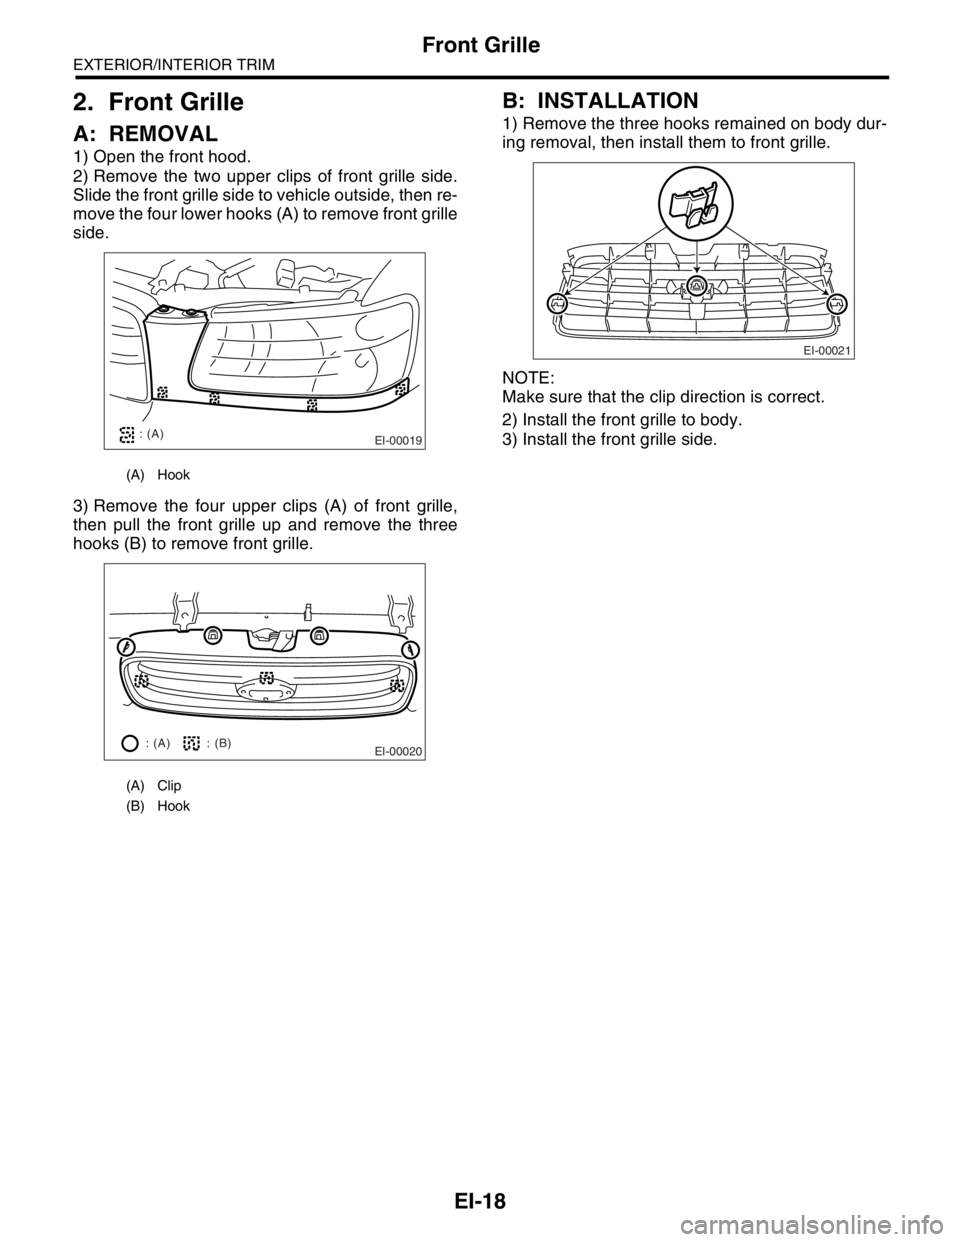
2. Front Grille
A: REMOVAL
1) Open the front hood.
2) Remove the two upper clips of front grille side.
Slide the front grille side to vehicle outside, then re-
move the four lower hooks (A) to remove front grille
side.
3) Remove the four upper clips (A) of front grille,
then pull the front grille up and remove the three
hooks (B) to remove front grille.
B: INSTALLATION
1) Remove the three hooks remained on body dur-
ing removal, then install them to front grille.
NOTE:
Make sure that the clip direction is correct.
2) Install the front grille to body.
3) Install the front grille side.
(A) Hook
(A) Clip
(B) Hook
EI-00019: (A)
EI-00020: (A) : (B)EI-00021
Page 495 of 2870
EI-19
EXTERIOR/INTERIOR TRIM
Hood Grille
3. Hood Grille
A: REMOVAL
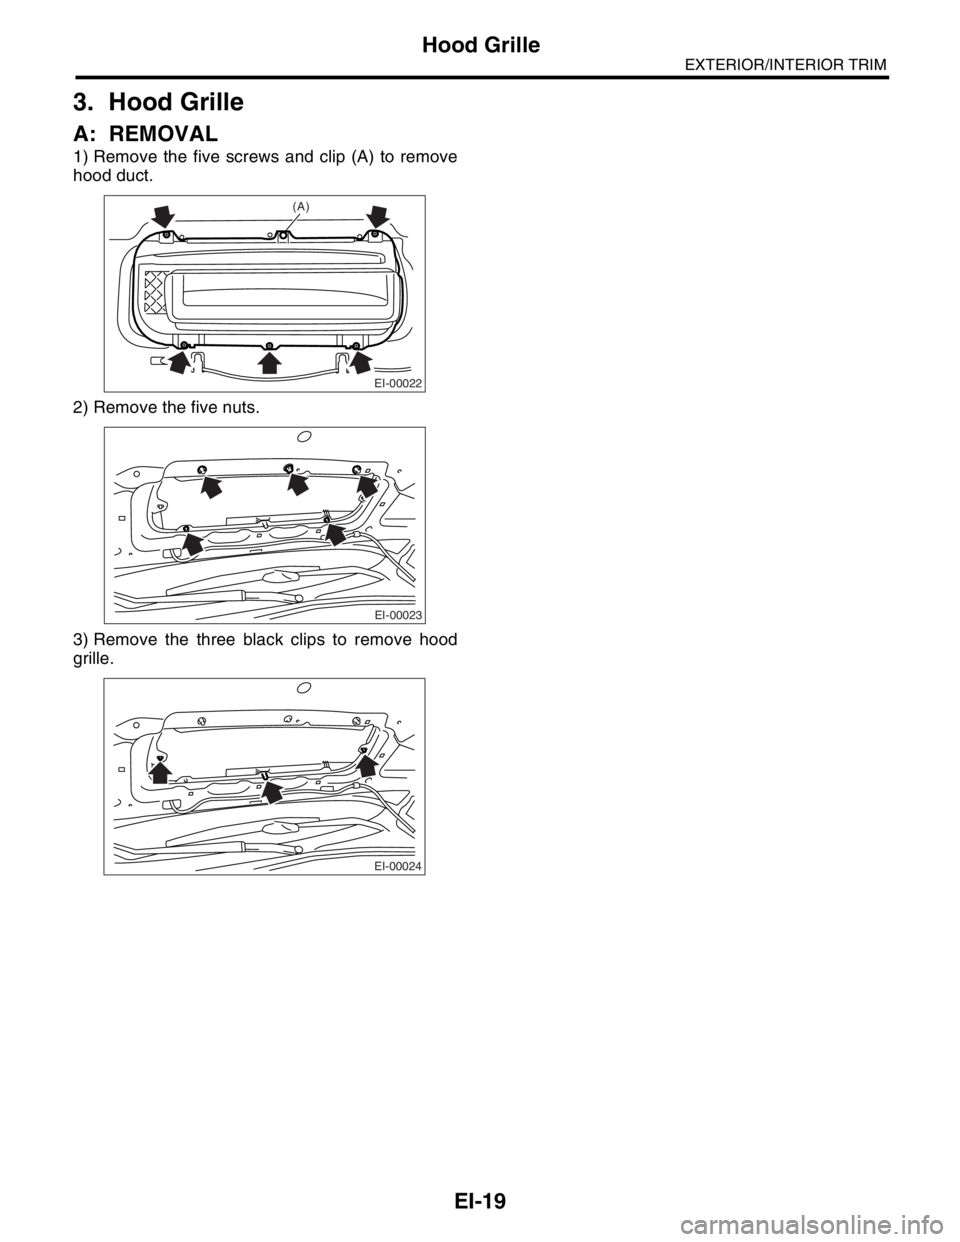
1) Remove the five screws and clip (A) to remove
hood duct.
2) Remove the five nuts.
3) Remove the three black clips to remove hood
grille.
EI-00022
(A)
EI-00023
EI-00024
Page 496 of 2870
EI-20
EXTERIOR/INTERIOR TRIM
Hood Grille
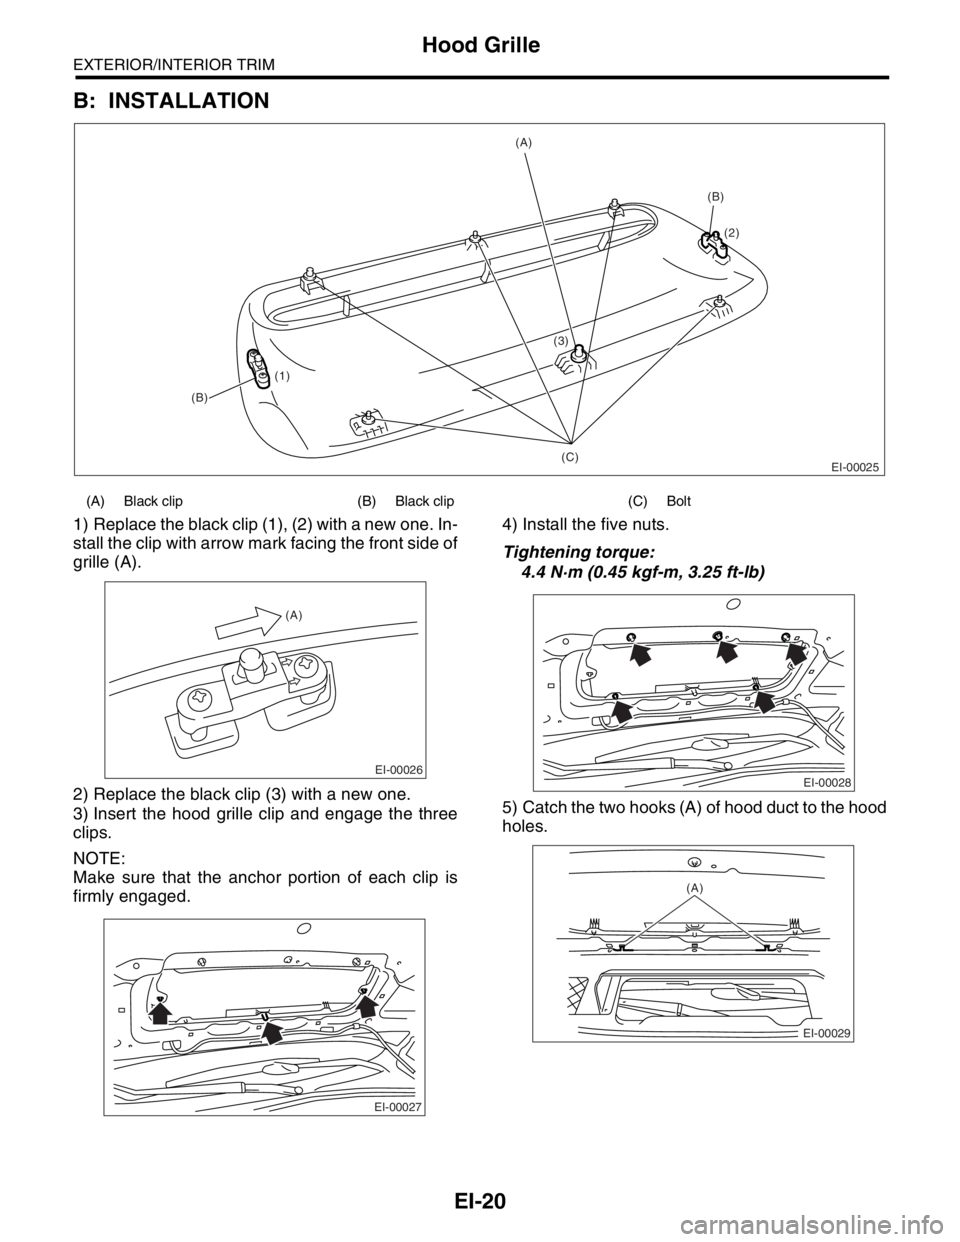
B: INSTALLATION
1) Replace the black clip (1), (2) with a new one. In-
stall the clip with arrow mark facing the front side of
grille (A).
2) Replace the black clip (3) with a new one.
3) Insert the hood grille clip and engage the three
clips.
NOTE:
Make sure that the anchor portion of each clip is
firmly engaged.4) Install the five nuts.
Tightening torque:
4.4 N·m (0.45 kgf-m, 3.25 ft-lb)
5) Catch the two hooks (A) of hood duct to the hood
holes.
(A) Black clip (B) Black clip (C) Bolt
EI-00025
(2)
(1)(3)(B)
(C) (B)(A)
EI-00026
(A)
EI-00027
EI-00028
(A)
EI-00029
Page 497 of 2870
EI-21
EXTERIOR/INTERIOR TRIM
Hood Grille
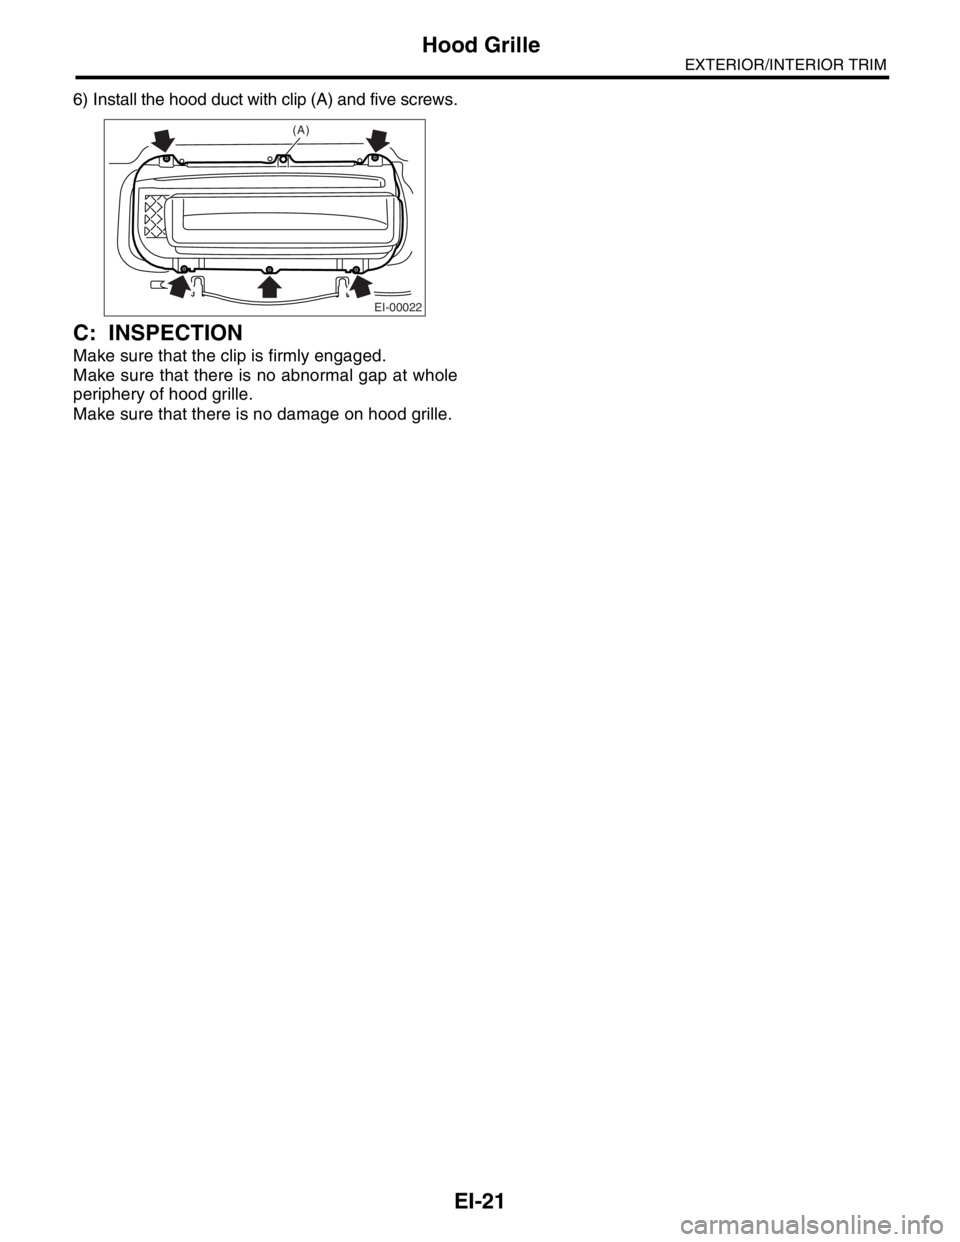
6) Install the hood duct with clip (A) and five screws.
C: INSPECTION
Make sure that the clip is firmly engaged.
Make sure that there is no abnormal gap at whole
periphery of hood grille.
Make sure that there is no damage on hood grille.
EI-00022
(A)
Page 498 of 2870
EI-22
EXTERIOR/INTERIOR TRIM
Front Under Cover
4. Front Under Cover
A: REMOVAL
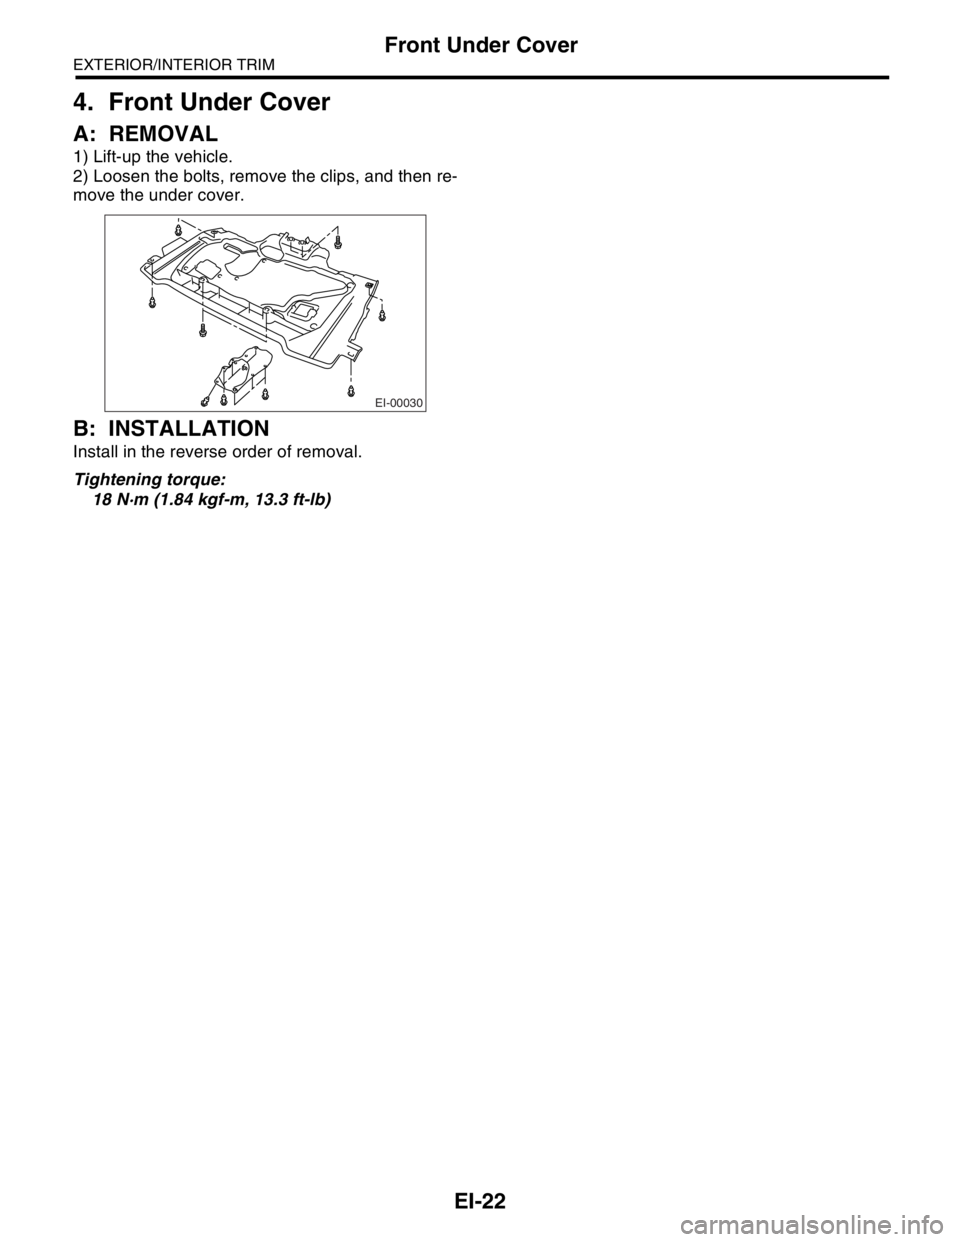
1) Lift-up the vehicle.
2) Loosen the bolts, remove the clips, and then re-
move the under cover.
B: INSTALLATION
Install in the reverse order of removal.
Tightening torque:
18 N·m (1.84 kgf-m, 13.3 ft-lb)
EI-00030
Page 499 of 2870
EI-23
EXTERIOR/INTERIOR TRIM
Front Bumper
5. Front Bumper
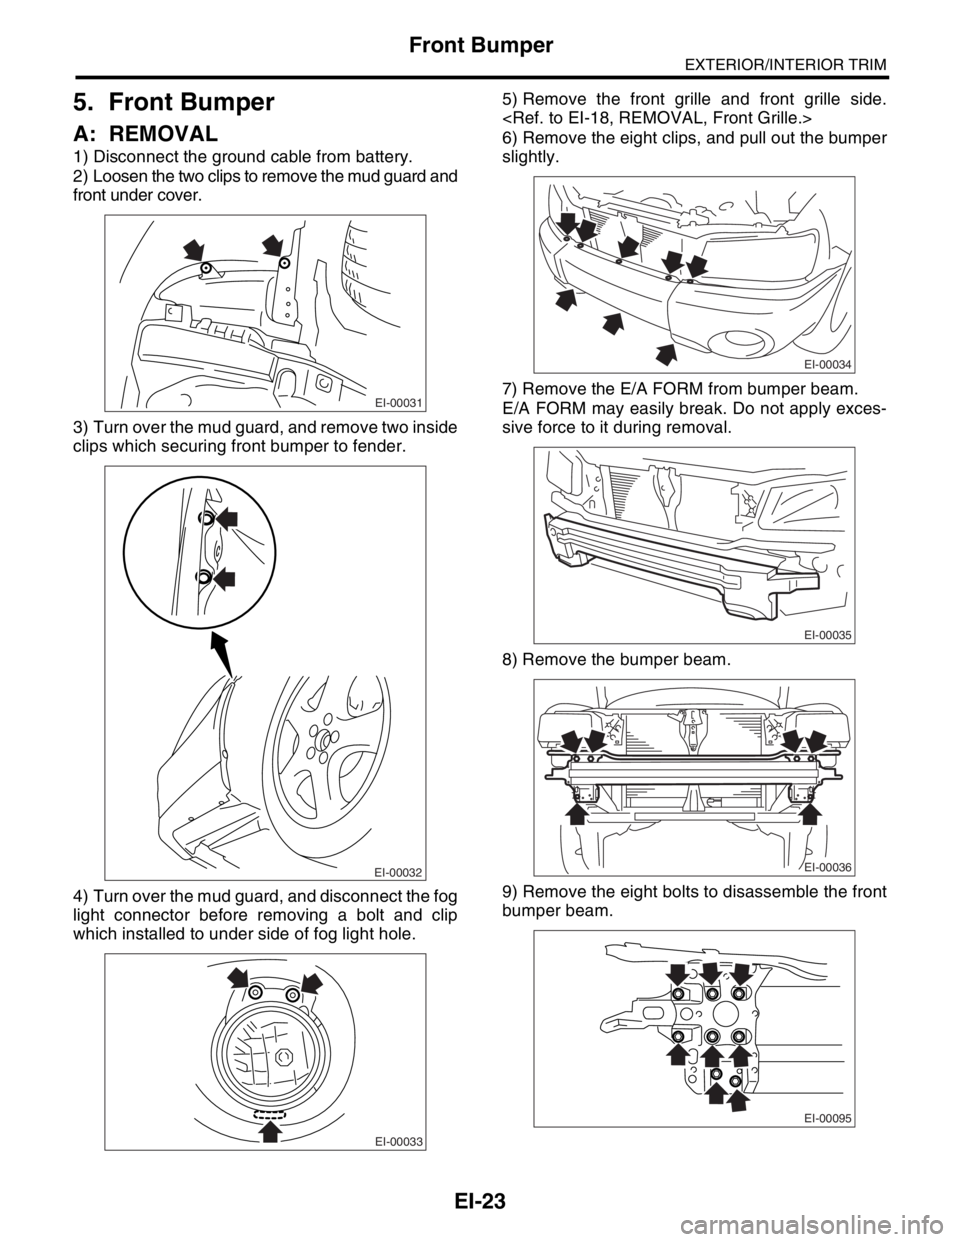
A: REMOVAL
1) Disconnect the ground cable from battery.
2) Loosen the two clips to remove the mud guard and
front under cover.
3) Turn over the mud guard, and remove two inside
clips which securing front bumper to fender.
4) Turn over the mud guard, and disconnect the fog
light connector before removing a bolt and clip
which installed to under side of fog light hole.5) Remove the front grille and front grille side.
6) Remove the eight clips, and pull out the bumper
slightly.
7) Remove the E/A FORM from bumper beam.
E/A FORM may easily break. Do not apply exces-
sive force to it during removal.
8) Remove the bumper beam.
9) Remove the eight bolts to disassemble the front
bumper beam.
EI-00031
EI-00032
EI-00033
EI-00034
EI-00035
EI-00036
EI-00095
Page 500 of 2870
EI-24
EXTERIOR/INTERIOR TRIM
Front Bumper
B: INSTALLATION
Install in the reverse order of removal.
Tightening torque:
Refer to COMPONENT in General Descrip-
tion.
NENT, General Description.>
Trending: dimensions, rims, oil temperature, fog light bulb, overheating, ECO mode, oil level
