SUBARU LEGACY 1999 Service Repair Manual
LEGACY 1999
SUBARU
SUBARU
https://www.carmanualsonline.info/img/17/57435/w960_57435-0.png
SUBARU LEGACY 1999 Service Repair Manual
Trending: spare wheel, remote start, fuse diagram, fuel tank removal, set clock, fuel pump, rims
Page 1091 of 1456
18. Rear Spoiler
A: REMOVAL AND INSTALLATION
1) Open trunk lid.
2) Disconnect high-mount stop light connector
located inside the trunk lid.
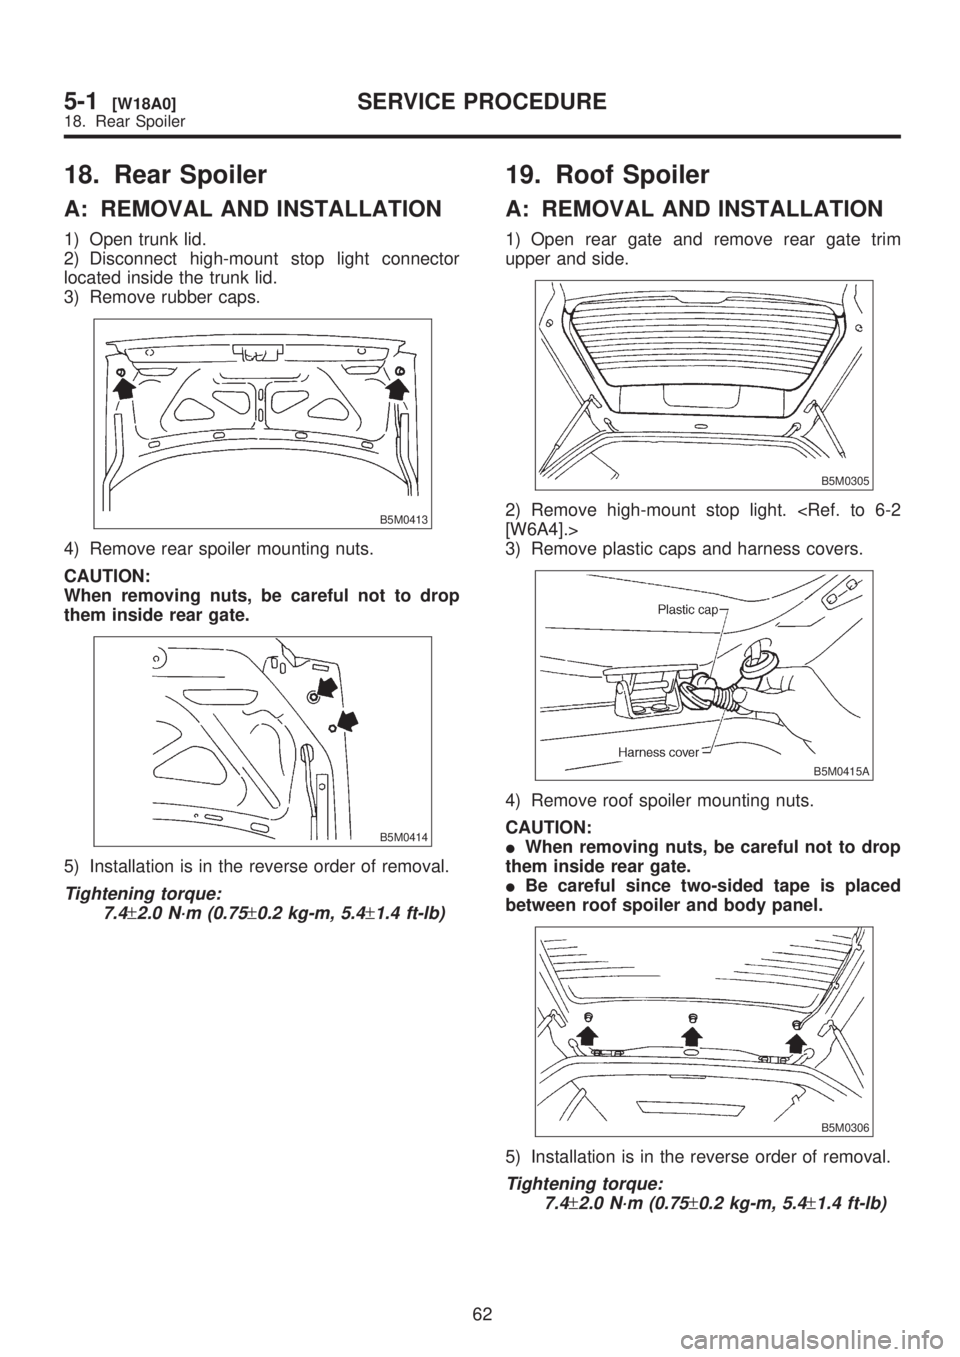
3) Remove rubber caps.
B5M0413
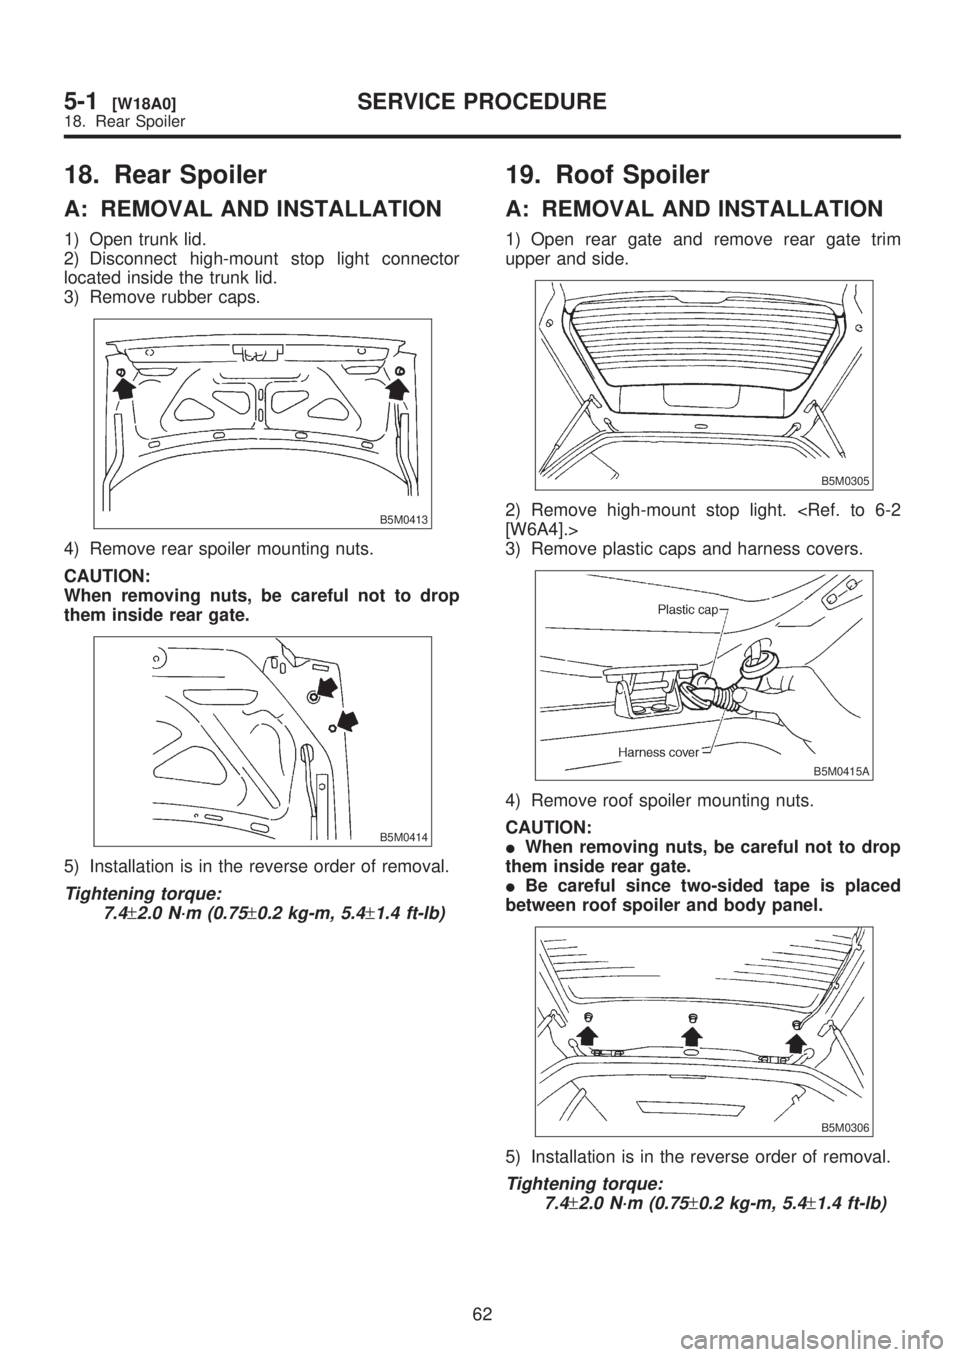
4) Remove rear spoiler mounting nuts.
CAUTION:
When removing nuts, be careful not to drop
them inside rear gate.
B5M0414
5) Installation is in the reverse order of removal.
Tightening torque:
7.4
±2.0 N´m (0.75±0.2 kg-m, 5.4±1.4 ft-lb)
19. Roof Spoiler
A: REMOVAL AND INSTALLATION
1) Open rear gate and remove rear gate trim
upper and side.
B5M0305
2) Remove high-mount stop light.
[W6A4].>
3) Remove plastic caps and harness covers.
B5M0415A
4) Remove roof spoiler mounting nuts.
CAUTION:
IWhen removing nuts, be careful not to drop
them inside rear gate.
IBe careful since two-sided tape is placed
between roof spoiler and body panel.
B5M0306
5) Installation is in the reverse order of removal.
Tightening torque:
7.4
±2.0 N´m (0.75±0.2 kg-m, 5.4±1.4 ft-lb)
62
5-1[W18A0]SERVICE PROCEDURE
18. Rear Spoiler
Page 1092 of 1456
18. Rear Spoiler
A: REMOVAL AND INSTALLATION
1) Open trunk lid.
2) Disconnect high-mount stop light connector
located inside the trunk lid.
3) Remove rubber caps.
B5M0413
4) Remove rear spoiler mounting nuts.
CAUTION:
When removing nuts, be careful not to drop
them inside rear gate.
B5M0414
5) Installation is in the reverse order of removal.
Tightening torque:
7.4
±2.0 N´m (0.75±0.2 kg-m, 5.4±1.4 ft-lb)
19. Roof Spoiler
A: REMOVAL AND INSTALLATION
1) Open rear gate and remove rear gate trim
upper and side.
B5M0305
2) Remove high-mount stop light.
[W6A4].>
3) Remove plastic caps and harness covers.
B5M0415A
4) Remove roof spoiler mounting nuts.
CAUTION:
IWhen removing nuts, be careful not to drop
them inside rear gate.
IBe careful since two-sided tape is placed
between roof spoiler and body panel.
B5M0306
5) Installation is in the reverse order of removal.
Tightening torque:
7.4
±2.0 N´m (0.75±0.2 kg-m, 5.4±1.4 ft-lb)
62
5-1[W18A0]SERVICE PROCEDURE
18. Rear Spoiler
Page 1093 of 1456
20. Side Spoiler
A: REMOVAL AND INSTALLATION
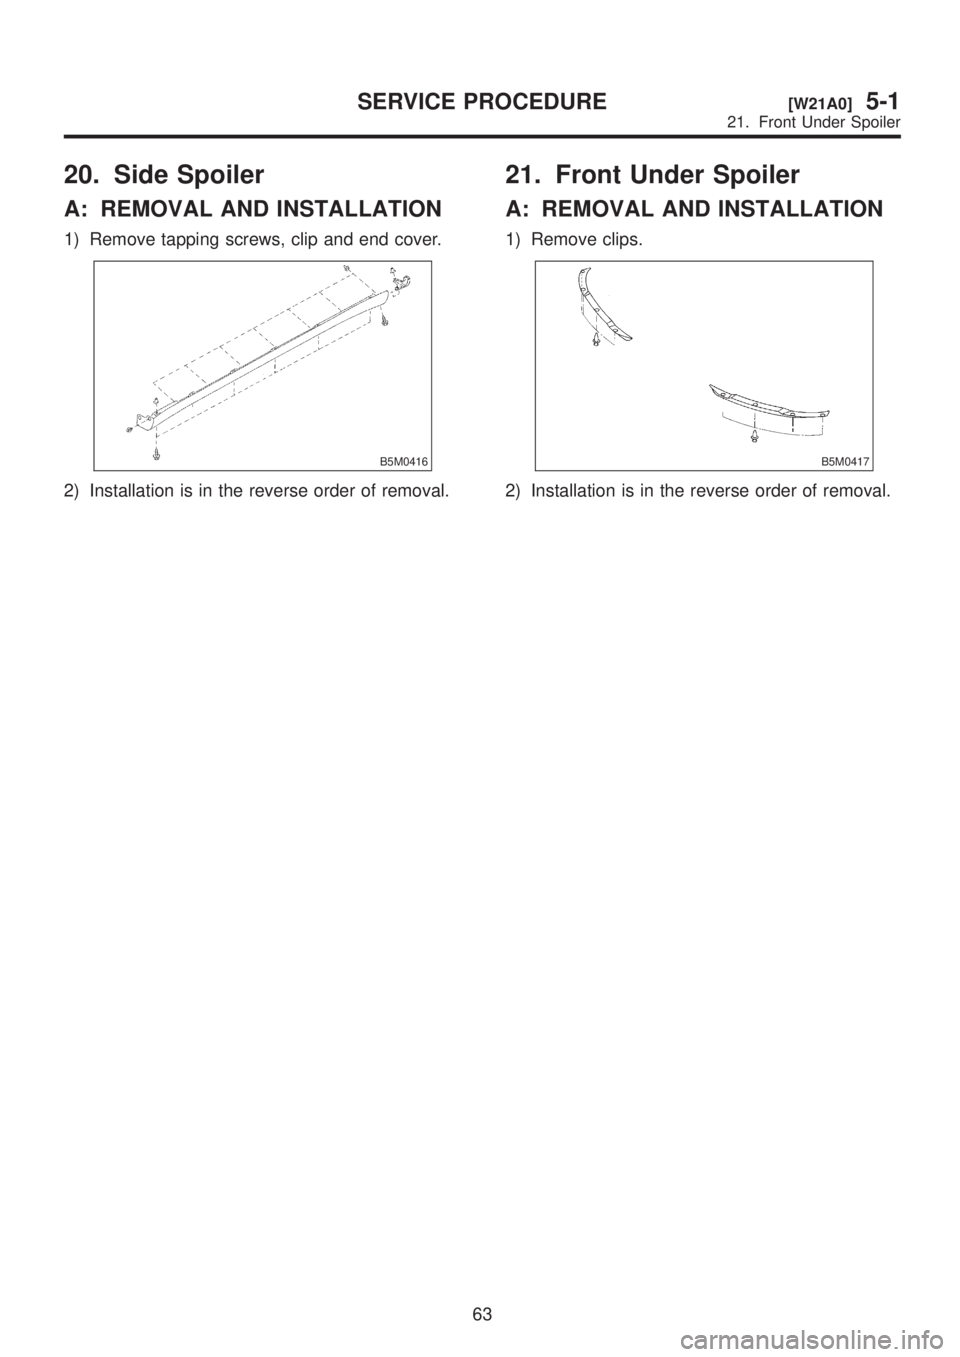
1) Remove tapping screws, clip and end cover.
B5M0416
2) Installation is in the reverse order of removal.
21. Front Under Spoiler
A: REMOVAL AND INSTALLATION
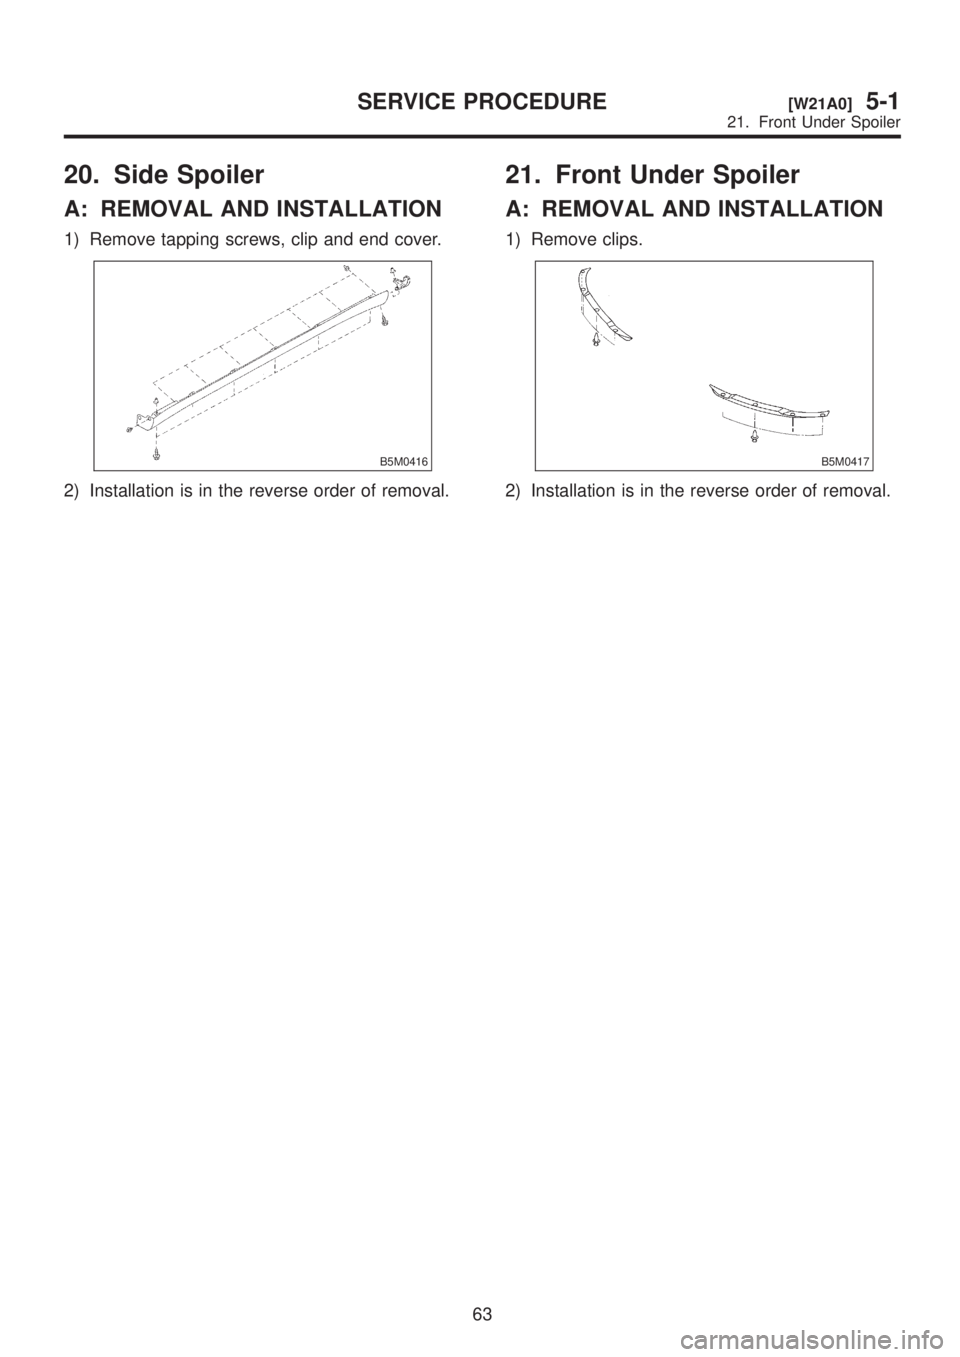
1) Remove clips.
B5M0417
2) Installation is in the reverse order of removal.
63
[W21A0]5-1SERVICE PROCEDURE
21. Front Under Spoiler
Page 1094 of 1456
20. Side Spoiler
A: REMOVAL AND INSTALLATION
1) Remove tapping screws, clip and end cover.
B5M0416
2) Installation is in the reverse order of removal.
21. Front Under Spoiler
A: REMOVAL AND INSTALLATION
1) Remove clips.
B5M0417
2) Installation is in the reverse order of removal.
63
[W21A0]5-1SERVICE PROCEDURE
21. Front Under Spoiler
Page 1095 of 1456
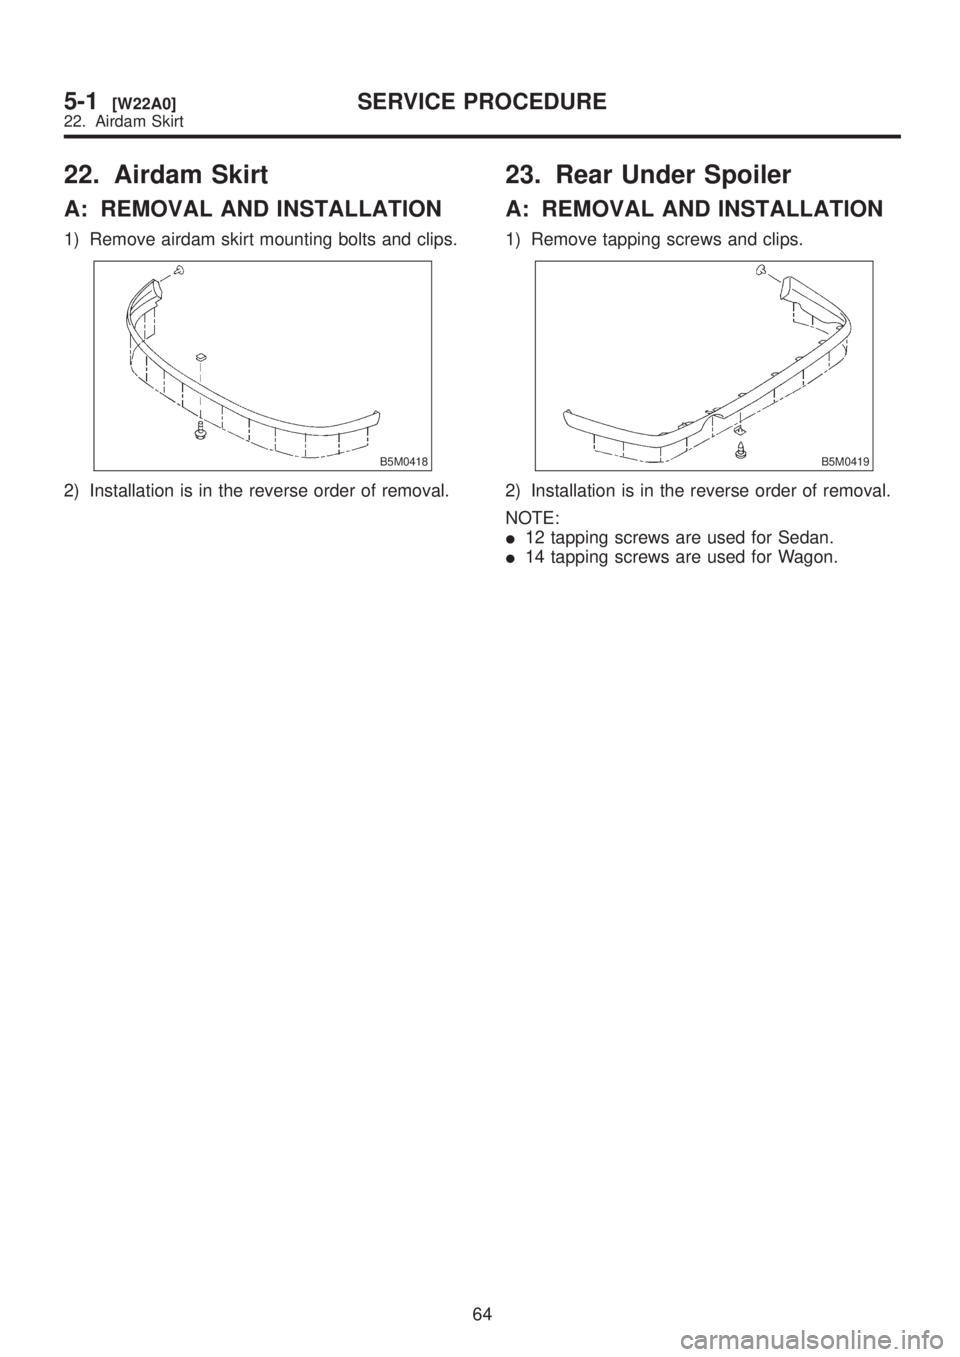
22. Airdam Skirt
A: REMOVAL AND INSTALLATION
1) Remove airdam skirt mounting bolts and clips.
B5M0418
2) Installation is in the reverse order of removal.
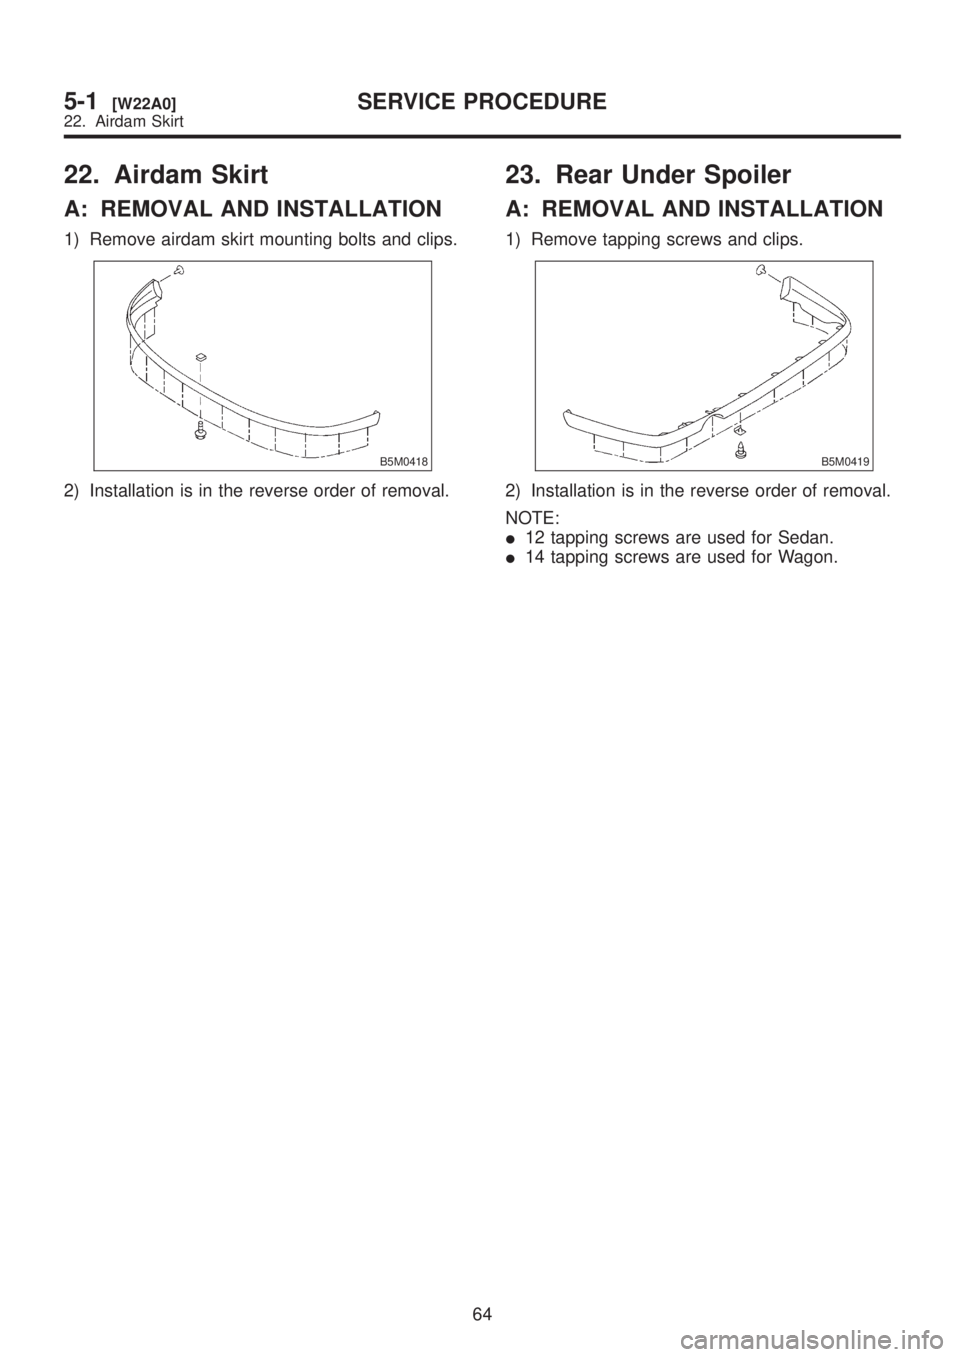
23. Rear Under Spoiler
A: REMOVAL AND INSTALLATION
1) Remove tapping screws and clips.
B5M0419
2) Installation is in the reverse order of removal.
NOTE:
I12 tapping screws are used for Sedan.
I14 tapping screws are used for Wagon.
64
5-1[W22A0]SERVICE PROCEDURE
22. Airdam Skirt
Page 1096 of 1456
22. Airdam Skirt
A: REMOVAL AND INSTALLATION
1) Remove airdam skirt mounting bolts and clips.
B5M0418
2) Installation is in the reverse order of removal.
23. Rear Under Spoiler
A: REMOVAL AND INSTALLATION
1) Remove tapping screws and clips.
B5M0419
2) Installation is in the reverse order of removal.
NOTE:
I12 tapping screws are used for Sedan.
I14 tapping screws are used for Wagon.
64
5-1[W22A0]SERVICE PROCEDURE
22. Airdam Skirt
Page 1097 of 1456
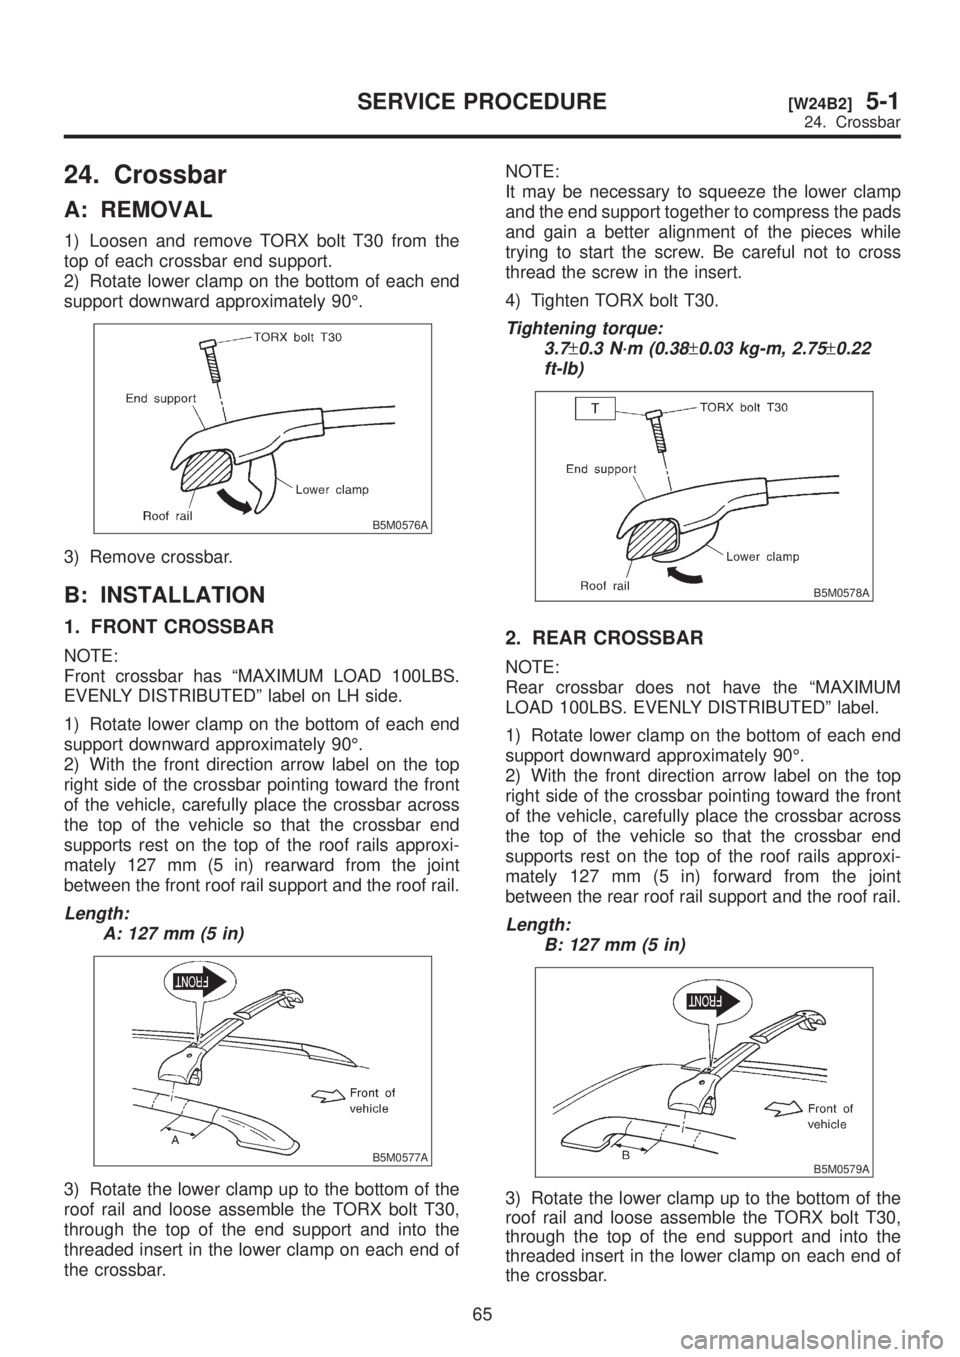
24. Crossbar
A: REMOVAL
1) Loosen and remove TORX bolt T30 from the
top of each crossbar end support.
2) Rotate lower clamp on the bottom of each end
support downward approximately 90É.
B5M0576A
3) Remove crossbar.
B: INSTALLATION
1. FRONT CROSSBAR
NOTE:
Front crossbar has ªMAXIMUM LOAD 100LBS.
EVENLY DISTRIBUTEDº label on LH side.
1) Rotate lower clamp on the bottom of each end
support downward approximately 90É.
2) With the front direction arrow label on the top
right side of the crossbar pointing toward the front
of the vehicle, carefully place the crossbar across
the top of the vehicle so that the crossbar end
supports rest on the top of the roof rails approxi-
mately 127 mm (5 in) rearward from the joint
between the front roof rail support and the roof rail.
Length:
A: 127 mm (5 in)
B5M0577A
3) Rotate the lower clamp up to the bottom of the
roof rail and loose assemble the TORX bolt T30,
through the top of the end support and into the
threaded insert in the lower clamp on each end of
the crossbar.NOTE:
It may be necessary to squeeze the lower clamp
and the end support together to compress the pads
and gain a better alignment of the pieces while
trying to start the screw. Be careful not to cross
thread the screw in the insert.
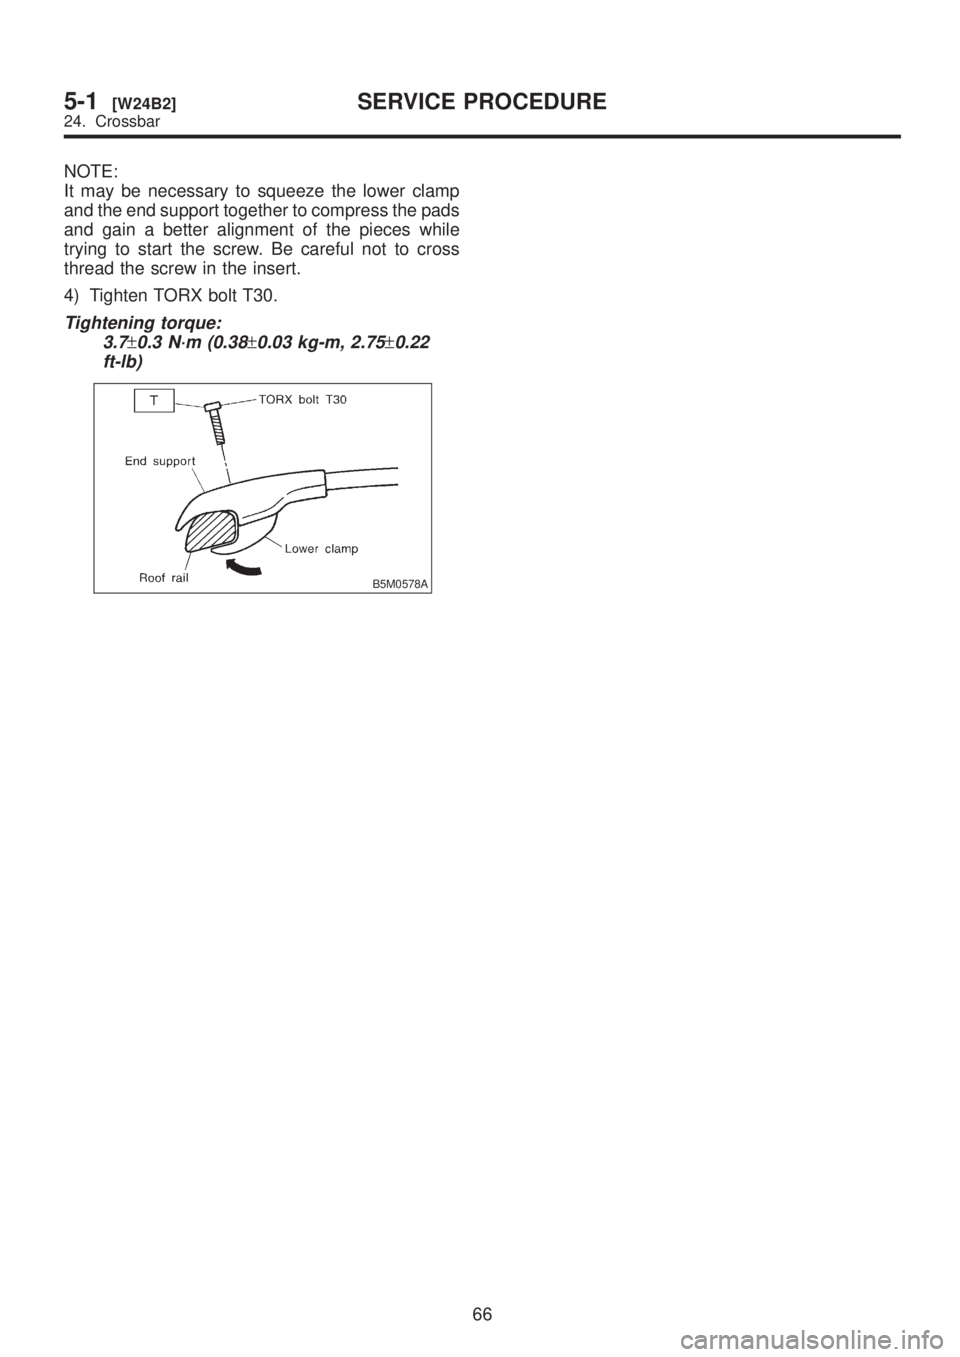
4) Tighten TORX bolt T30.
Tightening torque:
3.7
±0.3 N´m (0.38±0.03 kg-m, 2.75±0.22
ft-lb)
B5M0578A
2. REAR CROSSBAR
NOTE:
Rear crossbar does not have the ªMAXIMUM
LOAD 100LBS. EVENLY DISTRIBUTEDº label.
1) Rotate lower clamp on the bottom of each end
support downward approximately 90É.
2) With the front direction arrow label on the top
right side of the crossbar pointing toward the front
of the vehicle, carefully place the crossbar across
the top of the vehicle so that the crossbar end
supports rest on the top of the roof rails approxi-
mately 127 mm (5 in) forward from the joint
between the rear roof rail support and the roof rail.
Length:
B: 127 mm (5 in)
B5M0579A
3) Rotate the lower clamp up to the bottom of the
roof rail and loose assemble the TORX bolt T30,
through the top of the end support and into the
threaded insert in the lower clamp on each end of
the crossbar.
65
[W24B2]5-1SERVICE PROCEDURE
24. Crossbar
Page 1098 of 1456
NOTE:
It may be necessary to squeeze the lower clamp
and the end support together to compress the pads
and gain a better alignment of the pieces while
trying to start the screw. Be careful not to cross
thread the screw in the insert.
4) Tighten TORX bolt T30.
Tightening torque:
3.7
±0.3 N´m (0.38±0.03 kg-m, 2.75±0.22
ft-lb)
B5M0578A
66
5-1[W24B2]SERVICE PROCEDURE
24. Crossbar
Page 1099 of 1456
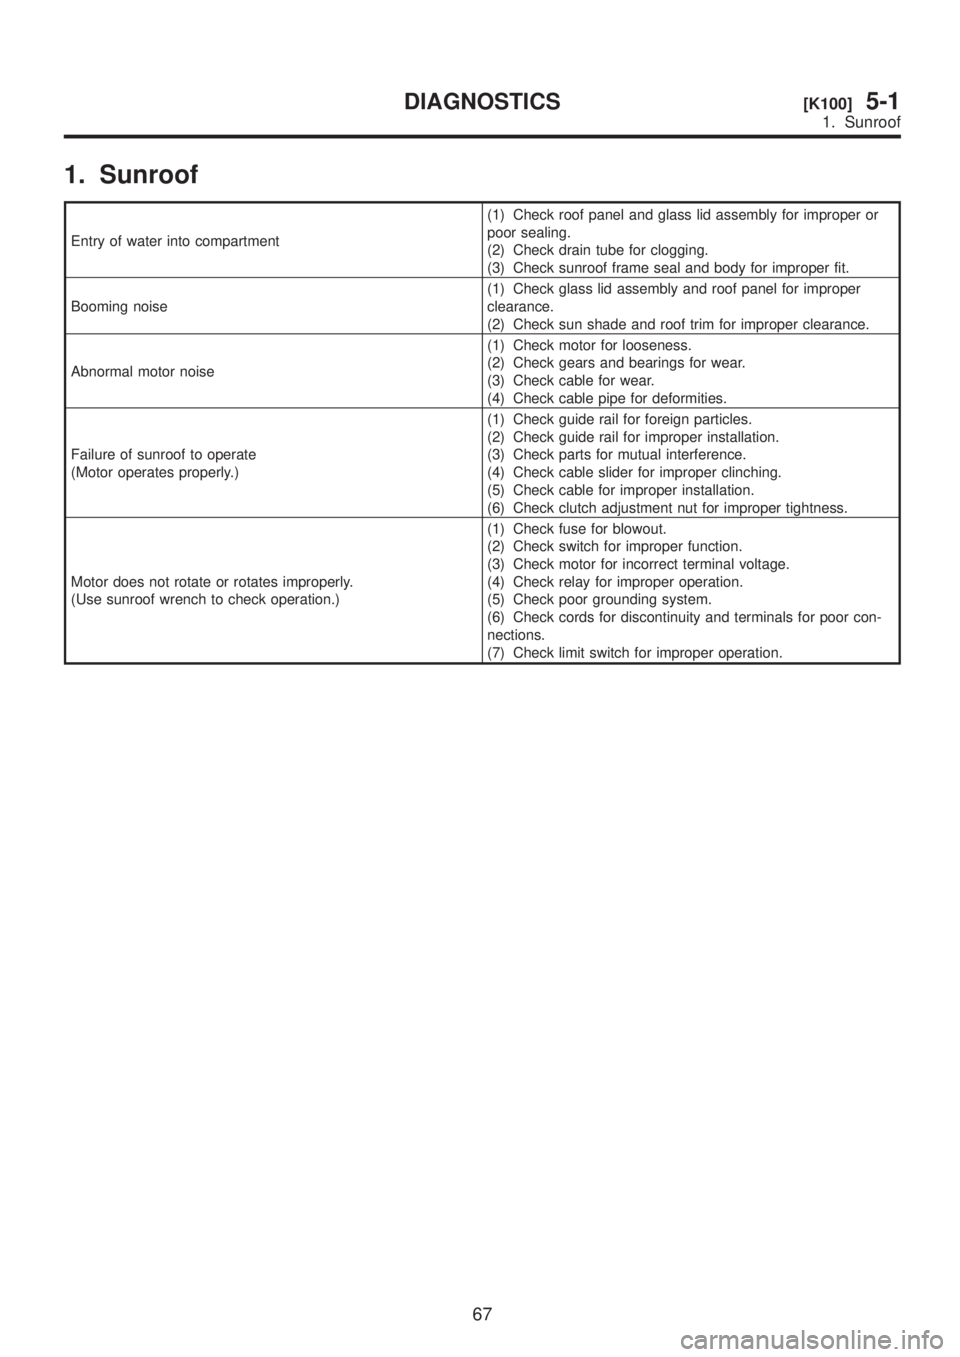
1. Sunroof
Entry of water into compartment(1) Check roof panel and glass lid assembly for improper or
poor sealing.
(2) Check drain tube for clogging.
(3) Check sunroof frame seal and body for improper fit.
Booming noise(1) Check glass lid assembly and roof panel for improper
clearance.
(2) Check sun shade and roof trim for improper clearance.
Abnormal motor noise(1) Check motor for looseness.
(2) Check gears and bearings for wear.
(3) Check cable for wear.
(4) Check cable pipe for deformities.
Failure of sunroof to operate
(Motor operates properly.)(1) Check guide rail for foreign particles.
(2) Check guide rail for improper installation.
(3) Check parts for mutual interference.
(4) Check cable slider for improper clinching.
(5) Check cable for improper installation.
(6) Check clutch adjustment nut for improper tightness.
Motor does not rotate or rotates improperly.
(Use sunroof wrench to check operation.)(1) Check fuse for blowout.
(2) Check switch for improper function.
(3) Check motor for incorrect terminal voltage.
(4) Check relay for improper operation.
(5) Check poor grounding system.
(6) Check cords for discontinuity and terminals for poor con-
nections.
(7) Check limit switch for improper operation.
67
[K100]5-1DIAGNOSTICS
1. Sunroof
Page 1100 of 1456
Trending: driver seat adjustment, jump cable, warning lights, tires, vacuum, recommended oil, fuse chart
