driver SUBARU OUTBACK 2010 5.G Manual PDF
[x] Cancel search | Manufacturer: SUBARU, Model Year: 2010, Model line: OUTBACK, Model: SUBARU OUTBACK 2010 5.GPages: 448, PDF Size: 7.36 MB
Page 274 of 448
7-32Starting and operating
.If the switch is held down for 10
seconds or longer, the indicator light
turns off, the Vehicle Dynamics Control
system is activated, and the system
ignores any further pressing of the
switch. To make the switch usable
again, turn the ignition switch to the“ LOCK ”position and restart the en-
gine.. Whentheswitchispressedto
deactivate the Vehicle Dynamics Con-
trol system, the vehicle ’s running per-
formance is comparable with that of a
vehicle that does not have a Vehicle
Dynamics Control system. Do not de-
activate the Vehicle Dynamics Control
system except when absolutely neces-
sary.. Even when the Vehicle Dynamics
Control system is deactivated, compo-
nents of the brake control system may
still activate. When the brake control
system is activated, the Vehicle Dy-
namics Control operation indicator
light illuminates. Tire pressure monitoring
system (TPMS) (if equipped)
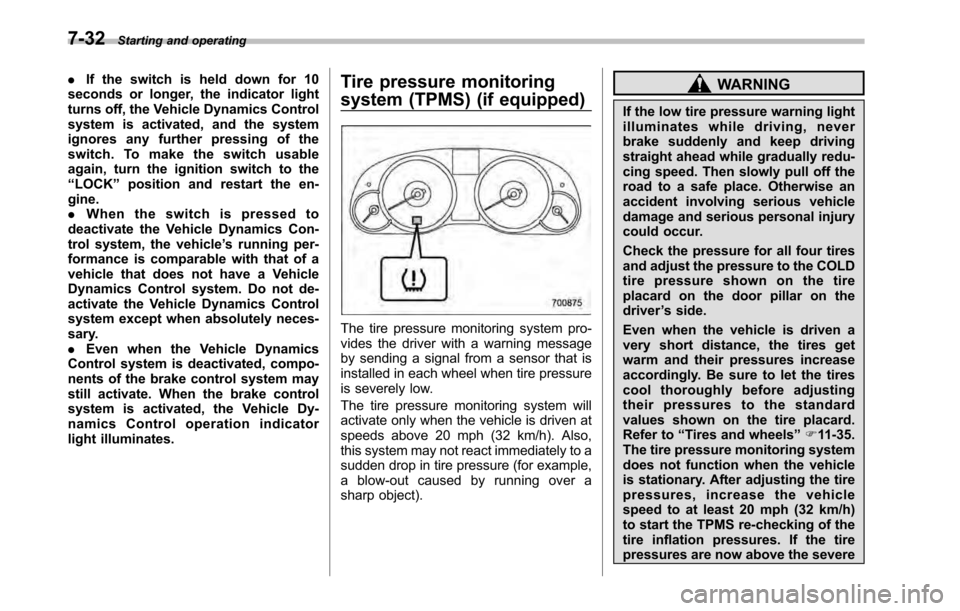
The tire pressure monitoring system pro-
vides the driver with a warning message
by sending a signal from a sensor that is
installed in each wheel when tire pressure
is severely low.
The tire pressure monitoring system will
activate only when the vehicle is driven at
speeds above 20 mph (32 km/h). Also,
this system may not react immediately to a
sudden drop in tire pressure (for example,
a blow-out caused by running over a
sharp object).
WARNING
If the low tire pressure warning light
illuminates while driving, never
brake suddenly and keep driving
straight ahead while gradually redu-
cing speed. Then slowly pull off the
road to a safe place. Otherwise an
accident involving serious vehicle
damage and serious personal injury
could occur.
Check the pressure for all four tires
and adjust the pressure to the COLD
tire pressure shown on the tire
placard on the door pillar on thedriver ’s side.
Even when the vehicle is driven a
very short distance, the tires get
warm and their pressures increase
accordingly. Be sure to let the tires
cool thoroughly before adjusting
their pressures to the standard
values shown on the tire placard.
Refer to “Tires and wheels ”F 11-35.
The tire pressure monitoring system
does not function when the vehicle
is stationary. After adjusting the tire
pressures, increase the vehicle
speed to at least 20 mph (32 km/h)
to start the TPMS re-checking of the
tire inflation pressures. If the tire
pressures are now above the severe
Page 275 of 448
low pressure threshold, the low tire
pressure warning light should turn
off a few minutes later.
If this light still illuminates while
driving after adjusting the tire pres-
sure, a tire may have significant
damage and a fast leak that causes
the tire to lose air rapidly. If you have
a flat tire, replace it with a spare tire
as soon as possible.
When a spare tire is mounted or a
wheel rim is replaced without the
original pressure sensor/transmitter
being transferred, the low tire pres-
sure warning light will illuminate
steadily after blinking for approxi-
mately one minute. This indicates
the TPMS is unable to monitor all
four road wheels. Contact your
SUBARU dealer as soon as possible
for tire and sensor replacement and/
or system resetting.
Do not inject any tire liquid or
aerosol tire sealant into the tires,
as this may cause a malfunction of
the tire pressure sensors. If the light
illuminates steadily after blinking for
approximately one minute, promptly
contact a SUBARU dealer to have
the system inspected.CAUTION
Do not place metal film or any metal
parts under the driver ’s seat. This
may cause poor reception of the
signals from the tire pressure sen-
sors, and the tire pressure monitor-
ing system will not function prop-
erly.
NOTE
This device complies with Part 15 of
the FCC Rules and with RSS-210 of
Industry Canada. Operation is subject
to the following two conditions: (1) This
device may not cause harmful inter-
ference, and (2) this device must
accept any interference received, in-
cluding interference that may cause
undesired operation.
Changes or modifications not ex-
pressly approved by the party respon-
sible for compliance could void theuser ’s authority to operate the equip-
ment. Parking your vehicle
WARNING
. Never leave unattended children
or pets in the vehicle. They could
accidentally injure themselves or
others through inadvertent op-
eration of the vehicle. Also, on
hot or sunny days, the tempera-
ture in a closed vehicle could
quickly become high enough to
cause severe or possibly fatal
injuries to them.
. Do not park the vehicle over
flammable materials such as dry
grass, waste paper or rags, as
they may burn easily if they come
near hot engine or exhaust sys-
tem parts.
. Be sure to stop the engine if you
take a nap in the vehicle. If
engine exhaust gas enters the
passenger compartment, occu-
pants in the vehicle could die
from carbon monoxide (CO) con-
tained in the exhaust gas. Starting and operating
7-33
– CONTINUED –
Page 277 of 448

without depressing the brake pedal or
the clutch pedal, the parking brake is
not released..When the parking brake is being
applied or released, noise may be
noticed. However, this is not a malfunc-tion.. When the electronic parking brake
system has a malfunction or the elec-
tronic parking brake operation is pro-
hibited temporarily, if the parking brake
switch is operated, a chirp sound is
heard and the brake system warning
light flashes.. When you cannot release the park-
ing brake due to, for example, a system
malfunction, you can release it by
using the parking brake release tool.
Refer to “Electronic parking brake –if
the electronic parking brake cannot bereleased ”F 9-16.
! Automatic release function by gaspedal
The electronic parking brake system has
an automatic release function. The park-
ing brake will be automatically released by
depressing the accelerator pedal. How-
ever, the automatic release function does
not operate under the following conditions. . Any door (other than the trunk lid or
rear gate) is open. .
The driver ’s seatbelt is not fastened.
If the parking brake is automatically
released, the brake system warning light
and the indicator on the parking brake
switch turn off.
NOTE
Even if you have applied the parking
brake by pressing the parking brake
switch, the parking brake will be auto-
matically released when the accelera-
tor pedal is depressed. ! Hill Holder function
The electronic parking brake system has a
Hill Holder function. If the Hill Holder
function is activated, the parking brake
will be automatically applied when stop-
ping on an uphill slope with the brake
pedal depressed. In this case, the brake
system warning light and the indicator light
on the parking brake switch illuminate. NOTE . The Hill Holder function may not
activate on a gentle uphill slope. In this
case, manually apply the electronic
parking brake.. If you do not depress the brake
pedal sufficiently, the Hill Holder func-
tion may not operate properly. How-
ever, this is not a malfunction. When stopping on an uphill slope, depress
the brake pedal firmly and release it
after the brake system warning lightilluminates..
Depending on the condition of the
road surface and braking force, the
brakes operate temporarily and feel
different than usual.. When the electronic parking brake
system has a malfunction while the Hill
Holder function is activated, a chirp
sound is heard, the Hill Holder indica-
tor light turns off and the brake system
warning light flashes.. The Hill Holder function does not
reactivate when parking with the elec-
tronic parking brake released after the
Hill Holder function is activated. If
necessary, manually apply the electro-
nic parking brake.. If the seatbelt is not fastened when
the Hill Holder function is activated, the
vehicle may not start moving smoothly
from a stop, or a noise may be heard
from the brake components. ! Hill Holder switch
WARNING
When stopping on an uphill slope
with the Hill Holder function acti-
vated, release the brake pedal after Starting and operating
7-35
– CONTINUED –
Page 286 of 448
8-2Driving tips
New vehicle break-in driving –the first 1,000 miles (1,600
km)
The performance and long life of your
vehicle are dependent on how you handle
and care for your vehicle while it is new.
Follow these instructions during the first
1,000 miles (1,600 km): . Do not race the engine. And do not
allow engine speed to exceed 4,000 rpm
except in an emergency. . Do not drive at one constant engine or
vehicle speed for a long time, either fast or
slow. . Avoid starting suddenly and rapid
acceleration, except in an emergency.. Avoid hard braking, except in an
emergency.
The same break-in procedures should be
applied to a newly installed or overhauled
engine or when brake pads or brake
linings are replaced with new ones. Fuel economy hints
The following suggestions will help to save
your fuel. .
Select the proper gear position for the
speed and road conditions.. Avoid sudden acceleration or decelera-
tion. Always accelerate gently until you
reach the desired speed. Then try to
maintain that speed for as long aspossible. . Do not pump the accelerator and avoid
racing the engine.. Avoid unnecessary engine idling.
. Keep the engine properly tuned.
. Keep the tires inflated to the correct
pressure shown on the tire placard, which
is located under the door latch on thedriver ’s side. Low pressure will increase
tire wear and fuel consumption. . Use the air conditioner only when
necessary.. Keep the front and rear wheels in
proper alignment.. Avoid carrying unnecessary luggage or
cargo.. The indication of the ECO gauge
shows a reference for saving fuel. For
details, refer to “ECO gauge ”F 3-8. Engine exhaust gas (carbon
monoxide)
WARNING
. Never inhale engine exhaust gas.
Engine exhaust gas contains
carbon monoxide, a colorless
and odorless gas which is dan-
gerous, or even lethal, if inhaled.
. Always properly maintain the en-
gine exhaust system to prevent
engine exhaust gas from enter-
ing the vehicle.
. Never run the engine in a closed
space, such as a garage, except
for the brief time needed to drive
the vehicle in or out of it.
. Avoid remaining in a parked
vehicle for a lengthy time while
the engine is running. If that is
unavoidable, then use the venti-
lation fan to force fresh air into
the vehicle.
. Always keep the front ventilator
inlet grille free from snow, leaves
or other obstructions to ensure
that the ventilation system al-
ways works properly.
. If at any time you suspect that
Page 289 of 448
Driving tips for AWD vehicles
WARNING
. Always maintain a safe driving
speed according to the road and
weather conditions in order to
avoid having an accident on a
sharp turn, during sudden brak-
ing or under other similar condi-tions.
. Always use the utmost care in
driving –overconfidence be-
cause you are driving an All-
Wheel Drive vehicle could easily
lead to a serious accident.
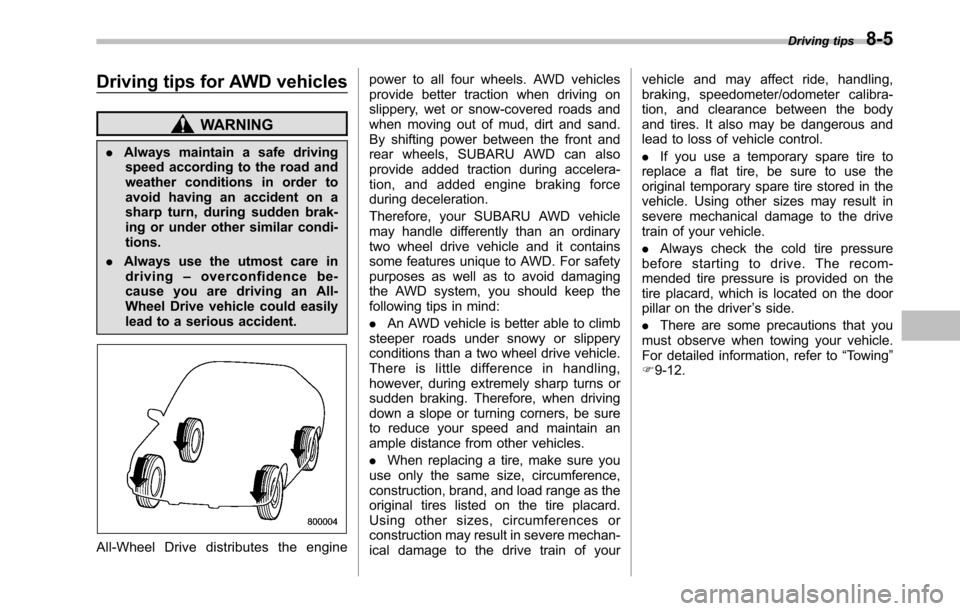
All-Wheel Drive distributes the engine power to all four wheels. AWD vehicles
provide better traction when driving on
slippery, wet or snow-covered roads and
when moving out of mud, dirt and sand.
By shifting power between the front and
rear wheels, SUBARU AWD can also
provide added traction during accelera-
tion, and added engine braking force
during deceleration.
Therefore, your SUBARU AWD vehicle
may handle differently than an ordinary
two wheel drive vehicle and it contains
some features unique to AWD. For safety
purposes as well as to avoid damaging
the AWD system, you should keep the
following tips in mind: .
An AWD vehicle is better able to climb
steeper roads under snowy or slippery
conditions than a two wheel drive vehicle.
There is little difference in handling,
however, during extremely sharp turns or
sudden braking. Therefore, when driving
down a slope or turning corners, be sure
to reduce your speed and maintain an
ample distance from other vehicles. . When replacing a tire, make sure you
use only the same size, circumference,
construction, brand, and load range as the
original tires listed on the tire placard.
Using other sizes, circumferences or
construction may result in severe mechan-
ical damage to the drive train of your vehicle and may affect ride, handling,
braking, speedometer/odometer calibra-
tion, and clearance between the body
and tires. It also may be dangerous and
lead to loss of vehicle control. .
If you use a temporary spare tire to
replace a flat tire, be sure to use the
original temporary spare tire stored in the
vehicle. Using other sizes may result in
severe mechanical damage to the drive
train of your vehicle. . Always check the cold tire pressure
before starting to drive. The recom-
mended tire pressure is provided on the
tire placard, which is located on the door
pillar on the driver ’s side.
. There are some precautions that you
must observe when towing your vehicle.
For detailed information, refer to “Towing ”
F 9-12. Driving tips
8-5
Page 294 of 448
8-10Driving tips
leading to loss of vehicle control.
An anti-lock brake system (ABS) en-
hances your vehicle ’s braking perfor-
mance on snowy and icy roads. For
information about braking on slippery
surfaces, refer to “ABS (Anti-lock Brake
System) ”F 7-25 and “Vehicle Dynamics
Control system ”F 7-28.
! Wiper operation when snowing
Before driving in cold weather, make sure
the wiper blades are not frozen to the
windshield or rear window.
If the wiper blades are frozen to the
windshield or rear window, perform the
following procedure. . To thaw the windshield wiper blades,
use the defroster with the airflow selection in “
”and the temperature set for
maximum warmth until the wiper blades
are completely thawed. Refer to “Climate
control ”F 4-1.
. If your vehicle is equipped with a wiper
deicer, use it. It is helpful to thaw the
windshield wiper blades. Refer to “Defog-
ger and deicer ”F 3-34.
. To thaw the rear wiper blade, use the
rear window defogger. Refer to “Defogger
and deicer ”F 3-34.
When driving in snow, if frozen snow starts
to stick on the surface of the windshield despite wiper operation, use the defroster
with the airflow selection in
“
”and the
temperature set for maximum warmth.
After the windshield gets warmed enough
to melt the frozen snow on it, wash it away
using the windshield washer. Refer to“ Windshield washer ”F 3-33
Snow stuck on the wiper arm prevents the
wiper from working effectively. If snow is
stuck on the wiper arm, pull off the road to
a safe place, then remove it. If you stop
the vehicle at road side, use the hazard
warning flasher to alert other drivers.
Refer to “Hazard warning flasher ”F 3-5.
We recommend use of non-freezing type
wiper blades (winter blades) during the
seasons you could have snow and freez-
ing temperatures. Blades of this type give
superior wiping performance in snowy
conditions. Be sure to use blades that
are suitable for your vehicle.
CAUTION
During high-speed driving, non-
freezing type wiper blades may not
perform as well as standard wiper
blades. If this happens, reduce the
vehicle speed. NOTE
When the season requiring non-freez-
ing type wiper blades is over, replace
them with standard wiper blades. &
Corrosion protection
Refer to “Corrosion protection ”F 10-4.
& Snow tires
WARNING
. When replacing original tires with
winter (snow) tires, make sure
you use only the same size,
construction and load range as
the original tires listed on the tire
placard. Using other sizes and
construction may affect speed-
ometer/odometer calibration and
clearance between the body and
tires. It also may be dangerous
and lead to loss of vehicle con-trol.
. You must install four winter tires
that are of the same size, circum-
ferences, construction, brand,
andloadrange.Mixingother
sizes, circumferences or con-
structions may result in severe
mechanical damage to the drive
Page 297 of 448
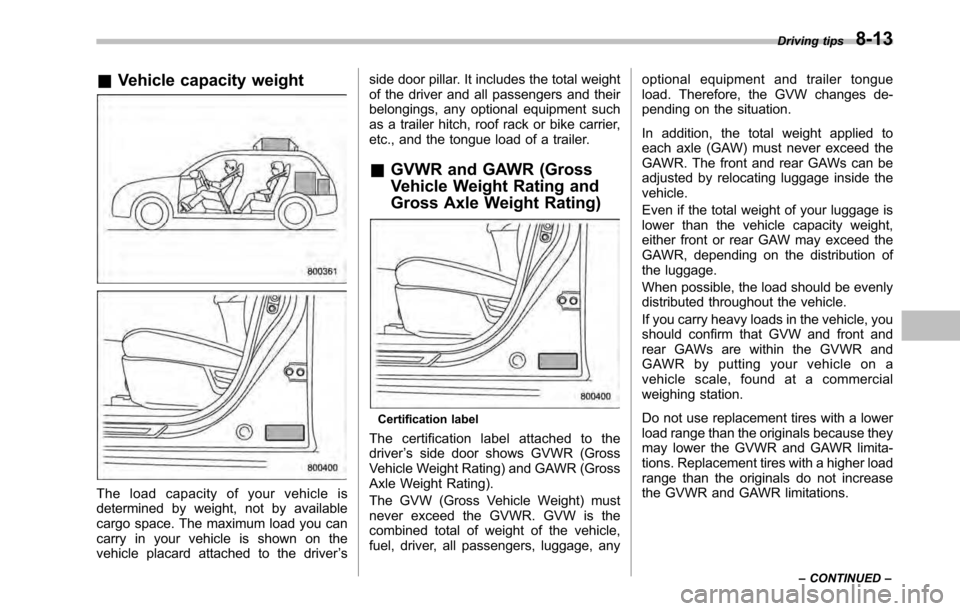
&Vehicle capacity weight
The load capacity of your vehicle is
determined by weight, not by available
cargo space. The maximum load you can
carry in your vehicle is shown on the
vehicle placard attached to the driver ’s side door pillar. It includes the total weight
of the driver and all passengers and their
belongings, any optional equipment such
as a trailer hitch, roof rack or bike carrier,
etc., and the tongue load of a trailer.
& GVWR and GAWR (Gross
Vehicle Weight Rating and
Gross Axle Weight Rating)
Certification label
The certification label attached to the driver ’s side door shows GVWR (Gross
Vehicle Weight Rating) and GAWR (Gross
Axle Weight Rating).
The GVW (Gross Vehicle Weight) must
never exceed the GVWR. GVW is the
combined total of weight of the vehicle,
fuel, driver, all passengers, luggage, any optional equipment and trailer tongue
load. Therefore, the GVW changes de-
pending on the situation.
In addition, the total weight applied to
each axle (GAW) must never exceed the
GAWR. The front and rear GAWs can be
adjusted by relocating luggage inside thevehicle.
Even if the total weight of your luggage is
lower than the vehicle capacity weight,
either front or rear GAW may exceed the
GAWR, depending on the distribution of
the luggage.
When possible, the load should be evenly
distributed throughout the vehicle.
If you carry heavy loads in the vehicle, you
should confirm that GVW and front and
rear GAWs are within the GVWR and
GAWR by putting your vehicle on a
vehicle scale, found at a commercial
weighing station.
Do not use replacement tires with a lower
load range than the originals because they
may lower the GVWR and GAWR limita-
tions. Replacement tires with a higher load
range than the originals do not increase
the GVWR and GAWR limitations.
Driving tips
8-13
– CONTINUED –
Page 304 of 448

8-20Driving tips
3.6 L models
Conditions Maximum total trailer weight
When towing a trailer without brakes. 1,000 lbs (453 kg)
When towing a trailer with brakes. 3,000 lbs (1,360 kg)
When towing a trailer on a long uphill grade
continuously for over 5 miles (8 km) with an
outside temperature of 104 8F (40 8C) or above. 1,500 lbs (680 kg)
All models other than 3.6 L models Model Conditions Maximum total trailer
weight
MT models When towing a trailer without brakes. 1,000 lbs (453 kg)
When towing a trailer with brakes. 2,700 lbs (1,224 kg)
CVT models When towing a trailer without brakes. 1,000 lbs (453 kg)
When towing a trailer with brakes. 2,700 lbs (1,224 kg)
When towing a trailer on a long uphill
grade continuously for over 5 miles (8
km) with an outside temperature of 1048F (40 8C) or above. 1,350 lbs (612 kg)!
Gross Vehicle Weight (GVW) and
Gross Vehicle Weight Rating(GVWR)
Gross Vehicle Weight
The Gross Vehicle Weight (GVW) must
never exceed the Gross Vehicle Weight
Rating (GVWR).
Gross Vehicle Weight (GVW) is the
combined total of the weight of the vehicle,
driver, passengers, luggage, trailer hitch,
trailer tongue load and any other optional
equipment installed on your vehicle.
Therefore, the GVW changes depending
on the situation. Determine the GVW each
time before going on a trip by putting your
vehicle and trailer on a vehicle scale.
GVWR is shown on the certification label
located on the driver ’s door of your
vehicle.
Page 312 of 448
9-2In case of emergency
If you park your vehicle in an emergency
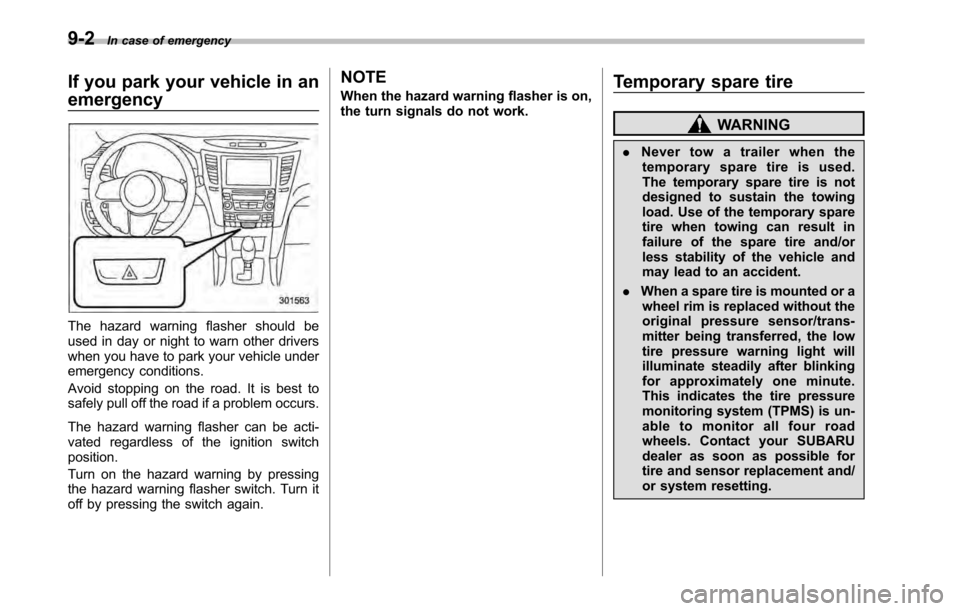
The hazard warning flasher should be
used in day or night to warn other drivers
when you have to park your vehicle under
emergency conditions.
Avoid stopping on the road. It is best to
safely pull off the road if a problem occurs.
The hazard warning flasher can be acti-
vated regardless of the ignition switchposition.
Turn on the hazard warning by pressing
the hazard warning flasher switch. Turn it
off by pressing the switch again. NOTE
When the hazard warning flasher is on,
the turn signals do not work.
Temporary spare tire
WARNING
. Never tow a trailer when the
temporary spare tire is used.
The temporary spare tire is not
designed to sustain the towing
load. Use of the temporary spare
tire when towing can result in
failure of the spare tire and/or
less stability of the vehicle and
may lead to an accident.
. When a spare tire is mounted or a
wheel rim is replaced without the
original pressure sensor/trans-
mitter being transferred, the low
tire pressure warning light will
illuminate steadily after blinking
for approximately one minute.
This indicates the tire pressure
monitoring system (TPMS) is un-
able to monitor all four road
wheels. Contact your SUBARU
dealer as soon as possible for
tire and sensor replacement and/
or system resetting.
Page 313 of 448

CAUTION
Never use any temporary spare tire
other than the original. Using other
sizes may result in severe mechan-
ical damage to the drive train of yourvehicle.
The temporary spare tire is smaller and
lighter than a conventional tire and is
designed for emergency use only. Re-
move the temporary spare tire and re-
install the conventional tire as soon as
possible because the spare tire is de-
signed only for temporary use.
Check the inflation pressure of the tem-
porary spare tire periodically to keep the
tire ready for use. The correct pressure is
60 psi (420 kPa, 4.2 kgf/cm
2) .
When using the temporary spare tire, note
the following precautions. . Do not exceed 50 mph (80 km/h).
. Do not put a tire chain on the temporary
spare tire. Because of the smaller tire size,
a tire chain will not fit properly. . Do not use two or more temporary
spare tires at the same time.. Do not drive over obstacles. This tire
has a smaller diameter, so road clearance
is reduced.
1) Tread wear indicator bar
2) Indicator location mark
. When the wear indicator appears on
the tread, replace the tire. . The temporary spare tire must be used
only on a rear wheel. If a front wheel tire
gets punctured, replace the wheel with a
rear wheel and install the temporary spare
tire in place of the removed rear wheel. Maintenance tools
Your vehicle is equipped with the following
maintenance tools. .
Jack
. Jack handle
. Screwdriver
. Towing hook (eye bolt)
. Wheel nut wrench
. Electronic parking brake release tool In case of emergency
9-3
– CONTINUED –