Trim SUBARU TRIBECA 2009 1.G Service Workshop Manual
[x] Cancel search | Manufacturer: SUBARU, Model Year: 2009, Model line: TRIBECA, Model: SUBARU TRIBECA 2009 1.GPages: 2453, PDF Size: 46.32 MB
Page 18 of 2453
AB-19
Curtain Airbag Module
AIRBAG SYSTEM
7. Curtain Airbag Module
A: REMOVAL
CAUTION:
Refer to “CAUTION” of “General Description”
before handling the airbag module.
1) Turn the ignition switch to OFF.
2) Disconnect the ground cable from battery and
wait for at least 20 seconds before starting work.
3) Remove the front pillar upper trim and center pil-
lar upper trim.
Trim.>
4) Remove the rear quarter trim.
5) Remove the roof trim.
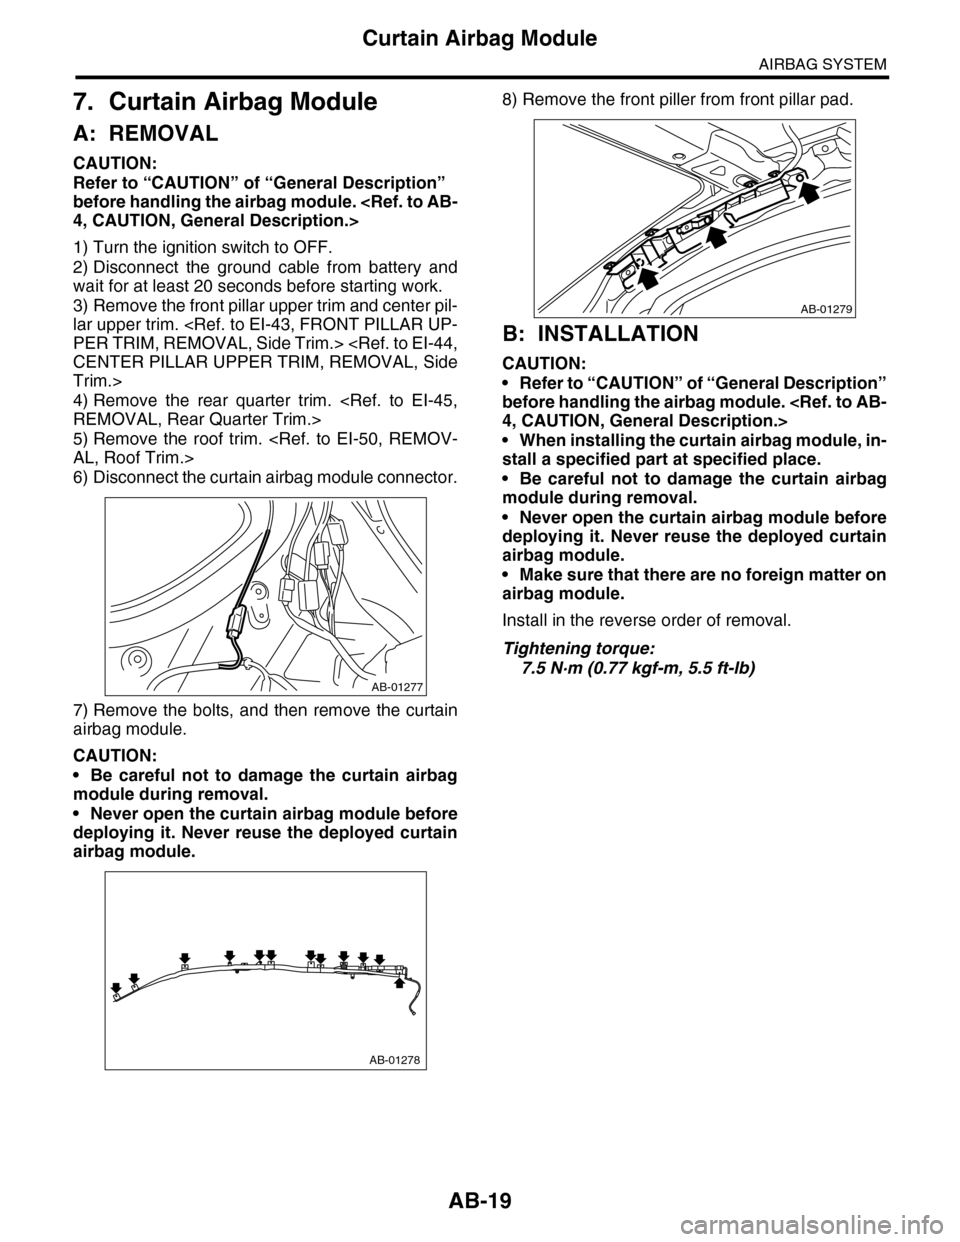
6) Disconnect the curtain airbag module connector.
7) Remove the bolts, and then remove the curtain
airbag module.
CAUTION:
•Be careful not to damage the curtain airbag
module during removal.
•Never open the curtain airbag module before
deploying it. Never reuse the deployed curtain
airbag module.
8) Remove the front piller from front pillar pad.
B: INSTALLATION
CAUTION:
•Refer to “CAUTION” of “General Description”
before handling the airbag module.
•When installing the curtain airbag module, in-
stall a specified part at specified place.
•Be careful not to damage the curtain airbag
module during removal.
•Never open the curtain airbag module before
deploying it. Never reuse the deployed curtain
airbag module.
•Make sure that there are no foreign matter on
airbag module.
Install in the reverse order of removal.
Tightening torque:
7.5 N·m (0.77 kgf-m, 5.5 ft-lb)
AB-01277
AB-01278
AB-01279
Page 19 of 2453
AB-20
Curtain Airbag Module
AIRBAG SYSTEM
C: INSPECTION
CAUTION:
Refer to “CAUTION” of “General Description”
before handling the airbag module.
Check for the following, and replace the damaged
parts with new parts.
cations After a Collision.>
1) With side collision (when curtain airbag is de-
ployed)
•Curtain airbag module assembly
•Roof Trim
•Front pillar upper trim
•Front piller pad (blue)
•Center pillar upper trim
•Center piller pad (green)
•Rear quarter upper trim
•Rear quarter piller pad (red)
•Airbag guide
2) When damage is found by visual check
•Assist grip
•Assist grip bracket
•Curtain airbag harness and connector on body
side.
3) With side collision (when curtain airbag is not de-
ployed)
Check the roof trim, pillar trim and airbag module
visually, and then replace them with new ones if
damaged or cracked.
Specially inspect the damage of airbag module
body, mounting bracket and harness connector.
4) Without side collision (dirt and damage of cover)
Replace the corresponding part with a new one.
Page 21 of 2453
AB-22
Side Airbag Sensor
AIRBAG SYSTEM
9. Side Airbag Sensor
A: REMOVAL
1) Turn the ignition switch to OFF.
2) Disconnect the ground cable from battery and
wait for at least 20 seconds before starting work.
3) Remove the center pillar lower trim.
Side Trim.>
4) Remove the seat belt retractor of the front outer
seat belt.
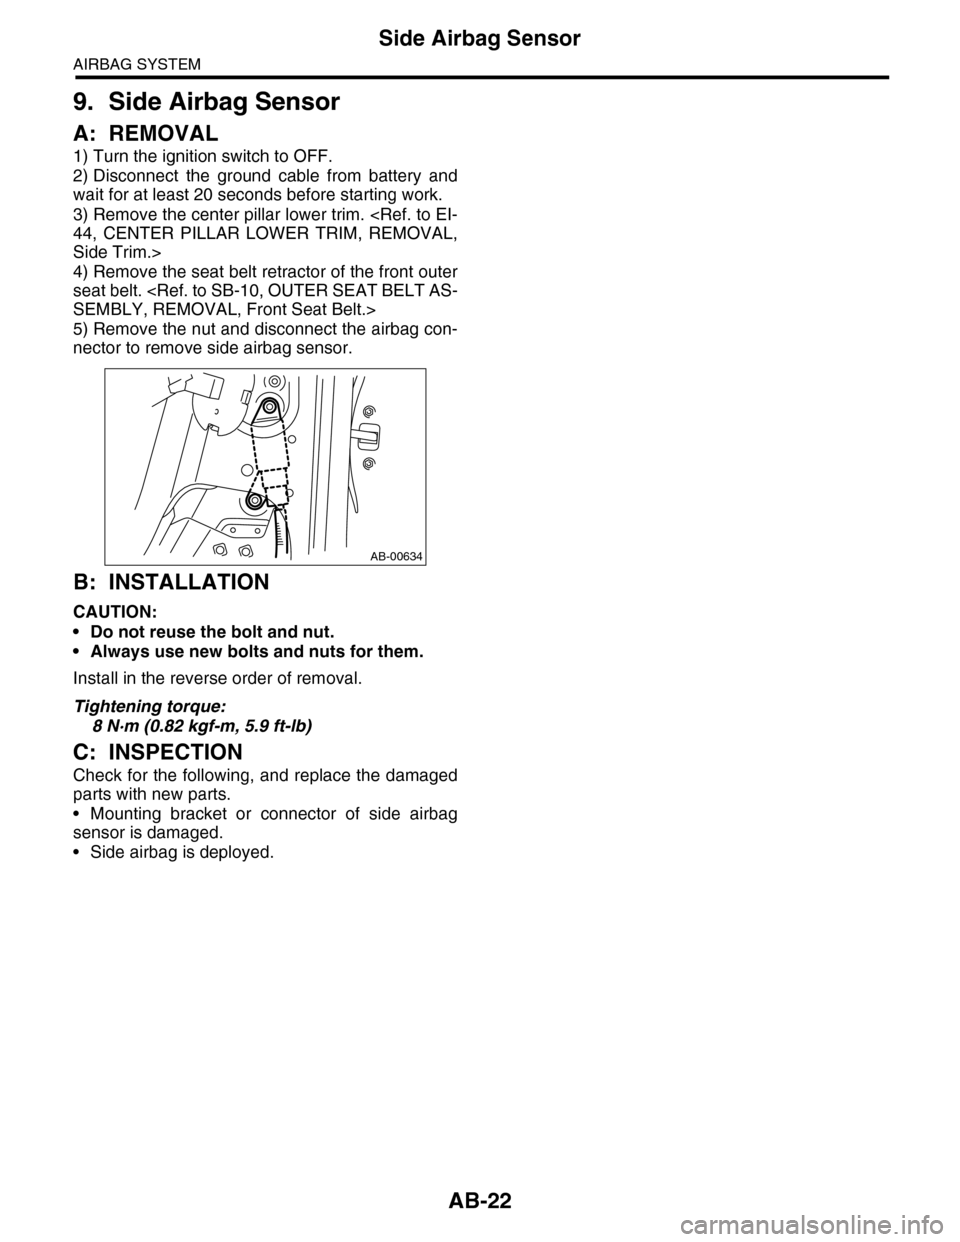
5) Remove the nut and disconnect the airbag con-
nector to remove side airbag sensor.
B: INSTALLATION
CAUTION:
•Do not reuse the bolt and nut.
•Always use new bolts and nuts for them.
Install in the reverse order of removal.
Tightening torque:
8 N·m (0.82 kgf-m, 5.9 ft-lb)
C: INSPECTION
Check for the following, and replace the damaged
parts with new parts.
•Mounting bracket or connector of side airbag
sensor is damaged.
•Side airbag is deployed.
AB-00634
Page 22 of 2453
AB-23
Curtain Airbag Sensor
AIRBAG SYSTEM
10.Curtain Airbag Sensor
A: REMOVAL
1) Turn the ignition switch to OFF.
2) Disconnect the ground cable from battery and
wait for at least 20 seconds before starting work.
3) Remove the rear quarter lower trim.
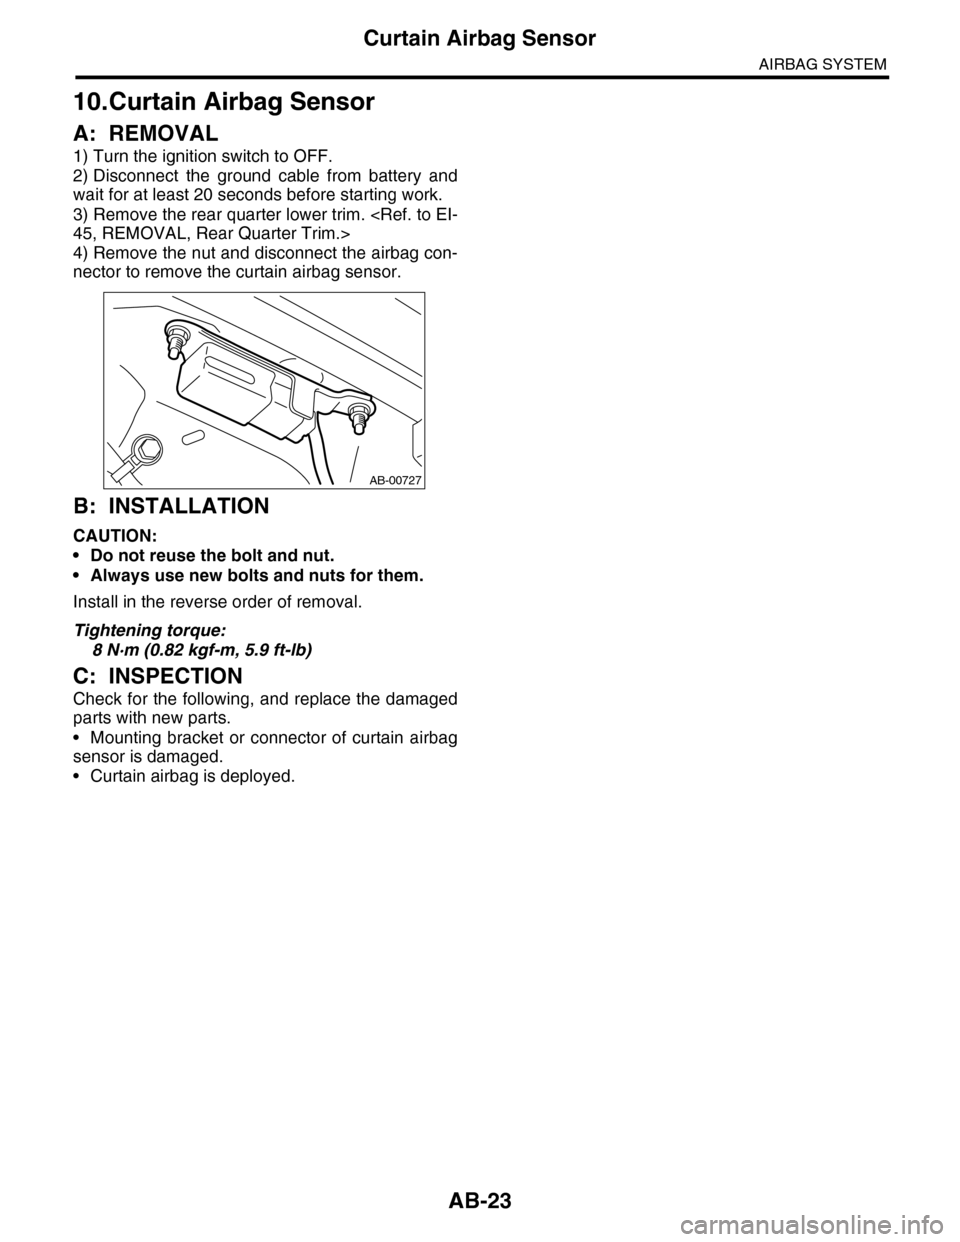
4) Remove the nut and disconnect the airbag con-
nector to remove the curtain airbag sensor.
B: INSTALLATION
CAUTION:
•Do not reuse the bolt and nut.
•Always use new bolts and nuts for them.
Install in the reverse order of removal.
Tightening torque:
8 N·m (0.82 kgf-m, 5.9 ft-lb)
C: INSPECTION
Check for the following, and replace the damaged
parts with new parts.
•Mounting bracket or connector of curtain airbag
sensor is damaged.
•Curtain airbag is deployed.
AB-00727
Page 201 of 2453
ET-15
Front Speaker
ENTERTAINMENT
10.Front Speaker
A: REMOVAL
1) Disconnect the ground cable from battery.
2) Remove the front door trim.
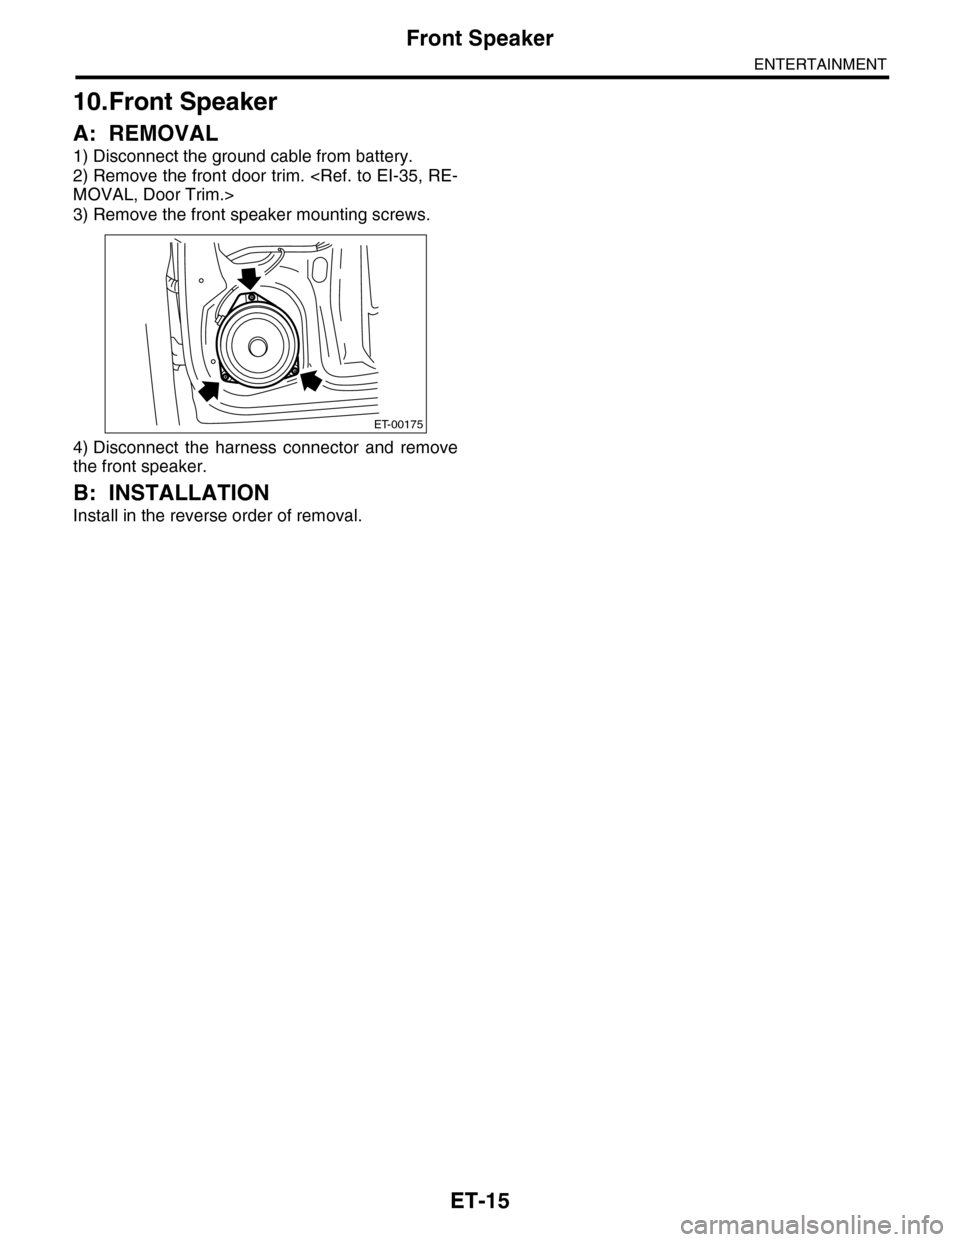
3) Remove the front speaker mounting screws.
4) Disconnect the harness connector and remove
the front speaker.
B: INSTALLATION
Install in the reverse order of removal.
ET-00175
Page 202 of 2453
ET-17
Rear Speaker
ENTERTAINMENT
12.Rear Speaker
A: REMOVAL
1) Disconnect the ground cable from battery.
2) Remove the rear door trim.
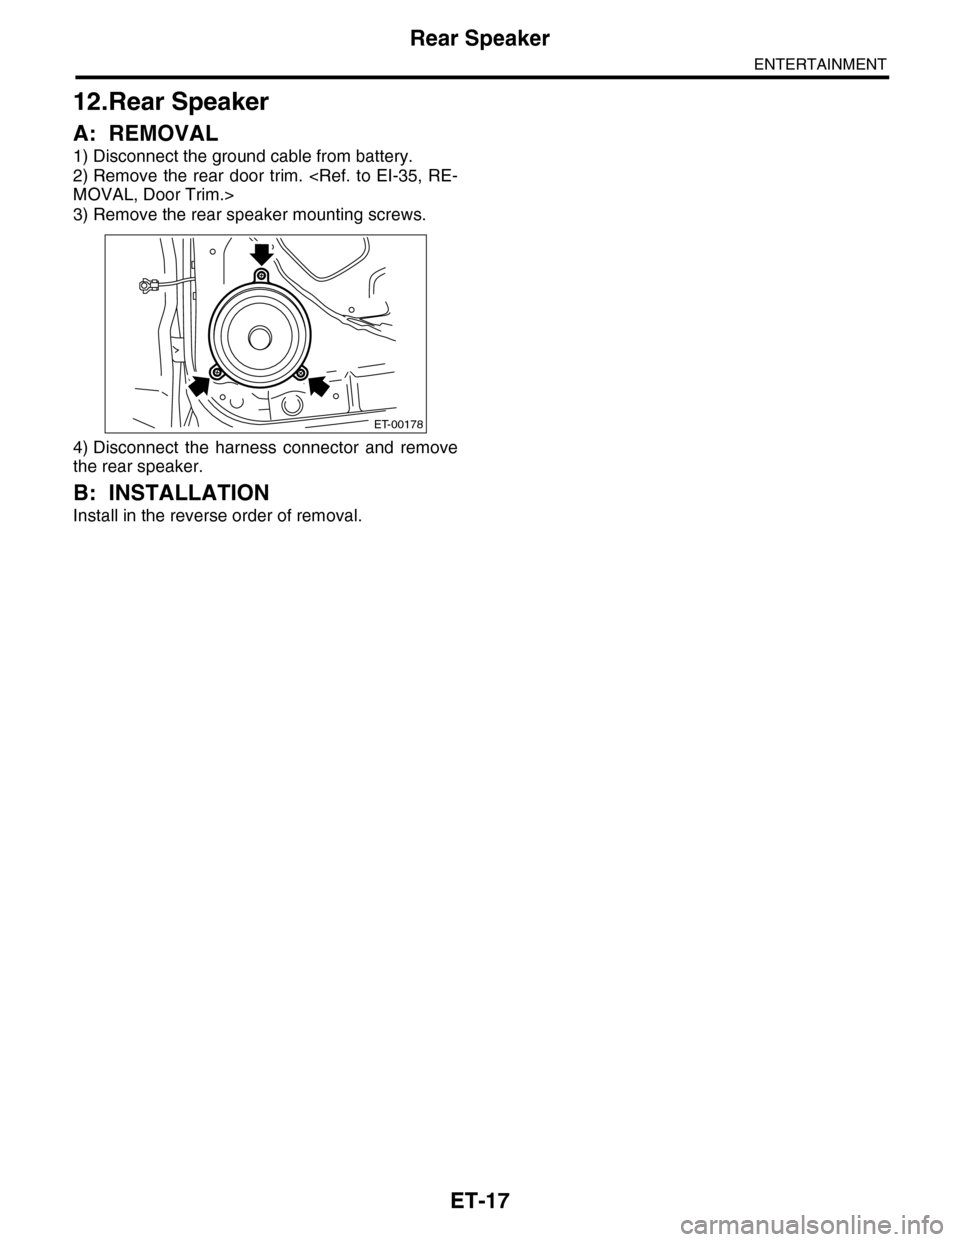
3) Remove the rear speaker mounting screws.
4) Disconnect the harness connector and remove
the rear speaker.
B: INSTALLATION
Install in the reverse order of removal.
ET-00178
Page 203 of 2453
ET-18
Woofer
ENTERTAINMENT
13.Woofer
A: REMOVAL
1) Disconnect the ground cable from battery.
2) Remove the quarter trim.
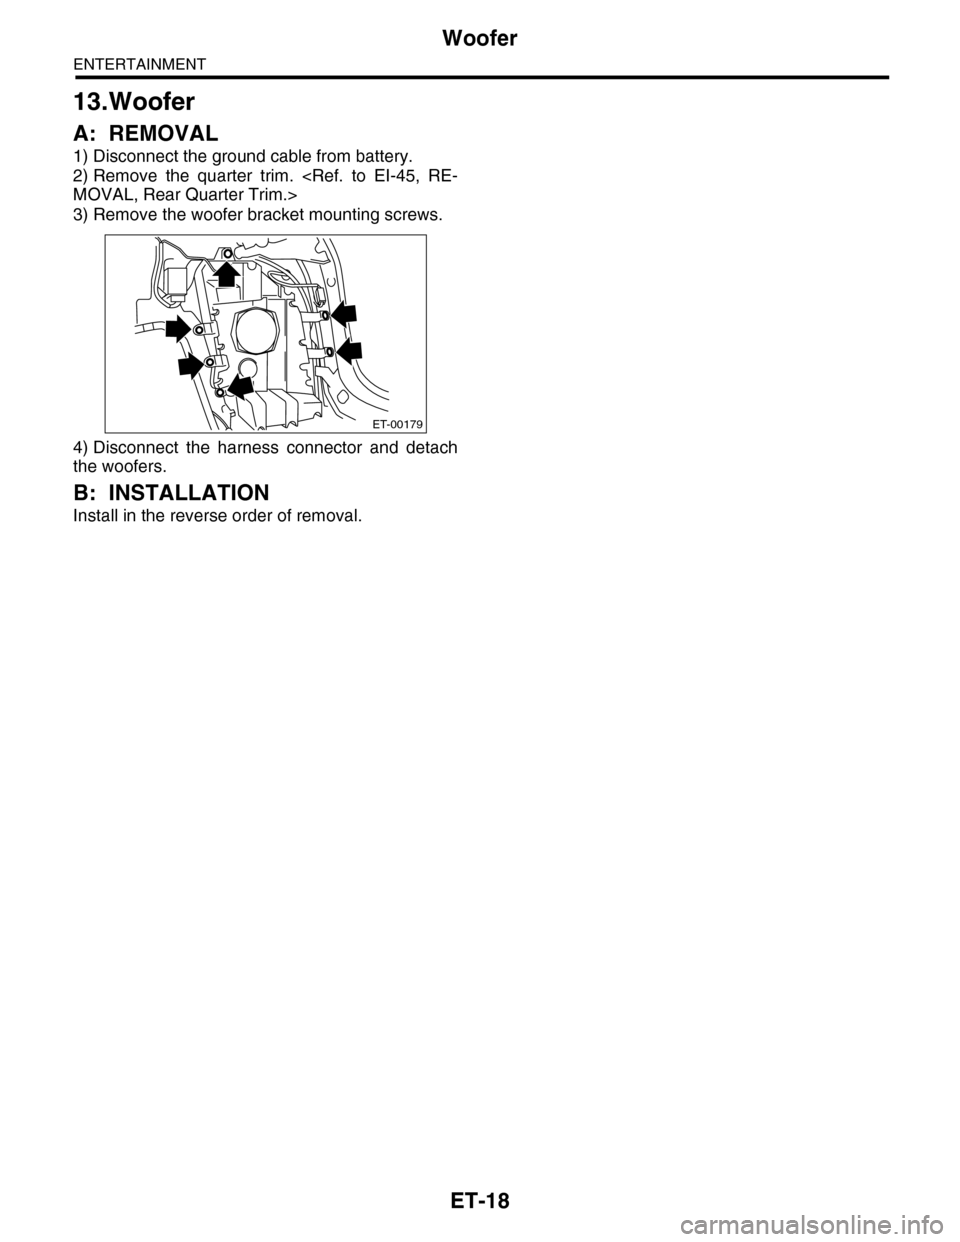
3) Remove the woofer bracket mounting screws.
4) Disconnect the harness connector and detach
the woofers.
B: INSTALLATION
Install in the reverse order of removal.
ET-00179
Page 205 of 2453
ET-20
Antenna Amplifier
ENTERTAINMENT
15.Antenna Amplifier
A: REMOVAL
1) Disconnect the ground cable from battery.
2) Remove the rear gate trim.
3) Disconnect the harness connectors and termi-
nals.
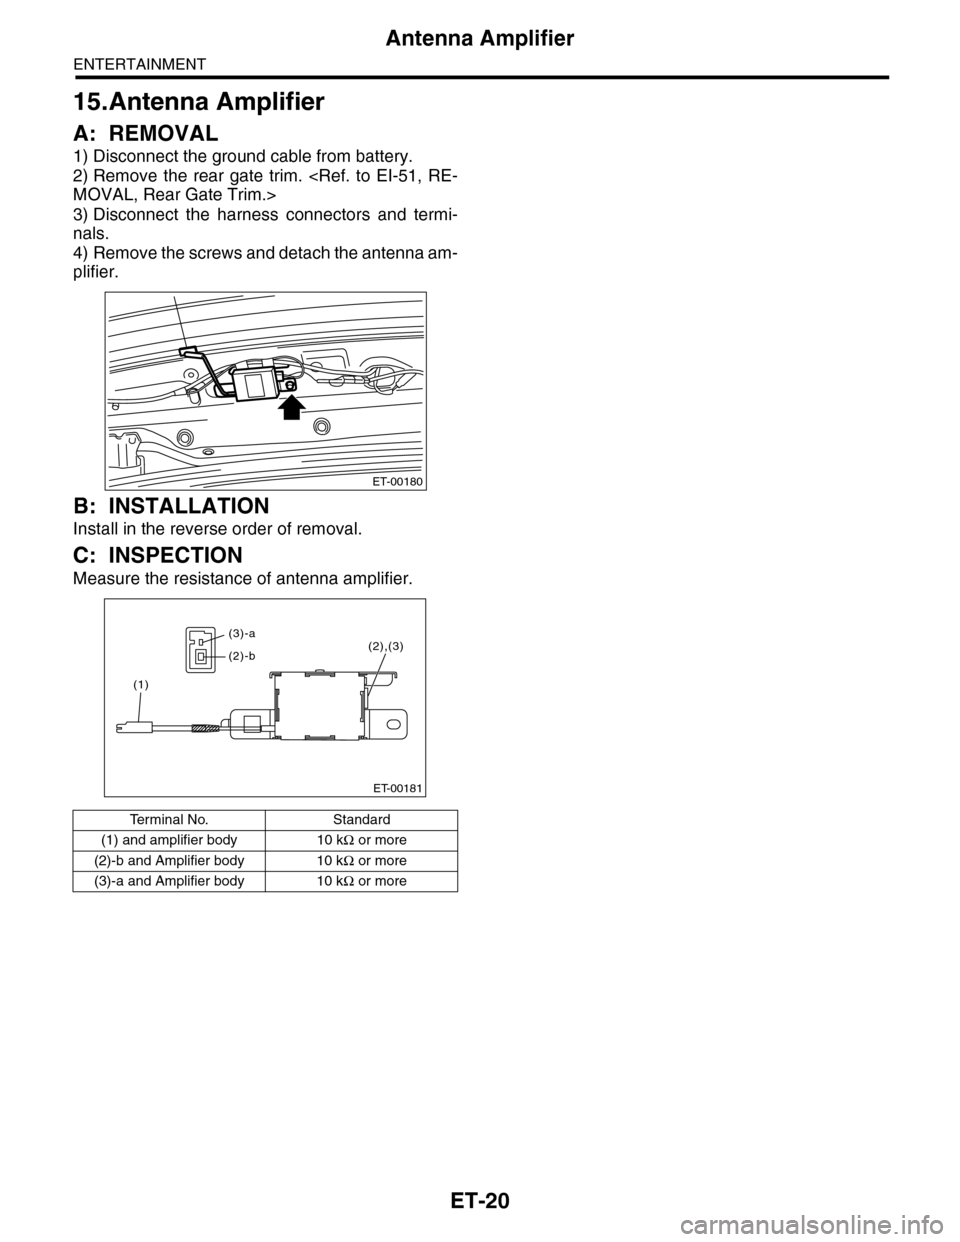
4) Remove the screws and detach the antenna am-
plifier.
B: INSTALLATION
Install in the reverse order of removal.
C: INSPECTION
Measure the resistance of antenna amplifier.
Te r m i n a l N o . S t a n d a r d
(1) and amplifier body 10 kΩ or more
(2)-b and Amplifier body 10 kΩ or more
(3)-a and Amplifier body 10 kΩ or more
ET-00180
ET-00181
(2),(3)
(1)
(3)-a
(2)-b
Page 206 of 2453
ET-21
Noise Surpressor
ENTERTAINMENT
16.Noise Surpressor
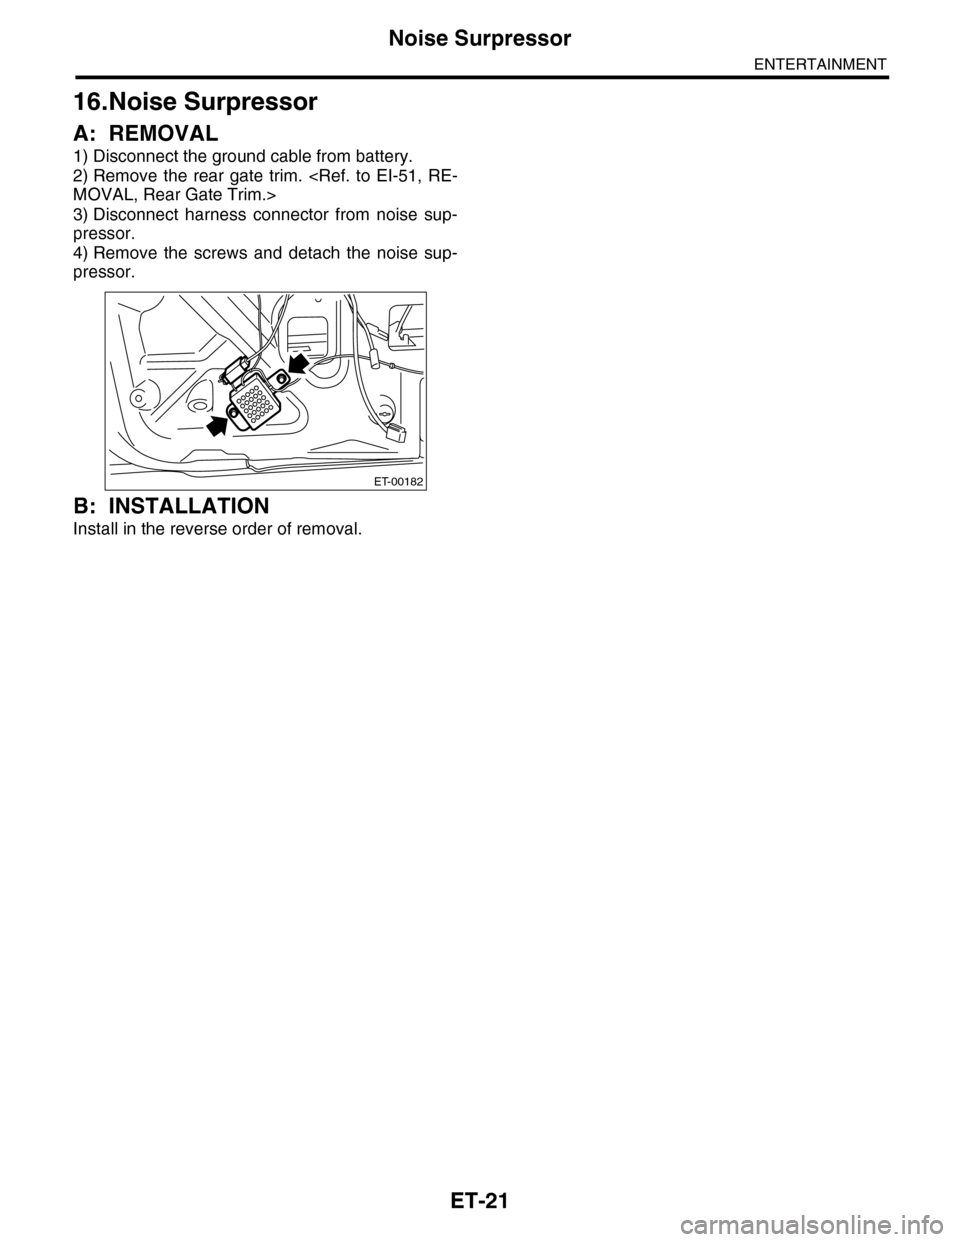
A: REMOVAL
1) Disconnect the ground cable from battery.
2) Remove the rear gate trim.
3) Disconnect harness connector from noise sup-
pressor.
4) Remove the screws and detach the noise sup-
pressor.
B: INSTALLATION
Install in the reverse order of removal.
ET-00182
Page 214 of 2453
ET-29
AUX Input Terminal
ENTERTAINMENT
24.AUX Input Terminal
A: REMOVAL
1) Disconnect the ground cable from battery.
2) Remove the quarter trim.
3) Remove the AUX input terminal from the trim.
B: INSTALLATION
Install in the reverse order of removal.