SUBARU TRIBECA 2014 1.G Owners Manual
Manufacturer: SUBARU, Model Year: 2014, Model line: TRIBECA, Model: SUBARU TRIBECA 2014 1.GPages: 426, PDF Size: 6.37 MB
Page 191 of 426
————————————————————————————————————————
————————————————————————————————————————
————————————————————————————————————————
————————————————————————————————————————
————————————————————————————————————————
————————————————————————————————————————
————————————————————————————————————————
————————————————————————————————————————
————————————————————————————————————————
————————————————————————————————————————
————————————————————————————————————————
————————————————————————————————————————
————————————————————————————————————————
Page 192 of 426
Antenna system.................................................. 5-2Printed antenna................................................... 5-2FM reception....................................................... 5-2
Installation of accessories.................................. 5-2
Audio set............................................................. 5-3Type A audio set................................................. 5-3Type B audio set................................................. 5-3
Type A audio set (if equipped)........................... 5-4Radio operation................................................... 5-4Compact disc player operation........................... 5-10
Type B audio set (if equipped).......................... 5-15Radio operation................................................. 5-15Built in CD changer operation ............................ 5-21
Audio control buttons....................................... 5-26MODE button..................................................... 5-26
Auxiliary input jack............................................ 5-28
Rear Seat Entertainment (RSE) systemoperation (if equipped)................................... 5-29
Precautions to observe when handling acompact disc................................................... 5-29
Audio
5
Page 193 of 426
5-2Audio
Antenna system
&Printed antenna
CAUTION
Do not use sharp instruments orwindow cleaner containing abra-sives to clean the inner surface ofthewindow on which the antenna isprinted. Doing so may damage theantenna printed on the window.
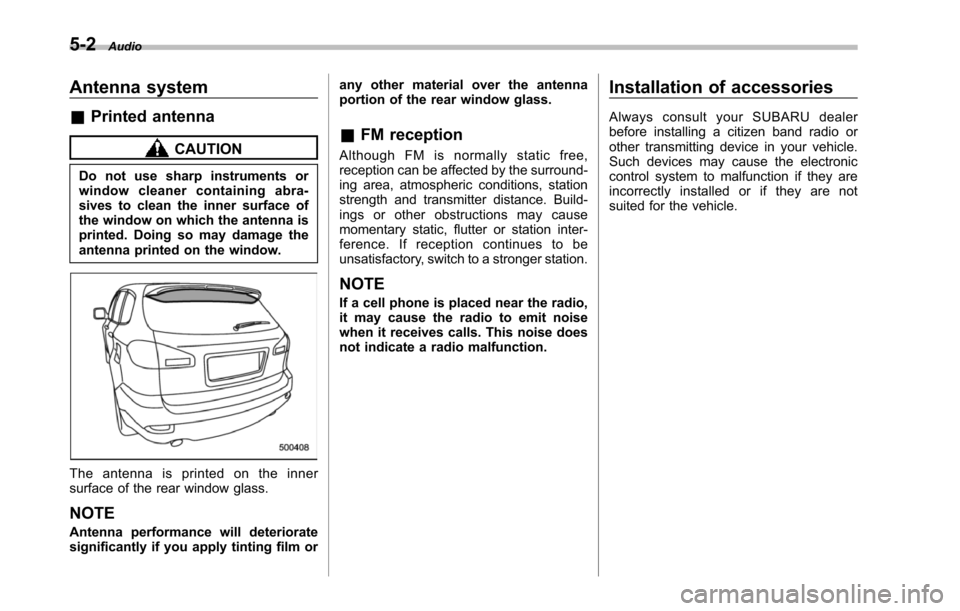
The antenna is printed on the innersurface of the rear window glass.
NOTE
Antenna performance will deterioratesignificantly if you apply tinting film or
any other material over the antennaportion of the rear window glass.
&FM reception
Although FM is normally static free,reception can be affected by the surround-ing area, atmospheric conditions, stationstrength and transmitter distance. Build-ings or other obstructions may causemomentary static, flutter or station inter-ference. If reception continues to beunsatisfactory, switch to a stronger station.
NOTE
If a cell phone is placed near the radio,it may cause the radio to emit noisewhen it receives calls. This noise doesnot indicate a radio malfunction.
Installation of accessories
Always consult your SUBARU dealerbefore installing a citizen band radio orother transmitting device in your vehicle.Such devices may cause the electroniccontrol system to malfunction if they areincorrectly installed or if they are notsuited for the vehicle.
Page 194 of 426
Audio set
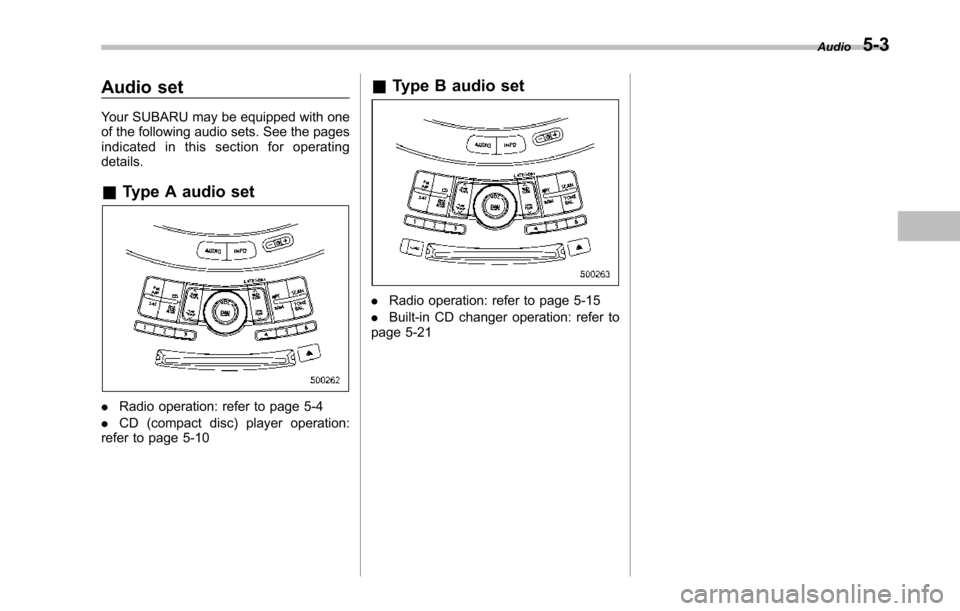
Your SUBARU may be equipped with oneof the following audio sets. See the pagesindicated in this section for operatingdetails.
&Type A audio set
.Radio operation: refer to page 5-4
.CD (compact disc) player operation:refer to page 5-10
&Type B audio set
.Radio operation: refer to page 5-15
.Built-in CD changer operation: refer topage 5-21
Audio5-3
Page 195 of 426
5-4Audio
Type A audio set (if equipped)
The audio set will operate only when the ignition switch is in the“Acc”or“ON”position.
&Radio operation
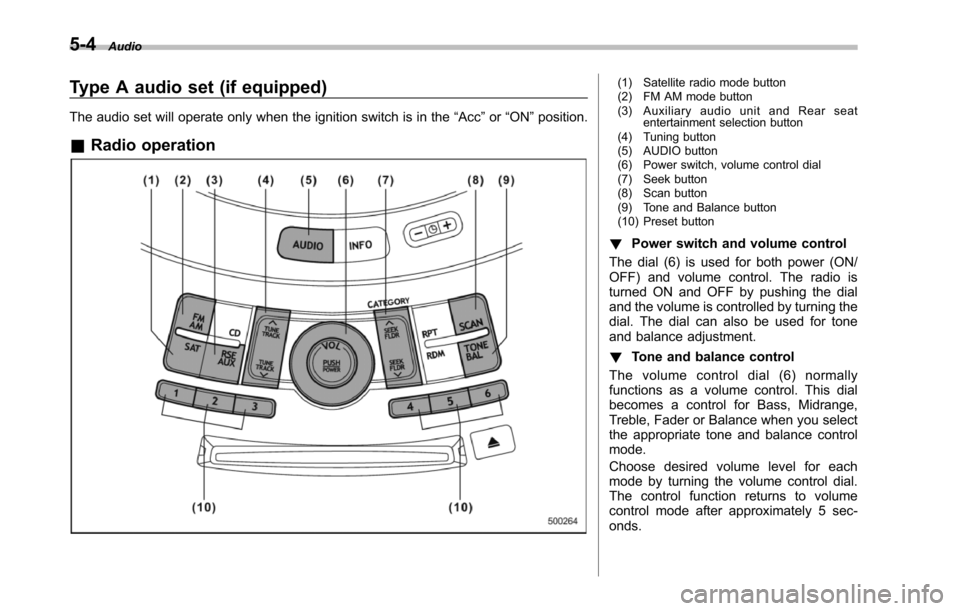
(1) Satellite radio mode button(2) FM AM mode button(3) Auxiliary audio unit and Rear seatentertainment selection button(4) Tuning button(5) AUDIO button(6) Power switch, volume control dial(7) Seek button(8) Scan button(9) Tone and Balance button(10) Preset button
!Power switch and volume control
The dial (6) is used for both power (ON/OFF) and volume control. The radio isturned ON and OFF by pushing the dialand the volume is controlled by turning thedial. The dial can also be used for toneand balance adjustment.
!Tone and balance control
The volume control dial (6) normallyfunctions as a volume control. This dialbecomes a control for Bass, Midrange,Treble, Fader or Balance when you selectthe appropriate tone and balance controlmode.
Choose desired volume level for eachmode by turning the volume control dial.The control function returns to volumecontrol mode after approximately 5 sec-onds.
Page 196 of 426
!To c h a n g e t o n e a n d b a l a n c econtrol modes
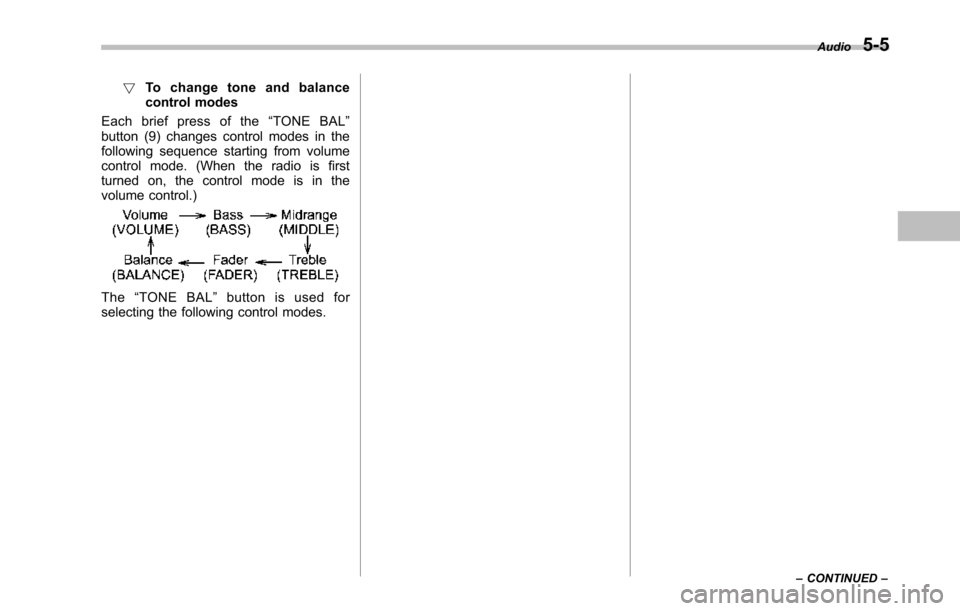
Each brief press of the“TONE BAL”button (9) changes control modes in thefollowing sequence starting from volumecontrol mode. (When the radio is firstturned on, the control mode is in thevolume control.)
The“TONE BAL”button is used forselecting the following control modes.
Audio5-5
–CONTINUED–
Page 197 of 426
5-6Audio
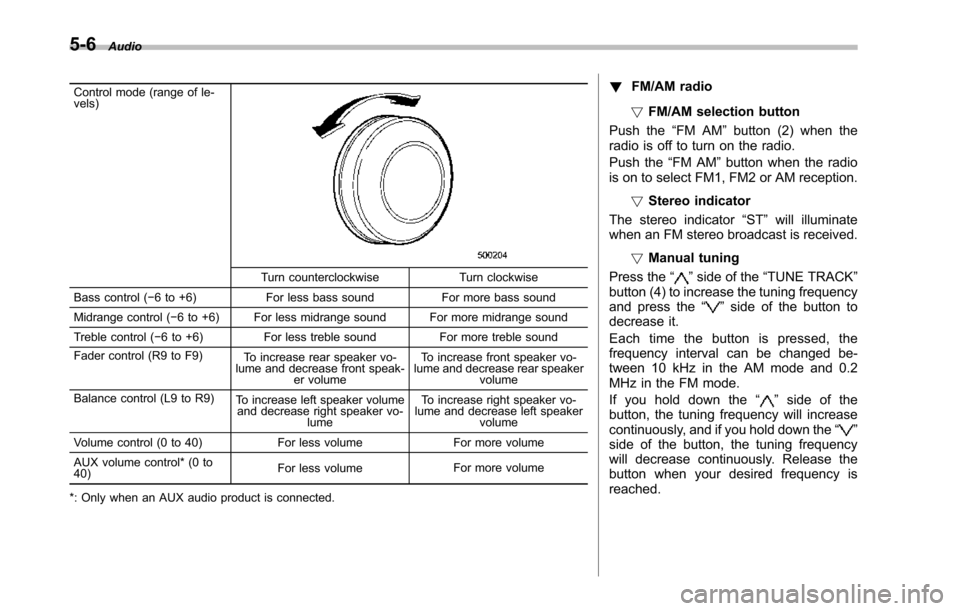
Control mode (range of le-vels)
Turn counterclockwise Turn clockwise
Bass control (!6 to +6) For less bass sound For more bass sound
Midrange control(!6 to +6) For less midrange sound For more midrange sound
Treble control (!6 to +6) For less treble sound For more treble sound
Fader control (R9 to F9)To increase rear speaker vo-lume and decrease front speak-er volume
To increase front speaker vo-lume and decrease rear speakervolume
Balance control(L9 to R9)To increase left speaker volumeand decrease right speaker vo-lume
To increase right speaker vo-lume and decrease left speakervolume
Volume control (0 to 40) For less volume For more volume
AUX volume control* (0 to40)For less volumeFor more volume
*: Only when an AUX audio product is connected.
!FM/AM radio
!FM/AM selection button
Push the“FM AM”button (2) when theradio is off to turn on the radio.
Push the“FM AM”button when the radiois on to select FM1, FM2 or AM reception.
!Stereo indicator
The stereo indicator“ST”will illuminatewhen an FM stereo broadcast is received.
!Manual tuning
Press the“”side of the“TUNE TRACK”button(4) to increase the tuning frequencyand press the“”side of the button todecrease it.
Each time the button is pressed, thefrequencyinterval can be changed be-tween 10 kHz in the AM mode and 0.2MHz in the FM mode.
If you hold down the“”side of thebutton, the tuningfrequency will increasecontinuously, and if you hold down the“”side of the button, the tuning frequencywill decrease continuously. Release thebutton when your desired frequency isreached.
Page 198 of 426
NOTE
While you are holding down either sideof the“TUNE TRACK”button, thetuning frequency will not stop chan-ging even if the frequency of a recei-vable station is reached.
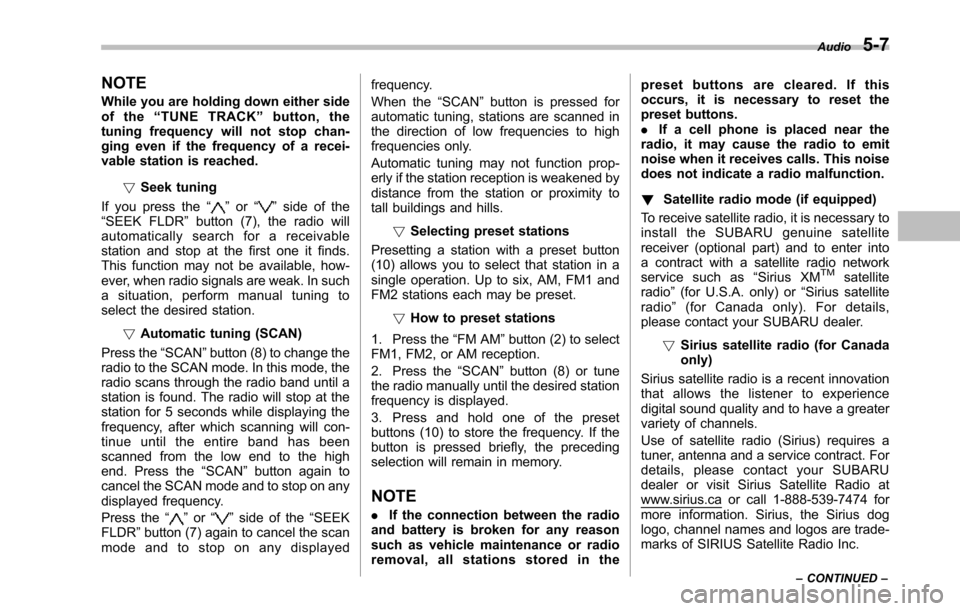
!Seek tuning
If you press the“”or“”side of the“SEEK FLDR”button (7), the radio willautomatically search for a receivablestation and stop at the first one it finds.This function may not be available, how-ever, when radio signals are weak. In suchasituation,performmanualtuningtoselect the desired station.
!Automatic tuning (SCAN)
Press the“SCAN”button (8) to change theradio to the SCAN mode. In this mode, theradio scans through the radio band until astation is found. The radio will stop at thestation for 5 seconds while displaying thefrequency, after which scanning will con-tinue until the entire band has beenscanned from the low end to the highend. Press the“SCAN”button again tocancel the SCAN mode and to stop on anydisplayed frequency.
Press the“”or“”side of the“SEEKFLDR”button (7) again to cancel the scanmode and to stop on any displayed
frequency.
When the“SCAN”button is pressed forautomatic tuning, stations are scanned inthe direction of low frequencies to highfrequencies only.
Automatic tuning may not function prop-erly if the station reception is weakened bydistancefrom the station or proximity totall buildings and hills.
!Selecting preset stations
Presetting a station with a preset button(10) allows you to select that station in asingle operation. Up to six, AM, FM1 andFM2 stations each may be preset.
!How to preset stations
1. Press the“FM AM”button (2) to selectFM1, FM2, or AM reception.
2. Press the“SCAN”button (8) or tunethe radio manually until the desired stationfrequencyis displayed.
3. Press and hold one of the presetbuttons (10) to store the frequency. If thebutton is pressed briefly, the precedingselection will remain in memory.
NOTE
.If the connection between the radioand battery is broken for any reasonsuch as vehicle maintenance or radioremoval, all stations stored in the
preset buttons are cleared. If thisoccurs, it is necessary to reset thepreset buttons..If a cell phone is placed near theradio, it may cause the radio to emitnoise when it receives calls. This noisedoes not indicate a radio malfunction.
!Satellite radio mode (if equipped)
To receive satellite radio, it is necessary toinstall the SUBARU genuine satellitereceiver (optional part) and to enter intoa contract with a satellite radio networkservice such as“Sirius XMTMsatelliteradio”(for U.S.A. only)or“Sirius satelliteradio”(for Canada only). For details,please contact your SUBARU dealer.
!Sirius satellite radio (for Canadaonly)
Sirius satellite radio is a recent innovationthat allows the listener to experiencedigital sound quality and to have a greatervariety of channels.
Use of satellite radio (Sirius) requires atuner, antenna and a service contract. Fordetails, please contact your SUBARUdealer or visit Sirius Satellite Radio atwww.sirius.ca or call 1-888-539-7474 formore information. Sirius, the Sirius doglogo, channel names and logos are trade-marks of SIRIUS Satellite Radio Inc.
Audio5-7
–CONTINUED–
Page 199 of 426
5-8Audio
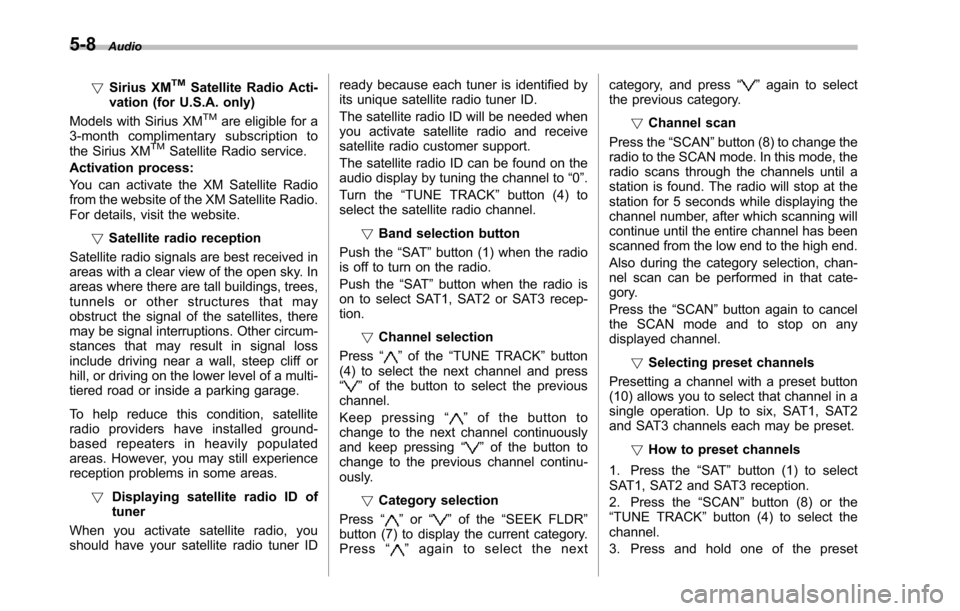
!Sirius XMTMSatellite Radio Acti-vation (for U.S.A. only)
Models with Sirius XMTMare eligible for a3-month complimentary subscription tothe Sirius XMTMSatellite Radio service.
Activation process:
You can activate the XM Satellite Radiofromthe website of the XM Satellite Radio.For details, visit the website.
!Satellite radio reception
Satellite radio signals are best received inareas with a clear view of the open sky. Inareas wherethere are tall buildings, trees,tunnels or other structures that mayobstruct the signal of the satellites, theremay be signal interruptions. Other circum-stances that may result in signal lossinclude driving near a wall, steep cliff orhill, or driving on the lower level of a multi-tiered road or inside a parking garage.
To help reduce this condition, satelliteradio providers have installed ground-based repeaters in heavily populatedareas. However, you may still experiencereception problems in some areas.
!Displaying satellite radio ID oftuner
When you activate satellite radio, youshould have your satellite radio tuner ID
ready because each tuner is identified byits unique satellite radio tuner ID.
The satellite radio ID will be needed whenyou activate satellite radio and receivesatellite radio customer support.
The satellite radio ID can be found on theaudio display by tuning the channel to“0”.
Turn the“TUNE TRACK”button (4) toselect the satellite radio channel.
!Band selection button
Push the“SAT”button (1) when the radiois off to turn on the radio.
Push the“SAT”button when the radio ison to select SAT1, SAT2 or SAT3 recep-tion.
!Channel selection
Press“”of the“TUNE TRACK”button(4) to select the next channel and press“”of the button to select the previouschannel.
Keep pressing“”of the button tochange to the next channel continuouslyand keep pressing“”of the button tochange to the previous channel continu-ously.
!Category selection
Press“”or“”of the“SEEK FLDR”button (7) to display the current category.Press“”again to select the next
category, and press“”again to selectthe previous category.
!Channel scan
Press the“SCAN”button (8) to change theradio to the SCAN mode. In this mode, theradio scans through the channels until astation is found. The radio will stop at thestation for 5 seconds while displaying thechannel number, after which scanning willcontinue until the entire channel has beenscanned from the low end to the high end.
Also during the category selection, chan-nel scan can be performed in that cate-gory.
Press the“SCAN”button again to cancelthe SCAN mode and to stop on anydisplayed channel.
!Selecting presetchannels
Presetting a channel with a preset button(10) allows you to select that channel in asingle operation. Up to six, SAT1, SAT2and SAT3 channels each may be preset.
!How to preset channels
1. Press the“SAT”button (1) to selectSAT1, SAT2 and SAT3 reception.
2. Press the“SCAN”button (8) or the“TUNE TRACK”button (4) to select thechannel.
3. Press and hold one of the preset
Page 200 of 426
buttons (10) to store the channel. If thebutton is pressed briefly, the precedingselection will remain in memory.
NOTE
If the connection between the radio andbattery is broken for any reason suchas vehicle maintenance or radio re-moval, all channels stored in the presetbuttons are cleared. If this occurs, it isnecessary to reset the preset buttons.
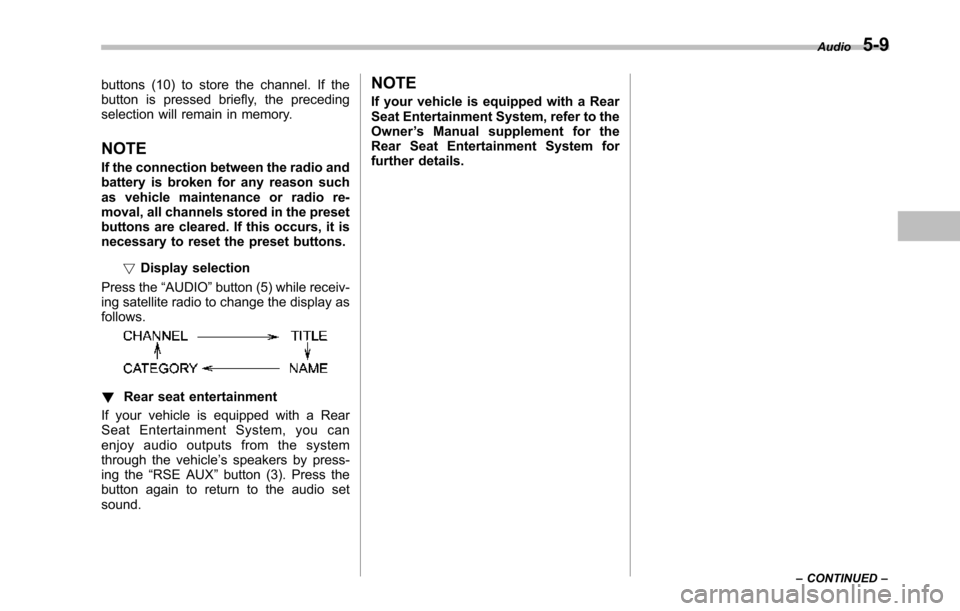
!Display selection
Press the“AUDIO”button (5) while receiv-ing satellite radio to change the display asfollows.
!Rear seat entertainment
If your vehicle is equipped with a RearSeat Entertainment System, you canenjoy audio outputs from the systemthrough the vehicle’s speakers by press-ing the“RSE AUX”button (3). Press thebutton again to return to the audio setsound.
NOTE
If your vehicle is equipped with a RearSeat Entertainment System, refer to theOwner’s Manual supplement for theRear Seat Entertainment System forfurther details.
Audio5-9
–CONTINUED–