SUBARU TRIBECA 2014 1.G Owners Manual
Manufacturer: SUBARU, Model Year: 2014, Model line: TRIBECA, Model: SUBARU TRIBECA 2014 1.GPages: 426, PDF Size: 6.37 MB
Page 201 of 426
5-10Audio
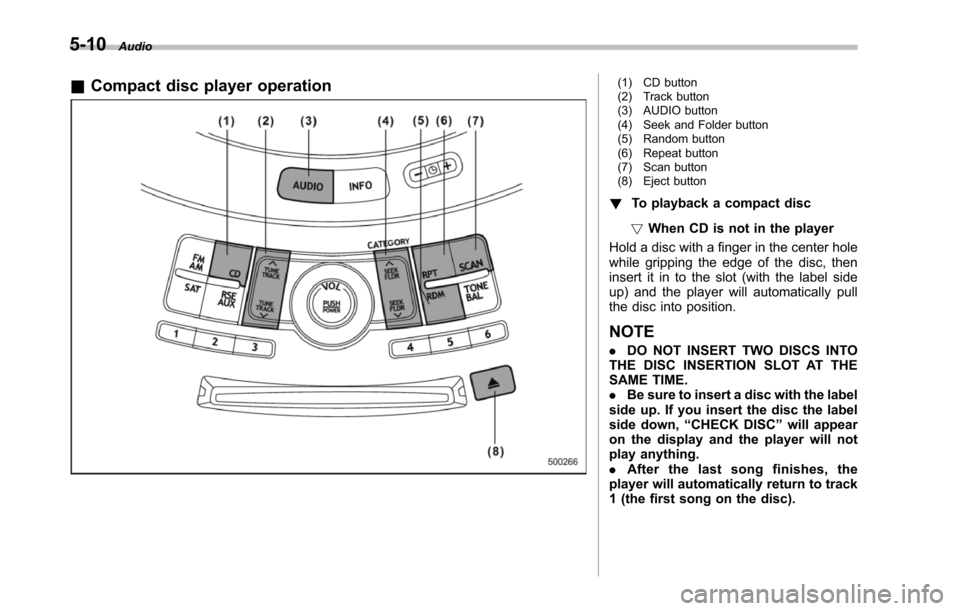
&Compact disc player operation(1) CD button(2) Track button(3) AUDIO button(4) Seek and Folder button(5) Random button(6) Repeat button(7) Scan button(8) Eject button
!To playback a compact disc
!When CD is not in the player
Hold a disc with a finger in the center holewhile gripping the edge of the disc, theninsert it in to the slot (with the label sideup) and the player will automatically pullthe disc into position.
NOTE
.DO NOT INSERT TWO DISCS INTOTHE DISC INSERTION SLOT AT THESAME TIME..Be sure to insert a disc with the labelside up. If you insert the disc the labelside down,“CHECK DISC”will appearon the display and the player will notplay anything..After the last song finishes, theplayer will automatically return to track1 (the first song on the disc).
Page 202 of 426
.If you insert a disc that cannot beplayed by the player,“CHECK DISC”will appear on the display and theplayer will revert to the previouslyselected mode..The player is designed to be able toplay music CD-Rs and music CD-RWs,but it may not be able to play certainones..CDs (i.e., 8 cm/3 inch CDs) are notsupported, and if inserted, they will beimmediately ejected.
!When CD is in the player
When the“CD”button (1) is pressed, theplayer will start playback.
NOTE
After the last song finishes, the playerwillautomatically return to track 1 (thefirst song on the disc).
!To stop playback of a CD
When the“PUSH POWER”button ispressed during playback of a CD, the CDstops playing temporarily. To let the CDresume playing, press the button again.
!To select a song from its beginning
!Forward direction
Briefly press the“”side of the“TUNETRACK”button (2) to skip to the beginning
of the next track. Each time this side of thebutton is pressed, the indicated tracknumber will increase.
NOTE
In an MP3 folder, skipping past the lasttrack will take you back to the first trackin the folder.
!Backward direction
Briefly press the“”side of the“TUNETRACK”button (2) to skip to the beginningof the current track. Each time this side ofthe button is pressed, the indicated tracknumber will decrease.
NOTE
In an MP3 folder, skipping past the lasttrack will take you back to the first trackin the folder.
!Fast-forwarding and rewinding
!Fast-forwarding
Press and hold the“”side of the“TUNETRACK”button (2) to fast-forward thetrack.
Release the button to stop fast-forwarding.
NOTE
If you fast-forward past the last trackon the disc, the player will select thefirst track on the disc and start playing
it.
!Rewinding
Press and hold the“”side of the“TUNETRACK”button (2) to rewind the track.
Release the button to stop rewinding.
NOTE
If you rewind to the beginning of thefirst track on the disc, the rewindingwill stop and the player will startplaying the first track on the disc.
!Folder selection (MP3 disc)
Press the“”side of the“SEEK FLDR”button (4) brieflyto select the next folder.Pressing the“”side of the same buttonthe first time makes the player go back tothe beginning of the currently selectedtrack; pressing it a second time makes itgo back to the previously selected track.
NOTE
Only MP3 folders are recognized whenan attempt to select the next or pre-vious folder is made. If no appropriatefolder exists on the disc, pressing the“”or“”side of the“SEEK FLDR”button has no effect.
Audio5-11
–CONTINUED–
Page 203 of 426
5-12Audio
!Repeating
!To repeat the currently playingtrack
To repeat a track, briefly press the“RPT”button (6) while the track is playing. Thedisplay will show“RPT”, and the track willbe repeated.
To cancel the track repeat-play mode:
Press the“RPT”button once (non-MP3disc)
Press the“RPT”button twice (MP3 disc)The“RPT”indication will turn off, and thenormal playback mode will be resumed.
NOTE
.With an MP3 disc inserted, eachtime you briefly press the button, themode willchange to the next one in thefollowing sequence.
If you accidentally press the button andcancel the track repeat-play mode,press it again to reselect the repeat-play mode..The repeat-play mode will be can-celed if you perform any of the follow-ing steps.–Press the“RDM”button.–Press the“SCAN”button.
–Press the“”button.–Select the radio mode.–Press the“RSE AUX”button.–Press the“”or“”side of the“SEEK FLDR”button (MP3 disc).–Turn off the power of the audioequipment.–Turn the ignition switch to the“LOCK”position.
!To repeat the currently playingfolder (MP3 disc)
To repeat the currently playing folder,press the“RPT”button (6) twice while atrack is playing. The display will show“F-RPT”,andthefolderwillbeplayedrepeatedly.
To cancel the folder repeat-play mode,press the“RPT”button once more. The“F-RPT”indication will turn off, and thenormal playback mode will be resumed.
NOTE
.Each time you briefly press thebutton, the mode will change to thenext one in the following sequence.
If you accidentally press the button andcancel the folder repeat-play mode,press it again to reselect the folder
repeat-play mode..The folder repeat-play mode will becancelled if you perform any of thefollowing steps.–Press the“RDM”button.–Press the“SCAN”button.–Press the“”button.–Select the radio mode.–Press the“RSE AUX”button.–Press the“”or“”side of the“SEEK FLDR”button (MP3 disc).–Turn off the power of the audioequipment.–Turn the ignition switch to the“LOCK”position.
!Random playback
!Non-MP3 disc
Press the“RDM”button (5) briefly duringdiscplayback to play all of the tracks onthe disc in a random order. The display willshow“RDM”, and all of the tracks on thedisc will be played in a random order.
To cancel random mode, press the buttonagain. The“RDM”indication will turn off,and the normal playback mode will beresumed.
NOTE
Random playback will be cancelled ifyou performany of the following steps.
Page 204 of 426
.Press the“RPT”button..Press the“SCAN”button..Press the“”button..Select the radio mode..Press the“RSE AUX”button..Press the“”or“”side of the“SEEK FLDR”button..Tu r n o f f t h e p o w e r o f t h e a u d i oequipment..Tu r n t h e i g n i t i o n s w i t c h t o t h e“LOCK”position.
!MP3 disc
Press the“RDM”button (5) during discplayback to play all of the tracks in thefolder currently being played in randomorder. Press the“RDM”button again toplay all of the tracks on the disc in randomorder. The display will show“RDM”duringthe random mode.
To cancel the random mode, press the“RDM”button during“in-disc”randomplayback. The“RDM”indication will turnoff, and the normal playback mode will beresumed.
NOTE
.Each time you briefly press thebutton, the mode will change to thenext one in the following sequence.
If you accidentally press the button andcancel the random mode, press it againto reselect the random mode..Random playback will be cancelledif you perform any of the followingsteps.–Press the“RPT”button.–Press the“SCAN”button.–Press the“”button.–Select the radiomode.–Press the“RSE AUX”button.–Press the“”or“”side of the“SEEK FLDR”button.–Turn off the power of the audioequipment.–Turn the ignition switch to the“LOCK”position.
!Scan
The scan mode lets you listen to the first10 seconds of each track on the disc/folder in succession. Press the“SCAN”button (7) to start scanning through alltracks upward beginning with the trackfollowing the currently selected one. Afterall tracks on the disc/folder has been
scanned, normal playback mode is re-stored.
To cancel a scan, press the button again.
NOTE
The scan mode will be cancelled if youperform any of the following opera-tions.
.Press the“RPT”button..Press the“RDM”button..Press the“”button..Press the“”or“”side of the“TUNE TRACK”button..Press the“”or“”side of the“SEEK FLDR”button (MP3 disc)..Select the radio mode..Press the“RSE AUX”button..Tu r n o f f t h e p o w e r o f t h e a u d i oequipment..Tu r n t h e i g n i t i o n s w i t c h t o t h e“LOCK”position.
!To eject a disc from the player
Whena disc is being played back or whena disc is in the player, press the“”button(8). The disc will be ejected.
NOTE
.Avoid driving the vehicle with a CDsticking out, because vibration mightmake it fall out..If the disc is left ejected for more
Audio5-13
–CONTINUED–
Page 205 of 426
5-14Audio
than approximately 15 seconds afterthe ignition switch is turned to the“LOCK”position, a disc protectionfunction will operate, automaticallyreloading the disc. In this case, thedisc is not played.
!Display selection (MP3 disc)
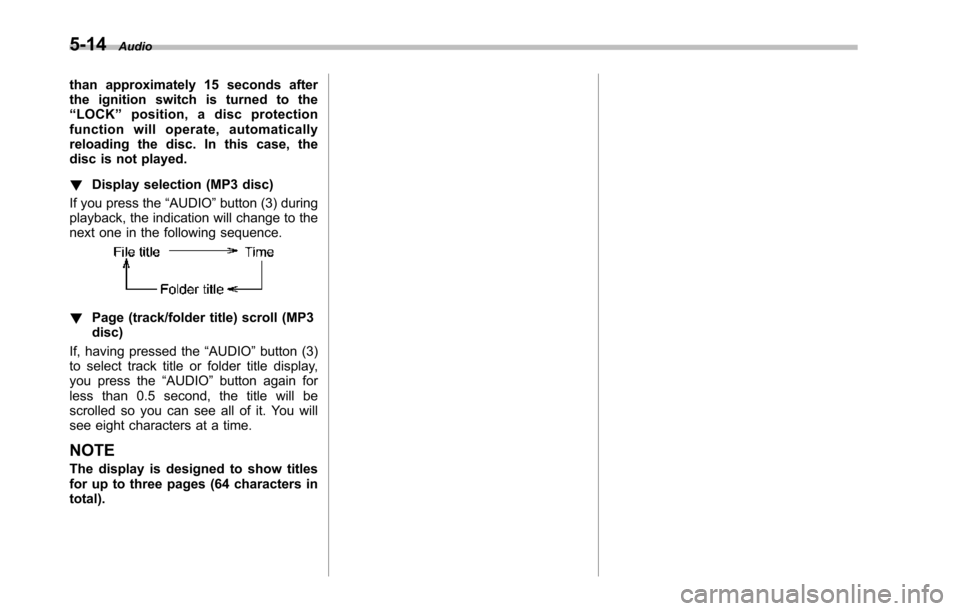
If you press the“AUDIO”button (3) duringplayback, the indication will change to thenext one in the following sequence.
!Page (track/folder title) scroll (MP3disc)
If, having pressed the“AUDIO”button (3)to select track title or folder title display,you press the“AUDIO”button again forless than 0.5 second, the title will bescrolled so you can see all of it. You willsee eight characters at a time.
NOTE
The display is designed to show titlesfor up to three pages (64 characters intotal).
Page 206 of 426
Type B audio set (if equipped)
The audio set will operate only when the ignition switch is in the“Acc”or“ON”positions.
&Radio operation
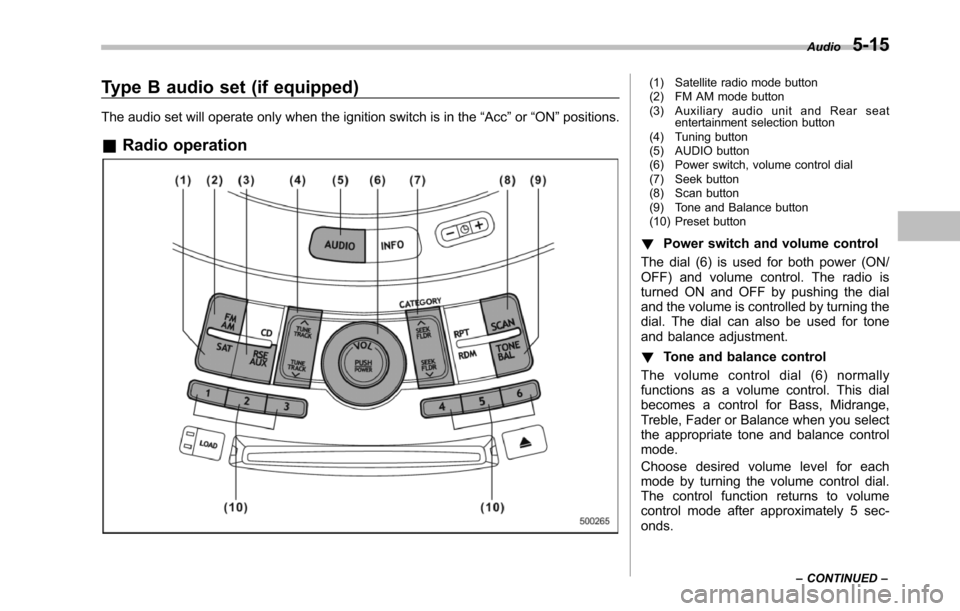
(1) Satellite radio mode button(2) FM AM mode button(3) Auxiliary audio unit and Rear seatentertainment selection button(4) Tuning button(5) AUDIO button(6) Power switch, volume control dial(7) Seek button(8) Scan button(9) Tone and Balance button(10) Preset button
!Power switch and volume control
The dial (6) is used for both power (ON/OFF) and volume control. The radio isturned ON and OFF by pushing the dialand the volume is controlled by turning thedial. The dial can also be used for toneand balance adjustment.
!Tone and balance control
The volume control dial (6) normallyfunctions as a volume control. This dialbecomes a control for Bass, Midrange,Treble, Fader or Balance when you selectthe appropriate tone and balance controlmode.
Choose desired volume level for eachmode by turning the volume control dial.The control function returns to volumecontrol mode after approximately 5 sec-onds.
Audio5-15
–CONTINUED–
Page 207 of 426
5-16Audio
!To c h a n g e t o n e a n d b a l a n c econtrol modes
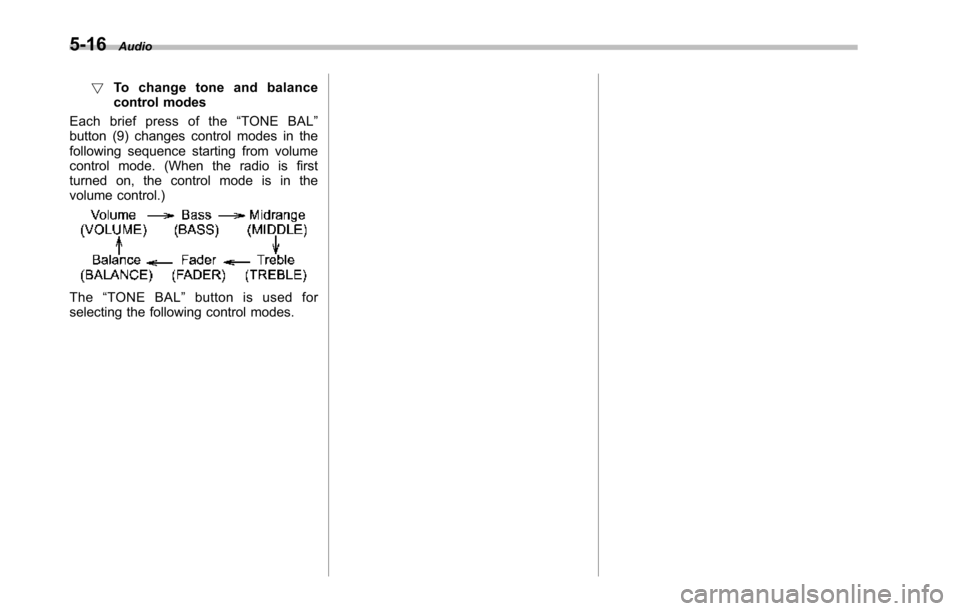
Each brief press of the“TONE BAL”button (9) changes control modes in thefollowing sequence starting from volumecontrol mode. (When the radio is firstturned on, the control mode is in thevolume control.)
The“TONE BAL”button is used forselecting the following control modes.
Page 208 of 426
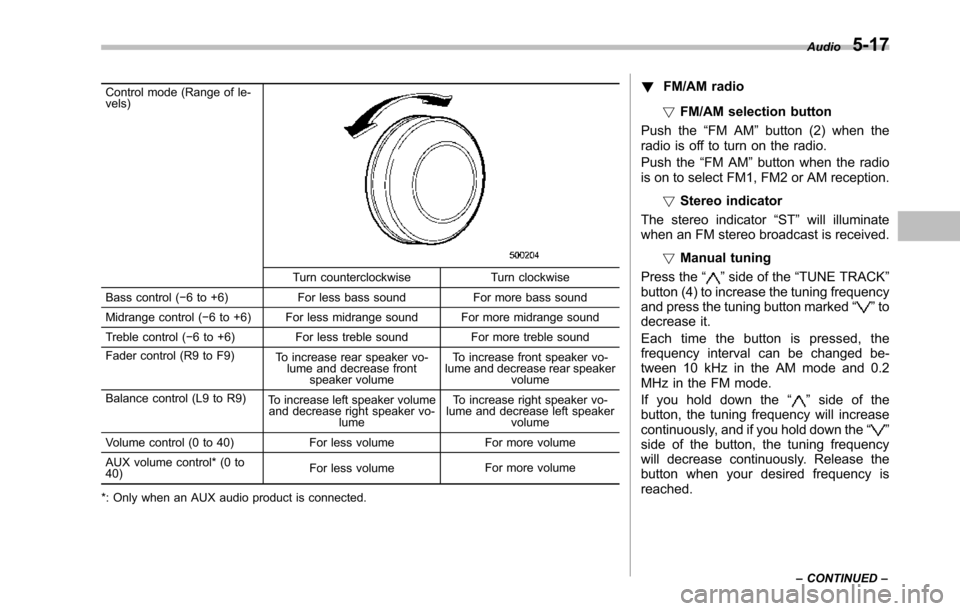
Control mode (Range of le-vels)
Turn counterclockwise Turn clockwise
Bass control (!6 to +6) For less bass sound For more bass sound
Midrange control (!6 to +6) For less midrange sound For more midrange sound
Treble control (!6 to +6) For less treble sound For more treble sound
Fader control (R9 to F9)To increase rear speaker vo-lume and decrease frontspeaker volume
To increase front speaker vo-lume and decrease rear speakervolume
Balance control (L9 to R9)To increase left speaker volumeand decrease right speaker vo-lume
To increase right speaker vo-lume and decrease left speakervolume
Volume control (0 to 40) For less volume For more volume
AUX volumecontrol* (0 to40)For less volumeFor more volume
*: Only when an AUX audio product is connected.
!FM/AM radio
!FM/AM selection button
Push the“FM AM”button (2) when theradio is off to turn on the radio.
Push the“FM AM”button when the radiois on to select FM1, FM2 or AM reception.
!Stereo indicator
The stereo indicator“ST”will illuminatewhen an FM stereo broadcast is received.
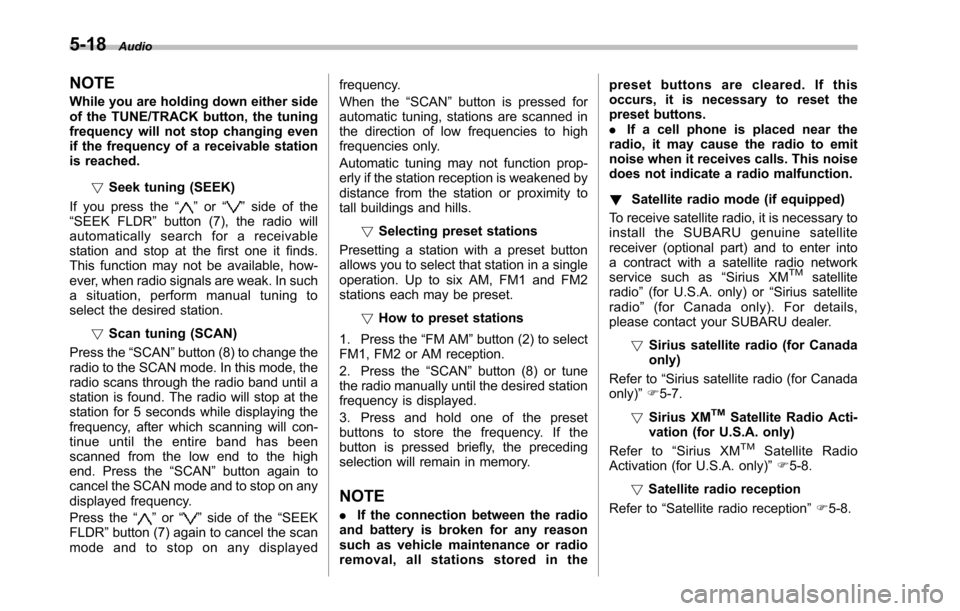
!Manual tuning
Press the“”side of the“TUNE TRACK”button (4) to increase the tuning frequencyand pressthe tuning button marked“”todecrease it.
Each time the button is pressed, thefrequency interval can be changed be-tween 10 kHz in the AM mode and 0.2MHz in the FM mode.
If you hold down the“”side of thebutton, the tuning frequency will increasecontinuously, and if you hold down the“”side of the button, the tuning frequencywill decreasecontinuously. Release thebutton when your desired frequency isreached.
Audio5-17
–CONTINUED–
Page 209 of 426
5-18Audio
NOTE
While you are holding down either sideof the TUNE/TRACK button, the tuningfrequency will not stop changing evenif the frequency of a receivable stationis reached.
!Seek tuning (SEEK)
If you press the“”or“”side of the“SEEK FLDR”button (7), the radio willautomatically search for a receivablestation and stop at the first one it finds.This function may not be available, how-ever, when radio signals are weak. In suchasituation,performmanualtuningtoselect the desired station.
!Scan tuning (SCAN)
Press the“SCAN”button (8) to change theradio to the SCAN mode. In this mode, theradio scans through the radio band until astationis found. The radio will stop at thestation for 5 seconds while displaying thefrequency, after which scanning will con-tinue until the entire band has beenscannedfrom the low end to the highend. Press the“SCAN”buttonagain tocancel the SCAN mode and to stop on anydisplayed frequency.
Press the“”or“”side of the“SEEKFLDR”button (7) again to cancel the scanmode and to stop on any displayed
frequency.
When the“SCAN”button is pressed forautomatic tuning, stations are scanned inthe direction of low frequencies to highfrequencies only.
Automatic tuning may not function prop-erly if the station reception is weakened bydistance from the station or proximity totall buildings and hills.
!Selecting preset stations
Presetting a station with a preset buttonallows you to select that station in a singleoperation. Up to six AM, FM1 and FM2stations each may be preset.
!How to preset stations
1. Press the“FM AM”button (2) to selectFM1, FM2 or AM reception.
2. Press the“SCAN”button (8) or tunethe radio manually until the desired stationfrequency is displayed.
3. Press and hold one of the presetbuttons to store the frequency. If thebutton is pressed briefly, the precedingselection will remain in memory.
NOTE
.If the connection between the radioand battery is broken for any reasonsuch as vehicle maintenance or radioremoval, all stations stored in the
preset buttons are cleared. If thisoccurs, it is necessary to reset thepreset buttons..If a cell phone is placed near theradio, it may cause the radio to emitnoise when it receives calls. This noisedoes not indicate a radio malfunction.
!Satellite radio mode (if equipped)
To receive satellite radio, it is necessary toinstall the SUBARU genuine satellitereceiver (optional part) and to enter intoa contract with a satellite radio networkservice such as“Sirius XMTMsatelliteradio”(for U.S.A. only) or“Sirius satelliteradio”(for Canada only). For details,please contact your SUBARU dealer.
!Sirius satellite radio (for Canadaonly)
Refer to“Sirius satellite radio (for Canadaonly)”F5-7.
!Sirius XMTMSatellite Radio Acti-vation (for U.S.A. only)
Refer to“Sirius XMTMSatellite RadioActivation (for U.S.A. only)”F5-8.
!Satellite radio reception
Refer to“Satellite radio reception”F5-8.
Page 210 of 426
!Displaying satellite radio ID oftuner
When you activate satellite radio, youshould have your satellite radio tuner IDready because each tuner is identified byits unique satellite radio tuner ID.
The satellite radio ID will be needed whenyou activate satellite radio and receivesatellite radio customer support.
The satellite radio ID can be found on theaudio display by tuning the channel to“0”.
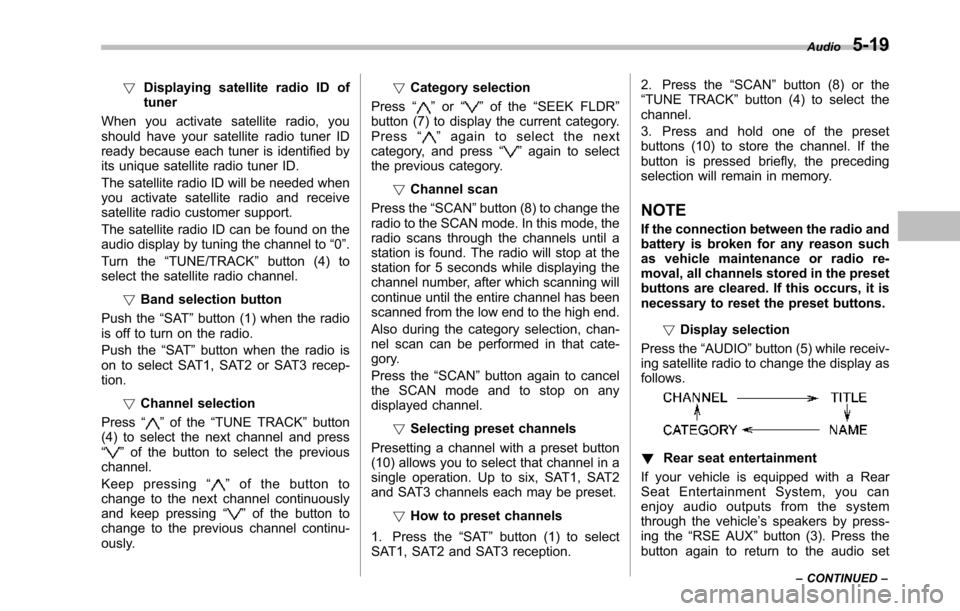
Turn the“TUNE/TRACK”button (4) toselect the satellite radio channel.
!Band selection button
Push the“SAT”button (1) when the radiois off to turn on the radio.
Push the“SAT”button when the radio ison to select SAT1, SAT2 or SAT3 recep-tion.
!Channel selection
Press“”of the“TUNE TRACK”button(4) to select the next channel and press“”of the button to select the previouschannel.
Keep pressing“”of the button tochange to the next channel continuouslyand keep pressing“”of the button tochange to the previous channel continu-ously.
!Category selection
Press“”or“”of the“SEEK FLDR”button (7) to display the current category.Press“”again to select the nextcategory, and press“”again to selectthe previous category.
!Channel scan
Press the“SCAN”button (8) to change theradio to the SCAN mode. In this mode, theradio scans through the channels until astation is found. The radio will stop at thestation for 5 seconds while displaying thechannel number, after which scanning willcontinue until the entire channel has beenscanned from the low end to the high end.
Also during the category selection, chan-nel scan can be performed in that cate-gory.
Press the“SCAN”button again to cancelthe SCAN mode and to stop on anydisplayed channel.
!Selecting preset channels
Presetting a channel with a preset button(10) allows you to select that channel in asingle operation. Up to six, SAT1, SAT2and SAT3 channels each may be preset.
!How to preset channels
1. Press the“SAT”button (1) to selectSAT1, SAT2 and SAT3 reception.
2. Press the“SCAN”button (8) or the“TUNE TRACK”button (4) to select thechannel.
3. Press and hold one of the presetbuttons (10) to store the channel. If thebutton is pressed briefly, the precedingselection will remain in memory.
NOTE
If the connection between the radio andbattery is broken for any reason suchas vehicle maintenance or radio re-moval, all channels stored in the presetbuttons are cleared. If this occurs, it isnecessary to reset the preset buttons.
!Display selection
Press the“AUDIO”button (5) while receiv-ing satellite radio to change the display asfollows.
!Rear seat entertainment
If your vehicle is equipped with a RearSeat Entertainment System, you canenjoy audio outputs from the systemthrough the vehicle’s speakers by press-ing the“RSE AUX”button (3). Press thebutton again to return to the audio set
Audio5-19
–CONTINUED–