SUBARU TRIBECA 2014 1.G Owners Manual
Manufacturer: SUBARU, Model Year: 2014, Model line: TRIBECA, Model: SUBARU TRIBECA 2014 1.GPages: 426, PDF Size: 6.37 MB
Page 211 of 426
5-20Audio
sound.
NOTE
If your vehicle is equipped with a RearSeat Entertainment System, refer to theOwner’s Manual supplement for theRear Seat Entertainment System forfurther details.
Page 212 of 426
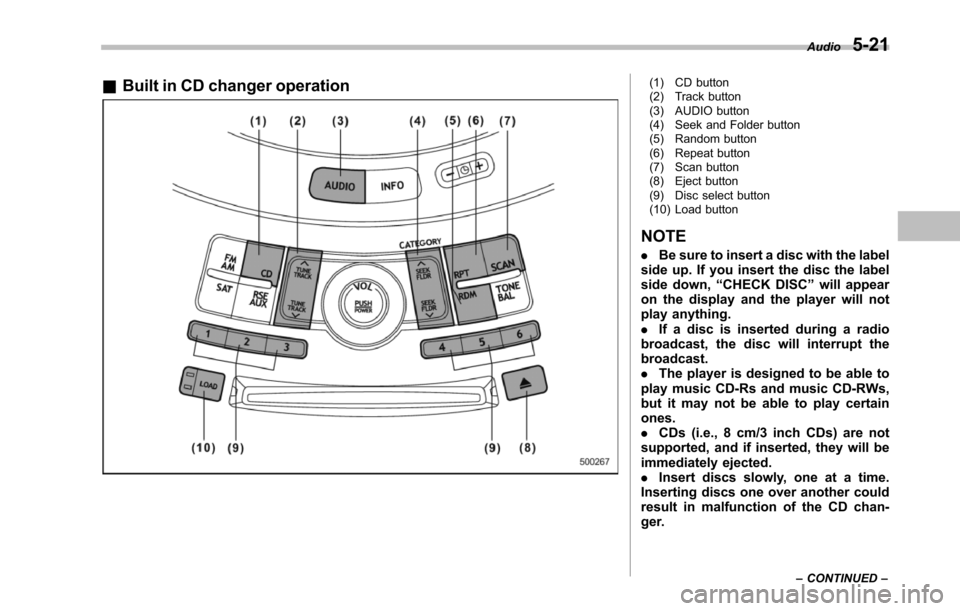
&Built in CD changer operation(1) CD button(2) Track button(3) AUDIO button(4) Seek and Folder button(5) Random button(6) Repeat button(7) Scan button(8) Eject button(9) Disc select button(10) Load button
NOTE
.Be sure to insert a disc with the labelside up. If you insert the disc the labelside down,“CHECK DISC”will appearon the display and the player will notplay anything..If a disc is inserted during a radiobroadcast, the disc will interrupt thebroadcast..The player is designed to be able toplay music CD-Rs and music CD-RWs,but it may not be able to play certainones..CDs (i.e., 8 cm/3 inch CDs) are notsupported, and if inserted, they will beimmediately ejected..Insert discs slowly, one at a time.Inserting discs one over another couldresult in malfunction of the CD chan-ger.
Audio5-21
–CONTINUED–
Page 213 of 426
5-22Audio
!How to insert a CD(s)
!Inserting a CD
1. Briefly press the“LOAD”button (10). Ifthe magazine in the player has an idleposition where you can insert a disc, thedisc number indicator associated with theidle position will blink.
If no indicator blinks, it means that there isno idle position in the magazine.
2. After the disc number indicator hasstarted to flash, insert the disc when“LOAD”flashes on the display. The discwill then be automatically drawn in, andthe player will begin to play back the firsttrack of the disc.
.To insert more discs in succession,repeatSteps 1 and 2. The magazine willbe loaded with discs in the ascendingorder of position number.
If you do not insert any disc in 15 secondsafter you have pressed the“LOAD”button,the player willbegin to play back the firsttrack of the last disc you have inserted.
.The disc indicator steadily lights up if adisc is already inserted in the correspond-ing position of the magazine.
.While the player is in the loading mode,if you press“FM AM”button, the player willenter the standby mode. Press the“CD”button (1) to start playback.
!Inserting a disc in a desiredposition
1. Briefly press the“LOAD”button (10). Ifthe magazine in the player has an idleposition where you can insert a disc, thedisc number indicator associated with theidle position will blink.
The positions in the magazine the indica-tor of which steadily lights up are alreadyloaded with discs.
2. Press the disc select button (9) at theposition where you want to insert a disc.
3. Insert the disc when“LOAD”flasheson the display. The disc will then beautomatically drawn in, and the player willbegin to play the first track on the disc.
.If you wish to insert another disc,repeat the procedure beginning with step1.
If you do not insert any disc in 15 secondsafter you have pressed the“LOAD”button,the player will begin to play back the firsttrack of the last disc you have inserted.
.While the player is in the loading mode,if you press“FM AM”button, the player willenter standby mode. Press the“CD”button (1) to start playback.
!Loading all the magazine (fulldisc loading mode)
1. If you press and hold the“LOAD”button (10), the player will produce a beepsound and will enter the full disc loadingmode.
2. A“disc number”indicator will blink,and“ALL LOAD”will be on display for aperiod of 15 seconds. If a disc is success-fully loaded during this period, the discnumber indicator will stop blinking and willsteadily light.
3. When the loading of a disc is com-plete, the next disc number indicator willblink. Then repeat Step 2.
4. When the magazine is filled with discsby repeating Steps 2 and 3, the player willstart playback of the discs, beginning withthe one inserted first.
If you fail to insert any disc during each 15seconds interval, the full disc loadingmode will be canceled, and the player willstart playback of the disc inserted first.
!How to play back a CD or make apause
!When there is no CD inserted:
Properly insert a CD. Refer to“How toinsert a CD(s)”F5-22.
When a CD is loaded, the player will startplayback of the CD, beginning with the
Page 214 of 426
first track.
!When there are CDs loaded:
Press the preferred disc select button (9),the disc number indicator of which isconstantly illuminated. The player will thenstart playback of the selected CD, begin-ning with the first track.
If a disc that the player cannot read hasbeen loaded,“CHECK DISC”will appearon the display and the player will not playanything.
!To select a song from its beginning
!Forward direction
Brieflypress the“”side of the“TUNETRACK”button (2) to skip to the beginningof the next track. Each time the button ispressed, the indicated track number willincrease.
NOTE
In an MP3 folder, skipping past the lasttrack will take you back to the first trackin the folder.
!Backward direction
Briefly press the“”side of the“TUNETRACK”button (2) to skip to the beginningof the current track. Each time the buttonis pressed, the indicated track number willdecrease.
NOTE
In an MP3 folder, skipping past the firsttrack will take you to the last track inthe folder.
!Fast-forwarding and rewinding
!Fast-forwarding
Press and hold the“”side of the“TUNETRACK”button (2) to fast-forward thetrack.
Release the button to stop fast-forwarding.
NOTE
If you fast-forward to the end of the lasttrack, fast-forwarding will stop and theplayer will start playback beginningwith the first track.
!Rewinding
Press and hold the“”side of the“TUNETRACK”button (2) to rewind the track.
Release the button to stop rewinding.
NOTE
If you rewind to the beginning of thefirst track, the rewinding will stop andthe player will start playback.
!Repeating
!To repeat the currently playingtrack
To repeat a track, briefly press the“RPT”button (6) while the track is playing. Thedisplay will show“RPT”, and the track willbe repeated.
To cancel the track repeat-play mode,briefly press the“RPT”button twice. The“RPT”indication will turn off, and thenormal playback mode will be resumed.
NOTE
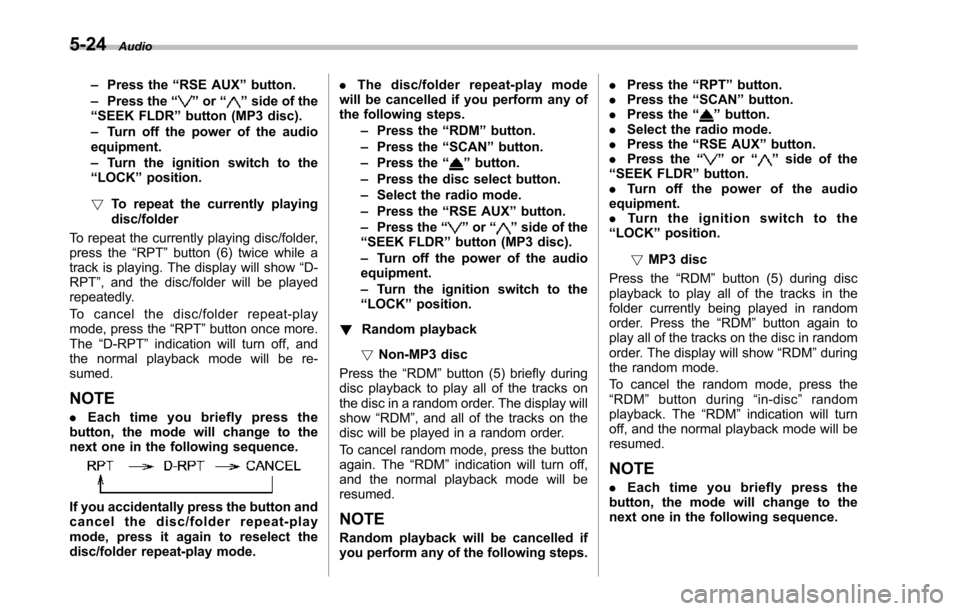
.Each time you briefly press thebutton, the mode will change to thenext one in the following sequence.
If you accidentally press the button andcancel the track repeat-play mode,press it again to reselect the repeat-play mode..The repeat-play mode will be can-celledif you perform any of the follow-ing steps.–Press the“RDM”button.–Press the“SCAN”button.–Press the“”button.–Press the disc select button.–Select the radio mode.
Audio5-23
–CONTINUED–
Page 215 of 426
5-24Audio
–Press the“RSE AUX”button.–Press the“”or“”side of the“SEEK FLDR”button (MP3 disc).–Turn off the power of the audioequipment.–Turn the ignition switch to the“LOCK”position.
!To repeat the currently playingdisc/folder
To repeat the currently playing disc/folder,press the“RPT”button (6) twice while atrack is playing. The display will show“D-RPT”, and the disc/folder will be playedrepeatedly.
To c a n c e l t h e d i s c / f o l d e r r e p e a t - p l a ymode, press the“RPT”button once more.The“D-RPT”indication will turn off, andthe normal playback mode will be re-sumed.
NOTE
.Each time you briefly press thebutton, the mode will change to thenext one in the following sequence.
If you accidentally press the button andcancel the disc/folder repeat-playmode, press it again to reselect thedisc/folder repeat-play mode.
.The disc/folder repeat-play modewill be cancelled if you perform any ofthe following steps.–Press the“RDM”button.–Press the“SCAN”button.–Press the“”button.–Press the disc select button.–Select the radio mode.–Press the“RSE AUX”button.–Press the“”or“”side of the“SEEK FLDR”button (MP3 disc).–Turn off the power of the audioequipment.–Turn the ignition switch to the“LOCK”position.
!Random playback
!Non-MP3 disc
Press the“RDM”button (5) briefly duringdisc playback to play all of the tracks onthe disc in a random order. The display willshow“RDM”, and all of the tracks on thedisc will be played in a random order.
To cancel random mode, press the buttonagain. The“RDM”indication will turn off,and the normal playback mode will beresumed.
NOTE
Random playback will be cancelled ifyou perform any of the following steps.
.Press the“RPT”button..Press the“SCAN”button..Press the“”button..Select the radio mode..Press the“RSE AUX”button..Press the“”or“”side of the“SEEK FLDR”button..Tu r n o f f t h e p o w e r o f t h e a u d i oequipment..Tu r n t h e i g n i t i o n s w i t c h t o t h e“LOCK”position.
!MP3 disc
Press the“RDM”button (5) during discplayback to play all of the tracks in thefolder currently being played in randomorder. Press the“RDM”button again toplay all of the tracks on the disc in randomorder. The display will show“RDM”duringthe random mode.
To cancel the random mode, press the“RDM”button during“in-disc”randomplayback. The“RDM”indication will turnoff, and the normal playback mode will beresumed.
NOTE
.Each time you briefly press thebutton, the mode will change to thenext one in the following sequence.
Page 216 of 426
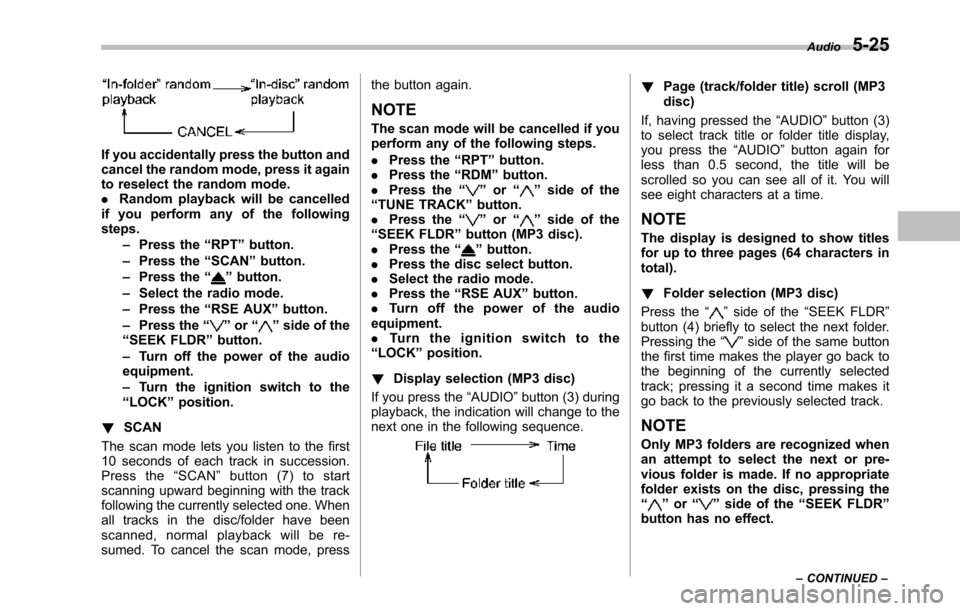
If you accidentally press the button andcancel the random mode, press it againto reselect the random mode..Random playback will be cancelledif you perform any of the followingsteps.–Press the“RPT”button.–Press the“SCAN”button.–Press the“”button.–Select the radio mode.–Press the“RSE AUX”button.–Press the“”or“”side of the“SEEK FLDR”button.–Turn off the power of the audioequipment.–Turn the ignition switch to the“LOCK”position.
!SCAN
The scan mode lets you listen to the first10 seconds of each track in succession.Press the“SCAN”button (7) to startscanning upward beginning with the trackfollowing the currently selected one. Whenall tracks in the disc/folder have beenscanned, normal playback will be re-sumed. To cancel the scan mode, press
the button again.
NOTE
The scan mode will be cancelled if youperform any of the following steps.
.Press the“RPT”button..Press the“RDM”button..Press the“”or“”side of the“TUNE TRACK”button..Press the“”or“”side of the“SEEK FLDR”button (MP3 disc)..Press the“”button..Press the discselect button..Select the radio mode..Press the“RSE AUX”button..Tu r n o f f t h e p o w e r o f t h e a u d i oequipment..Tu r n t h e i g n i t i o n s w i t c h t o t h e“LOCK”position.
!Display selection (MP3 disc)
If you press the“AUDIO”button (3) duringplayback, theindication will change to thenext one in the following sequence.
!Page (track/folder title) scroll (MP3disc)
If, having pressed the“AUDIO”button (3)to select track title or folder title display,you press the“AUDIO”button again forless than 0.5 second, the title will bescrolled so you can see all of it. You willsee eightcharacters at a time.
NOTE
The display is designed to show titlesfor up to three pages (64 characters intotal).
!Folder selection (MP3 disc)
Press the“”side of the“SEEK FLDR”button (4) briefly to select the next folder.Pressing the“”side of the same buttonthe first time makes the player go back tothe beginning of the currently selectedtrack; pressing it a second time makes itgo back to the previously selected track.
NOTE
Only MP3 folders are recognized whenan attempt to select the next or pre-vious folder is made. If no appropriatefolder existson the disc, pressing the“”or“”side of the“SEEK FLDR”button has no effect.
Audio5-25
–CONTINUED–
Page 217 of 426
5-26Audio
!How to unload CDs from the player
!Ejecting a CD from the player
Of the discs loaded, you can select andremove only one disc.
1. Use the disc select button (9) to selectthe disc to be ejected.
2. Briefly press the“”button (8). Theselected disc will be ejected. The discnumber indicator will flash at this time.When you remove the ejected disc, thedisc number indicator will turn off.
To remove more discs in succession,repeat Steps 1 and 2.
!Ejecting all discs from the player(all disc ejection mode)
1. If you press and hold the“”button(8), the player will produce a beep soundand will enter the all disc ejection mode.
2. Remove the disc that has beenejected. The other discs loaded will thenbe ejected one after another. If you do notremove the disc that has been ejected, the“All disc ejection mode”will be canceled.
NOTE
.Avoid driving the vehicle with a CDstickingout, because vibration mightmake it fall out..If you press the“”buttonwhile
the player is in all disc ejection mode,the mode will be cancelled followingejection of the disc that is currentlybeing ejected..If you press the“CD”button whilethe player is in all disc ejection mode,the player will draw in the discs thathave been ejected and play them.
Audio control buttons
These buttons are located on the spokesof the steering wheel. They allow thedriver to control audio functions withouttaking his/her hands off the steeringwheel.
&MODE button
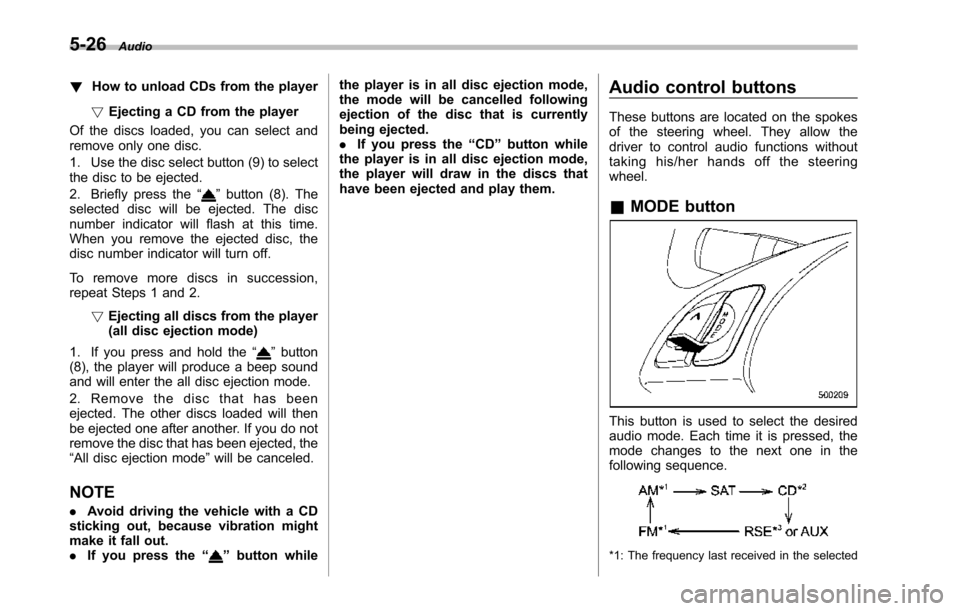
This button is used to select the desiredaudio mode. Each time it is pressed, themode changesto the next one in thefollowing sequence.
*1: The frequency last received in the selected
Page 218 of 426
waveband will be displayed.
*2: Only when a CD is in the player.
*3: Only vehicle equipped with RSE (Rear SeatEntertainment)
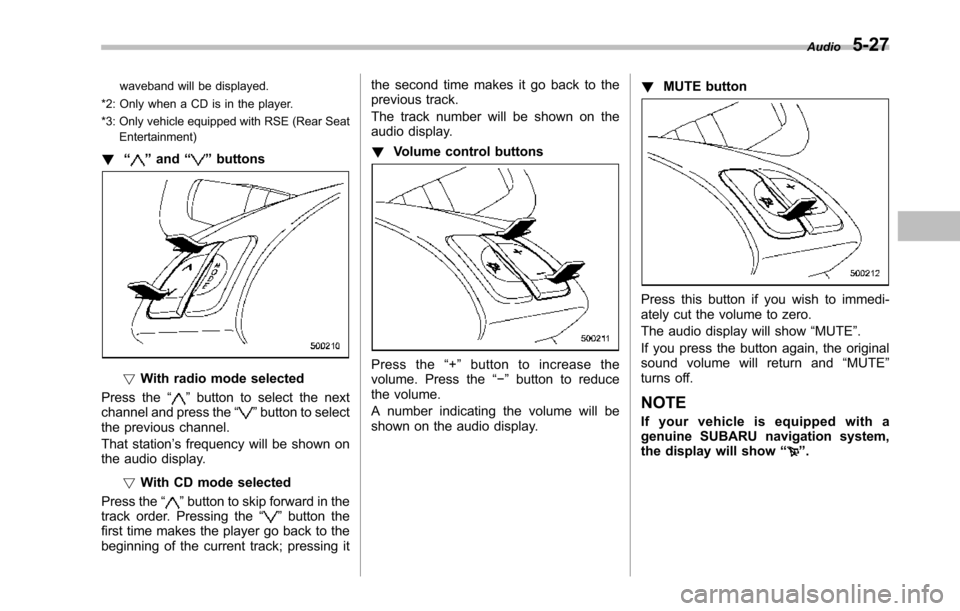
!“”and“”buttons
!With radio mode selected
Press the“”button to select the nextchannel and press the“”button to selectthe previous channel.
That station’s frequency will be shown onthe audiodisplay.
!With CD mode selected
Press the“”button to skip forward in thetrack order. Pressing the“”button thefirst time makes the player go back to thebeginning of the current track; pressing it
the second time makes it go back to theprevious track.
The track number will be shown on theaudio display.
!Volume control buttons
Press the“+”button to increase thevolume. Press the“!”button to reducethe volume.
A number indicating the volume will beshown on the audio display.
!MUTE button
Press this button if you wish to immedi-ately cut the volume to zero.
The audio display will show“MUTE”.
If you press the button again, the originalsound volume will return and“MUTE”turns off.
NOTE
If your vehicle is equipped with agenuine SUBARU navigation system,the display will show“”.
Audio5-27
Page 219 of 426
5-28Audio
Auxiliary input jack
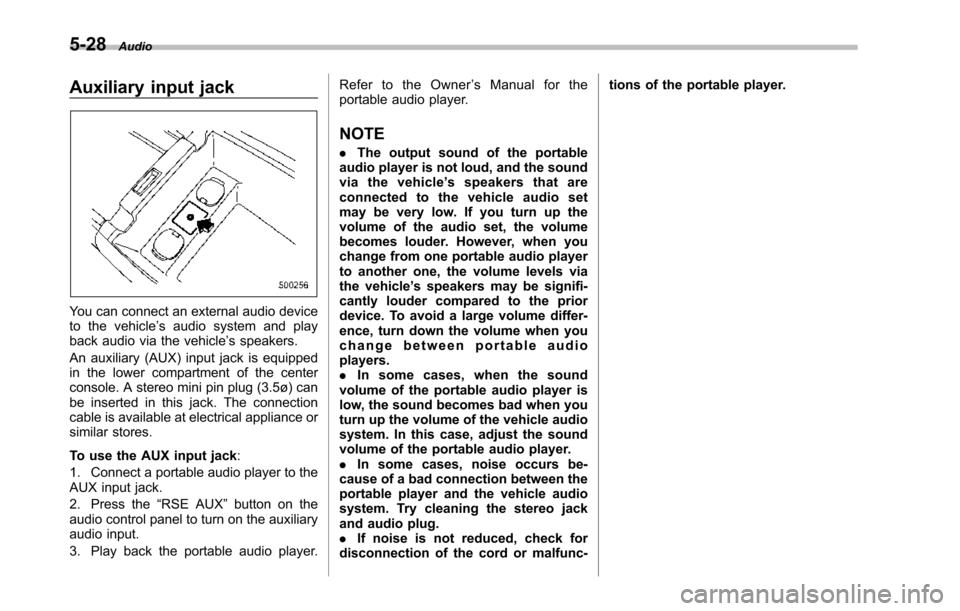
You can connect an external audio deviceto the vehicle’s audio system and playback audio via the vehicle’s speakers.
An auxiliary (AUX) input jack is equippedin the lower compartment of the centerconsole. A stereo mini pin plug (3.5ø) canbe inserted in this jack. The connectioncable is available at electrical appliance orsimilar stores.
To use the AUX input jack:
1. Connect a portable audio player to theAUX input jack.
2. Press the“RSE AUX”button on theaudio control panel to turn on the auxiliaryaudio input.
3. Play back the portable audio player.
Refer to the Owner’sManualfortheportable audio player.
NOTE
.The output sound of the portableaudio player is not loud, and the soundvia the vehicle’sspeakersthatareconnected to the vehicle audio setmay be very low. If you turn up thevolume of the audio set, the volumebecomes louder. However, when youchange from one portable audio playerto another one, the volume levels viathe vehicle’s speakers may be signifi-cantly louder compared to the priordevice. To avoid a large volume differ-ence, turn down the volume when youchange between portable audioplayers..In some cases, when the soundvolume of the portable audio player islow, the sound becomes bad when youturn up the volume of the vehicle audiosystem. In this case, adjust the soundvolume of the portable audio player..In some cases, noise occurs be-cause of a bad connection between theportable player and the vehicle audiosystem. Try cleaning the stereo jackand audio plug..If noise is not reduced, check fordisconnection of the cord or malfunc-
tions of the portable player.
Page 220 of 426
Rear Seat Entertainment
(RSE) system operation (if
equipped)
If your vehicle is equipped with the RearSeat Entertainment (RSE) system, youcan listen to the audio via the vehiclespeakers. Push the“RSE AUX”button toplay a DVD using the Rear Seat Entertain-ment system.
For detailed operating procedures, refer tothe Owner’s Manual supplement for theRear Seat Entertainment (RSE) system.
NOTE
.To watch a DVD in the front seatsusing the monitor of the navigationsystem, park the vehicle in a safelocation and apply the parking brake.Images of the DVD will not be displayedon the front monitor unless the parkingbrake is applied..The harman/kardon®audio systemis a stereo system with 2 channels. If aharman/kardon®audio system isequipped, the Rear Seat Entertainment(RSE) system may not generate asatisfying realistic sound when playing5.1 channel audio sources.
Precautions to observe when
handling a compact disc
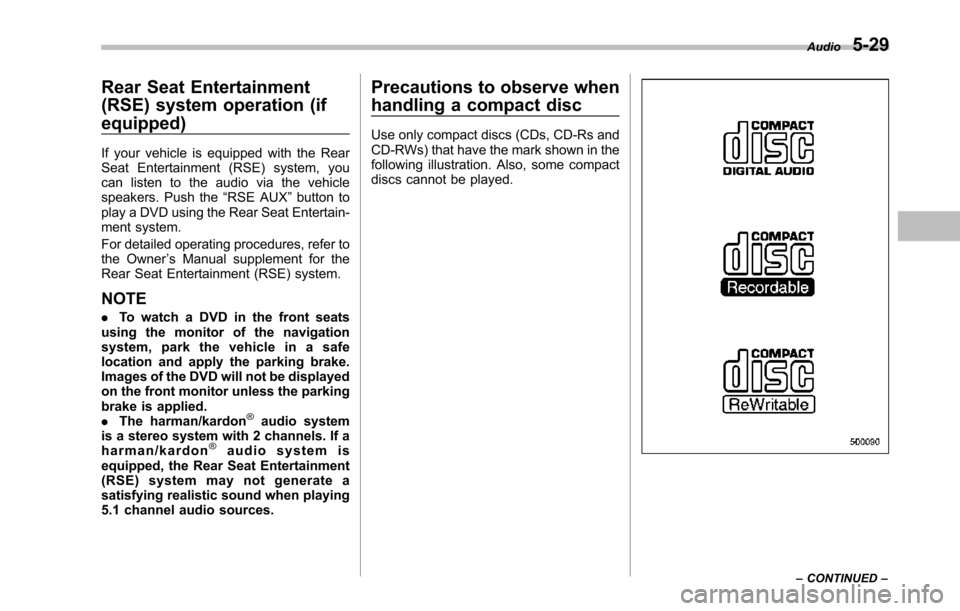
Use only compact discs (CDs, CD-Rs andCD-RWs) that have the mark shown in thefollowing illustration. Also, some compactdiscs cannot be played.
Audio5-29
–CONTINUED–