release SUZUKI IGNIS 2022 User Guide
[x] Cancel search | Manufacturer: SUZUKI, Model Year: 2022, Model line: IGNIS, Model: SUZUKI IGNIS 2022Pages: 505, PDF Size: 8.36 MB
Page 86 of 505
2-63BEFORE DRIVING
75RM4-01E
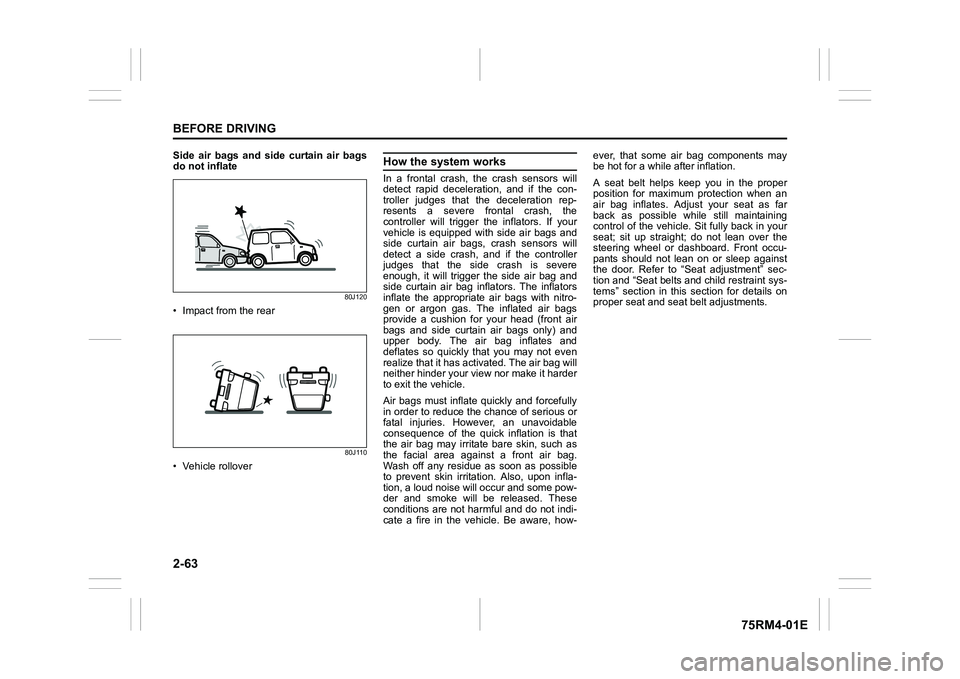
Side air bags and side curtain air bags
do not inflate
80J120
• Impact from the rear
80J110
• Vehicle rollover
How the system worksIn a frontal crash, the crash sensors will
detect rapid deceleration, and if the con-
troller judges that the deceleration rep-
resents a severe frontal crash, the
controller will trigger the inflators. If your
vehicle is equipped with side air bags and
side curtain air bags, crash sensors will
detect a side crash, and if the controller
judges that the side crash is severe
enough, it will trigger the side air bag and
side curtain air bag inflators. The inflators
inflate the appropriate air bags with nitro-
gen or argon gas. The inflated air bags
provide a cushion for your head (front air
bags and side curtain air bags only) and
upper body. The air bag inflates and
deflates so quickly that you may not even
realize that it has activated. The air bag will
neither hinder your view nor make it harder
to exit the vehicle.
Air bags must inflate quickly and forcefully
in order to reduce the chance of serious or
fatal injuries. However, an unavoidable
consequence of the quick inflation is that
the air bag may irritate bare skin, such as
the facial area against a front air bag.
Wash off any residue as soon as possible
to prevent skin irritation. Also, upon infla-
tion, a loud noise will occur and some pow-
der and smoke will be released. These
conditions are not harmful and do not indi-
cate a fire in the vehicle. Be aware, how-ever, that some air bag components may
be hot for a while after inflation.
A seat belt helps keep you in the proper
position for maximum protection when an
air bag inflates. Adjust your seat as far
back as possible while still maintaining
control of the vehicle. Sit fully back in your
seat; sit up straight; do not lean over the
steering wheel or dashboard. Front occu-
pants should not lean on or sleep against
the door. Refer to “Seat adjustment” sec-
tion and “Seat belts and child restraint sys-
tems” section in this
section for details on
proper seat and seat belt adjustments.
Page 106 of 505
2-83BEFORE DRIVING
75RM4-01E
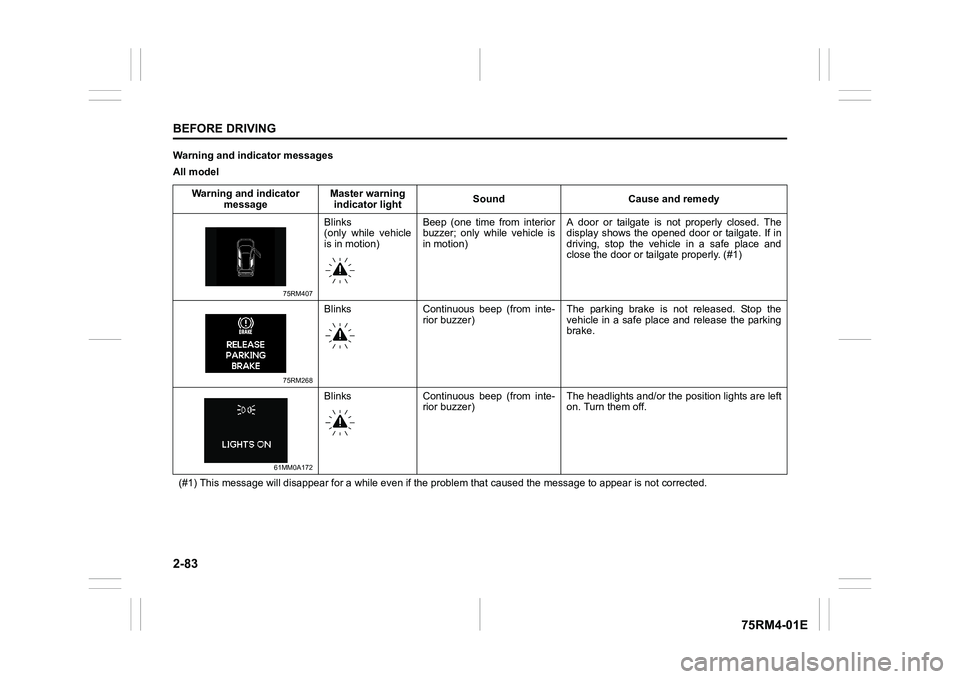
Warning and indicator messages
All modelWarning and indicator message Master warning
indicator light Sound Cause and remedy
75RM407
Blinks
(only while vehicle
is in motion)Beep (one time from interior
buzzer; only while vehicle is
in motion) A door or tailgate is not properly closed. The
display shows the opened door or tailgate. If in
driving, stop the vehicle in a safe place and
close the door or tailgate properly. (#1)
75RM268
Blinks Continuous beep (from inte-
rior buzzer) The parking brake is not released. Stop the
vehicle in a safe place and release the parking
brake.
61MM0A172
Blinks Continuous beep (from inte-
rior buzzer) The headlights and/or the
position lights are left
on. Turn them off.
(#1) This message will disappear for a while even if the proble m that caused the message to appear is not corrected.
Page 117 of 505
2-94
BEFORE DRIVING
75RM4-01E
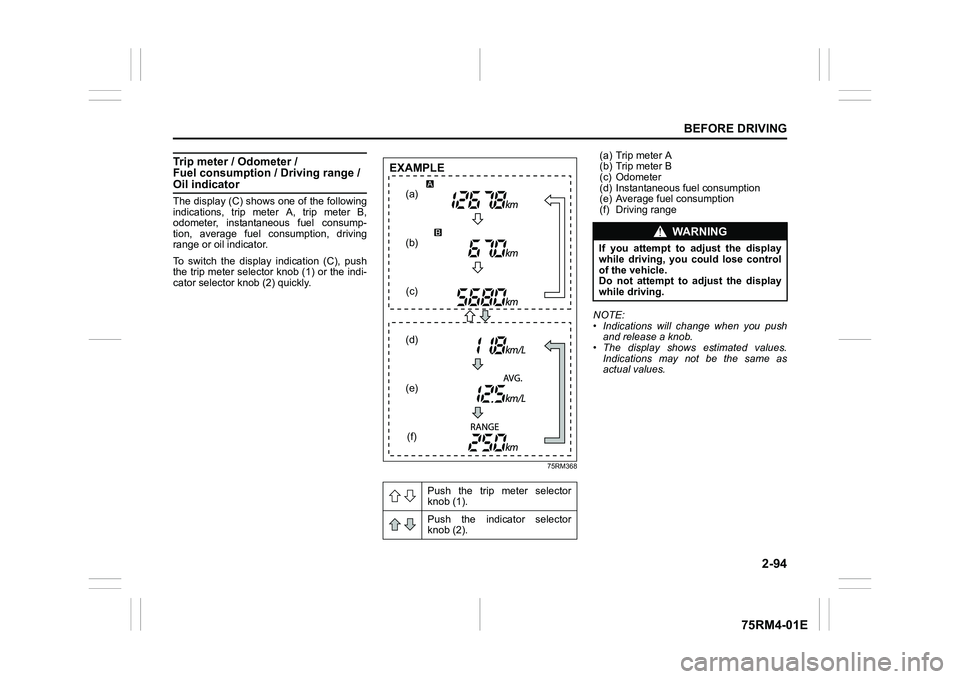
Trip meter / Odometer /
Fuel consumption / Driving range / Oil indicatorThe display (C) shows one of the following
indications, trip meter A, trip meter B,
odometer, instantaneous fuel consump-
tion, average fuel consumption, driving
range or oil indicator.
To switch the display indication (C), push
the trip meter selector knob (1) or the indi-
cator selector knob (2) quickly.
75RM368
(a) Trip meter A
(b) Trip meter B
(c) Odometer
(d) Instantaneous fuel consumption
(e) Average fuel consumption
(f) Driving range
NOTE:
• Indications will change when you push and release a knob.
• The display shows estimated values.
Indications may not be the same as
actual values.
Push the trip meter selector
knob (1).
Push the indicator selector
knob (2).
(a)
(b) (c)
(d)
(e) (f)
EXAMPLE
WA R N I N G
If you attempt to a djust the display
while driving, you could lose control
of the vehicle.
Do not attempt to adjust the display
while driving.
Page 126 of 505
2-103BEFORE DRIVING
75RM4-01E
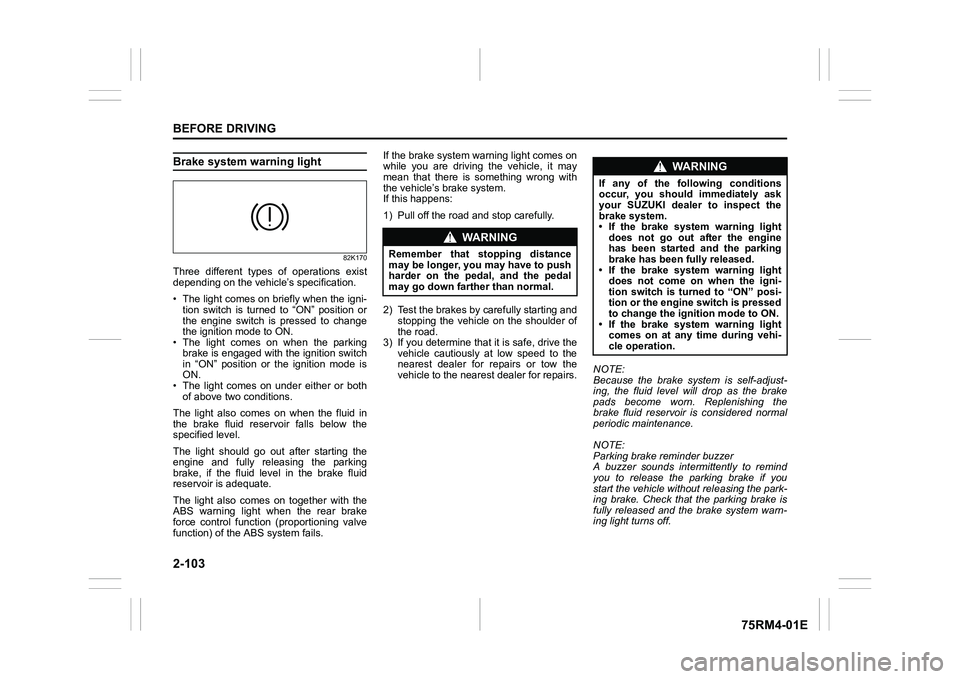
Brake system warning light
82K170
Three different types of operations exist
depending on the vehicle’s specification.
• The light comes on briefly when the igni- tion switch is turned to “ON” position or
the engine switch is pressed to change
the ignition mode to ON.
• The light comes on when the parking
brake is engaged with the ignition switch
in “ON” position or the ignition mode is
ON.
• The light comes on under either or both of above two conditions.
The light also comes on when the fluid in
the brake fluid reservoir falls below the
specified level.
The light should go out after starting the
engine and fully releasing the parking
brake, if the fluid level in the brake fluid
reservoir is adequate.
The light also comes on together with the
ABS warning light when the rear brake
force control function (proportioning valve
function) of the ABS system fails. If the brake system warning light comes on
while you are driving the vehicle, it may
mean that there is something wrong with
the vehicle’s brake system.
If this happens:
1) Pull off the road and stop carefully.
2) Test the brakes by carefully starting and
stopping the vehicle on the shoulder of
the road.
3) If you determine that it is safe, drive the
vehicle cautiously at low speed to the
nearest dealer for repairs or tow the
vehicle to the nearest dealer for repairs. NOTE:
Because the brake system is self-adjust-
ing, the fluid level will drop as the brake
pads become worn. Replenishing the
brake fluid reservoir is considered normal
periodic maintenance.
NOTE:
Parking brake reminder buzzer
A buzzer sounds intermittently to remind
you to release the parking brake if you
start the vehicle without releasing the park-
ing brake. Check that the parking brake is
fully released and the brake system warn-
ing light turns off.
WA R N I N G
Remember that stopping distance
may be longer, you may have to push
harder on the pedal, and the pedal
may go down farther than normal.
WA R N I N G
If any of the following conditions
occur, you should immediately ask
your SUZUKI dealer to inspect the
brake system.
• If the brake system warning light
does not go out after the engine
has been started and the parking
brake has been fully released.
• If the brake system warning light does not come on when the igni-
tion switch is turned to “ON” posi-
tion or the engine switch is pressed
to change the ignition mode to ON.
• If the brake system warning light comes on at any time during vehi-
cle operation.
Page 131 of 505
2-108
BEFORE DRIVING
75RM4-01E
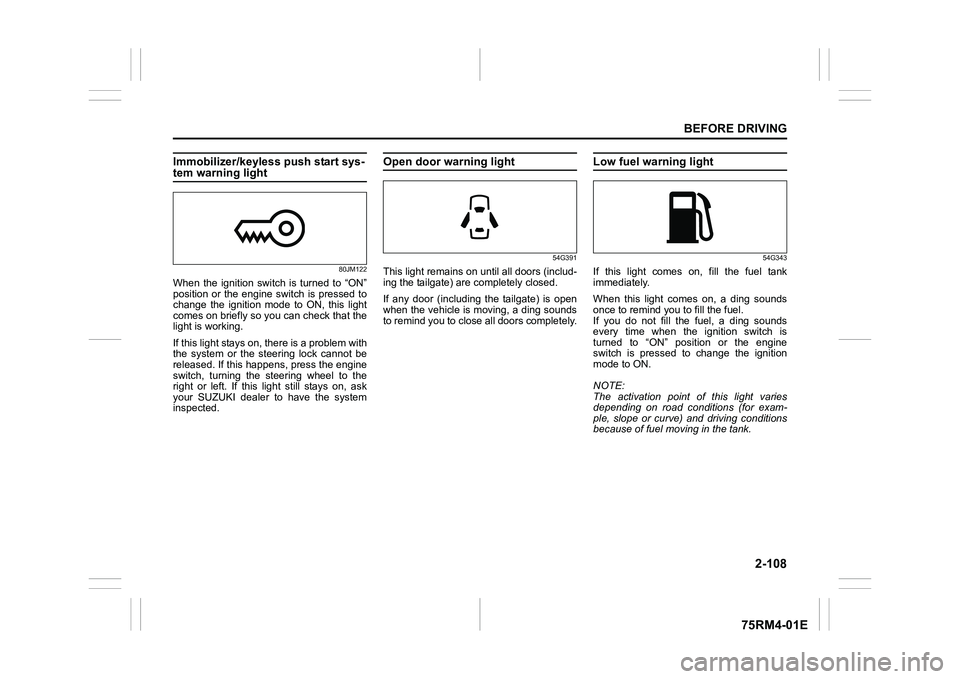
Immobilizer/keyless push start sys-tem warning light
80JM122
When the ignition switch is turned to “ON”
position or the engine switch is pressed to
change the ignition mode to ON, this light
comes on briefly so you can check that the
light is working.
If this light stays on, there is a problem with
the system or the steering lock cannot be
released. If this happens, press the engine
switch, turning the steering wheel to the
right or left. If this light still stays on, ask
your SUZUKI dealer to have the system
inspected.
Open door warning light
54G391
This light remains on until all doors (includ-
ing the tailgate) are completely closed.
If any door (including the tailgate) is open
when the vehicle is moving, a ding sounds
to remind you to close all doors completely.
Low fuel warning light
54G343
If this light comes on, fill the fuel tank
immediately.
When this light comes on, a ding sounds
once to remind you to fill the fuel.
If you do not fill the fuel, a ding sounds
every time when the ignition switch is
turned to “ON” position or the engine
switch is pressed to change the ignition
mode to ON.
NOTE:
The activation point of this light varies
depending on road conditions (for exam-
ple, slope or curve) and driving conditions
because of fuel moving in the tank.
Page 140 of 505
2-117BEFORE DRIVING
75RM4-01E
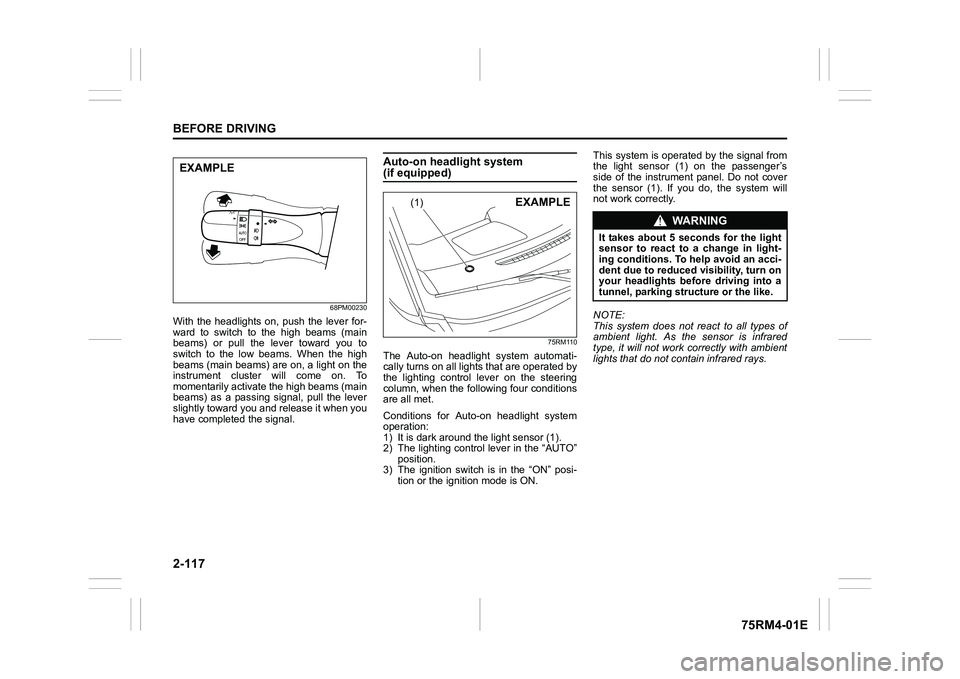
68PM00230
With the headlights on, push the lever for-
ward to switch to the high beams (main
beams) or pull the lever toward you to
switch to the low beams. When the high
beams (main beams) are on, a light on the
instrument cluster will come on. To
momentarily activate the high beams (main
beams) as a passing signal, pull the lever
slightly toward you and release it when you
have completed the signal.
Auto-on headlight system (if equipped)
75RM110
The Auto-on headlig ht system automati-
cally turns on all lights that are operated by
the lighting control lever on the steering
column, when the following four conditions
are all met.
Conditions for Auto-on headlight system
operation:
1) It is dark around the light sensor (1).
2) The lighting control lever in the “AUTO” position.
3) The ignition switch is in the “ON” posi-
tion or the ignition mode is ON. This system is operated by the signal from
the light sensor (1) on the passenger’s
side of the instrument panel. Do not cover
the sensor (1). If you do, the system will
not work correctly.
NOTE:
This system does not react to all types of
ambient light. As the sensor is infrared
type, it will not work correctly with ambient
lights that do not contain infrared rays.
EXAMPLE
(1)
EXAMPLE
WA R N I N G
It takes about 5 seconds for the light
sensor to react to a change in light-
ing conditions. To help avoid an acci-
dent due to reduced visibility, turn on
your headlights before driving into a
tunnel, parking structure or the like.
Page 155 of 505
3-2
OPERATING YOUR VEHICLE
75RM4-01E
NOTE:
It is normal for water to drip from the air
conditioning system after use.
4) Check that the hood is fully closed andlatched.
5) Check the headlights, turn signal lights, brake lights and horn for proper opera-
tion.
6) Adjust the seat and head restraint.
7) Check the brake pedal and the parking brake lever.
8) Adjust the mirrors.
9) Check that you and all passengers have properly fastened your seat belts.
10)Check that all warning lights come on as the ignition switch is turned to “ON”
position or the engine switch is pressed
to change the ignition mode to ON.
11)Check all gauges.
12)Check that the brake system warning light turns off when the parking brake is
released.
Once a week, or each time you fill your fuel
tank, perform the following under-hood
checks:
1) Engine oil level
2) Coolant level
3) Brake fluid level
4) Lead-acid battery solution level
5) Windshield washer fluid level
6) Hood latch operation Pull the hood release handle inside the
vehicle. Check that you cannot open the hood all the way without releasing
the secondary latch. Close the hood
securely after checking for proper latch
operation. See the item “All latches,
hinges and locks” of “Chassis, body
and others” in “Maintenance schedule”
in the “INSPECTION AND MAINTE-
NANCE” section for lubrication sched-
ule.
Once a month, or each time you fill your
fuel tank, check the tire pressure using a
tire pressure gauge. Also check the tire
pressure of the spare tire.
Engine oil consumptionIt is normal for the engine to consume
some engine oil during normal vehicle
operation.
The amount of engine oil consumption
depends on viscosity and quality of the oil
and your driving conditions.
More oil is consumed during high-speed
driving and when there is frequent acceler-
ation and deceleration. Under high loads,
your engine also will consume more oil.
A new engine also consumes more oil,
since its pistons, piston rings and cylinder
walls have not yet become conditioned.
New engines reach the normal level of oil
consumption only after approximately
5000 km (3000 miles) driving.
Oil consumption:
Max. 1.0 L per 1000 km
(1 Qt. per 600 miles)
When judging the amount of oil consump-
tion, note that the oil may become diluted
and it is difficult to judge the accurate oil
level.
As an example, if a vehicle is used for
repeated short trips, and consumes a nor-
mal amount of oil, the dipstick may not
show any drop in the oil level at all, even
after 1000 km (600 miles) or more of driv-
ing. This is because the oil gradually
becomes diluted with fuel or moisture,
WA R N I N G
Check that the hood is fully closed
and latched before d riving. If it is not,
it can fly up unexpectedly during
driving, obstructing your view and
resulting in an accident.
Page 157 of 505
3-4
OPERATING YOUR VEHICLE
75RM4-01E
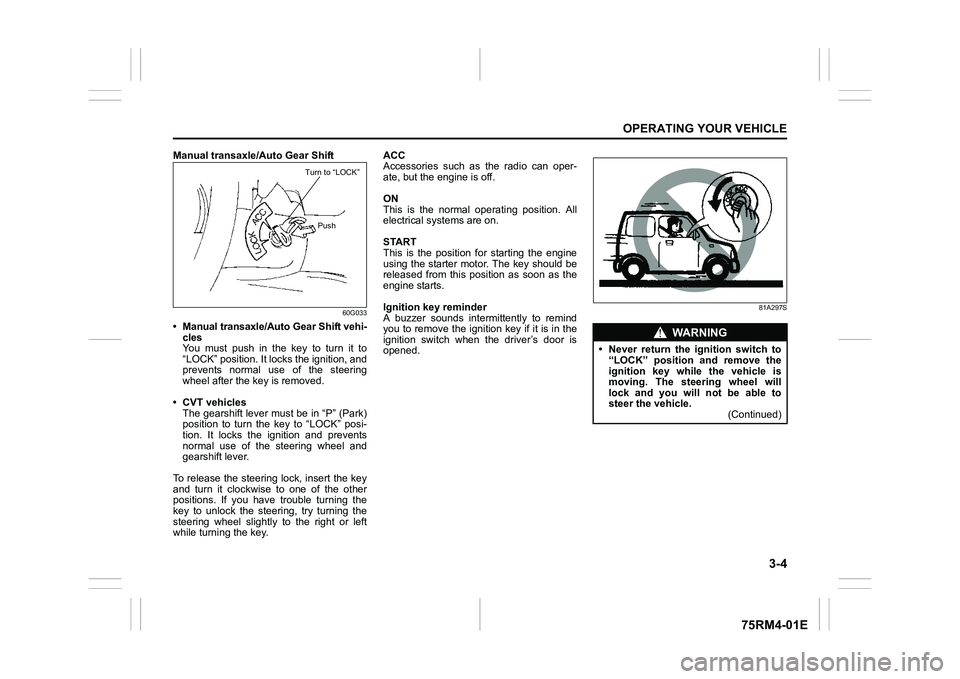
Manual transaxle/Auto Gear Shift
60G033
• Manual transaxle/Auto Gear Shift vehi-cles
You must push in the key to turn it to
“LOCK” position. It lo cks the ignition, and
prevents normal use of the steering
wheel after the key is removed.
• CVT vehicles The gearshift lever must be in “P” (Park)
position to turn the key to “LOCK” posi-
tion. It locks the ignition and prevents
normal use of the steering wheel and
gearshift lever.
To release the steering lock, insert the key
and turn it clockwis e to one of the other
positions. If you have trouble turning the
key to unlock the steering, try turning the
steering wheel slightly to the right or left
while turning the key. ACC
Accessories such as the radio can oper-
ate, but the engine is off.
ON
This is the normal operating position. All
electrical systems are on.
START
This is the position for starting the engine
using the starter motor. The key should be
released from this position as soon as the
engine starts.
Ignition key reminder
A buzzer sounds intermittently to remind
you to remove the ignition key if it is in the
ignition switch when the driver’s door is
opened.
81A297S
Turn to “LOCK”
Push
WA R N I N G
• Never return the ignition switch to“LOCK” position and remove the
ignition key while the vehicle is
moving. The steering wheel will
lock and you will not be able to
steer the vehicle. (Continued)
Page 159 of 505
3-6
OPERATING YOUR VEHICLE
75RM4-01E
CVT – Provided you have the keyless
push start system remote controller with
you, the engine automatically starts when
you press the engine switch to select this
ignition mode after placing the gearshift
lever in the “P” position and depressing the
brake pedal. (If you need to re-start the
engine while the vehicle is moving, shift
into “N”.)
NOTE:
You do not need to keep the engine switch
pressed to start the engine.
NOTE:
In the presence of strong radio signals or
noise, you may not be able to change the
ignition mode to ACC or ON or to start the
engine using the engine switch. In this
case, the information display in the instru-
ment cluster will show the following mes-
sage: KEY FOB NOT DETECTED.
Unreleased steering lock warningIf the steering lock remains engaged when
you press the engine switch to change the
ignition mode to ON, the information dis-
play in the instrument cluster shows the
message: “TRN. STEERING WHEEL TO
RELEASE LOCK”. Refer to “Information
display” in the “BEFORE DRIVING” sec-
tion for details.
NOTE:
The steering lock may not be released and
the immobilizer/keyless push start system
warning light turns on if some load is acting
on the steering wheel . If this happens, turn
the steering wheel to the right or left to
relieve it from the load before you press
the engine switch again to change to the
desired ignition mode.
Keyless push start system (if equipped)Provided the keyless push start system
remote controller is within the interior work-
able area (refer to the related explanation
in this section), you can use the engine
switch for starting the engine and selecting
an ignition mode (ACC or ON). In addition,
the following functions can be used:
• Keyless entry function. Refer to “Keyless push start system r emote controller /
keyless entry system transmitter” in the
“BEFORE DRIVING” se ction for details.
• Locking and unlocking doors (including the tailgate) using a request switch.
Refer to “Keyless push start system
remote controller / keyless entry system
transmitter” in the “BEFORE DRIVING”
section for details.
• Immobilizer (anti-thef t) function. Refer to
“Immobilizer syste m” in the “BEFORE
DRIVING” section for details.
NOTICE
Do not leave the engine switch in
ACC or ON mode when the engine is
not running. Avoid using the radio or
other electric accessories for a long
time when the engine switch is in
ACC or ON mode when the engine is
not running, other wise the lead-acid
battery may discharge.
Page 163 of 505
3-10
OPERATING YOUR VEHICLE
75RM4-01E
NOTE:
• Even when the remote controller is in theinterior workable area, if it is in any of the
following conditions, you may not be
able to start the engine or select the igni-
tion modes, and the REMOTE CON-
TROLLER OUTSIDE warning may be
given.
– The remote controller’s battery is low.
– The remote controller is affected by strong radio signals or noise.
– The remote controller is in contact with
or covered by a metallic object.
– The remote controller is in stowage such as the glove box or a door
pocket.
– The remote controller is in the sun
visor pocket or on the floor.
• Even when the remote controller is out- side the interior workable area, if it is in
any of the following conditions, you may
be able to start the engine or select the
ignition mode. The REMOTE CON-
TROLLER OUTSIDE warning may not
be given at that time.
– The remote controller is outside the
vehicle but very close to a door.
– The remote controller is on the instru-
ment panel.
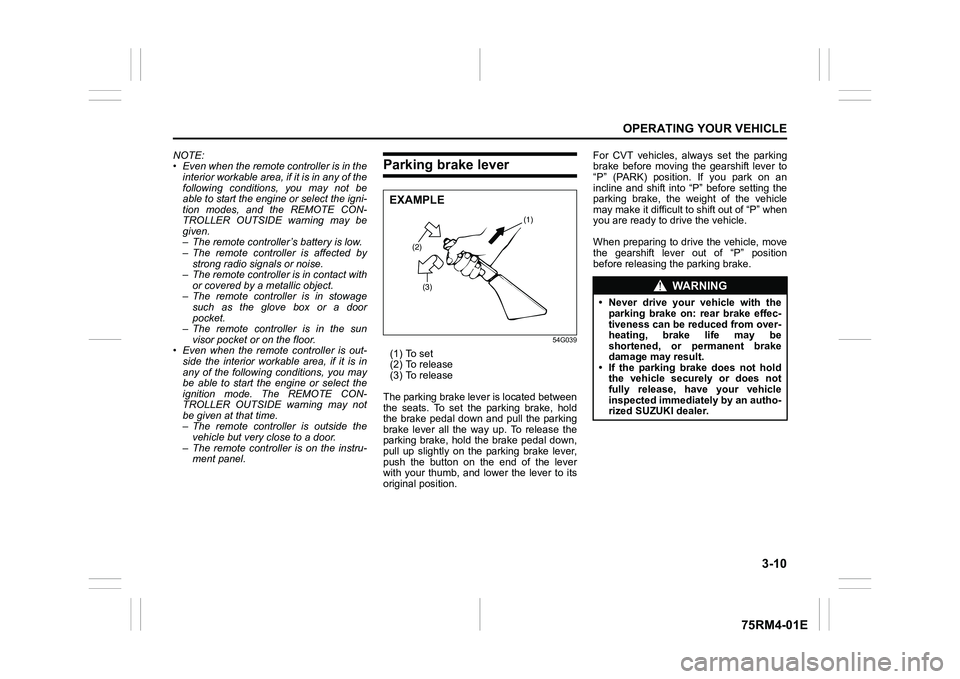
Parking brake lever
54G039
(1) To set
(2) To release
(3) To release
The parking brake lever is located between
the seats. To set the parking brake, hold
the brake pedal down and pull the parking
brake lever all the way up. To release the
parking brake, hold the brake pedal down,
pull up slightly on the parking brake lever,
push the button on the end of the lever
with your thumb, and lower the lever to its
original position. For CVT vehicles, always set the parking
brake before moving the gearshift lever to
“P” (PARK) position. If you park on an
incline and shift into “P” before setting the
parking brake, the weight of the vehicle
may make it difficult to shift out of “P” when
you are ready to drive the vehicle.
When preparing to drive the vehicle, move
the gearshift lever out of “P” position
before releasing the parking brake.
(2)
(3) (1)
EXAMPLE
WA R N I N G
• Never drive your vehicle with the
parking brake on: rear brake effec-
tiveness can be reduced from over-
heating, brake life may be
shortened, or permanent brake
damage may result.
• If the parking brake does not hold the vehicle securely or does not
fully release, have your vehicle
inspected immediately by an autho-
rized SUZUKI dealer.