flat tire TOYOTA AVALON 2021 Owners Manual (in English)
[x] Cancel search | Manufacturer: TOYOTA, Model Year: 2021, Model line: AVALON, Model: TOYOTA AVALON 2021Pages: 548, PDF Size: 13.4 MB
Page 5 of 548

5
1
8 7 5 4
3
2
9
6
6-1. Maintenance and care
Cleaning and protecting
the vehicle exterior .......... 366
Cleaning and protecting
the vehicle interior ........... 369
6-2. Maintenance
Maintenance
requirements ................... 372
General maintenance ........ 374
Emission inspection and
maintenance (I/M)
programs ......................... 378
6-3. Do-it-yourself
maintenance
Do-it-yourself service
precautions ..................... 379
Hood.................................. 381
Positioning a floor jack ...... 382
Engine compartment ......... 383
Tires .................................. 394
Tire inflation pressure........ 408
Wheels .............................. 411
Air conditioning filter .......... 413
Electronic key battery ........ 415
Checking and replacing
fuses ............................... 418
Light bulbs ......................... 4217-1. Essential information
Emergency flashers ........... 424
If your vehicle has to be
stopped in an
emergency....................... 425
If the vehicle is trapped
in rising water .................. 426
7-2. Steps to take in
an emergency
If your vehicle needs to
be towed .......................... 427
If you think something
is wrong ........................... 432
Fuel pump shut off
system ............................. 433
If a warning light turns on
or a warning buzzer
sounds ............................. 434
If a warning message is
displayed ......................... 444
If you have a flat tire .......... 449
If the engine will
not start ........................... 461
If the electronic key does
not operate properly ........ 463
If the vehicle battery is
discharged ....................... 466
If your vehicle overheats.... 471
If the vehicle becomes
stuck ................................ 474
6Maintenance and care7When trouble arises
Page 17 of 548

17Pictorial index
Windshield wipers . . . . . . . . . . . . . . . . . . . . . . . . . . . . . . . . . P. 210
Precautions for winter season . . . . . . . . . . . . . . . . . . . . . . . . . P. 317
Fuel filler door . . . . . . . . . . . . . . . . . . . . . . . . . . . . . . . . . . . . P. 214
Refueling method . . . . . . . . . . . . . . . . . . . . . . . . . . . . . . . . . . . P. 214
Fuel type/fuel tank capacity . . . . . . . . . . . . . . . . . . . . . . . . . . . P. 480
Tires . . . . . . . . . . . . . . . . . . . . . . . . . . . . . . . . . . . . . . . . . . P. 394
Tire size/inflation pressure . . . . . . . . . . . . . . . . . . . . . . . . . P. 486
Winter tires/tire chains . . . . . . . . . . . . . . . . . . . . . . . . . . . . P. 317
Checking/rotation/tire pressure warning system . . . . . . . . .P. 394
Coping with flat tires . . . . . . . . . . . . . . . . . . . . . . . . . . . . . . P. 449
Hood . . . . . . . . . . . . . . . . . . . . . . . . . . . . . . . . . . . . . . . . . . . . P. 381
Opening . . . . . . . . . . . . . . . . . . . . . . . . . . . . . . . . . . . . . . . . . . P. 381
Engine oil . . . . . . . . . . . . . . . . . . . . . . . . . . . . . . . . . . . . . . . . . P. 481
Coping with overheat . . . . . . . . . . . . . . . . . . . . . . . . . . . . . . . . P. 471
Front turn signal lights/parking lights . . . . . . . . . . . . . P. 195, 202
Headlights/daytime running lights . . . . . . . . . . . . . . . . . . . . P. 202
Front side marker lights . . . . . . . . . . . . . . . . . . . . . . . . . . . . P. 202
Headlights . . . . . . . . . . . . . . . . . . . . . . . . . . . . . . . . . . . . . . . P. 202
Front turn signal lights . . . . . . . . . . . . . . . . . . . . . . . . . . . . . P. 195
Daytime running lights/parking lights . . . . . . . . . . . . . . . . . P. 202
Front turn signal lights/cornering lights . . . . . . . . . . . P. 195, 202
Side turn signal lights . . . . . . . . . . . . . . . . . . . . . . . . . . . . . . P. 195
Rear turn signal lights/rear side marker lights/
tail lights/stoplights . . . . . . . . . . . . . . . . . . . . . . . . . . . . P. 195, 202
Back-up lights
Shifting the shift lever to R . . . . . . . . . . . . . . . . . . . . . . . . . . . . P. 189
License plate lights . . . . . . . . . . . . . . . . . . . . . . . . . . . . . . . . P. 202
4
5
6
7
Light bulbs of the exterior lights for driving
(Replacing method: P. 421, Watts: P. 488)
*: If equipped
8
9
10
11
12
13
14
15
16
17
Page 75 of 548

751-2. Emergency assistance
1
For safety and security
■Enhanced Roadside Assistance
Enhanced Roadside Assistance adds GPS data to the already
included warranty-based Toyota roadside service.
Subscribers can press the “SOS” button to reach a Safety Connect
response-center agent, who can help with a wide range of needs,
such as: towing, flat tire, fuel delivery, etc. For a description of the
Enhanced Roadside Assistance services and their limitations,
please see the Safety Connect Terms and Conditions, which are
available at Toyota.com in the United States, Toyotapr.com in
Puerto Rico and Toyota.ca in Canada.
Important! Read this information before using Safety Connect.
■Exposure to radio frequency signals
The Safety Connect system installed in your vehicle is a low-power
radio transmitter and receiver. It receives and also sends out radio
frequency (RF) signals.
In August 1996, the Federal Communications Commission (FCC)
adopted RF exposure guidelines with safety levels for mobile wire-
less phones. Those guidelines are consistent with the safety stan-
dards previously set by the following U.S. and international
standards bodies.
●ANSI (American National Standards Institute) C95.1 [1992]
●NCRP (National Council on Radiation Protection and Measure-
ment) Report 86 [1986]
●ICNIRP (International Commission on Non-Ionizing Radiation
Protection) [1996]
Those standards were based on comprehensive and periodic eval-
uations of the relevant scientific literature. Over 120 scientists, engi-
neers, and physicians from universities, and government health
agencies and industries reviewed the available body of research to
develop the ANSI Standard (C95.1).
The design of Safety Connect complies with the FCC guidelines in
addition to those standards.
Safety information for Safety Connect
Page 96 of 548

962. Instrument cluster
Select a menu icon to display its content.
Driving information (P. 9 7 )
Select to display the following:
• Speedometer/driving range
• Fuel consumption
• Eco Driving Indicator/driving range
Driving assist system information
Select to perform the following:
Display the operational status of the following systems:
• Dynamic radar cruise control with full-speed range (P. 247)
• LDA (Lane Departure Alert with steering control) (P. 237)
Display the following navigation system-linked information (if equipped):
• Route guidance
• Compass display (heading-up display)
Audio system-linked display
Select to enable selection of an audio source or track on the multi-infor-
mation display using the meter control switches.
Vehicle information
Select to perform the following:
Display the following information:
• Tire inflation pressure (P. 395)
Enable/Disable the following systems:
• Parking assist (Intuitive parking assist) (if equipped) (P. 276)
• BSM (Blind Spot Monitor) function (P. 260)
• RCTA (Rear Cross Traffic Alert) function (P. 260)
These functions can also be enabled/disabled on .
Settings display (P. 100)
Select to change the meter display settings and other settings.
Warning message display (P. 444)
Select to display warning messages and measures to be taken if a mal-
function is detected.
Menu icons
Page 104 of 548

1042. Instrument cluster
■ Vehicle settings
Press and hold to change the settings of the following items:
ItemSettingsDetails
TPWS (Tire pressure warning system) (P. 395)
Set pressure (tire pressure warning sys-
tem initialization)
Select to initialize the tire pres-
sure warning system. To per-
form initialization, press and hold
the switch.
Before performing initialization,
make sure to adjust the inflation
pressure of each tire to the spec-
ified level. (P. 396)
Change wheel (register tire pressure
warning system sensor ID codes)
Select to register the ID codes of
the tire pressure sensors to the
tire pressure warning system. To
register the ID codes, press and
hold the switch.
(P. 397)
Scheduled maintenance display
Maintenance data reset
Select to reset the message indi-
cating maintenance is required,
after the required maintenance is
performed. (P. 373)
Page 107 of 548

1072. Instrument cluster
2
Instrument cluster
■Eco Driving Indicator
Eco Driving Indicator will not operate under the following conditions:
●The shift lever is in any position other than D.
●A paddle shift switch (if equipped) is operated.
●Neither normal mode nor Eco drive mode is selected. (P. 305)
●The vehicle speed is approximately 80 mph (130 km/h) or higher.
■Suspension of the settings display
●Some settings cannot be changed while driving. When changing settings,
park the vehicle in a safe place.
●If a warning message is displayed, operation of the settings display will be
suspended.
■Tire pressure
●It may take a few minutes to display the tire inflation pressure after the
engine switch is turned to IGNITION ON mode. It may also take a few min-
utes to display the tire inflation pressure after inflation pressure has been
adjusted.
●“---” may be displayed if the tire position information cannot be determined
due to unfavorable radio wave conditions.
●Tire inflation pressure changes with temperature. The displayed values may
also be different from the values measured using a tire pressure gauge.
■Liquid crystal display
Small spots or light spots may appear on the display. This phenomenon is
characteristic of liquid crystal displays, and there is no problem continuing to
use the display.
■Customization
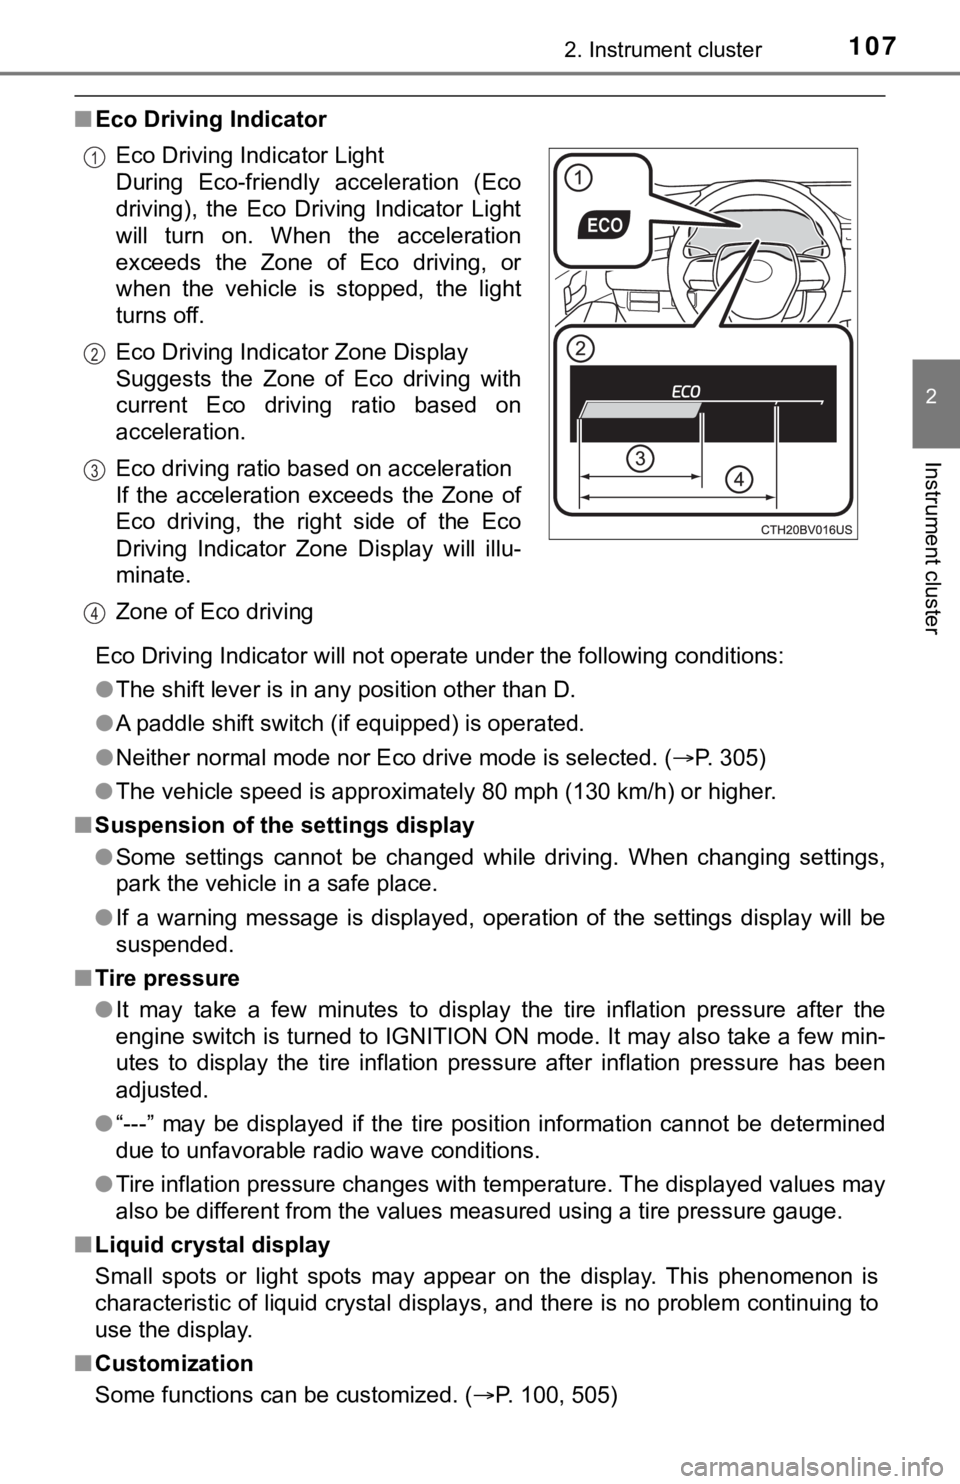
Some functions can be customized. (P. 100, 505) Eco Driving Indicator Light
During Eco-friendly acceleration (Eco
driving), the Eco Driving Indicator Light
will turn on. When the acceleration
exceeds the Zone of Eco driving, or
when the vehicle is stopped, the light
turns off.
Eco Driving Indicator Zone Display
Suggests the Zone of Eco driving with
current Eco driving ratio based on
acceleration.
Eco driving ratio based on acceleration
If the acceleration exceeds the Zone of
Eco driving, the right side of the Eco
Driving Indicator Zone Display will illu-
minate.
Zone of Eco driving
1
2
3
4
Page 177 of 548

1774-1. Before driving
4
Driving
NOTICE
■When driving the vehicle
●Do not depress the accelerator and brake pedals at the same time during
driving, as this may restrain the engine output.
●Do not use the accelerator pedal or depress the accelerator and brake
pedals at the same time to hold the vehicle on a hill.
■When parking the vehicle
Always set the parking brake and shift the shift lever to P. Failure to do so
may cause the vehicle to move or the vehicle may accelerate suddenly if
the accelerator pedal is accidentally depressed.
■Avoiding damage to vehicle parts
●Do not turn the steering wheel fully in either direction and hold it there for
an extended period of time.
Doing so may damage the power steering motor.
●When driving over bumps in the road, drive as slowly as possible to avoid
damaging the wheels, underside of the vehicle, etc.
■If you get a flat tire while driving
A flat or damaged tire may cause the following situations. Hold the steering
wheel firmly and gradually depress the brake pedal to slow down the vehi-
cle.
●It may be difficult to control your vehicle.
●The vehicle will make abnormal sounds or vibrations.
●The vehicle will lean abnormally.
Information on what to do in case of a flat tire (P. 449)
■When encountering flooded roads
Do not drive on a road that has flooded after heavy rain etc. Doing so may
cause the following serious damage to the vehicle:
●Engine stalling
●Short in electrical components
●Engine damage caused by water immersion
In the event that you drive on a flooded road and the vehicle is flooded, be
sure to have your Toyota dealer check the following:
●Brake function
●Changes in quantity and quality of oil and fluid used for the engine, tran-
saxle, transfer (AWD models), rear differential (AWD models), etc.
●Lubricant condition for the propeller shaft (AWD models), bearings and
suspension joints (where possible), and the function of all joints, bearings,
etc.
Page 209 of 548

2094-3. Operating the lights and wipers
4
Driving
●In the following situations the system may not be able to correctly detect the
surrounding brightness level. This may cause the low beams to remain on
or the high beams to flash or dazzle pedestrians or vehicles ahead. In such
a case, it is necessary to manually switch between the high and low beams.
• When driving in inclement weather (heavy rain, snow, fog, sandstorms,
etc.)
• When the windshield is obscured by fog, mist, ice, dirt, etc.
• When the windshield is cracked or damaged
• When the camera sensor is deformed or dirty
• When the temperature of the camera sensor is extremely high
• When the surrounding brightness level is equal to that of headlights, tail
lights or fog lights
• When headlights or tail lights of vehicles ahead are turned off, dirty,
changing color, or not aimed properly
• When the vehicle is hit by water, snow, dust, etc. from a preceding vehi-
cle
• When driving through an area of intermittently changing brightness and
darkness
• When frequently and repeatedly driving ascending/descending roads, or
roads with rough, bumpy or uneven surfaces (such as stone-paved
roads, gravel roads, etc.)
• When frequently and repeatedly taking curves or driving on a winding
road
• When there is a highly reflective object ahead of the vehicle, such as a
sign or mirror
• When the back of a preceding vehicle is highly reflective, such as a con-
tainer on a truck
• When the vehicle's headlights are damaged or dirty, or are not aimed
properly
• When the vehicle is listing or titling due to a flat tire, a trailer being towed,
etc.
• When the headlights are changed between the high beams and low
beams repeatedly in an abnormal manner
• When the driver believes that the high beams may be flashing or dazzling
pedestrians or other drivers
■Temporarily lowering sensor sensitivity
<0037004b004800030056004800510056004c0057004c0059004c0057005c00030052004900030057004b004800030056004800510056005200550003004600440051000300450048000300570048005000530052005500440055004c004f005c0003004f00
52005a00480055004800470011[
Turn the engine switch off while the following conditions are met.
• The headlight switch is in .
• The headlight switch lever is in high beam position.
Turn the engine switch to the IGNITION ON mode.
Within 5 seconds after , repeat pulling the headlight switch lever to the
original position then pushing it to the high beam position quickly 9 times,
then leave the lever in high beam position.
Automatic High Beam (headlights) may turn on even when the vehicle is
stopped.
1
2
32
Page 229 of 548

2294-5. Using the driving support systems
4
Driving
WARNING
■When to disable the pre-collision system
In the following situations, disable the system, as it may not operate prop-
erly, possibly leading to an accident resulting in death or serious injury:
●When the vehicle is being towed
●When your vehicle is towing another vehicle
●When transporting the vehicle via truck, boat, train or similar means of
transportation
●When the vehicle is raised on a lift with the engine running and the tires
are allowed to rotate freely
●When inspecting the vehicle using a drum tester such as a chassis dyna-
mometer or speedometer tester, or when using an on vehicle wheel bal-
ancer
●When a strong impact is applied to the front bumper or front grille, due to
an accident or other reasons
●If the vehicle cannot be driven in a stable manner, such as when the vehi-
cle has been in an accident or is malfunctioning
●When the vehicle is driven in a sporty manner or off-road
●When the tires are not properly inflated
●When the tires are very worn
●When tires of a size other than specified are installed
●When tire chains are installed
●When a compact spare tire or an emergency tire puncture repair kit is used
●If equipment (snow plow, etc.) that may obstruct the radar sensor or front
camera is temporarily installed to the vehicle
Page 235 of 548

2354-5. Using the driving support systems
4
Driving
• When a very bright light, such as the sun or the headlights of oncoming
traffic, shines directly into the front camera
• When the surrounding area is dim, such as at dawn or dusk, or while at
night or in a tunnel
• After the engine has started the vehicle has not been driven for a certain
amount of time
• While making a left/right turn and for a few seconds after making a left/
right turn
• While driving on a curve and for a few seconds after driving on a curve
• If your vehicle is skidding
• If the wheels are misaligned
• If a wiper blade is blocking the front camera
• The vehicle is wobbling.
• The vehicle is being driven at extremely high speeds.
• When driving on a hill
• If the radar sensor or front camera is misaligned
●In some situations such as the following, sufficient braking force may not be
obtained, preventing the system from performing properly:
• If the braking functions cannot operate to their full extent, such as when
the brake parts are extremely cold, extremely hot, or wet
• If the vehicle is not properly maintained (brakes or tires are excessively
worn, improper tire inflation pressure, etc.)
• When the vehicle is being driven on a gravel road or other slippery sur-
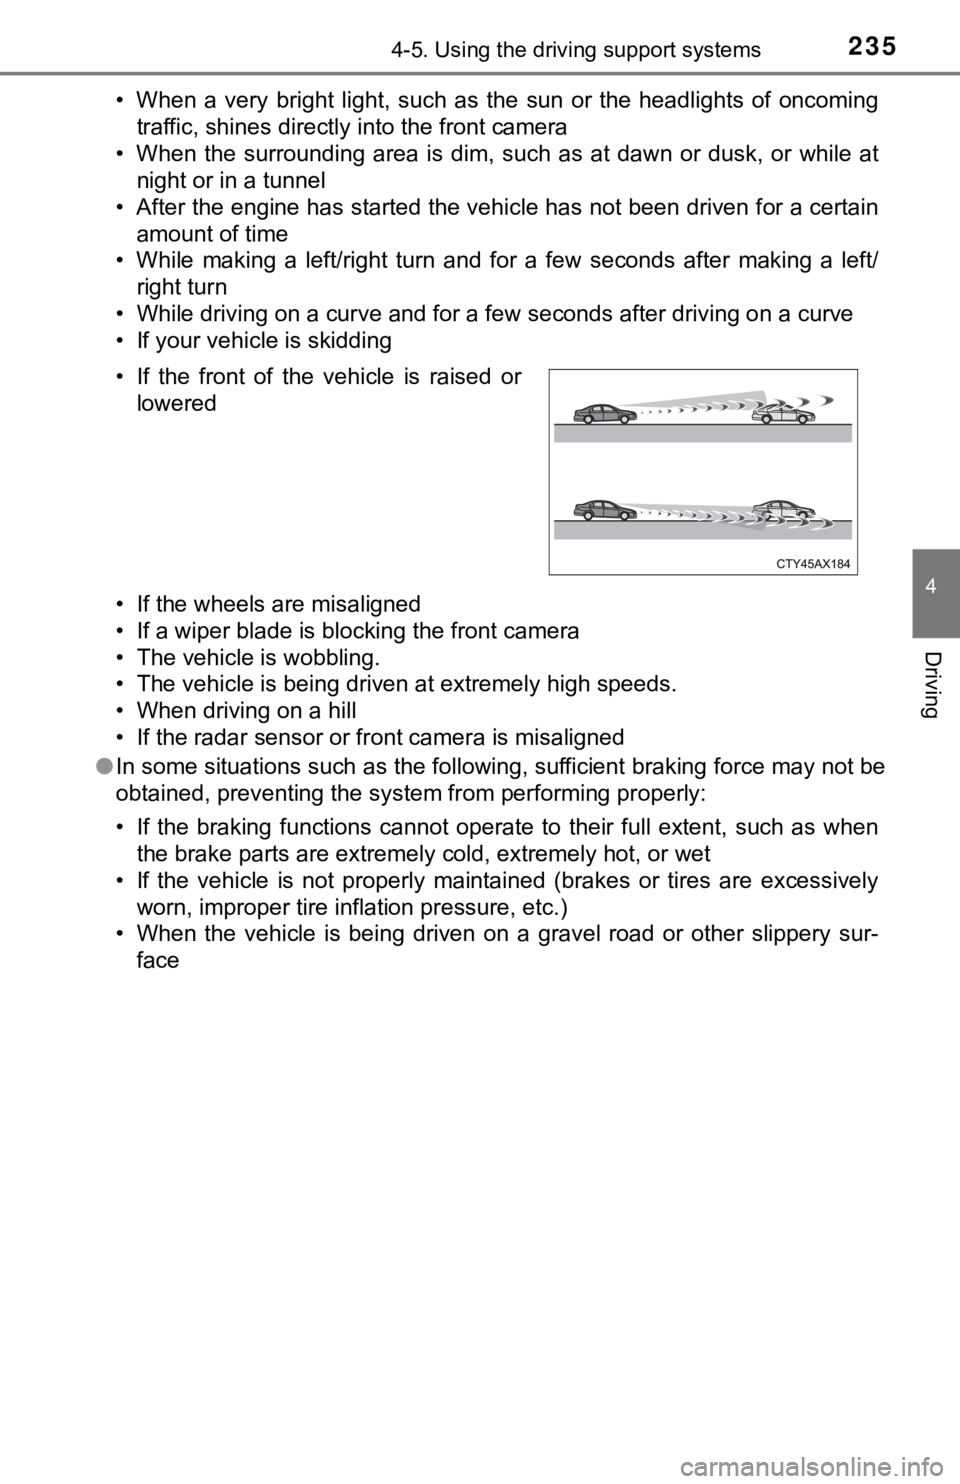
face • If the front of the vehicle is raised or
lowered