display TOYOTA BZ4X 2023 Owners Manual
[x] Cancel search | Manufacturer: TOYOTA, Model Year: 2023, Model line: BZ4X, Model: TOYOTA BZ4X 2023Pages: 628, PDF Size: 11.91 MB
Page 429 of 628
4296-4. Using the other interior features
Owners Manual_USA_M42C01_en
6
Interior features
The USB Type-C charging ports
are used to supply 3 A of elec-
tricity at 5 V to external devices.
The USB Type-C charging ports
are for charging only. They are
not designed for data transfer or
other purposes. Depending on the external
device, it may not charge prop-
erly. Refer to the manual
included with the device before
using a USB charging port.
Refer to “MULTIMEDIA
OWNER’S MANUAL” for USB
Type-A information.
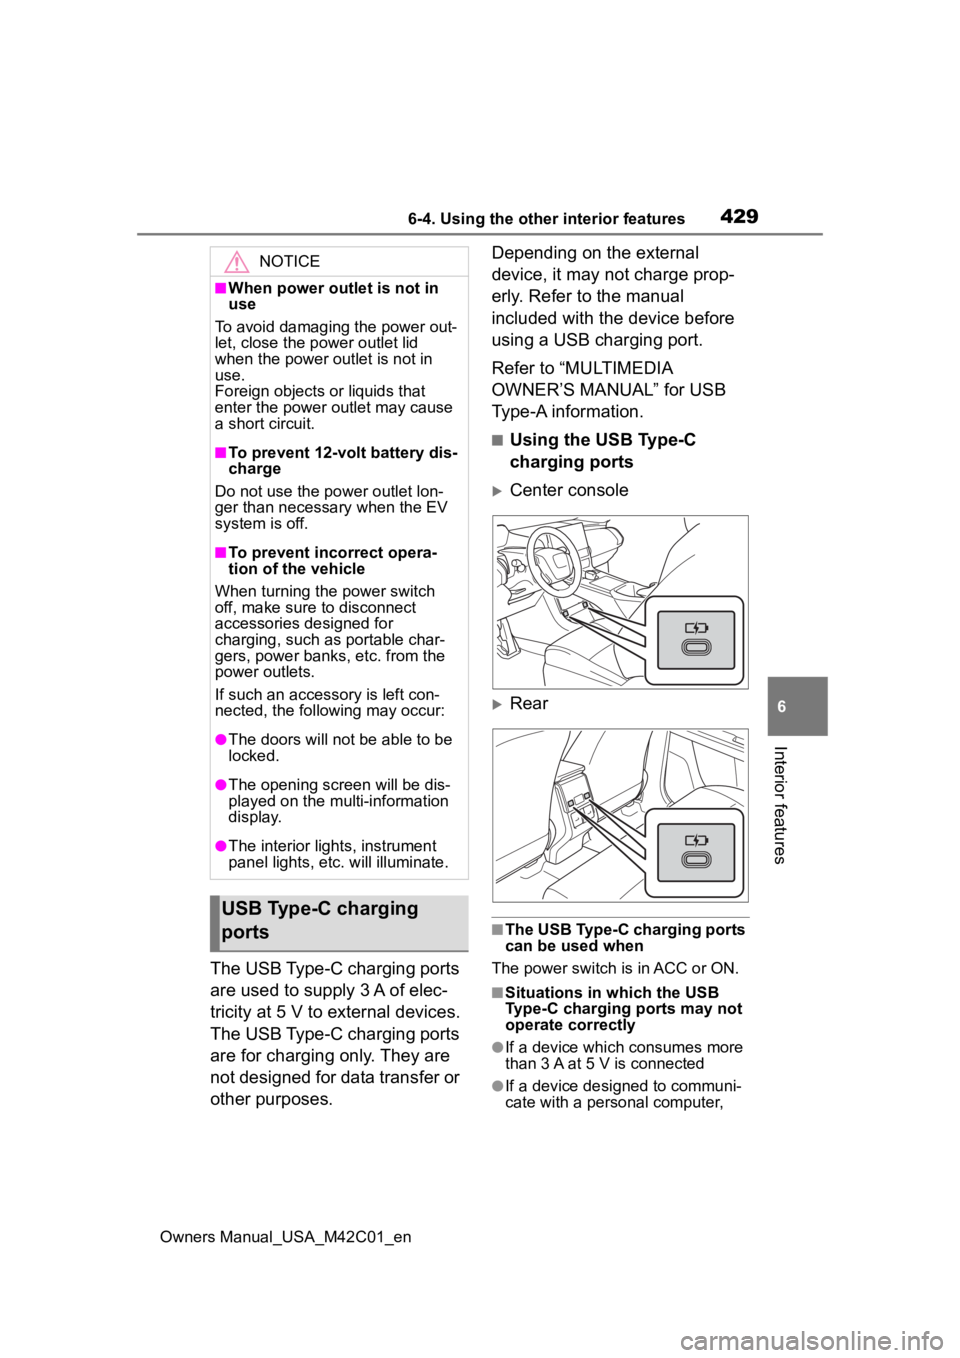
■Using the USB Type-C
charging ports
Center console
Rear
■The USB Type-C charging ports
can be used when
The power switch is in ACC or ON.
■Situations in which the USB
Type-C charging ports may not
operate correctly
●If a device which consumes more
than 3 A at 5 V is connected
●If a device designed to communi-
cate with a personal computer,
NOTICE
■When power outlet is not in
use
To avoid damaging the power out-
let, close the p ower outlet lid
when the power outlet is not in
use.
Foreign objects or liquids that
enter the power outlet may cause
a short circuit.
■To prevent 12-volt battery dis-
charge
Do not use the power outlet lon-
ger than necessary when the EV
system is off.
■To prevent incorrect opera-
tion of the vehicle
When turning the power switch
off, make sure to disconnect
accessories designed for
charging, such as portable char-
gers, power banks, etc. from the
power outlets.
If such an accessory is left con-
nected, the following may occur:
●The doors will not be able to be
locked.
●The opening scr een will be dis-
played on the multi-information
display.
●The interior lights, instrument
panel lights, etc. will illuminate.
USB Type-C charging
ports
Page 436 of 628
4366-4. Using the other interior features
Owners Manual_USA_M42C01_en
WARNING
●Do not attach an aluminum
sticker or other metallic object to
the side of the portable device
(or to its case or cover) that
touches the charge area
●Do not use the charging tray as
a small storage space
●Do not subject to a strong force
or impact
●Do not disassemble, modify or
remove
●Do not charge devices other
than specified portable devices
●Keep away from magnetic items
●Do not charge devices if the
charge area is covered in dust
●Do not cover with a cloth or sim-
ilar material
NOTICE
■Situations in which the func-
tion may not operate normally
Devices may not be charged nor-
mally in the following situations.
●The portable device is fully
charged
●The portable device is being
charged with a cable connected
●There is foreign matter between
the charge area and portable
device
●Charging has caused the porta-
ble device to heat up
●The temperature around the
charging tray is 95°F (35°C) or
higher, such as in extreme heat
●The portable device is placed
with its charging side facing up
●The portable device is placed in
an area misaligned from the
charge area
●The portable device is larger
than the charging tray
●A foldable and portable device
is placed outside the charge
area
●The camera lens protrudes 0.12
in. (3 mm) or more from the sur-
face of the portal device
●The vehicle is in an area where
strong electrical waves or noise
are emitted, such as near a tele-
vision tower, power plant, gaso-
line station, broadcasting
station, large display, airport,
etc.
●Any of the following objects that
is protrudes 0.12 in. (3 mm) or
thicker is stuck or installed
between the charging side of
the portable device and the
charge area.
• Thick cases or covers
• A case or cover attached with an uneven or tilt ed surface, so
that the charging side is not flat
• Thick decorations
• Accessories, such as finger rings, straps, etc.
●When the portable device is in
contact with, or is covered by
any of the following metallic
objects:
• A card that has metal on it, such as aluminum foil, etc.
• A pack of cigarettes that includes aluminum foil
• A wallet or bag that is made of metal
• Coins
Page 441 of 628
4416-4. Using the other interior features
Owners Manual_USA_M42C01_en
6
Interior features
reach the “Learn” or “Smart”
button on the garage door
opener motor.
■Programming HomeLink®
Steps 2 through 4 must be per-
formed within 60 seconds, oth-
erwise the HomeLink
® indicator
light will stop flashing and pro-
gramming will not be success-
fully completed.
1 Vehicles with Digital Rear-
view Mirror: Press the Home-
Link
® button or menu button
When the HomeLink® button is
pressed:
Homelink
® Training Tutorial will be
displayed to assist you program-
ming the HomeLink
®.
When Homelink
® Training Tutorial
is displayed, follow the instructions
displayed.
When the menu button is pressed:
Press the menu button and
select the “Set Up >”. Homelink
®
Training Tutorial will be displayed to
assist you programming the Home-
Link
®.
When Homelink
® Training Tutorial
is displayed, follow the instructions
displayed.
2 Press and release the Home-
Link
® button you want to pro-
gram and check that the
HomeLink
® indicator light
flashes (orange).
3 Point the remote control
transmitter for the device at
the rear view mirror, 1 to 3 in. (25 to 75 mm) from the
HomeLink
® buttons.
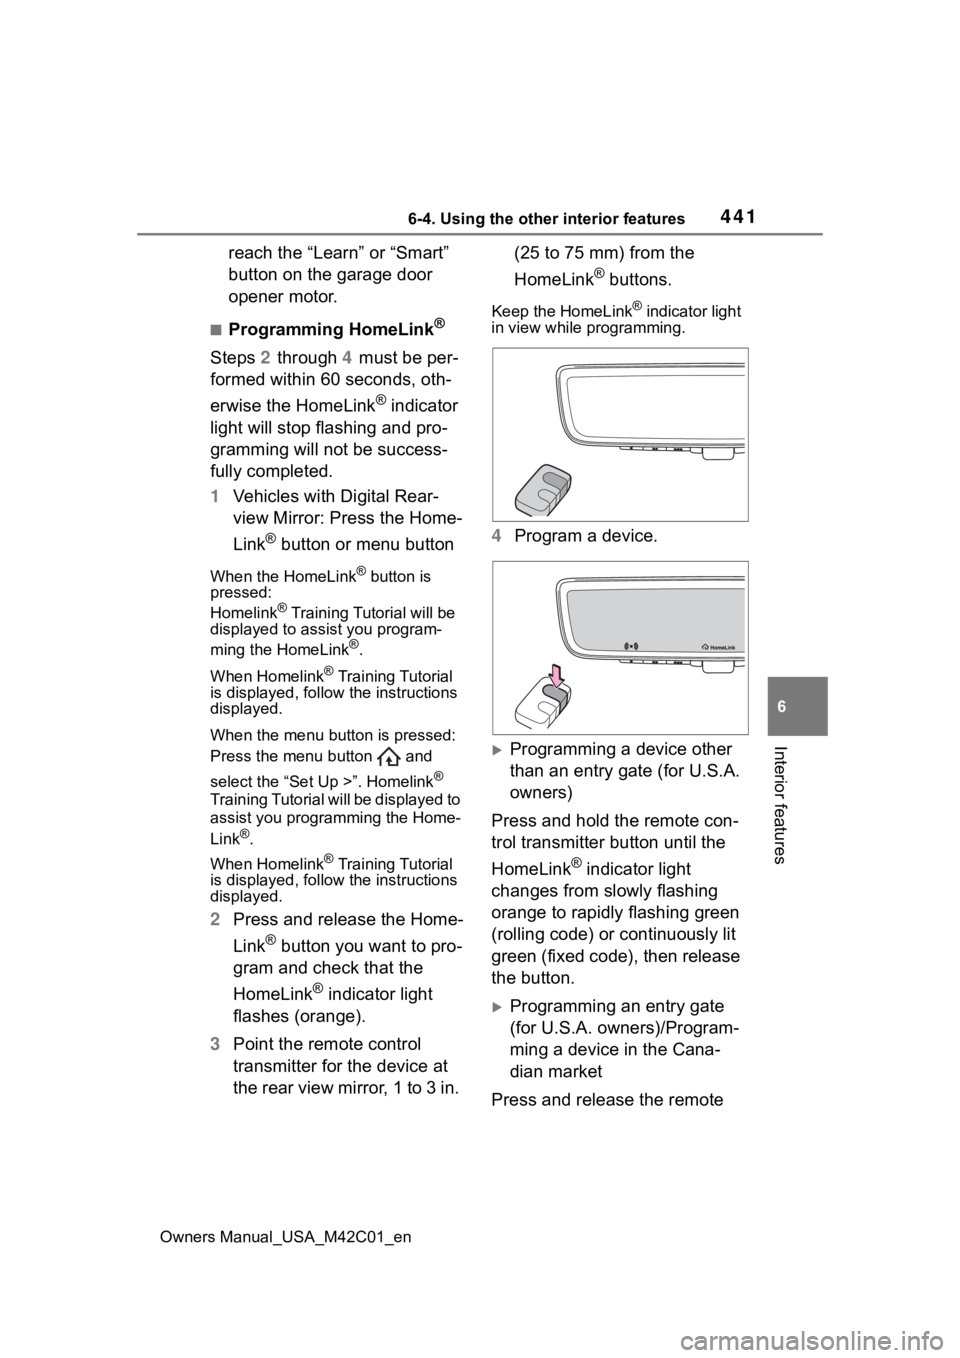
Keep the HomeLink® indicator light
in view while programming.
4 Program a device.
Programming a device other
than an entry gate (for U.S.A.
owners)
Press and hold the remote con-
trol transmitter button until the
HomeLink
® indicator light
changes from slowly flashing
orange to rapidly flashing green
(rolling code) or continuously lit
green (fixed code), then release
the button.
Programming an entry gate
(for U.S.A. owners)/Program-
ming a device in the Cana-
dian market
Press and release the remote
Page 449 of 628
4497-1. Maintenance and care
Owners Manual_USA_M42C01_en
7
Maintenance and care
●If the electronic key is inside the
vehicle and a door handle
becomes wet during a car wash, a
buzzer may sound outside the
vehicle and “Key Detected In
Vehicle” may be shown on the
multi-information display. To turn
off the alarm, lock all the doors.
■Wheels and wheel ornaments
●Remove any dirt immediately by
using a neutral detergent.
●Wash detergent off with water
immediately after use.
●To protect the paint from damage,
make sure to obs erve the follow-
ing precautions.
• Do not use acidi c, alkaline or
abrasive detergent
• Do not use hard brushes
• Do not use det ergent on the
wheels when they are hot, such
as after driving or parking in hot
weather
■Painted brake calipers (if
equipped)
●When using detergent, use neu-
tral detergent. Do not use hard
brushes or abrasive cleaners, as
they will damage the paint.
●Do not use detergent on the brake
calipers when th ey are hot.
●Wash detergent off immediately
after use.
■Brake pads and calipers
Rust may form if the vehicle is
parked with wet brake pads or disc
rotors, causing them to stick. Before
parking the vehicle after it is
washed, drive slow ly and apply the
brakes several times to dry the
parts.
■Bumpers
Do not scrub with abrasive cleaners.
■Plated portions
If dirt cannot be removed, clean the
parts as follows:
●Use a soft cloth dampened with an approximately 5% solution of neu-
tral detergent and water to clean
the dirt off.
●Wipe the surface with a dry, soft
cloth to remove any remaining
moisture.
●To remove oily deposits, use alco-
hol wet wipes or a similar product.
WARNING
■When washing the vehicle
Do not apply water to the inside of
the motor compartment. Doing so
may cause the electrical compo-
nents, etc. to catch fire.
■When cleaning the windshield
(vehicles with rain-sensing
windshield wipers)
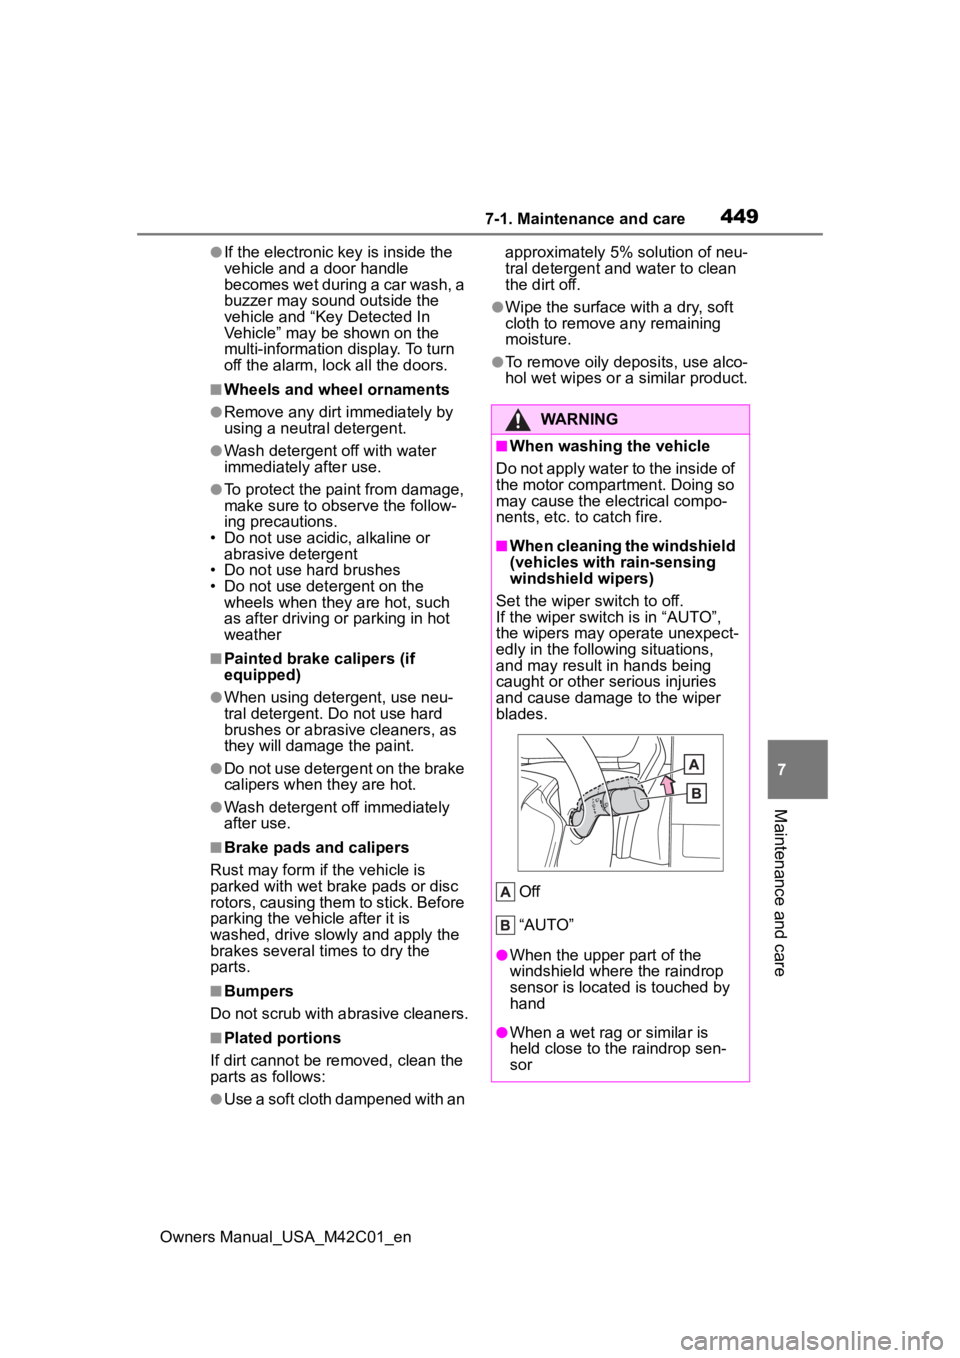
Set the wiper switch to off.
If the wiper switch is in “AUTO”,
the wipers may operate unexpect-
edly in the following situations,
and may result in hands being
caught or other serious injuries
and cause damage to the wiper
blades.
Off
“AUTO”
●When the upper part of the
windshield where the raindrop
sensor is located is touched by
hand
●When a wet rag or similar is
held close to the raindrop sen-
sor
Page 461 of 628
4617-3. Do-it-yourself maintenance
Owners Manual_USA_M42C01_en
7
Maintenance and care
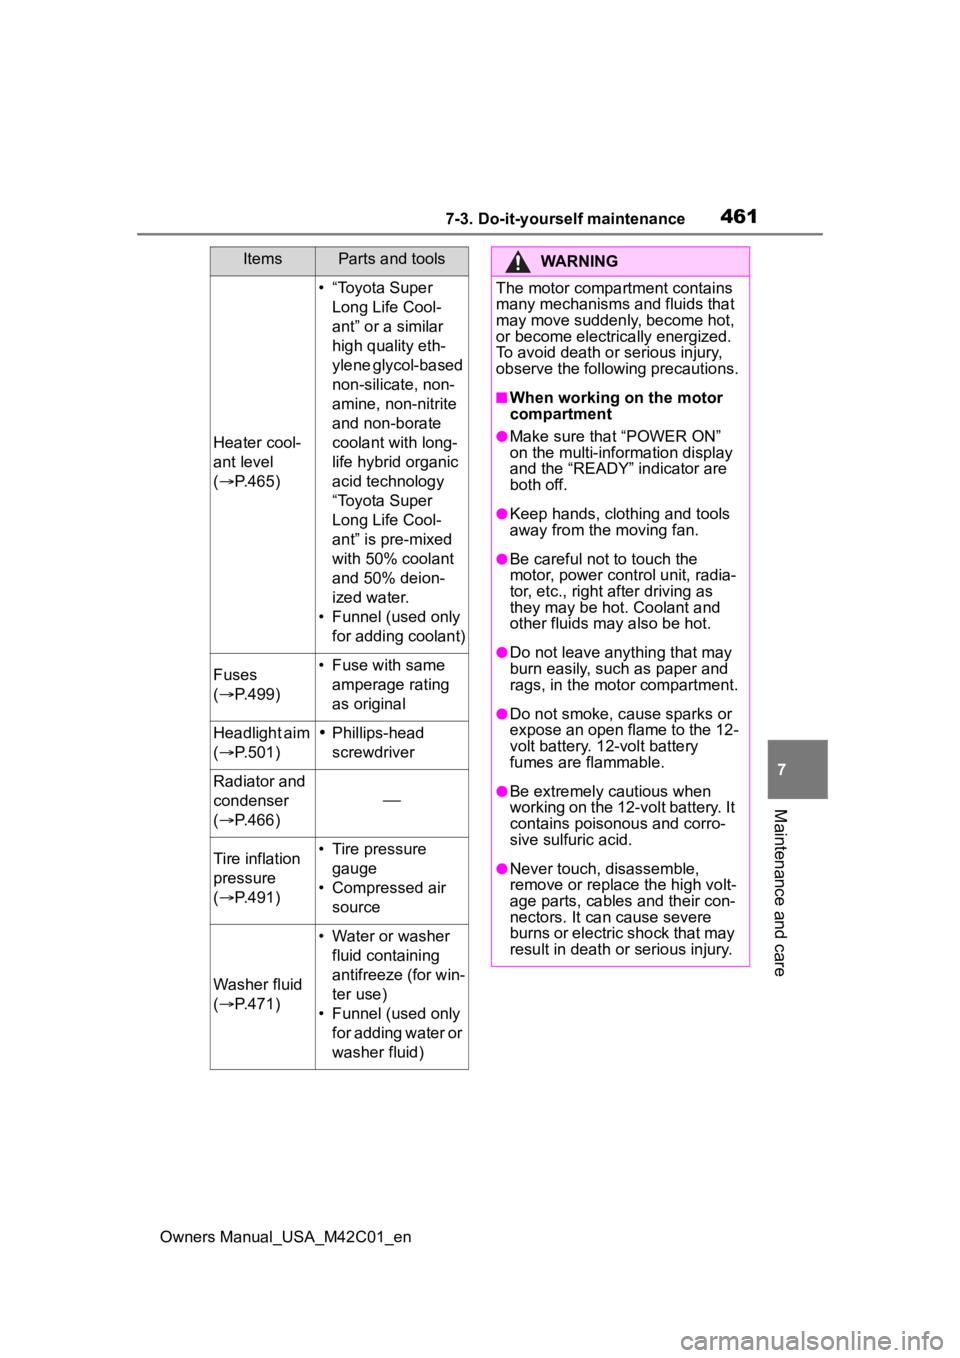
Heater cool-
ant level
( P.465)
• “Toyota Super
Long Life Cool-
ant” or a similar
high quality eth-
ylene glycol-based
non-silicate, non-
amine, non-nitrite
and non-borate
coolant with long-
life hybrid organic
acid technology
“Toyota Super
Long Life Cool-
ant” is pre-mixed
with 50% coolant
and 50% deion-
ized water.
• Funnel (used only for adding coolant)
Fuses
( P.499)• Fuse with same
amperage rating
as original
Headlight aim
( P.501)Phillips-head
screwdriver
Radiator and
condenser
( P.466)
Tire inflation
pressure
( P.491)• Tire pressure
gauge
• Compressed air source
Washer fluid
( P.471)
• Water or washer
fluid containing
antifreeze (for win-
ter use)
• Funnel (used only for adding water or
washer fluid)
ItemsParts and toolsWARNING
The motor compartment contains
many mechanisms and fluids that
may move suddenly, become hot,
or become electrically energized.
To avoid death or serious injury,
observe the following precautions.
■When working on the motor
compartment
●Make sure that “POWER ON”
on the multi-information display
and the “READY” indicator are
both off.
●Keep hands, clothing and tools
away from the moving fan.
●Be careful not to touch the
motor, power control unit, radia-
tor, etc., right after driving as
they may be hot. Coolant and
other fluids may also be hot.
●Do not leave anything that may
burn easily, such as paper and
rags, in the motor compartment.
●Do not smoke, cause sparks or
expose an open flame to the 12-
volt battery. 12-volt battery
fumes are flammable.
●Be extremely cautious when
working on the 12-volt battery. It
contains poisonous and corro-
sive sulfuric acid.
●Never touch, disassemble,
remove or replace the high volt-
age parts, cables and their con-
nectors. It can cause severe
burns or electric shock that may
result in death or serious injury.
Page 471 of 628
4717-3. Do-it-yourself maintenance
Owners Manual_USA_M42C01_en
7
Maintenance and care
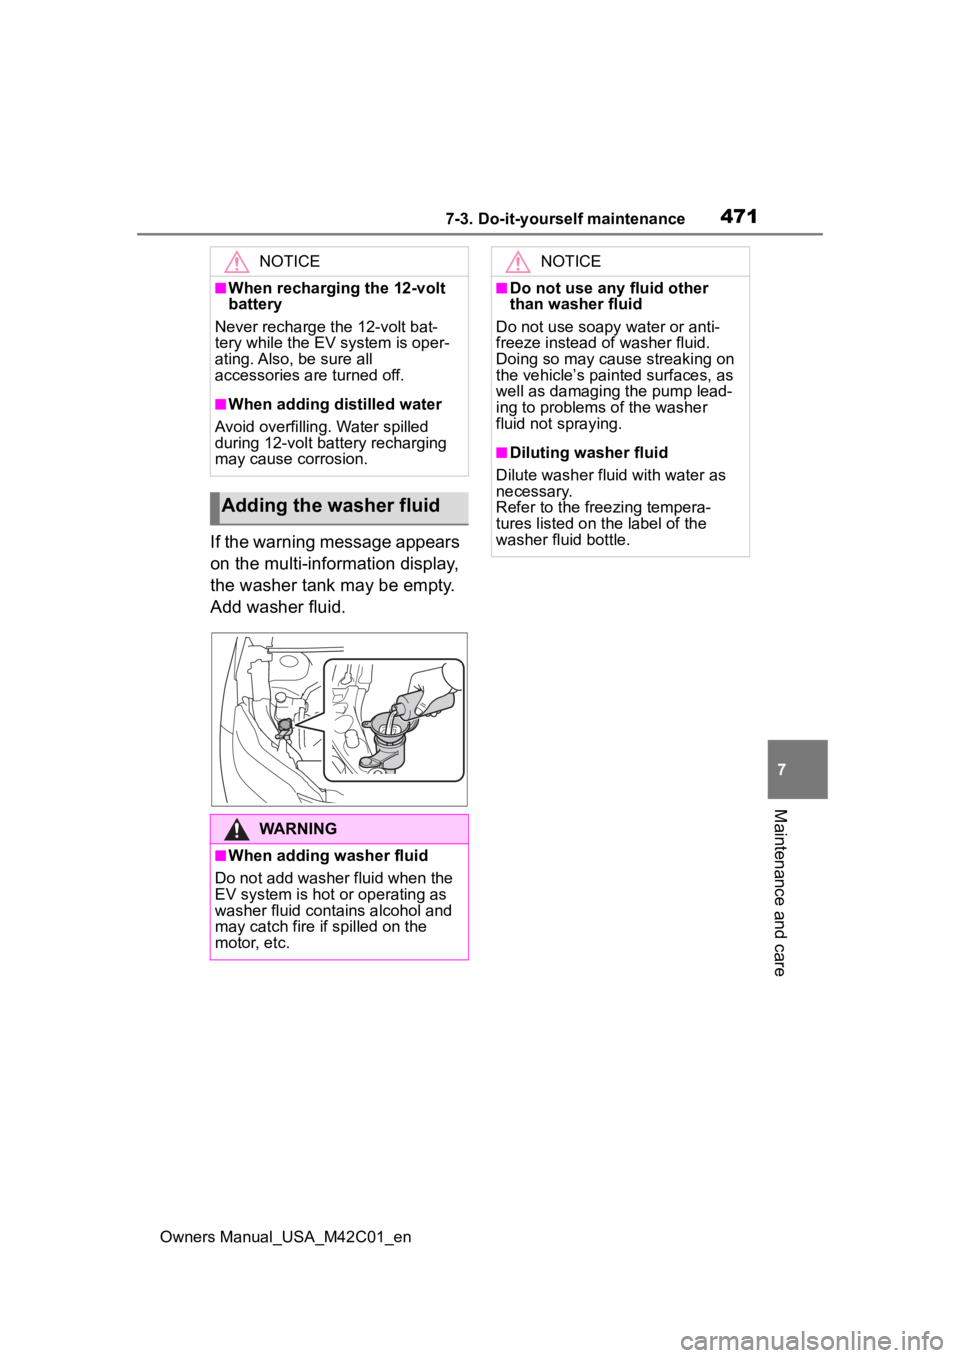
If the warning message appears
on the multi-information display,
the washer tank may be empty.
Add washer fluid.
NOTICE
■When recharging the 12-volt
battery
Never recharge the 12-volt bat-
tery while the EV system is oper-
ating. Also, be sure all
accessories are turned off.
■When adding distilled water
Avoid overfilling. Water spilled
during 12-volt battery recharging
may cause corrosion.
Adding the washer fluid
WARNING
■When adding washer fluid
Do not add washer fluid when the
EV system is hot or operating as
washer fluid contains alcohol and
may catch fire if spilled on the
motor, etc.
NOTICE
■Do not use any fluid other
than washer fluid
Do not use soapy water or anti-
freeze instead of washer fluid.
Doing so may cause streaking on
the vehicle’s painted surfaces, as
well as damaging the pump lead-
ing to problems of the washer
fluid not spraying.
■Diluting washer fluid
Dilute washer fluid with water as
necessary.
Refer to the freezing tempera-
tures listed on the label of the
washer fluid bottle.
Page 474 of 628

4747-3. Do-it-yourself maintenance
Owners Manual_USA_M42C01_en
Rotate the tires in the order
shown.
To equalize tire wear and extend
tire life, Toyota recommends that
tire rotation is carried out at the
same interval as tire inspection.
Do not fail to initialize the tire pres-
sure warning system after tire rota-
tion.
Front
■When rotating the tires
Make sure that the power switch is
OFF. If the tires are rotated while the
power switch is in ON, the tire posi-
tion information will not be updated.
If this accidentally occurs, either turn
the power switch to OFF and then to
ON, or initialize the system after
checking that the tire pressure is
properly adjusted.
Your vehicle is equipped with a
tire pressure warning system
that uses tire pressure warning
valves and transmitters to detect
low tire inflation pressure before
serious problems arise.
The tire pressure warning sys-
tem of this vehicle adopts a 2-
type warning system.
When “Adjust Pressure” is
displayed (Normal Warning)
A warning with the tire pressure
warning light and warning buzzer
when there is an unknown level of
low tire pressure with the appear-
ance of the tire due to natural air
leakage as well as the pressure
lowering due to changes in the
pressure according to the outside
temperature.
When “Immediately Check
Tire when Safe” is displayed
(Emergency Warning)
A warning with the tire pressure
warning light and warning buzzer
when there is a k nown level of low
tire pressure with the appearance
of the tire due to pressure suddenly
lowering.
However, the system may not be
able to detect sudden tire ruptures
(bursting, etc.).
The tire pressure detected by
the tire pressure warning sys-
tem can be displayed on the
multi-information display.
NOTICE
■If tire inflation pressure of
each tire becomes low while
driving
Do not continue driving, or your
tires and/or wheels may be
ruined.
Tire rotation
Tire pressure warning
system
Page 475 of 628
4757-3. Do-it-yourself maintenance
Owners Manual_USA_M42C01_en
7
Maintenance and care
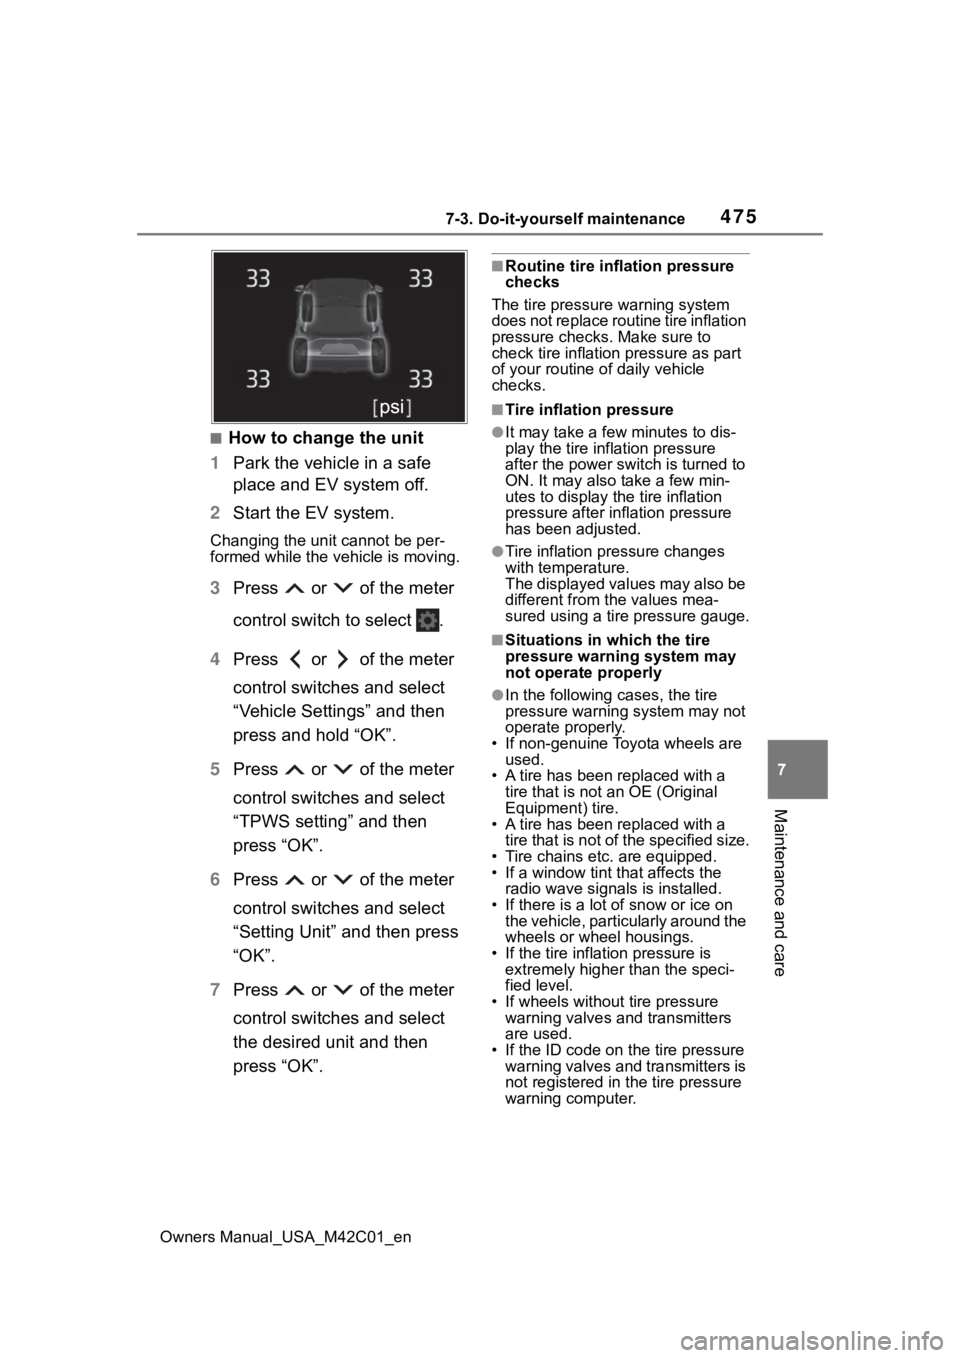
■How to change the unit
1 Park the vehicle in a safe
place and EV system off.
2 Start the EV system.
Changing the unit cannot be per-
formed while the vehicle is moving.
3Press or of the meter
control switch to select .
4 Press or of the meter
control switches and select
“Vehicle Settings” and then
press and hold “OK”.
5 Press or of the meter
control switches and select
“TPWS setting” and then
press “OK”.
6 Press or of the meter
control switches and select
“Setting Unit” and then press
“OK”.
7 Press or of the meter
control switches and select
the desired unit and then
press “OK”.
■Routine tire inflation pressure
checks
The tire pressure warning system
does not replace routine tire inflation
pressure checks . Make sure to
check tire inflation pressure as part
of your routine o f daily vehicle
checks.
■Tire inflation pressure
●It may take a few minutes to dis-
play the tire inflation pressure
after the power switch is turned to
ON. It may also take a few min-
utes to display the tire inflation
pressure after infl ation pressure
has been adjusted.
●Tire inflation pressure changes
with temperature.
The displayed values may also be
different from the values mea-
sured using a tire pressure gauge.
■Situations in which the tire
pressure warning system may
not operate properly
●In the following cases, the tire
pressure warning system may not
operate properly.
• If non-genuine Toyota wheels are used.
• A tire has been replaced with a
tire that is not an OE (Original
Equipment) tire.
• A tire has been replaced with a
tire that is not of the specified size.
• Tire chains etc. are equipped.
• If a window tint that affects the radio wave signals is installed.
• If there is a lot of snow or ice on the vehicle, particularly around the
wheels or wheel housings.
• If the tire inflation pressure is extremely higher than the speci-
fied level.
• If wheels without tire pressure warning valves and transmitters
are used.
• If the ID code on the tire pressure warning valves and transmitters is
not registered in the tire pressure
warning computer.
Page 476 of 628
4767-3. Do-it-yourself maintenance
Owners Manual_USA_M42C01_en
●Performance may be affected in
the following situations.
• Near a TV tower, electric power
plant, gas station, radio station,
large display, airpo rt or other facil-
ity that generates strong radio
waves or electrical noise
• When carrying a portable radio, cellular phone, cordless phone or
other wireless communication
device
If tire position information is not cor-
rectly displayed due to the radio
wave conditions, the display may be
corrected by driving and changing
the radio wave conditions.
●When the vehicle is parked, the
time taken for the warning to start
or go off could be extended.
●When tire inflation pressure
declines rapidly for example when
a tire has burst, the warning may
not function.
When replacing tires or wheels,
tire pressure warning valves and
transmitters must also be
installed.
When new tire pressure warning
valves and transmitters are
installed, new ID codes must be
registered in the tire pressure warn-
ing computer and the tire pressure
warning system must be initialized.
( P.481)
■When replacing the tires and
wheels
If the ID code of the tire pressure
warning valve and transmitter is not
registered, the tire pressure warning
system will not work properly. After driving for about 10 minutes, the tire
pressure warning light blinks for 1
minute and stays on to indicate a
system malfunction.
Installing tire pressure
warning valves and trans-
mitters
NOTICE
■Repairing or replacing tires,
wheels, tire pressure warn-
ing valves, transmitters and
tire valve caps
●When removing or fitting the
wheels, tires or the tire pressure
warning valves and transmit-
ters, contact your
Toyota dealer
as the tire pressure warning
valves and transmitters may be
damaged if not handled cor-
rectly.
●Make sure to install the tire
valve caps. If the tire valve caps
are not installed, water could
enter the tire pressure warning
valves and the tire pressure
warning valves could be bound.
●When replacing tire valve caps,
do not use tire valve caps other
than those specified. The cap
may become stuck.
■To avoid damage to the tire
pressure warning valves and
transmitters
When a tire is repa ired with liquid
sealants, the tire pressure warn-
ing valve and transmitter may not
operate properly. If a liquid seal-
ant is used, contact your Toyota
dealer as soon as possible. After
use of liquid sealant, make sure to
replace the tire p ressure warning
valve and transmitter when repair-
ing or replacing the tire.
Page 477 of 628
4777-3. Do-it-yourself maintenance
Owners Manual_USA_M42C01_en
7
Maintenance and care
■When rotating the tires
It is necessary to register the
position of each wheel after per-
forming a tire rotation.
Wheel position registration can
be performed by oneself. Wheel
position registration is per-
formed by driving forward with
moderate left and right turns.
However, depending on the driv-
ing conditions and driving envi-
ronment, registration may take
some time to complete.
■Registration of the tire posi-
tion
1 Park the vehicle in a safe
place and stop the EV sys-
tem for 15 minutes or more.
2 Start the EV system
( P.467)
Registration cannot be performed
while the vehicle is moving.
3Press or of the meter
control switches and select
.
4 Press or of the meter
control switches and select
“Vehicle Settings”, and then
press and hold the “OK”.
5 Press or of the meter
control switches and select “TPWS Setting”, and then
press “OK”.
6 Press or of the meter
control switches and select
“Tire Rotation”, and then
press “OK”.
7 Press or of the meter
control switches and select
“OK”, and then press “OK”.
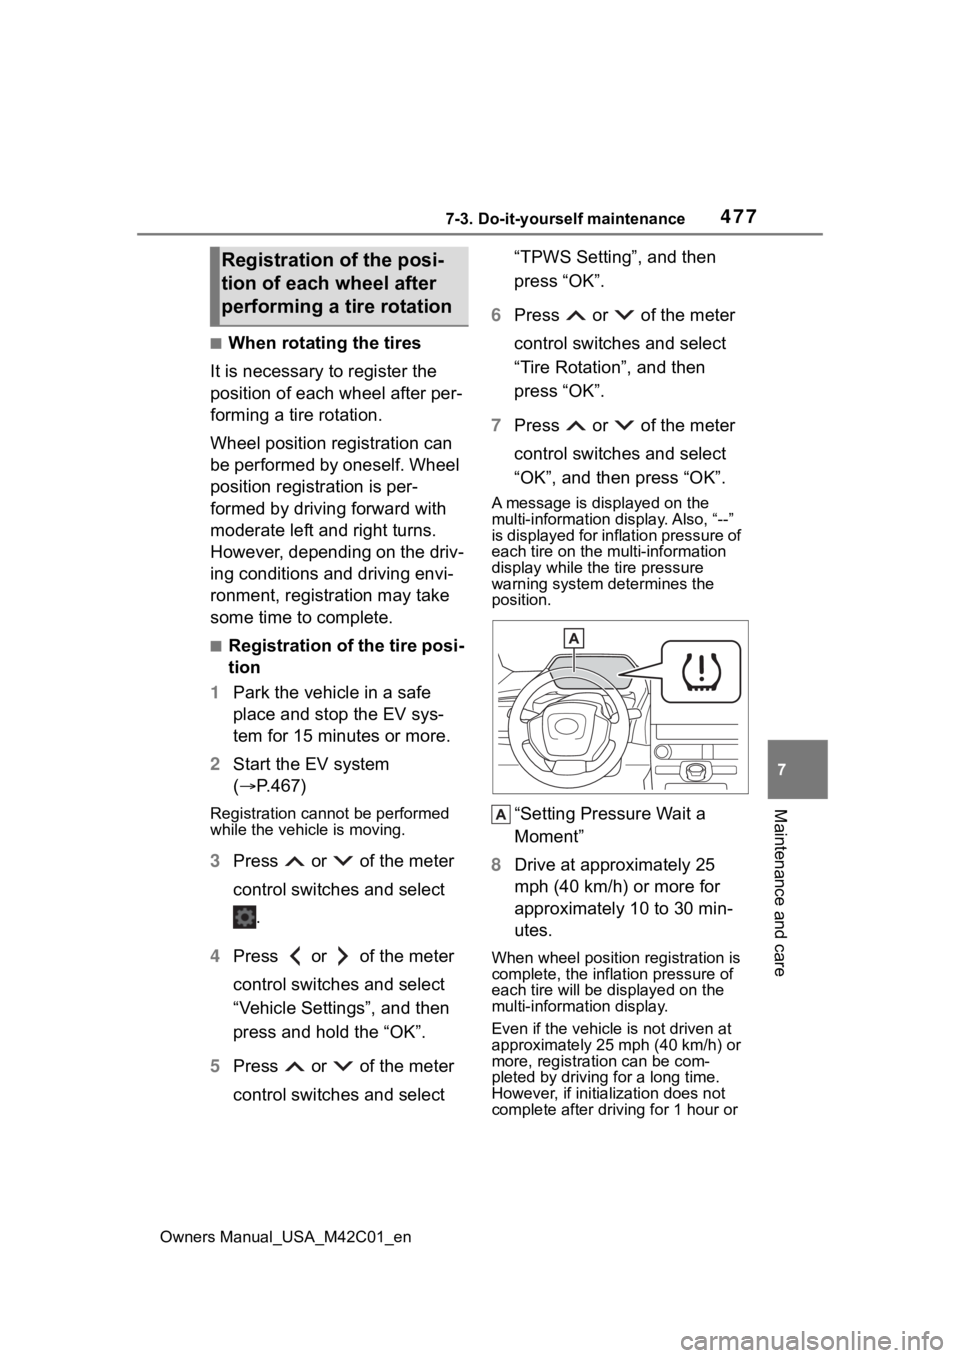
A message is displayed on the
multi-information di splay. Also, “--”
is displayed for inflation pressure of
each tire on the m ulti-information
display while the tire pressure
warning system determines the
position.
“Setting Pressure Wait a
Moment”
8 Drive at approximately 25
mph (40 km/h) or more for
approximately 10 to 30 min-
utes.
When wheel position registration is
complete, the infl ation pressure of
each tire will be displayed on the
multi-information display.
Even if the vehicle is not driven at
approximately 25 mph (40 km/h) or
more, registration can be com-
pleted by driving for a long time.
However, if initialization does not
complete after driving for 1 hour or
Registration of the posi-
tion of each wheel after
performing a tire rotation