lock TOYOTA CAMRY 2010 XV40 / 8.G Repair Manual
[x] Cancel search | Manufacturer: TOYOTA, Model Year: 2010, Model line: CAMRY, Model: TOYOTA CAMRY 2010 XV40 / 8.GPages: 538, PDF Size: 9.22 MB
Page 135 of 538
135
2-1. Driving procedures
2
When driving
Engine (ignition) switch (vehicles without smart key system)
■Starting the engine
Automatic transmission
Check that the parking brake is set.
Check that the shift lever is set in P.
Sit in the driver’s seat and firmly depress the brake pedal.
Turn the engine switch to the “START” position and start
the engine.
Manual transmission Check that the parking brake is set.
Check that the shift lever is set in N.
Firmly depress the clutch pedal.
Turn the engine switch to the “START” position and start
the engine.
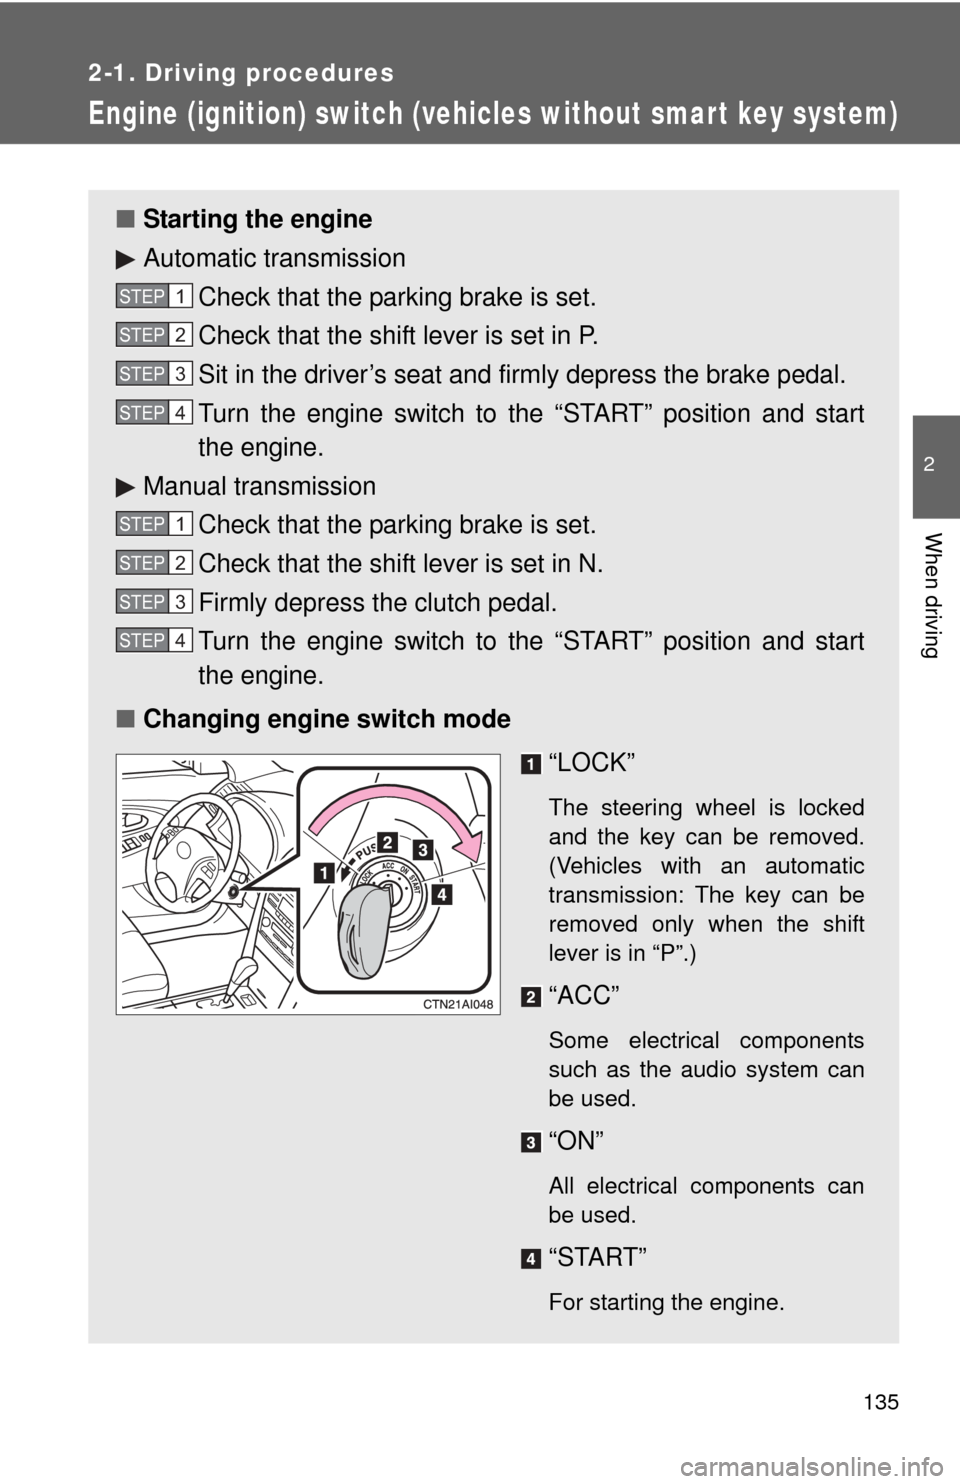
■ Changing engine switch mode
“LOCK”
The steering wheel is locked
and the key can be removed.
(Vehicles with an automatic
transmission: The key can be
removed only when the shift
lever is in “P”.)
“ACC”
Some electrical components
such as the audio system can
be used.
“ON”
All electrical components can
be used.
“START”
For starting the engine.
STEP1
STEP2
STEP3
STEP4
STEP1
STEP2
STEP3
STEP4
Page 136 of 538
136 2-1. Driving procedures
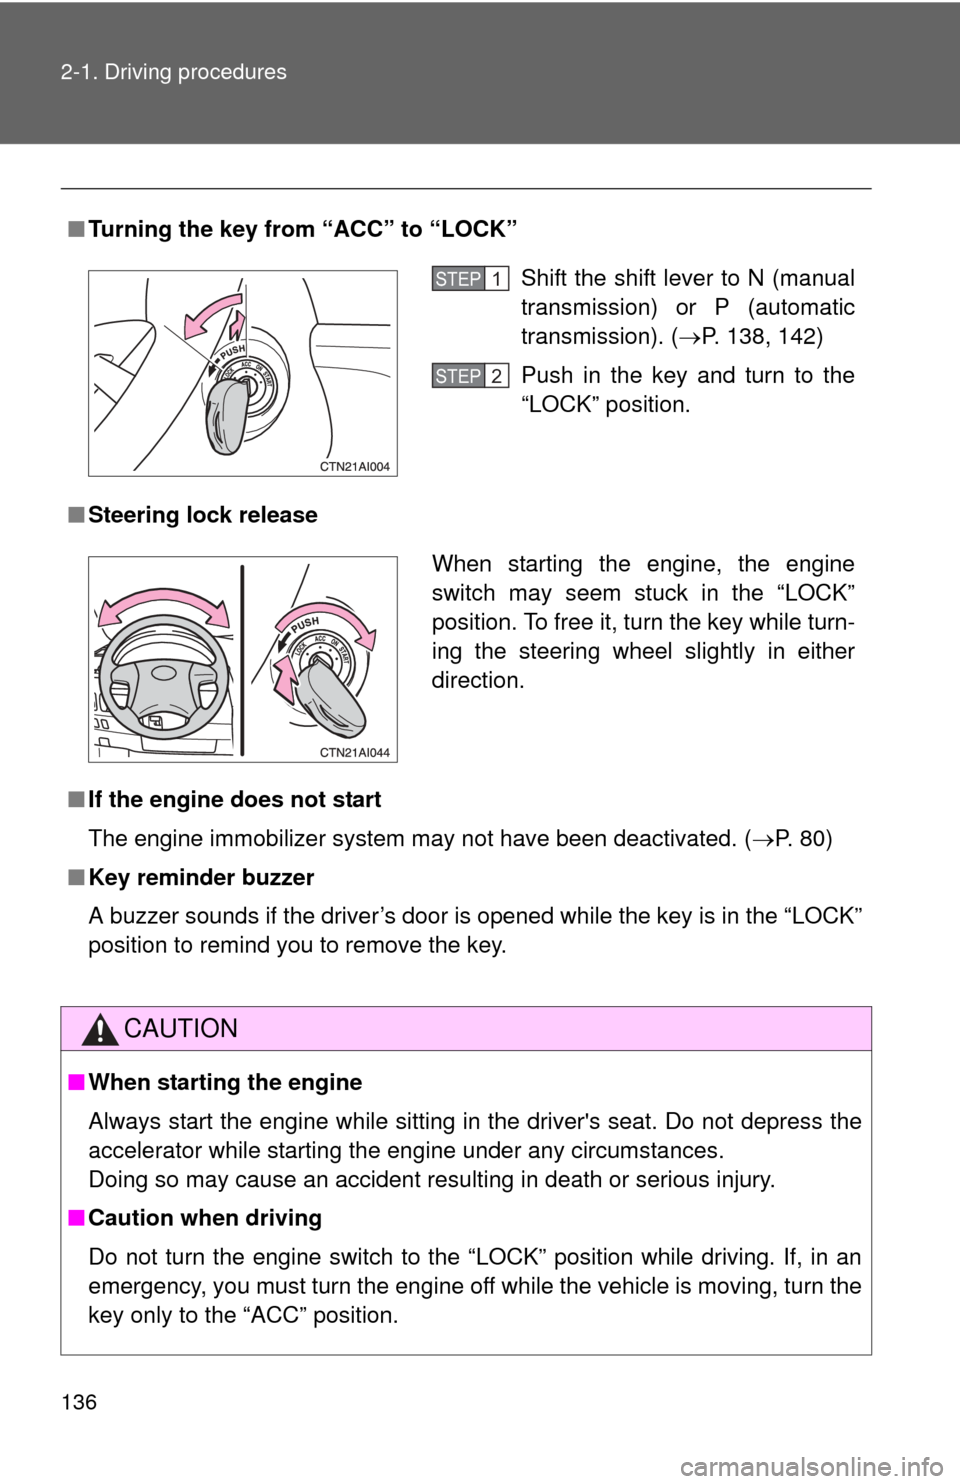
■Turning the key from “ACC” to “LOCK”
■ Steering lock release
■ If the engine does not start
The engine immobilizer system may not have been deactivated. ( P. 80)
■ Key reminder buzzer
A buzzer sounds if the driver’s door is opened while the key is in the “LOCK”
position to remind you to remove the key.
CAUTION
■When starting the engine
Always start the engine while sitting in the driver's seat. Do not depress the
accelerator while starting the engine under any circumstances.
Doing so may cause an accident resulting in death or serious injury.
■ Caution when driving
Do not turn the engine switch to the “LOCK” position while driving. If, in an
emergency, you must turn the engine off while the vehicle is moving, turn the
key only to the “ACC” position.
Shift the shift lever to N (manual
transmission) or P (automatic
transmission). ( P. 138, 142)
Push in the key and turn to the
“LOCK” position.STEP1
STEP2
When starting the engine, the engine
switch may seem stuck in the “LOCK”
position. To free it, turn the key while turn-
ing the steering wheel slightly in either
direction.
Page 146 of 538
146
2-1. Driving procedures
Hor n
■After adjusting the steering wheel
Make sure that the steering wheel is securely locked.
The horn may not sound if the steering wheel is not securely locked.
(P. 65)
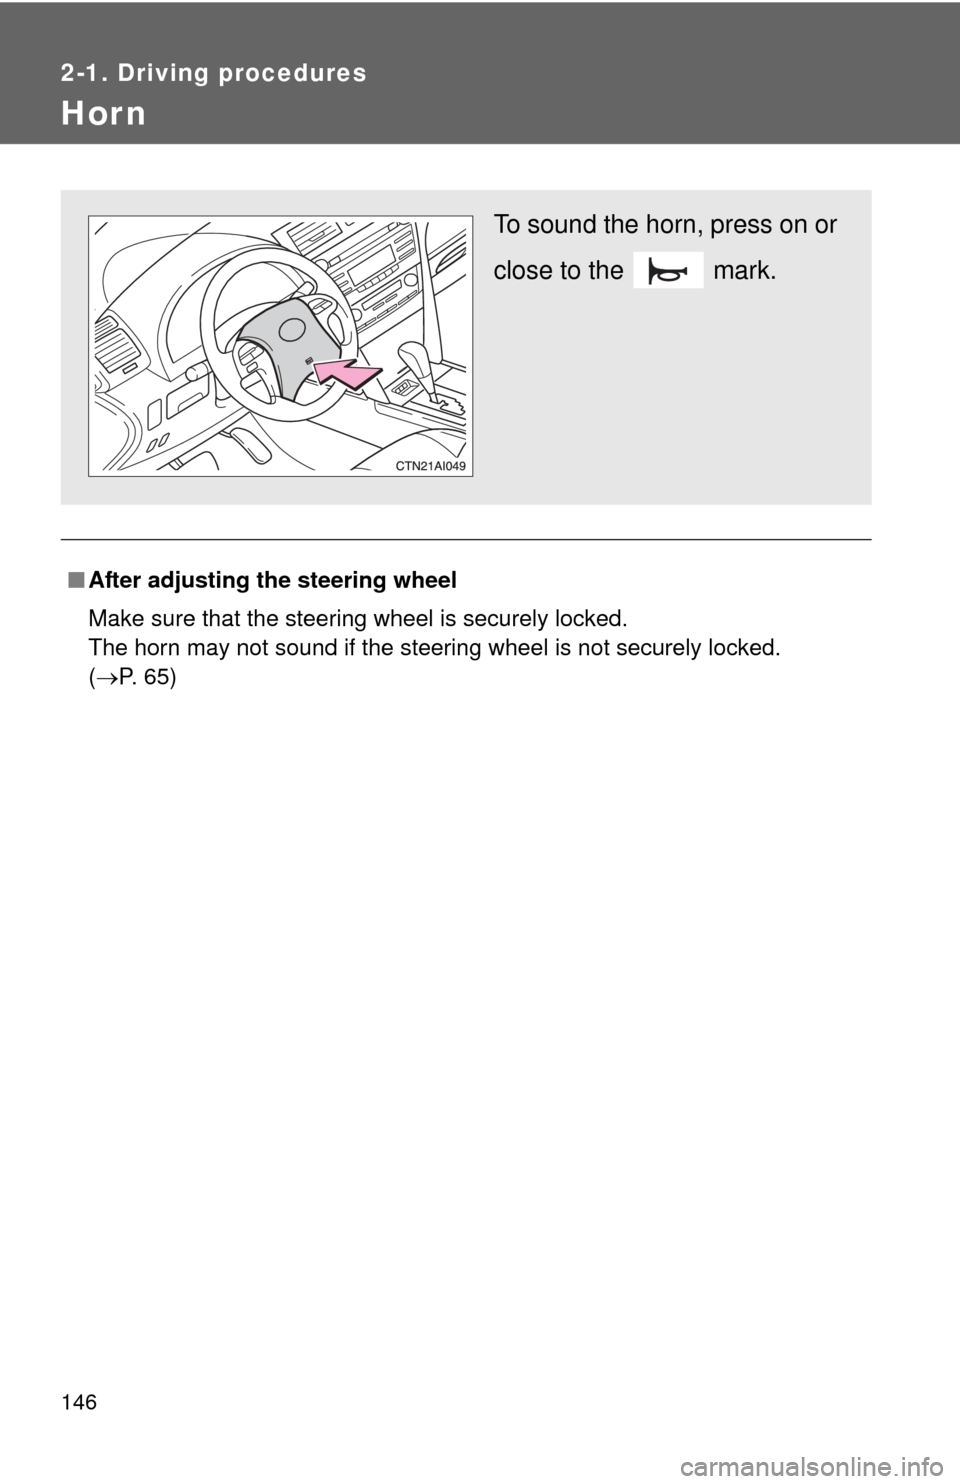
To sound the horn, press on or
close to the mark.
Page 150 of 538
150 2-2. Instrument cluster
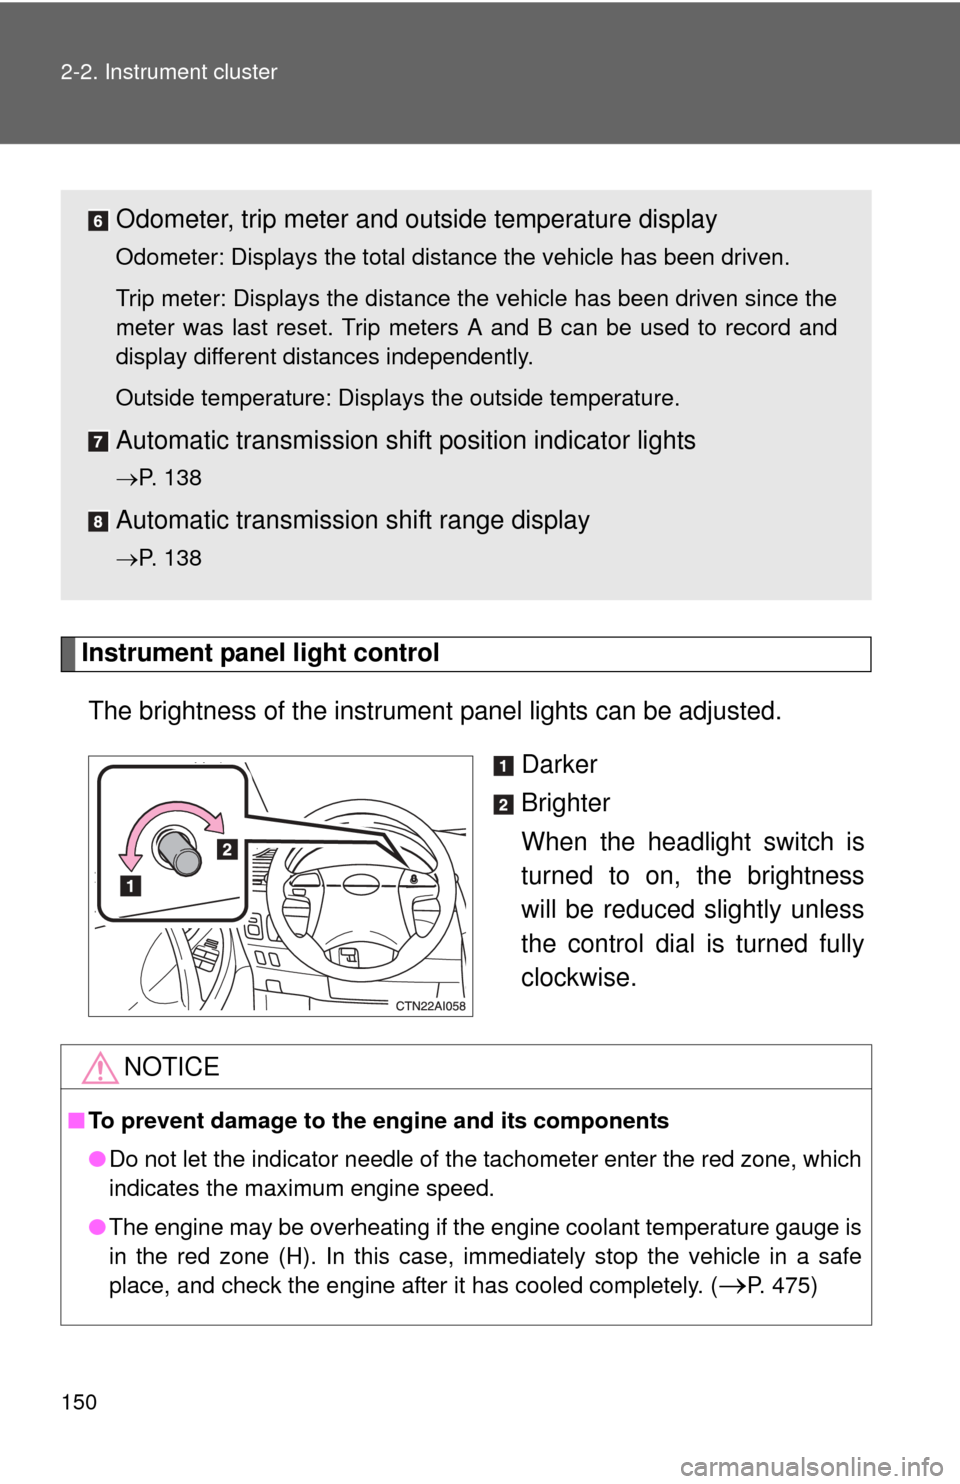
Instrument panel light controlThe brightness of the instrument panel lights can be adjusted.
Darker
Brighter
When the headlight switch is
turned to on, the brightness
will be reduced slightly unless
the control dial is turned fully
clockwise.
Odometer, trip meter and outside temperature display
Odometer: Displays the total distance the vehicle has been driven.
Trip meter: Displays the distance the vehicle has been driven since the
meter was last reset. Trip meters A and B can be used to record and
display different distances independently.
Outside temperature: Displays the outside temperature.
Automatic transmission shift position indicator lights
P. 138
Automatic transmission shift range display
P. 138
NOTICE
■To prevent damage to the engine and its components
●Do not let the indicator needle of the tachometer enter the red zone, which
indicates the maximum engine speed.
● The engine may be overheating if the engine coolant temperature gauge is
in the red zone (H). In this case, immediately stop the vehicle in a safe
place, and check the engine after it has cooled completely. (
P. 475)
Page 161 of 538
161
2-3. Operating the lights and wipers
2
When driving
■
The headlights can be oper ated automatically when
Vehicles with smart key system
The “ENGINE START STOP” switch is in IGNITION ON mode.
Vehicles without smart key system
The engine switch is in the “ON” position.
■ Daytime running light system
To make your vehicle more visible to other drivers, the headlights turn on
automatically (at a reduced intensity) whenever the engine is started and the
parking brake is released. Daytime running lights are not designed for use at
night.
For U.S.A.: Daytime running lights can be turned off by operating the switch.
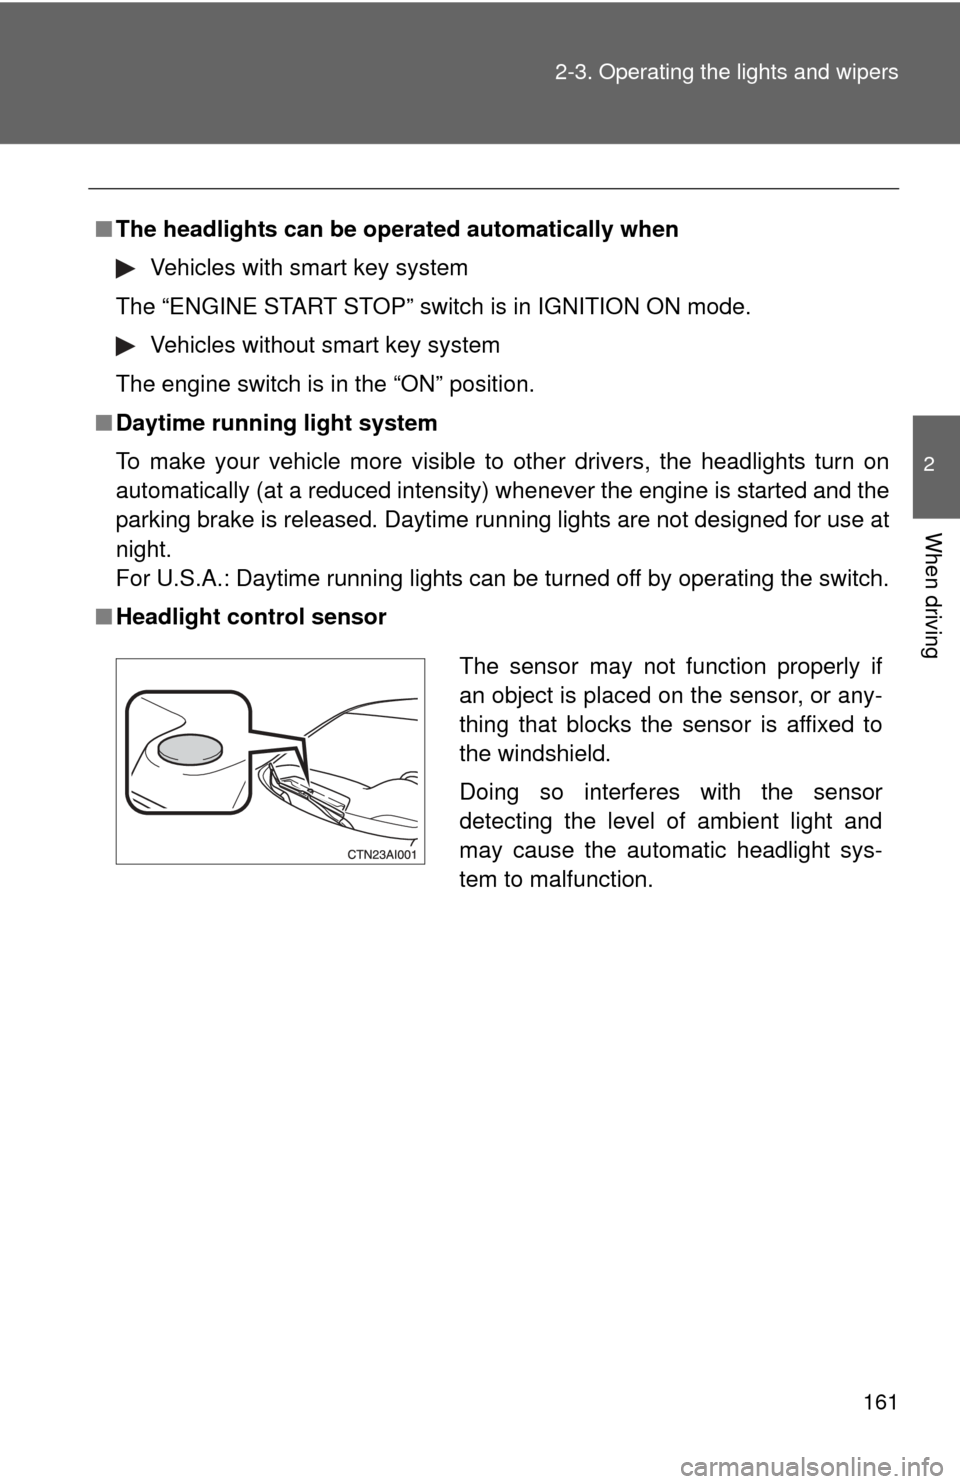
■ Headlight control sensor
The sensor may not function properly if
an object is placed on the sensor, or any-
thing that blocks the sensor is affixed to
the windshield.
Doing so interferes with the sensor
detecting the level of ambient light and
may cause the automatic headlight sys-
tem to malfunction.
Page 162 of 538
162 2-3. Operating the lights and wipers
■Automatic light off system
Vehicles with smart key system
● When the headlights are on: The headlights and tail lights turn off 30 sec-
onds after all doors are closed with the “ENGINE START STOP” switch
OFF. (The lights turn off immediately if on the key is pressed after
all doors are locked.)
● When only the tail lights are on: The tail lights turn off automatically if the
“ENGINE START STOP” switch is turned OFF and the driver’s door is
opened.
To turn the lights on again, turn the “ENGINE START STOP” switch to IGNI-
TION ON mode, or turn the headlight switch off and then back to or
position.
If any of the doors or trunk lid is kept open, the lights automatically turn off
after 20 minutes.
Vehicles without smart key system
● When the headlights are on: The headlights and tail lights turn off 30 sec-
onds after all doors are closed with the engine switch OFF. (Vehicles with
wireless remote control: The lights turn off immediately if on the
key is pressed after all doors are locked.)
● When only the tail lights are on: The tail lights turn off automatically if the
engine switch is turned OFF and the driver’s door is opened.
To turn the lights on again, turn the engine switch to the “ON” position, or
turn the headlight switch off and then back to or position.
If any of the doors or trunk lid is kept open, the lights automatically turn off
after 20 minutes.
■ Customization that can be co nfigured at Toyota dealer
Settings (e.g. Light sensor sensitivity) can be changed.
(Customizable features P. 510)
NOTICE
■To prevent battery discharge
Do not leave the lights on longer than necessary when the engine is not run-
ning.
Page 165 of 538
165
2-3. Operating the lights and wipers
2
When driving
■
The windshield wiper and washers can be operated when
Vehicles with smart key system
The “ENGINE START STOP” switch is in IGNITION ON mode.
Vehicles without smart key system
The engine switch is in the “ON” position.
■ If no windshield washer fluid sprays
Check that the washer nozzles are not blocked and if there is washer fluid in
the windshield washer fluid reservoir.
NOTICE
■When the windshield is dry
Do not use the wipers, as they may damage the windshield.
■ When there is no washer fluid spray from the nozzle
Damage to the washer fluid pump may be caused if the lever is pulled
toward you and held continually.
■ When a nozzle becomes blocked
Do not try to clear it with a pin or other object. The nozzle will be damaged.
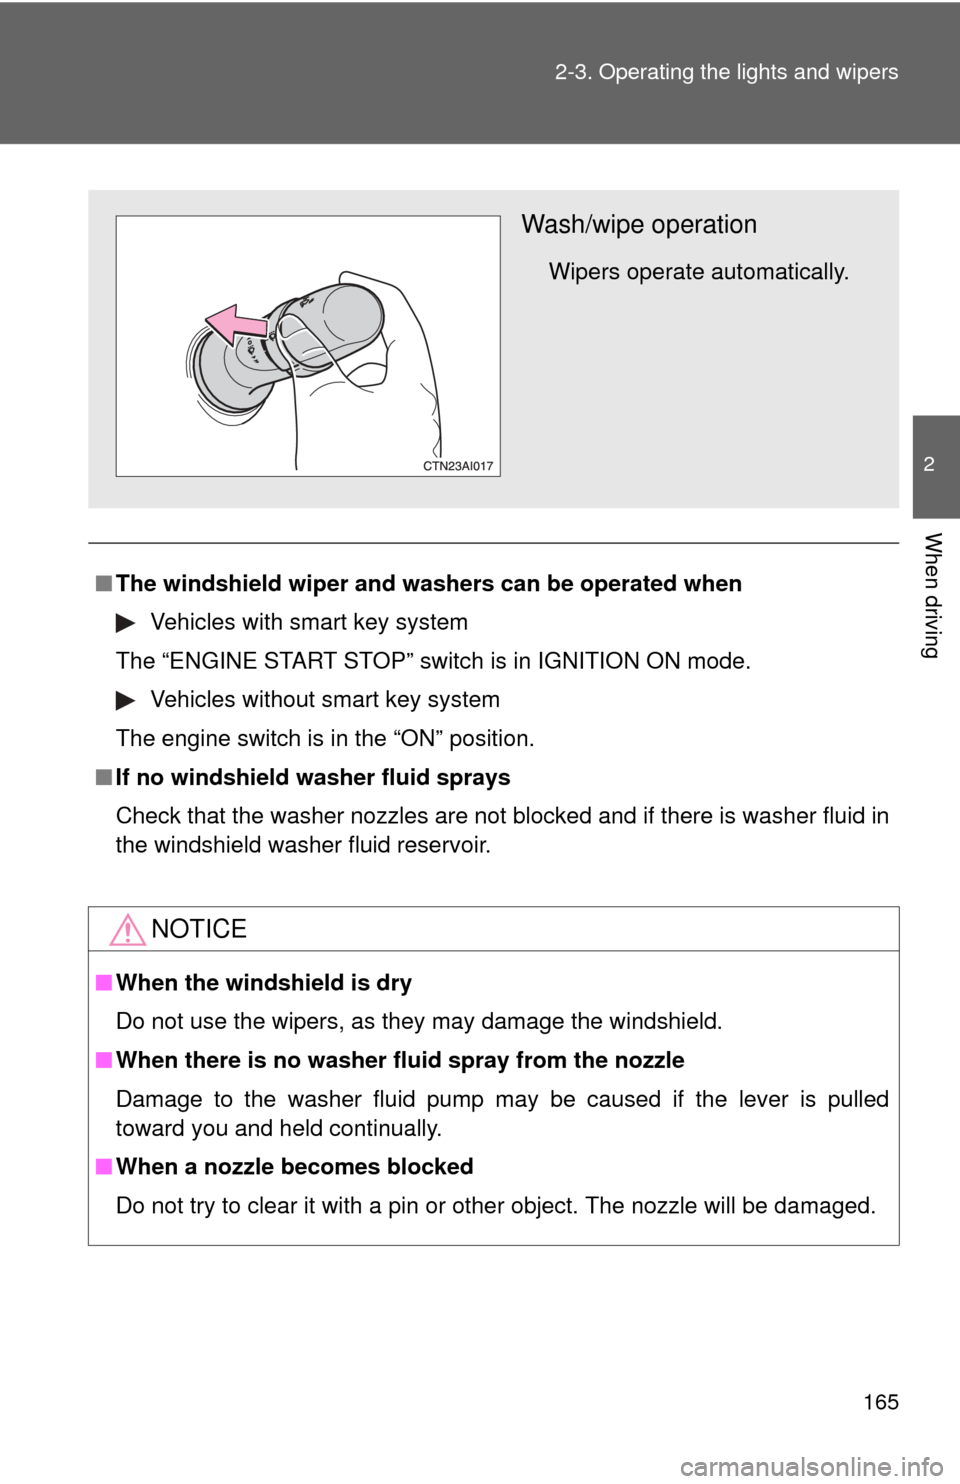
Wash/wipe operation
Wipers operate automatically.
Page 170 of 538
170
2-4. Using other driving systems
Driving assist systems
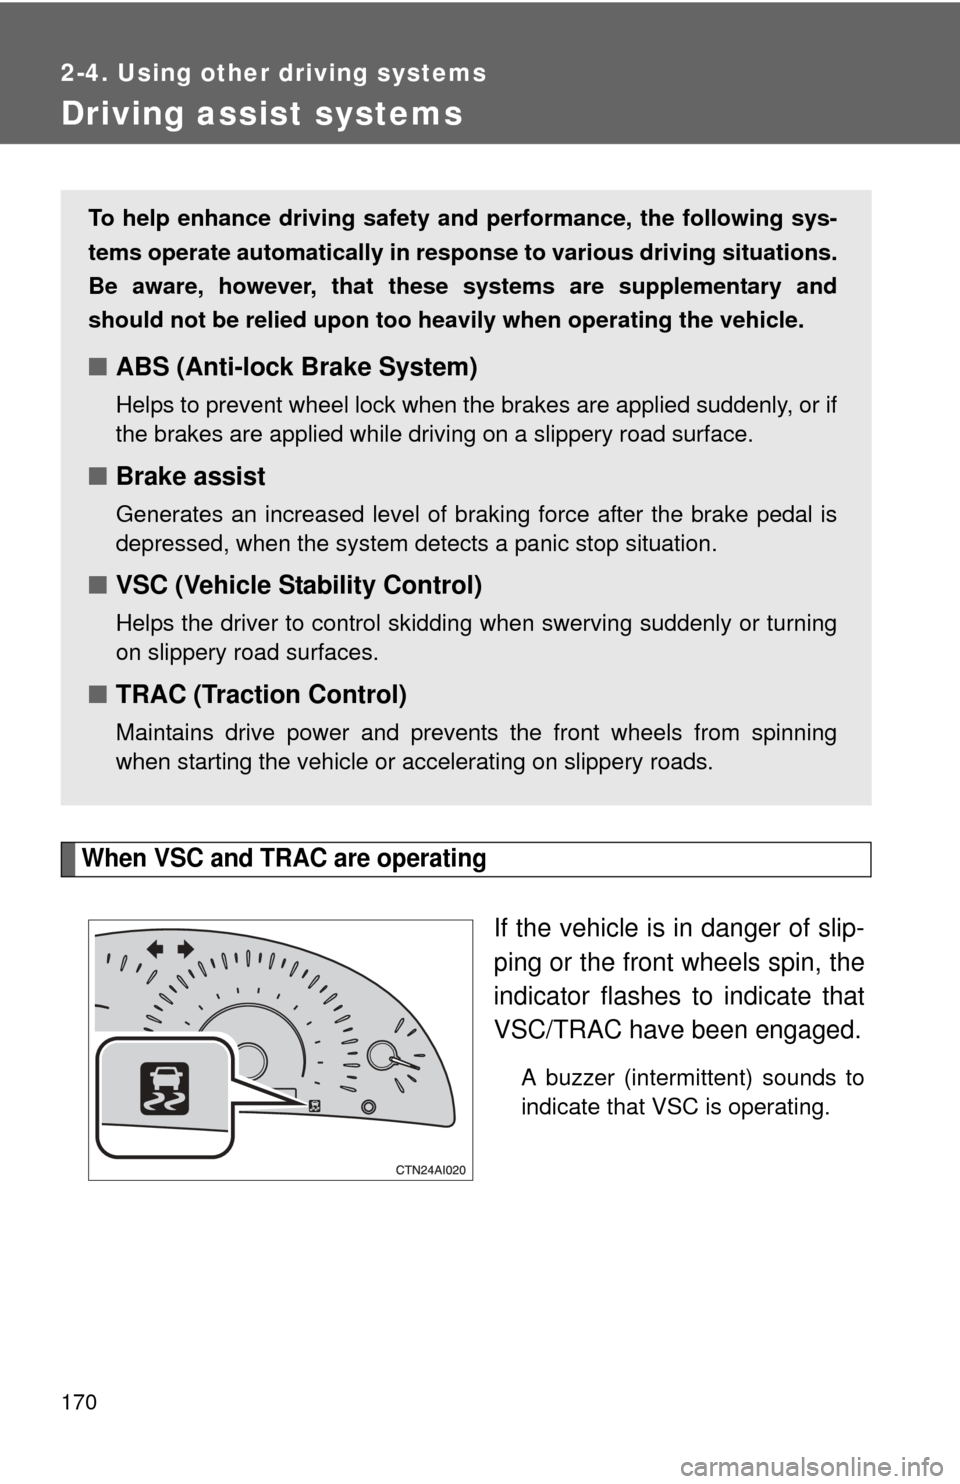
When VSC and TRAC are operating
If the vehicle is in danger of slip-
ping or the front wheels spin, the
indicator flashes to indicate that
VSC/TRAC have been engaged.
A buzzer (intermittent) sounds to
indicate that VSC is operating.
To help enhance driving safety and performance, the following sys-
tems operate automatically in res ponse to various driving situations.
Be aware, however, that these systems are supplementary and
should not be relied upon too h eavily when operating the vehicle.
■ABS (Anti-lock Brake System)
Helps to prevent wheel lock when the brakes are applied suddenly, or if
the brakes are applied while driving on a slippery road surface.
■Brake assist
Generates an increased level of braking force after the brake pedal is
depressed, when the system detects a panic stop situation.
■VSC (Vehicle Stability Control)
Helps the driver to control skidding when swerving suddenly or turning
on slippery road surfaces.
■TRAC (Traction Control)
Maintains drive power and prevents the front wheels from spinning
when starting the vehicle or accelerating on slippery roads.
Page 177 of 538

177
2-5. Driving information
2
When driving
CAUTION
■Storage precautions
Observe the following precautions.
Failing to do so may result in death or serious injury.
●Vehicles with fold-down type rear
seat: To prevent cargo and luggage
from sliding forward during braking, do not stack anything in the
enlarged trunk. Keep cargo and luggage low, as close to the floor as
possible.
●Vehicles with fold-down type rear seat: Never allow anyone to ride in
the enlarged trunk. It is not design ed for passengers. They should ride
in their seats with their seat belts properly fastened. Otherwise, they
are much more likely to suffer death or serious bodily injury, in the
event of sudden braking, su dden swerving or a collision.
●Do not place cargo or luggage in or on the following locations as the
item may get under the clutch, brake or accelerator pedal and prevent
the pedals from being depressed properly, block the driver’s vision, or
hit the driver or passengers, causing an accident.
• Driver’s feet
• Front passenger or rear seats (when stacking items)
• Package tray
• Instrument panel
• Dashboard
●Secure all items in the occupant compartment, as they may shift and
injure someone during sudden braking, sudden swerving or an acci-
dent.
■Capacity and distribution
●Do not exceed the maximum axle weight rating or the total vehicle
weight rating.
●Even if the total load of occupant's weight and the cargo load is less
than the total load capacity, do not apply the load unevenly.
Improper loading may cause deterioration of steering or braking con-
trol which may cause death or serious injury.
Page 189 of 538

189
2-5. Driving information
2
When driving
●
In order to maintain efficient engine braking and electrical charging
performance, do not use overdrive (automatic transmission) or the
5th gear (manual transmission).
● Due to the added load of the trailer, your vehicle's engine may
overheat on hot days (at temperatures over 85°F [30°C]) when
driving up a long or steep grade. If the engine coolant temperature
gauge indicates overheating, immedi ately turn off the air condition-
ing (if in use), pull your vehicle off the road and stop in a safe spot.
( P. 475)
● Always place wheel blocks under both the vehicle and the trailer
wheels when parking. Apply the parking brake firmly, and put the
transmission in P (automatic transmission) or in first or R (manual
transmission). Avoid parking on a slope, but if unavoidable, do so
only after performing the following:
Apply the brakes and keep them applied.
Have someone place wheel blocks under both the vehicle and
trailer wheels.
When the wheel blocks are in pl ace, release the brakes slowly
until the blocks absorb the load.
Apply the parking brake firmly.
Shift into first or R (manual transmission) or P (automatic
transmission) and turn off the engine.
● When restarting after parking on a slope:
With the transmission in the P position (automatic transmis-
sion) or the clutch pedal (m anual transmission) depressed,
start the engine. On vehicles with an automatic transmission,
be sure to keep the brake pedal pressed.
Shift into a forward gear. If reversing, shift into the R position.
Release the parking brake (also brake pedal on vehicles with
automatic transmission), and sl owly pull or back away from
the wheel blocks. Stop and apply the brakes.
Have someone retrieve the blocks.
STEP1
STEP2
STEP3
STEP4
STEP5
STEP1
STEP2
STEP3
STEP4