display TOYOTA CAMRY 2013 XV50 / 9.G Owners Manual
[x] Cancel search | Manufacturer: TOYOTA, Model Year: 2013, Model line: CAMRY, Model: TOYOTA CAMRY 2013 XV50 / 9.GPages: 540, PDF Size: 7 MB
Page 4 of 540

TABLE OF CONTENTSIndex
4
3-4. Using the storage featuresList of storage features....... 296
• Glove box ......................... 297
• Console box ..................... 298
• Coin holder ....................... 299
• Bottle holders ................... 300
• Cup holders ...................... 301
• Auxiliary boxes ................. 303
3-5. Other interior features Sun visors .......................... 305
Vanity mirrors ..................... 306
Clock .................................. 307
Outside temperature display .............................. 308
Ashtray ............................... 310
Power outlets ..................... 311
Seat heaters ....................... 314
Armrest............................... 316
Assist grips ......................... 317
Coat hooks ......................... 318
Floor mat ............................ 319
Trunk features .................... 321
Garage door opener ........... 323
Compass ............................ 330
Safety Connect................... 334 4-1. Maintenance and care
Cleaning and protecting the vehicle exterior ........... 342
Cleaning and protecting the vehicle interior ............ 345
4-2. Maintenance Maintenance requirements .................... 348
General maintenance ......... 351
Emission inspection and maintenance (I/M)
programs .......................... 355
4-3. Do-it-yourself maintenance Do-it-yourself service precautions ....................... 356
Hood ................................... 359
Positioning a floor jack........ 360
Engine compartment .......... 362
Tires.................................... 376
Tire inflation pressure ......... 382
Wheels................................ 386
Air conditioning filter ........... 389
Wireless remote control/ electronic key battery ....... 391
Checking and replacing fuses ................................. 396
Light bulbs .......................... 408
4Maintenance and care
Page 7 of 540
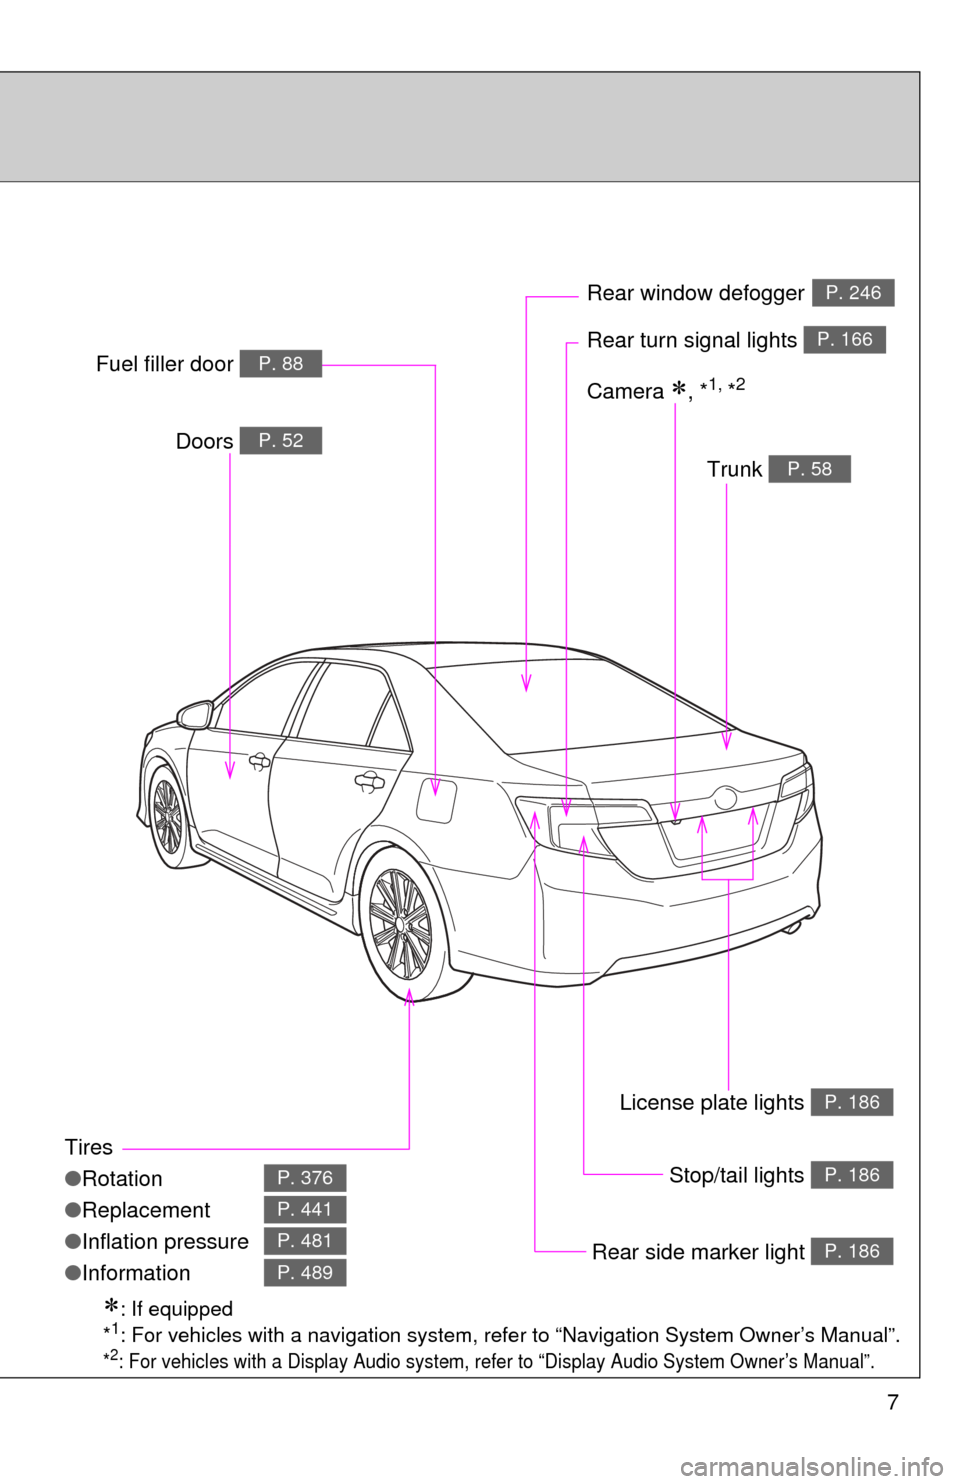
7
Tires
●Rotation
● Replacement
● Inflation pressure
● Information
P. 376
P. 441
P. 481
P. 489
Trunk P. 58
Doors P. 52
Rear turn signal lights P. 166
Rear window defoggerP. 246
Stop/tail lights P. 186
Rear side marker light P. 186
Fuel filler door P. 88
: If equipped
*1: For vehicles with a navigation system, refe r to “Navigation System Owner’s Manual”.
*2: For vehicles with a Display Audio system, re fer to “Display Audio System Owner’s Manual”.
Camera , *1, *2
License plate lights P. 186
Page 9 of 540
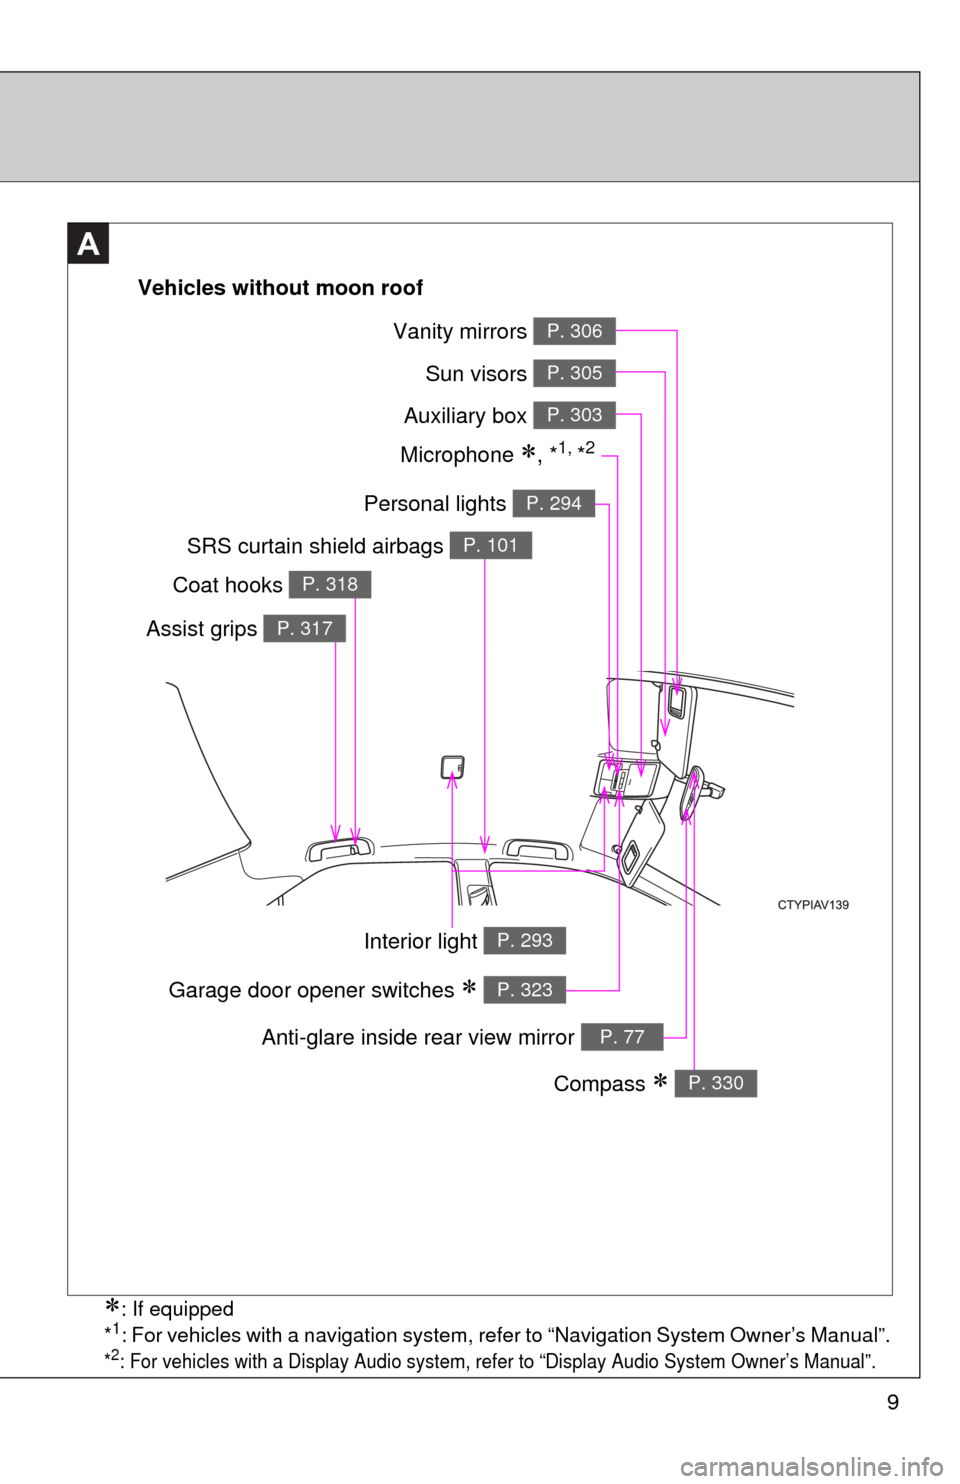
9
A
Vehicles without moon roof
Vanity mirrors P. 306
Sun visors P. 305
Auxiliary box P. 303
Personal lights P. 294
SRS curtain shield airbags P. 101
Interior light P. 293
Compass P. 330
Anti-glare inside rear view mirror P. 77
Garage door opener switches P. 323
Microphone , *1, *2
: If equipped
*1: For vehicles with a navigation system, refer to “Navigation System Owner’s Manual”.
*2: For vehicles with a Display Audio system, refer to “Display Audio System Owner’s Manual”.
Coat hooks P. 318
Assist grips P. 317
Page 11 of 540
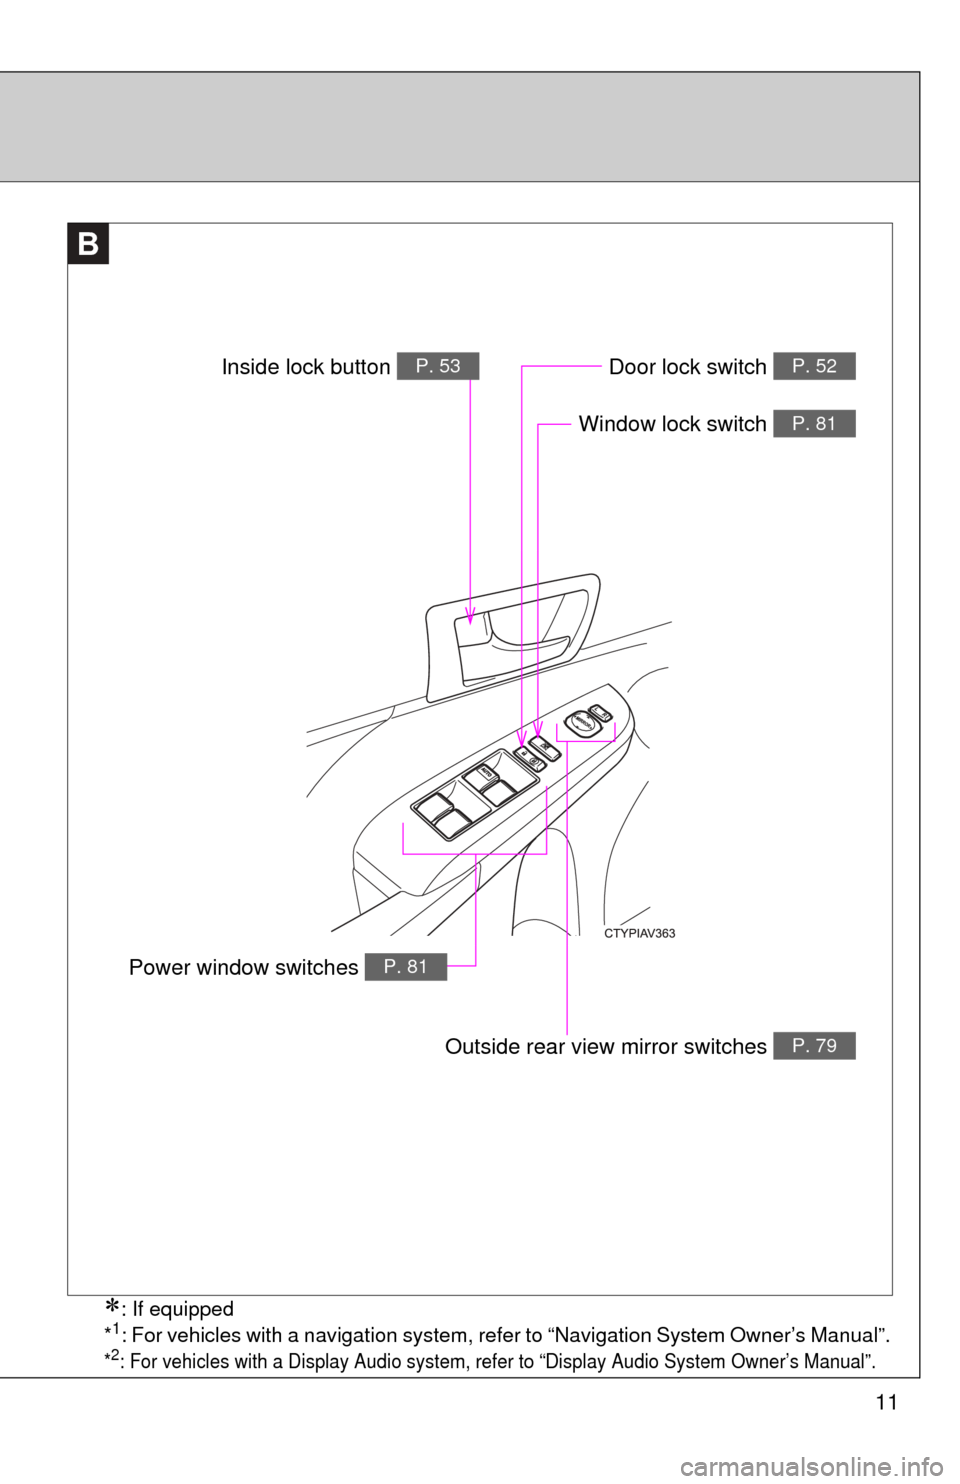
11
B
Window lock switch P. 81
Outside rear view mirror switches P. 79
Door lock switch P. 52
Power window switches P. 81
Inside lock button P. 53
: If equipped
*1: For vehicles with a navigation system, refer to “Navigation System Owner’s Manual”.
*2: For vehicles with a Display Audio system, refer to “Display Audio System Owner’s Manual”.
Page 13 of 540
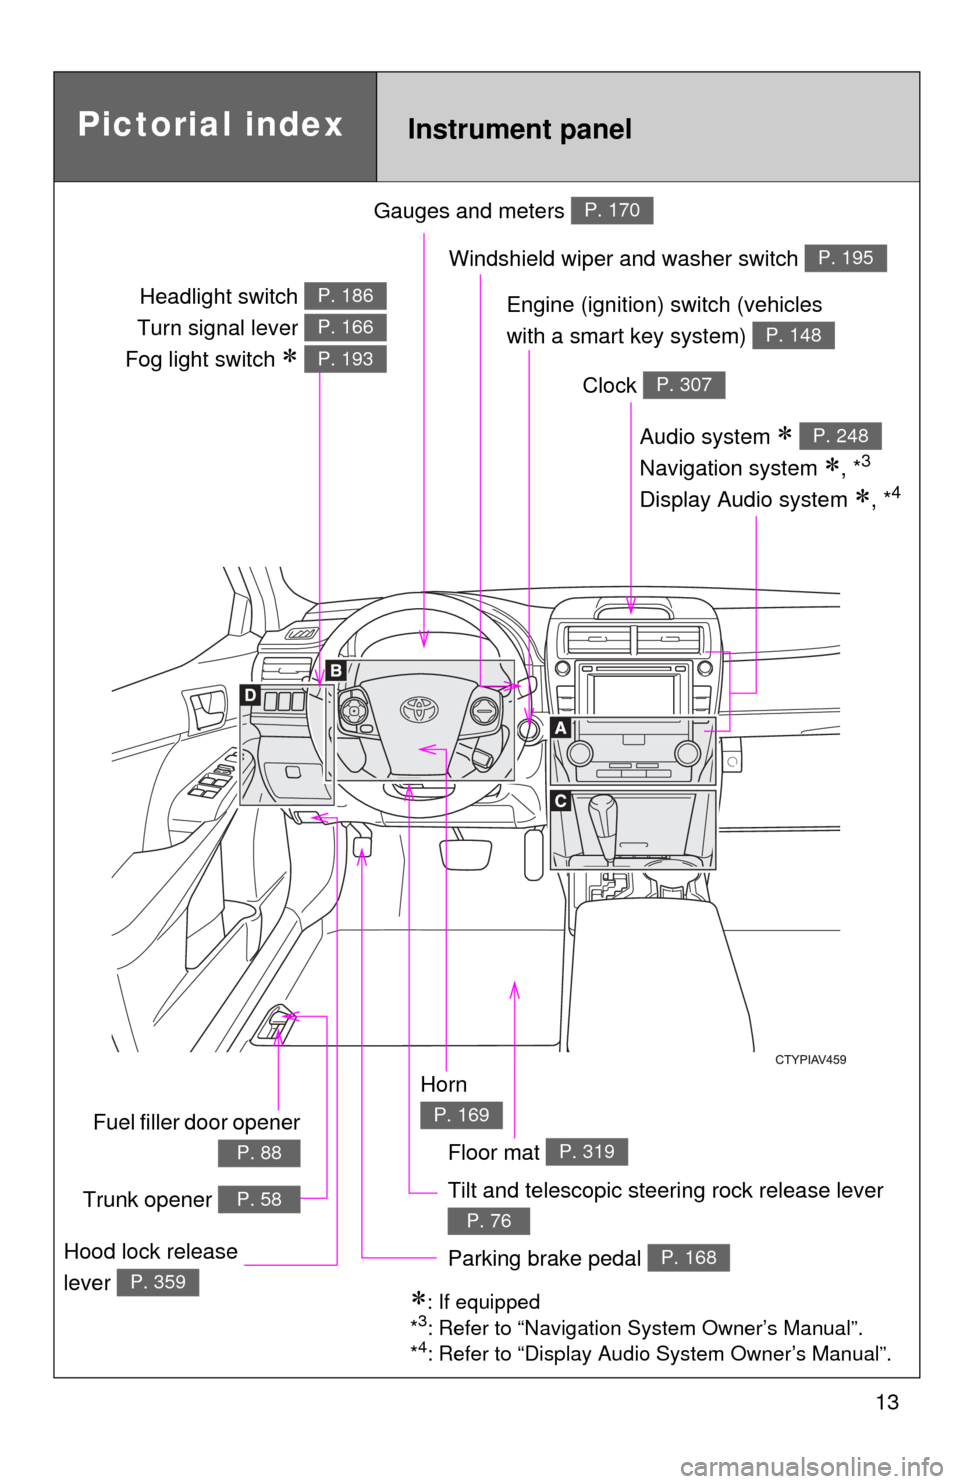
13
Gauges and meters P. 170
Tilt and telescopic steering rock release lever
P. 76
Pictorial indexInstrument panel
Audio system
Navigation system
, *3
Display Audio system , *4
P. 248
Windshield wiper and washer switch P. 195
Clock P. 307
Parking brake pedal P. 168Hood lock release
lever
P. 359: If equipped
*3: Refer to “Navigation System Owner’s Manual”.
*4: Refer to “Display Audio System Owner’s Manual”.
Horn
P. 169
Engine (ignition) switch (vehicles
with a smart key system)
P. 148
Headlight switch
Turn signal lever
Fog light switch
P. 186
P. 166
P. 193
Fuel filler door opener
P. 88
Trunk opener P. 58
Floor mat P. 319
Page 15 of 540
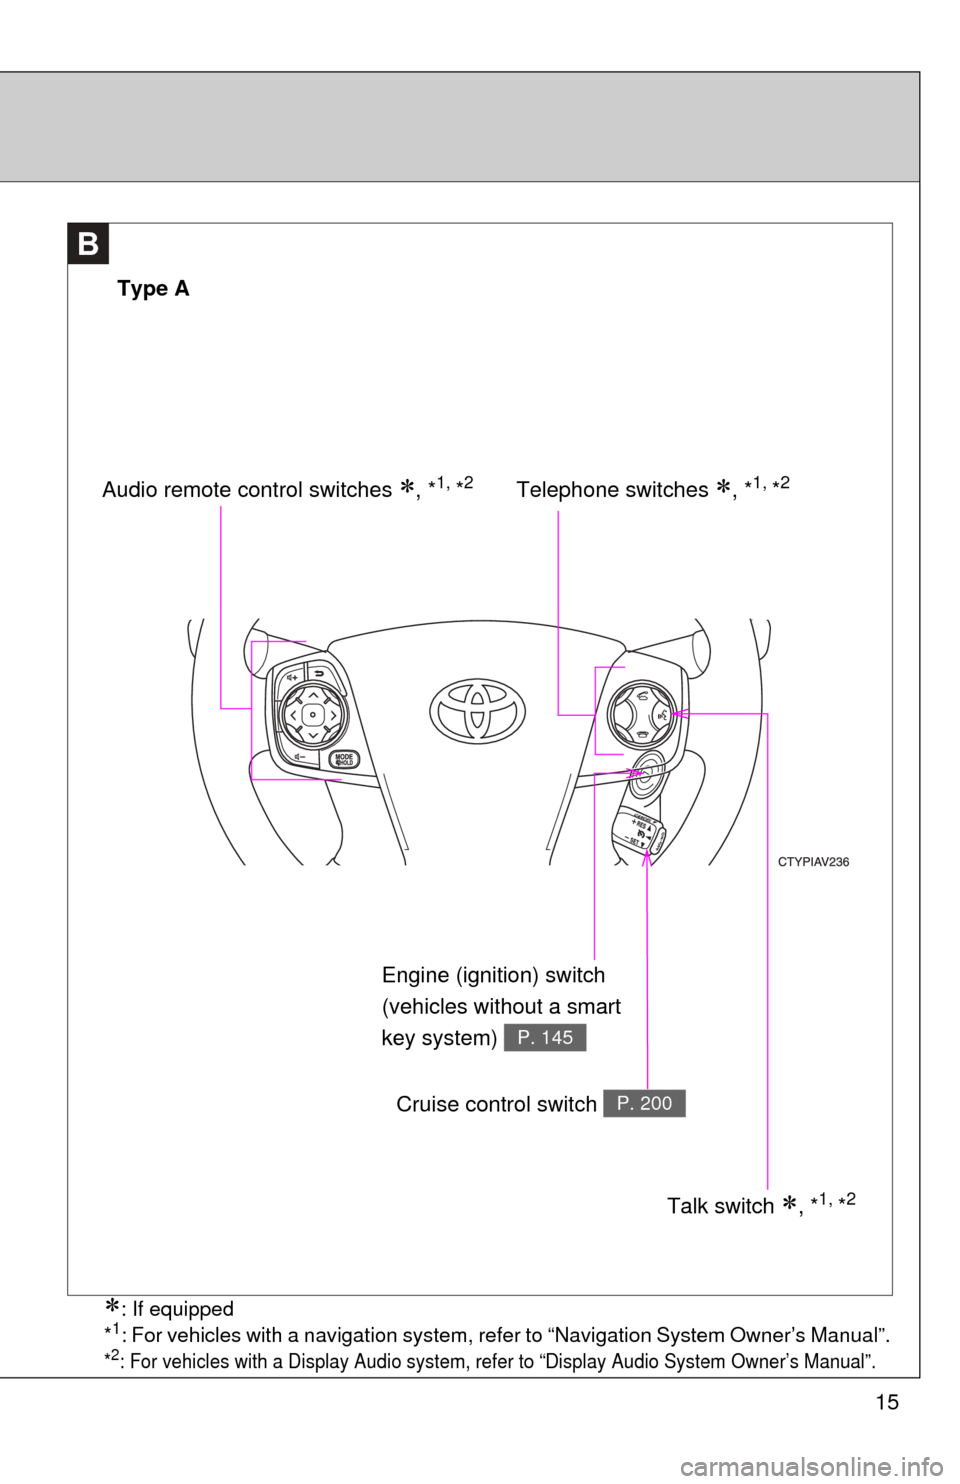
15
B
Telephone switches , *1, *2
Type A
Audio remote control switches , *1, *2
Talk switch , *1, *2
Cruise control switch P. 200
Engine (ignition) switch
(vehicles without a smart
key system)
P. 145
: If equipped
*1: For vehicles with a navigation system, refer to “Navigation System Owner’s Manual”.
*2: For vehicles with a Display Audio system, refer to “Display Audio System Owner’s Manual”.
Page 17 of 540
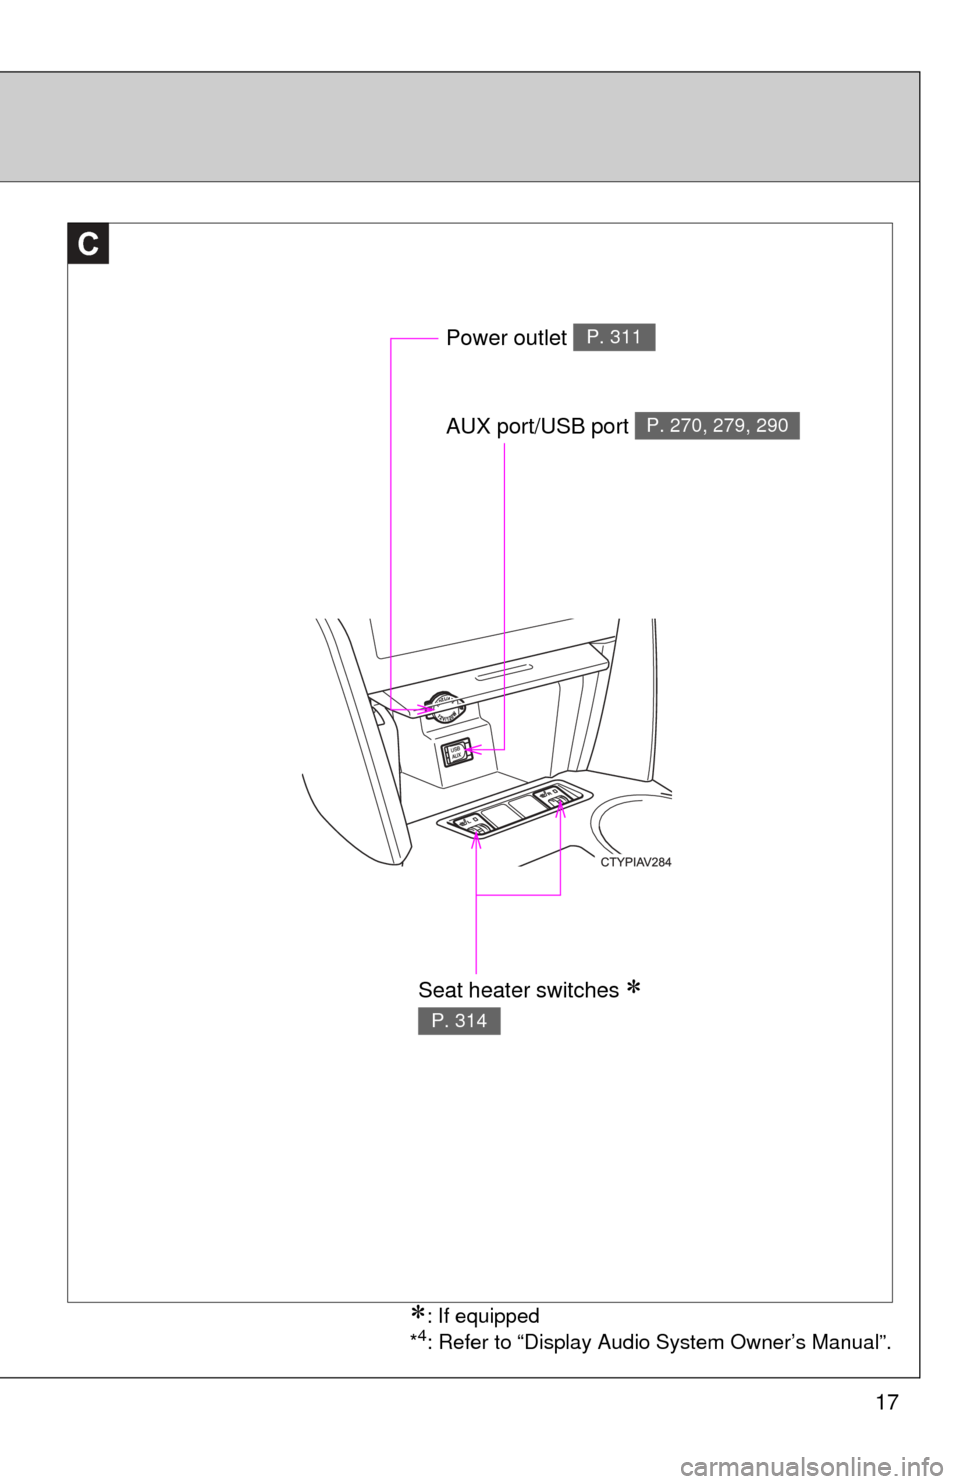
17
C
Power outlet P. 311
AUX port/USB port P. 270, 279, 290
Seat heater switches
P. 314
: If equipped
*4: Refer to “Display Audio System Owner’s Manual”.
Page 55 of 540
55
1-2. Opening, closing and locking the doors and trunk
1
Before driving
Automatic door locking and unlocking systems
The following functions can be set or cancelled:
■ Setting and canceling the functions (vehicles without naviga-
tion system and Display Audio system)
To switch between setting and canceling, follow the procedure
below.
Vehicles without a smart key system
Close all the doors and turn the engine switch to the “ON”
position. (Perform step 2 within 10 seconds.)
Vehicles with a smart key system
Close all the doors and turn the “ENGINE START STOP”
switch to IGNITION ON mode. (Perform step 2 within 10 sec-
onds.)
FunctionOperation
Shift position linked
door locking function Shifting the shift lever out of P locks all the
doors.
Shift position linked
door unlocking function Shifting the shift lever to P unlocks all the
doors.
Speed linked door lock-
ing function All the doors are locked when the vehicle
speed is approximately 12 mph (20 km/h) or
higher.
Driver's door linked
door unlocking function
(vehicles without a
smart key system) All the doors are unlocked when the driver's
door is opened within 10 seconds after turn-
ing the engine switch to “ACC” or “LOCK”.
Driver's door linked
door unlocking function
(vehicles with a smart
key system) All the doors are unlocked when the driver's
door is opened within 10 seconds after turn-
ing the “ENGINE START STOP” switch off.
STEP1
Page 123 of 540
123
1
1-7. Safety information
Before driving
Installing child restraints
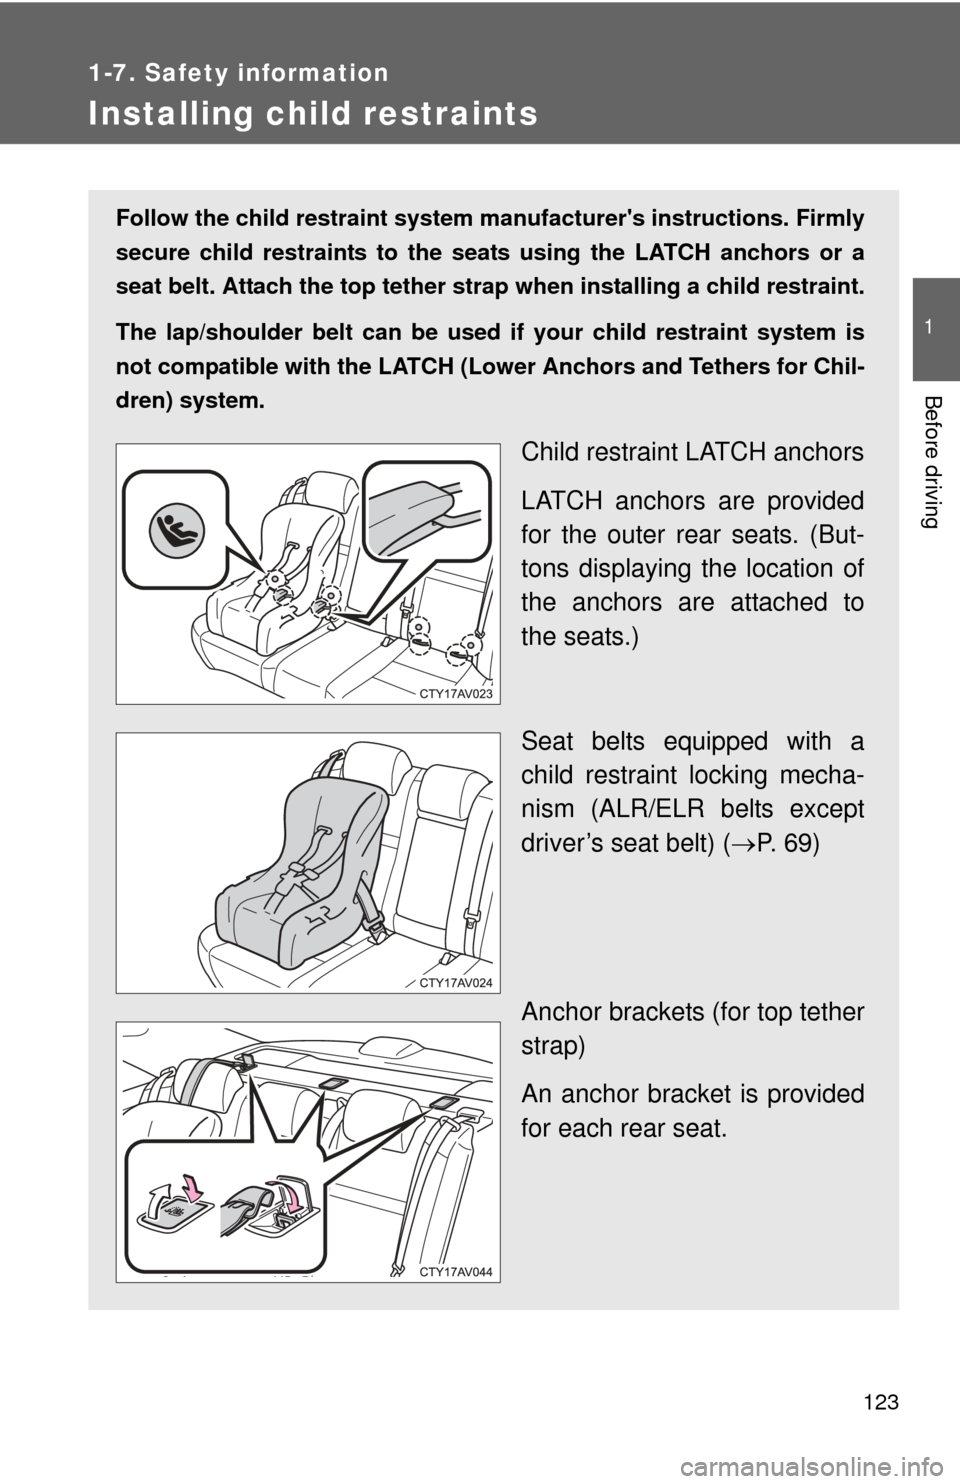
Follow the child restraint system manufacturer's instructions. Firmly
secure child restraints to the seat s using the LATCH anchors or a
seat belt. Attach the top tether stra p when installing a child restraint.
The lap/shoulder belt can be used if your child restraint system is
not compatible with the LATCH (Low er Anchors and Tethers for Chil-
dren) system.
Child restraint LATCH anchors
LATCH anchors are provided
for the outer rear seats. (But-
tons displaying the location of
the anchors are attached to
the seats.)
Seat belts equipped with a
child restraint locking mecha-
nism (ALR/ELR belts except
driver’s seat belt) ( P. 69)
Anchor brackets (for top tether
strap)
An anchor bracket is provided
for each rear seat.
Page 158 of 540
158 2-1. Driving procedures
■When driving with cruise control activated
Even when performing the following actions with the intent of enabling
engine braking, engine braking will not activate while driving in S mode and
downshifting to 5 or 4 because cruise control will not be canceled. ( P. 200)
■ If the shift lever cannot be shifted from P
P. 455
■ If the “S” indicator does not come on or the “D” indicator is displayed
even after shifting the shift lever to S
This may indicate a malfunction in the automatic transmission system. Have
the vehicle inspected by your Toyota dealer immediately.
(In this situation, the transmission will operate in the same manner as when
the shift lever is in D.)
■ Downshift restriction wa rning buzzer (S mode)
To help ensure safety and driving performance, downshifting operation may
sometimes be restricted. In some circumstances, downshifting may not be
possible even when the shift lever is operated. (A buzzer will sound twice.)
CAUTION
■ When driving on slippery road surfaces
Do not accelerate or shift gears suddenly.
Sudden changes in engine braking may cause the vehicle to spin or skid,
resulting in an accident.