TOYOTA HIGHLANDER 2009 XU40 / 2.G Owners Manual
HIGHLANDER 2009 XU40 / 2.G
TOYOTA
TOYOTA
https://www.carmanualsonline.info/img/14/6399/w960_6399-0.png
TOYOTA HIGHLANDER 2009 XU40 / 2.G Owners Manual
Trending: door lock, change language, traction control, headlights, key, child restraint, coolant temperature
Page 251 of 608
251
2-5. Driving information
2
When driving
CAUTION
●
Lubricate the hitch ball with a light coat of grease.
● Remove the trailer hitch whenever you are not towing a trailer. After
removing the hitch, seal any mounting hole in the vehicle body to prevent
entry of any substances into the vehicle.
■ When towing a trailer
●If the gross trailer weight exceeds 1000 lb. (453 kg), trailer brakes are
required. Toyota recommends trailers with brakes that conform to all appli-
cable federal and state/provincial regulations.
● Never tap into your vehicle's hydraulic system, as this will lower the vehi-
cle's braking effectiveness.
● Never tow a trailer without using a safety chain securely attached to both
the trailer and the vehicle. If damage occurs to the coupling unit or hitch
ball, there is danger of the trailer wandering into another lane.
NOTICE
■When installing a trailer hitch
●Use only the position recommended by your Toyota dealer. Do not install
the trailer hitch on the bumper as this may cause body damage.
● Do not use axle-mounted hitches, as they can cause damage to the axle
housing, wheel bearings, wheels or tires.
■ Safety chain
A safety chain must always be used between the towing vehicle and the
trailer. Leave sufficient slack in the chain for turns. The chain should cross
under the trailer tongue to prevent the tongue from dropping to the ground in
the case that it becomes damaged or separated. For the correct safety chain
installation procedure, ask your Toyota dealer.
■ Do not directly splice trailer lights
Directly splicing trailer lights may damage your vehicle's electrical system
and cause a malfunction.
Page 252 of 608
252
2-5. Driving information
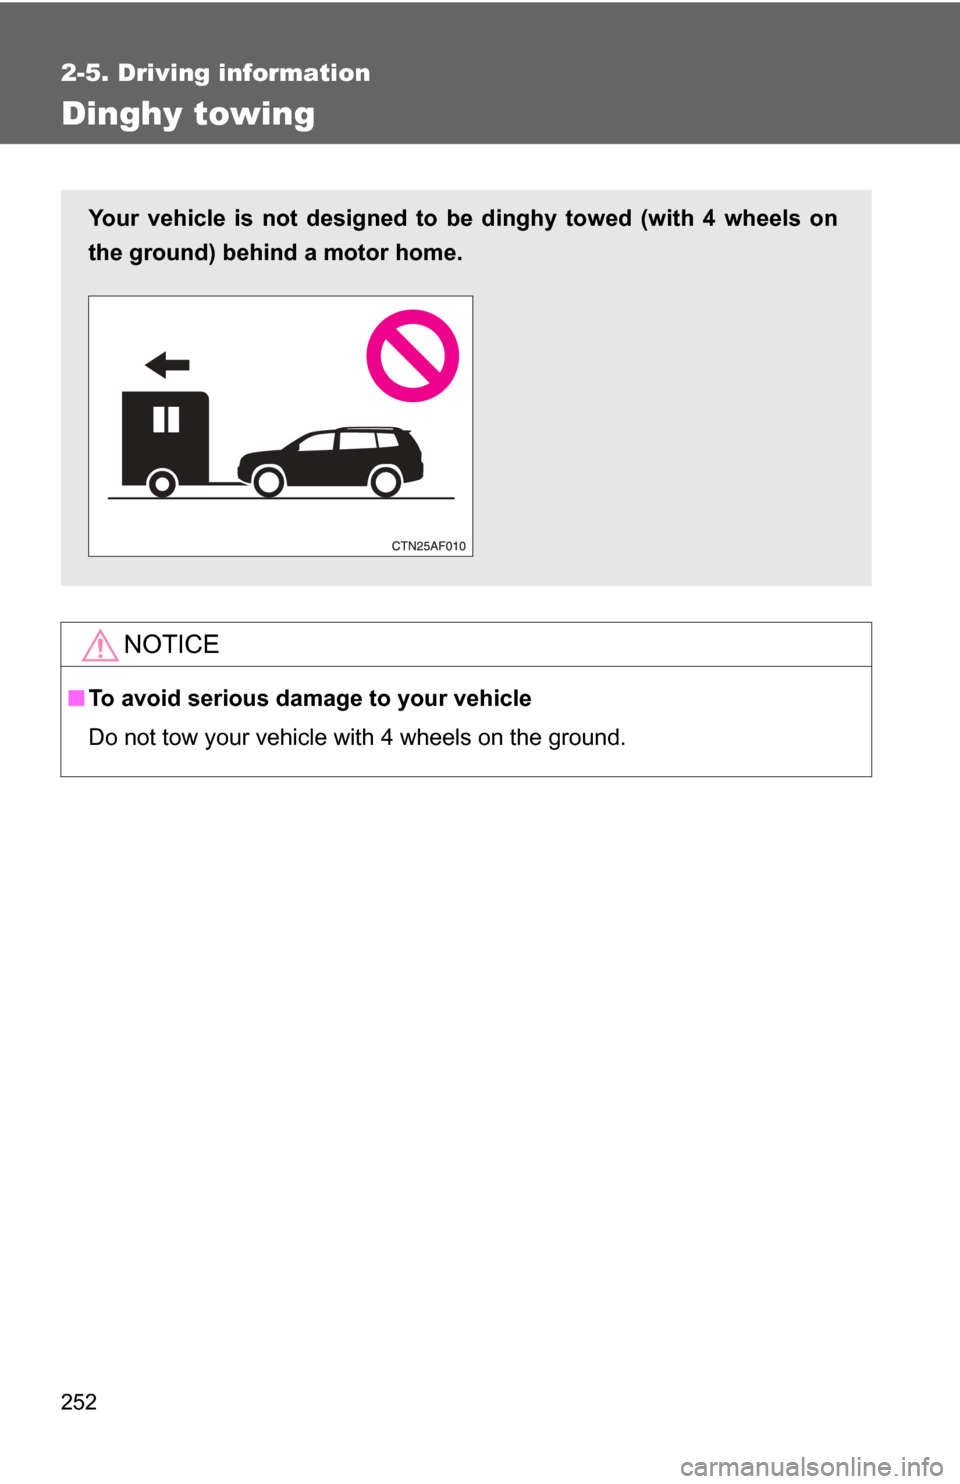
Dinghy towing
NOTICE
■To avoid serious damage to your vehicle
Do not tow your vehicle with 4 wheels on the ground.
Your vehicle is not designed to be dinghy towed (with 4 wheels on
the ground) behind a motor home.
Page 253 of 608
253
2-5. Driving information
2
When driving
Page 254 of 608
254
3-1. Using the air conditioning system and defogger
Front manual air conditioning system ....... 256
Front automatic air conditioning system ....... 263
Rear manual air conditioning system ....... 271
Rear automatic air conditioning system ....... 274
Rear window and outside rear view mirror
defoggers ....................... 277
Windshield wiper de-icer ............................ 279
Using the steering wheel climate remote control
switches ......................... 280 3-2. Using the audio system
Audio system ................... 281
Using the radio ................. 284
Using the CD player ......... 290
Playing back MP3 and WMA discs ..................... 297
Optimal use of the audio system.................. 304
Using the AUX adapter .... 307
Using the steering wheel audio switches ............... 309
3-3. Using the rear audio system Rear seat entertainment system features ............. 311
Using the DVD player (DVD video) ................... 318
Using the DVD player (video CD)...................... 327
Using the DVD player (audio CD/CD text) ........ 330
Using the DVD player (MP3 discs) .................... 331
Using the video mode ...... 333
Changing the initial setting ............................ 335
Page 255 of 608
Interior features3
255
3-4. Using the hands-free phone system (for cellular phone)
Hands-free phone system (for cellular phone)
features .......................... 342
Using the hands-free phone system ................ 346
Making a phone call ......... 353
Setting a cellular phone ............................. 357
Security and system setup .............................. 362
Using the phone book ...... 365
3-5. Using the interior lights Interior lights list ............... 372
• Personal/interior light main switch .................... 373
• Personal/interior
lights .............................. 373
• Interior light .................... 374 3-6. Using the storage features
List of storage features .... 375
• Glove box....................... 376
• Console box ................... 377
• Overhead console .......... 378
• Cup holders ................... 379
• Bottle holders ................. 383
• Auxiliary boxes ............... 384
• Side table ....................... 386
3-7. Other interior features Sun visors ........................ 388
Vanity mirrors ................... 389
Clock (vehicles without multi-information
display) .......................... 390
Conversation mirror ......... 391
Power outlets ................... 392
Seat heaters..................... 396
Armrests........................... 398
Floor mat .......................... 399
Luggage compartment features .......................... 400
Garage door opener......... 406
Compass .......................... 411
Page 256 of 608
256
3-1. Using the air conditioning system and defogger
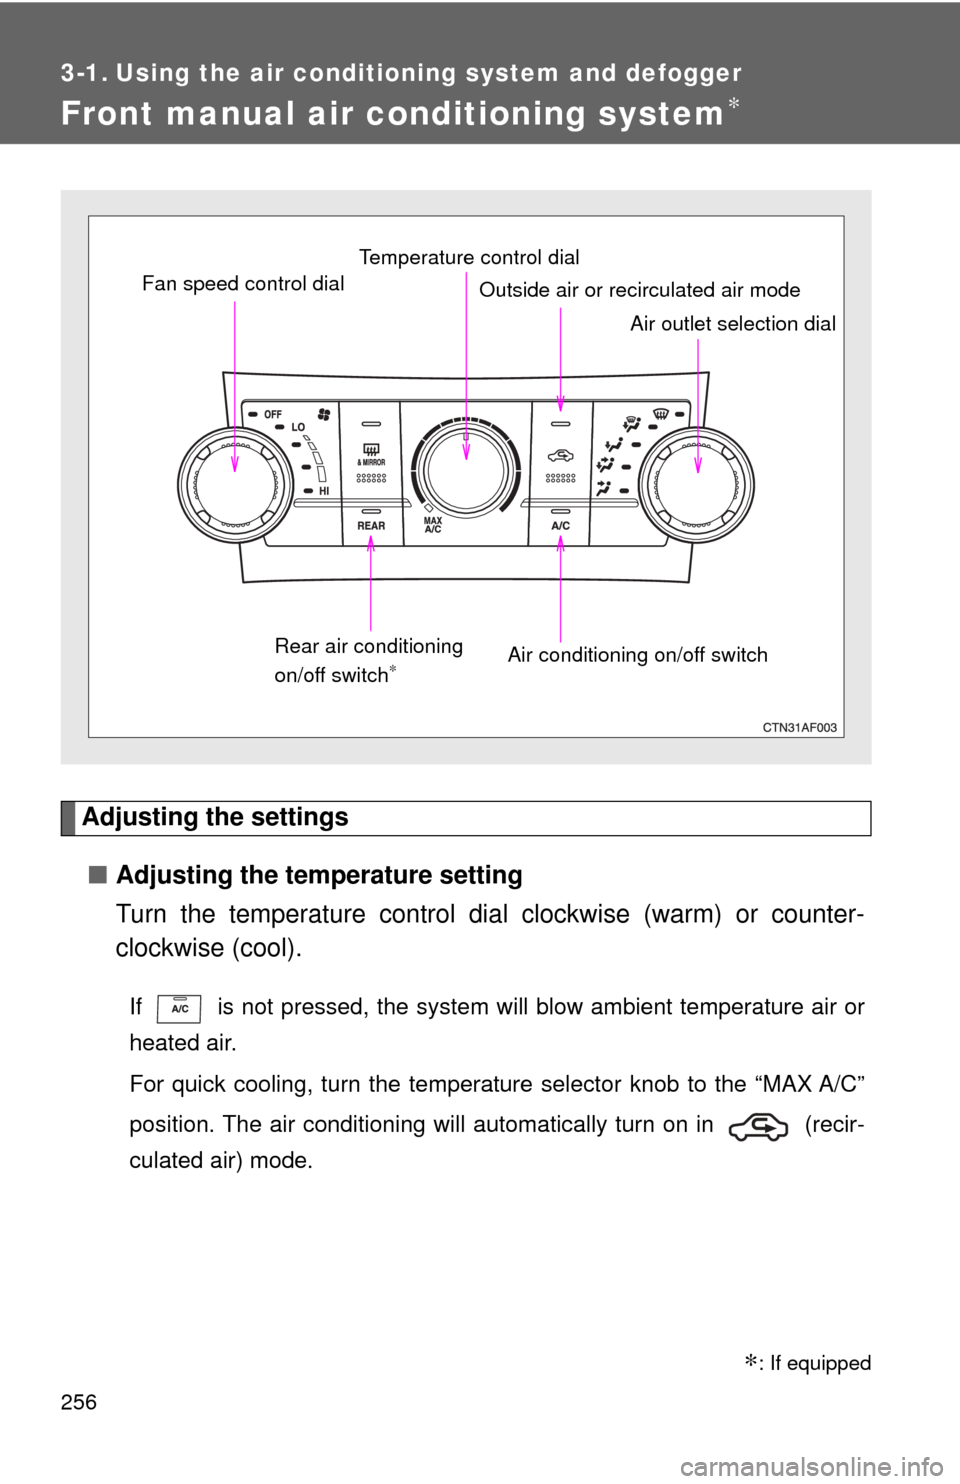
Front manual air conditioning system∗
Adjusting the settings■ Adjusting the temperature setting
Turn the temperature control dial clockwise (warm) or counter-
clockwise (cool).
If is not pressed, the system will blow ambient temperature air or
heated air.
For quick cooling, turn the temperature selector knob to the “MAX A/C”
position. The air conditioning will automatically turn on in (recir-
culated air) mode.
Fan speed control dial
Air outlet selection dial
Air conditioning on/off switch
Temperature control dial
Outside air or recirculated air mode
Rear air conditioning
on/off switch∗
∗: If equipped
Page 257 of 608
257
3-1. Using the air conditioning system
and defogger
3
Interior features
■Adjusting the fan speed
Turn the fan speed control dial clockwise (increase) or counter-
clockwise (decrease).
Turn the dial to “OFF” to turn the fan off.
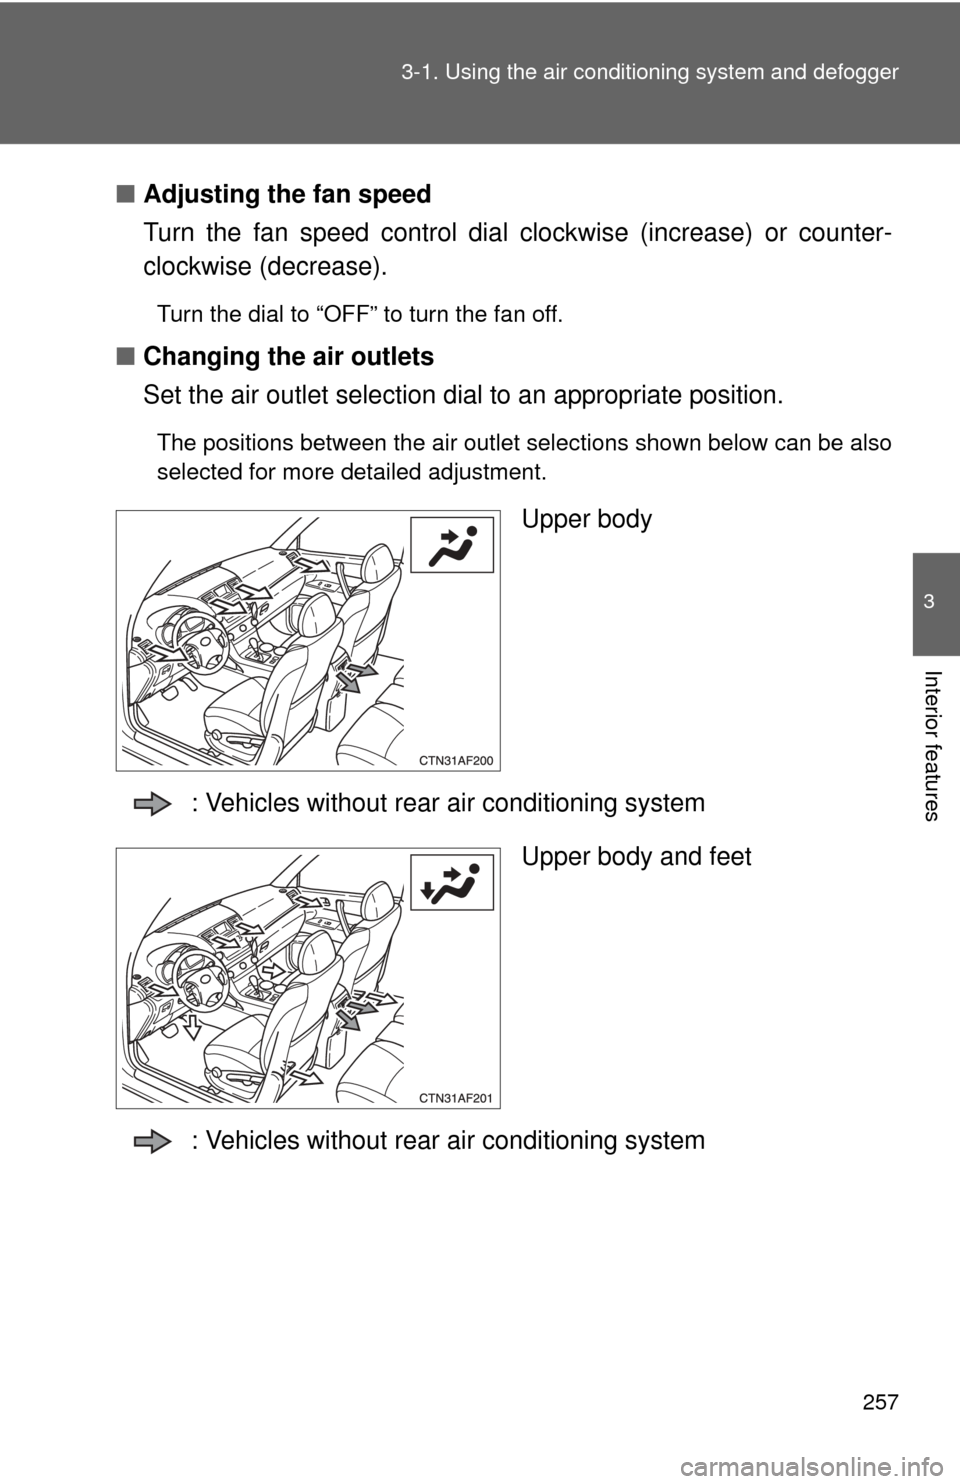
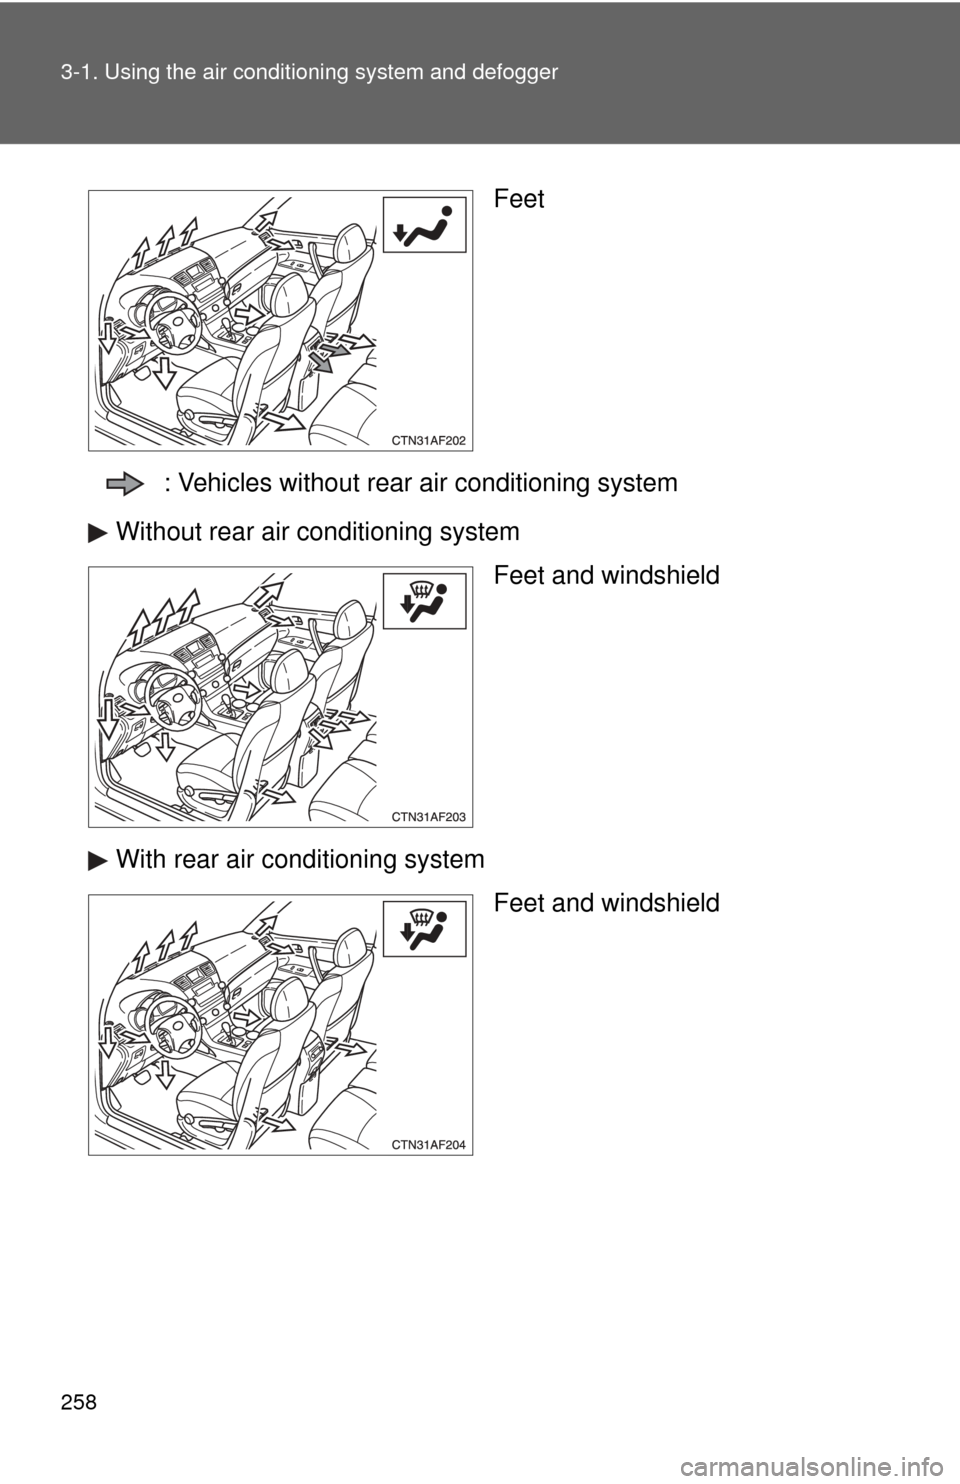
■ Changing the air outlets
Set the air outlet selection di al to an appropriate position.
The positions between the air outlet selections shown below can be also
selected for more detailed adjustment.
Upper body
: Vehicles without rear air conditioning system Upper body and feet
: Vehicles without rear air conditioning system
Page 258 of 608
258 3-1. Using the air conditioning system and defogger
Feet
: Vehicles without rear air conditioning system
Without rear air conditioning system Feet and windshield
With rear air conditioning system Feet and windshield
Page 259 of 608
259
3-1. Using the air conditioning system
and defogger
3
Interior features
■Switching between outside air and recirculated air modes
Press .
The mode switches between outside air mode (indicator off) and recircu-
lated air mode (indicator on) modes each time is pressed.
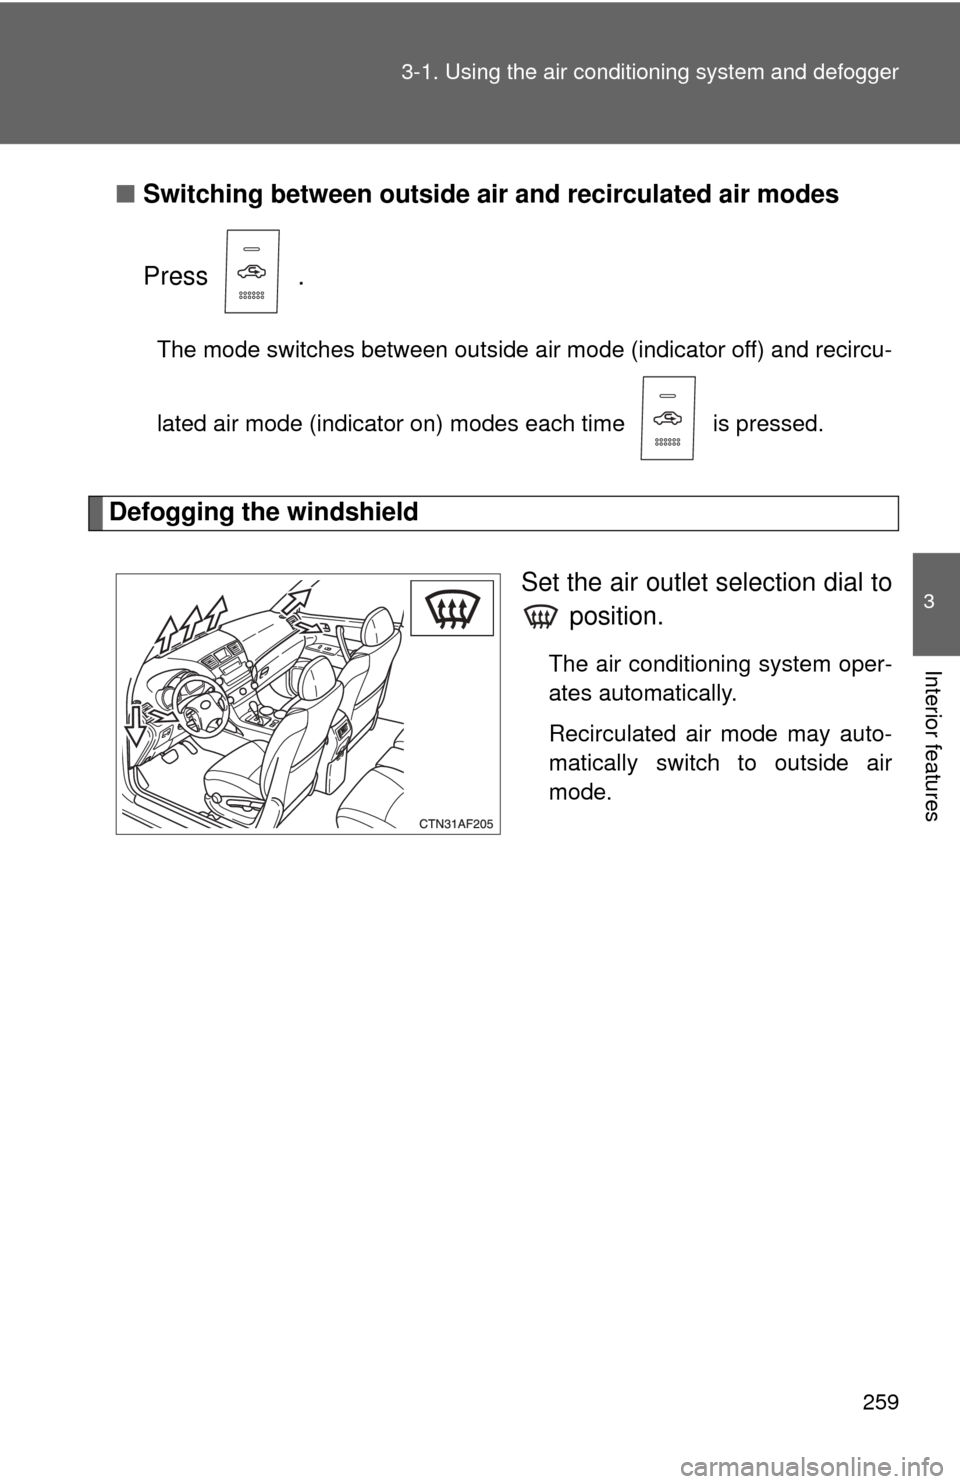
Defogging the windshield
Set the air outlet selection dial to position.
The air conditioning system oper-
ates automatically.
Recirculated air mode may auto-
matically switch to outside air
mode.
Page 260 of 608
260 3-1. Using the air conditioning system and defogger
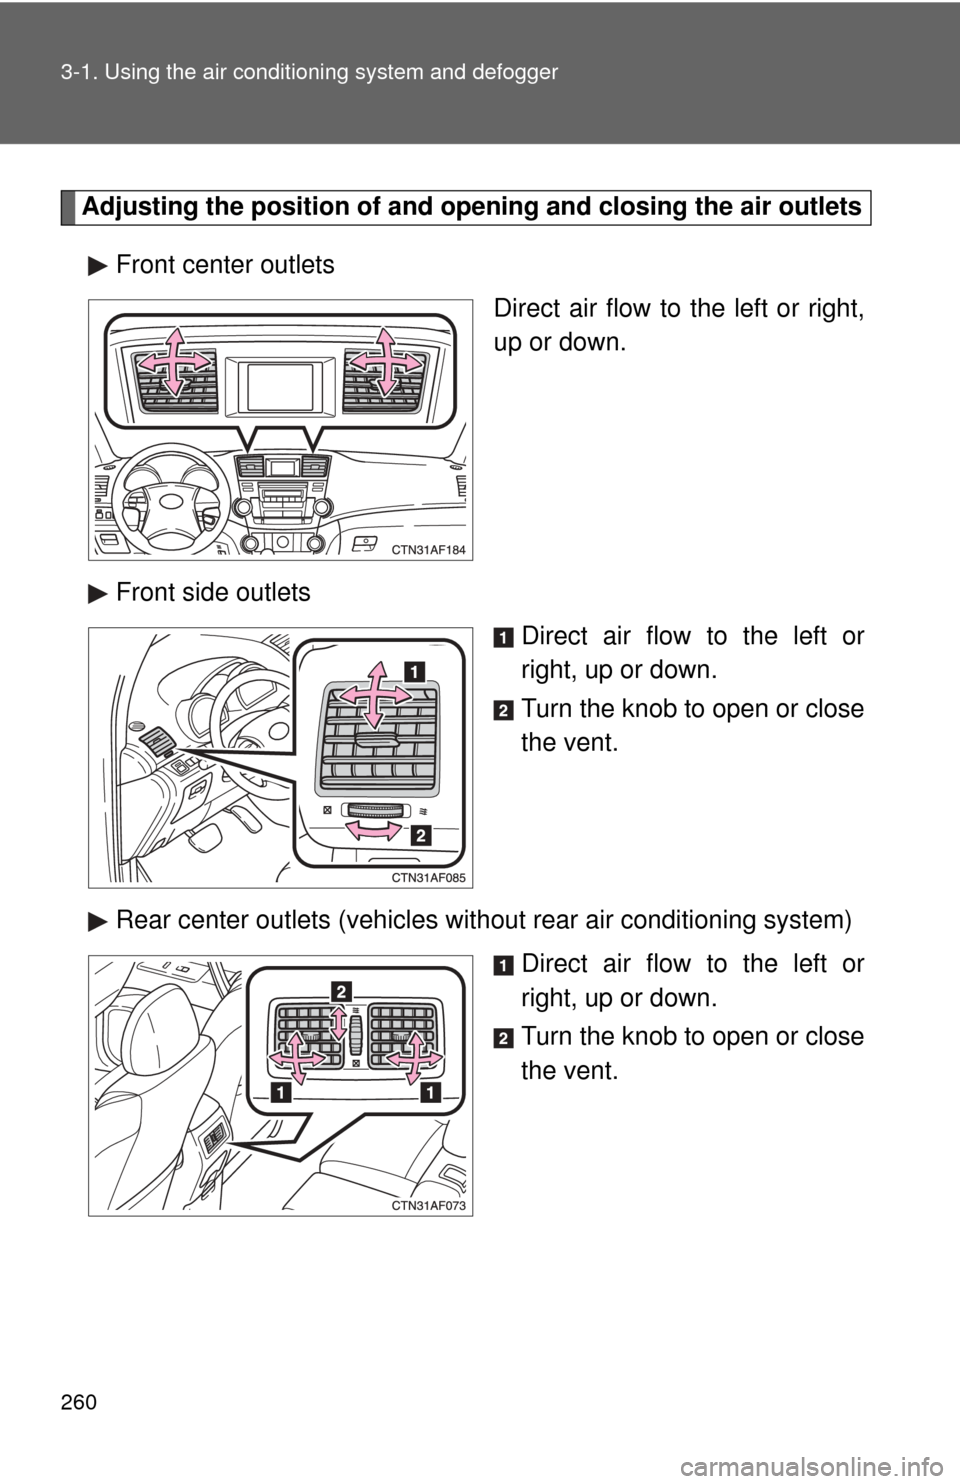
Adjusting the position of and opening and closing the air outlets
Front center outlets Direct air flow to the left or right,
up or down.
Front side outlets Direct air flow to the left or
right, up or down.
Turn the knob to open or close
the vent.
Rear center outlets (vehicles with out rear air conditioning system)
Direct air flow to the left or
right, up or down.
Turn the knob to open or close
the vent.
Trending: manual transmission, torque, heating, oil temperature, radio, low oil pressure, child restraint

