engine oil TOYOTA HIGHLANDER 2023 User Guide
[x] Cancel search | Manufacturer: TOYOTA, Model Year: 2023, Model line: HIGHLANDER, Model: TOYOTA HIGHLANDER 2023Pages: 552, PDF Size: 13.36 MB
Page 319 of 552
3194-6. Driving tips
4
Driving
NOTICE
■To prevent water damage
Take all necessary safety mea-
sures to ensure that water dam-
age to the engine or other
components does not occur.
●Water entering the engine air
intake will cause severe engine
damage.
●Water entering the automatic
transmission will cause deterio-
ration in shift quality, locking up
of your transmission accompa-
nied by vibration, and ultimately
damage.
●Water can wash the grease
from wheel bearings, causing
rusting and premature failure,
and may also enter the differen-
tial, transmission and transfer
case, reducing the gear oil’s
lubricating qualities.
■When you drive through
water
If driving through water, such as
when crossing shallow streams,
first check the depth of the water
and the bottom of the riverbed for
firmness. Drive slowly and avoid
deep water.
■Inspection after off-road driv-
ing
●Sand and mud that has accu-
mulated in bra ke drums and
around brake di scs may affect
braking efficiency and may
damage brake system compo-
nents.
●Always perform a maintenance
inspection aft er each day of
off-road driving that has taken
you through rough terrain, sand,
mud, or water. For scheduled
maintenance information, refer
to the “Scheduled Maintenance
Guide” or “Owner’s Manual
Supplement”.
Page 350 of 552
3505-4. Using the other interior features
A portable device, such as a
smartphone or mobile battery,
can be charged by just placing it
on the charging area, provided
the device is compatible with the
Qi wireless charging standard
created by the Wireless Power
Consortium.
The wireless charger cannot be
used with a portable device that
is larger than the charging area.
Additionally, depending on the
portable device, the wireless
charger may not operate prop-
erly. Refer to the operation man-
ual of the portable device.
■The “Qi” logo
The “Qi” logo is a trademark of
the Wireless Power Consortium.
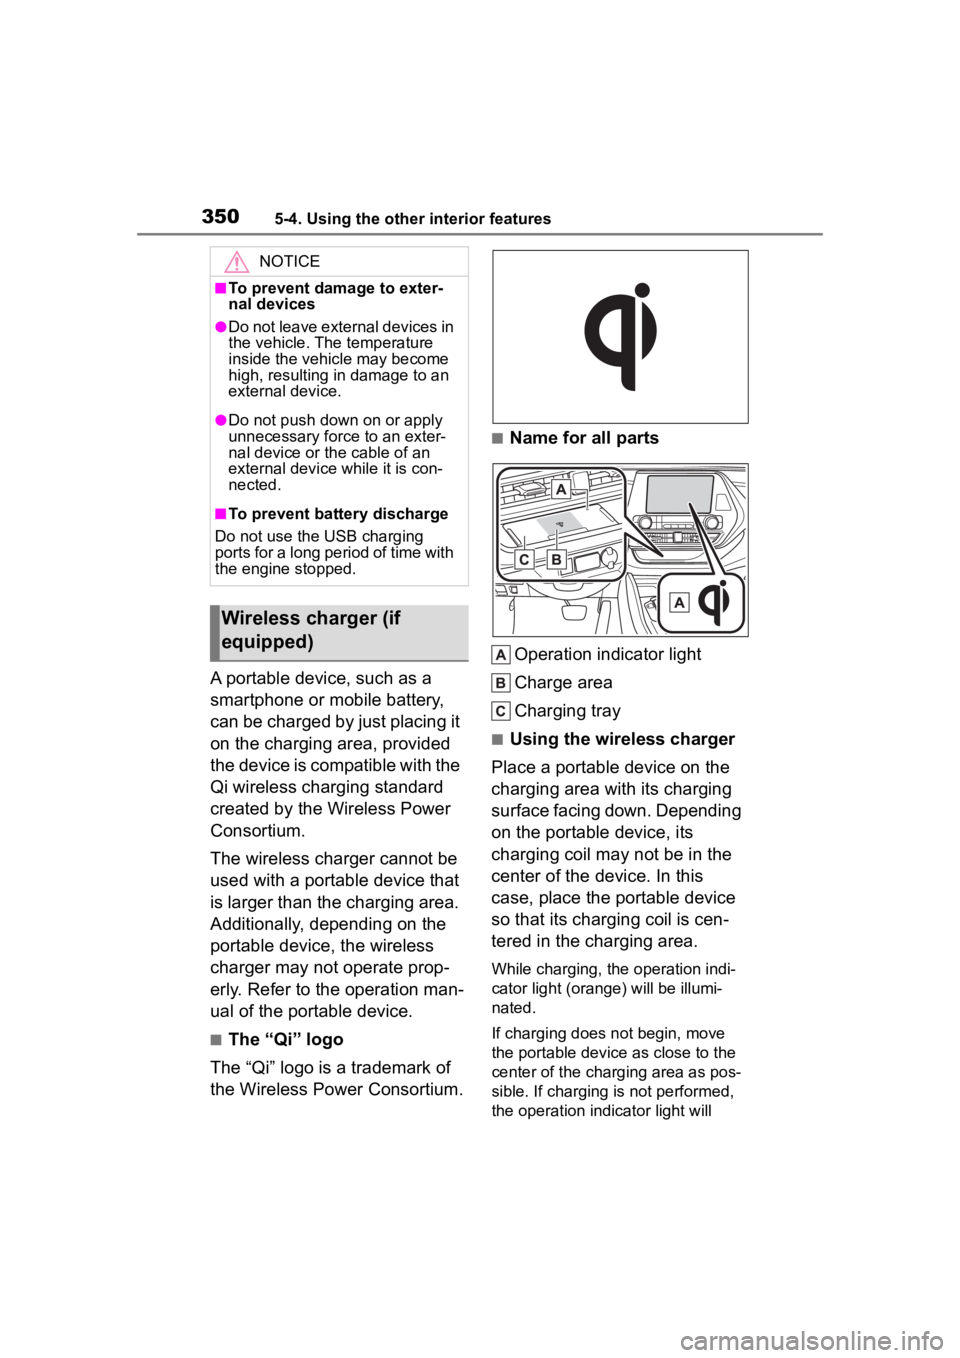
■Name for all parts
Operation indicator light
Charge area
Charging tray
■Using the wireless charger
Place a portable device on the
charging area with its charging
surface facing down. Depending
on the portable device, its
charging coil may not be in the
center of the device. In this
case, place the portable device
so that its charging coil is cen-
tered in the charging area.
While charging, the operation indi-
cator light (oran ge) will be illumi-
nated.
If charging does not begin, move
the portable device as close to the
center of the charging area as pos-
sible. If charging is not performed,
the operation indicator light will
NOTICE
■To prevent damage to exter-
nal devices
●Do not leave external devices in
the vehicle. The temperature
inside the vehicle may become
high, resulting in damage to an
external device.
●Do not push down on or apply
unnecessary force to an exter-
nal device or the cable of an
external device while it is con-
nected.
■To prevent battery discharge
Do not use the USB charging
ports for a long period of time with
the engine stopped.
Wireless charger (if
equipped)
Page 353 of 552
3535-4. Using the other interior features
5
Interior features
■The wireless charger can be
operated when
The engine switch is in ACC or ON.
■Portable devices that can be
charged
●Portable devices compatible with
the Qi wireless charging standard
can be charged by the wireless
charger. However, compatibility
with all devices which meet the Qi
wireless charging standard is not
guaranteed.
●The wireless charger is designed
to supply low power electricity (5
W or less) to a cellular phone,
smartphone, or other portable
device.
●Failure to do so may result in the
possibility of fire, However, porta- ble devices, such as the following,
can be charged with more than 5
W.
• 7.5 W charging compatible iPhones can be charged at 7.5 W
or less.
• Portable devices which conform to WPC Ver 1.2.4 (Extended Power
profile ) can be charged at 10 W or
less.
■If a cover or accessory is
attached to the portable device
Do not charge a portable device if a
cover or accessory w hich is not Qi
compatible is atta ched. Depending
on the type of cover (including for
certain genuine manufacturer parts)
and/or accessory a ttached, it may
not be possible to charge the porta-
ble device. If the portable device is
placed on the charging area and
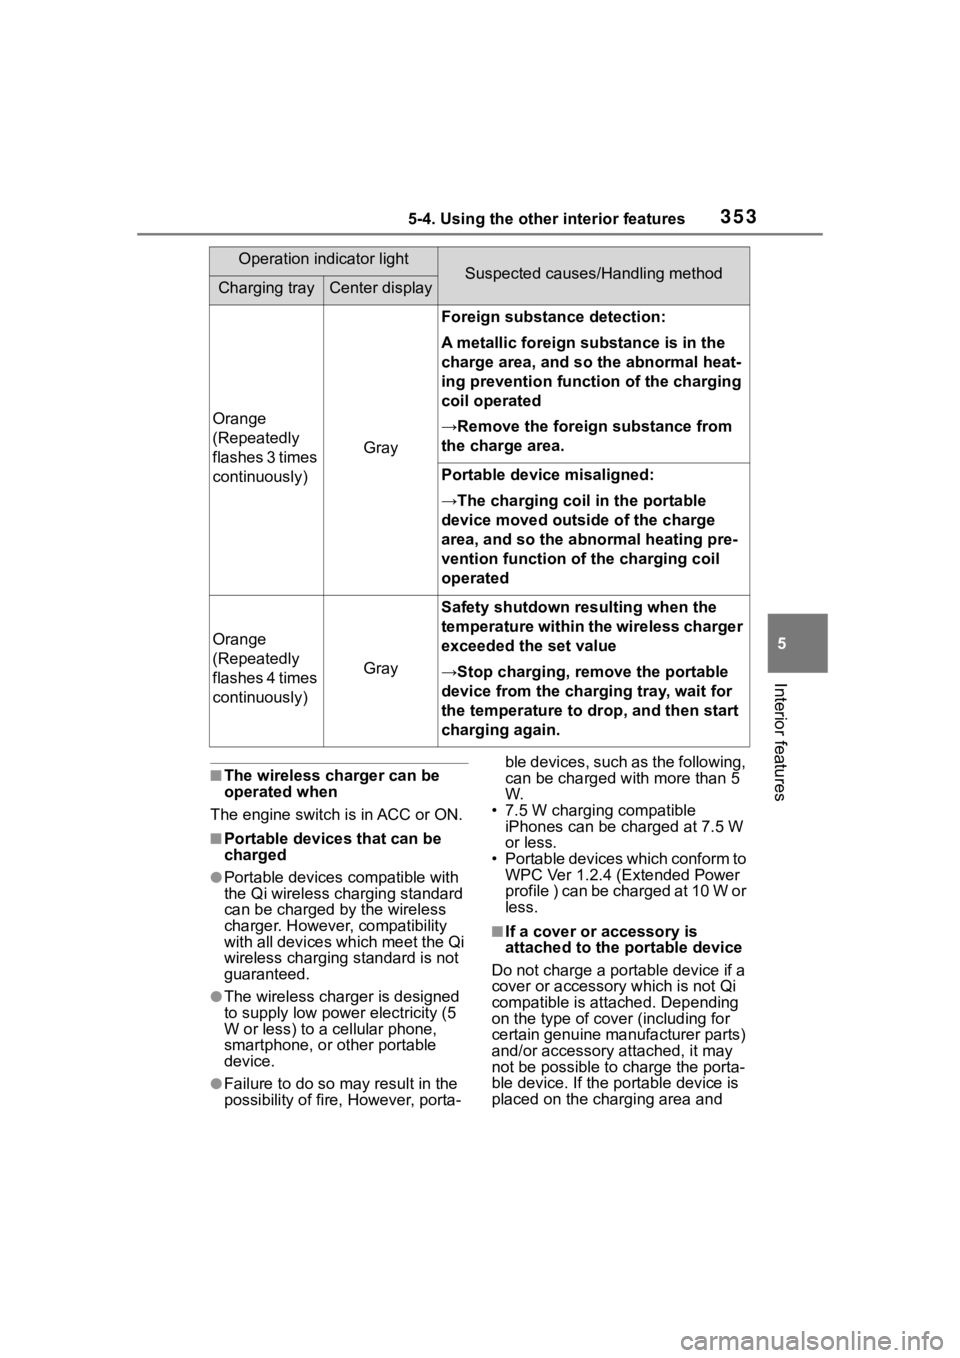
Orange
(Repeatedly
flashes 3 times
continuously)
Gray
Foreign substance detection:
A metallic foreign substance is in the
charge area, and so the abnormal heat-
ing prevention function of the charging
coil operated
→Remove the foreign substance from
the charge area.
Portable device misaligned:
→The charging coil in the portable
device moved outside of the charge
area, and so the abnormal heating pre-
vention function of the charging coil
operated
Orange
(Repeatedly
flashes 4 times
continuously)
Gray
Safety shutdown resulting when the
temperature within the wireless charger
exceeded the set value
→Stop charging, remove the portable
device from the charging tray, wait for
the temperature to drop, and then start
charging again.
Operation indicator lightSuspected causes/Handling methodCharging trayCenter display
Page 371 of 552
3716-1. Maintenance and care
6
Maintenance and care
parts.
■Bumpers
Do not scrub with abrasive cleaners.
■Plated portions
If dirt cannot be removed, clean the
parts as follows:
●Use a soft cloth dampened with an
approximately 5% solution of neu-
tral detergent and water to clean
the dirt off.
●Wipe the surface with a dry, soft
cloth to remove any remaining
moisture.
●To remove oily deposits, use alco-
hol wet wipes or a similar product.
WARNING
■When washing the vehicle
Do not apply water to the inside of
the engine compartment. Doing
so may cause the electrical com-
ponents, etc. to catch fire.
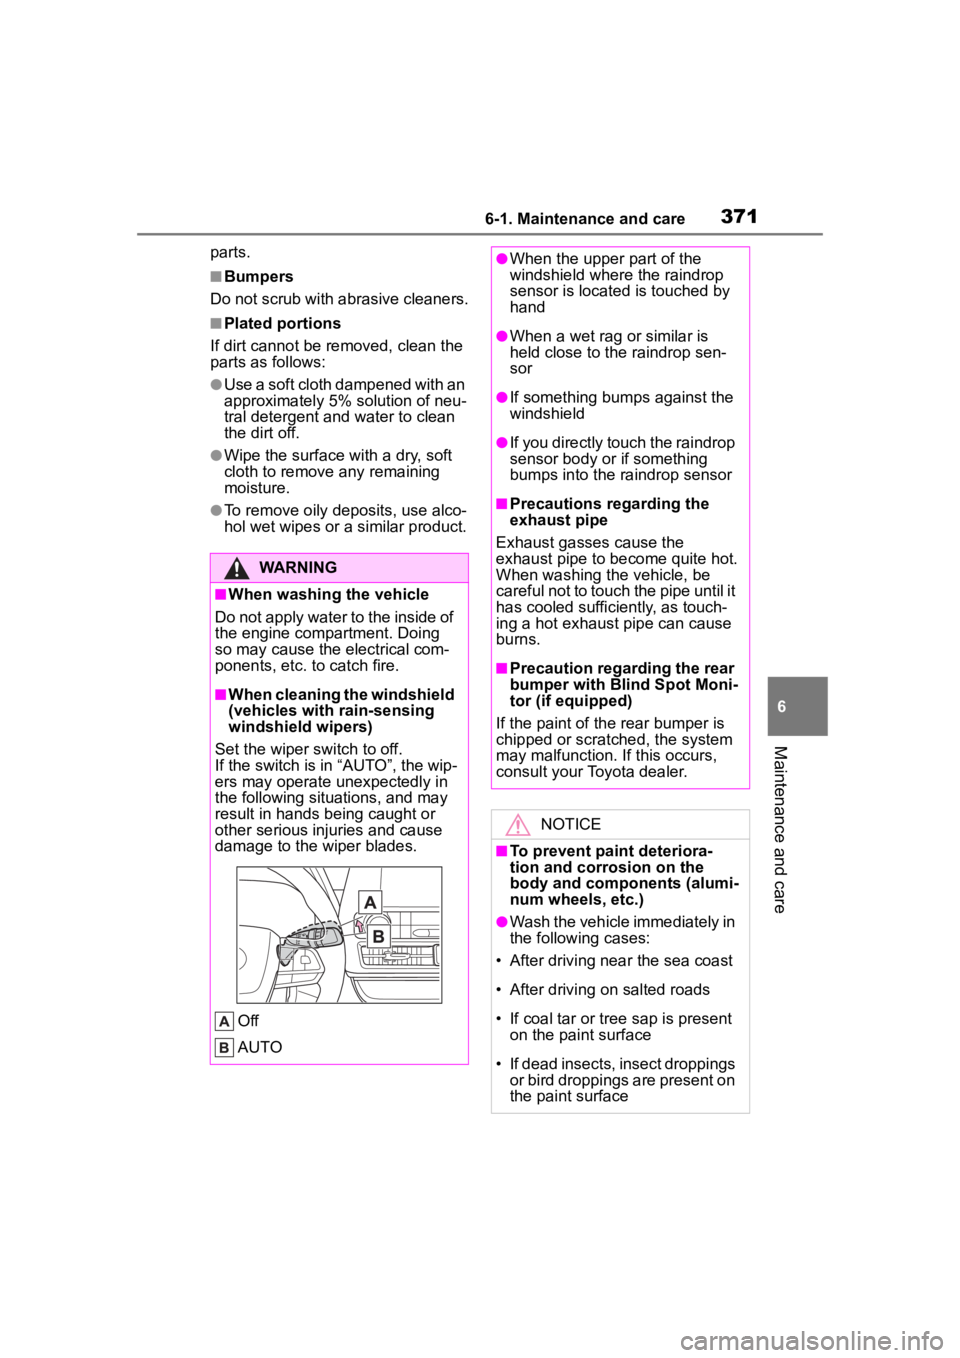
■When cleaning the windshield
(vehicles with rain-sensing
windshield wipers)
Set the wiper switch to off.
If the switch is in “AUTO”, the wip-
ers may operate unexpectedly in
the following situations, and may
result in hands being caught or
other serious injuries and cause
damage to the wiper blades.
Off
AUTO
●When the upper part of the
windshield where the raindrop
sensor is located is touched by
hand
●When a wet rag or similar is
held close to the raindrop sen-
sor
●If something bumps against the
windshield
●If you directly touch the raindrop
sensor body or if something
bumps into the ra indrop sensor
■Precautions regarding the
exhaust pipe
Exhaust gasses cause the
exhaust pipe to become quite hot.
When washing the vehicle, be
careful not to touch the pipe until it
has cooled sufficiently, as touch-
ing a hot exhaust pipe can cause
burns.
■Precaution regarding the rear
bumper with Blind Spot Moni-
tor (if equipped)
If the paint of th e rear bumper is
chipped or scratched, the system
may malfunction. If this occurs,
consult your Toyota dealer.
NOTICE
■To prevent paint deteriora-
tion and corrosion on the
body and components (alumi-
num wheels, etc.)
●Wash the vehicle immediately in
the following cases:
• After driving nea r the sea coast
• After driving on salted roads
• If coal tar or tree sap is present on the paint surface
• If dead insects, insect droppings or bird droppings are present on
the paint surface
Page 376 of 552
3766-2. Maintenance
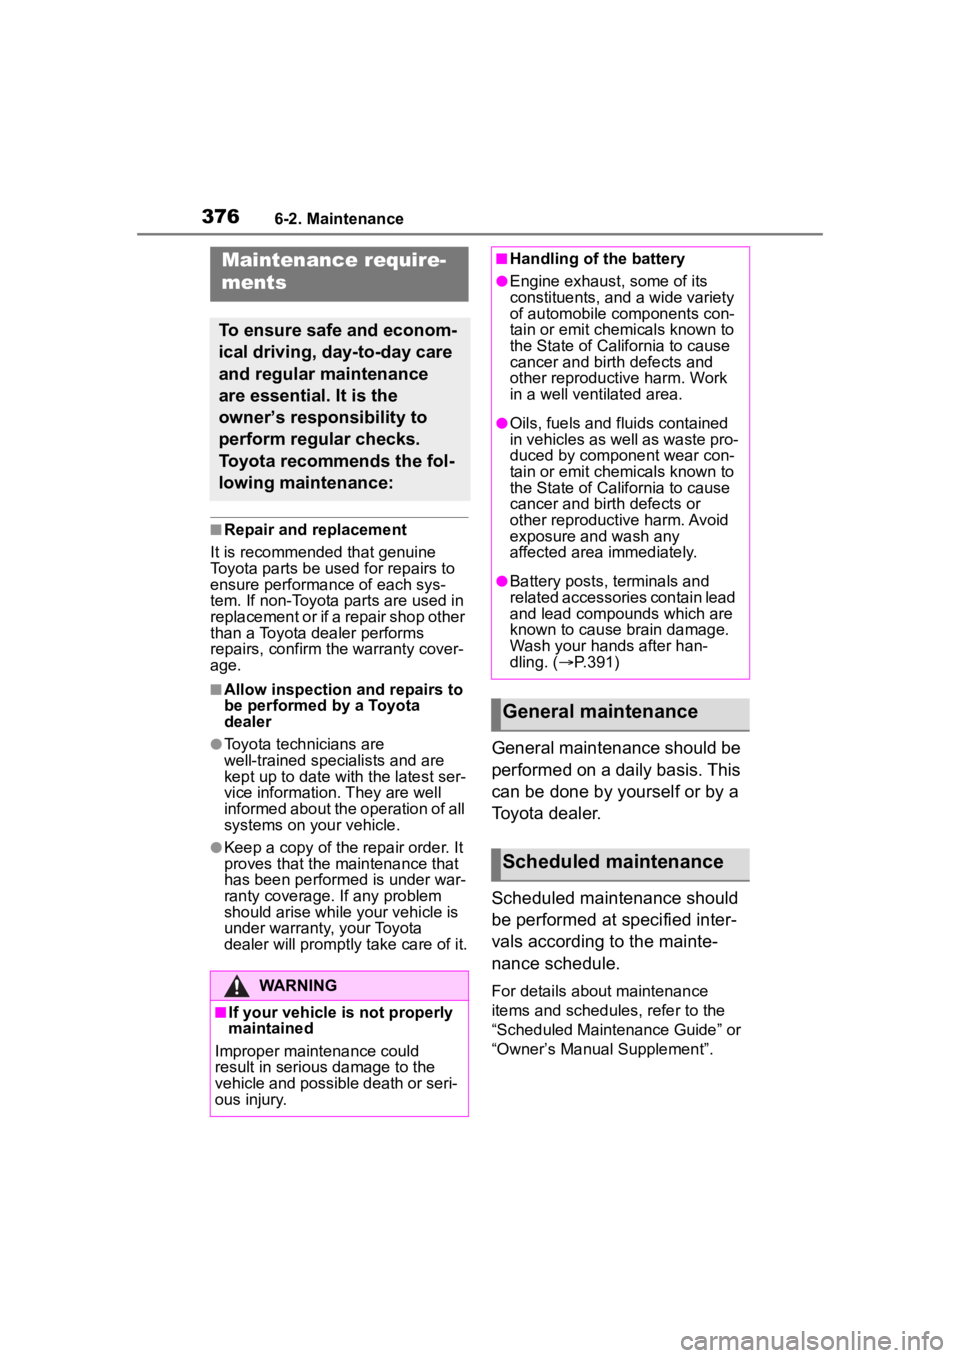
6-2.Maintenance
■Repair and replacement
It is recommended that genuine
Toyota parts be used for repairs to
ensure performanc e of each sys-
tem. If non-Toyota parts are used in
replacement or if a repair shop other
than a Toyota dealer performs
repairs, confirm the warranty cover-
age.
■Allow inspection and repairs to
be performed by a Toyota
dealer
●Toyota technicians are
well-trained specialists and are
kept up to date with the latest ser-
vice information. They are well
informed about the operation of all
systems on your vehicle.
●Keep a copy of the repair order. It
proves that the maintenance that
has been performed is under war-
ranty coverage. If any problem
should arise while your vehicle is
under warranty, your Toyota
dealer will promptly take care of it.
General maintenance should be
performed on a daily basis. This
can be done by yourself or by a
Toyota dealer.
Scheduled maintenance should
be performed at specified inter-
vals according to the mainte-
nance schedule.
For details about maintenance
items and schedules, refer to the
“Scheduled Maintenance Guide” or
“Owner’s Manual Supplement”.
Maintenance require-
ments
To ensure safe and econom-
ical driving, day-to-day care
and regular maintenance
are essential. It is the
owner’s responsibility to
perform regular checks.
Toyota recommends the fol-
lowing maintenance:
WARNING
■If your vehicle is not properly
maintained
Improper maintenance could
result in serious damage to the
vehicle and possible death or seri-
ous injury.
■Handling of the battery
●Engine exhaust, some of its
constituents, and a wide variety
of automobile components con-
tain or emit chemicals known to
the State of California to cause
cancer and birth defects and
other reproductive harm. Work
in a well ventilated area.
●Oils, fuels and fluids contained
in vehicles as well as waste pro-
duced by component wear con-
tain or emit chemicals known to
the State of California to cause
cancer and birth defects or
other reproductive harm. Avoid
exposure and wash any
affected area immediately.
●Battery posts, terminals and
related accessories contain lead
and lead compounds which are
known to cause brain damage.
Wash your hands after han-
dling. ( P.391)
General maintenance
Scheduled maintenance
Page 378 of 552
3786-2. Maintenance
General maintenance
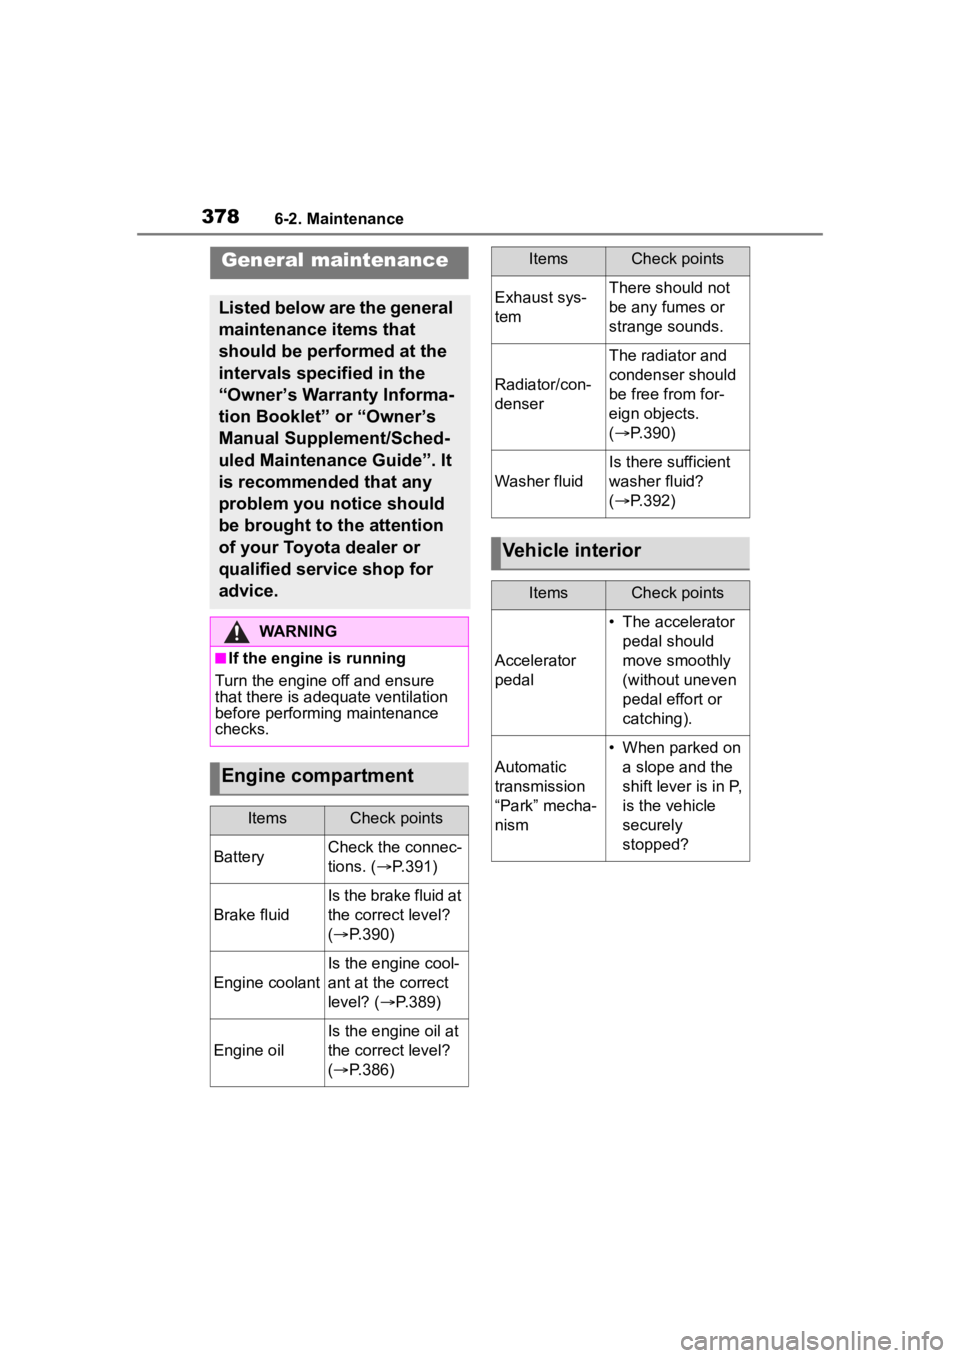
Listed below are the general
maintenance items that
should be performed at the
intervals specified in the
“Owner’s Warranty Informa-
tion Booklet” or “Owner’s
Manual Supplement/Sched-
uled Maintenance Guide”. It
is recommended that any
problem you notice should
be brought to the attention
of your Toyota dealer or
qualified service shop for
advice.
WARNING
■If the engine is running
Turn the engine off and ensure
that there is adequate ventilation
before performing maintenance
checks.
Engine compartment
ItemsCheck points
BatteryCheck the connec-
tions. ( P.391)
Brake fluid
Is the brake fluid at
the correct level?
( P.390)
Engine coolant
Is the engine cool-
ant at the correct
level? ( P.389)
Engine oil
Is the engine oil at
the correct level?
( P.386)
Exhaust sys-
temThere should not
be any fumes or
strange sounds.
Radiator/con-
denser
The radiator and
condenser should
be free from for-
eign objects.
( P.390)
Washer fluid
Is there sufficient
washer fluid?
( P.392)
Vehicle interior
ItemsCheck points
Accelerator
pedal
• The accelerator
pedal should
move smoothly
(without uneven
pedal effort or
catching).
Automatic
transmission
“Park” mecha-
nism
• When parked on a slope and the
shift lever is in P,
is the vehicle
securely
stopped?
ItemsCheck points
Page 382 of 552
3826-3. Do-it-yourself maintenance
6-3.Do-it-yourself maintenance
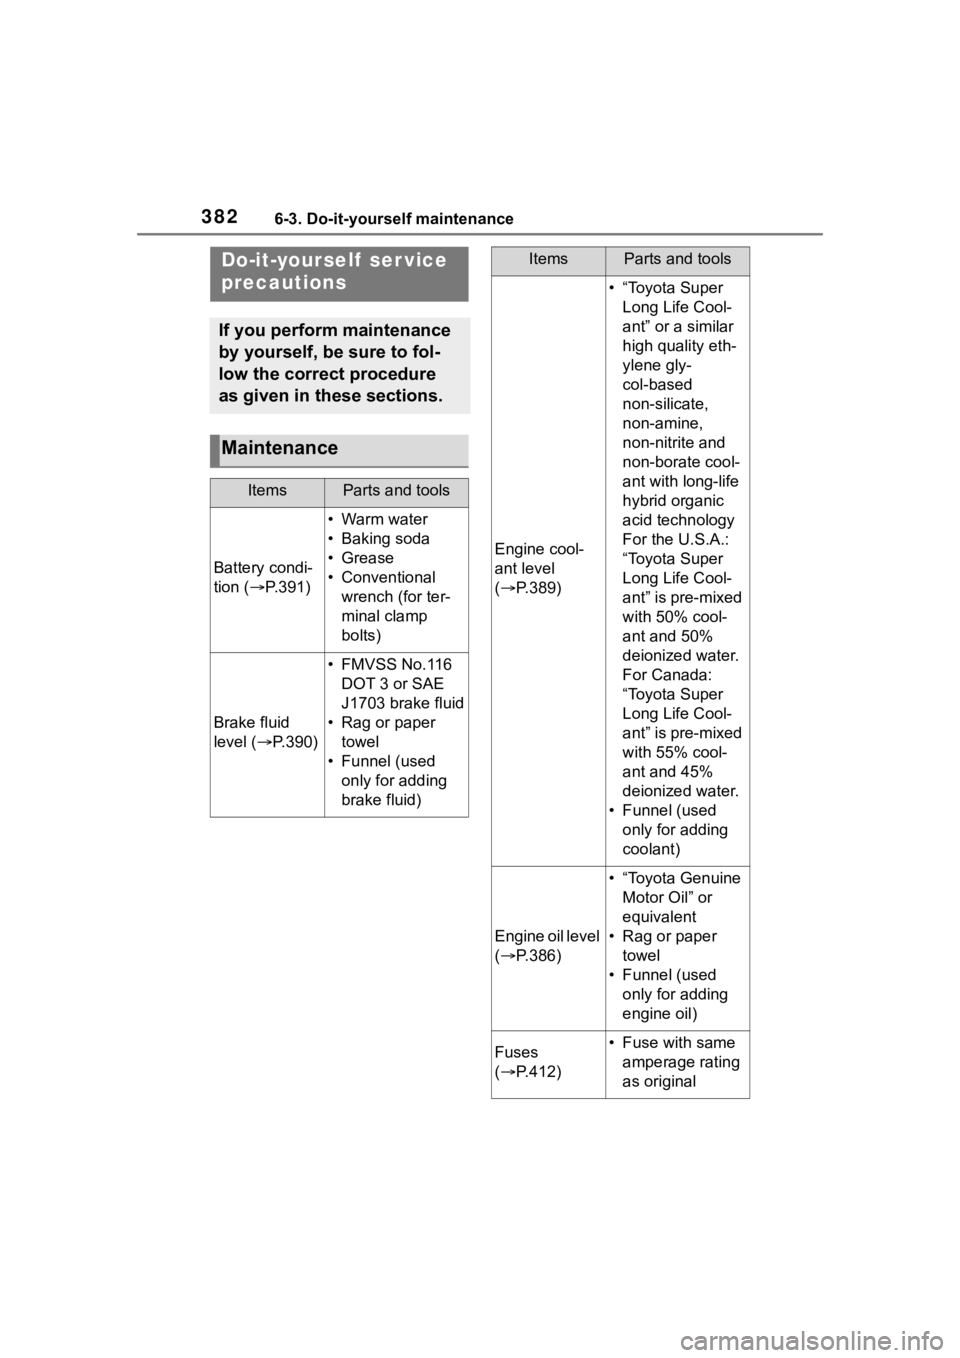
Do-it-yourself ser vice
precautions
If you perform maintenance
by yourself, be sure to fol-
low the correct procedure
as given in these sections.
Maintenance
ItemsParts and tools
Battery condi-
tion (P.391)
• Warm water
• Baking soda
•Grease
• Conventional
wrench (for ter-
minal clamp
bolts)
Brake fluid
level ( P.390)
• FMVSS No.116
DOT 3 or SAE
J1703 brake fluid
• Rag or paper towel
• Funnel (used only for adding
brake fluid)
Engine cool-
ant level
( P.389)
• “Toyota Super
Long Life Cool-
ant” or a similar
high quality eth-
ylene gly-
col-based
non-silicate,
non-amine,
non-nitrite and
non-borate cool-
ant with long-life
hybrid organic
acid technology
For the U.S.A.:
“Toyota Super
Long Life Cool-
ant” is pre-mixed
with 50% cool-
ant and 50%
deionized water.
For Canada:
“Toyota Super
Long Life Cool-
ant” is pre-mixed
with 55% cool-
ant and 45%
deionized water.
• Funnel (used only for adding
coolant)
Engine oil level
( P.386)
• “Toyota Genuine
Motor Oil” or
equivalent
• Rag or paper towel
• Funnel (used only for adding
engine oil)
Fuses
( P.412)• Fuse with same
amperage rating
as original
ItemsParts and tools
Page 383 of 552
3836-3. Do-it-yourself maintenance
6
Maintenance and care
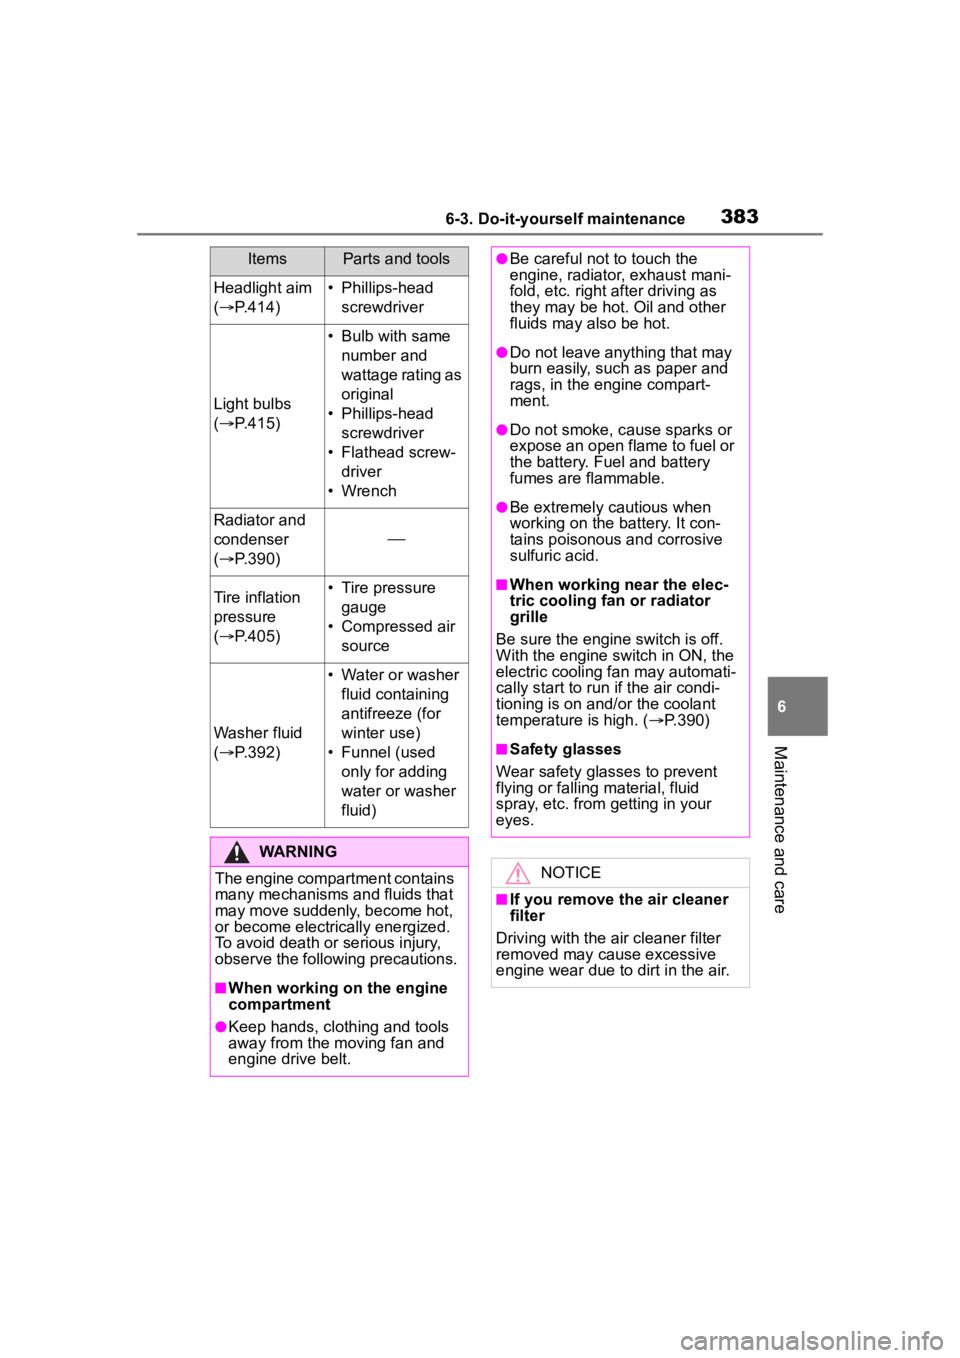
Headlight aim
( P.414)• Phillips-head
screwdriver
Light bulbs
( P.415)
• Bulb with same
number and
wattage rating as
original
• Phillips-head screwdriver
• Flathead screw- driver
• Wrench
Radiator and
condenser
( P.390)
Tire inflation
pressure
( P.405)• Tire pressure
gauge
• Compressed air source
Washer fluid
( P.392)
• Water or washer
fluid containing
antifreeze (for
winter use)
• Funnel (used only for adding
water or washer
fluid)
WARNING
The engine compartment contains
many mechanisms and fluids that
may move suddenly, become hot,
or become electrically energized.
To avoid death or serious injury,
observe the following precautions.
■When working on the engine
compartment
●Keep hands, clothing and tools
away from the moving fan and
engine drive belt.
ItemsParts and tools●Be careful not to touch the
engine, radiator, exhaust mani-
fold, etc. right a fter driving as
they may be hot. Oil and other
fluids may also be hot.
●Do not leave anything that may
burn easily, such as paper and
rags, in the engine compart-
ment.
●Do not smoke, cause sparks or
expose an open flame to fuel or
the battery. Fuel and battery
fumes are flammable.
●Be extremely cautious when
working on the battery. It con-
tains poisonous and corrosive
sulfuric acid.
■When working near the elec-
tric cooling fan or radiator
grille
Be sure the engine switch is off.
With the engine switch in ON, the
electric cooling fa n may automati-
cally start to run if the air condi-
tioning is on and/or the coolant
temperature is high. ( P.390)
■Safety glasses
Wear safety glasses to prevent
flying or falling material, fluid
spray, etc. from getting in your
eyes.
NOTICE
■If you remove the air cleaner
filter
Driving with the air cleaner filter
removed may cause excessive
engine wear due to dirt in the air.
Page 386 of 552
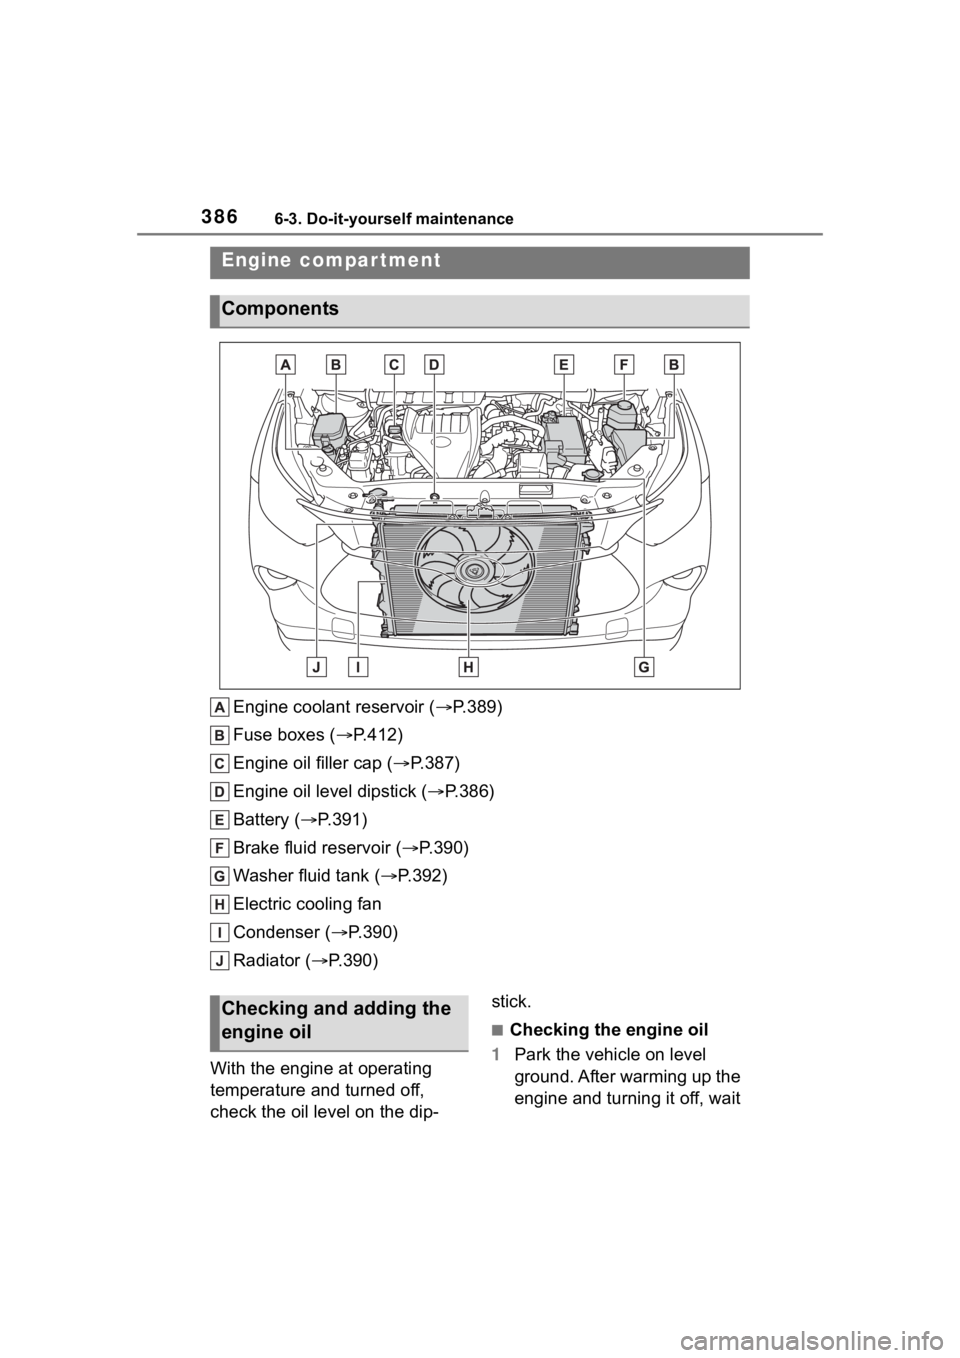
3866-3. Do-it-yourself maintenance
Engine coolant reservoir ( P.389)
Fuse boxes ( P.412)
Engine oil filler cap ( P.387)
Engine oil level dipstick ( P.386)
Battery ( P.391)
Brake fluid reservoir ( P.390)
Washer fluid tank ( P.392)
Electric cooling fan
Condenser ( P.390)
Radiator ( P.390)
With the engine at operating
temperature and turned off,
check the oil level on the dip- stick.
■Checking the engine oil
1 Park the vehicle on level
ground. After warming up the
engine and turning it off, wait
Engine compar tment
Components
Checking and adding the
engine oil
Page 387 of 552
3876-3. Do-it-yourself maintenance
6
Maintenance and care
more than 5 minutes for the
oil to drain back into the bot-
tom of the engine.
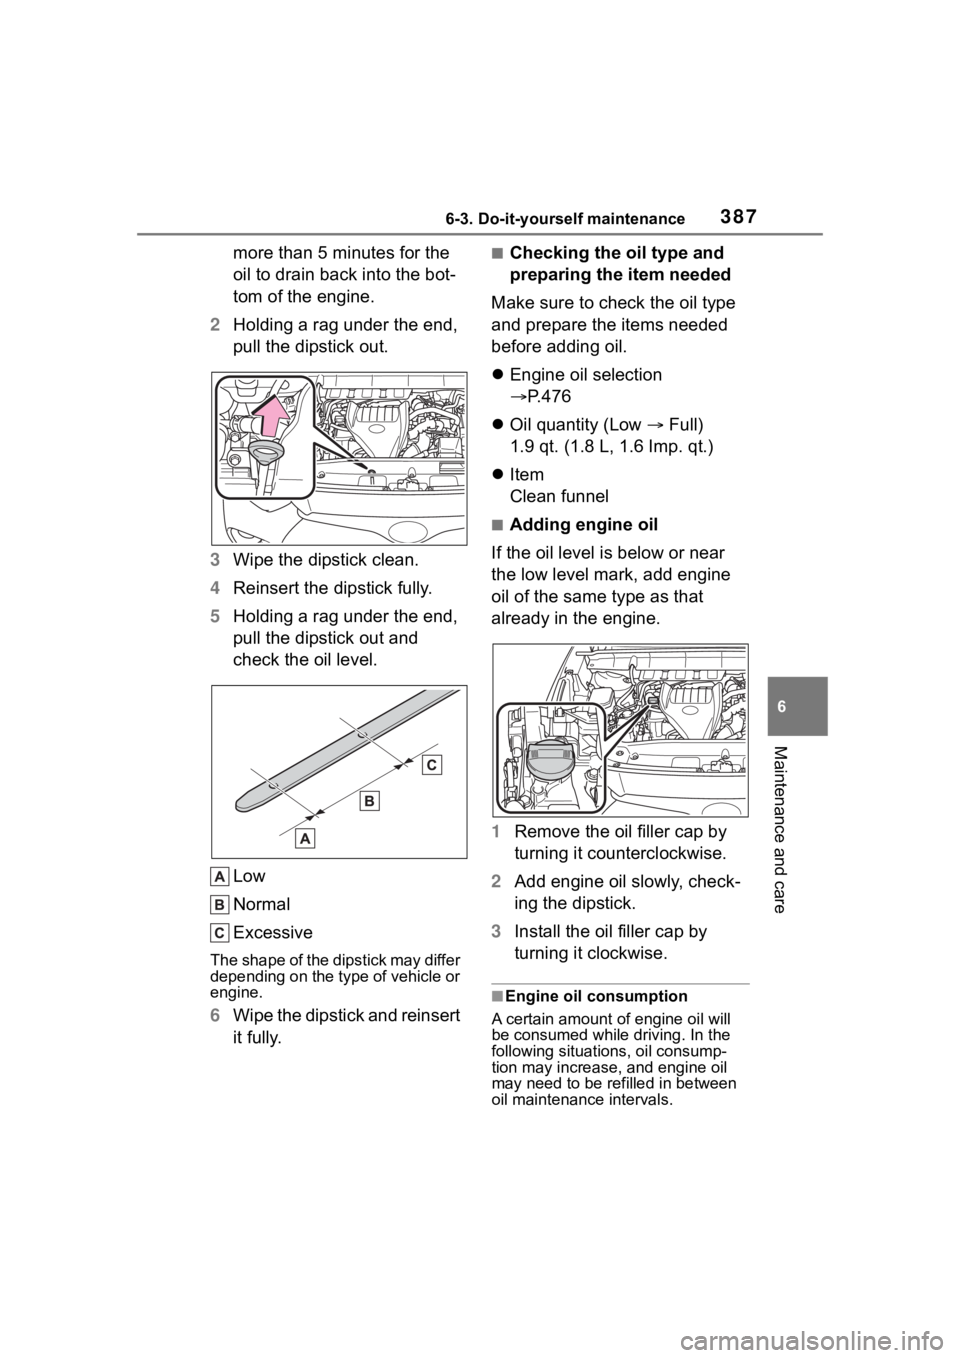
2 Holding a rag under the end,
pull the dipstick out.
3 Wipe the dipstick clean.
4 Reinsert the dipstick fully.
5 Holding a rag under the end,
pull the dipstick out and
check the oil level.
Low
Normal
Excessive
The shape of the dipstick may differ
depending on the type of vehicle or
engine.
6Wipe the dipstick and reinsert
it fully.
■Checking the oil type and
preparing the item needed
Make sure to check the oil type
and prepare the items needed
before adding oil.
Engine oil selection
P.476
Oil quantity (Low Full)
1.9 qt. (1.8 L, 1.6 Imp. qt.)
Item
Clean funnel
■Adding engine oil
If the oil level is below or near
the low level mark, add engine
oil of the same type as that
already in the engine.
1 Remove the oil filler cap by
turning it counterclockwise.
2 Add engine oil slowly, check-
ing the dipstick.
3 Install the oil filler cap by
turning it clockwise.
■Engine oil consumption
A certain amount of engine oil will
be consumed while driving. In the
following situatio ns, oil consump-
tion may increase, and engine oil
may need to be refilled in between
oil maintenance intervals.