TOYOTA LAND CRUISER 1998 Factory Repair Manual
LAND CRUISER 1998
TOYOTA
TOYOTA
https://www.carmanualsonline.info/img/14/57459/w960_57459-0.png
TOYOTA LAND CRUISER 1998 Factory Repair Manual
Trending: compression ratio, roof rack, fuel cap, service schedule, fog light, ABS, low oil pressure
Page 701 of 3115
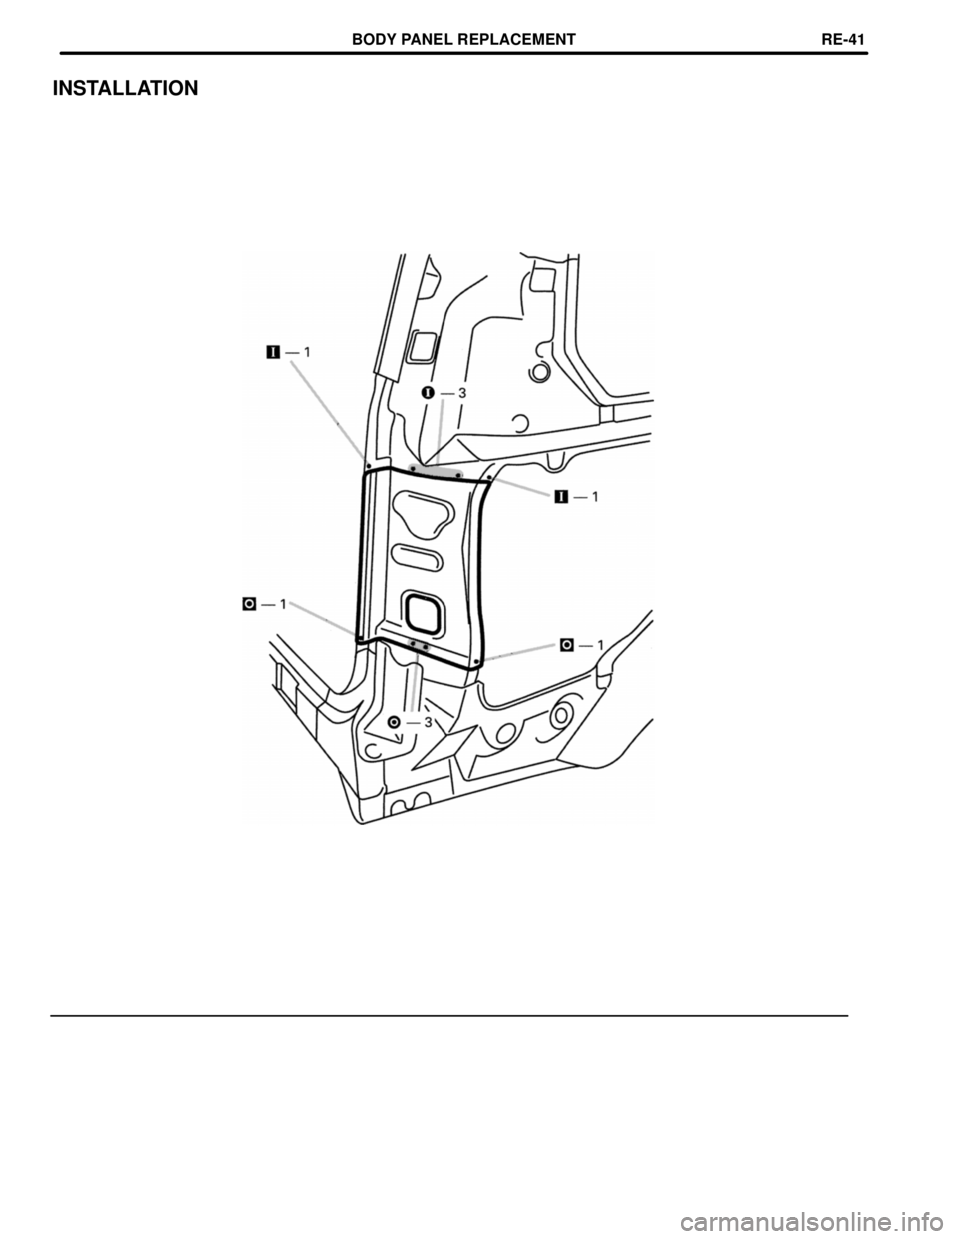
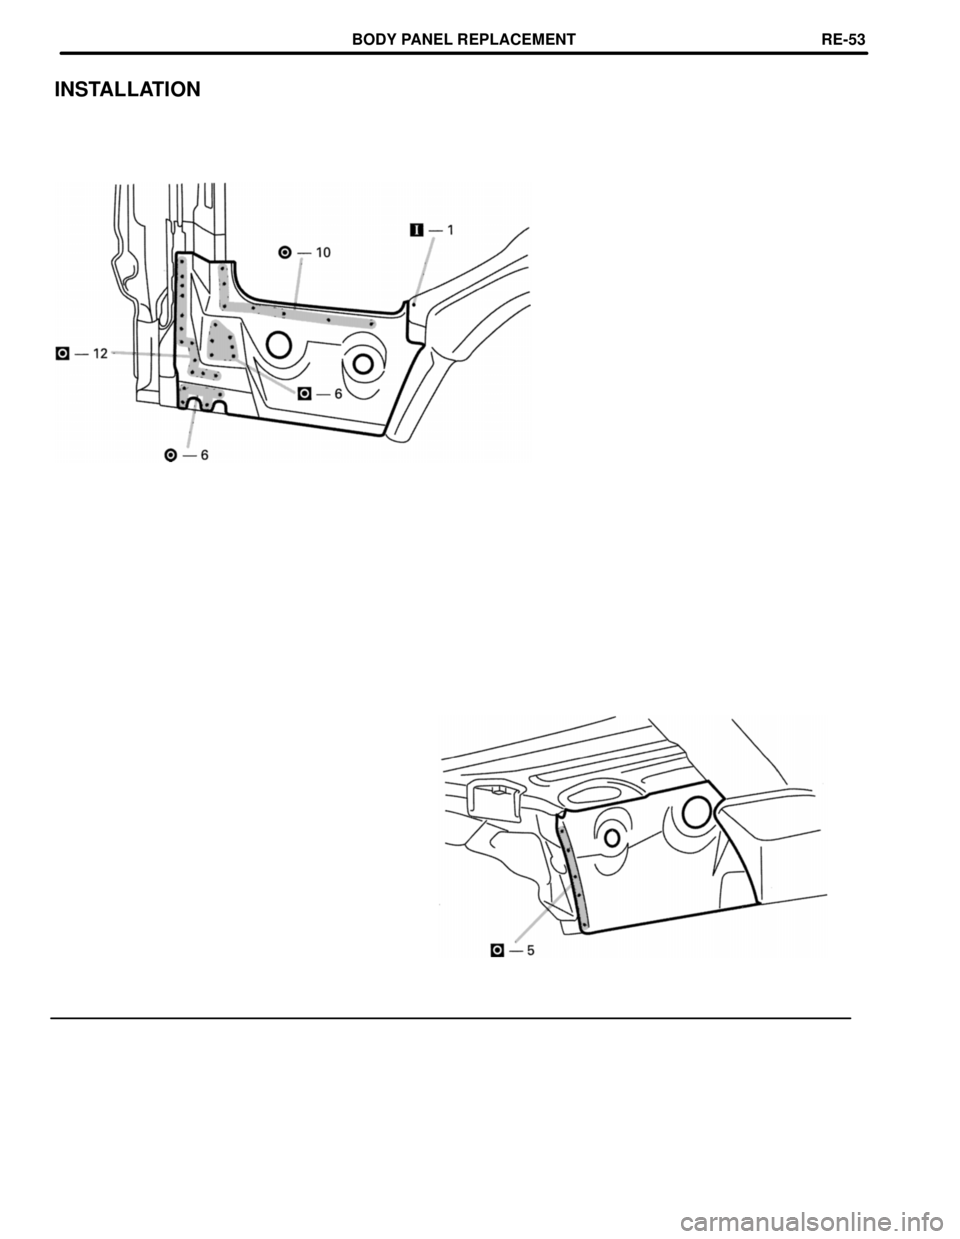
INSTALLATION
BODY PANEL REPLACEMENTRE-53
Page 702 of 3115
mm in.
160 6.30
ROCKER OUTER PANEL (CUT)
REMOVAL
[Cut and Join Locations]
Cut and Join Location
160 mm
Cut and Join Location
(Cut Location for Supply Parts) Cut and Join Location
(Cut Location for Supply Parts)
1. Cut and join the parts at the locations as shown
above.
HINT: Take care not to damage the internal rein-
forcement.
BODY PANEL REPLACEMENTRE-26
Page 703 of 3115
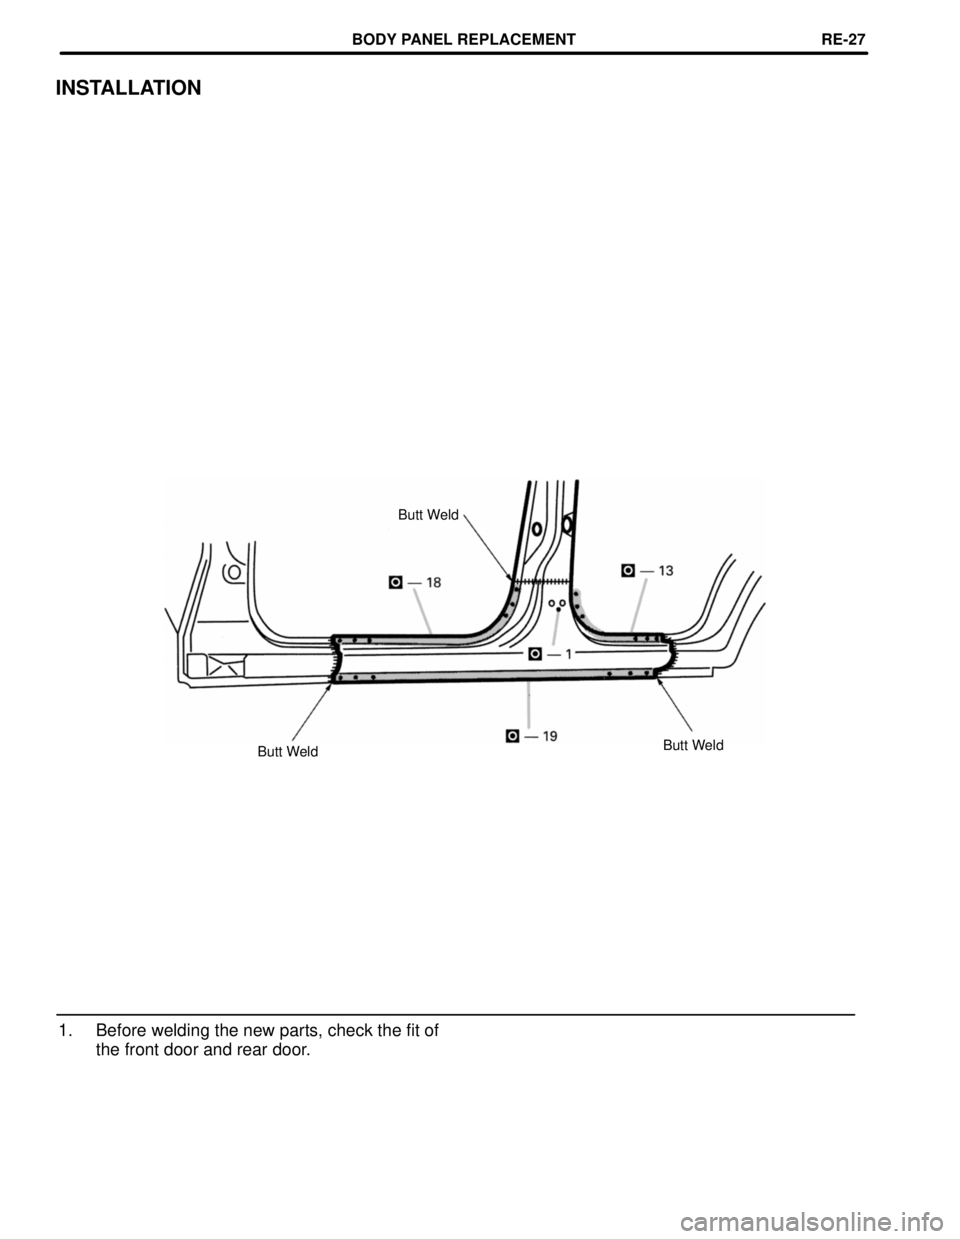
INSTALLATION
Butt Weld
Butt Weld
Butt Weld
1. Before welding the new parts, check the fit of
the front door and rear door.
BODY PANEL REPLACEMENTRE-27
Page 704 of 3115
ROOF PANEL (ASSY): Moon Roof
REMOVAL
[If reusing the roof panel reinforcement]
Hemming Location
Disc Sander
BODY PANEL REPLACEMENTRE-70
Page 705 of 3115
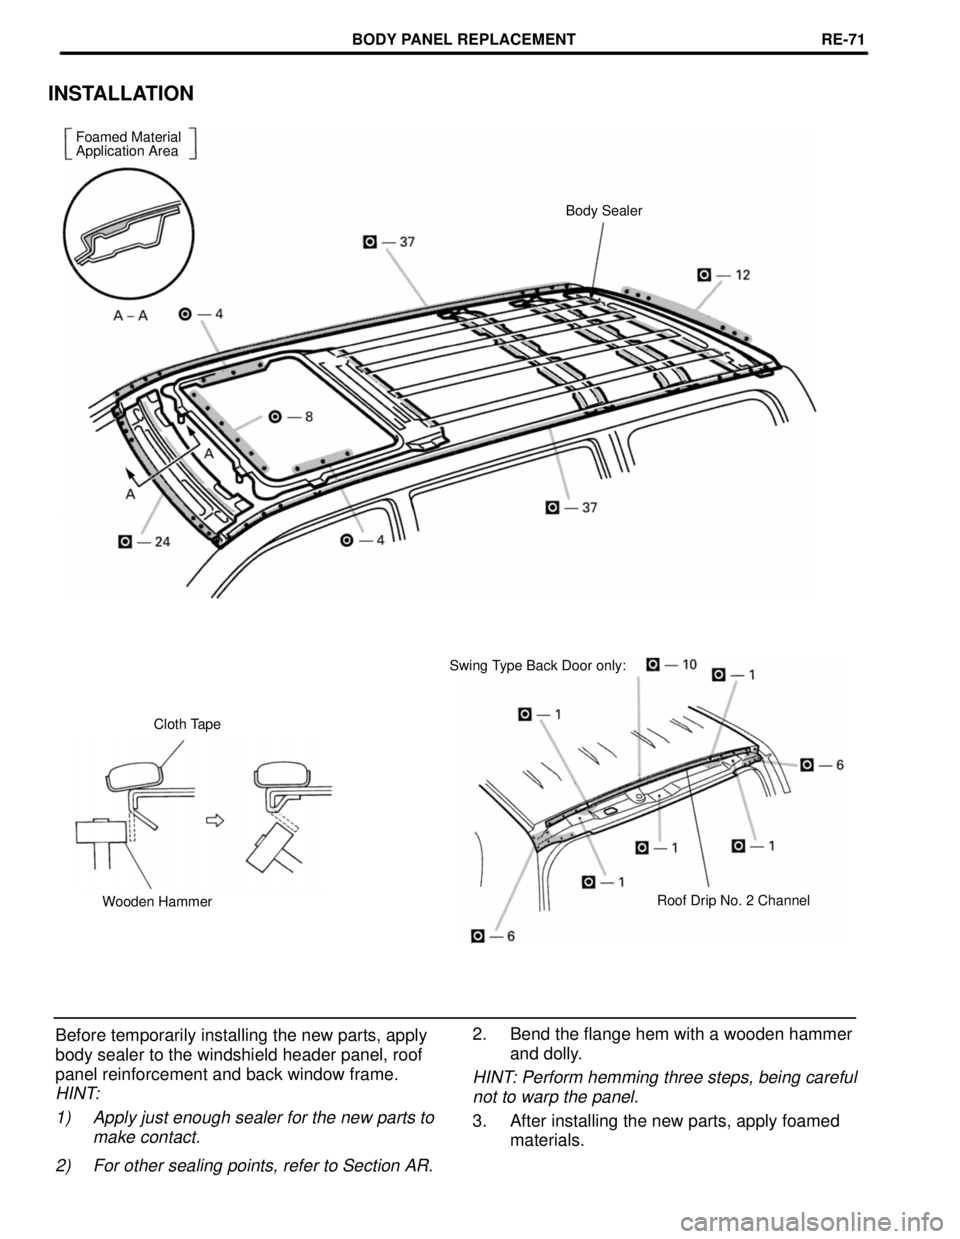
INSTALLATION
Foamed Material
Application Area
Body Sealer
Swing Type Back Door only:
Cloth Tape
Roof Drip No. 2 Channel
Wooden Hammer
2. Bend the flange hem with a wooden hammer
and dolly.
HINT: Perform hemming three steps, being careful
not to warp the panel.
3. After installing the new parts, apply foamed
materials. Before temporarily installing the new parts, apply
body sealer to the windshield header panel, roof
panel reinforcement and back window frame.
HINT:
1) Apply just enough sealer for the new parts to
make contact.
2) For other sealing points, refer to Section AR.
BODY PANEL REPLACEMENTRE-71
Page 706 of 3115
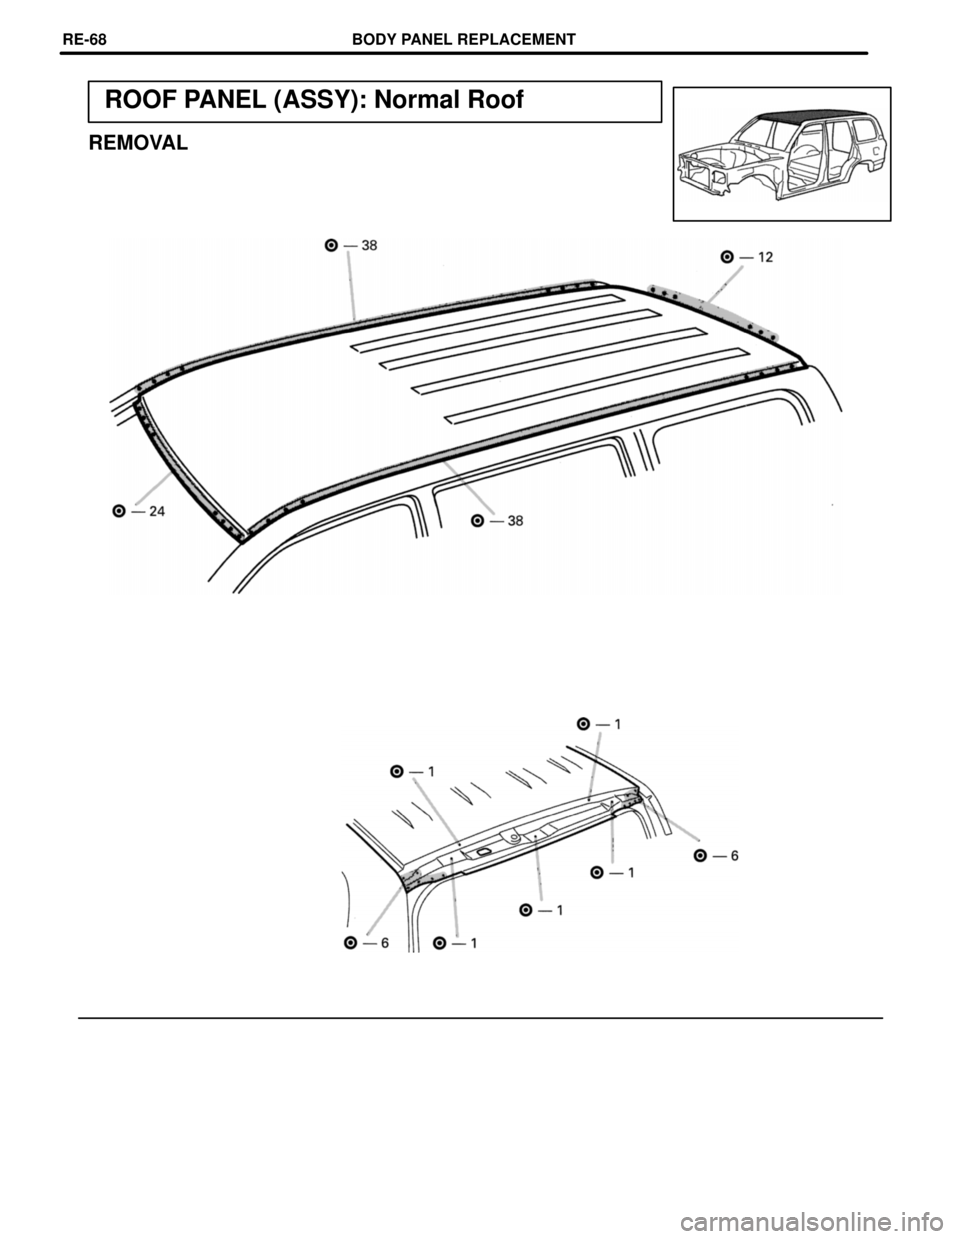
ROOF PANEL (ASSY): Normal Roof
REMOVAL
BODY PANEL REPLACEMENTRE-68
Page 707 of 3115
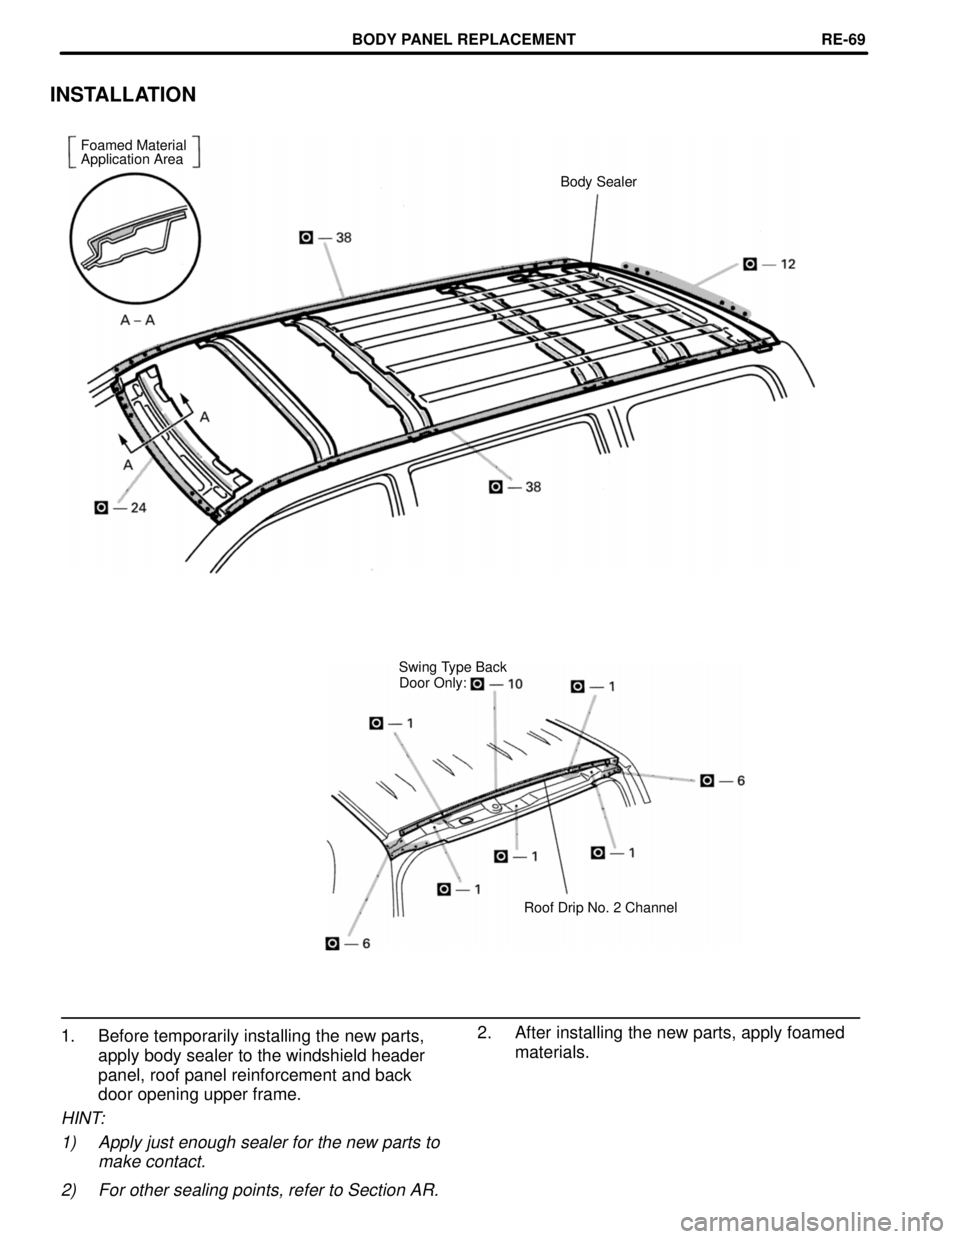
INSTALLATION
Foamed Material
Application Area
Body Sealer
Swing Type Back
Door Only:
Roof Drip No. 2 Channel
1. Before temporarily installing the new parts,
apply body sealer to the windshield header
panel, roof panel reinforcement and back
door opening upper frame.
HINT:
1) Apply just enough sealer for the new parts to
make contact.
2) For other sealing points, refer to Section AR.
2. After installing the new parts, apply foamed
materials.
BODY PANEL REPLACEMENTRE-69
Page 708 of 3115
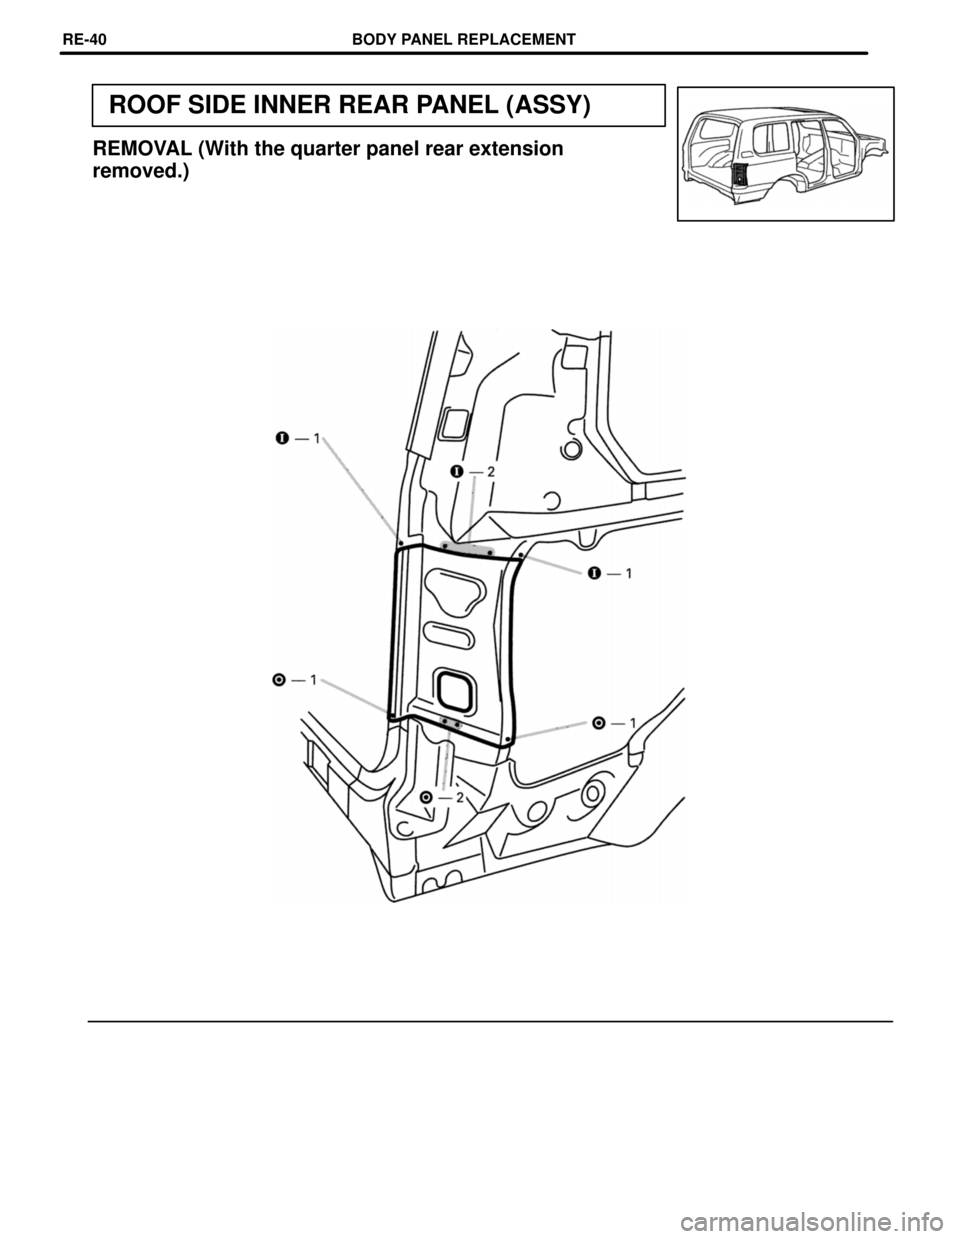
ROOF SIDE INNER REAR PANEL (ASSY)
REMOVAL (With the quarter panel rear extension
removed.)
BODY PANEL REPLACEMENTRE-40
Page 709 of 3115
INSTALLATION
BODY PANEL REPLACEMENTRE-41
Page 710 of 3115
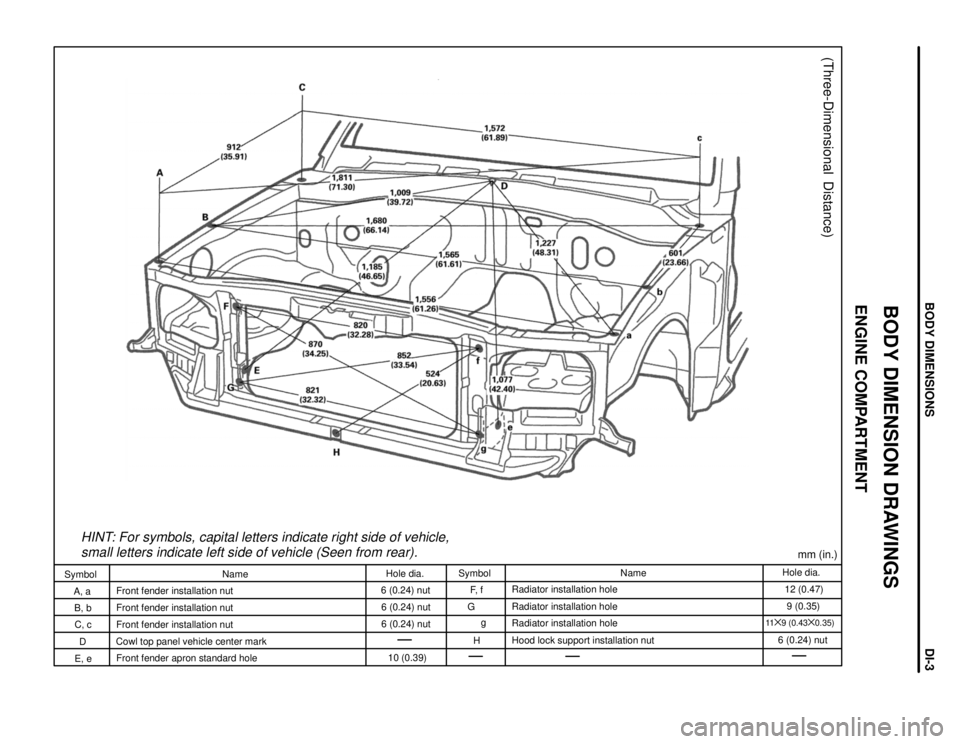
HINT: For symbols, capital letters indicate right side of vehicle,
small letters indicate left side of vehicle (Seen from rear).
(Three-Dimensional Distance)
mm (in.)
Hole dia.
12 (0.47)
9 (0.35)
11y9 (0.43
y0.35)
6 (0.24) nut Name
Radiator installation hole
Radiator installation hole
Radiator installation hole
Hood lock support installation nut Symbol
F, f
G
g
H Hole dia.
6 (0.24) nut
6 (0.24) nut
6 (0.24) nut
10 (0.39) Name
Front fender installation nut
Front fender installation nut
Front fender installation nut
Cowl top panel vehicle center mark
Front fender apron standard hole Symbol
A, a
B, b
C, c
D
E, e
BODY DIMENSION DRAWINGS
ENGINE COMPARTMENT
BODY DIMENSIONSDI-3
Trending: instrument cluster, engine air intake, wheel size, brake pads, ECO mode, key, ignition
![TOYOTA LAND CRUISER 1998 Factory Repair Manual mm in.
160 6.30
ROCKER OUTER PANEL (CUT)
REMOVAL
[Cut and Join Locations]
Cut and Join Location
160 mm
Cut and Join Location
(Cut Location for Supply Parts) Cut and Join Location
(Cut Location for Sup TOYOTA LAND CRUISER 1998 Factory Repair Manual mm in.
160 6.30
ROCKER OUTER PANEL (CUT)
REMOVAL
[Cut and Join Locations]
Cut and Join Location
160 mm
Cut and Join Location
(Cut Location for Supply Parts) Cut and Join Location
(Cut Location for Sup](/img/14/57459/w960_57459-701.png)
![TOYOTA LAND CRUISER 1998 Factory Repair Manual ROOF PANEL (ASSY): Moon Roof
REMOVAL
[If reusing the roof panel reinforcement]
Hemming Location
Disc Sander
BODY PANEL REPLACEMENTRE-70 TOYOTA LAND CRUISER 1998 Factory Repair Manual ROOF PANEL (ASSY): Moon Roof
REMOVAL
[If reusing the roof panel reinforcement]
Hemming Location
Disc Sander
BODY PANEL REPLACEMENTRE-70](/img/14/57459/w960_57459-703.png)
