TOYOTA MIRAI 2020 Owners Manual (in English)
Manufacturer: TOYOTA, Model Year: 2020, Model line: MIRAI, Model: TOYOTA MIRAI 2020Pages: 528, PDF Size: 11.98 MB
Page 381 of 528

3817-3. Do-it-yourself maintenance
MIRAI_OM_USA_OM62073U
7
Maintenance and care
■Tire types
●Summer tires
Summer tires are high-speed performance tires best suited to highway
driving under dry conditions. Si nce summer tires do not have th e same
traction performance as snow tires, summer tires are inadequate for
driving on snow-covered or icy ro ads. For driving on snow-covered
roads or icy roads, the use of snow tires is recommended. When install-
ing snow tires, be sure to replace all four tires.
●All season tires
All season tires are designed to provide better traction in sno w and to
be adequate for driving in most winter conditions as well as fo r use
year-round. All season tires, however, do not have adequate tra ction
performance compared with snow tires in heavy or loose snow. Al so, all
season tires fall short in acceleration and handling performanc e com-
pared with summer tires in highway driving.
●Snow tires
For driving on snow-covered roads or icy roads, we recommend us ing
snow tires. If you need snow tires, select tires of the same si ze, con-
struction and load capacity as t he originally installed tires. Since your
vehicle has radial tires as original equipment, make sure your snow
tires also have radial construct ion. Do not install studded tires without
first checking local regulations for possible restrictions. Sno w tires
should be install ed on all wheels. ( P. 301)
■If the tread on snow tires wea rs down below 0.16 in. (4 mm)
The effectiveness of the tires as snow tires is lost.
Page 382 of 528

3827-3. Do-it-yourself maintenance
MIRAI_OM_USA_OM62073U■
Situations in which the tire pressure warning system may not op
er-
ate properly
●In the following cases, the tire pressure warning system may no t operate
properly.
• If non-genuine Toyota wheels are used.
• A tire has been replaced with a tire that is not an OE (Original Equip-
ment) tire.
• A tire has been replac ed with a tire that is not of the specif ied size.
• Tire chains, etc., are equipped.
• An auxiliary-supported ru n-flat tire is equipped.
• If a window tint that affects the radio wave signals is instal led.
• If there is a lot of snow or ice on the vehicle, particularly around the
wheels or wheel housings.
• If the tire inflation pressure is extremely higher than the sp ecified
level.
• If wheels without the tire pressure warning valves and transmi tters
are used.
• If the ID code on the tire pressure warning valves and transmi tters is
not registered in the tire pressure warning computer.
●Performance may be affected in the following situations.
• Near a TV tower, electric power plant, gas station, radio stat ion, large
display, airport or other facilit y that generates strong radio waves or
electrical noise
• When carrying a portable radio, cellular phone, cordless phone or
other wireless communication device
●When the vehicle is parked, the time taken for the warning to s tart or go
off could be extended.
●When tire inflation pressure declines rapidly for example when a tire has
burst, the warning may not function.
Page 383 of 528
3837-3. Do-it-yourself maintenance
MIRAI_OM_USA_OM62073U
7
Maintenance and care
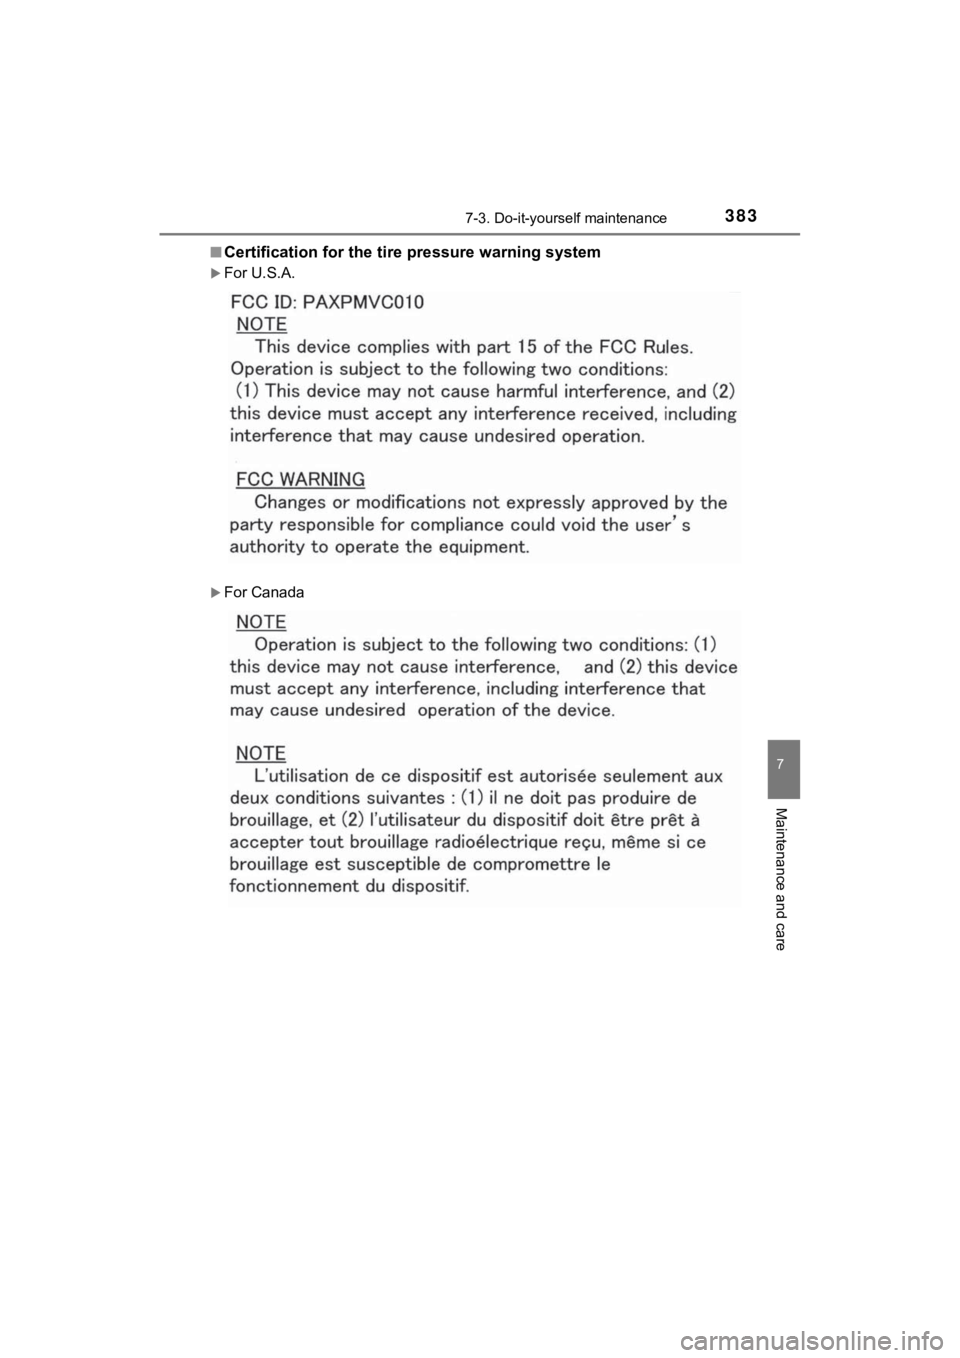
■Certification for the tire pressure warning system
For U.S.A.
For Canada
Page 384 of 528

3847-3. Do-it-yourself maintenance
MIRAI_OM_USA_OM62073U
WARNING
■When inspecting or replacing tires
Observe the following precautions to prevent accidents.
Failure to do so may cause damage to parts of the drivetrain as well as
dangerous handling characteristics, which may lead to an accide nt
resulting in death o r serious injury.
●Do not mix tires of different ma kes, models or tread patterns.
Also, do not mix tires of re markably different treadwear.
●Do not use tire sizes other th an those recommended by Toyota.
●Do not mix differently constructed tires (radial, bias-belted o r bias-ply
tires).
●Do not mix summer, all season and snow tires.
●Do not use tires that have b een used on another vehicle.
Do not use tires if you do not kn ow how they were used previous ly.
Page 385 of 528

3857-3. Do-it-yourself maintenance
MIRAI_OM_USA_OM62073U
7
Maintenance and care
NOTICE
■Repairing or replacing tires, wheels, tire pressure warning valves,
transmitters and tire valve caps
●When removing or fitting the wheels, tires or the tire pressure warning
valves and transmitters, contact your Toyota dealer as the tire pres-
sure warning valves and transmitters may be damaged if not hand led
correctly.
●Make sure to install the tire val ve caps. If the tire valve caps are not
installed, water could enter the tire pressure warning valves a nd the
tire pressure warning valves could be bound.
●When replacing tire valve caps, do not use tire valve caps othe r than
those specified. The cap may become stuck.
■To avoid damage to the tire pressure warning valves and transmi t-
ters
When a tire is repaired with liqui d sealants, the tire pressure warning
valve and transmitter may not operate properly. If a liquid sea lant is
used, contact your Toyota dealer or other qualified service shop as soon
as possible. After use of liquid sealant, make sure to replace the tire
pressure warning valve and transmitter when replacing the tire.
( P. 3 7 9 )
■Driving on rough roads
Take particular care when drivi ng on roads with loose surfaces or pot-
holes.
These conditions may cause losses in tire inflation pressure, reducing
the cushioning ability of the t ires. In addition, driving on ro ugh roads
may cause damage to the tires themselves, as well as the vehicl e’s
wheels and body.
■If tire inflation pressure of e ach tire becomes low while drivi ng
Do not continue driving, or your t ires and/or wheels may be ruined.
Page 386 of 528
3867-3. Do-it-yourself maintenance
MIRAI_OM_USA_OM62073U
Replacing the tire
●Stop the vehicle on a hard, flat surface.
● Set the parking brake.
● Shift the shift position to P.
● Stop the fuel cell system.
When raising your vehicle with a jack, position the jack cor-
rectly. Improper placement may damage your vehicle or cause
injury.
If necessary tire replacement seem s difficult to perform, contact
your Toyota dealer.
Before jacking up the vehicle
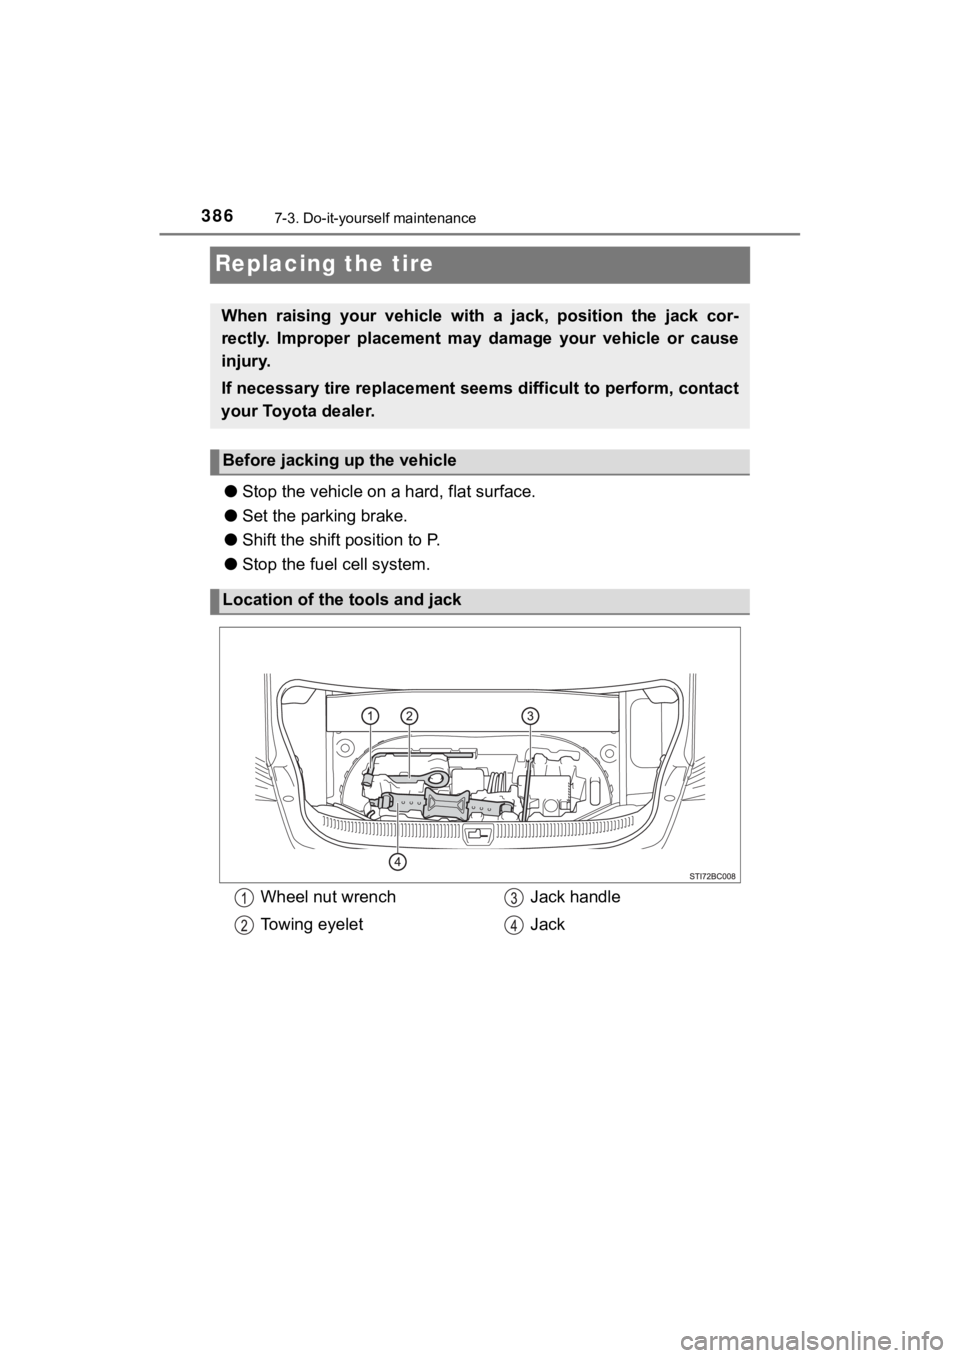
Location of the tools and jack
Wheel nut wrench
To w i n g e y e l e t Jack handle
Jack
Page 387 of 528
3877-3. Do-it-yourself maintenance
MIRAI_OM_USA_OM62073U
7
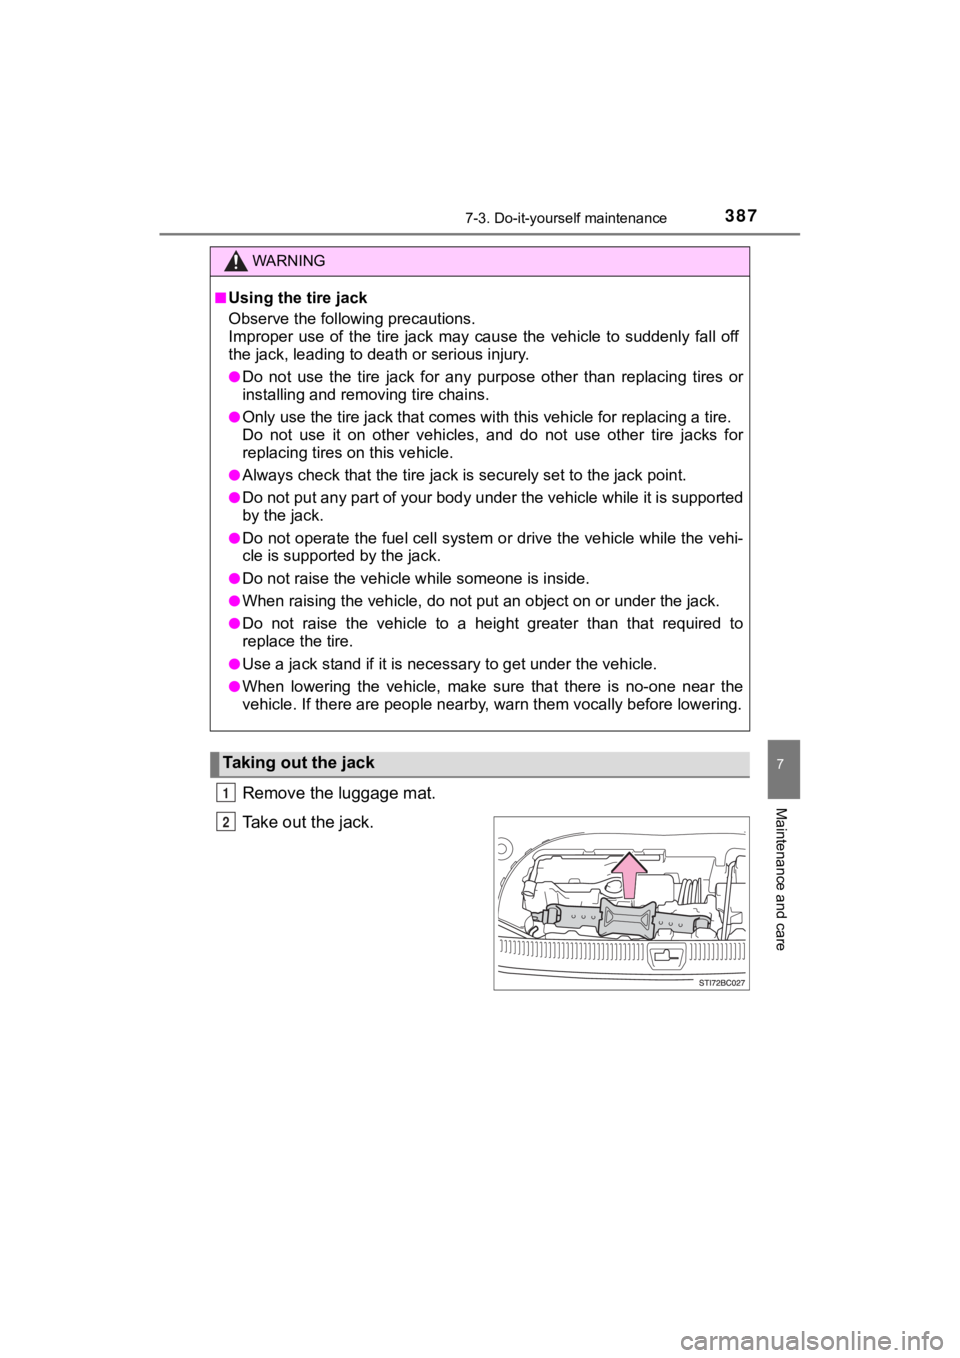
Maintenance and careRemove the luggage mat.
Take out the jack.
WARNING
■Using the tire jack
Observe the following precautions.
Improper use of the tire jack may cause the vehicle to suddenly fall off
the jack, leading to death or serious injury.
●Do not use the tire jack for any purpose other than replacing t ires or
installing and removing tire chains.
●Only use the tire jack that comes with this vehicle for replacing a tire.
Do not use it on other vehicles, and do not use other tire jack s for
replacing tires on this vehicle.
●Always check that the tire jack is securely set to the jack point.
●Do not put any part of your body under the vehicle while it is supported
by the jack.
●Do not operate the fuel cell system or drive the vehicle while the vehi-
cle is supported by the jack.
●Do not raise the vehicle w hile someone is inside.
●When raising the vehicle, do not put an object on or under the jack.
●Do not raise the vehicle to a height greater than that required to
replace the tire.
●Use a jack stand if it is nece ssary to get under the vehicle.
●When lowering the vehicle, make sure that there is no-one near the
vehicle. If there are people nearb y, warn them vocally before lowering.
Taking out the jack
1
2
Page 388 of 528
3887-3. Do-it-yourself maintenance
MIRAI_OM_USA_OM62073U
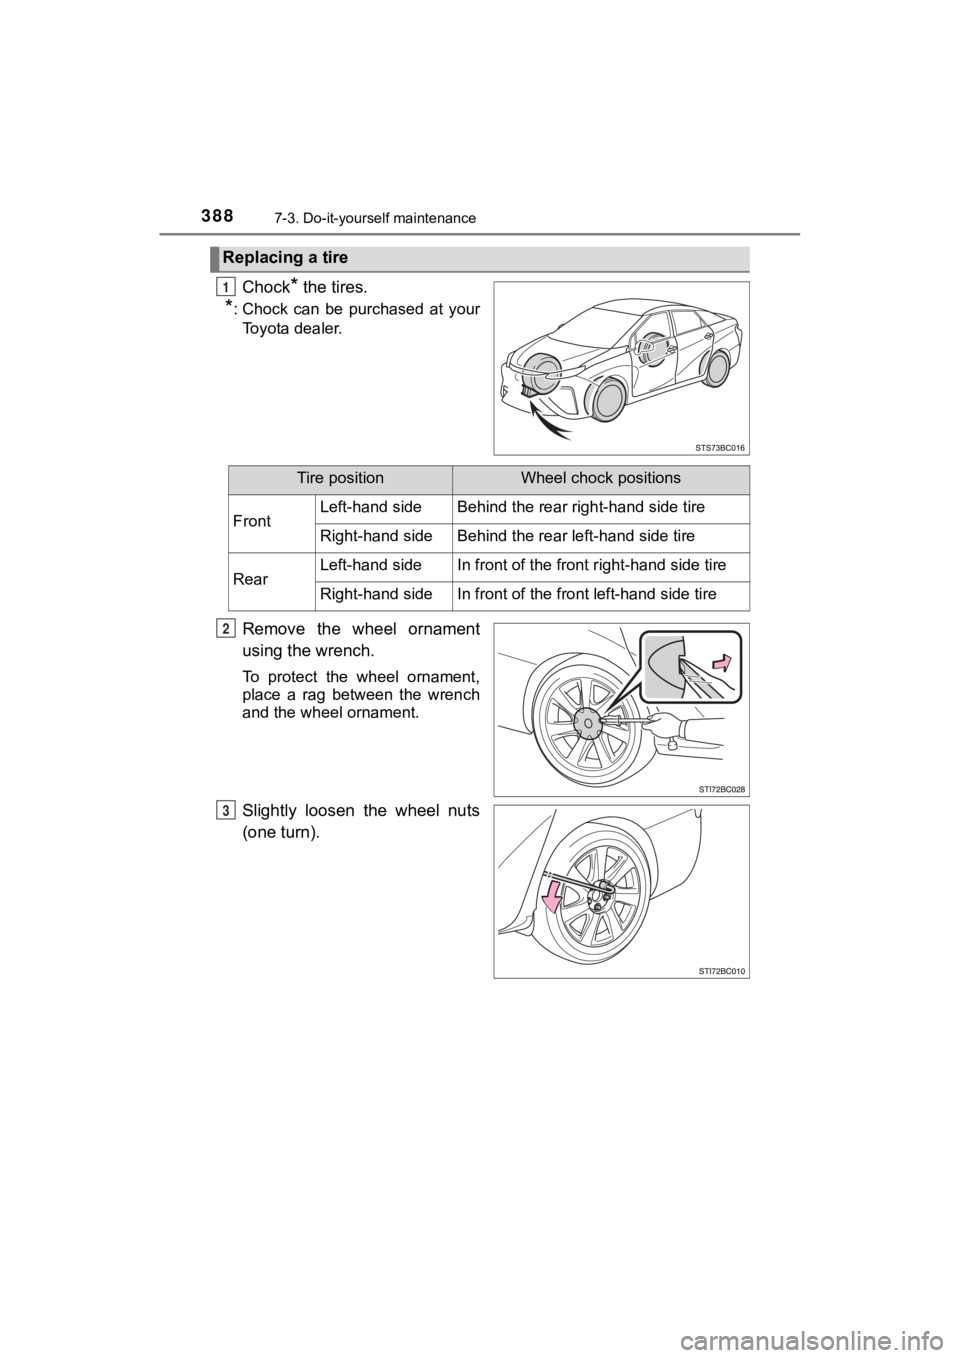
Chock* the tires.
*: Chock can be purchased at yourToyota dealer.
Remove the wheel ornament
using the wrench.
To protect the wheel ornament,
place a rag between the wrench
and the wheel ornament.
Slightly loosen the wheel nuts
(one turn).
Replacing a tire
1
Tire positionWheel chock positions
FrontLeft-hand sideBehind the rear right-hand side tire
Right-hand sideBehind the rear left-hand side tire
RearLeft-hand sideIn front of the front r ight-hand side tire
Right-hand sideIn front of the front left-hand side tire
2
3
Page 389 of 528
3897-3. Do-it-yourself maintenance
MIRAI_OM_USA_OM62073U
7
Maintenance and care
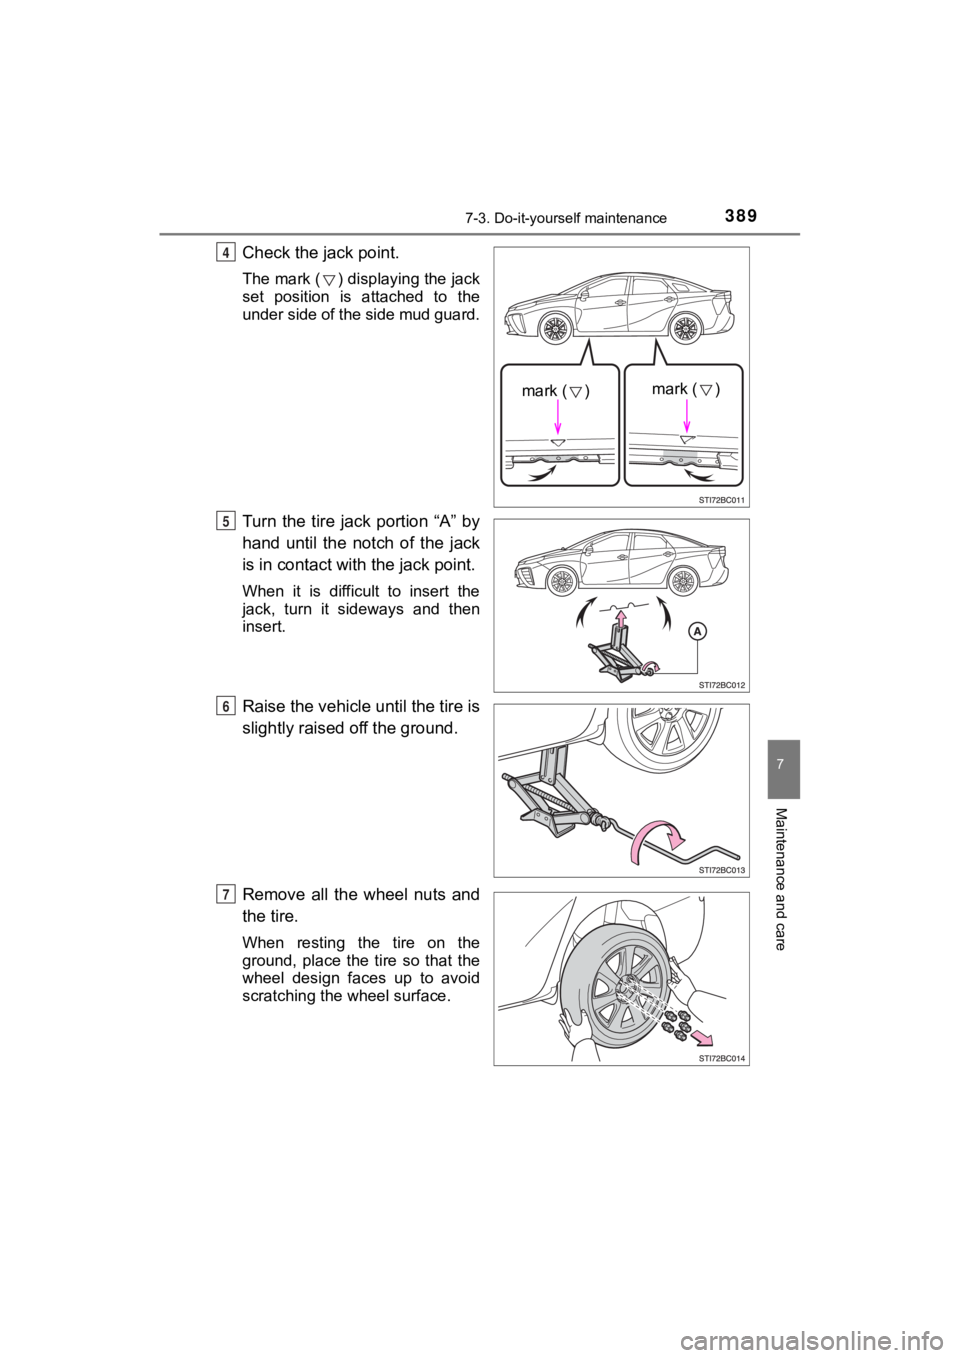
Check the jack point.
The mark ( ) displaying the jack
set position is attached to the
under side of the side mud guard.
Turn the tire jack portion “A” by
hand until the notch of the jack
is in contact with the jack point.
When it is difficult to insert the
jack, turn it sideways and then
insert.
Raise the vehicle until the tire is
slightly raised off the ground.
Remove all the wheel nuts and
the tire.
When resting the tire on the
ground, place the tire so that the
wheel design faces up to avoid
scratching the wheel surface.
mark ( )mark ( )
4
5
6
7
Page 390 of 528
3907-3. Do-it-yourself maintenance
MIRAI_OM_USA_OM62073U
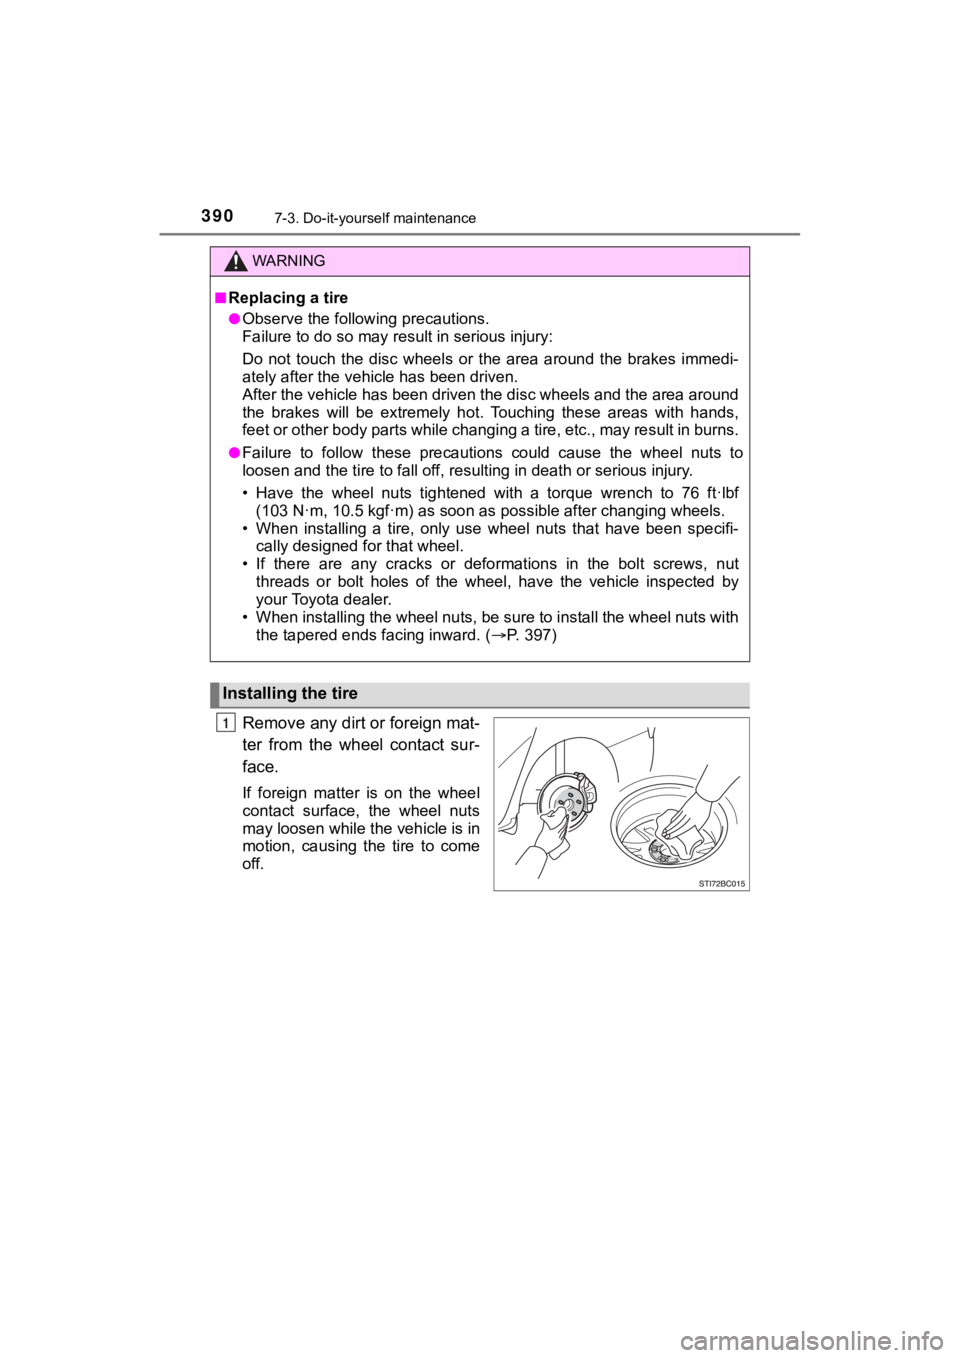
Remove any dirt or foreign mat-
ter from the wheel contact sur-
face.
If foreign matter is on the wheel
contact surface, the wheel nuts
may loosen while the vehicle is in
motion, causing the tire to come
off.
WARNING
■Replacing a tire
●Observe the following precautions.
Failure to do so may result in serious injury:
Do not touch the disc wheels o r the area around the brakes imme di-
ately after the vehi cle has been driven.
After the vehicle has been driven the disc wheels and the area around
the brakes will be extremely hot . Touching these areas with han ds,
feet or other body parts while c hanging a tire, etc., may result in burns.
●Failure to follow these precautions could cause the wheel nuts to
loosen and the t ire to fall off, resulting in death or serious injury.
• Have the wheel nuts tightened with a torque wrench to 76 ft·lb f
(103 N·m, 10.5 kgf·m) as soon as possible after changing wheels.
• When installing a tire, only use wheel nuts that have been spe cifi-
cally designed for that wheel.
• If there are any cracks or defo rmations in the bolt screws, nut
threads or bolt holes of the wheel, have the vehicle inspected by
your Toyota dealer.
• When installing the wheel nuts, be sure to install the wheel n uts with
the tapered ends facing inward. ( P. 3 9 7 )
Installing the tire
1