display TOYOTA PRIUS V 2012 Accessories, Audio & Navigation (in English)
[x] Cancel search | Manufacturer: TOYOTA, Model Year: 2012, Model line: PRIUS V, Model: TOYOTA PRIUS V 2012Pages: 228, PDF Size: 3.73 MB
Page 208 of 228
208
1. SETUP OPERATION
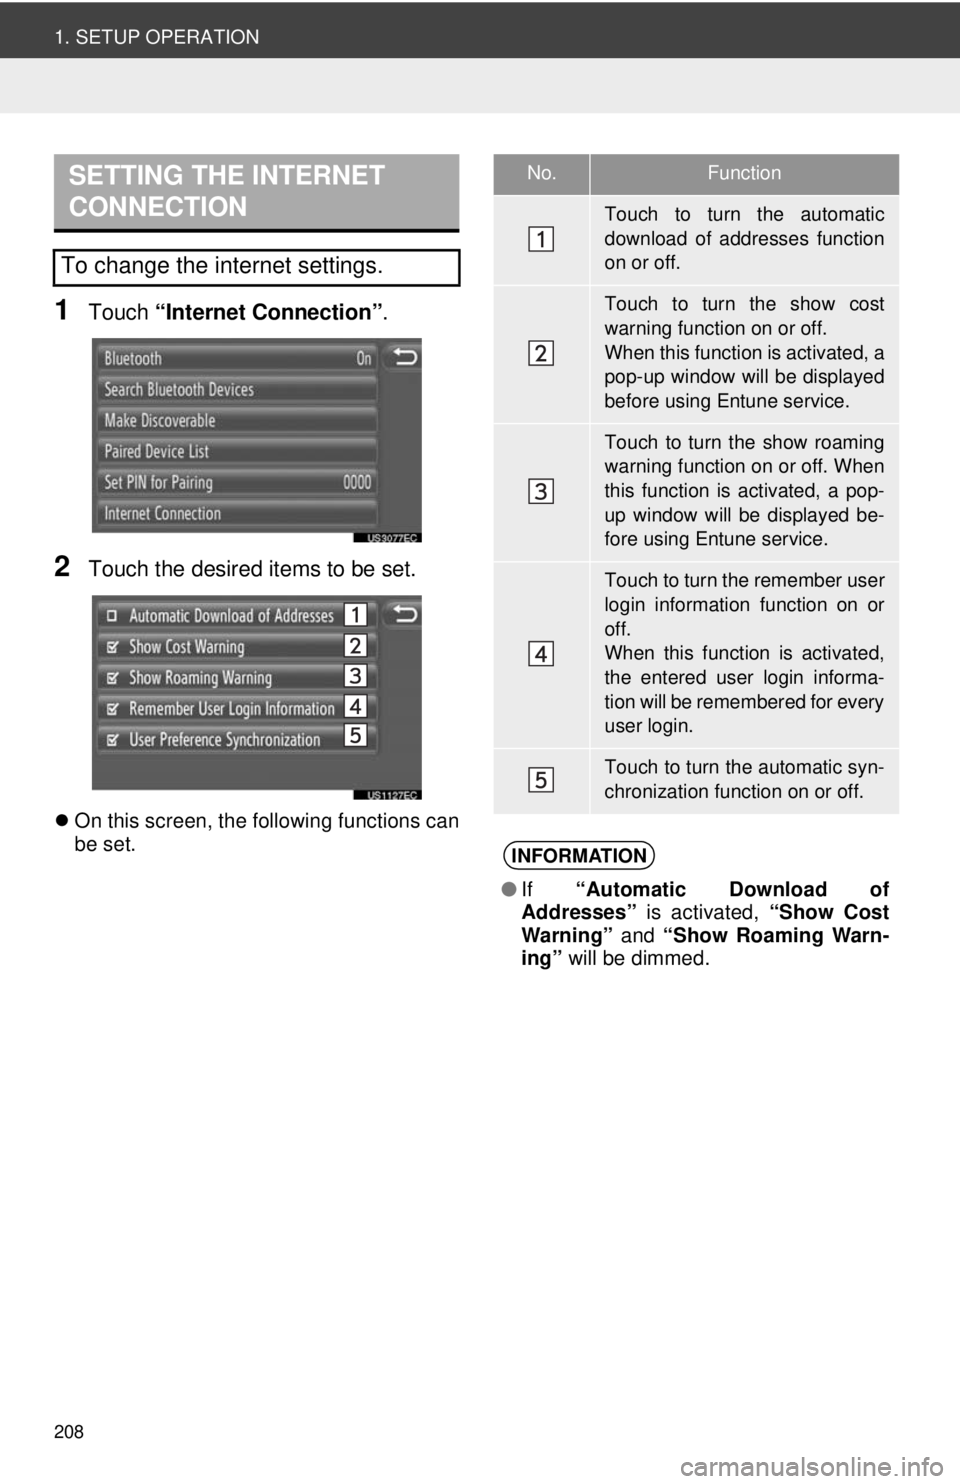
1Touch “Internet Connection” .
2Touch the desired items to be set.
On this screen, the following functions can
be set.
SETTING THE INTERNET
CONNECTION
To change the internet settings.
No.Function
Touch to turn the automatic
download of addresses function
on or off.
Touch to turn the show cost
warning function on or off.
When this function is activated, a
pop-up window will be displayed
before using Entune service.
Touch to turn the show roaming
warning function on or off. When
this function is activated, a pop-
up window will be displayed be-
fore using Entune service.
Touch to turn the remember user
login information function on or
off.
When this function is activated,
the entered user login informa-
tion will be remembered for every
user login.
Touch to turn the automatic syn-
chronization function on or off.
INFORMATION
●If “Automatic Download of
Addresses” is activated, “Show Cost
Warning” and “Show Roaming Warn-
ing” will be dimmed.
Page 211 of 228
211
8
SETUP
1. SETUP OPERATION
7. VEHICLE SETTINGS∗
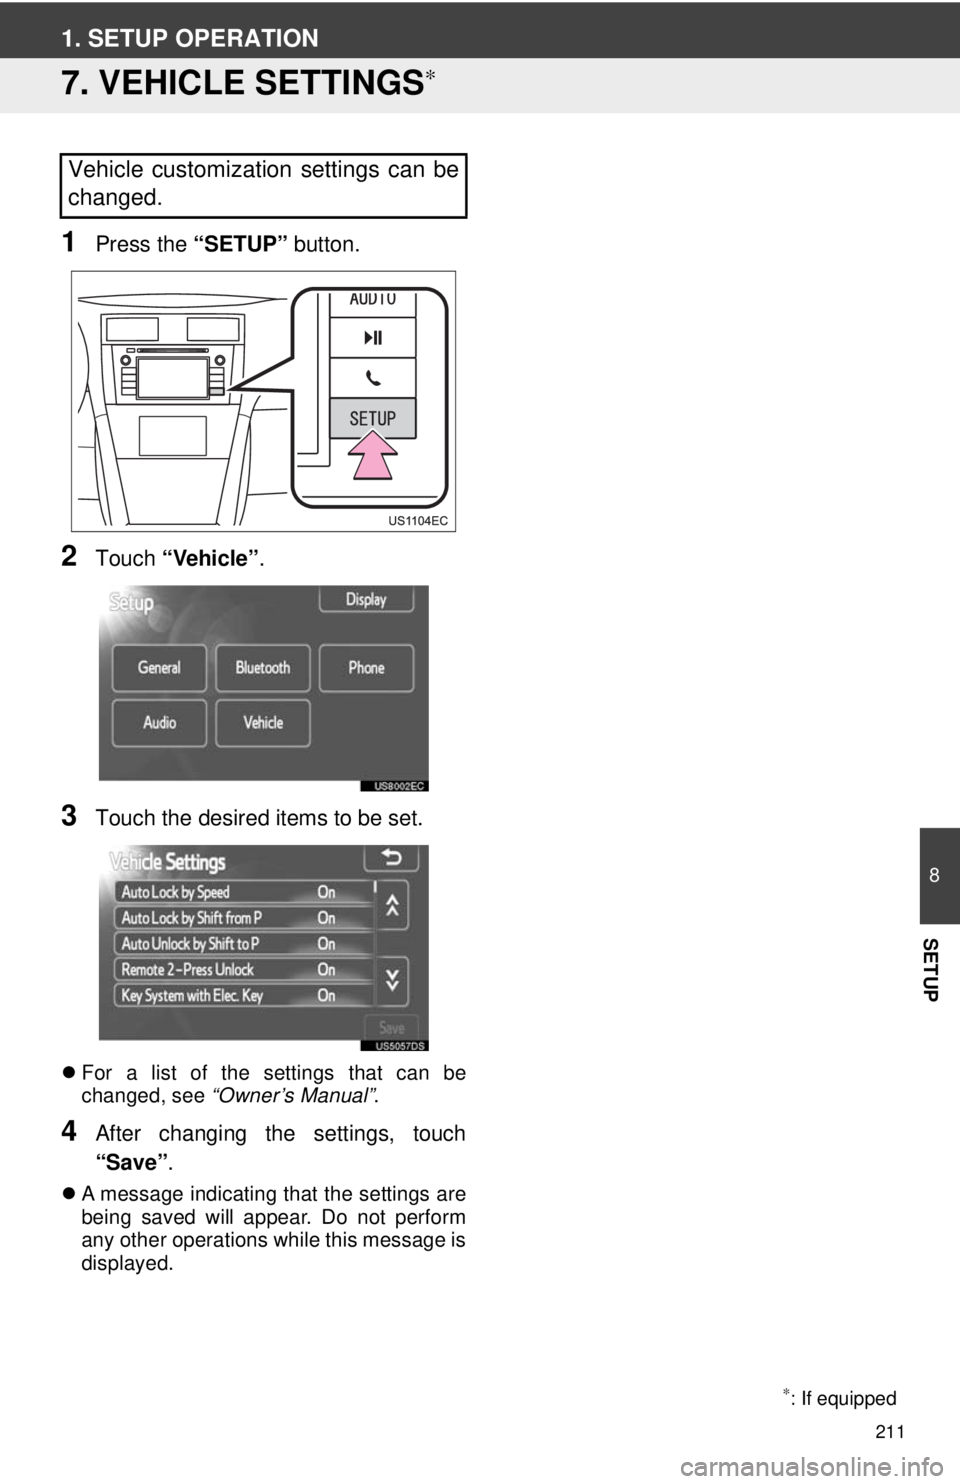
1Press the “SETUP” button.
2Touch “Vehicle”.
3Touch the desired items to be set.
For a list of the settings that can be
changed, see “Owner’s Manual” .
4After changing the settings, touch
“Save”.
A message indicating that the settings are
being saved will appear. Do not perform
any other operations while this message is
displayed.
Vehicle customization settings can be
changed.
∗: If equipped
Page 213 of 228
9
213
1
2
3
4
5
6
7
8
9
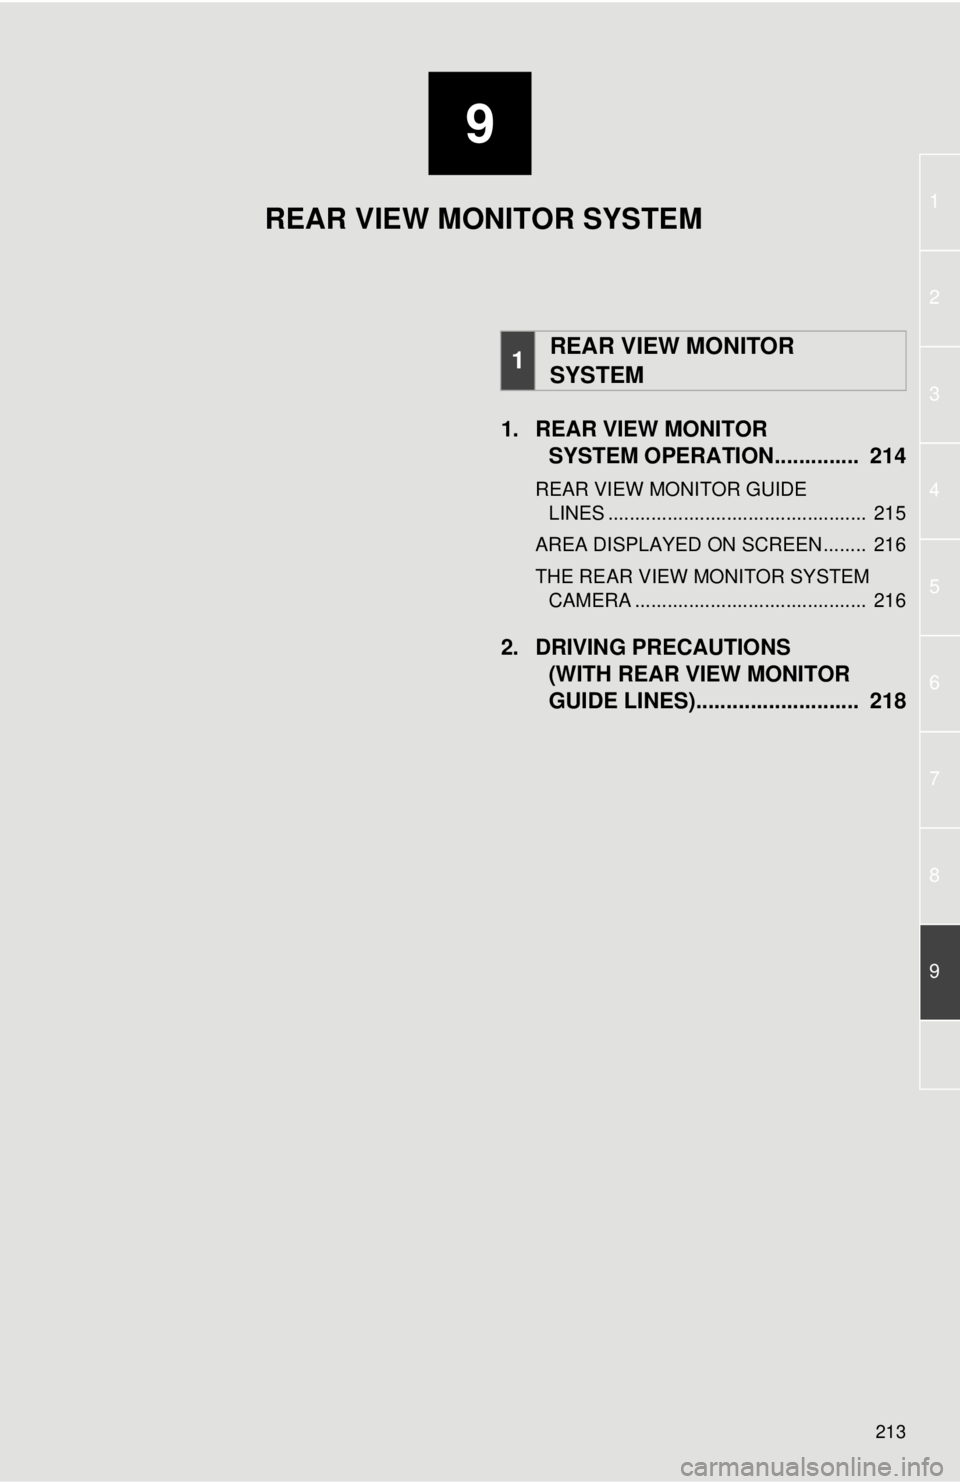
1. REAR VIEW MONITOR SYSTEM OPERATION. ............. 214
REAR VIEW MONITOR GUIDE
LINES ................................................ 215
AREA DISPLAYED ON SCREEN........ 216
THE REAR VIEW MONITOR SYSTEM CAMERA ........................................... 216
2. DRIVING PRECAUTIONS (WITH REAR VIEW MONITOR
GUIDE LINES)........................... 218
1REAR VIEW MONITOR
SYSTEM
REAR VIEW MONITOR SYSTEM
Page 214 of 228
214
1. REAR VIEW MONITOR SYSTEM
1. REAR VIEW MONITOR SYSTEM OPERATION
1To display the rear view image on the
screen, the shift lever is in the “R” posi-
tion when the engine switch is in the
“ON” position.
If you move the shift lever out of the “R”
position, the screen returns to the previ-
ous screen.
The rear view monitor system assists
the driver by displaying an image of the
view behind the vehicle while backing
up.
The image is displayed in reverse on
the screen. This allows the image to
appear in the same manner as that of
the rear view mirror.CAUTION
●Never depend on the rear view monitor
system entirely when backing up.
Always make sure your intended path is
clear.
Use caution, just as you would when
backing up any vehicle.
● Never back up while looking only at the
screen. The image on the screen is dif-
ferent from actual conditions. Depicted
distances between objects and flat sur-
faces will differ from the actual dis-
tances. If you back up while looking only
at the screen, you may hit a vehicle, a
person or an object. When backing up,
be sure to check behind and all around
the vehicle visually and with mirrors
before proceeding.
● Do not use the system when the back
door, trunk or tailgate is not completely
closed.
● Use your own eyes to confirm the vehi-
cle’s surroundings, as the displayed
image may become faint or dark, and
moving images will be distorted, or not
entirely visible when the outside tem-
perature is low. When backing up, be
sure to check behind and all around the
vehicle visually and with mirror before
proceeding.
● Do not use the system in the following
cases:
• On icy or slick road surfaces, or in
snow.
• When using tire chains or emergency tires.
• On an uneven road, such as a slope.
With rear view monitor guide lines (If
equipped)
● Always check the vehicle surrounding
area, because the guide lines are ancil-
lary lines.
● The guide lines are ancillary lines and
do not change even if the steering wheel
is turned.
Page 215 of 228
215
1. REAR VIEW MONITOR SYSTEM
9
REAR VIEW MONITOR SYSTEM
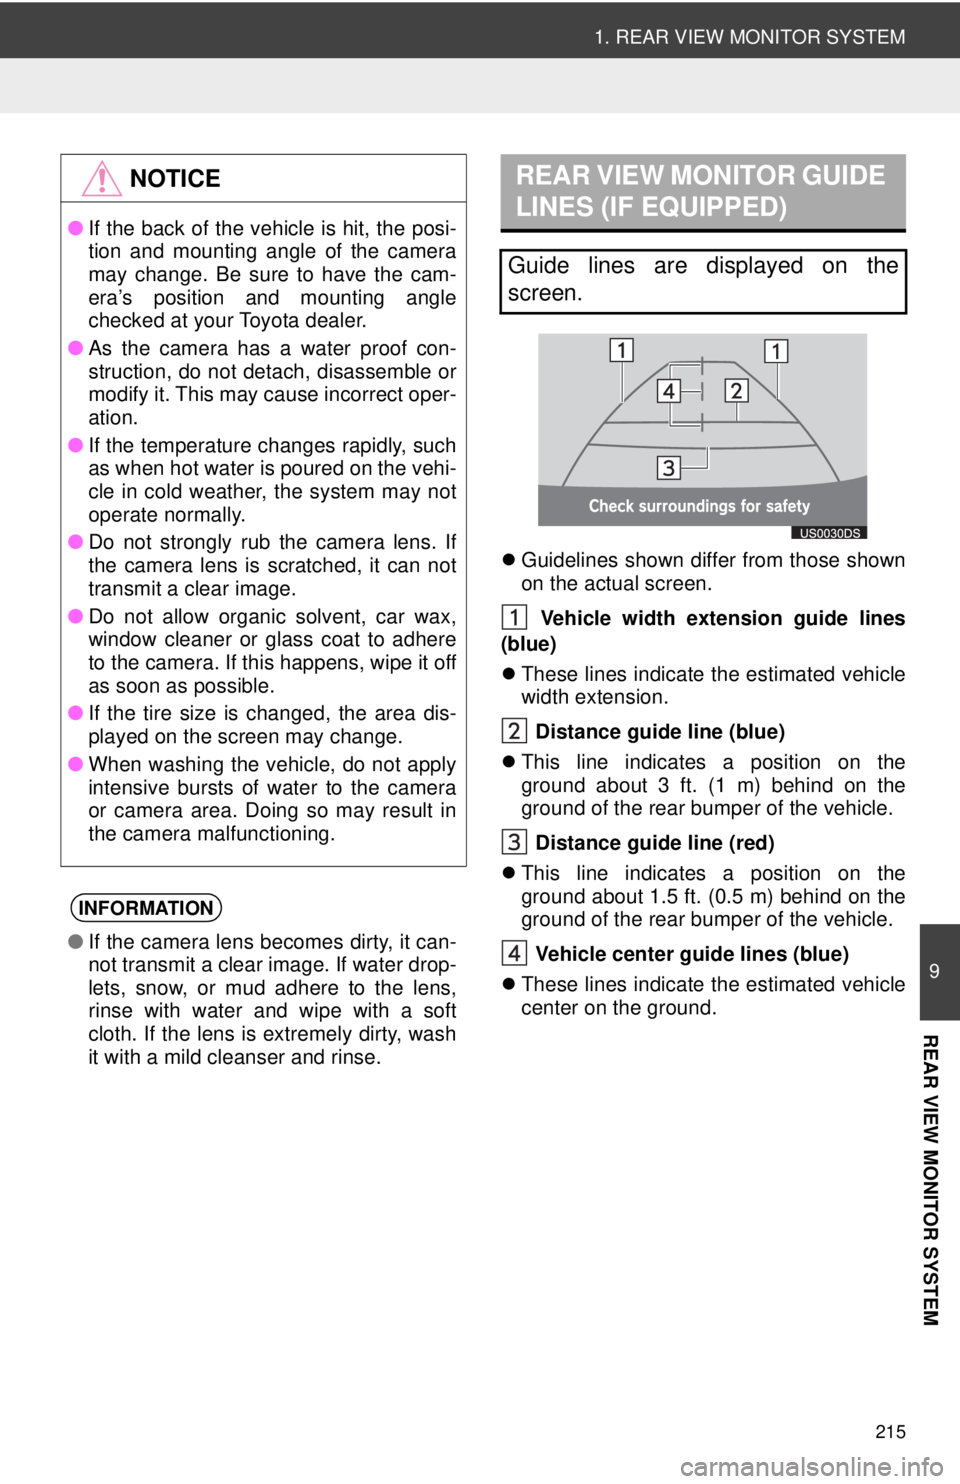
Guidelines shown differ from those shown
on the actual screen.
Vehicle width exten sion guide lines
(blue)
These lines indicate the estimated vehicle
width extension.
Distance guide line (blue)
This line indicates a position on the
ground about 3 ft. (1 m) behind on the
ground of the rear bumper of the vehicle.
Distance guide line (red)
This line indicates a position on the
ground about 1.5 ft. (0.5 m) behind on the
ground of the rear bumper of the vehicle.
Vehicle center gu ide lines (blue)
These lines indicate the estimated vehicle
center on the ground.
NOTICE
● If the back of the vehicle is hit, the posi-
tion and mounting angle of the camera
may change. Be sure to have the cam-
era’s position and mounting angle
checked at your Toyota dealer.
● As the camera has a water proof con-
struction, do not detach, disassemble or
modify it. This may cause incorrect oper-
ation.
● If the temperature changes rapidly, such
as when hot water is poured on the vehi-
cle in cold weather, the system may not
operate normally.
● Do not strongly rub the camera lens. If
the camera lens is scratched, it can not
transmit a clear image.
● Do not allow organic solvent, car wax,
window cleaner or glass coat to adhere
to the camera. If this happens, wipe it off
as soon as possible.
● If the tire size is changed, the area dis-
played on the screen may change.
● When washing the vehicle, do not apply
intensive bursts of water to the camera
or camera area. Doing so may result in
the camera malfunctioning.
INFORMATION
●If the camera lens becomes dirty, it can-
not transmit a clear image. If water drop-
lets, snow, or mud adhere to the lens,
rinse with water and wipe with a soft
cloth. If the lens is extremely dirty, wash
it with a mild cleanser and rinse.
REAR VIEW MONITOR GUIDE
LINES (IF EQUIPPED)
Guide lines are displayed on the
screen.
Page 216 of 228
216
1. REAR VIEW MONITOR SYSTEM
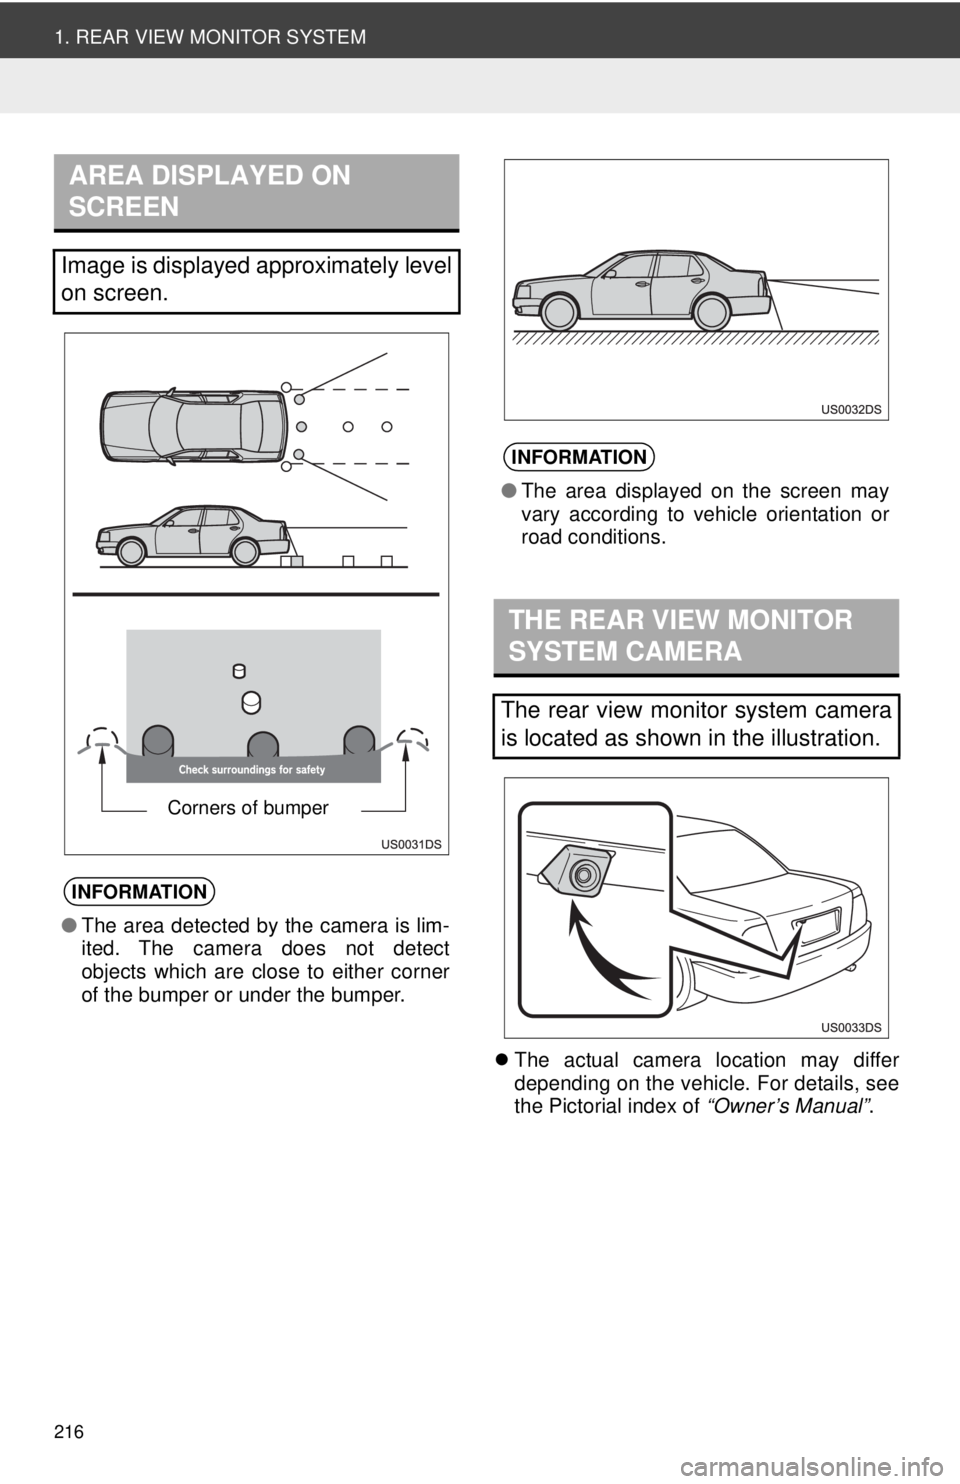
The actual camera location may differ
depending on the vehicle. For details, see
the Pictorial index of “Owner’s Manual”.
AREA DISPLAYED ON
SCREEN
Image is displayed approximately level
on screen.
INFORMATION
●The area detected by the camera is lim-
ited. The camera does not detect
objects which are close to either corner
of the bumper or under the bumper.
Corners of bumper
INFORMATION
●The area displayed on the screen may
vary according to vehicle orientation or
road conditions.
THE REAR VIEW MONITOR
SYSTEM CAMERA
The rear view monitor system camera
is located as shown in the illustration.
Page 222 of 228
222
ALPHABETICAL INDEX
A
Adding destinations.................................. 49
“Address” .................................................. 35
Adjust contrast/brightness...................... 201
“Advanced”................................................ 40
“AM” ........................................................ 106
Application operation ................................ 93
Apps .......................................................... 93
APPS button ....................................... 20, 74
“Audio” .................................................... 100
Audio remote controls (steering switches) ............................. 141
Audio system ....... ..................................... 99
Audio system operating hint s ................. 144
Caring for your CD player and discs.................................... ..... 146
CD-R and CD-RW discs ..................... 149
iPod .................................................... 145
MP3/WMA files ................................... 148
Radio reception .................................. 144
Terms ................................................. 150
USB memory ...................................... 146
B
“Beep” .....................................................197
Bluetooth®...............................132, 153, 202
Bluetooth® audio .................................... 132
Connecting Bluetooth® audio ............. 134
Playing Bluetooth® audio player ......... 137
Sound setting.............................. 104, 105
Switching to Bluetooth
® audio
mode ............................................... 133
Bluetooth
® hands-free system . ...............153
Bluetooth® settings ................................ 202
Bluetooth® function ON/OFF .............. 202
Displaying the paired device list ......... 206
Pairing a Bluetooth
® device................ 203
Setting pin........................................... 207
C
“Calendar” .................................................79
“Call History” ...........................................173
Calling on a Bluetooth
® phone ............... 170
By call history ..................................... 173
By dial ................................................. 170
Page 223 of 228
223
By phone book ................................... 171
By POI call ......................................... 174
By speed dials .................................... 172
By “Stored” list on the “Contacts” screen ........................... 170
Calling using a short message ........... 173
CAR button ............................................. 190
CD........................................................... 117
Cellular phone......................................... 153
Channel category.................................... 113
Checking calendar ................................... 79
Connecting a Bluetooth
® phone ............ 161
Connecting Bluetooth® audio ................. 134
Controls using the “TUNE SCROLL” knob ........................ 103
D
“Day / Night Mode”.................................... 61
“Delete Personal Data” ........................... 197
Destination search ................................... 33
On the “Enter Destination” screen........ 35
On the “My Destinations” screen.......... 33
Detour the segment on the route ....... 51, 88
Dial.......................................................... 170 Displaying and editing the entry
information.................................... 58, 168
Displaying the radio ID ............................ 112
Displaying the title and name .................. 114
Download application ............................... 93 Operating application ........................... 93
DSP control ............................................. 104
Automatic sound levelizer (ASL) ......... 104
Surround function ............................... 104
E
Eject button ............................................. 117
Email ........................................................ 77Checking “Email” .................................. 77
Receiving a new email ......................... 77
“Enter Destination” .................................... 35
F
“FM” ........................................................ 106
Fuel consumption.................................... 191 History ................................................. 192
Trip information ................................... 191
Function index........................................... 12
Page 225 of 228
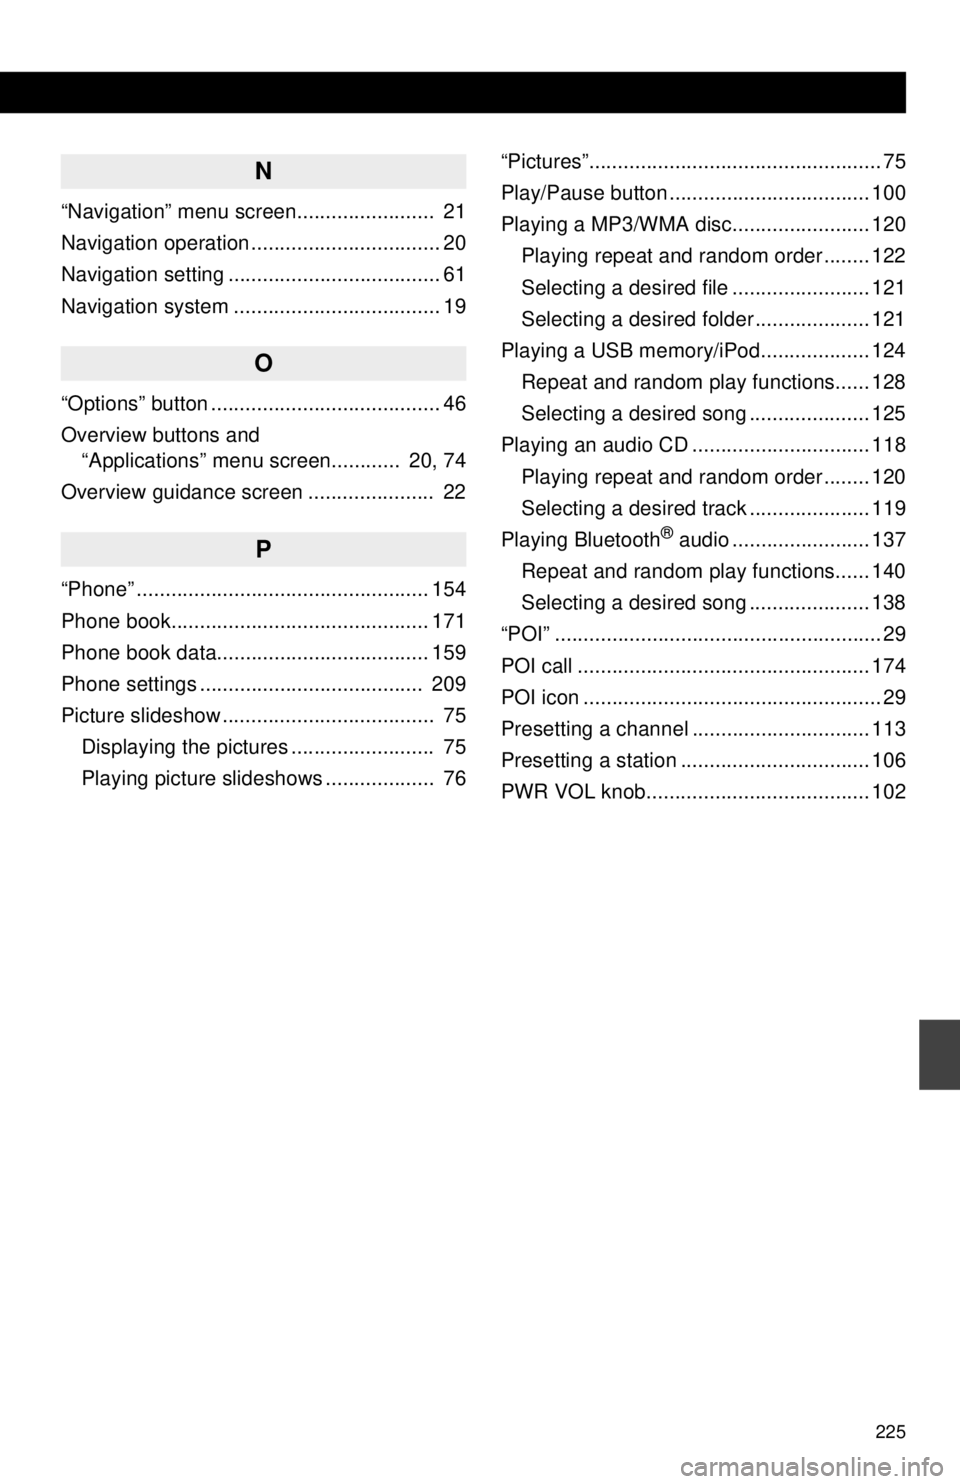
225
N
“Navigation” menu screen........................ 21
Navigation operation ................................. 20
Navigation setting ..................................... 61
Navigation system .................................... 19
O
“Options” button ........................................ 46
Overview buttons and “Applications” menu screen............ 20, 74
Overview guidance screen ...................... 22
P
“Phone” ................................................... 154
Phone book............................................. 171
Phone book data..................................... 159
Phone settings ....................................... 209
Picture slideshow ..................................... 75 Displaying the pictures ......................... 75
Playing picture slideshows ................... 76 “Pictures”................................................... 75
Play/Pause button ................................... 100
Playing a MP3/WMA disc........................ 120
Playing repeat and random order ........ 122
Selecting a desired file ........................ 121
Selecting a desired folder .................... 121
Playing a USB memory/iPod................... 124 Repeat and random play functions...... 128
Selecting a desired song ..................... 125
Playing an audio CD ............................... 118 Playing repeat and random order ........ 120
Selecting a desired track ..................... 119
Playing Bluetooth
® audio ........................ 137
Repeat and random play functions...... 140
Selecting a desired song ..................... 138
“POI” ......................................................... 29
POI call ................................................... 174
POI icon .................................................... 29
Presetting a channel ............................... 113
Presetting a station ................................. 106
PWR VOL knob....................................... 102
Page 226 of 228

226
ALPHABETICAL INDEX
Q
Quick guide ................................................. 9
R
Radio broadcast data system ................. 107
Radio reception ....................................... 144AM ....................................................... 144
FM ....................................................... 144
XM
®..................................................... 145
Rear view monitor system .................... ... 213
Recalculating the route by the traffic messages ................................... 89
Receiving on a Bluetooth
® phone .......... 175
Reconnecting the Bluetooth® phone...... 164
Registering a entry ........................... 52, 165 Displaying and editing the entry information ................................ 58, 168
Registering a entry as “Speed Dials” ............................. 167
Registering a new entry................ 52, 165
Sending stored contacts to a USB memory .................................... 60
Registering “Home” .................................. 52 Route guidance .........................................44
Route guidance screen ............................ 44
“Route Options” .........................................64
Route preferences...............................43, 64
Route settings .......................................... 64
S
Satellite radio (SAT) ................................112
Screens for general settings ...................197
Delete personal data ...........................199
Selecting a language ...........................198
“SEEK/TRACK” button ............................100
Selecting a channel .................................114
Selecting a station ...................................107
Setting “Home” as the destination ............ 33
Setting the route ....................................... 43
Setup .......................................................195
SETUP button .........................................196
“Setup” screen........................................ 196
Short message function ......................... 179 Checking received short messages.... 179
Checking sent short messages .......... 180
Sending a new short messages ......... 180