TOYOTA PROACE CITY VERSO 2020 Owners Manual
Manufacturer: TOYOTA, Model Year: 2020, Model line: PROACE CITY VERSO, Model: TOYOTA PROACE CITY VERSO 2020Pages: 272, PDF Size: 58.6 MB
Page 111 of 272

The eng")
111
Driving
6
NOTIC E
During parking manoeuvres, STOP mode is not available for a few seconds after coming out of reverse gear or turning the steering wheel.
Restarting the engine (START mode)
The engine automatically restarts as soon as the driver indicates the intention of moving off again.– With a manual gearbox: with the clutch pedal fully depressed.– With an automatic gearbox:• With the selector in position D or M: with the brake pedal released.• With the selector in position N and the brake pedal released: with the selector at D or M.• With the selector in position P and the brake pedal depressed: with the selector at R, N, D or M.
Special cases
The engine will restart automatically if all conditions for operation are met again and in the following case.– Speed of the vehicle exceeds 3 km/h (2 mph) (depending on the engine).In this case, this indicator lamp flashes for a few seconds, then goes off.
Malfunctions
Depending on the vehicle’s equipment:In the event of a system malfunction, this warning lamp flashes on the instrument panel.The warning lamp in this button flashes and a message appears, accompanied by an audible signal.Have the vehicle checked by a TOYOTA dealer or a qualified workshop.
The vehicle stalls in STOP mode
All of the instrument panel warning lamps come on if there is a fault.Depending on version, a warning message may also be displayed, prompting you to place the gear selector in position N and depress the brake pedal.► Switch off the ignition then start the engine again with the key or the "START/STOP" button.
WARNI NG
The Stop & Start system requires a 12 V battery of specific technology and specification.All work concerning the battery must be carried out only by a TOYOTA dealer or a qualified workshop.
Under-inflation detection
This system automatically checks the pressures of the tyres while driving.It compares the information given by the wheel speed sensors with reference values, which must be reinitialised every time the tyre pressures are adjusted or a wheel changed.The system triggers an alert as soon as it detects a drop in the inflation pressure of one or more tyres.
WARNI NG
Under-inflation detection does not replace the need for vigilance on the part of the driver.This system does not avoid the need to regularly check the tyre pressures (including the spare wheel) as well as before a long journey.Driving with under-inflated tyres, particularly in adverse conditions (heavy load, high speed, long journey):– worsens road-holding.– lengthens braking distances.– causes premature wear of the tyres.– increases fuel consumption.
Page 112 of 272

11 2
NOTIC E
The inflation pressures defined for the vehicle can be found on the tyre pressure label.For more information on the Identification markings, refer to the corresponding section.
WARNI NG
Checking tyre pressuresThis check should be done when the tyres are "cold" (vehicle stopped for 1 hour or after a journey of less than 10 km (6 miles) at moderate speeds).Otherwise, add 0.3 bar to the pressures shown on the label.
NOTIC E
Snow chainsThe system does not have to be reinitialised after fitting or removing snow chains.
NOTIC E
Spare wheelThe steel spare wheel does not have an under-inflation detection sensor.
Under-inflation alert
This is signalled by the fixed illumination of this warning lamp, accompanied by an audible signal and, depending on equipment, the display of a message.► Reduce speed immediately, avoid excessive steering movements and avoid sudden braking.► Stop the vehicle as soon as it is safe to do so.
WARNI NG
The loss of pressure detected does not always cause visible bulging of the tyre.Do not rely on just a visual check.
► Using a compressor, such as the one in the temporary puncture repair kit, check the pressures of the four tyres when cold.► If it is not possible to make this check immediately, drive carefully at reduced speed.► In the event of a puncture, use the temporary puncture repair kit or the spare wheel (depending on equipment).
NOTIC E
The alert is kept active until the system is reinitialised.
Reinitialisation
Reinitialise the system after adjusting one or more tyre pressures and after changing one or more wheels.
WARNI NG
Before reinitialising the system, make sure that the pressures of the four tyres are correct for the conditions of use of the vehicle and
conform to the values written on the tyre pressure label.Check the pressures of the four tyres before performing the reinitialisation.The system does not advise if a pressure is incorrect at the time of reinitialisation.
Without audio system
► Press this button for about 3 seconds then release it. Reinitialisation is confirmed by an audible signal.
Page 113 of 272

11 3
Driving
6
With audio system or touch screen
With the vehicle stationary, the system is reinitialised via the vehicle configuration menu.
Malfunction
These warning lamps come on in the event of a malfunction.In this case, the tyre under-inflation monitoring function is no longer performed.Have the system checked by a TOYOTA dealer or a qualified workshop.
Head-up display
This system projects various information onto a smoked projection blade situated in the driver's field of vision, enabling them to drive without taking their eyes off the road.
Information displayed
during operation
Once the system has been activated, the following information is grouped together in the head-up display:
A.The speed of your vehicle.
B.Cruise control/speed limiter information.
C.If your vehicle is suitably equipped, distances between vehicles, automatic emergency braking alerts and navigation instructions.
D.If your vehicle is suitably equipped, speed limit information.
NOTIC E
For more information on Navigation, refer to the section Audio equipment and
telematics.
Selector
1.On.
2.Off (long press).
3.Brightness adjustment.
4.Display height adjustment.
Activation/Deactivation
► With the engine running, press button 1 to
activate the system and deploy the projection blade.
Page 114 of 272

11 4
► Press and hold button 2 to deactivate the system and retract the projection blade.The state of the system is saved when the engine is switched off and restored on restarting.
Height adjustment
► With the engine running, adjust the display to the desired height using the buttons 4:• up to move the display up,• down to move the display down.
Brightness adjustment
► With the engine running, adjust the brightness of the information display using the buttons 3:• on the "sun" to increase the brightness,• on the "moon" to decrease the brightness.
W ARNI NG
When stationary or while driving, no objects should be placed around the projection blade
(or in its recess) so as not to impede its movement and correct operation.
NOTIC E
In certain extreme weather conditions (rain and/or snow, bright sunshine, etc.), the head-up display may not be legible or may suffer temporary interference.Some sunglasses may hamper reading of the
information.To clean the projection blade, use a clean, soft cloth (such as a spectacles cloth or microfibre cloth). Do not use a dry or abrasive cloth, or detergent or solvent products, due to the risk of scratching the projection blade or damaging the non-reflective coating.
NOTIC E
This system operates when the engine is running, and the settings are saved when the ignition is switched off.
Driving and manoeuvring
aids - General
recommendations
NOTIC E
Driving and manoeuvring aids cannot, in any circumstances, replace the need for vigilance on the part of the driver.The driver must comply with the Highway Code, must remain in control of the vehicle in all circumstances and must be able to retake control of it at all times. The driver must adapt the speed to climactic conditions, traffic and the state of the road.It is the driver's responsibility to constantly check the traffic, to assess the relative distances and speeds of other vehicles and to anticipate their movements before indicating and changing lane.The systems cannot exceed the limits of the
laws of physics.
NOTIC E
Driving aidsYou should hold the steering wheel with both hands, always use the interior and exterior rear view mirrors, always keep the feet close to the pedals and take a break every two hours.
Page 115 of 272

11 5
Driving
6
NOTIC E
Manoeuvring aidsThe driver must always check the surroundings of the vehicle before and during the whole manoeuvre, in particular using the mirrors.
WARNI NG
RadarThe operation of the radar as well as the associated functions may be impaired through the accumulation of dirt (mud, frost, etc.), in certain difficult weather conditions (very heavy rain, snow) or if the bumper is damaged.If the front bumper is to be repainted, contact a TOYOTA dealer or a qualified workshop; certain types of paint could interfere with the operation of the radar.
WARNI NG
Driving aids cameraThis camera and its associated functions may be impaired or not work if the windscreen area in front of the camera is dirty, misty, frosty, covered with snow, damaged or masked by a sticker.On versions with camera alone, this message indicates to you that the camera is obstructed: "Driving aids camera: visibility limited, see user guide".In humid and cold weather, demist the windscreen regularly.Poor visibility (inadequate street lighting, heavy rain, thick fog, snowfall), dazzle (headlamps of an oncoming vehicle, low sun, reflections on a damp road, leaving a tunnel, alternating shade and light) can also impair detection performance.In the event of a windscreen replacement, contact a TOYOTA dealer or a qualified workshop to recalibrate the camera;
otherwise, the operation of the associated driving aids may be disrupted.
NOTIC E
Other camerasThe images from the camera(s) displayed on the touch screen or on the instrument panel may be distorted by the relief.
In the presence of areas in shade, or in conditions of bright sunlight or inadequate lighting, the image may be darkened and with lower contrast.Obstacles may appear further away than they actually are.
WARNI NG
SensorsThe operation of the sensors as well as the associated functions may be disturbed by sound interference such as that emitted by noisy vehicles and machinery (e.g. lorries, pneumatic drills), by the accumulation of snow or dead leaves on the road or in the event of damaged bumpers and mirrors.When reverse gear is engaged, an audible signal (long beep) indicates that the sensors may be dirty.A front or rear impact to the vehicle can upset the sensors’ settings, which is not
always detected by the system: distance measurements may be distorted.The sensors do not systematically detect obstacles that are too low (pavements, studs) or too thin (trees, posts, wire fences).Certain obstacles located in the sensors’ blind spots may not be detected or may no longer be detected during the manoeuvre.Certain materials (fabrics) absorb sound waves: pedestrians may not be detected.
Page 116 of 272
11 6
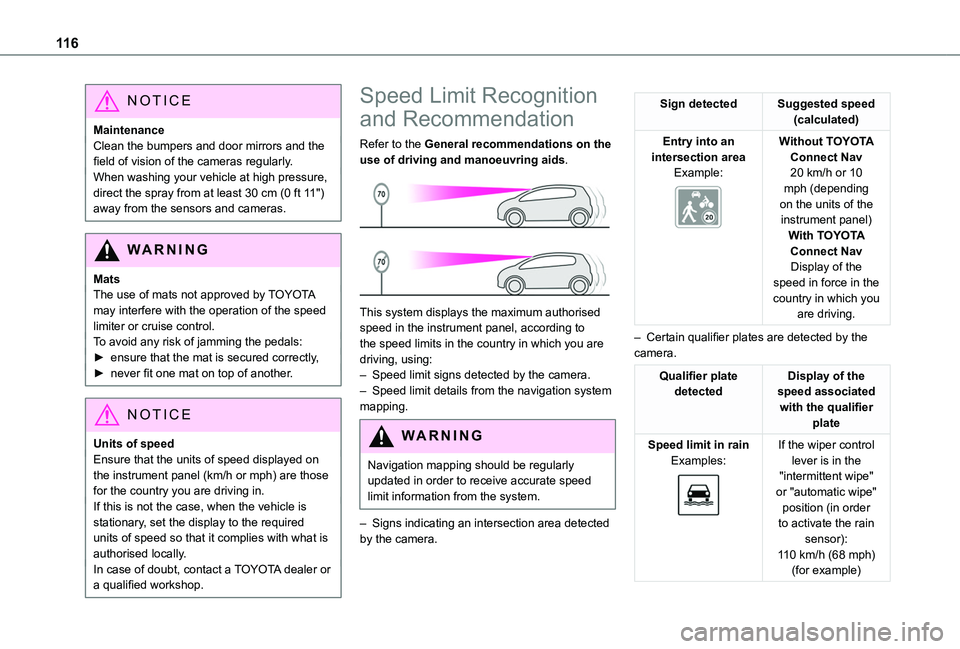
NOTIC E
MaintenanceClean the bumpers and door mirrors and the field of vision of the cameras regularly.When washing your vehicle at high pressure, direct the spray from at least 30 cm (0 ft 11") away from the sensors and cameras.
WARNI NG
MatsThe use of mats not approved by TOYOTA may interfere with the operation of the speed limiter or cruise control.To avoid any risk of jamming the pedals:► ensure that the mat is secured correctly,► never fit one mat on top of another.
NOTIC E
Units of speed
Ensure that the units of speed displayed on the instrument panel (km/h or mph) are those for the country you are driving in.If this is not the case, when the vehicle is stationary, set the display to the required units of speed so that it complies with what is authorised locally.In case of doubt, contact a TOYOTA dealer or a qualified workshop.
Speed Limit Recognition
and Recommendation
Refer to the General recommendations on the use of driving and manoeuvring aids.
This system displays the maximum authorised speed in the instrument panel, according to the speed limits in the country in which you are driving, using:– Speed limit signs detected by the camera.– Speed limit details from the navigation system mapping.
WARNI NG
Navigation mapping should be regularly updated in order to receive accurate speed limit information from the system.
– Signs indicating an intersection area detected by the camera.
Sign detectedSuggested speed (calculated)
Entry into an intersection areaExample:
Without TOYOTA Connect Nav20 km/h or 10 mph (depending on the units of the instrument panel)With TOYOTA
Connect NavDisplay of the speed in force in the country in which you are driving.
– Certain qualifier plates are detected by the camera.
Qualifier plate detectedDisplay of the speed associated with the qualifier plate
Speed limit in rainExamples:
If the wiper control lever is in the "intermittent wipe" or "automatic wipe" position (in order to activate the rain sensor):
110 km/h (68 mph) (for example)
Page 117 of 272
 (for exam")
11 7
Driving
6
Qualifier plate detectedDisplay of the speed associated with the qualifier plate
Speed limit if towing
If an approved towing device is fixed to the vehicle:90 km/h (56 mph) (for example)
Speed limit applicable over a certain distanceExample:
70 km/h (43 mph) (for example)
Speed limit for vehicles whose gross vehicle weight or gross train weight is less than 3.5 tonnes
90 km/h (56 mph) (for example)
Speed limit in snowExample:
If the exterior temperature is below 3°C:
30 km/h (19 mph) (for example)with a "snowflake" symbol
Qualifier plate detectedDisplay of the speed associated with the qualifier plate
Speed limit at certain timesExample:
30 km/h (19 mph) (for example)with a "clock" symbol
WARNI NG
The units for the speed limit (km/h or mph) depend on the country you are driving in.This should be taken into account so that you observe the speed limit.For the system to work correctly when changing country, the speed unit in the instrument panel must correspond to that of the country you are driving in.
WARNI NG
The automatic reading of road signs is a driving aid system and does not always display speed limits correctly.The speed limit signs present on the road always take priority over the display by the system. The system is designed to detect signs that conform to the Vienna Convention on road signs.
NOTIC E
Specific speed limits, such as those for heavy goods vehicles, are not displayed.The display of the speed limit in the instrument panel is updated when passing a speed limit sign intended for cars (light vehicles).
Activation / Deactivation
By default, the system is automatically activated at every engine start.It is set via the vehicle configuration menu.
Page 118 of 272

11 8
Information displayed on
the instrument panel
1.Detected speed limit indicationor
2.End of speed limit indication
The system is active but is not detecting speed limit information.
On detecting speed limit information, the system displays the value.
In the case of suggested maximum speeds, the first time the vehicle exceeds the suggested speed by more than 5 km/h (3 mph) (e.g. 95 km/h (59 mph)), the speed is displayed flashing for 10 seconds.
Operating limits
The system does not take account of reduced speed limits, especially those imposed in the following cases:– atmospheric pollution,– when towing,– driving with a space-saver type spare wheel or snow chains fitted,– Tyre repaired using the temporary puncture repair kit,– young drivers.It is possible for the system to not display the speed limit if it does not detect a speed limit sign within a preset period and in the following situations:– road signs that are obstructed, do not comply with the standard, are damaged or distorted,– obsolete or incorrect maps.
Recommendation
In addition to Speed Limit Recognition and Recommendation, the driver can select the speed displayed as a speed setting for the speed limiter or cruise control using the speed limiter or cruise control memorisation button.
NOTIC E
For more information on the Speed limiter, Cruise control or Adaptive cruise control, refer to the corresponding sections.
Steering mounted controls
1.Speed limiter/cruise control mode selection
2.Memorise the speed setting
Page 119 of 272

11 9
Driving
6
Information displayed on the
instrument panel
3.Speed limit indication
4.Speed memorisation prompt
5.Current speed setting
Memorising the speed
► Switch on the speed limiter/cruise control.The speed limiter/cruise control information is displayed. Upon detecting a sign suggesting a new speed setting, the system displays the value and "MEM" flashes for a few seconds, prompting you
to save it as the new speed setting.
NOTIC E
If there is a difference of less than 9 km/h (6 mph) between the speed setting and the speed displayed by the Speed Limit Recognition and Recommendation, the "MEM" symbol is not displayed.
Depending on the road conditions, several speeds may be displayed.► Press button 2once to save the suggested speed value.A message is displayed, confirming the request.► Press button 2again to confirm and save the new speed setting.After a predetermined period, the screen returns to the normal display.
Extended Traffic Sign
Recognition
Refer to the General recommendations on the use of driving and manoeuvring aids.
This additional system recognises these road signs and displays them in the instrument panel if the appropriate display mode is selected.One-way street: if you start driving the wrong way down a one-way street, an alert message, including the sign's symbol, is displayed in the instrument panel (request to check the traffic direction).Other signs: when approaching one of these signs, the sign’s symbol is displayed in the
instrument panel.
WARNI NG
The actual road signs always take priority over the display from the system.The signs must comply with the Vienna Convention on road signs.
Activation / Deactivation
It is set via the vehicle configuration menu.
Speed limiter
Refer to the General recommendations on the use of driving and manoeuvring aids.This system prevents the vehicle from exceeding the speed programmed by the driver (speed setting).The speed limiter is switched on manually.The minimum speed setting is 30 km/h (19 mph).The speed setting remains in the system memory when the ignition is switched off.
Page 120 of 272
 / OFF (position 0)
2.Reduce the speed setting
3.Increase the speed setting
4.Pause / resume speed limiter with the speed setting previously sto")
120
Steering mounted control
1.ON (LIMIT position) / OFF (position 0)
2.Reduce the speed setting
3.Increase the speed setting
4.Pause / resume speed limiter with the speed setting previously stored
5.Depending on version:Display of speed thresholds recorded using Memorising speedsorUse the speed suggested by the Speed Limit Recognition and Recommendation (MEM display)
6.Display and adjustment of the programmed inter-vehicle distance
For more information on Memorising speeds or on the Speed Limit Recognition and Recommendation, refer to the corresponding sections.
Information displayed on
the instrument panel
Head-up display
6.Speed limiter mode selection indication
7.Speed limiter on/pause status indication
8.Programmed speed setting value
9.Speed suggested by the Speed Limit Recognition and Recommendation
Switching on/pausing
► Turn thumbwheel 1 to the "LIMIT" position to select the speed limiter; the function is paused.
► If you are satisfied with the limit speed setting (most recent speed setting programmed in the system), press button 4 to switch the speed limiter on.
► Pressing button 4 again temporarily pauses the function.
NOTIC E
An audible warning will sound if the vehicle's speed exceeds the speed setting for an extended period.