roof TOYOTA PROACE CITY VERSO EV 2021 User Guide
[x] Cancel search | Manufacturer: TOYOTA, Model Year: 2021, Model line: PROACE CITY VERSO EV, Model: TOYOTA PROACE CITY VERSO EV 2021Pages: 320, PDF Size: 75.81 MB
Page 96 of 320

96
WARNI NG
MaintenanceClean the windscreen regularly, particularly the area in front of the camera.The internal surface of the windscreen can also become misted around the camera. In humid and cold weather, demist the windscreen regularly.Do not allow snow to accumulate on the bonnet or roof of the vehicle as this could obstruct the camera.
Automatic headlamp
dipping
WARNI NG
For more information, refer to the General recommendations for automatic lighting systems.
Whit the ring of the lighting control lever is in the "AUTO” position and the function activated on the touch screen, this system automatically switches between dipped and main beam headlamps, according to the lighting and traffic conditions, using a camera located at the top of the windscreen.
WARNI NG
This system is a driving aid.The driver remains responsible for the vehicle's lighting, its correct use in the prevailing light, visibility and traffic conditions, and for compliance with driving and vehicle regulations.
NOTIC E
The system becomes operational when the vehicle exceeds 25 km/h (16 mph).When the speed falls below 15 km/h (9 mph), the function is no longer operational.
Activation/Deactivation
The settings are changed via the Driving / Vehicle touch screen menu.
When deactivated, the lighting system changes to "automatic illumination of headlamps" mode.The state of the system is stored when the ignition is switched off.
Operation
If the ambient light level is very low and traffic conditions permit:– The main beam headlamps come on automatically. These indicator lamps light up on the instrument panel.If the ambient light level is sufficient and/or the traffic conditions do not allow the main beam headlamps to be lit:– The dipped beam headlamps remain lit. These indicator lamps light up on the instrument panel.The function is deactivated if the fog lamps are switched on or if the system detects poor visibility conditions (e.g. fog, heavy rain, snowfall).When the fog lamps are switched off or the visibility conditions become favourable again, the
function is automatically reactivated.This indicator lamp goes out when the function is deactivated.
Pause
If the situation requires a change of headlamp beam, the driver can take over at any time.► A "headlamp flash" pauses the function and the lighting system switches
to "automatic illumination of lamps" mode:
Page 97 of 320
97
Lighting and visibility
4
– If the "AUTO" and "Dipped beam" indicator lamps were on, the system changes to main beam.– If the "AUTO" and "Main beam" indicator lamps were on, the system changes to dipped beam.► To reactivate the function, once again switch the headlamps manually between dipped and main beam.
NOTIC E
The system may be disrupted or not work correctly:– When visibility conditions are poor (snowfall, heavy rain, etc.).– If the windscreen in front of the camera is dirty, misted or obscured (for example, by a sticker).– If the vehicle is facing highly reflective signs.When the system detects thick fog, it temporarily deactivates the function.
The system is not able to detect:– Road users that do not have their own lighting, such as pedestrians.– Vehicles whose lighting is obscured (for example, vehicles driving behind a safety barrier on a motorway).– Vehicles at the top or bottom of a steep slope, on winding roads, on crossroads.
WARNI NG
Clean the windscreen regularly, particularly the area in front of the camera.The internal surface of the windscreen can also become misted around the camera. In humid and cold weather, demist the windscreen regularly.Do not allow snow to accumulate on the bonnet or roof of the vehicle as this could obstruct the detection camera.
Headlamp beam height
adjustment
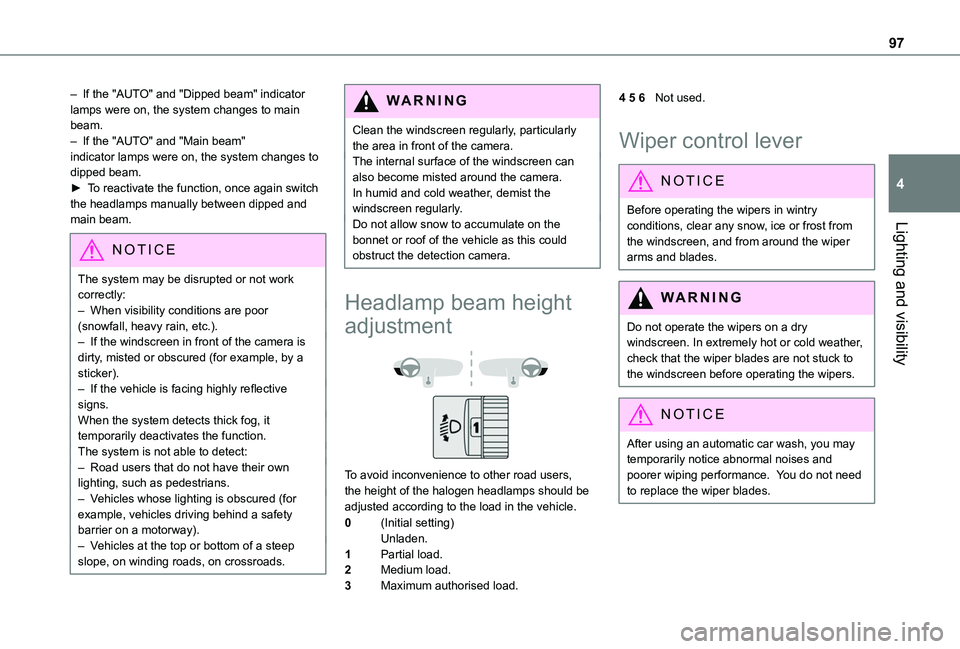
To avoid inconvenience to other road users, the height of the halogen headlamps should be adjusted according to the load in the vehicle.
0(Initial setting)Unladen.
1Partial load.
2Medium load.
3Maximum authorised load.
4 5 6Not used.
Wiper control lever
NOTIC E
Before operating the wipers in wintry conditions, clear any snow, ice or frost from the windscreen, and from around the wiper arms and blades.
WARNI NG
Do not operate the wipers on a dry windscreen. In extremely hot or cold weather, check that the wiper blades are not stuck to the windscreen before operating the wipers.
NOTIC E
After using an automatic car wash, you may temporarily notice abnormal noises and poorer wiping performance. You do not need to replace the wiper blades.
Page 111 of 320
111
Safety
5
Rear seat belts
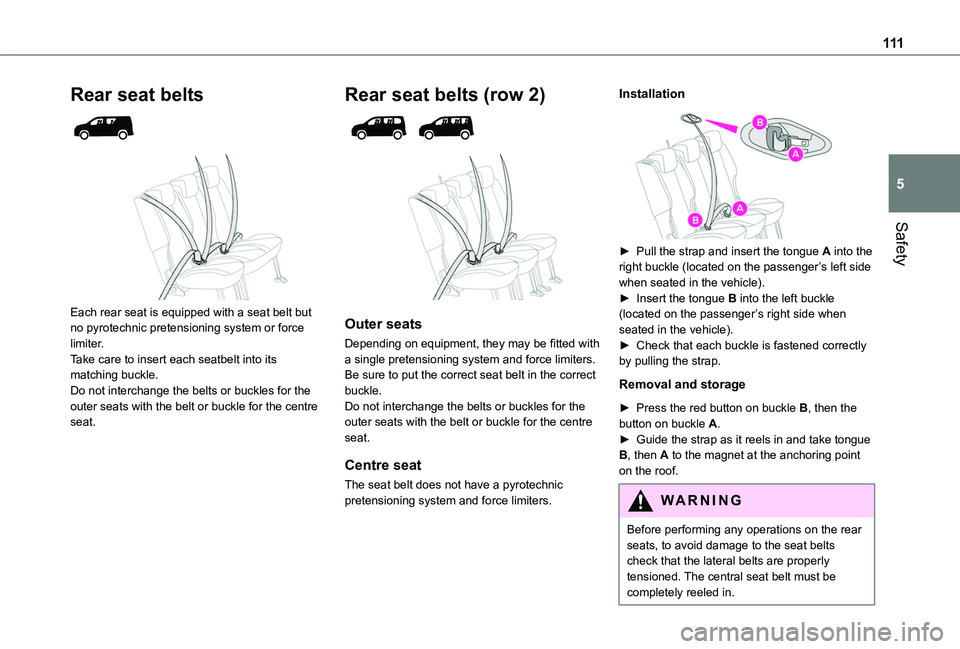
Each rear seat is equipped with a seat belt but no pyrotechnic pretensioning system or force limiter.Take care to insert each seatbelt into its matching buckle.Do not interchange the belts or buckles for the outer seats with the belt or buckle for the centre seat.
Rear seat belts (row 2)
Outer seats
Depending on equipment, they may be fitted with a single pretensioning system and force limiters.Be sure to put the correct seat belt in the correct buckle.Do not interchange the belts or buckles for the outer seats with the belt or buckle for the centre seat.
Centre seat
The seat belt does not have a pyrotechnic pretensioning system and force limiters.
Installation
► Pull the strap and insert the tongue A into the right buckle (located on the passenger’s left side when seated in the vehicle).► Insert the tongue B into the left buckle (located on the passenger’s right side when seated in the vehicle).► Check that each buckle is fastened correctly by pulling the strap.
Removal and storage
► Press the red button on buckle B, then the button on buckle A.► Guide the strap as it reels in and take tongue
B, then A to the magnet at the anchoring point on the roof.
WARNI NG
Before performing any operations on the rear seats, to avoid damage to the seat belts check that the lateral belts are properly tensioned. The central seat belt must be completely reeled in.
Page 114 of 320
11 4
In all cases, the airbag warning lamp comes on.Following an impact, have the seat belt system checked, and if necessary replaced, by a TOYOTA dealer or a qualified workshop.
Airbags
General information
System designed to help improve the safety of the occupants sitting in the front seats and the rear outer seats, in the event of a violent collision. The airbags supplement the action of the seat belts equipped with a force limiting system.Electronic detectors record and analyse the front and side impacts sustained in the impact detection zones:– In the event of violent impact, the airbags deploy instantly and help better protect the occupants of the vehicle; immediately after the
impact, the airbags deflate rapidly in order not to hinder the visibility or the possible exit of the occupants.– In the event of a slight impact, a rear impact and under certain rollover conditions, the airbags may not deploy; only the seat belt helps to protect you in these situations.The seriousness of the impact depends on the nature of the obstacle and the speed of the vehicle at the moment of collision.
WARNI NG
The airbags do not operate when the ignition is switched off.This equipment will only deploy once. If a second impact occurs (during the same or a subsequent accident), the airbag will not be deployed again.
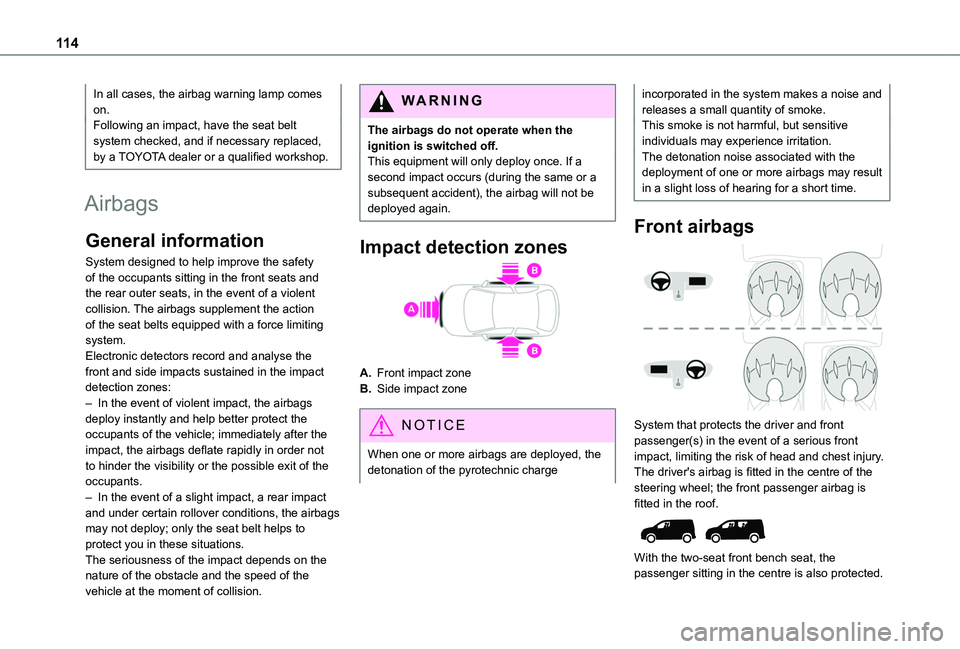
Impact detection zones
A.Front impact zone
B.Side impact zone
NOTIC E
When one or more airbags are deployed, the detonation of the pyrotechnic charge
incorporated in the system makes a noise and releases a small quantity of smoke.This smoke is not harmful, but sensitive individuals may experience irritation.The detonation noise associated with the deployment of one or more airbags may result in a slight loss of hearing for a short time.
Front airbags
System that protects the driver and front passenger(s) in the event of a serious front
impact, limiting the risk of head and chest injury.The driver's airbag is fitted in the centre of the steering wheel; the front passenger airbag is fitted in the roof.
With the two-seat front bench seat, the passenger sitting in the centre is also protected.
Page 117 of 320
11 7
Safety
5
The vehicle's front door panels include side impact sensors.A damaged door or any unauthorised or incorrectly executed work (modification or repair) on the front doors or their interior trim could compromise the operation of these sensors - risk of malfunction of the lateral airbags!All work must be carried out only by any authorized Toyota retailer or Toyota authorized repairer, or any reliable repairer.
WARNI NG
Curtain airbagsDo not fix or attach anything to the roof, as this could cause head injuries when the curtain airbag is deployed.Do not remove the grab handles installed on the roof, as these help to secure the curtain airbags.
Child seats
NOTIC E
The regulations on carrying children are specific to each country. Refer to the legislation in force in your country.
For maximum safety, please observe the following recommendations:
– In accordance with European regulations, all children under the age of 12 or less than 150 cm (4 ft 11”) tall must travel in approved child seats suited to their weight, on seats fitted with a seat belt or ISOFIX mountings.– Statistically, the safest seats in your vehicle for carrying children are the rear seats.– Children weighing less than 9 kg (20 lb) must travel in the "rear facing" position, whether in the front or rear of the vehicle.
NOTIC E
It is recommended that children travel on the rear seats of the vehicle:– ‘rear facing’ up to the age of 3,– ‘forward facing’ over the age of 3.
WARNI NG
Make sure that the seat belt is correctly positioned and tightened.For child seats with a support leg, ensure that the support leg is in firm and steady contact with the floor.
WARNI NG
An incorrectly installed child seat compromises the child's safety in the event of an accident.Ensure that there is no seat belt or seat belt buckle under the child seat, as this could destabilise it.Remember to fasten the seat belts or the harness of child seats, keeping the slack relative to the child's body to a minimum, even for short journeys.When installing a child seat using the seat belt, ensure that the seat belt is tightened correctly on the child seat and that it secures the child seat firmly on the seat of the vehicle. If the passenger seat is adjustable, move it forwards if necessary.Remove the head restraint before installing a child seat with a backrest on a passenger seat.Ensure that the head restraint is stored or attached securely to prevent it from being thrown around the vehicle in the event of sharp braking. Refit the head restraint once the child seat has been removed.
Page 169 of 320
169
Driving
6
WARNI NG
If any of the following malfunctions occurs, do not use the system:– Following an impact on the windscreen close to the camera.– Brake lamps not working.
WARNI NG
If the vehicle has undergone any of the following modifications, do not use the system:– Carrying long objects on roof bars or a roof rack.– Towing.– Front end of the vehicle modified (for example by adding long-range headlamps or painting the front bumper).– Obstructed radar.
Malfunction
In the event of a cruise control malfunction, dashes are displayed instead of the cruise control speed setting.This warning lamp comes on, accompanied by an audible signal and an onscreen message, to indicate a system malfunction.Have the system checked by a TOYOTA dealer or a qualified workshop.
Memorising speeds
This function, used only for the speed limiter and programmable cruise control, lets you save speed settings that will subsequently be proposed for the purpose of configuring these two systems.You can memorise multiple speed settings for each of the two systems.By default, some speed settings are already memorised.
WARNI NG
As a safety measure, the driver must only change speed settings when stationary.
Changing a speed setting
Speed setting can be activated, deactivated, selected and changed in the Driving / Vehicle touch screen menu.
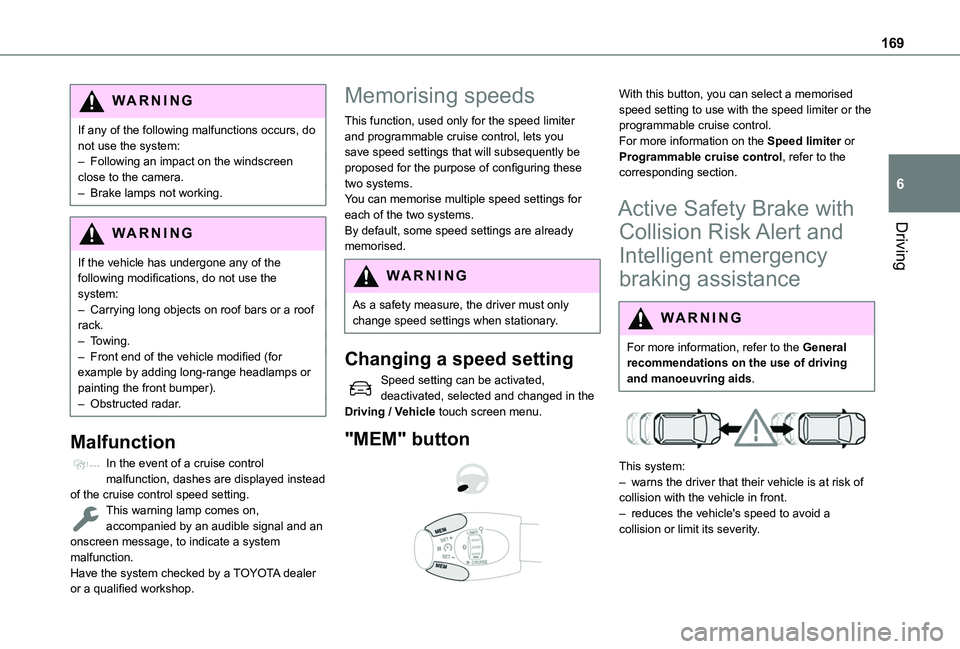
"MEM" button
With this button, you can select a memorised speed setting to use with the speed limiter or the programmable cruise control.For more information on the Speed limiter or Programmable cruise control, refer to the corresponding section.
Active Safety Brake with
Collision Risk Alert and
Intelligent emergency
braking assistance
WARNI NG
For more information, refer to the General recommendations on the use of driving and manoeuvring aids.
This system:
– warns the driver that their vehicle is at risk of collision with the vehicle in front.– reduces the vehicle's speed to avoid a collision or limit its severity.
Page 170 of 320
170
WARNI NG
The system also takes motorcyclists and animals into account; however, animals below 0.5 m (1 ft 6") tall and objects on the road are not necessarily detected.
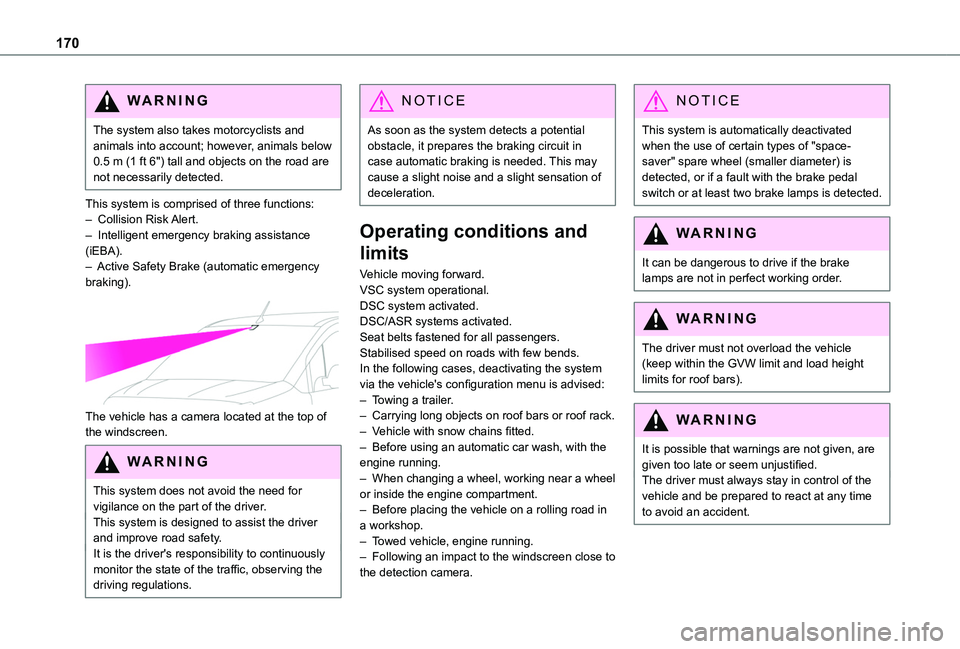
This system is comprised of three functions:– Collision Risk Alert.– Intelligent emergency braking assistance (iEBA).– Active Safety Brake (automatic emergency braking).
The vehicle has a camera located at the top of the windscreen.
W ARNI NG
This system does not avoid the need for vigilance on the part of the driver.This system is designed to assist the driver and improve road safety.It is the driver's responsibility to continuously monitor the state of the traffic, observing the driving regulations.
NOTIC E
As soon as the system detects a potential obstacle, it prepares the braking circuit in case automatic braking is needed. This may cause a slight noise and a slight sensation of deceleration.
Operating conditions and
limits
Vehicle moving forward.VSC system operational.DSC system activated.DSC/ASR systems activated.Seat belts fastened for all passengers.Stabilised speed on roads with few bends.In the following cases, deactivating the system via the vehicle's configuration menu is advised:– Towing a trailer.– Carrying long objects on roof bars or roof rack.– Vehicle with snow chains fitted.
– Before using an automatic car wash, with the engine running.– When changing a wheel, working near a wheel or inside the engine compartment.– Before placing the vehicle on a rolling road in a workshop.– Towed vehicle, engine running.– Following an impact to the windscreen close to the detection camera.
NOTIC E
This system is automatically deactivated when the use of certain types of "space-saver" spare wheel (smaller diameter) is detected, or if a fault with the brake pedal switch or at least two brake lamps is detected.
WARNI NG
It can be dangerous to drive if the brake lamps are not in perfect working order.
WARNI NG
The driver must not overload the vehicle (keep within the GVW limit and load height limits for roof bars).
WARNI NG
It is possible that warnings are not given, are given too late or seem unjustified.The driver must always stay in control of the vehicle and be prepared to react at any time to avoid an accident.
Page 191 of 320
191
Driving
6
Operating limits
– The system may suggest an inappropriate parking space (parking prohibited, work in progress with damaged road surface, location alongside a ditch, etc.).– The system may indicate that a space has been found but not offer it because of a fixed obstacle on the opposite side of the manoeuvre, which would not allow the vehicle to follow the necessary trajectory required for parking.– The system may indicate that a space has been found but the manoeuvre will not be triggered, because the width of the lane is insufficient.– The system is not designed to perform the parking manoeuvre on a sharp bend.– The system does not detect spaces that are much larger than the vehicle itself or that are delimited by obstacles that are too low (pavements, studs, etc.) or too thin (trees, posts, wire fences, etc.).– If the boot is heavily loaded, the tilt of the
vehicle towards the rear may interfere with the distance measurements.
WARNI NG
Do not use the function under the following exterior conditions:– Alongside a soft shoulder (e.g. ditch) or quay or on the edge of a drop.– When the road surface is slippery (e.g. ice).
WARNI NG
If any of the following malfunctions occurs, do not use the system:– If a tyre is under-inflated.– If one of the bumpers is damaged.– If one of the cameras is faulty.
WARNI NG
If the vehicle has undergone any of the following modifications, do not use the function:– When carrying an object extending beyond the dimensions of the vehicle (ladder on the roof bars, bicycle carrier on the tailgate, etc.).– With a non-approved towball in place.– With snow chains fitted.– When driving on a small-diameter or "space-saver" type spare wheel.– When the wheels fitted are a different size from the original ones.
– After modifying one or both bumpers (added protection).– If the sensors have been repainted other than by the TOYOTA dealer network.– With sensors not approved for the vehicle.
Malfunctions
When the function is not activated, this indicator lamp will flash briefly and an audible signal will be emitted to indicate a system malfunction.If the malfunction occurs while the system is in use, the warning lamp goes off.If the parking sensor malfunction occurs during use, indicated by this warning lamp coming on, it causes the function to deactivate.In the event of a malfunction, have the system checked by a TOYOTA dealer or a qualified workshop.In the event of a power steering malfunction, this warning lamp is displayed on the instrument panel, accompanied by a warning message.
WARNI NG
You must stop the vehicle.Stop as soon as it is safe to do so and switch off the ignition.Contact a TOYOTA dealer or a qualified workshop.
Page 210 of 320
210
Measurement display in the instrument panel
If the mass on board the vehicle exceeds the maximum authorised weight, this indicator lamp comes on.
Malfunction
Display of the malfunction in the loading area
After the measurement is triggered from the loading area, the LEDs of the 3 buttons flash simultaneously for about 3 seconds and then go out.Contact a TOYOTA dealer or a qualified workshop.
Information displayed on the instrument panel
These warning lamps come on, together with a message.
Contact a TOYOTA dealer or a qualified workshop.
Roof bars / Roof rack
WARNI NG
RecommendationsDistribute the load uniformly, taking care to avoid overloading one of the sides.Arrange the heaviest part of the load as close as possible to the roof.Secure the load firmly.Drive gently: the vehicle will be more susceptible to the effects of side winds and its stability may be affected.Regularly check the security and tight fastening of the roof bars and racks, at least before each trip.Remove the roof bars once they are no longer needed.
WARNI NG
In the event of loading (not exceeding 40 cm (1 ft 3") in height) on the roof, do not exceed the following loads:– Transverse bars on longitudinal bars: 80 kg (176 lb).– Two transverse bars bolted to the roof: 100 kg (220 lb).– Three transverse bars bolted to the roof: 150 kg (330 lb).– An aluminium rack: 120 kg (264 lb).– A steel rack: 115 kg (253 lb).If the height exceeds 40 cm (1 ft 3"), adapt the speed of the vehicle to the profile of the road to avoid damaging the roof bars or the roof rack and the fixings on the vehicle.Refer to national legislation in order to comply with the regulations for transporting objects that are longer than the vehicle.
W ARNI NG
In the event of loading a 7-seat model (not exceeding 40 cm (1 ft 3") in height) on the roof, do not exceed the following loads:– Three transverse bars bolted to the roof: 100 kg (220 lb).– An aluminium rack: 70 kg (154 lb).– A steel rack: 65 kg (143 lb).
Page 211 of 320
2 11
Practical information
7
WARNI NG
As a safety measure and to avoid damaging the roof, it is essential to use the roof bars and racks approved for your vehicle.Observe the instructions on fitting and use contained in the guide supplied with the roof bars and racks.
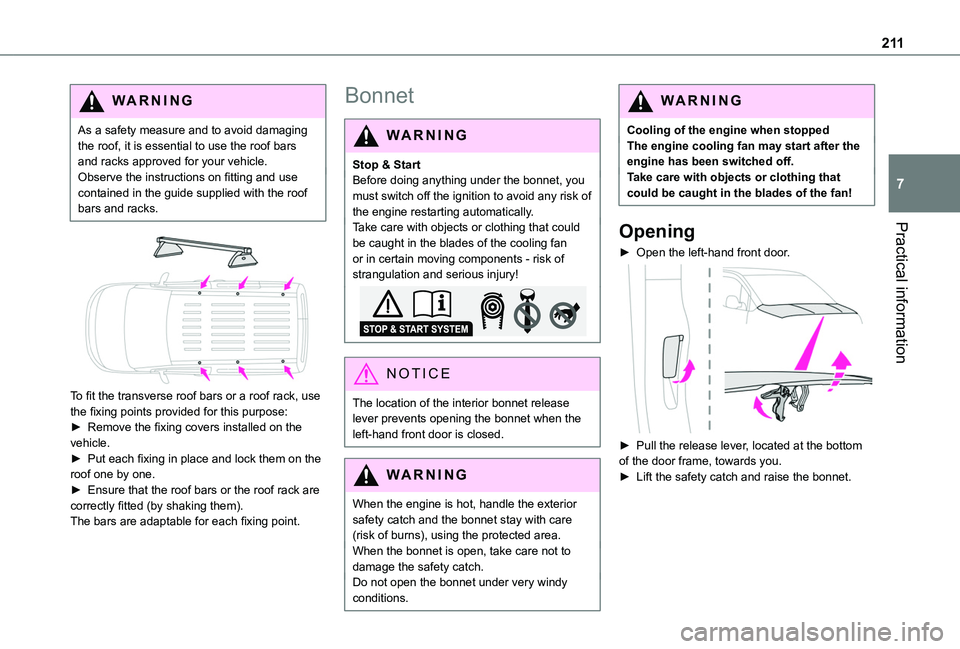
To fit the transverse roof bars or a roof rack, use the fixing points provided for this purpose:► Remove the fixing covers installed on the vehicle.
► Put each fixing in place and lock them on the roof one by one.► Ensure that the roof bars or the roof rack are correctly fitted (by shaking them).The bars are adaptable for each fixing point.
Bonnet
WARNI NG
Stop & StartBefore doing anything under the bonnet, you must switch off the ignition to avoid any risk of the engine restarting automatically.Take care with objects or clothing that could be caught in the blades of the cooling fan or in certain moving components - risk of strangulation and serious injury!
NOTIC E
The location of the interior bonnet release lever prevents opening the bonnet when the left-hand front door is closed.
WARNI NG
When the engine is hot, handle the exterior safety catch and the bonnet stay with care (risk of burns), using the protected area.When the bonnet is open, take care not to damage the safety catch.Do not open the bonnet under very windy
conditions.
WARNI NG
Cooling of the engine when stoppedThe engine cooling fan may start after the engine has been switched off.Take care with objects or clothing that could be caught in the blades of the fan!
Opening
► Open the left-hand front door.
► Pull the release lever, located at the bottom of the door frame, towards you.► Lift the safety catch and raise the bonnet.