stop start TOYOTA RAV4 2019 (in English) Repair Manual
[x] Cancel search | Manufacturer: TOYOTA, Model Year: 2019, Model line: RAV4, Model: TOYOTA RAV4 2019Pages: 728, PDF Size: 21.09 MB
Page 616 of 728
6168-2. Steps to take in an emergency
The following may indicate a
problem with your transmission.
Contact your Toyota dealer or
WA R N I N G
■While towing (vehicles with
towing eyelet)
●When towing using cables or
chains, avoid sudden starts, etc.
which place excessive stress on
the towing eyelets, cables or
chains. The towing eyelets,
cables or chains may become
damaged, broken debris may hit
people, and cause serious dam-
age.
●Do not turn the engine switch to
OFF.
There is a possibility that the
steering wheel is locked and
cannot be operated.
■Installing towing eyelet to the
vehicle (vehicles with towing
eyelet)
Make sure that towing eyelet is
installed securely.
If not securely installed, towing
eyelet may come loose during
towing.
NOTICE
■To prevent damage to the
vehicle when towing using a
wheel-lift type truck
●Do not tow the vehicle from the
rear when the engine switch is
in OFF or the key is removed
(vehicles without smart key sys-
tem). The steering lock mecha-
nism is not strong enough to
hold the front wheels straight.
●When raising the vehicle,
ensure adequate ground clear-
ance for towing at the opposite
end of the raised vehicle. With-
out adequate clearance, the
vehicle could be damaged while
being towed.
■To prevent damage to the
vehicle when towing with a
sling-type truck
Do not tow with a sling-type truck,
either from the front or rear.
■To prevent damage to the
vehicle during emergency
towing (vehicles with towing
eyelet)
Do not secure cables or chains to
the suspension components.
■When towing the vehicle
(vehicles with Stop & Start
system)
If it is necessary to tow the vehicle
with all four wheels on the ground,
perform the following procedure
before towing the vehicle, in order
to protect the system.
Turn the engine switch to OFF
and then start the engine or turn
the engine switch to ON.
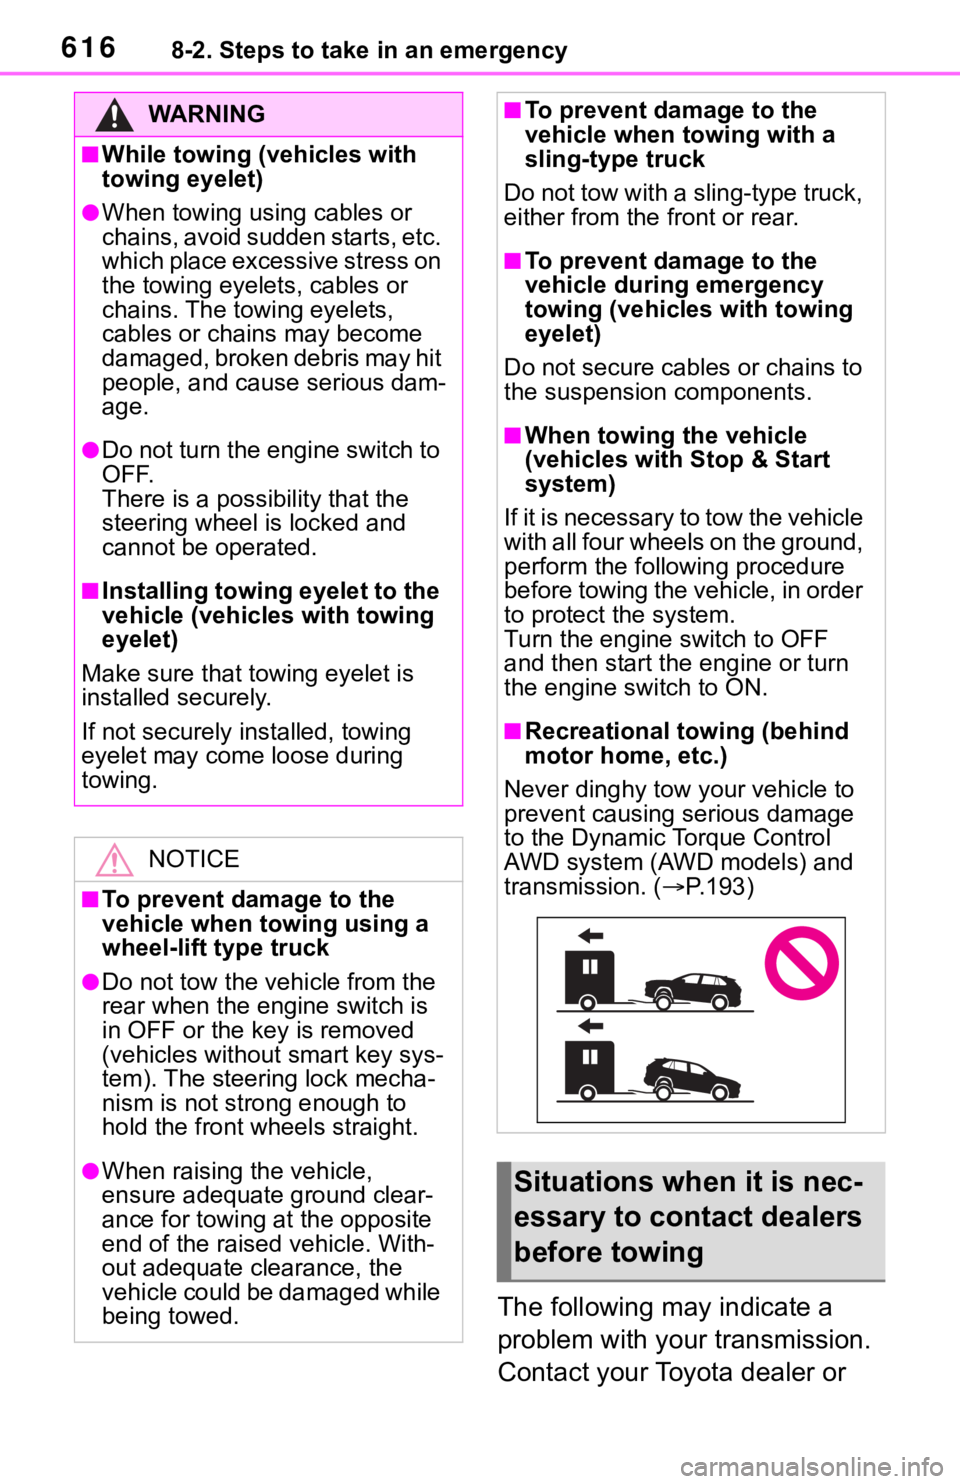
■Recreational towing (behind
motor home, etc.)
Never dinghy tow your vehicle to
prevent causing serious damage
to the Dynamic Torque Control
AWD system (AWD models) and
transmission. ( P.193)
Situations when it is nec-
essary to contact dealers
before towing
Page 619 of 728
6198-2. Steps to take in an emergency
8
When trouble arises
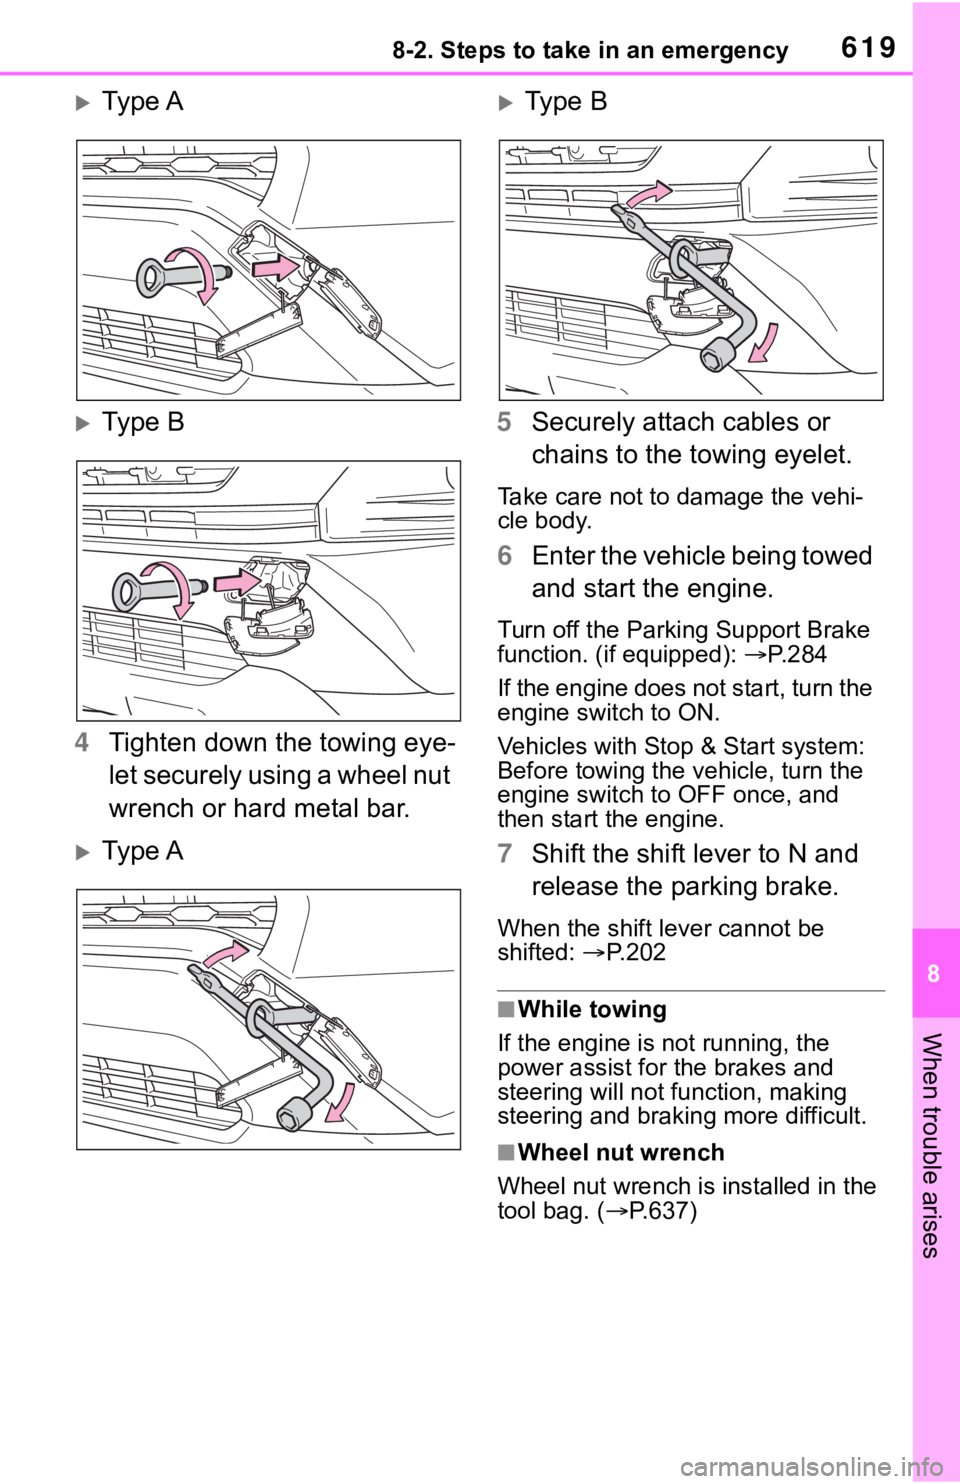
Ty p e A
Ty p e B
4 Tighten down the towing eye-
let securely using a wheel nut
wrench or hard metal bar.
Ty p e A
Type B
5 Securely attach cables or
chains to the towing eyelet.
Take care not to damage the vehi-
cle body.
6Enter the vehicle being towed
and start the engine.
Turn off the Parking Support Brake
function. (if equipped): P. 2 8 4
If the engine does not start, turn the
engine switch to ON.
Vehicles with Stop & Start system:
Before towing the ve hicle, turn the
engine switch to OFF once, and
then start the engine.
7 Shift the shift lever to N and
release the parking brake.
When the shift lever cannot be
shifted: P. 2 0 2
■While towing
If the engine is not running, the
power assist for the brakes and
steering will not function, making
steering and braking more difficult.
■Wheel nut wrench
Wheel nut wrench is installed in the
tool bag. ( P.637)
Page 621 of 728
6218-2. Steps to take in an emergency
8
When trouble arises
Follow the procedure below to
restart the engine after the sys-
tem is activated.
1Turn the engine switch to
ACC or off.
2 Restart the engine.
Fuel pump shut off
system
To minimize the risk of fuel
leakage when the engine
stalls or when an airbag
inflates upon collision, the
fuel pump shut off system
stops the supply of fuel to
the engine.
Restarting the engine
NOTICE
■Before starting the engine
Inspect the ground under the
vehicle.
If you find that fuel has leaked
onto the ground, the fuel system
has been damaged and is in need
of repair. Do not restart the
engine.
Page 625 of 728
6258-2. Steps to take in an emergency
8
When trouble arises
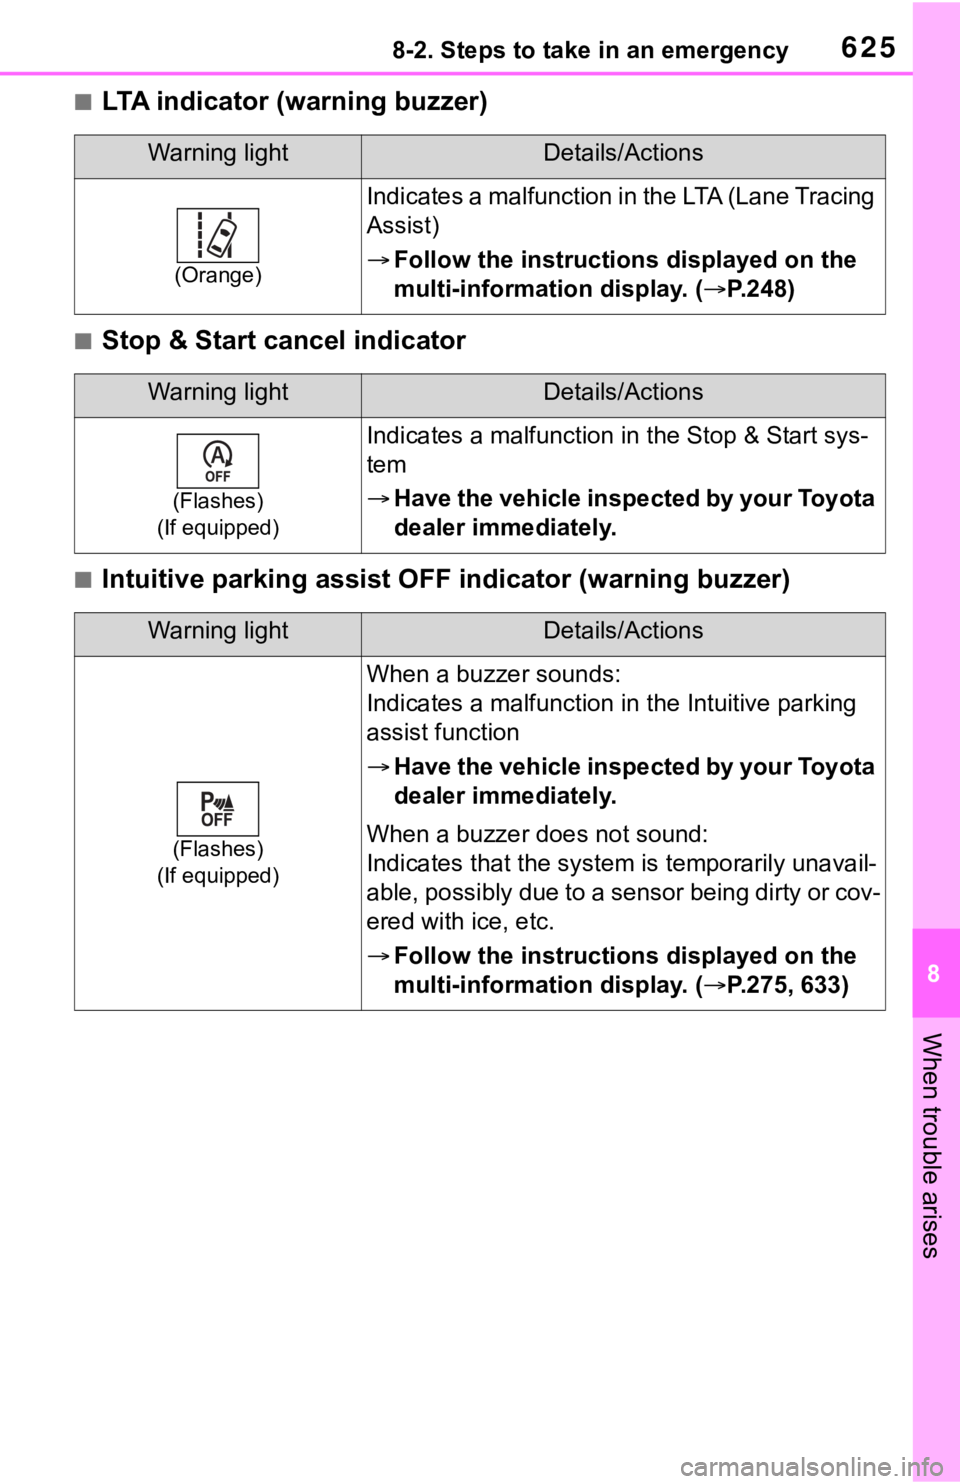
■LTA indicator (warning buzzer)
■Stop & Start cancel indicator
■Intuitive parking assist OFF indicator (warning buzzer)
Warning lightDetails/Actions
(Orange)
Indicates a malfunction in the LTA (Lane Tracing
Assist)
Follow the instructions displayed on the
multi-information display. ( P.248)
Warning lightDetails/Actions
(Flashes)
(If equipped)
Indicates a malfunctio n in the Stop & Start sys-
tem
Have the vehicle inspected by your Toyota
dealer immediately.
Warning lightDetails/Actions
(Flashes)
(If equipped)
When a buzzer sounds:
Indicates a malfunction in the Intuitive parking
assist function
Have the vehicle inspected by your Toyota
dealer immediately.
When a buzzer does not sound:
Indicates that the system is temporarily unavail-
able, possibly due to a sensor being dirty or cov-
ered with ice, etc.
Follow the instructions displayed on the
multi-information display. ( P.275, 633)
Page 632 of 728
6328-2. Steps to take in an emergency
WA R N I N G
As an added safety feature, your
vehicle has been equipped with a
tire pressure m onitoring system
(TPMS-tire pressure warning sys-
tem) that illumina tes a low tire
pressure telltale (tire pressure
warning light) when one or more
of your tires is significantly under-
inflated. Accordingly, when the
low tire pressure telltale (tire pres-
sure warning light) illuminates,
you should stop and check your
tires as soon as possible, and
inflate them to the proper pres-
sure. Driving on a significantly
under-inflated tire causes the tire
to overheat and can lead to tire
failure. Under-inflation also
reduces fuel efficiency and tire
tread life, and may affect the vehi-
cle’s handling and stopping ability.
Please note that the TPMS (tire
pressure warning system) is not a
substitute for pro per tire mainte-
nance, and it is the driver’s
responsibility to m aintain correct
tire pressure, eve n if under-infla-
tion has not reach ed the level to
trigger illuminatio n of the TPMS
low tire pressure telltale (tire pres-
sure warning light).
Your vehicle has also been
equipped with a TPMS (tire pres-
sure warning system) malfunc-
tion indicator to indicate when the
system is not operating properly.
The TPMS (tire pressure warning
system) malfunction indicator is
combined with the low tire pres-
sure telltale (tire pressure warning
light). When the system detects a
malfunction, the te lltale will flash
for approximately one minute and
then remain continuously illumi-
nated. This sequence will con-
tinue upon subsequent vehicle
start-ups as long as the malfunc-
tion exists. When the malfunction
indicator is illu minated, the sys-
tem may not be ab le to detect or
signal low tire pressure as
intended.
TPMS (tire pressure warning sys-
t em ) m alf un ctio n s m a y o cc ur f or a
variety of reasons, including the
installation of replacement or
alternate tires or wheels on the
vehicle that prevent the TPMS
(tire pressure warning system)
from functioning properly. Always
check the TPMS (tire pressure
warning system) malfunction tell-
tale after replacing one or more
tires or wheels on your vehicle to
ensure that the replacement or
alternate tires and wheels allow
the TPMS (tire pressure warning
system) to continue to function
properly.
NOTICE
■To ensure the tire pressure
warning system operates
properly (vehicles with tire
pressure warning system)
Do not install tires with different
specifications or manufacturers
as the tire pressure warning sys-
tem may not operate properly.
Page 634 of 728

6348-2. Steps to take in an emergency
sumable.
■If a message that indicates the
need for visiting your Toyota
dealer is displayed
The system or part shown on the
multi-information di splay is malfunc-
tioning. Have the vehicle inspected
by your Toyota dealer immediately.
■If a message that indicates the
need for referring to Owner’s
Manual is displayed
●If “Engine Coolant Temp High” is
shown, follow the instructions
( P.653).
●If the following messages are
shown, there may be a malfunc-
tion.
Immediately stop t he vehicle in a
safe place and co ntact your Toy-
ota dealer. Continuing to drive the
vehicle may be dangerous.
• “Charging System Malfunction”
• “High Transmission Fluid Temp”
• “Smart Entry & Start System Mal- function”
●If the following messages are
shown, there may be a malfunc-
tion.
Immediately have the vehicle
inspected by you r Toyota dealer.
• “Oil Pressure Low”
•“Braking Power Low”
■If “Shift to P when Parked” is
shown
Message is displayed when the
driver’s door is opened without turn-
ing the engine switch to OFF with
the shift lever in any position other
than P.
Shift the shift lever to P.
■If “Auto Power OFF to Conserve
Battery” is shown
Power was turned off due to the
automatic power off function.
Next time when starting the engine,
increase the engin e speed slightly
and maintain that level for approxi-
mately 5 minutes to recharge the
battery.
■If “Engine Oil Level Low Add or
Replace” is displayed
The engine oil le vel may be low.
Check the level o f the engine oil,
and add engine oil if necessary. This
message may be displayed if the
vehicle is stopped on a slope. Move
the vehicle to a l evel surface and
check if the message disappears.
■If “Maintenance Required
Soon” is shown
Indicates that all maintenance
according to the driven distance on
the maintenance schedule
* should
be performed soon.
Comes on approximately 4500
miles (7200 km) after the message
has been reset.
If necessary, perform maintenance.
Please reset the m essage after the
maintenance is performed.
( P.557)
*: Refer to the separate “Scheduled
Maintenance Guide” or “Owner’
Manual Supplement” for the main-
tenance interval applicable to your
vehicle.
■If “Maintenance Required Visit
Your Dealer” is shown
Indicates that all maintenance is
required to correspond to the driven
distance on the maintenance sched-
ule
*.
Comes on approximately 5000
miles (8000 km) after the message
has been reset. (The indicator will
not work properly unless the mes-
sage has been reset.)
Perform the necessary mainte-
nance. Please reset the message
after the maintenance is performed.
( P.557)
*: Refer to the separate “Scheduled
Maintenance Guide” or “Owner’
Manual Supplement” for the main-
tenance interval applicable to your
vehicle.
Page 638 of 728
6388-2. Steps to take in an emergency
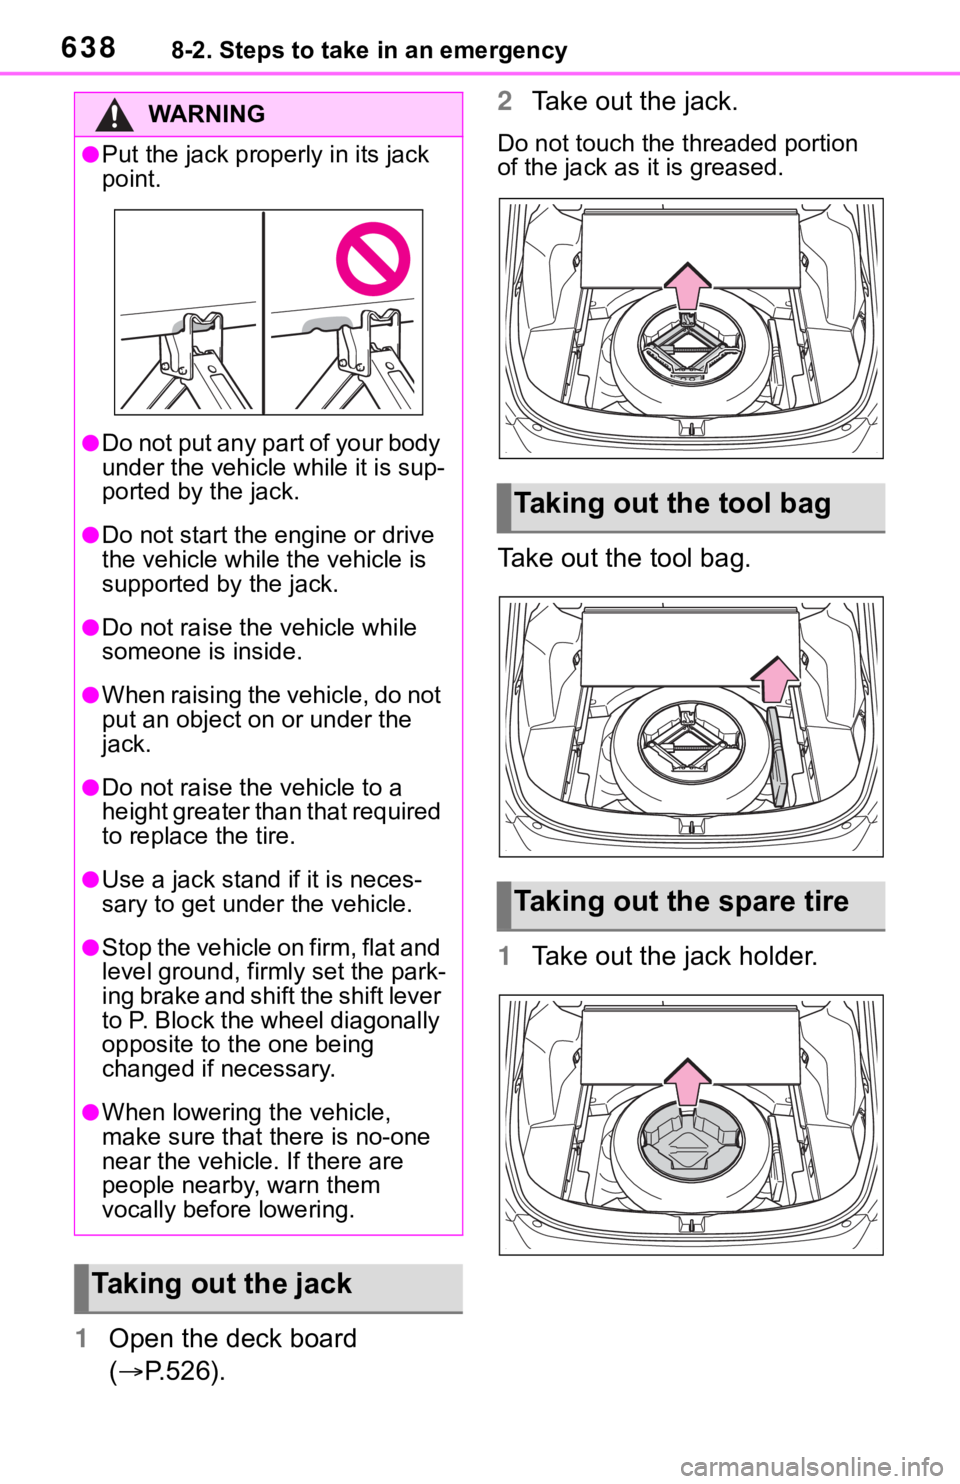
1Open the deck board
( P.526). 2
Take out the jack.
Do not touch the threaded portion
of the jack as it is greased.
Take out the tool bag.
1Take out the jack holder.
WA R N I N G
●Put the jack prope rly in its jack
point.
●Do not put any part of your body
under the vehicle while it is sup-
ported by the jack.
●Do not start the engine or drive
the vehicle while the vehicle is
supported by the jack.
●Do not raise the vehicle while
someone is inside.
●When raising the vehicle, do not
put an object on or under the
jack.
●Do not raise the vehicle to a
height greater than that required
to replace the tire.
●Use a jack stand if it is neces-
sary to get under the vehicle.
●Stop the vehicle on firm, flat and
level ground, firm ly set the park-
ing brake and shift the shift lever
to P. Block the wheel diagonally
opposite to the one being
changed if necessary.
●When lowering the vehicle,
make sure that there is no-one
near the vehicle. If there are
people nearby, warn them
vocally before lowering.
Taking out the jack
Taking out the tool bag
Taking out the spare tire
Page 648 of 728
6488-2. Steps to take in an emergency
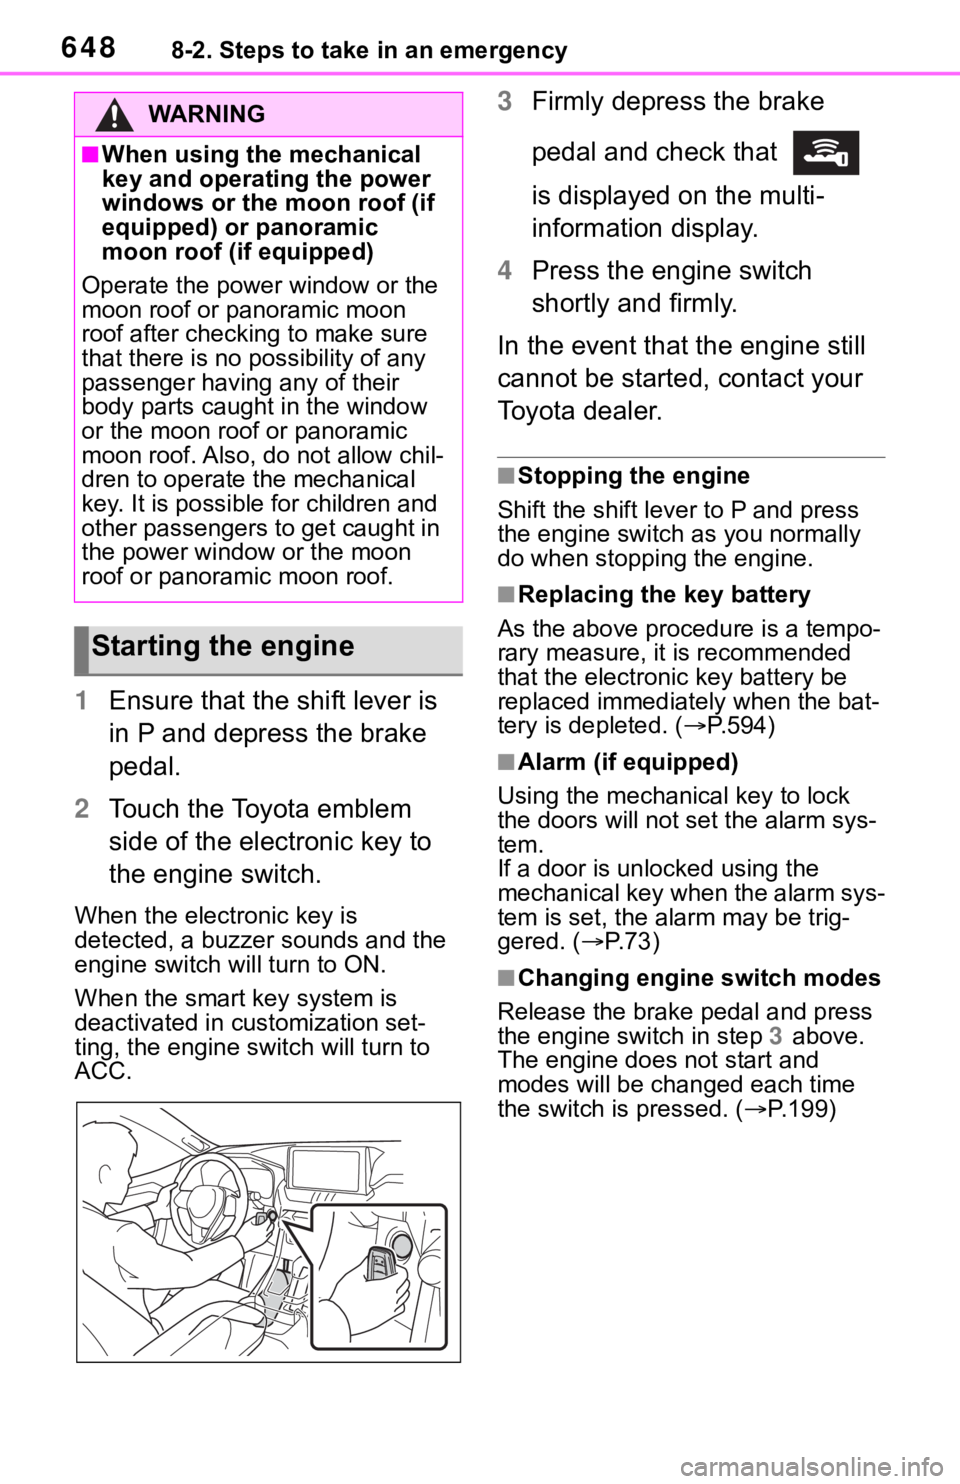
1Ensure that the shift lever is
in P and depress the brake
pedal.
2 Touch the Toyota emblem
side of the electronic key to
the engine switch.
When the electronic key is
detected, a buzzer sounds and the
engine switch will turn to ON.
When the smart key system is
deactivated in customization set-
ting, the engine switch will turn to
ACC.
3Firmly depress the brake
pedal and check that
is displayed on the multi-
information display.
4 Press the engine switch
shortly and firmly.
In the event that the engine still
cannot be started, contact your
Toyota dealer.
■Stopping the engine
Shift the shift lever to P and press
the engine switch as you normally
do when stopping the engine.
■Replacing the key battery
As the above proce dure is a tempo-
rary measure, it is recommended
that the electronic key battery be
replaced immediatel y when the bat-
tery is depleted. ( P.594)
■Alarm (if equipped)
Using the mechanical key to lock
the doors will not set the alarm sys-
tem.
If a door is unl ocked using the
mechanical key when the alarm sys-
tem is set, the alarm may be trig-
gered. ( P.73)
■Changing engine switch modes
Release the brake pedal and press
the engine switch in step 3 above.
The engine does not start and
modes will be changed each time
the switch is pressed. ( P.199)
WA R N I N G
■When using the mechanical
key and operating the power
windows or the moon roof (if
equipped) or panoramic
moon roof (if equipped)
Operate the power window or the
moon roof or panoramic moon
roof after checking to make sure
that there is no possibility of any
passenger having any of their
body parts caught in the window
or the moon roof or panoramic
moon roof. Also, do not allow chil-
dren to operate the mechanical
key. It is possible for children and
other passengers to get caught in
the power window or the moon
roof or panoramic moon roof.
Starting the engine
Page 650 of 728
6508-2. Steps to take in an emergency
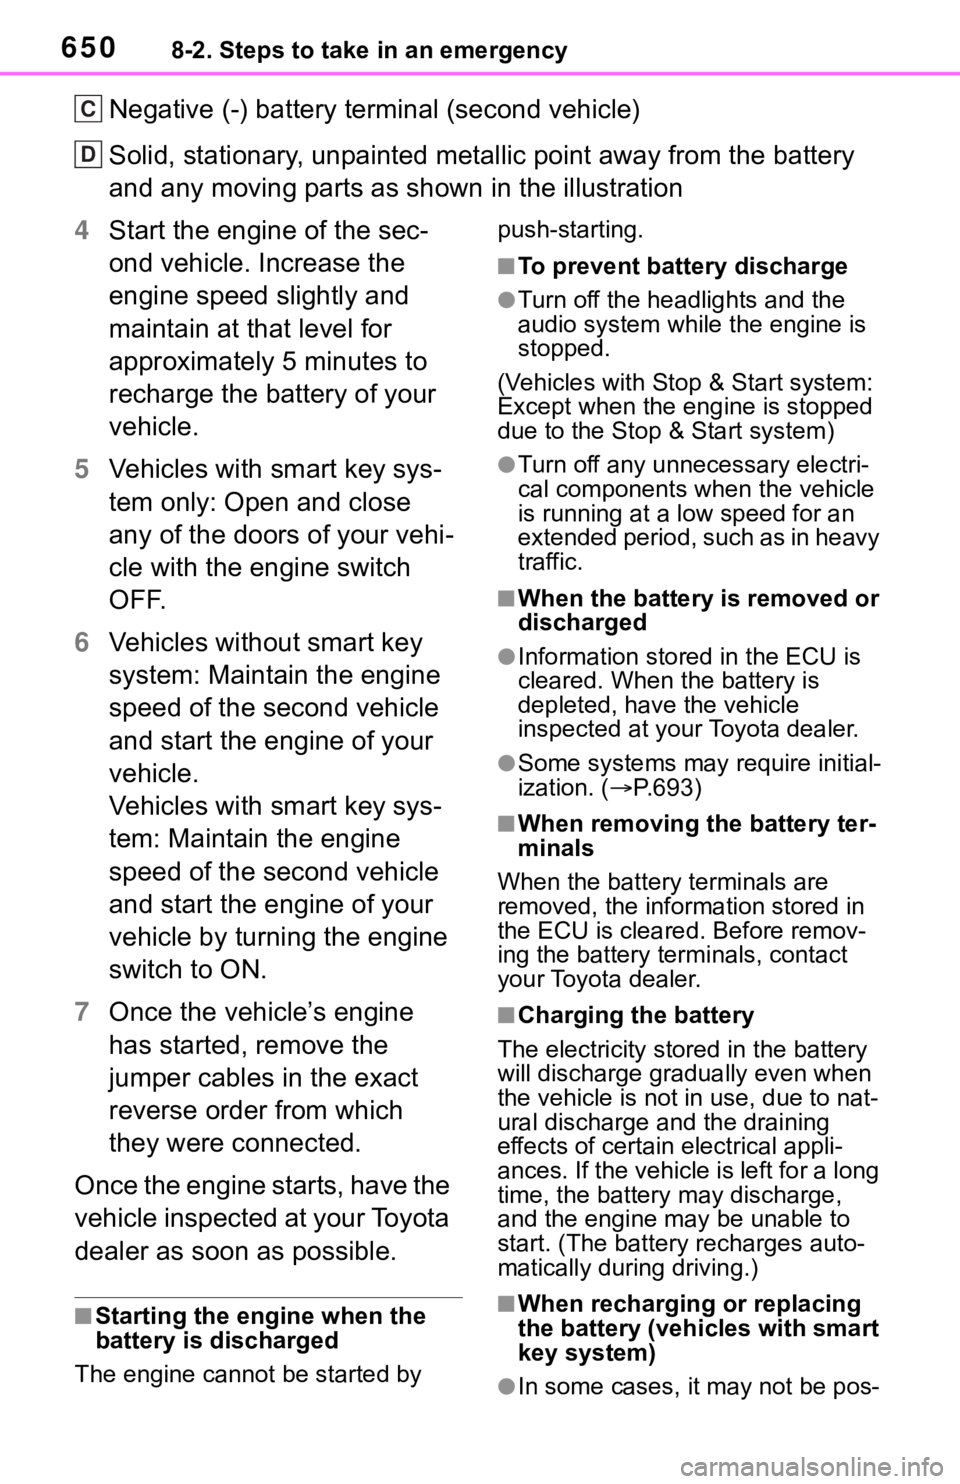
Negative (-) battery term inal (second vehicle)
Solid, stationary, unpainted metallic point away from the batte ry
and any moving parts as shown in the illustration
4 Start the engine of the sec-
ond vehicle. Increase the
engine speed slightly and
maintain at that level for
approximately 5 minutes to
recharge the battery of your
vehicle.
5 Vehicles with smart key sys-
tem only: Open and close
any of the doors of your vehi-
cle with the engine switch
OFF.
6 Vehicles without smart key
system: Maintain the engine
speed of the second vehicle
and start the engine of your
vehicle.
Vehicles with smart key sys-
tem: Maintain the engine
speed of the second vehicle
and start the engine of your
vehicle by turning the engine
switch to ON.
7 Once the vehicle’s engine
has started, remove the
jumper cables in the exact
reverse order from which
they were connected.
Once the engine starts, have the
vehicle inspected at your Toyota
dealer as soon as possible.
■Starting the engine when the
battery is discharged
The engine cannot be started by push-starting.
■To prevent bat
tery discharge
●Turn off the headlights and the
audio system while the engine is
stopped.
(Vehicles with Stop & Start system:
Except when the en gine is stopped
due to the Stop & Start system)
●Turn off any unnecessary electri-
cal components when the vehicle
is running at a low speed for an
extended period, such as in heavy
traffic.
■When the battery is removed or
discharged
●Information stored in the ECU is
cleared. When the battery is
depleted, have the vehicle
inspected at your Toyota dealer.
●Some systems may require initial-
ization. ( P.693)
■When removing the battery ter-
minals
When the battery terminals are
removed, the information stored in
the ECU is cleared. Before remov-
ing the battery term inals, contact
your Toyota dealer.
■Charging the battery
The electricity stored in the battery
will discharge grad ually even when
the vehicle is not in use, due to nat-
ural discharge and the draining
effects of certain electrical appli-
ances. If the vehicle is left for a long
time, the battery may discharge,
and the engine may be unable to
start. (The battery recharges auto-
matically during driving.)
■When recharging or replacing
the battery (vehicles with smart
key system)
●In some cases, it may not be pos-
C
D
Page 651 of 728
6518-2. Steps to take in an emergency
8
When trouble arises
sible to unlock the doors using the
smart key system when the bat-
tery is discharged. Use the wire-
less remote control or the
mechanical key to lock or unlock
the doors.
●The engine may not start on the
first attempt after the battery has
recharged but will start normally
after the se cond attempt. This is
not a malfunction.
●The engine switch mode is memo-
rized by the vehicle. When the
battery is reconnected, the system
will return to the mode it was in
before the battery was dis-
charged. Before disconnecting the
battery, turn the engine switch off.
If you are unsure what mode the
engine switch was in before the
battery discharged, be especially
careful when reconnecting the
battery.
■When the battery is removed or
discharged (vehicles with Stop
& Start system)
After the battery terminals have
been disconnecte d and recon-
nected or the battery has been
replaced, the Stop & Start system
may not automatically stop the
engine for approximately 5 to 60
minutes.
■When replacing the battery
●Vehicles with Stop & Start system:
Use a genuine batt ery specifically
designed for use with the Stop &
Start system or a ba ttery with equiv-
alent specifications to a genuine
battery. If an unsupported battery is
used, Stop & Start system functions
may be restricted to protect the bat-
tery. Also, battery performance may
decrease and the engine may not
be able to restart. Contact your Toy-
ota dealer for details.
●Use a battery tha t conforms to
European regulations.
●Ty p e A :
Use a battery that the case size is same as the previous one (LN3), 20
hours rate capacity (20HR) is equiv-
alent (65Ah) or greater, and perfor-
mance rating (CCA) is equivalent
(603A) or greater.
Ty p e B :
Use a battery that the case size is
same as the previous one (LN2), 20
hours rate capacity (20HR) is equiv-
alent (60Ah) or greater, and perfor-
mance rating (CCA) is equivalent
(560A) or greater.
Ty p e C :
Use a battery that the case size is
same as the previous one (LN2), 20
hours rate capacity (20HR) is equiv-
alent (60Ah) or greater, and perfor-
mance rating (CCA) is equivalent
(563A) or greater.
• If the sizes differ, the battery can-
not be properly secured.
• If the 20 hour rate capacity is low,
even if the time p eriod where the
vehicle is not used is a short time,
the battery may discharge and
engine may not be able to start.
WA R N I N G
■When removing the battery
terminals
Always remove the negative (-)
terminal first. If the positive (+) ter-
minal contacts any metal in the
surrounding area when the posi-
tive (+) terminal is removed, a
spark may occur, leading to a fire
in addition to ele ctrical shocks
and death or serious injury.
■Avoiding battery fires or
explosions
Observe the following precautions
to prevent accidentally igniting the
flammable gas that may be emit-
ted from the battery:
●Make sure each jumper cable is
connected to the correct termi-
nal and that it is not unintention-
ally in contact with any other
than the intended terminal.