ECU TOYOTA RAV4 HYBRID 2020 (in English) Manual PDF
[x] Cancel search | Manufacturer: TOYOTA, Model Year: 2020, Model line: RAV4 HYBRID, Model: TOYOTA RAV4 HYBRID 2020Pages: 744, PDF Size: 31.43 MB
Page 481 of 744
4815-13. Phone operation (Hands-free system for cellular phones)
5
Audio
memorized in the system.
●International phone calls may not
be made depending on the type of
Bluetooth
® phone you have.
●The list should group together
consecutive entries with the same
phone number and same call
type. For example, two calls from
John’s mobile would be displayed
as follows: John (2)
Calls can be made using regis-
tered contacts which can be
selected from a contact list.
( P.481)
1 Display the phone top
screen. ( P.475)
2 Select “Favorites” and select
the desired contact.
3 Select the desired number.
4 Check that the dialing screen
is displayed.
Calls can be made by using
contact data which is transferred
from a registered cellular phone.
( P.493)
Up to 5000 contacts (maximum
of 4 phone numbers, e-mail
addresses and addresses per
contact) can be registered in the
contact list.
1 Display the phone top
screen. ( P.475)
2 Select “Contacts” and select
the desired contact. 3
Select the desired number.
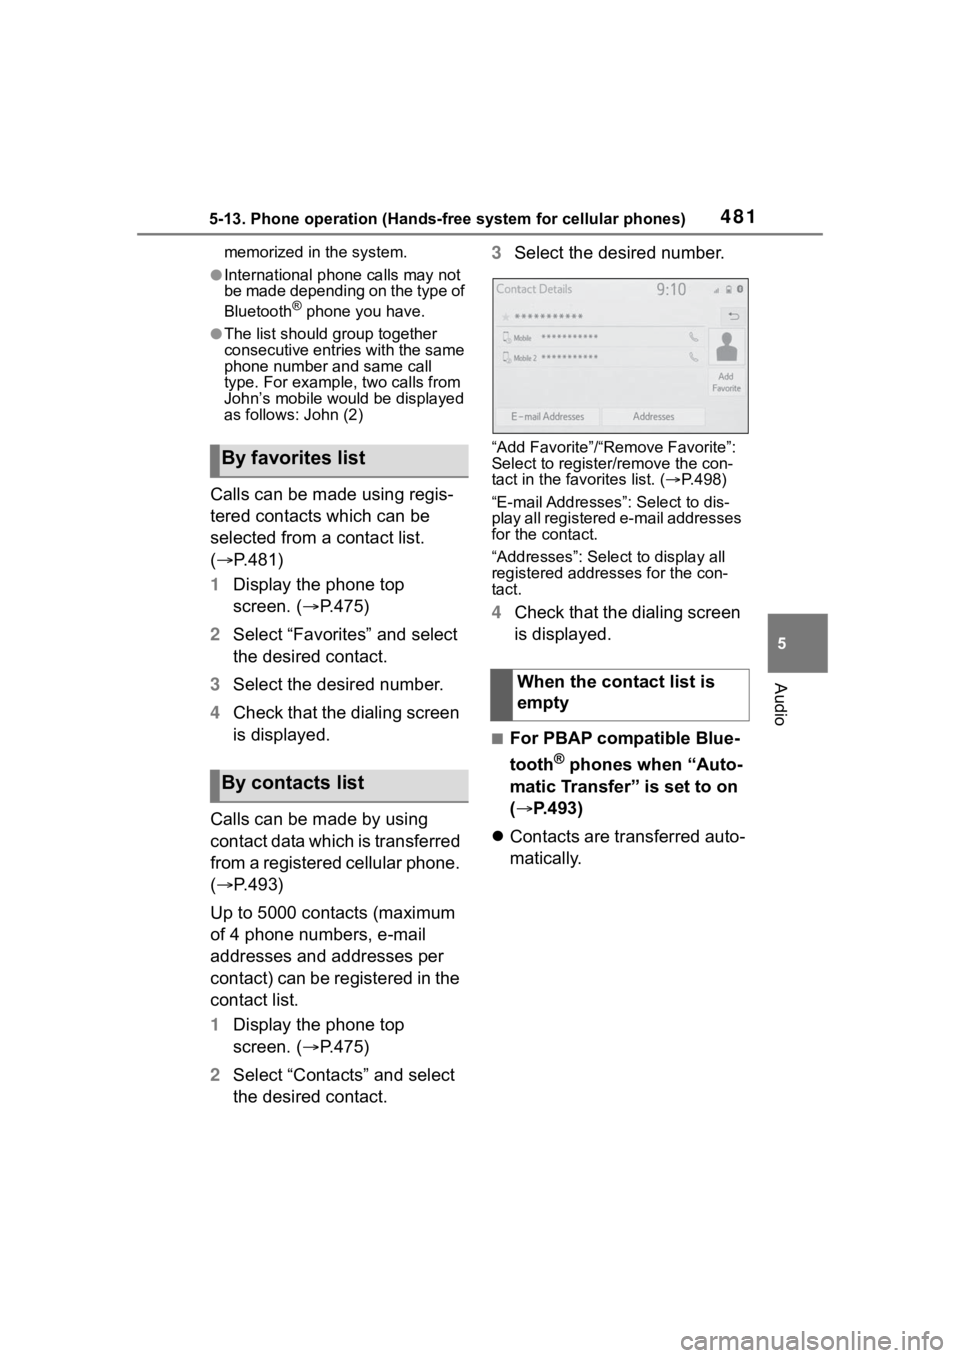
“Add Favorite”/“Remove Favorite”:
Select to register/remove the con-
tact in the favo rites list. (P.498)
“E-mail Addresses”: Select to dis-
play all registered e-mail addresses
for the contact.
“Addresses”: Select to display all
registered addresses for the con-
tact.
4 Check that the dialing screen
is displayed.
■For PBAP compatible Blue-
tooth
® phones when “Auto-
matic Transfer” is set to on
( P.493)
Contacts are transferred auto-
matically.
By favorites list
By contacts list
When the contact list is
empty
Page 504 of 744
5045-15. What to do if... (Bluetooth®)
■In other situations
The Bluetooth
® connection sta-
tus is displayed at the top of the
screen each time the power
switch is in ACC or ON.
Even though all conceivable
measures have been taken, the
symptom status does not
change.
●For details, refer to the owner’s
manual that came with the cellular
phone.
Likely causeSolution
Connection con-
firmation display
on this system is
set to on.
To turn off the
display, set con-
nection confir-
mation display
on this system to
off. ( P.410)
Likely causeSolution
The cellular
phone is not
close enough to
this system.Bring the cellu-
lar phone closer
to this system.
Radio interfer-
ence has
occurred.
Turn off Wi-Fi®
devices or other
devices that may
emit radio
waves.
The cellular
phone is the
most likely cause
of the symptom.
Turn the cellular
phone off,
remove and rein-
stall the battery
pack, and then
restart the cellu-
lar phone.
Enable the cellu-
lar phone’s Blue-
tooth
®
connection.
Disable the
Wi-Fi
® connec-
tion of the cellu-
lar phone.
Stop the cellular
phone’s security
software and
close all applica-
tions.
Before using an
application
installed on the
cellular phone,
carefully check
its source and
how its opera-
tion might affect
this system.
Likely causeSolution
Page 508 of 744
5085-16. Connected Services overview
■Settings required to use
Toyota mobile application
Perform the settings in the fol-
lowing order.
1 Download the Toyota mobile
application to your smart-
phone.
2 Open the Toyota mobile
application on your smart
phone and follow instruc-
tions. Bluetooth
® Pairing is
required.
In order to use Toyota mobile appli-
cation, the following must first be
performed:
Register a Bluetooth® phone
with the hands-free system.
( P.400)
●Applications can only be used
when the Toyota mobile applica-
tion has been downloaded to your
smartphone, and the application is
running.
●Toyota mobile application opera-
tional procedures can also be con-
firmed by visiting
http://www.toyota.com/
connected-servicesin the United States.
●If a Toyota mobile application is
used while iPod audio/video is
being played back, system opera-
tion may become unstable.
*: Vehicles equipped with DCM
■Subscription
After you have signed the
Telematics Subscription Ser-
vice Agreement and are
enrolled, you can begin
receiving services. A variety
of subscription terms are
available. Contact your Toyota
Preparation before using
Toyota mobile applicationType B: Function
achieved by using
DCM and the system
*
The functionality of Wi-Fi®
Hotspot is made possible
through the shared work of
the DCM and the system.
These are subscription-
based telematics services
that use Global Positioning
System (GPS) data and
embedded cellular technol-
ogy to provide safety and
security as well as conve-
nience features.
These services are available
by subscription on select,
telematics hardware-
equipped vehicles and sup-
ported by the Toyota
response center, which
operates 24 hours a day, 7
days a week.
For details about Wi-Fi
®
Hotspot: P.412
Before using the function
Page 537 of 744
5376-3. Using the storage features
6
Interior features
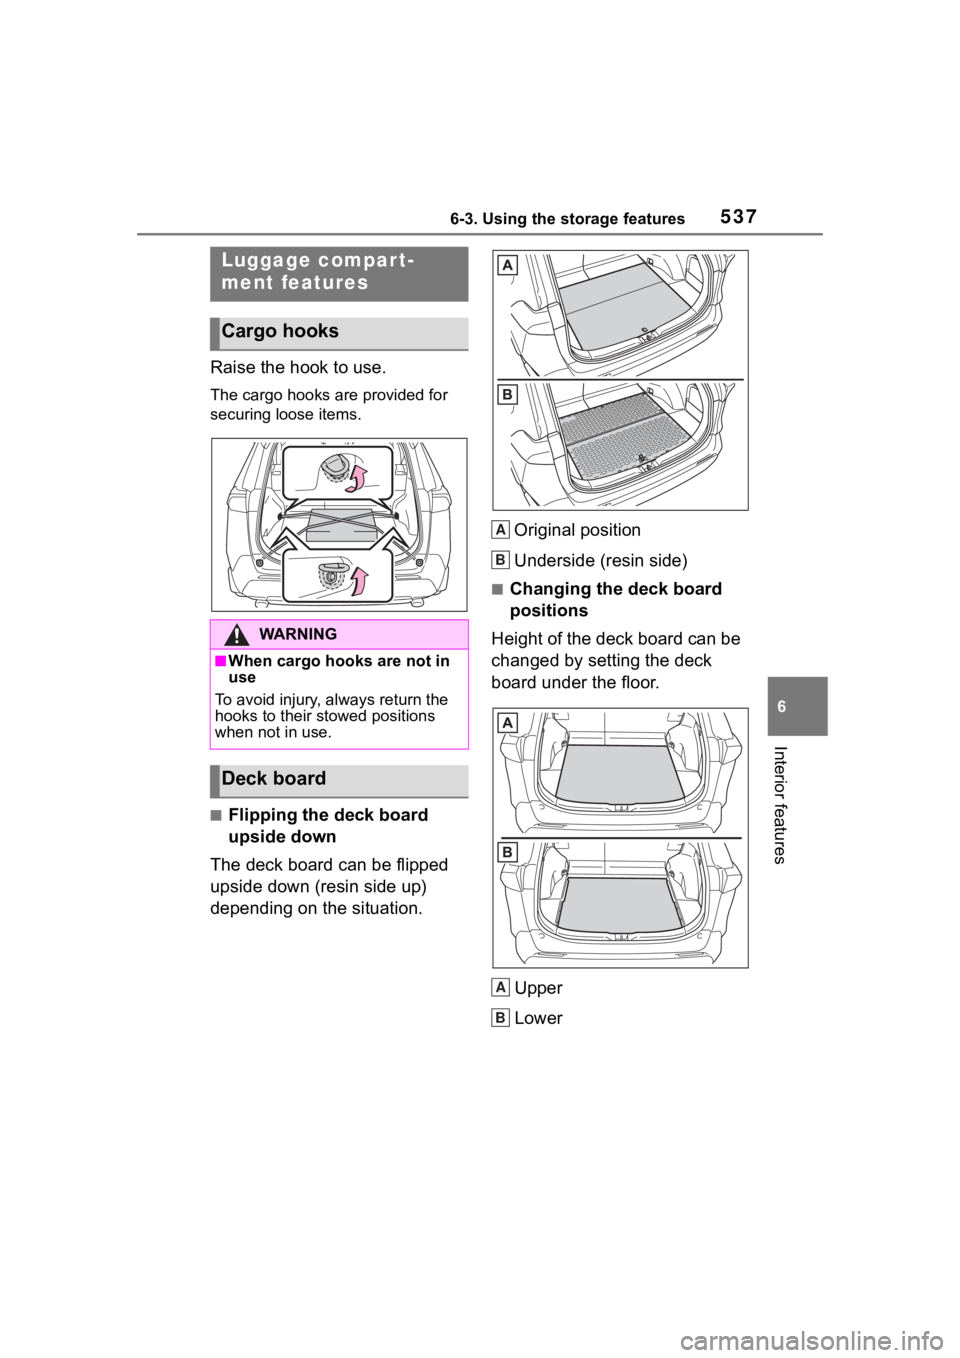
Raise the hook to use.
The cargo hooks are provided for
securing loose items.
■Flipping the deck board
upside down
The deck board can be flipped
upside down (resin side up)
depending on the situation. Original position
Underside (resin side)
■Changing the deck board
positions
Height of the deck board can be
changed by setting the deck
board under the floor.
Upper
Lower
Luggage compart-
ment features
Cargo hooks
WA R N I N G
■When cargo hooks are not in
use
To avoid injury, always return the
hooks to their stowed positions
when not in use.
Deck board
A
B
A
B
Page 540 of 744
5406-3. Using the storage features
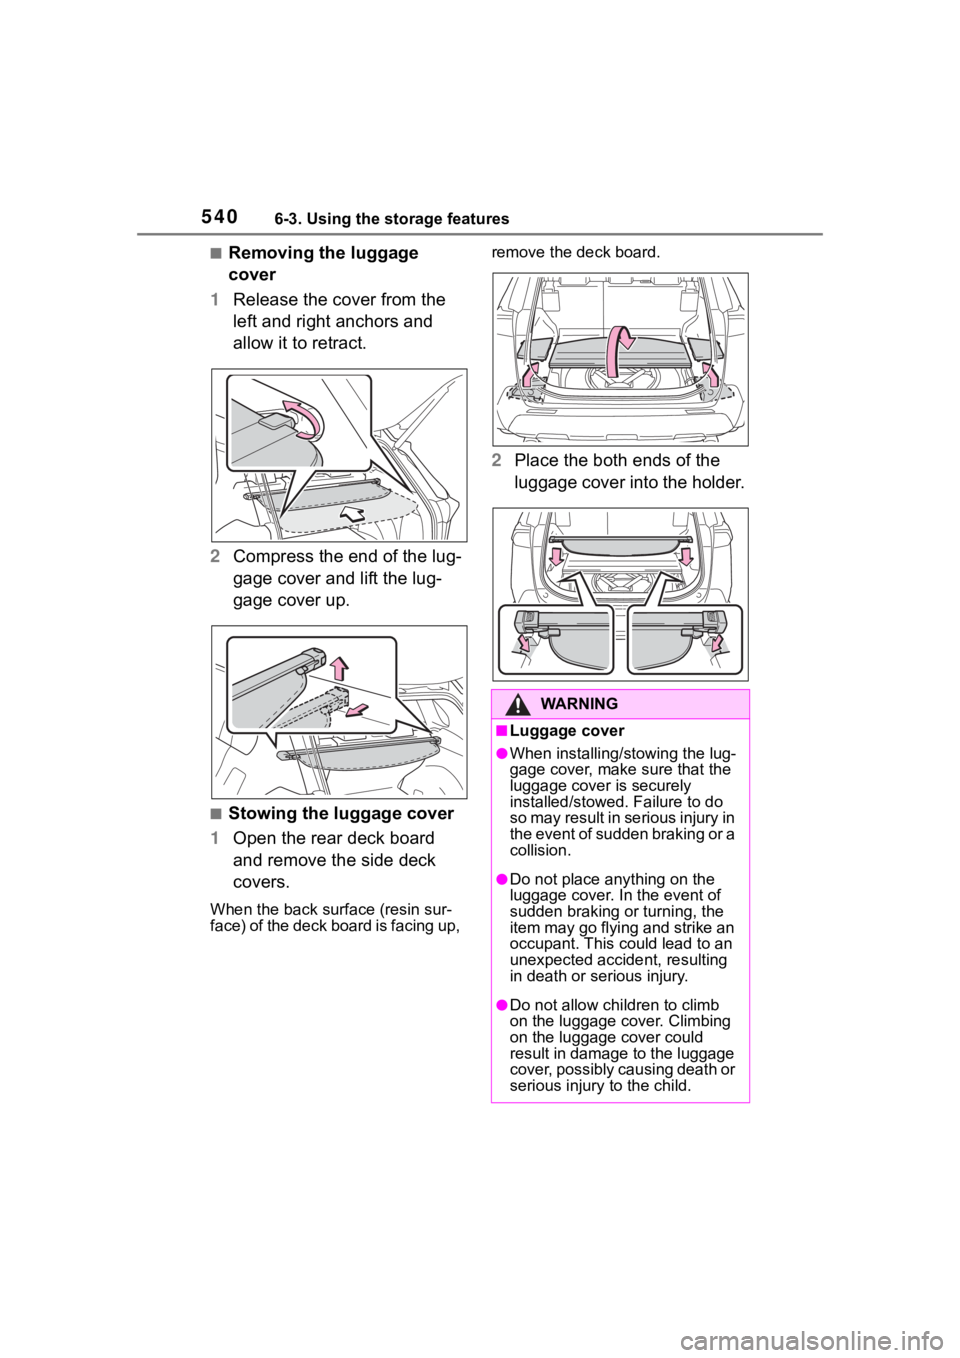
■Removing the luggage
cover
1 Release the cover from the
left and right anchors and
allow it to retract.
2 Compress the end of the lug-
gage cover and lift the lug-
gage cover up.
■Stowing the luggage cover
1 Open the rear deck board
and remove the side deck
covers.
When the back surface (resin sur-
face) of the deck board is facing up, remove the deck board.
2
Place the both ends of the
luggage cover into the holder.
WA R N I N G
■Luggage cover
●When installing/stowing the lug-
gage cover, make sure that the
luggage cover is securely
installed/stowed. Failure to do
so may result in serious injury in
the event of sudden braking or a
collision.
●Do not place anything on the
luggage cover. In the event of
sudden braking or turning, the
item may go flying and strike an
occupant. This could lead to an
unexpected accident, resulting
in death or se rious injury.
●Do not allow children to climb
on the luggage cover. Climbing
on the luggage cover could
result in damage to the luggage
cover, possibly causing death or
serious injury to the child.
Page 552 of 744
5526-4. Using the other interior features
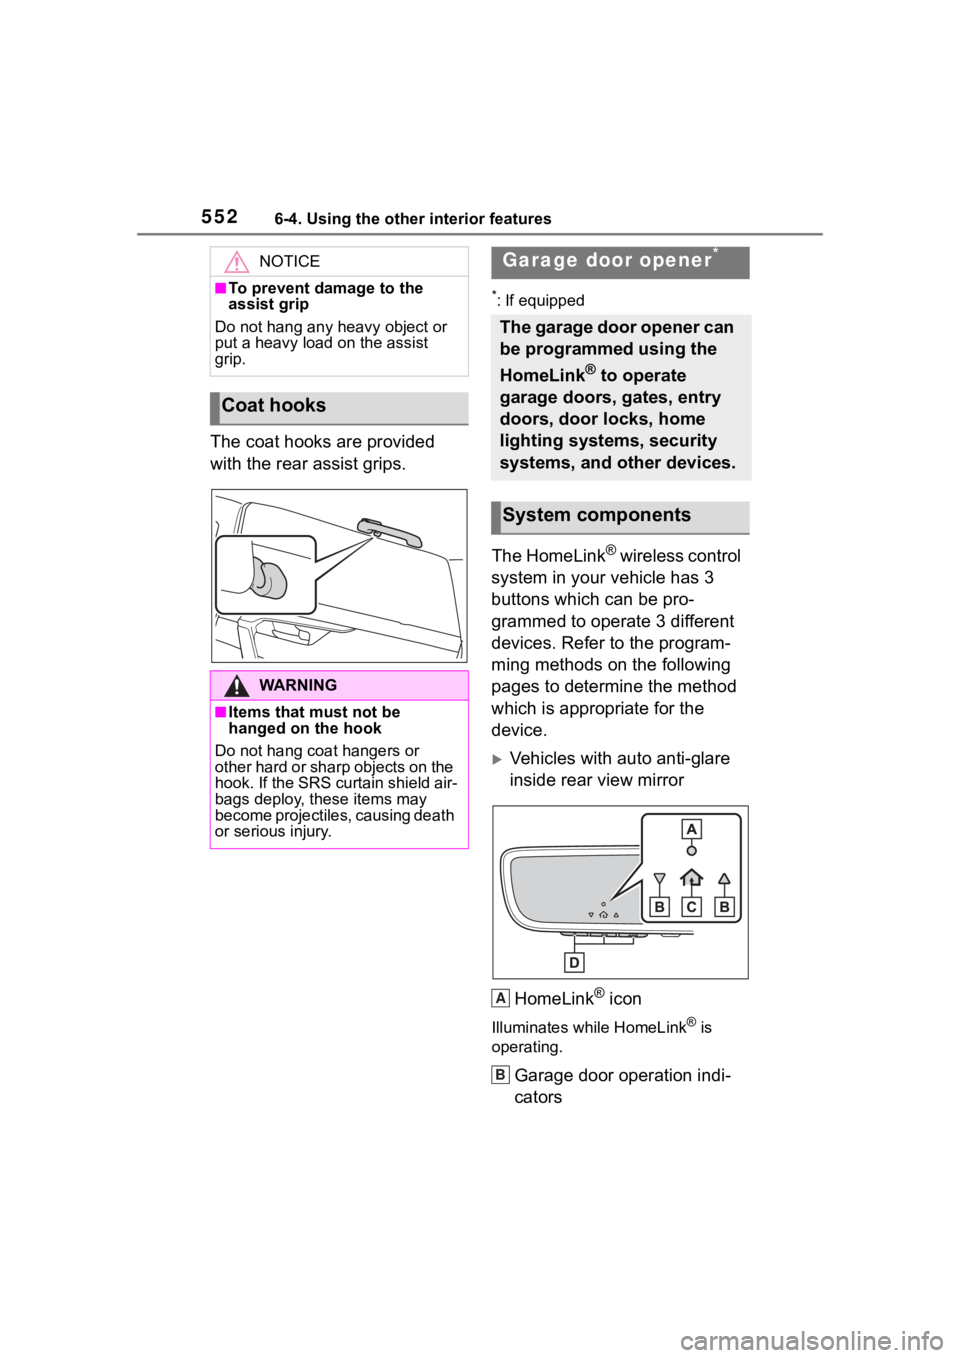
The coat hooks are provided
with the rear assist grips.
*: If equipped
The HomeLink® wireless control
system in your vehicle has 3
buttons which can be pro-
grammed to operate 3 different
devices. Refer to the program-
ming methods on the following
pages to determine the method
which is appropriate for the
device.
Vehicles with auto anti-glare
inside rear view mirror
HomeLink
® icon
Illuminates while HomeLink® is
operating.
Garage door operation indi-
cators
NOTICE
■To prevent damage to the
assist grip
Do not hang any heavy object or
put a heavy load on the assist
grip.
Coat hooks
WA R N I N G
■Items that must not be
hanged on the hook
Do not hang coat hangers or
other hard or sharp objects on the
hook. If the SRS curtain shield air-
bags deploy, these items may
become projectiles, causing death
or serious injury.
Garage door opener*
The garage door opener can
be programmed using the
HomeLink
® to operate
garage doors, gates, entry
doors, door locks, home
lighting systems, security
systems, and other devices.
System components
A
B
Page 570 of 744
5707-2. Maintenance
Exhaust sys-
temThere should not
be any fumes or
strange sounds.
Radiator/con-
denser
The radiator and
condenser should
be free from for-
eign objects.
( P.581)
Washer fluid
Is there sufficient
washer fluid?
( P.583)
Luggage compartment
ItemsCheck points
12-volt batteryCheck the connec-
tions. ( P.584)
Vehicle interior
ItemsCheck points
Accelerator
pedal
• The accelerator
pedal should
move smoothly
(without uneven
pedal effort or
catching).
Hybrid trans-
mission “Park”
mechanism
• When parked on a slope and the
shift position is in
P, is the vehicle
securely
stopped?
ItemsCheck points
Brake pedal
• Does the brake pedal move
smoothly?
• Does the brake pedal have
appropriate
clearance from
the floor?
• Does the brake pedal have the
correct amount
of free play?
Brakes
• The vehicle should not pull to
one side when
the brakes are
applied.
• The brakes should work
effectively.
• The brake pedal should not feel
spongy.
• The brake pedal should not get
too close to the
floor when the
brakes are
applied.
Head
restraints
• Do the head restraints move
smoothly and
lock securely?
Indica-
tors/buzzers
• Do the indica-tors and buzzers
function prop-
erly?
Lights• Do all the lights come on?
ItemsCheck points
Page 571 of 744
5717-2. Maintenance
7
Maintenance and care
Parking brake
• Does the park-ing brake oper-
ate normally?
• When parked on a slope and the
parking brake is
on, is the vehicle
securely
stopped?
Seat belts
• Do the seat belts operate
smoothly?
• The seat belts should not be
damaged.
Seats
• Do the seat con-trols operate
properly?
Steering wheel
• Does the steer-ing wheel rotate
smoothly?
• Does the steer- ing wheel have
the correct
amount of free
play?
• There should not be any strange
sounds coming
from the steer-
ing wheel.
ItemsCheck pointsVehicle exterior
ItemsCheck points
Doors
• Do the doors operate
smoothly?
Engine hood
• Does the engine hood lock system
work properly?
Fluid leaks
• There should not be any signs of
fluid leakage
after the vehicle
has been parked.
Tires
• Is the tire infla-tion pressure
correct?
• The tires should not be damaged
or excessively
worn.
• Have the tires been rotated
according to the
maintenance
schedule?
• The wheel nuts should not be
loose.
Windshield
wipers/rear
window wiper
• The wiper blades should not show
any signs of
cracking, split-
ting, wear, con-
tamination or
deformation.
• The wiper blades should clear the
windshield/rear
window without
streaking or skip-
ping.
Page 576 of 744
5767-3. Do-it-yourself maintenance
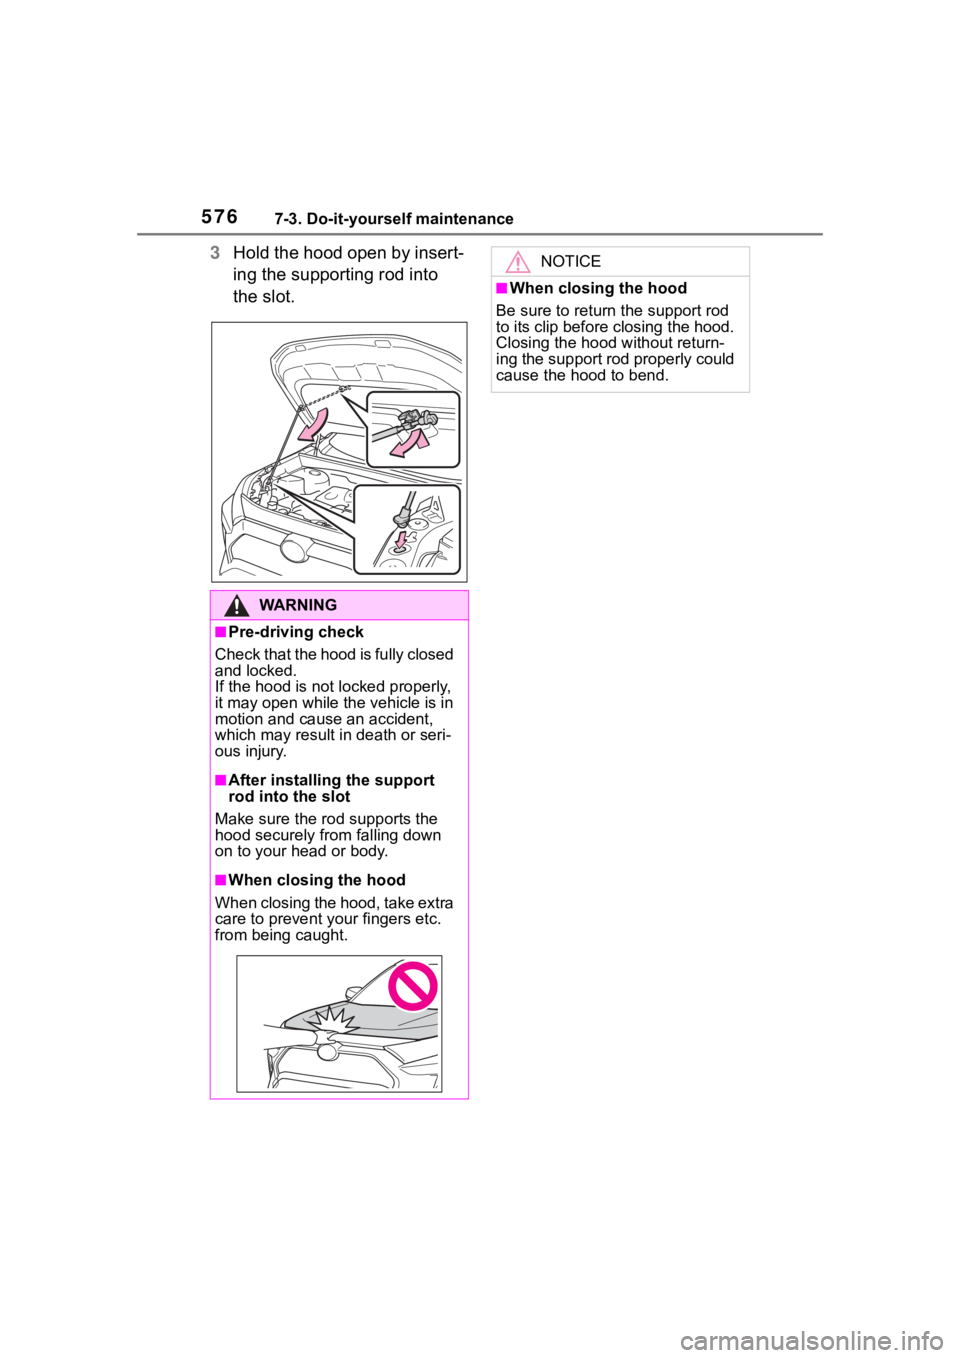
3Hold the hood open by insert-
ing the supporting rod into
the slot.
WA R N I N G
■Pre-driving check
C h e c k t h a t t h e h o o d i s f u l l y c l o s e d
and locked.
If the hood is not locked properly,
it may open while the vehicle is in
motion and cause an accident,
which may result in death or seri-
ous injury.
■After installing the support
rod into the slot
Make sure the rod supports the
hood securely from falling down
on to your head or body.
■When closing the hood
When closing the hood, take extra
care to prevent y our fingers etc.
from being caught.
NOTICE
■When closing the hood
Be sure to return the support rod
to its clip before closing the hood.
Closing the hood without return-
ing the support rod properly could
cause the hood to bend.
Page 611 of 744
6117-3. Do-it-yourself maintenance
7
Maintenance and care
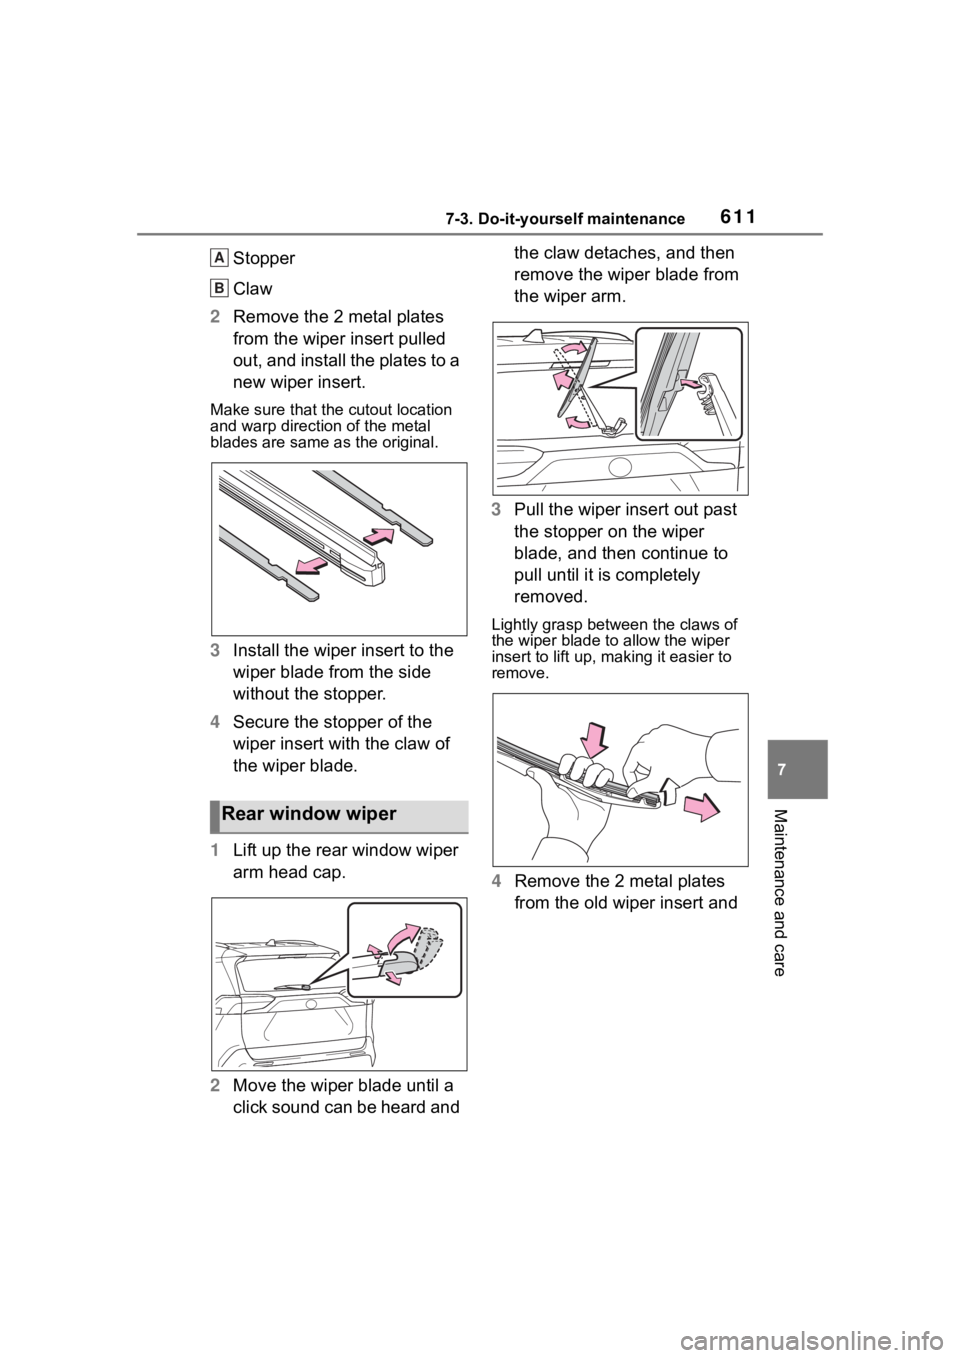
Stopper
Claw
2 Remove the 2 metal plates
from the wiper insert pulled
out, and install the plates to a
new wiper insert.
Make sure that the cutout location
and warp direction of the metal
blades are same as the original.
3Install the wiper insert to the
wiper blade from the side
without the stopper.
4 Secure the stopper of the
wiper insert with the claw of
the wiper blade.
1 Lift up the rear window wiper
arm head cap.
2 Move the wiper blade until a
click sound can be heard and the claw detaches, and then
remove the wiper blade from
the wiper arm.
3 Pull the wiper insert out past
the stopper on the wiper
blade, and then continue to
pull until it is completely
removed.
Lightly grasp between the claws of
the wiper blade to allow the wiper
insert to lift up, making it easier to
remove.
4 Remove the 2 metal plates
from the old wiper insert and
Rear window wiper
A
B