tire type TOYOTA RAV4 PLUG-IN HYBRID 2023 Owners Manual
[x] Cancel search | Manufacturer: TOYOTA, Model Year: 2023, Model line: RAV4 PLUG-IN HYBRID, Model: TOYOTA RAV4 PLUG-IN HYBRID 2023Pages: 718, PDF Size: 167.55 MB
Page 15 of 718
13Pictorial index
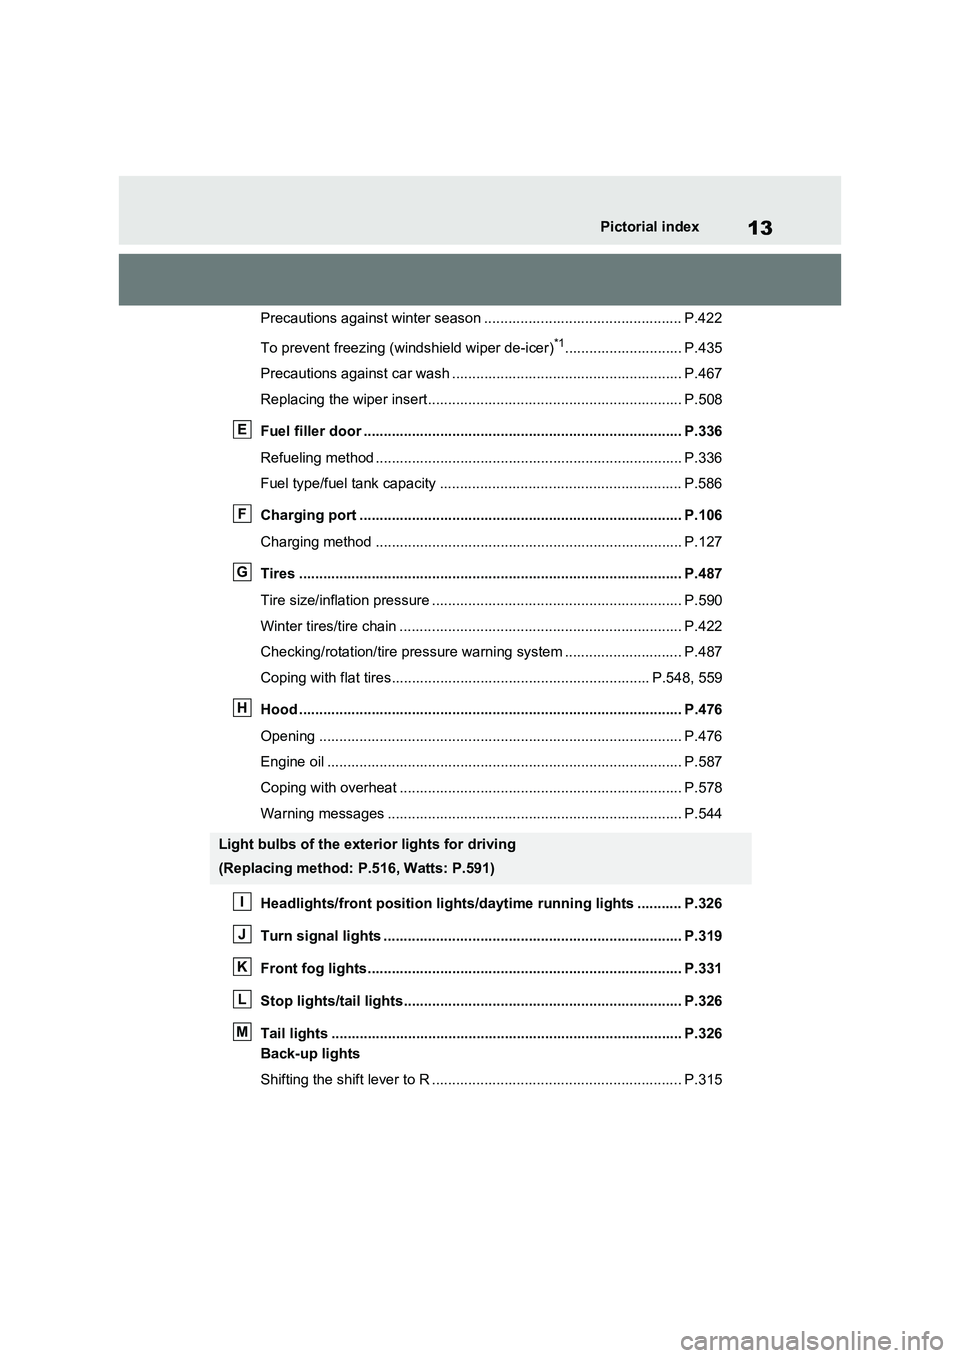
Precautions against winter season ................................................. P.422
To prevent freezing (windshield wiper de-icer)
*1............................. P.435
Precautions against car wash ......................................................... P.467
Replacing the wiper insert............................................................... P.508
Fuel filler door ............................................................................... P.336
Refueling method ............................................................................ P.336
Fuel type/fuel tank capacity ............................................................ P.586
Charging port ................................................................................ P.106
Charging method ............................................................................ P.127
Tires ............................................................................................... P.487
Tire size/inflation pressure .............................................................. P.590
Winter tires/tire chain ...................................................................... P.422
Checking/rotation/tire pressure warning system ............................. P.487
Coping with flat tires................................................................ P.548, 559
Hood ............................................................................................... P.476
Opening .......................................................................................... P.476
Engine oil ........................................................................................ P.587
Coping with overheat ...................................................................... P.578
Warning messages ......................................................................... P.544
Headlights/front position lights/daytime running lights ........... P.326
Turn signal lights .......................................................................... P.319
Front fog lights.............................................................................. P.331
Stop lights/tail lights..................................................................... P.326
Tail lights ....................................................................................... P.326
Back-up lights
Shifting the shift lever to R .............................................................. P.315
Light bulbs of the exterior lights for driving
(Replacing method: P.516, Watts: P.591)
E
F
G
H
I
J
K
L
M
Page 107 of 718
105
2 2-1. Plug-in hybrid system
Plug-in hybrid system
A pressure level 50 kPa (0.5 kgf/cm2 or
bar, 7 psi) lower than the specified
value will cause a worsening of several
percentage points.
■When driving on highways,
use the EV/HV mode selection
switch to drive in HV mode
The power consumption will
increase significantly if the vehicle
is driven in EV mode on highways.
■Do not load unnecessary
objects in the vehicle
Driving with objects weighing 100
kg (220 lb.) in the vehicle will
worsen the electrical and fuel effi-
ciency by approximately 3%.
Air resistance also greatly affects
electrical and fuel efficiency.
Remove any exterior accessories
such as a roof luggage carrier when
they are not being used.
The running resistance of snow
tires is high and they will worsen
electrical and fuel efficiency.
Replace them with standard tires
as soon as they are no longer
needed.
■Know your vehicle’s electrical
and fuel efficiency
If you know your vehicle’s daily
electrical and fuel efficiency, you
will understand the benefits of Eco
drive.
Use the Power Consumption/Fuel
Economy, ECO Accelerator Guid-
ance/“Eco Score” and other data
displayed on the multi-information display.
The following indicate that charging
has been carried out properly.
The charging indicator of the
charging port turns off
“Charging Complete” is dis-
played on the multi-information
display when a door is opened
with the power switch off
(P.131)
Regardless of the type of power
source or whether the charging
schedule function is used, charging
is completed if the above can be
confirmed.
Charging-related messages: P.172
Display when charging is
completed
Page 210 of 718
2083-1. Instrument cluster
Select to enable/disable the battery
cooler. (P.128)
PBD (Power Back Door) (if
equipped) (P.243)
Select to set up the following items.
•System settings
Select to enable/disable the power
back door system.
•“Hands Free”
*
Select to enable/disable the Hands
Free Power Back Door.
• “Opening Adjustment”
Select the open position when power
back door is fully open.
•“Volume”
Select to set the volume of the buzzer
which sounds when the power back
door system operates.
*: Vehicles with Hands Free Power
Back Door
“TPWS” (Tire Pressure Warning
System) (P.488)
• “Setting Pressure”
Select to initialize the tire pressure
warning system.
• “Identifying Each Wheel & Position”
Select to register the ID codes of the
tire pressure sensors to the tire pres-
sure warning system.
•“Setting Unit”
Select to change the units of measure
displayed.
“Rear Seat Reminder” (P.237)
Select to enable/disable the rear seat
reminder.
■ Settings
“Language”
Select to change the language on the
multi-information display.
“Units”
Select to change the units of measure
displayed.
“Meter Type”
Select to change the speedometer dis-
play.
(EV indicator) (P.90)
Select to enable/disable the EV indica-
tor.
(Driving information display
settings)
Select to set up the following items.
•“Hybrid System”
Select to enable/disable the ECO
Accelerator Guidance (P.202).
• “Fuel Economy”
Select to change the display on Fuel
Economy (P.201).
• “Power Consumption”
Select to change the display on Power
Consumption (P.201).
(Audio settings)
Select to enable/disable screen.
(Vehicle information dis-
play settings)
• “Display Contents”
Select to set up the following items.
“Energy monitor”:
Select to enable/disable the Energy
monitor (P.226)
AWD:
Select to enable/disable the AWD sys-
tem display (P.205).
Page 397 of 718
395
5 5-5. Using the driving support systems
Driving
●When there are spinning objects near
your vehicle such as the fan of an air
conditioning unit.
●When water is splashed or sprayed
toward the rear bumper, such as from
a sprinkler.
●Moving objects (flags, exhaust fumes,
large rain droplets or snowflakes, rain
water on the road surface, etc.).
●When the distance between your vehi-
cle and a guardrail, wall, etc., that
enters the detection area is short.
●Gratings and gutters.
●When a sensor or the area around a
sensor is extremely hot or cold.
●If the suspension has been modified
or tires of a size other than specified
are installed.
●If the front of the vehicle is raised or
lowered due to the carried load.
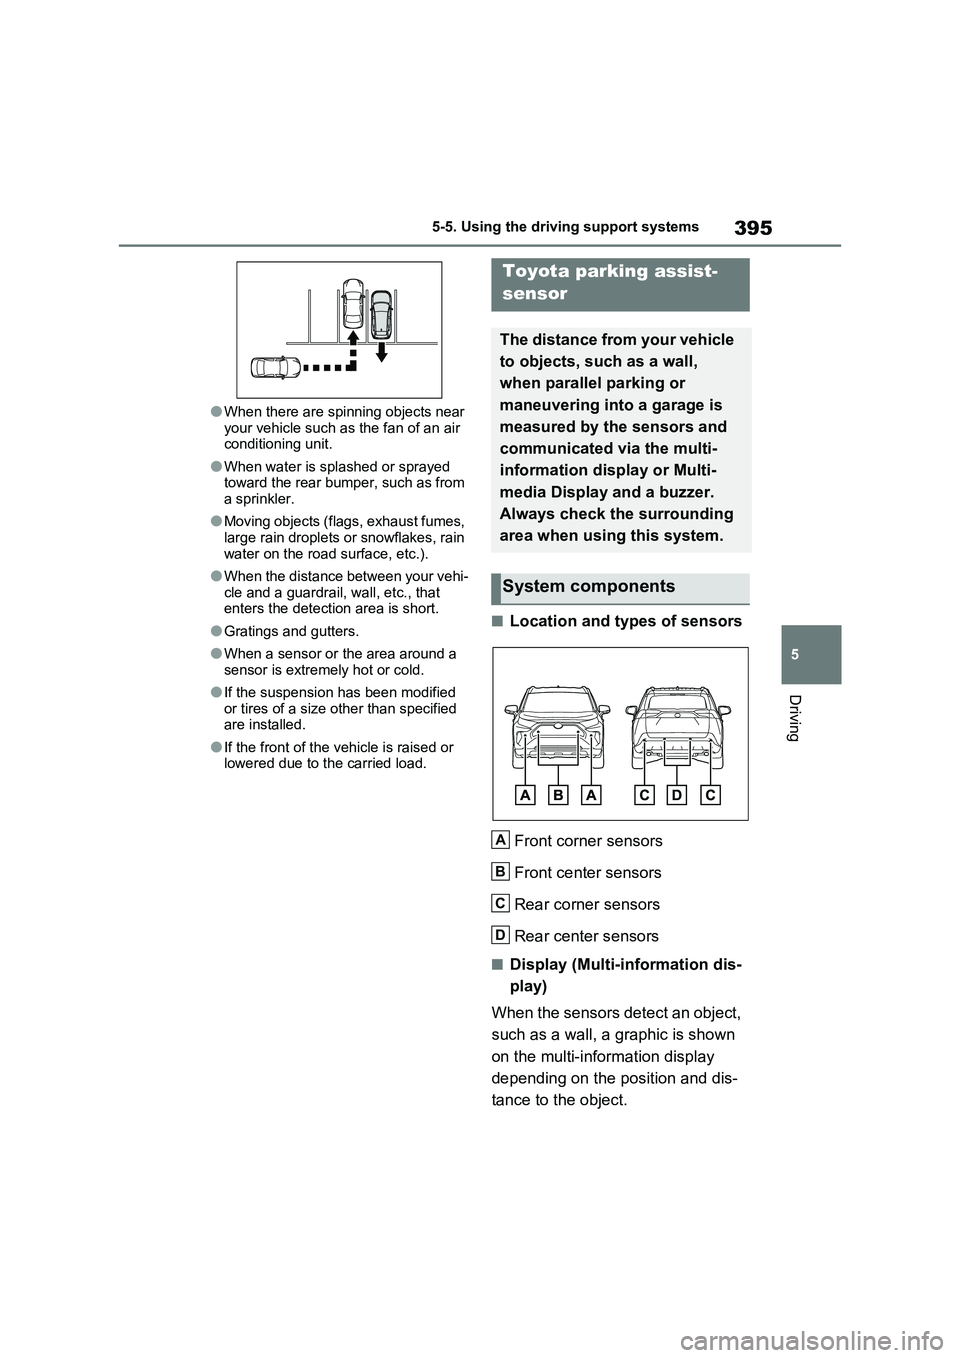
■Location and types of sensors
Front corner sensors
Front center sensors
Rear corner sensors
Rear center sensors
■Display (Multi-information dis-
play)
When the sensors detect an object,
such as a wall, a graphic is shown
on the multi-information display
depending on the position and dis-
tance to the object.
Toyota parking assist-
sensor
The distance from your vehicle
to objects, such as a wall,
when parallel parking or
maneuvering into a garage is
measured by the sensors and
communicated via the multi-
information display or Multi-
media Display and a buzzer.
Always check the surrounding
area when using this system.
System components
A
B
C
D
Page 399 of 718
397
5
5-5. Using the driving support systems
Driving
To re-enable the system, select on
the multi-information display, select
and turn it on.
If the system is disabled, it will remain
off even if the power switch is turned to
ON after the power switch has been
turned off.
■The system can be operated when
●The power switch is in ON.
●Toyota parking assist-sensor function is on.
●The vehicle speed is less than about 10 km/h (6 mph).
●The shift lever is in other than P.
■If “Clean Parking Assist Sensor” is displayed on the multi-information
display
A sensor may be covered with ice, snow, dirt, etc. Remove the ice, snow,
dirt, etc., from the sensor to return the system to normal.
Also, due to ice forming on a sensor at
low temperatures, a warning message
WARNING
■Cautions regarding the use of the system
There is a limit to the degree of recog- nition accuracy and control perfor-mance that this system can provide,
do not overly rely on this system. The driver is always responsible for pay-ing attention to the vehicle’s sur-
roundings and driving safely.
■To ensure the system can oper-
ate properly
Observe the following precautions. Failing to do so may result in the vehi-
cle being unable to be driven safely and possibly cause an accident.
●Do not damage the sensors, and always keep them clean.
●Do not attach a sticker or install an electronic component, such as a backlit license plate (especially fluo-
rescent type), fog lights, fender pole or wireless antenna near a radar sensor.
●Do not subject the surrounding area of the sensor to a strong impact. If
subjected to an impact, have the vehicle inspected by any authorized Toyota retailer or Toyota authorized
repairer, or any reliable repairer. If the front or rear bumper needs to be removed/installed or replaced,
contact any authorized Toyota retailer or Toyota authorized repairer, or any reliable repairer.
●Do not modify, disassemble or paint the sensors.
●Do not attach a license plate cover.
●Keep your tires properly inflated.
■When to disable the function
In the following situations, disable the
function as it may operate even though there is no possibility of a colli-sion.
●Failing to observe the warnings above.
●A non-genuine Toyota suspension (lowered suspension, etc.) is installed.
■Notes when washing the vehicle
Do not apply intensive bursts of water
or steam to the sensor area.
Doing so may result in the sensor malfunctioning.
●When using a high pressure washer to wash the vehicle, do not
spray the sensors directly, as doing so may cause a sensor to malfunc-tion.
●When using steam to clean the vehicle, do not direct steam too
close to the sensors as doing so may cause a sensor to malfunction.
Page 426 of 718
4245-6. Driving tips
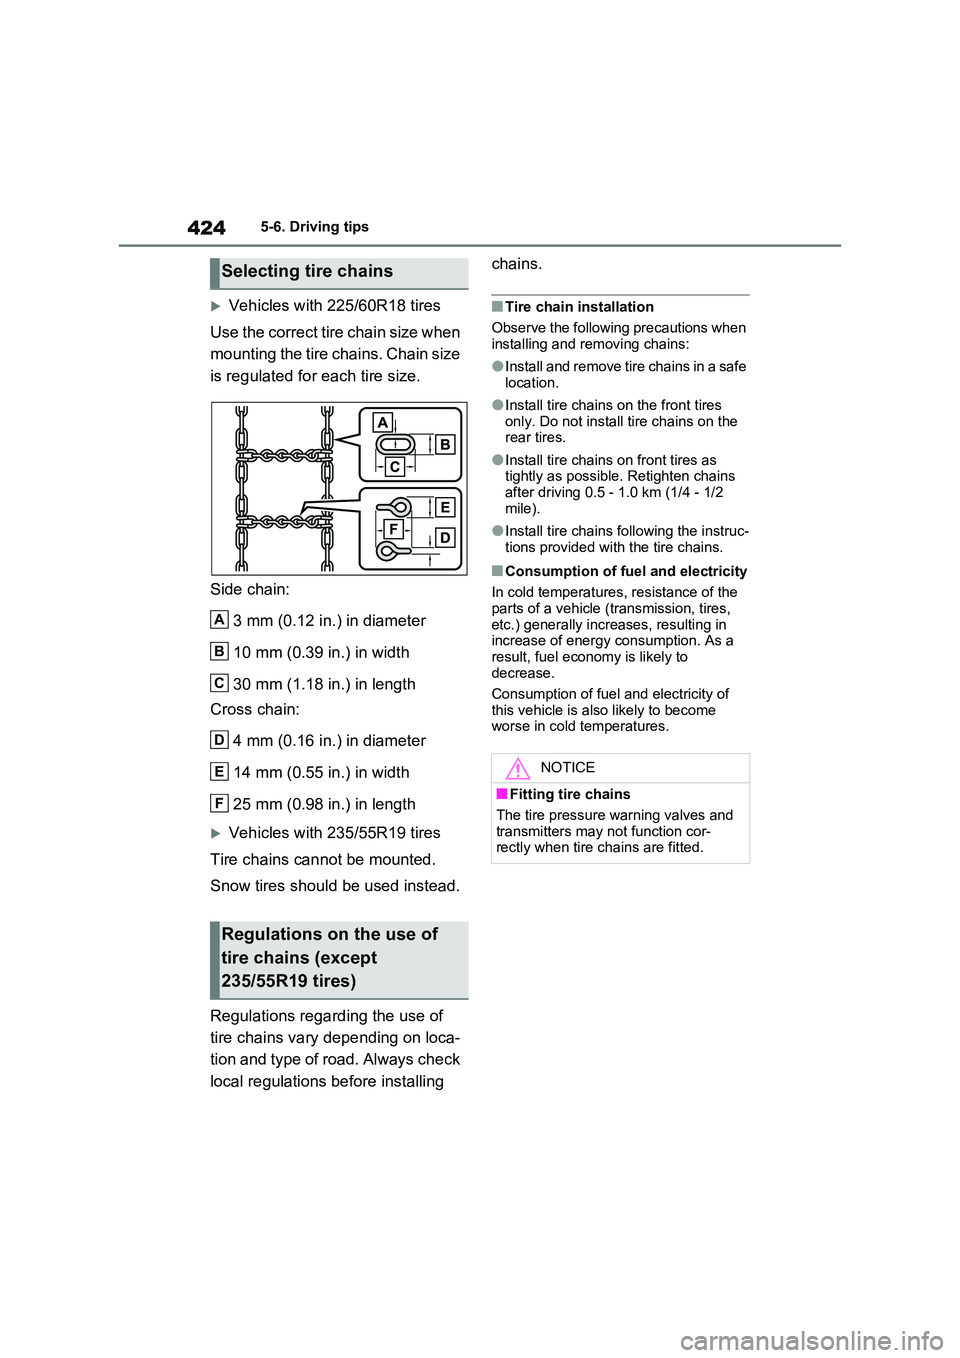
Vehicles with 225/60R18 tires
Use the correct tire chain size when
mounting the tire chains. Chain size
is regulated for each tire size.
Side chain:
3 mm (0.12 in.) in diameter
10 mm (0.39 in.) in width
30 mm (1.18 in.) in length
Cross chain:
4 mm (0.16 in.) in diameter
14 mm (0.55 in.) in width
25 mm (0.98 in.) in length
Vehicles with 235/55R19 tires
Tire chains cannot be mounted.
Snow tires should be used instead.
Regulations regarding the use of
tire chains vary depending on loca-
tion and type of road. Always check
local regulations before installing
chains.
■Tire chain installation
Observe the following precautions when installing and removing chains:
●Install and remove tire chains in a safe location.
●Install tire chains on the front tires only. Do not install tire chains on the rear tires.
●Install tire chains on front tires as tightly as possible. Retighten chains
after driving 0.5 - 1.0 km (1/4 - 1/2 mile).
●Install tire chains following the instruc-tions provided with the tire chains.
■Consumption of fuel and electricity
In cold temperatures, resistance of the
parts of a vehicle (transmission, tires, etc.) generally increases, resulting in increase of energy consumption. As a
result, fuel economy is likely to decrease.
Consumption of fuel and electricity of
this vehicle is also likely to become worse in cold temperatures.
Selecting tire chains
Regulations on the use of
tire chains (except
235/55R19 tires)
A
B
C
D
E
F
NOTICE
■Fitting tire chains
The tire pressure warning valves and transmitters may not function cor-rectly when tire chains are fitted.
Page 490 of 718

4887-3. Do-it-yourself maintenance
Rotate the tires in the order shown.
To equalize tire wear and help extend
tire life, Toyota recommends that tire
rotation is carried out approximately
every 5000 km (3000 miles).
Do not fail to initialize the tire pressure
warning system after tire rotation.
Front
■When rotating the tires
Make sure that the power switch is OFF. If the tires are rotated while the power
switch is in ON, the tire position informa- tion will not be updated.
If this accidentally occurs, either turn the
power switch to OFF and then to ON, or
initialize the system after checking that
the tire pressure is properly adjusted.
Your vehicle is equipped with a tire
pressure warning system that uses
tire pressure warning valves and
transmitters to detect low tire infla-
tion pressure before serious prob-
lems arise.
The tire pressure warning system
of this vehicle adopts a 2-type
warning system
When “Adjust Pressure” is dis-
played (Normal Warning)
WARNING
●Do not use tire sizes other than those recommended by Toyota.
●Do not mix differently constructed tires (radial, bias-belted or bias-ply
tires).
●Do not mix summer, all season and
snow tires.
●Do not use tires that have been
used on another vehicle. Do not use tires if you do not know how they were used previously.
●Vehicles with compact spare tire: Do not tow if your vehicle has a
compact spare tire installed.
●Vehicles with emergency tire punc-
ture repair kit: Do not tow anything if a tire that has been repaired using the emergency tire puncture repair
kit is installed. The load on the tire may cause unexpected damage to the tire.
NOTICE
■Driving on rough roads
Take particular care when driving on
roads with loose surfaces or potholes. These conditions may cause losses in tire inflation pressure, reducing the
cushioning ability of the tires. In addi- tion, driving on rough roads may cause damage to the tires them-
selves, as well as the vehicle’s wheels and body.
■If tire inflation pressure of each tire becomes low while driving
Do not continue driving, or your tires
and/or wheels may be ruined.
Tire rotation
Tire pressure warning sys-
tem
A
Page 501 of 718
499
7
7-3. Do-it-yourself maintenance
Maintenance and care
When replacing wheels, care
should be taken to ensure that they
are equivalent to those removed in
load capacity, diameter, rim width
and inset*.
Replacement wheels are available
at any authorized Toyota retailer or
Toyota authorized repairer, or any
reliable repairer.
*: Conventionally referred to as offset.
Toyota does not recommend using
the following:
Wheels of different sizes or types
Used wheels
Bent wheels that have been
straightened
■When replacing wheels
The wheels of your vehicle are equipped with tire pressure warning valves and
transmitters that allow the tire pressure warning system to provide advance warning in the event of a loss in tire
inflation pressure. Whenever wheels are replaced, tire pressure warning valves and transmitters must be installed.
( P.488, 500)
Wheels
If a wheel is bent, cracked or
heavily corroded, it should be
replaced. Otherwise, the tire
may separate from the wheel
or cause a loss of handling
control.
Wheel selection
WARNING
■When replacing wheels
●Do not use wheels that are a differ-
ent size from those recommended in the Owner’s Manual, as this may result in a loss of handling control.
●Never use an inner tube in a leak-ing wheel which is designed for a
tubeless tire. Doing so may result in an accident, causing death or seri-ous injury.
■When installing the wheel nuts
Never use oil or grease on the wheel
bolts or wheel nuts. Oil and grease may cause the wheel nuts to be excessively tightened, leading to bolt
or disc wheel damage. In addition, the oil or grease can cause the wheel nuts to loosen and the wheel may fall
off, causing an accident and resulting in death or serious injury. Remove any oil or grease from the wheel bolts
or wheel nuts.
■Use of defective wheels prohib-
ited
Do not use cracked or deformed wheels.
Doing so could cause the tire to leak air during driving, possibly causing an accident.
Page 532 of 718
5308-2. Steps to take in an emergency
When using a flat-bed truck to
transport the vehicle, use tire strap-
ping belts. Refer to the owner’s
manual of the flat-bed truck for the
tire strapping method.
In order to suppress vehicle move-
ment during transportation, set the
parking brake and turn the power
switch off.
If a tow truck is not available in an
emergency, your vehicle may be
temporarily towed using cables or
chains secured to the emergency
towing eyelets. This should only be
attempted on hard surfaced roads
for short distances at under 30
km/h (18 mph).
A driver must be in the vehicle to
steer and operate the brakes. The
vehicle’s wheels, drive train, axles,
steering and brakes must be in
good condition.
WARNING
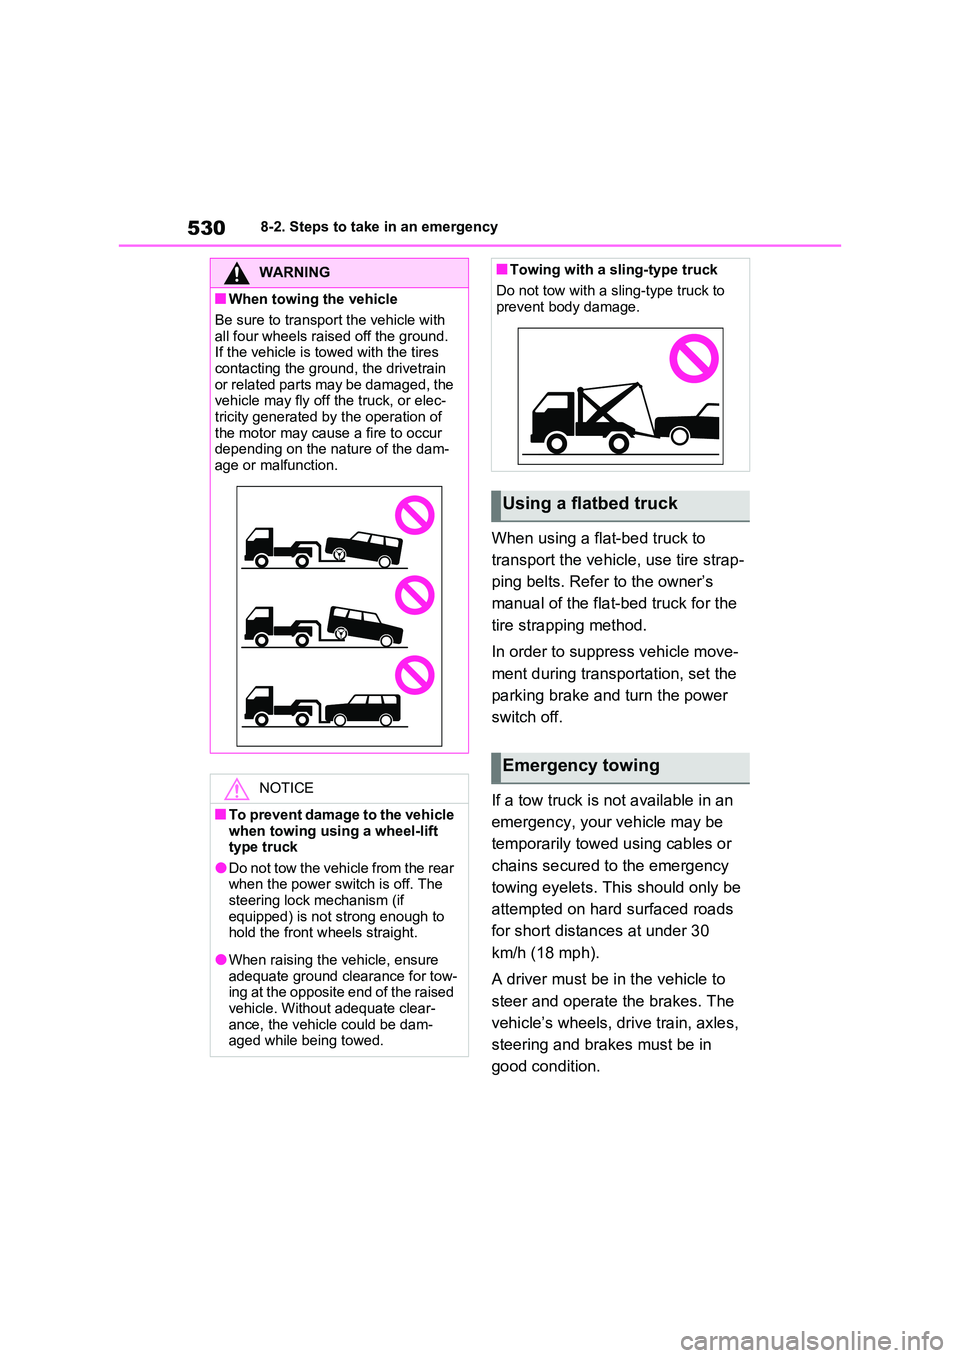
■When towing the vehicle
Be sure to transport the vehicle with
all four wheels raised off the ground. If the vehicle is towed with the tires contacting the ground, the drivetrain
or related parts may be damaged, the vehicle may fly off the truck, or elec-tricity generated by the operation of
the motor may cause a fire to occur depending on the nature of the dam-age or malfunction.
NOTICE
■To prevent damage to the vehicle when towing using a wheel-lift type truck
●Do not tow the vehicle from the rear when the power switch is off. The steering lock mechanism (if
equipped) is not strong enough to hold the front wheels straight.
●When raising the vehicle, ensure adequate ground clearance for tow-ing at the opposite end of the raised
vehicle. Without adequate clear- ance, the vehicle could be dam-aged while being towed.
■Towing with a sling-type truck
Do not tow with a sling-type truck to prevent body damage.
Using a flatbed truck
Emergency towing
Page 553 of 718
551
8
8-2. Steps to take in an emergency
When trouble arises
●The kit is exclusively designed for size
and type of tires originally installed on your vehicle. Do not use it for tires that a different size than the original ones,
or for any other purposes.
●If the sealant gets on your clothes, it
may stain.
●If the sealant adheres to a wheel or
the surface of the vehicle body, the stain may not be removable if it is not cleaned at once. Immediately wipe
away the sealant with a wet cloth.
●During operation of the repair kit, a
loud operation noise is produced. This does not indicate a malfunction.
●Do not use to check or to adjust the tire pressure.
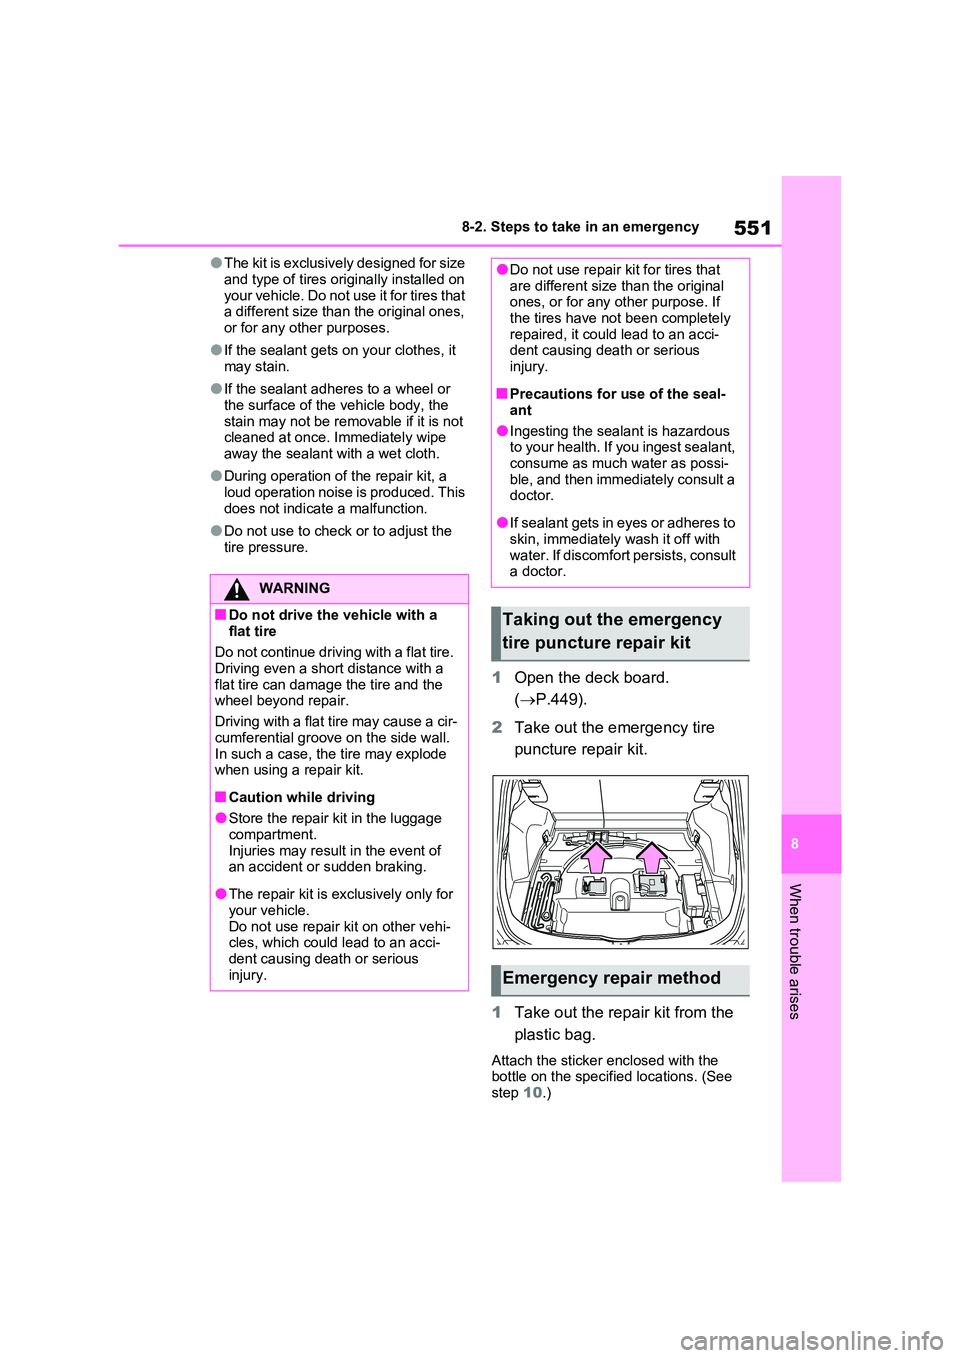
1 Open the deck board.
( P.449).
2 Take out the emergency tire
puncture repair kit.
1 Take out the repair kit from the
plastic bag.
Attach the sticker enclosed with the bottle on the specified locations. (See step 10.)
WARNING
■Do not drive the vehicle with a
flat tire
Do not continue driving with a flat tire. Driving even a short distance with a
flat tire can damage the tire and the wheel beyond repair.
Driving with a flat tire may cause a cir-
cumferential groove on the side wall. In such a case, the tire may explode when using a repair kit.
■Caution while driving
●Store the repair kit in the luggage
compartment. Injuries may result in the event of an accident or sudden braking.
●The repair kit is exclusively only for your vehicle.
Do not use repair kit on other vehi- cles, which could lead to an acci-dent causing death or serious
injury.
●Do not use repair kit for tires that are different size than the original ones, or for any other purpose. If
the tires have not been completely repaired, it could lead to an acci-dent causing death or serious
injury.
■Precautions for use of the seal-
ant
●Ingesting the sealant is hazardous to your health. If you ingest sealant,
consume as much water as possi- ble, and then immediately consult a doctor.
●If sealant gets in eyes or adheres to skin, immediately wash it off with
water. If discomfort persists, consult a doctor.
Taking out the emergency
tire puncture repair kit
Emergency repair method