TOYOTA VENZA 2014 Accessories, Audio & Navigation (in English)
Manufacturer: TOYOTA, Model Year: 2014, Model line: VENZA, Model: TOYOTA VENZA 2014Pages: 48, PDF Size: 3.27 MB
Page 31 of 48
128-8673b
31 of 48
- 21 -
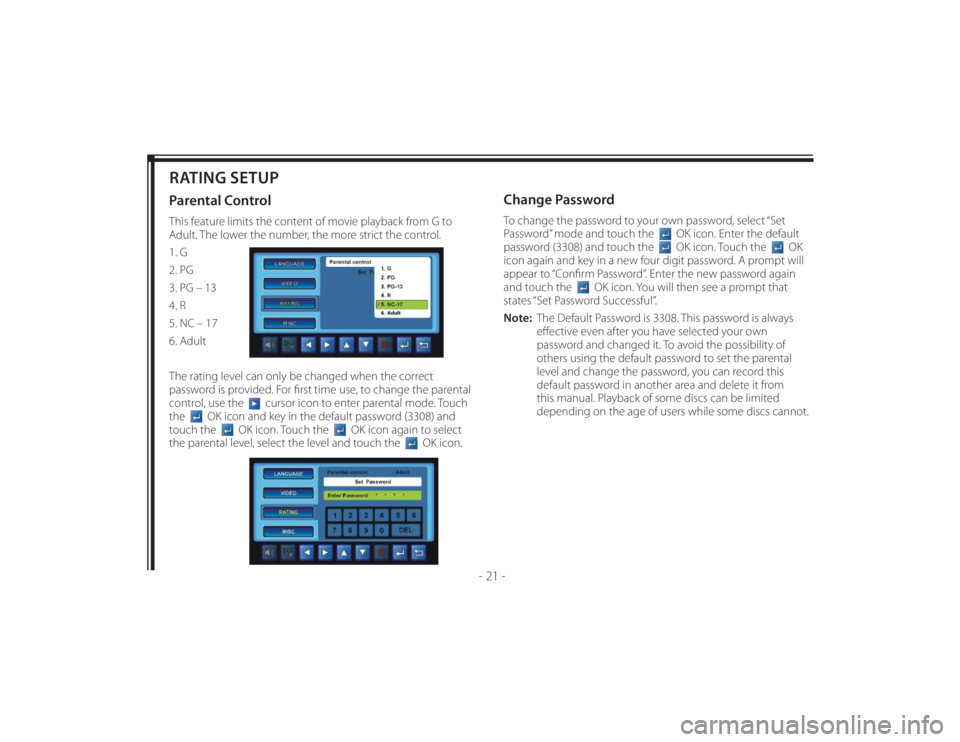
RATING SETUPParental ControlThis feature limits the content of movie playback from G to
Adult. The lower the number, the more strict the control.
1. G
2. PG
3. PG – 13
4. R
5. NC – 17
6. Adult
The rating level can only be changed when the correct
password is provided. For fi rst time use, to change the parental
control, use the
cursor icon to enter parental mode. Touch
the
OK icon and key in the default password (3308) and
touch the
OK icon. Touch the
OK icon again to select
the parental level, select the level and touch the
OK icon.
Change PasswordTo change the password to your own password, select “Set
Password” mode and touch the
OK icon. Enter the default
password (3308) and touch the OK icon. Touch the
OK
icon again and key in a new four digit password. A prompt will
appear to “Confi rm Password”. Enter the new password again
and touch the
OK icon. You will then see a prompt that
states “Set Password Successful”.
Note: The Default Password is 3308. This password is always
eff ective even after you have selected your own
password and changed it. To avoid the possibility of
others using the default password to set the parental
level and change the password, you can record this
default password in another area and delete it from
this manual. Playback of some discs can be limited
depending on the age of users while some discs cannot.
Page 32 of 48
128-8673b
32 of 48
- 22 -
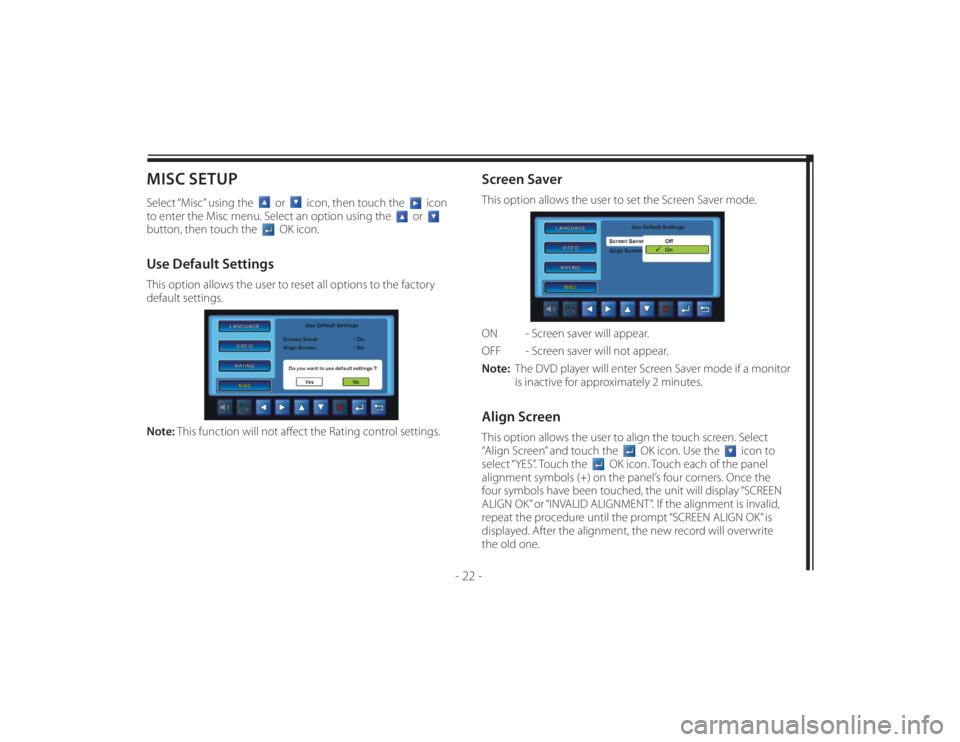
MISC SETUPSelect “Misc” using the
or
icon, then touch the
icon
to enter the Misc menu. Select an option using the
or
button, then touch the
OK icon.
Use Default SettingsThis option allows the user to reset all options to the factory
default settings.
Note: This function will not aff ect the Rating control settings.
Screen SaverThis option allows the user to set the Screen Saver mode.
ON - Screen saver will appear.
OFF - Screen saver will not appear.
Note: The DVD player will enter Screen Saver mode if a monitor
is inactive for approximately 2 minutes.Align ScreenThis option allows the user to align the touch screen. Select
“Align Screen” and touch the
OK icon. Use the
icon to
select “YES”. Touch the
OK icon. Touch each of the panel
alignment symbols (+) on the panel’s four corners. Once the
four symbols have been touched, the unit will display “SCREEN
ALIGN OK” or “INVALID ALIGNMENT”. If the alignment is invalid,
repeat the procedure until the prompt “SCREEN ALIGN OK” is
displayed. After the alignment, the new record will overwrite
the old one.
Page 33 of 48
128-8673b
33 of 48
- 23 -
PLAYING MP3 DISCSMP3 is a format for storing digital audio. An audio CD-quality
song can be compressed into the MP3 format with very little
loss of quality, while taking up much less space. CD-R discs that
have been encoded in MP3 format can be played on the Seat
Top DVD system. The Seat Top DVD system plays the songs
in the order they were burned on to the disc. When playback
is started the elapsed time of the track that is playing will be
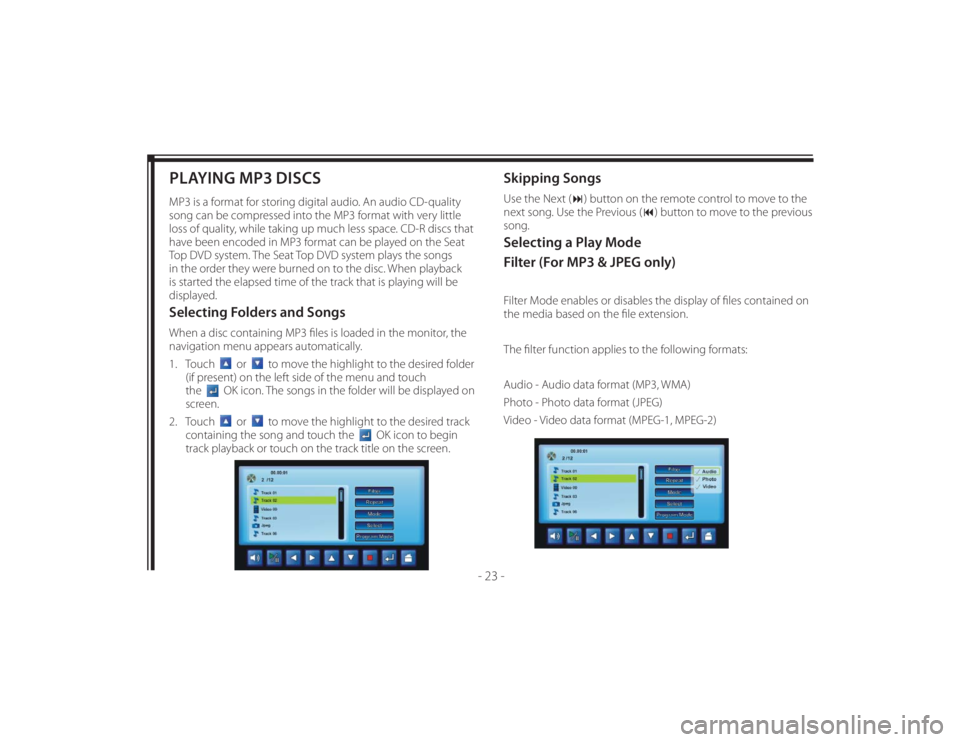
displayed.Selecting Folders and SongsWhen a disc containing MP3 fi les is loaded in the monitor, the
navigation menu appears automatically.
1. Touch
or
to move the highlight to the desired folder
(if present) on the left side of the menu and touch
the
OK icon. The songs in the folder will be displayed on
screen.
2. Touch
or
to move the highlight to the desired track
containing the song and touch the
OK icon to begin
track playback or touch on the track title on the screen.
Skipping SongsUse the Next () button on the remote control to move to the
next song. Use the Previous () button to move to the previous
song.Selecting a Play Mode
Filter (For MP3 & JPEG only)Filter Mode enables or disables the display of fi les contained on
the media based on the fi le extension.
The fi lter function applies to the following formats:
Audio - Audio data format (MP3, WMA)
Photo - Photo data format (JPEG)
Video - Video data format (MPEG-1, MPEG-2)
Page 34 of 48
128-8673b
34 of 48
- 24 -
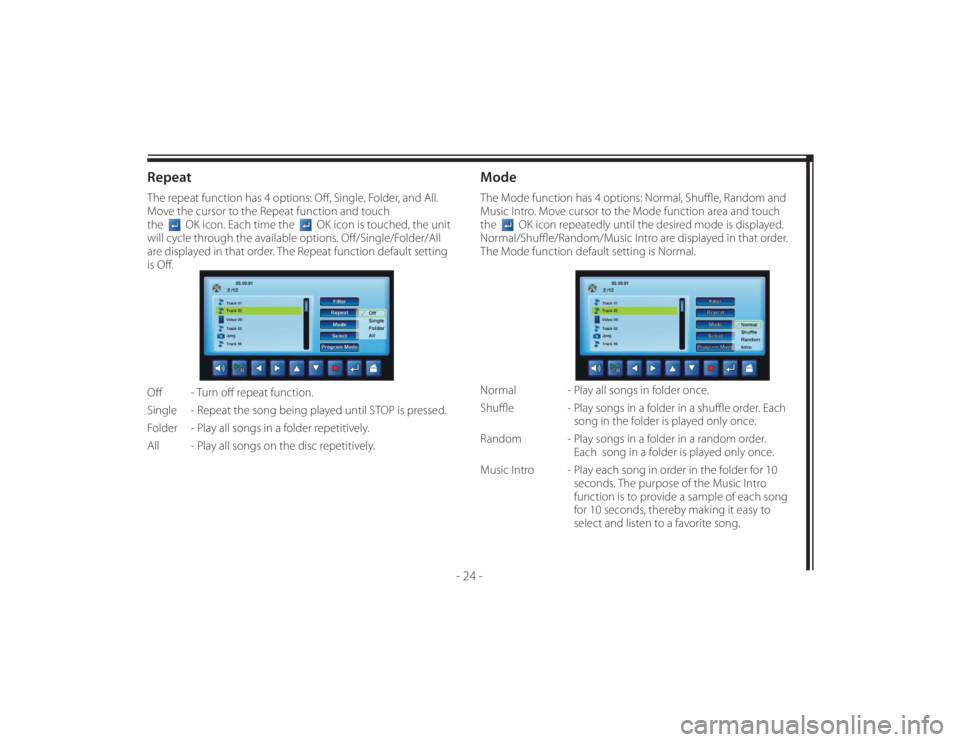
RepeatThe repeat function has 4 options: Off , Single, Folder, and All.
Move the cursor to the Repeat function and touch
the
OK icon. Each time the
OK icon is touched, the unit
will cycle through the available options. Off /Single/Folder/All
are displayed in that order. The Repeat function default setting
is Off .
Off - Turn off repeat function.
Single - Repeat the song being played until STOP is pressed.
Folder - Play all songs in a folder repetitively.
All - Play all songs on the disc repetitively.
ModeThe Mode function has 4 options: Normal, Shuffl e, Random and
Music Intro. Move cursor to the Mode function area and touch
the
OK icon repeatedly until the desired mode is displayed.
Normal/Shuffl e/Random/Music Intro are displayed in that order.
The Mode function default setting is Normal.
Normal - Play all songs in folder once.
Shuffl e - Play songs in a folder in a shuffl e order. Each
song in the folder is played only once.
Random - Play songs in a folder in a random order.
Each song in a folder is played only once.
Music Intro - Play each song in order in the folder for 10
seconds. The purpose of the Music Intro
function is to provide a sample of each song
for 10 seconds, thereby making it easy to
select and listen to a favorite song.
Page 35 of 48
128-8673b
35 of 48
- 25 -
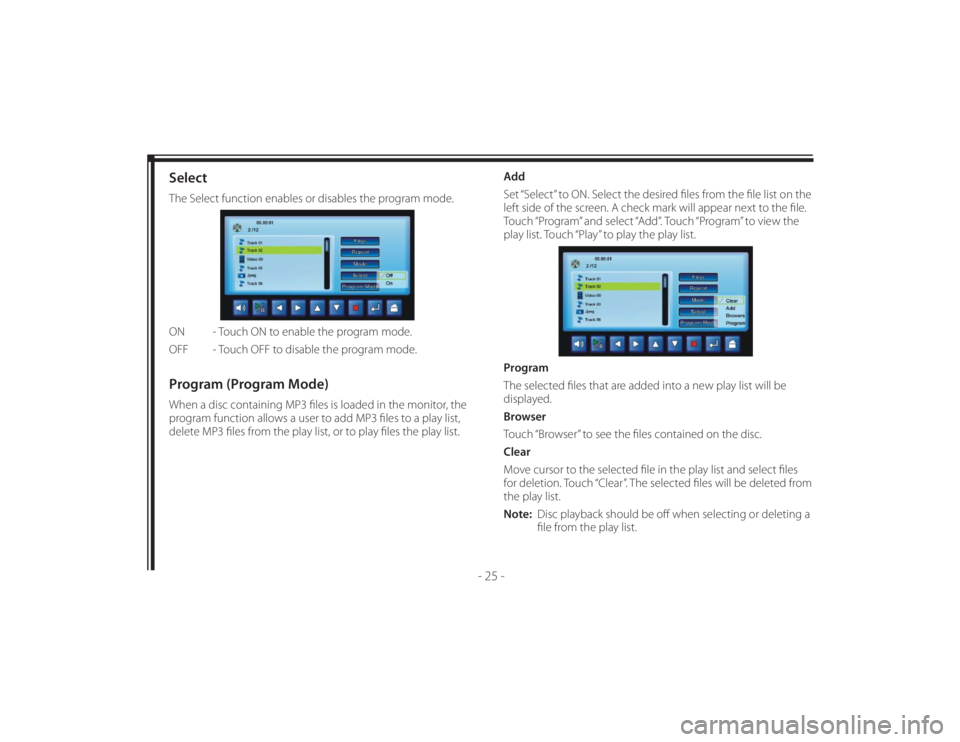
SelectThe Select function enables or disables the program mode.
ON - Touch ON to enable the program mode.
OFF - Touch OFF to disable the program mode.Program (Program Mode)When a disc containing MP3 fi les is loaded in the monitor, the
program function allows a user to add MP3 fi les to a play list,
delete MP3 fi les from the play list, or to play fi les the play list.Add
Set “Select” to ON. Select the desired fi les from the fi le list on the
left side of the screen. A check mark will appear next to the fi le.
Touch “Program” and select “Add”. Touch “Program” to view the
play list. Touch “Play” to play the play list.
Program
The selected fi les that are added into a new play list will be
displayed.
Browser
Touch “Browser” to see the fi les contained on the disc.
Clear
Move cursor to the selected fi le in the play list and select fi les
for deletion. Touch “Clear”. The selected fi les will be deleted from
the play list.
Note: Disc playback should be off when selecting or deleting a
fi le from the play list.
Page 36 of 48
128-8673b
36 of 48
- 26 -
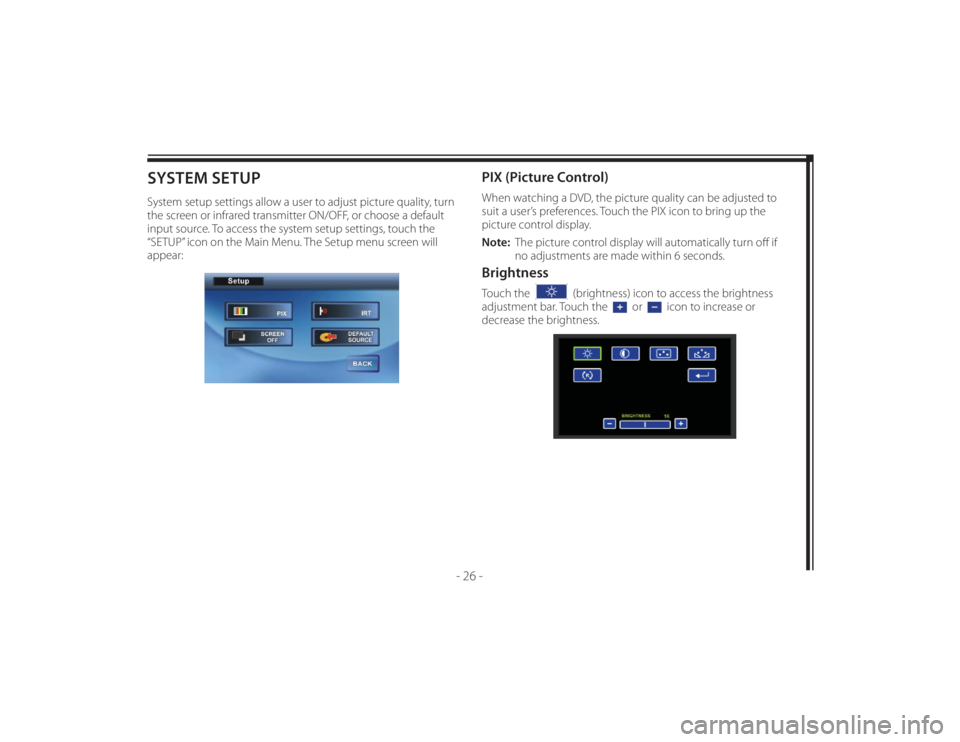
SYSTEM SETUPSystem setup settings allow a user to adjust picture quality, turn
the screen or infrared transmitter ON/OFF, or choose a default
input source. To access the system setup settings, touch the
“SETUP” icon on the Main Menu. The Setup menu screen will
appear:
PIX (Picture Control)When watching a DVD, the picture quality can be adjusted to
suit a user’s preferences. Touch the PIX icon to bring up the
picture control display.
Note: The picture control display will automatically turn off if
no adjustments are made within 6 seconds. BrightnessTouch the
(brightness) icon to access the brightness
adjustment bar. Touch the
or
icon to increase or
decrease the brightness.
Page 37 of 48
128-8673b
37 of 48
- 27 -
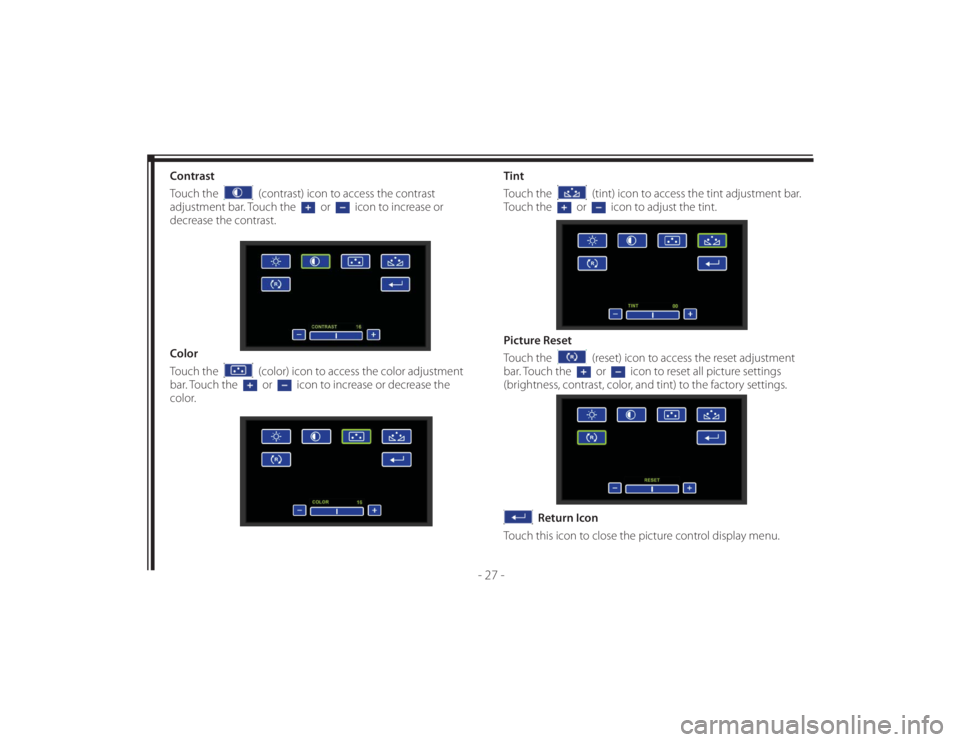
Contrast
Touch the
(contrast) icon to access the contrast
adjustment bar. Touch the
or
icon to increase or
decrease the contrast.
Color
Touch the
(color) icon to access the color adjustment
bar. Touch the or
icon to increase or decrease the
color.Tint
Touch the
(tint) icon to access the tint adjustment bar.
Touch the
or
icon to adjust the tint.
Picture Reset
Touch the
(reset) icon to access the reset adjustment
bar. Touch the or
icon to reset all picture settings
(brightness, contrast, color, and tint) to the factory settings.
Return Icon
Touch this icon to close the picture control display menu.
Page 38 of 48
128-8673b
38 of 48
- 28 -
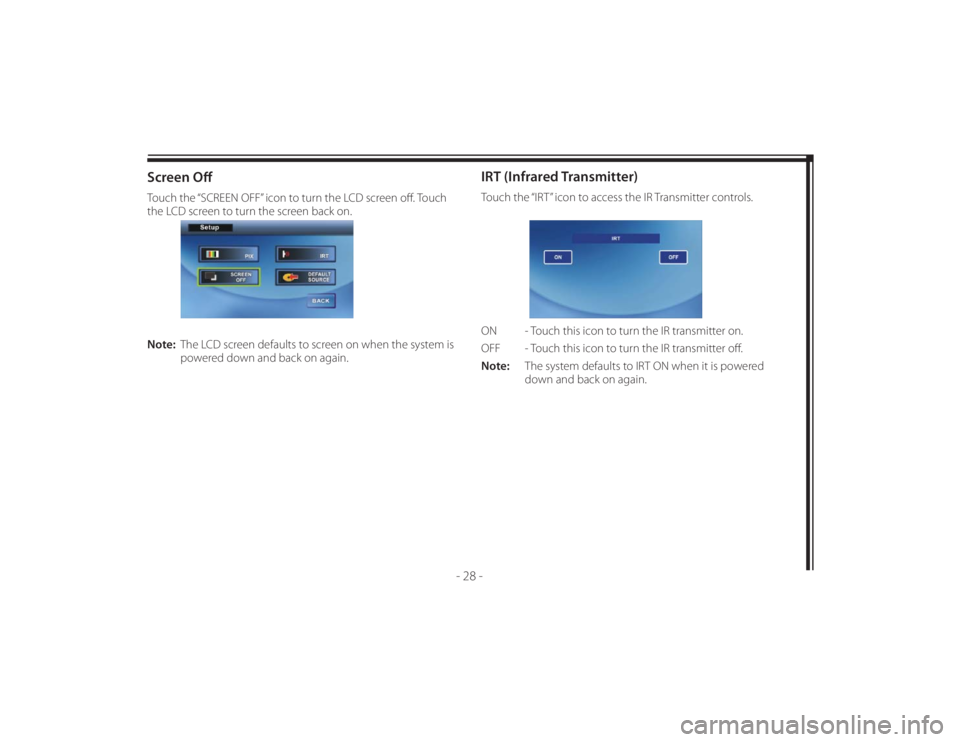
Screen Off Touch the “SCREEN OFF” icon to turn the LCD screen off . Touch
the LCD screen to turn the screen back on.
Note: The LCD screen defaults to screen on when the system is
powered down and back on again.
IRT (Infrared Transmitter)Touch the “IRT” icon to access the IR Transmitter controls.
ON - Touch this icon to turn the IR transmitter on.
OFF - Touch this icon to turn the IR transmitter off .
Note: The system defaults to IRT ON when it is powered
down and back on again.
Page 39 of 48
128-8673b
39 of 48
- 29 -
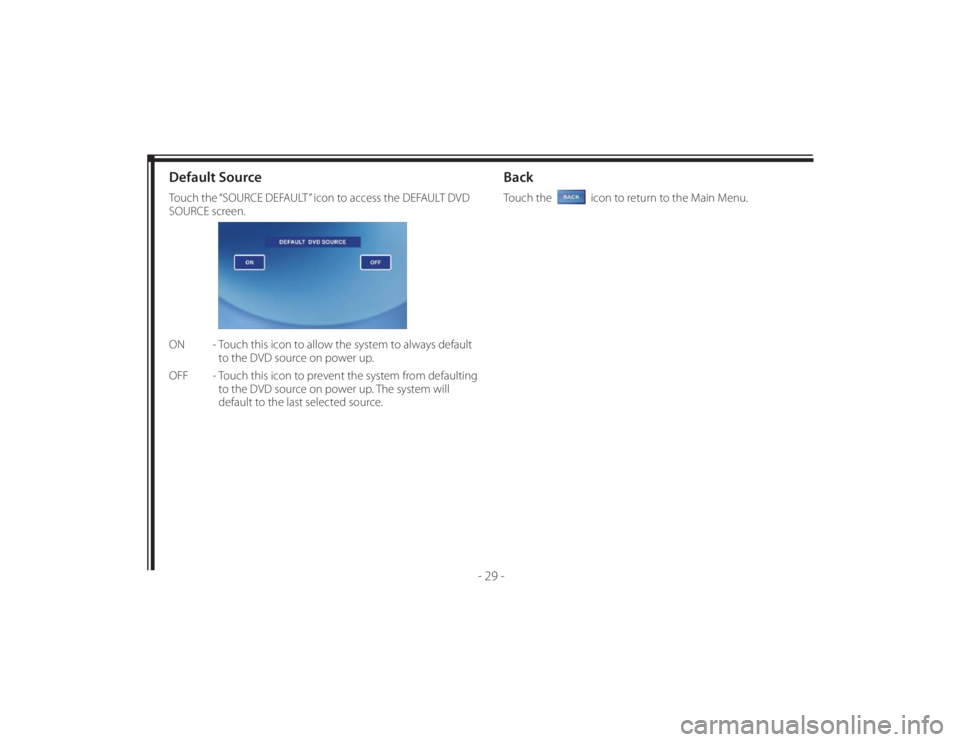
Default SourceTouch the “SOURCE DEFAULT” icon to access the DEFAULT DVD
SOURCE screen.
ON - Touch this icon to allow the system to always default
to the DVD source on power up.
OFF - Touch this icon to prevent the system from defaulting
to the DVD source on power up. The system will
default to the last selected source.
BackTouch the
icon to return to the Main Menu.
Page 40 of 48
128-8673b
40 of 48
- 30 -
TROUBLESHOOTINGProblem SolutionIR Sensor Inoperative (DVD Player
Won’t Accept Commands From
Remote Control)• Verify that the batteries in the remote are fresh.
• Verify that the remote sensor eye is not obstructed.
• Verify that monitor select M1 or monitor select M2 has been selected correctly on the
Remote Control.
• ( When monitor Select M1 is pressed on the Remote Control, the remote will only operate
the passenger side monitor.)
• ( When monitor Select M2 is pressed on the Remote Control, the remote will only operate
the driver side monitor.)
Disc Will Not Play or Wrong
Region is Displayed• Check the type of disc you put into disc slot. This DVD system only plays digital video discs,
audio CDs and MP3s.
• Both the unit and the disc are coded by region. If the regional codes don’t match, the disc
can’t be played. This DVD player is set to Region 1.
Play Starts, Then Stops
Immediately• The disc is dirty. Clean it.
• Condensation has formed. Allow player to dry out.
• Disc is damaged; try another disc.
No Sound or Distorted Sound • If you are using the IR headphones, make sure you turn on the IRT power with the IRT ON/
OFF button on the Remote Control. Make sure that the headphone batteries are fresh.
• If you are using the vehicle radio, make sure that there is no plug in the vehicle’s AUX jack
and that the radio is in the AUX mode.
OSD Displays “Incorrect Disc
Format”• Disc loaded backwards, turn disc around so that the disc label is facing towards the viewer.