VAUXHALL COMBO 2014 Owners Manual
Manufacturer: VAUXHALL, Model Year: 2014, Model line: COMBO, Model: VAUXHALL COMBO 2014Pages: 187, PDF Size: 4.15 MB
Page 91 of 187

Lighting89Headlight range
adjustment
Manual headlight range
adjustment
To adapt headlight range to the
vehicle load to prevent dazzling of
other road users: Press À or Á
buttons until the required setting is displayed in the Driver Information
Centre 3 79.
0=Front seats occupied1=All seats occupied2=All seats occupied and load
compartment laden3=Driver's seat occupied and load
compartment laden
Headlights when driving
abroad
The asymmetrical headlight beam
extends visibility at the edge of the
road at the passenger side.
However, when driving in countries
where traffic drives on the opposite
side of the road, adjust the headlights
to prevent dazzling of oncoming
traffic.
Have the headlights adjusted by a
workshop.
Daytime running lights
Daytime running lights increase
visibility of the vehicle during daylight.
When the function is activated and
the ignition is switched on, the
headlights come on automatically and
instrument illumination is subdued.
The light switch must be in position
§ . The daytime running lights switch
off when the ignition is switched off.
Notice
The driver remains responsible for
switching on the low beam when
required, e.g. when driving through
a tunnel or at night.
When the function is deactivated, the
headlights do not come on
automatically when the ignition is
switched on and the light switch is in
position §.
The daytime running lights function is activated/deactivated via a menu in
the Driver Information Centre 3 79.
Page 92 of 187

90LightingHazard warning flashers
Operated with the ¨ button.
Turn and lane-change
signalsLever up=right turn signalLever down=left turn signal
If the lever is moved past the
resistance point, the turn signal is
switched on constantly. When the
steering wheel moves back, the turn
signal is automatically deactivated.
For five flashes, e.g. when changing
lanes, press the lever until resistance is felt and then release.
Move the lever to the resistance point
and hold for longer indication.
Switch the indicator off manually by
moving the lever to its original
position.
Front fog lights
Operated by pressing the > button.
Switching on front fog lights will
switch sidelights on automatically.
Press the button again to turn the
front fog lights off.
Page 93 of 187

Lighting91Rear fog lights
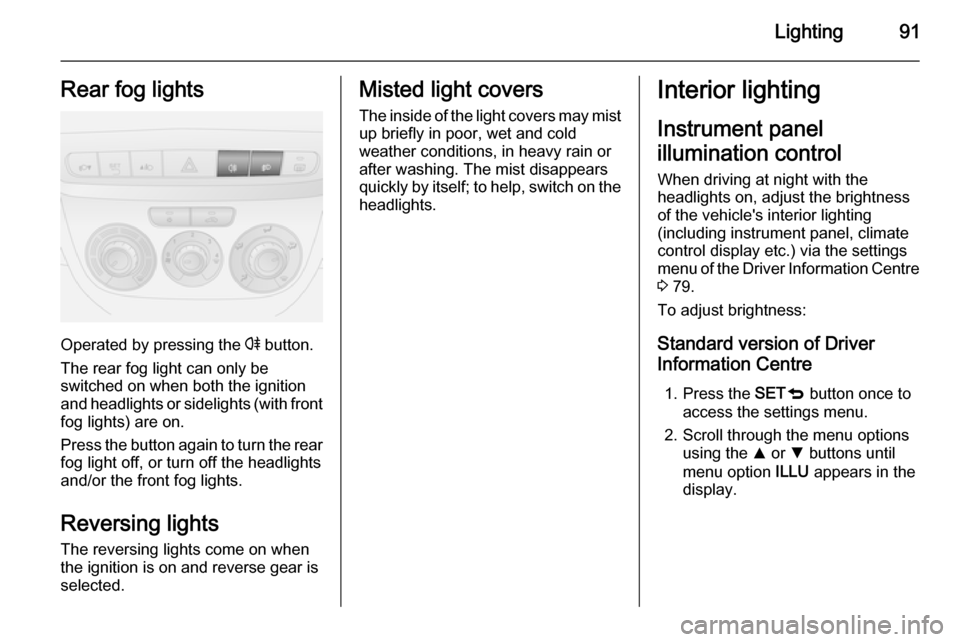
Operated by pressing the r button.
The rear fog light can only be
switched on when both the ignition
and headlights or sidelights (with front
fog lights) are on.
Press the button again to turn the rear fog light off, or turn off the headlights
and/or the front fog lights.
Reversing lights The reversing lights come on when
the ignition is on and reverse gear is
selected.
Misted light covers
The inside of the light covers may mist
up briefly in poor, wet and cold
weather conditions, in heavy rain or
after washing. The mist disappears
quickly by itself; to help, switch on the headlights.Interior lighting
Instrument panel
illumination control When driving at night with the
headlights on, adjust the brightness
of the vehicle's interior lighting
(including instrument panel, climate
control display etc.) via the settings
menu of the Driver Information Centre
3 79.
To adjust brightness:
Standard version of Driver
Information Centre
1. Press the SETq button once to
access the settings menu.
2. Scroll through the menu options using the R or S buttons until
menu option ILLU appears in the
display.
Page 94 of 187

92Lighting
3. Press the R or S button to
increase or decrease the
displayed value.
4. Press SETq briefly to confirm
changes and automatically return
to the previous display screen.
Multifunction version of Driver
Information Centre
1. Press the SETq button to access
the settings menu.
2. Scroll through the menu options using the R or S buttons until
menu option LIGHTING appears
in the display.
3. Press the R or S button to
increase or decrease the displayed value.
4. Press SETq briefly to confirm
changes and automatically return to the previous display screen.
It is also possible to adjust the
brightness using the R or S buttons
without accessing the settings menu.
Driver Information Centre 3 79.Interior lights
Depending on model variant, during
entry and exit of the vehicle the front
and rear courtesy lights come on
automatically and then switch off after
a delay.
Notice
In the event of an accident of a
certain severity, the interior lights
come on automatically. Fuel cut-off
system 3 85.
Front courtesy light
Centre switch position: automatic
interior light.
To operate manually when the doors are closed, press the lens on either
side.
Front courtesy light with readinglights
Centre switch position: automatic
interior light.
Can be operated individually or
together with the 7 switch when the
doors are closed.
Press rocker switch 7 left or right to
operate respective reading light.
Page 95 of 187

Lighting93
Rear courtesy lights
Centre switch position: automatic
interior light.
To operate manually when the doors are closed, press the lens on either
side.
Load compartment lighting Depending on model variant, load
compartment lighting switches on
when the rear doors / tailgate or
sliding side door is opened.
Removable rear courtesy light
Depending on model variant, the
removable rear courtesy light may
illuminate when the rear doors /
tailgate or sliding side doors are
opened and the central switch is in the middle position.
Switch the light on permanently by pressing the top part of the central
switch c.
Switch the light off permanently by pressing the bottom part of the central switch ( AUTO OFF ).
To use as a handheld torch, press the
button at the top of the lamp assembly (see illustration) to release it and pull
torch down gently to remove. Press
the switch on the end of the torch to
turn the light on/off.
Replace the torch in its original
position to recharge the battery after
use.
Page 96 of 187

94LightingLighting featuresBattery discharge
protection To ensure reliable engine restarts,
several battery discharge protection
features are implemented as part of
the stop-start system.
Stop-start system 3 103.
Page 97 of 187

Climate control95Climate controlClimate control systems ............... 95
Air vents ....................................... 99
Maintenance .............................. 100Climate control systems
Heating and ventilation
system
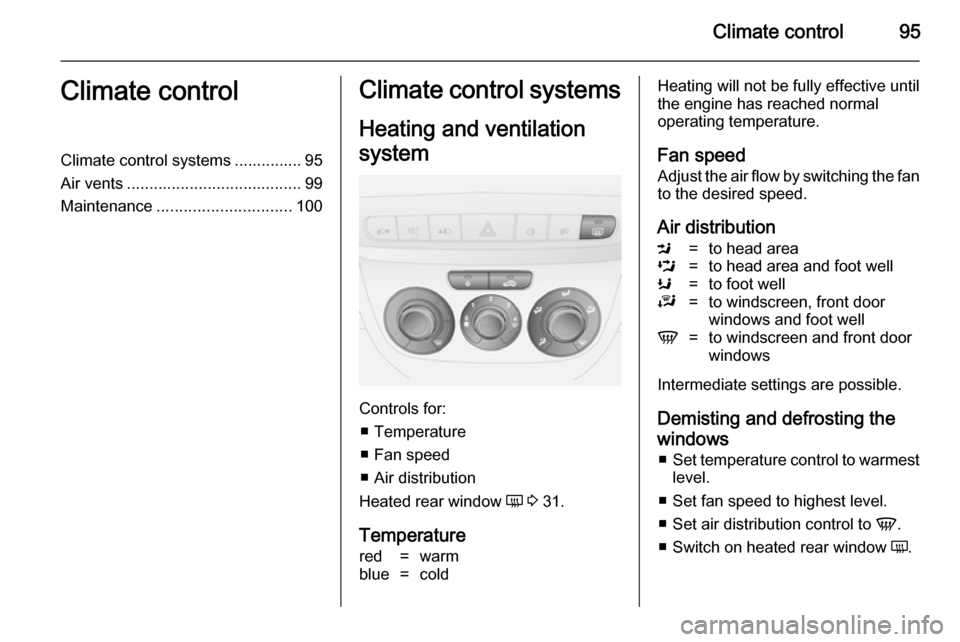
Controls for: ■ Temperature
■ Fan speed
■ Air distribution
Heated rear window Ü 3 31.
Temperature
red=warmblue=coldHeating will not be fully effective until
the engine has reached normal
operating temperature.
Fan speed Adjust the air flow by switching the fan
to the desired speed.
Air distributionM=to head areaL=to head area and foot wellK=to foot wellJ=to windscreen, front door
windows and foot wellV=to windscreen and front door
windows
Intermediate settings are possible.
Demisting and defrosting thewindows ■ Set temperature control to warmest
level.
■ Set fan speed to highest level.
■ Set air distribution control to V.
■ Switch on heated rear window Ü.
Page 98 of 187

96Climate control
■Open side air vents as required and
direct them towards door windows.
■ For simultaneous warming of the foot well, set air distribution control
to J.
Air conditioning system
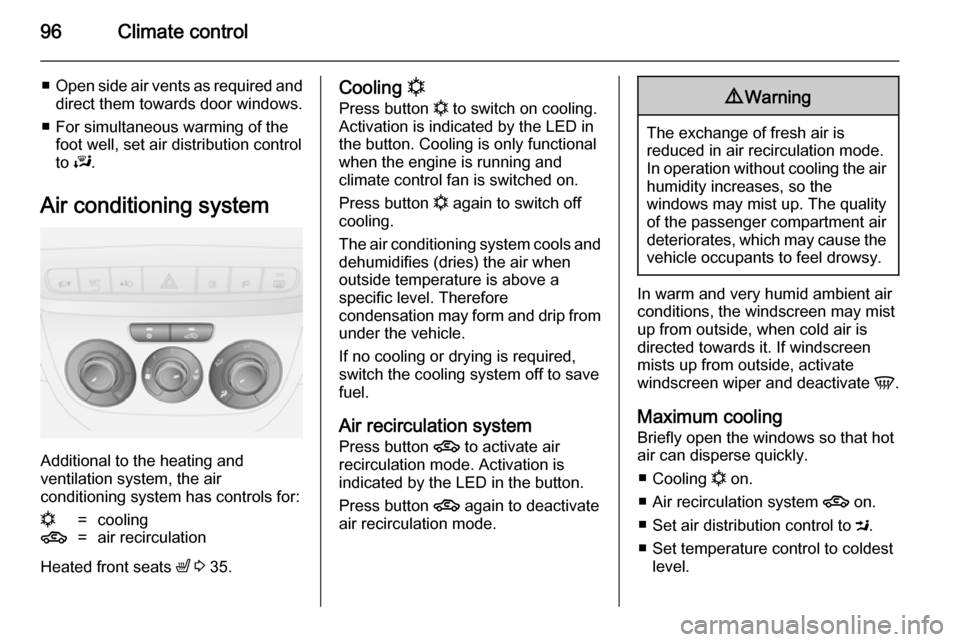
Additional to the heating and
ventilation system, the air
conditioning system has controls for:
n=cooling4=air recirculation
Heated front seats ß 3 35.
Cooling n
Press button n to switch on cooling.
Activation is indicated by the LED in
the button. Cooling is only functional
when the engine is running and
climate control fan is switched on.
Press button n again to switch off
cooling.
The air conditioning system cools and
dehumidifies (dries) the air when
outside temperature is above a
specific level. Therefore
condensation may form and drip from under the vehicle.
If no cooling or drying is required,
switch the cooling system off to save
fuel.
Air recirculation system
Press button 4 to activate air
recirculation mode. Activation is
indicated by the LED in the button.
Press button 4 again to deactivate
air recirculation mode.9 Warning
The exchange of fresh air is
reduced in air recirculation mode.
In operation without cooling the air humidity increases, so the
windows may mist up. The quality
of the passenger compartment air
deteriorates, which may cause the vehicle occupants to feel drowsy.
In warm and very humid ambient air
conditions, the windscreen may mist
up from outside, when cold air is
directed towards it. If windscreen
mists up from outside, activate
windscreen wiper and deactivate V.
Maximum cooling
Briefly open the windows so that hot air can disperse quickly.
■ Cooling n on.
■ Air recirculation system 4 on.
■ Set air distribution control to M.
■ Set temperature control to coldest level.
Page 99 of 187

Climate control97
■ Set fan speed to highest level.
■ Open all air vents.
Demisting and defrosting the
windows ■ Set temperature control to warmest
level.
■ Set fan speed to highest level.
■ Set air distribution control to V.
■ Switch cooling n on.
■ Switch on heated rear window Ü.
■ Open side air vents as required and
direct them towards door windows.
■ For simultaneous warming of the foot well, set air distribution control
to J.Electronic climate control
system
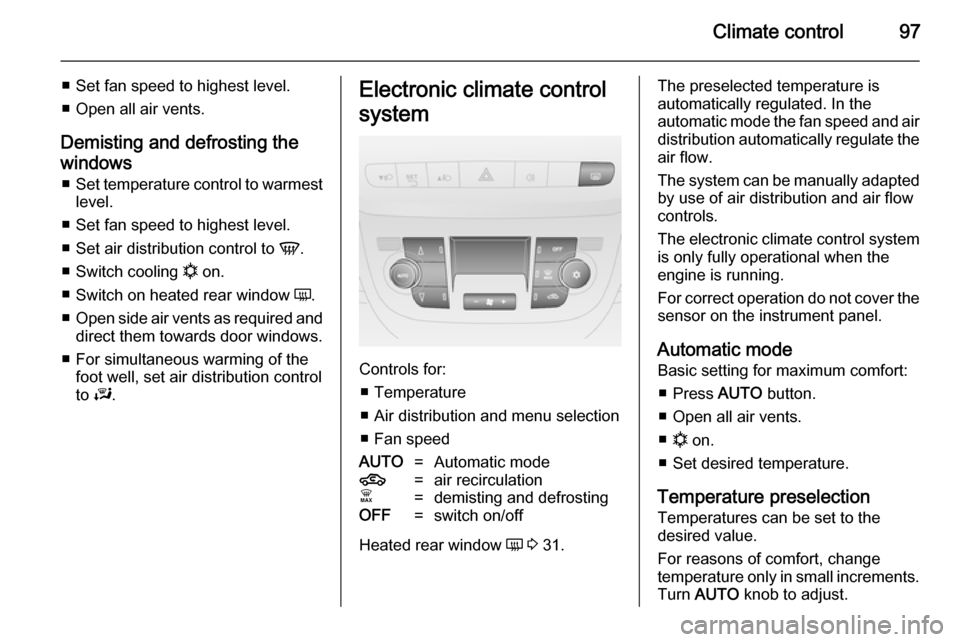
Controls for: ■ Temperature
■ Air distribution and menu selection
■ Fan speed
AUTO=Automatic mode4=air recirculationÊ=demisting and defrostingOFF=switch on/off
Heated rear window Ü 3 31.
The preselected temperature is
automatically regulated. In the
automatic mode the fan speed and air distribution automatically regulate the
air flow.
The system can be manually adapted by use of air distribution and air flowcontrols.
The electronic climate control system
is only fully operational when the
engine is running.
For correct operation do not cover the
sensor on the instrument panel.
Automatic mode Basic setting for maximum comfort:
■ Press AUTO button.
■ Open all air vents.
■ n on.
■ Set desired temperature.
Temperature preselection
Temperatures can be set to the
desired value.
For reasons of comfort, change
temperature only in small increments. Turn AUTO knob to adjust.
Page 100 of 187

98Climate control
clockwise=warmanticlockwise=cold
Heating will not be fully effective until
the engine has reached normal
operating temperature.
When the minimum temperature is
set below 16 ℃, the electronic climate
control system runs at maximum
cooling. LO appears in the display.
If the maximum temperature is set
above 32 ℃, the electronic climate
control system runs at maximum
heating. HI appears in the display.
Fan speed
The selected fan speed is indicated
with bars in the display.
Press ] or < to increase or decrease
the fan speed.
maximum fan
speed=all bars displayedminimum fan
speed=one bar displayed
Press n button to deactivate fan.
To return to automatic fan speed:
Press AUTO button.
Demisting and defrosting the
windows
Press the Ê button.
Temperature and air distribution are
set automatically and the fan runs at a high speed.
When the vehicle reaches normal
operating temperature the function
remains active for approx. 3 minutes.
To return to automatic mode: press
button n or AUTO .
Air distribution
Press R, S and 6 buttons.
LED in buttons illuminate.
Arrows shown in the display indicate
the distribution settings.
Cooling
Press button n to switch on cooling.
Activation is indicated by the LED in
the button. Cooling is only functional
when the engine is running and
climate control fan is switched on.
Press button n again to switch off
cooling.The air conditioning system cools and
dehumidifies (dries) when outside
temperature is above a specific level. Therefore condensation may form
and drip from under the vehicle.
If no cooling or drying is required
press n again to switch the cooling
system off, thus saving fuel.
Manual air recirculation mode
Operated with the 4 button.recir‐
cula‐
tion on=LED in button illuminated;
D appears in the displayrecir‐
cula‐
tion off=LED in button
extinguishes; E
appears in the display9 Warning
The exchange of fresh air is
reduced in air recirculation mode.
In operation without cooling the air humidity increases, so the
windows may mist up. The quality
of the passenger compartment air
deteriorates, which may cause the vehicle occupants to feel drowsy.