ECU VOLKSWAGEN CORRADO 1990 Owner's Guide
[x] Cancel search | Manufacturer: VOLKSWAGEN, Model Year: 1990, Model line: CORRADO, Model: VOLKSWAGEN CORRADO 1990Pages: 906, PDF Size: 6.56 MB
Page 553 of 906
F - BASIC TESTING
Article Text (p. 8)
1990 Volkswagen Corrado
For Volkswagen Technical Site: http://vw.belcom.ru
Copyright © 1998 Mitchell Repair Information Company, LLC
Thursday, March 23, 2000 09:44PM
Fox
Coil Wire With Connectors .................... 1600-2400
Spark Plug Wire With Connectors .............. 4800-7200
Spark Plug Connector ......................... 4000-6000
Suppressor .................................... 800-1200ÄÄÄÄÄÄÄÄÄÄÄÄÄÄÄÄÄÄÄÄÄÄÄÄÄÄÄÄÄÄÄÄÄÄÄÄÄÄÄÄÄÄÄÄÄÄÄÄÄÄÄÄÄÄÄÄÄÄÄÄ IGNITION COIL RESISTANCE TABLE
IGNITION COIL RESISTANCE TABLE - Ohms @ 68
øF (20øC)
ÄÄÄÄÄÄÄÄÄÄÄÄÄÄÄÄÄÄÄÄÄÄÄÄÄÄÄÄÄÄÄÄÄÄÄÄÄÄÄÄÄÄÄÄÄÄÄÄÄÄÄÄÄÄÄÄÄÄÄÄApplication Primary Secondary
Jetta GLi 2.0L ......... .60-.70 ............. 6500-8500
All Other Models ....... .52-.76 ............. 2400-3500
ÄÄÄÄÄÄÄÄÄÄÄÄÄÄÄÄÄÄÄÄÄÄÄÄÄÄÄÄÄÄÄÄÄÄÄÄÄÄÄÄÄÄÄÄÄÄÄÄÄÄÄÄÄÄÄÄÄÄÄÄ DISTRIBUTOR
HALL EFFECT SENDER
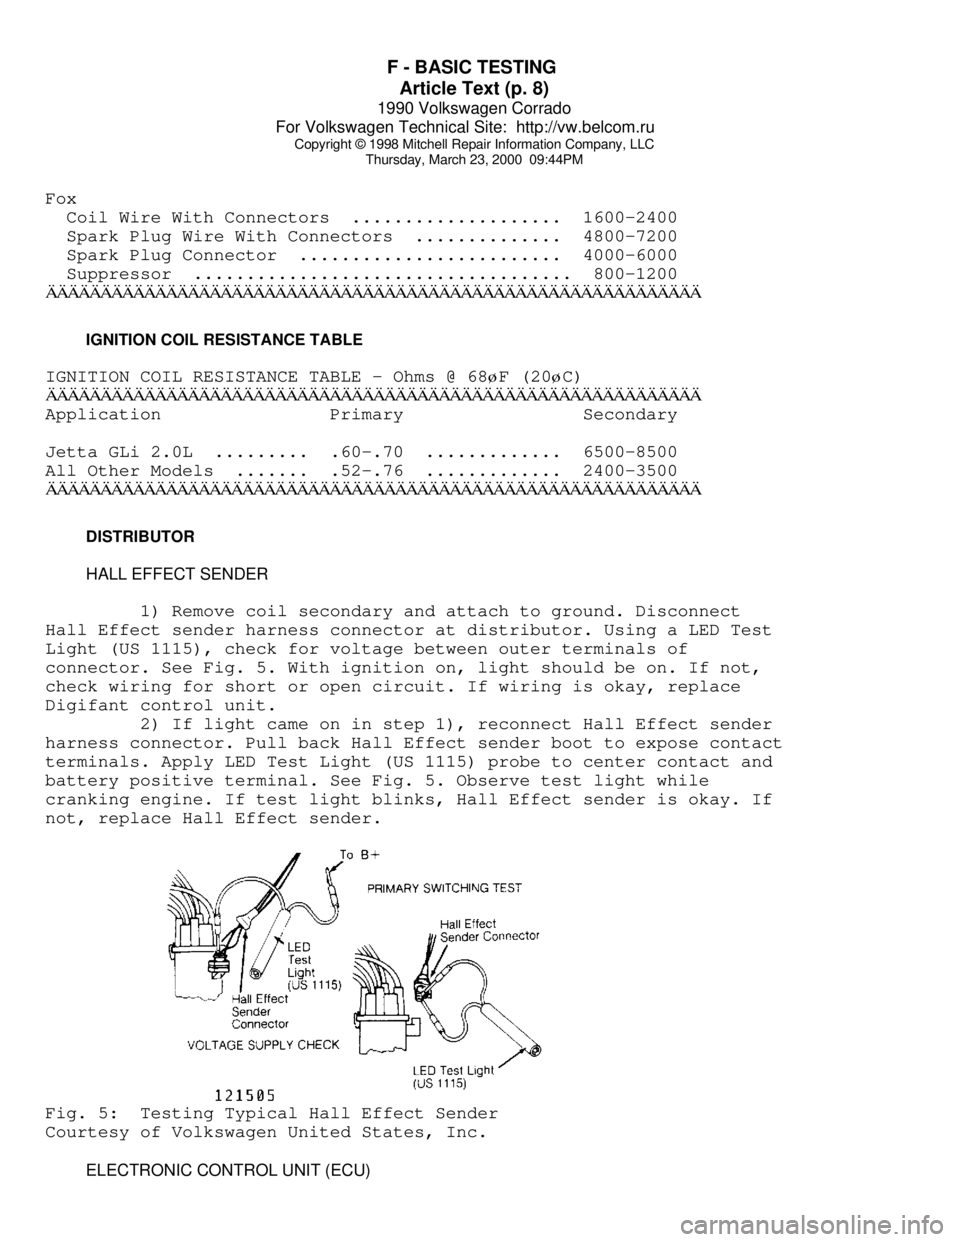
1) Remove coil secondary and attach to ground. Disconnect
Hall Effect sender harness connector at distributor. Using a LED Test
Light (US 1115), check for voltage between outer terminals of
connector. See Fig. 5. With ignition on, light should be on. If not,
check wiring for short or open circuit. If wiring is okay, replace
Digifant control unit.
2) If light came on in step 1), reconnect Hall Effect sender
harness connector. Pull back Hall Effect sender boot to expose contact
terminals. Apply LED Test Light (US 1115) probe to center contact and
battery positive terminal. See Fig. 5. Observe test light while
cranking engine. If test light blinks, Hall Effect sender is okay. If
not, replace Hall Effect sender.Fig. 5: Testing Typical Hall Effect Sender
Courtesy of Volkswagen United States, Inc.
ELECTRONIC CONTROL UNIT (ECU)
Page 555 of 906
F - BASIC TESTING
Article Text (p. 10)
1990 Volkswagen Corrado
For Volkswagen Technical Site: http://vw.belcom.ru
Copyright © 1998 Mitchell Repair Information Company, LLC
Thursday, March 23, 2000 09:44PM
distributor cap.ÄÄÄÄÄÄÄÄÄÄÄÄÄÄÄÄÄÄÄÄÄÄÄÄÄÄÄÄÄÄÄÄÄÄÄÄÄÄÄÄÄÄÄÄÄÄÄÄÄÄÄÄÄÄÄÄÄÄÄÄ HALL EFFECT SENDER & COIL POWER STAGE
The Hall Effect sender and coil power stage should be tested
if there is no spark at the spark plugs when tested. These tests also
check the CIS-Motronic ECU response to the Hall Effect sender signal.
Ensure SPARK and IGNITION COIL tests are performed first.
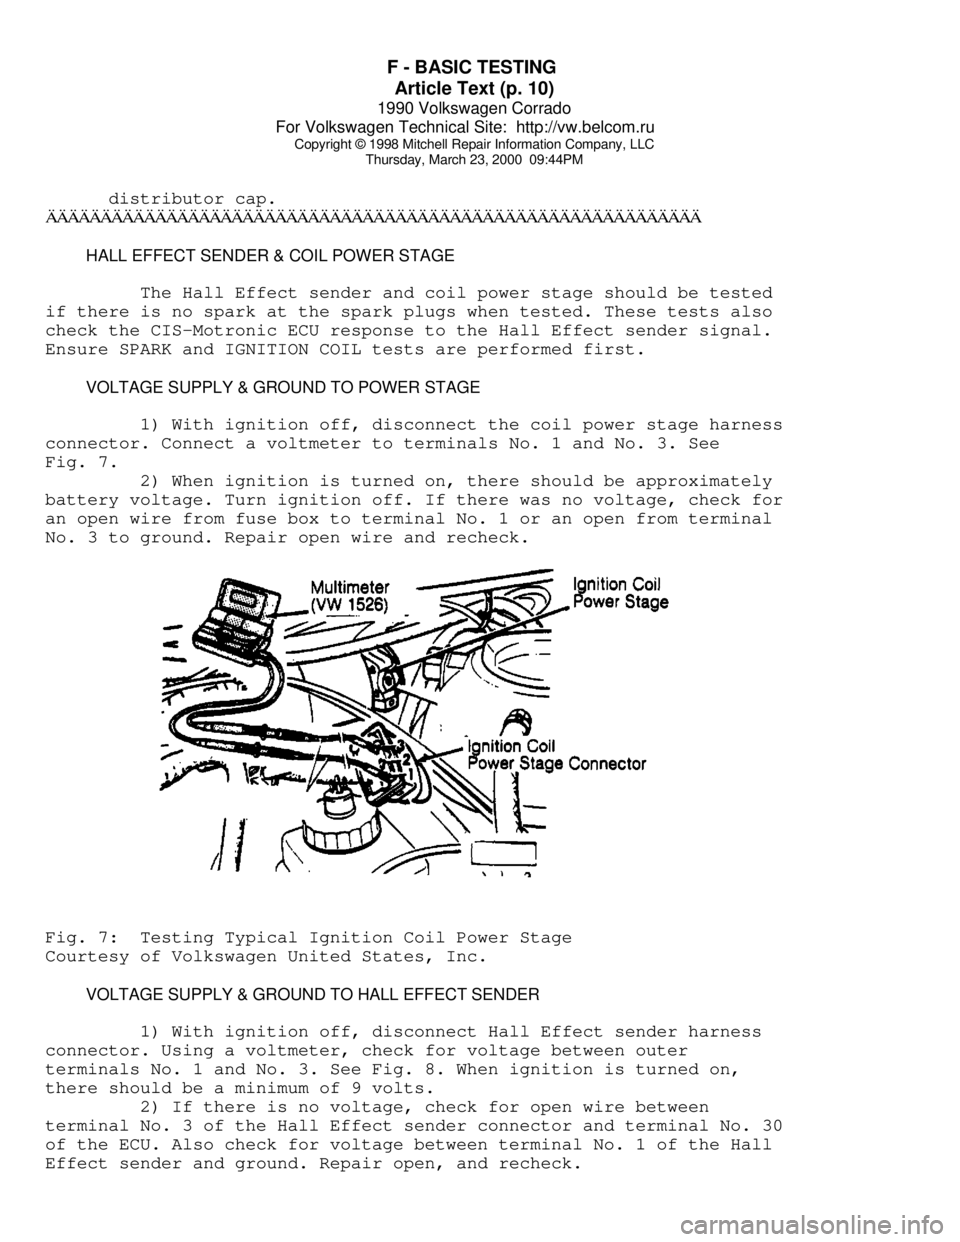
VOLTAGE SUPPLY & GROUND TO POWER STAGE
1) With ignition off, disconnect the coil power stage harness
connector. Connect a voltmeter to terminals No. 1 and No. 3. See
Fig. 7.
2) When ignition is turned on, there should be approximately
battery voltage. Turn ignition off. If there was no voltage, check for
an open wire from fuse box to terminal No. 1 or an open from terminal
No. 3 to ground. Repair open wire and recheck.Fig. 7: Testing Typical Ignition Coil Power Stage
Courtesy of Volkswagen United States, Inc.
VOLTAGE SUPPLY & GROUND TO HALL EFFECT SENDER
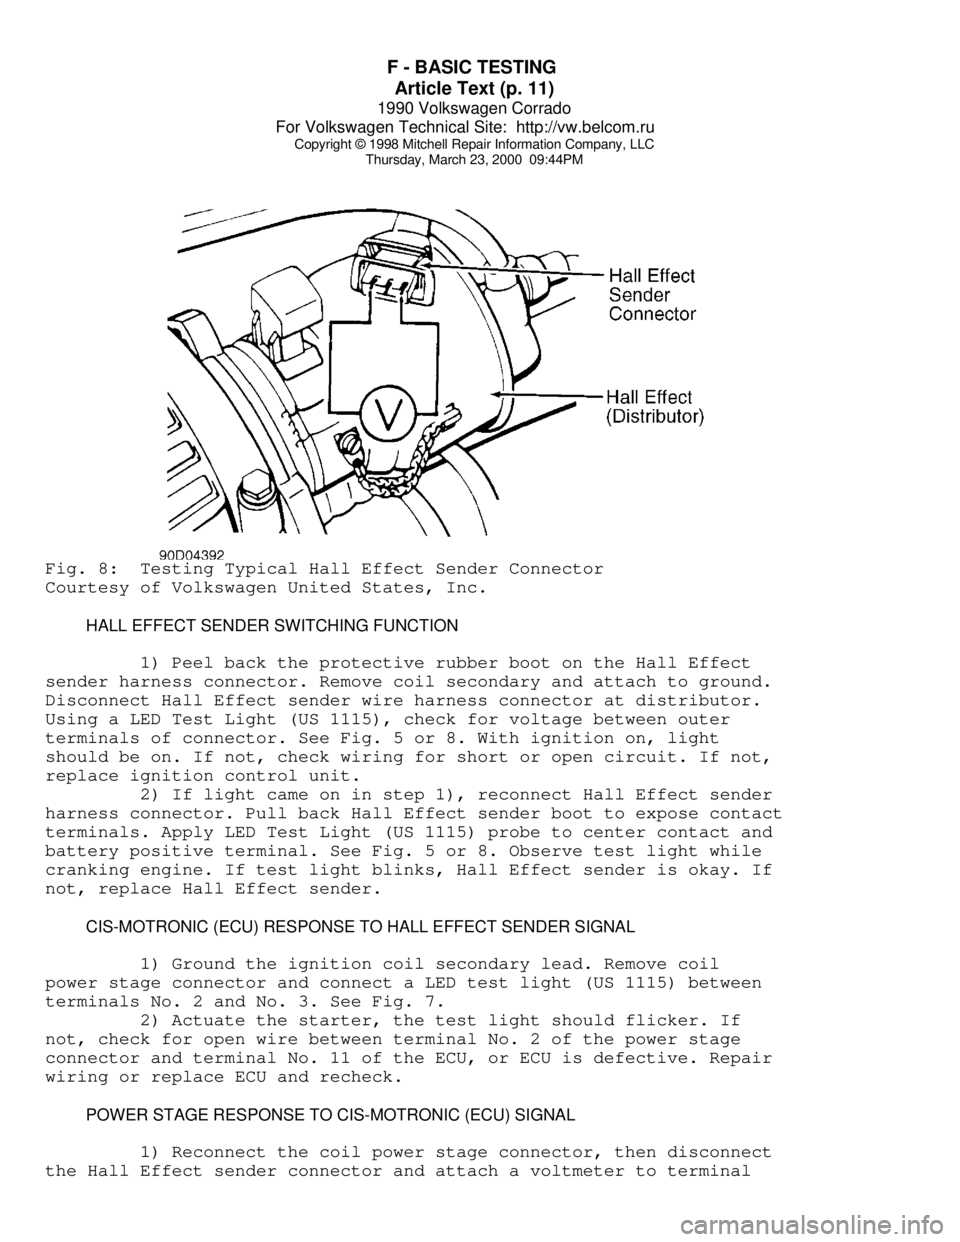
1) With ignition off, disconnect Hall Effect sender harness
connector. Using a voltmeter, check for voltage between outer
terminals No. 1 and No. 3. See Fig. 8. When ignition is turned on,
there should be a minimum of 9 volts.
2) If there is no voltage, check for open wire between
terminal No. 3 of the Hall Effect sender connector and terminal No. 30
of the ECU. Also check for voltage between terminal No. 1 of the Hall
Effect sender and ground. Repair open, and recheck.
Page 556 of 906
F - BASIC TESTING
Article Text (p. 11)
1990 Volkswagen Corrado
For Volkswagen Technical Site: http://vw.belcom.ru
Copyright © 1998 Mitchell Repair Information Company, LLC
Thursday, March 23, 2000 09:44PMFig. 8: Testing Typical Hall Effect Sender Connector
Courtesy of Volkswagen United States, Inc.
HALL EFFECT SENDER SWITCHING FUNCTION
1) Peel back the protective rubber boot on the Hall Effect
sender harness connector. Remove coil secondary and attach to ground.
Disconnect Hall Effect sender wire harness connector at distributor.
Using a LED Test Light (US 1115), check for voltage between outer
terminals of connector. See Fig. 5 or 8. With ignition on, light
should be on. If not, check wiring for short or open circuit. If not,
replace ignition control unit.
2) If light came on in step 1), reconnect Hall Effect sender
harness connector. Pull back Hall Effect sender boot to expose contact
terminals. Apply LED Test Light (US 1115) probe to center contact and
battery positive terminal. See Fig. 5 or 8. Observe test light while
cranking engine. If test light blinks, Hall Effect sender is okay. If
not, replace Hall Effect sender.
CIS-MOTRONIC (ECU) RESPONSE TO HALL EFFECT SENDER SIGNAL
1) Ground the ignition coil secondary lead. Remove coil
power stage connector and connect a LED test light (US 1115) between
terminals No. 2 and No. 3. See Fig. 7.
2) Actuate the starter, the test light should flicker. If
not, check for open wire between terminal No. 2 of the power stage
connector and terminal No. 11 of the ECU, or ECU is defective. Repair
wiring or replace ECU and recheck.
POWER STAGE RESPONSE TO CIS-MOTRONIC (ECU) SIGNAL
1) Reconnect the coil power stage connector, then disconnect
the Hall Effect sender connector and attach a voltmeter to terminal
Page 557 of 906
F - BASIC TESTING
Article Text (p. 12)
1990 Volkswagen Corrado
For Volkswagen Technical Site: http://vw.belcom.ru
Copyright © 1998 Mitchell Repair Information Company, LLC
Thursday, March 23, 2000 09:44PM
No. 1 and No. 15 of the coil.
2) Turn the ignition on, using a jumper wire, briefly connect
the center terminal of the Hall Effect sender connector to ground. The
voltage should briefly increase to at least 2 volts then drop to zero.
If not, either the ECU or coil power stage are defective.
IGNITION CHECKS (AFC-DIGIFANT II)
SPARK TEST
1) Using an ohmmeter, check resistance of each spark plug
wire. See HIGH TENSION WIRE RESISTANCE table. Check for a strong Blue
spark at coil wire and each spark plug wire by holding wire terminal
5/16" ground while cranking engine.
2) Disconnect and inspect all related ignition system
connectors and harness. Clean or repair as necessary. If okay, remove
negative battery cable. Disconnect secondary and primary leads from
ignition coil.
3) Using ohmmeter, check resistance between primary terminals
of coil. Check secondary resistance between coil secondary terminal
and primary positive terminal. Replace coil if readings are not within
specifications. See IGNITION COIL RESISTANCE table.
HIGH TENSION WIRE RESISTANCE TABLEÄÄÄÄÄÄÄÄÄÄÄÄÄÄÄÄÄÄÄÄÄÄÄÄÄÄÄÄÄÄÄÄÄÄÄÄÄÄÄÄÄÄÄÄÄÄÄÄÄÄÄÄÄÄÄÄÄÄÄÄApplication Ohms
Vanagon
Coil Wire With Connectors ................... 1200-2800
Spark Plug Wire/Connector ................... 4600-7400
Spark Plug Connector ........................ 4000-6000
Suppressor (1) ............................... 600-1400
All Other Models
Coil Wire Only .................................... (1)
Coil Wire With Connector .................... 1600-2400
Spark Plug Wire/ Connector .................. 4000-6000
Suppressor (2) ............................... 600-1400
(1) - Check for continuity.
(2) - Suppressor is located between ignition wire and
distributor cap.
ÄÄÄÄÄÄÄÄÄÄÄÄÄÄÄÄÄÄÄÄÄÄÄÄÄÄÄÄÄÄÄÄÄÄÄÄÄÄÄÄÄÄÄÄÄÄÄÄÄÄÄÄÄÄÄÄÄÄÄÄ IGNITION COIL
IGNITION COIL RESISTANCE TABLE - Ohms @ 68
øF (20øC)
ÄÄÄÄÄÄÄÄÄÄÄÄÄÄÄÄÄÄÄÄÄÄÄÄÄÄÄÄÄÄÄÄÄÄÄÄÄÄÄÄÄÄÄÄÄÄÄÄÄÄÄÄÄÄÄÄÄÄÄÄApplication Primary Secondary
Jetta GLi 2.0L ......... .60-.70 ............. 6900-8500
All Other Models ....... .52-.76 ............. 2400-3500
ÄÄÄÄÄÄÄÄÄÄÄÄÄÄÄÄÄÄÄÄÄÄÄÄÄÄÄÄÄÄÄÄÄÄÄÄÄÄÄÄÄÄÄÄÄÄÄÄÄÄÄÄÄÄÄÄÄÄÄÄ
Page 575 of 906
H - TESTS W/O CODES
Article Text (p. 2)
1990 Volkswagen Corrado
For Volkswagen Technical Site: http://vw.belcom.ru
Copyright © 1998 Mitchell Repair Information Company, LLC
Thursday, March 23, 2000 09:45PM
WILL NOT START OR STARTS HARD COLD (CRANKS OKAY)
* Check ignition fuse (if equipped).
* Check fuel pump fuse and fuel pump relay.
* Verify air intake system is unrestricted.
* Ensure fuel system pressure and volume are correct.
* Check cold start valve and thermo time switch operation.
* Ensure airflow sensor plate is in rest position. Adjust as
necessary.
* Test coolant temperature sensor and wiring. Repair or replace
as required.
* Check for poor ignition ground (1.8L & 2.0L 16-valve engines).
* Check for poor quality or contaminated fuel.
* Check condensation (water) in fuel tank causing fuel pump to
freeze (cold climate).
* Check exhaust system for restriction.
* Test airflow meter. Replace if faulty.
* Ensure sufficient secondary spark is available.
* Check air induction system for cracks or restriction.
* Ensure vacuum hoses are not disconnected or damaged.
* Ensure fuel system residual pressure is correct.
* Ensure fuel injector operation is correct.
* Ensure EGR valve operation is correct and valve closes
completely (if equipped).
* Check for cracks or poor connections at throttle body.
* Ensure ignition and valve timing are correct.
* Check ignition coil primary connections and wiring harness.
* Ensure ignition coil resistance is within specification.
* Check air temperature sensor operation (if equipped).
* Ensure electrical harness and connectors are not broken or loose.
* Ensure ECU or ignition control unit has correct voltage supply
and is properly grounded.
* Ensure engine has sufficient compression.
* Inspect intake air components for leaking hoses, connections or
cracks. Repair as required.
WILL NOT START OR STARTS HARD HOT (CRANKS OKAY)
* Check ignition fuse (if equipped).
* Check fuel system fuse and fuel pump relay.
* Check for poor quality or contaminated fuel.
* Check condensation (water) in fuel tank causing fuel pump to
freeze (cold climate).
* Check exhaust system for restriction.
* Check cold start valve and thermo time switch operation.
* Check fuel system and control system pressure. Replace pressure
regulator if necessary.
* Check residual fuel pressure. Replace fuel pump check valve or
fuel accumulator as necessary.
* Check oxygen sensor system operation.
* Ensure airflow sensor plate is in rest position. Adjust as
Page 576 of 906
H - TESTS W/O CODES
Article Text (p. 3)
1990 Volkswagen Corrado
For Volkswagen Technical Site: http://vw.belcom.ru
Copyright © 1998 Mitchell Repair Information Company, LLC
Thursday, March 23, 2000 09:45PM
necessary.
* Ensure injector spray patterns and volume are correct. Replace
faulty injectors.
* Inspect fuel lines and connections for leaks.
* Check carbon canister solenoid valves (CIS-E Motronic).
* Test airflow meter. Replace if faulty.
* Ensure sufficient secondary spark is available.
* Check air induction system for cracks or restriction.
* Check airflow sensor plate rest position.
* Ensure vacuum hoses are not disconnected or damaged.
* Ensure EGR valve operation is correct and valve closes
completely (if equipped).
* Check for cracks or poor connections at throttle body.
* Ensure ignition and valve timing are correct.
* Check ignition coil primary connections and wiring harness.
* Ensure ignition coil resistance is within specification.
* Check air temperature sensor operation.
* Check coolant temperature sensor operation.
* Ensure electrical harness and connectors are not broken or loose.
* Ensure ECU or ignition control unit has correct voltage supply
and is properly grounded.
* Ensure engine has sufficient compression.
ENGINE STALLS OR IDLES ROUGH
* Check fuel system and control system pressure. Replace pressure
regulator if necessary.
* Check cold start valve for leaking (engine warm).
* Ensure injector spray patterns and volume are correct. Replace
faulty injectors.
* Test coolant temperature sensor and wiring. Repair or replace
as required.
* Inspect intake air components for leaking hoses, connections or
cracks. Repair as required.
* Ensure airflow sensor plate movement and rest position. Adjust
as necessary.
* Test idle switch and idle air stabilizer valve.
* Perform system electrical checks.
* Check airflow meter. Replace if faulty.
* Ensure idle RPM is correct.
* Check auxiliary air by-pass regulator.
* Check fuel injector electrical connections.
* Use stethoscope to verify fuel injectors are operating.
* Ensure sufficient secondary spark is available in all cylinders.
* Verify vacuum hose routing is correct and there are no
vacuum leaks.
* Check idle stabilizer operation.
* Check for EGR system malfunction (if equipped).
* Check O2 sensor operation.
* Check for distortion or cracks in fuel injector(s) plastic
connecting flange(s).
* Check for use of poor quality fuel containing insufficient
Page 582 of 906
HEATER SYSTEM
Article Text (p. 2)
1990 Volkswagen Corrado
For Volkswagen Technical Site: http://vw.belcom.ru
Copyright © 1998 Mitchell Repair Information Company, LLC
Thursday, March 23, 2000 09:45PM
When all service work is completed, reconnect negative
battery cable. Turn ignition on. Ensure the left turn indicator light
comes on for about 5 seconds and then goes out. If light does not come
on for about 5 seconds and then go out, air bag system needs to be
serviced.
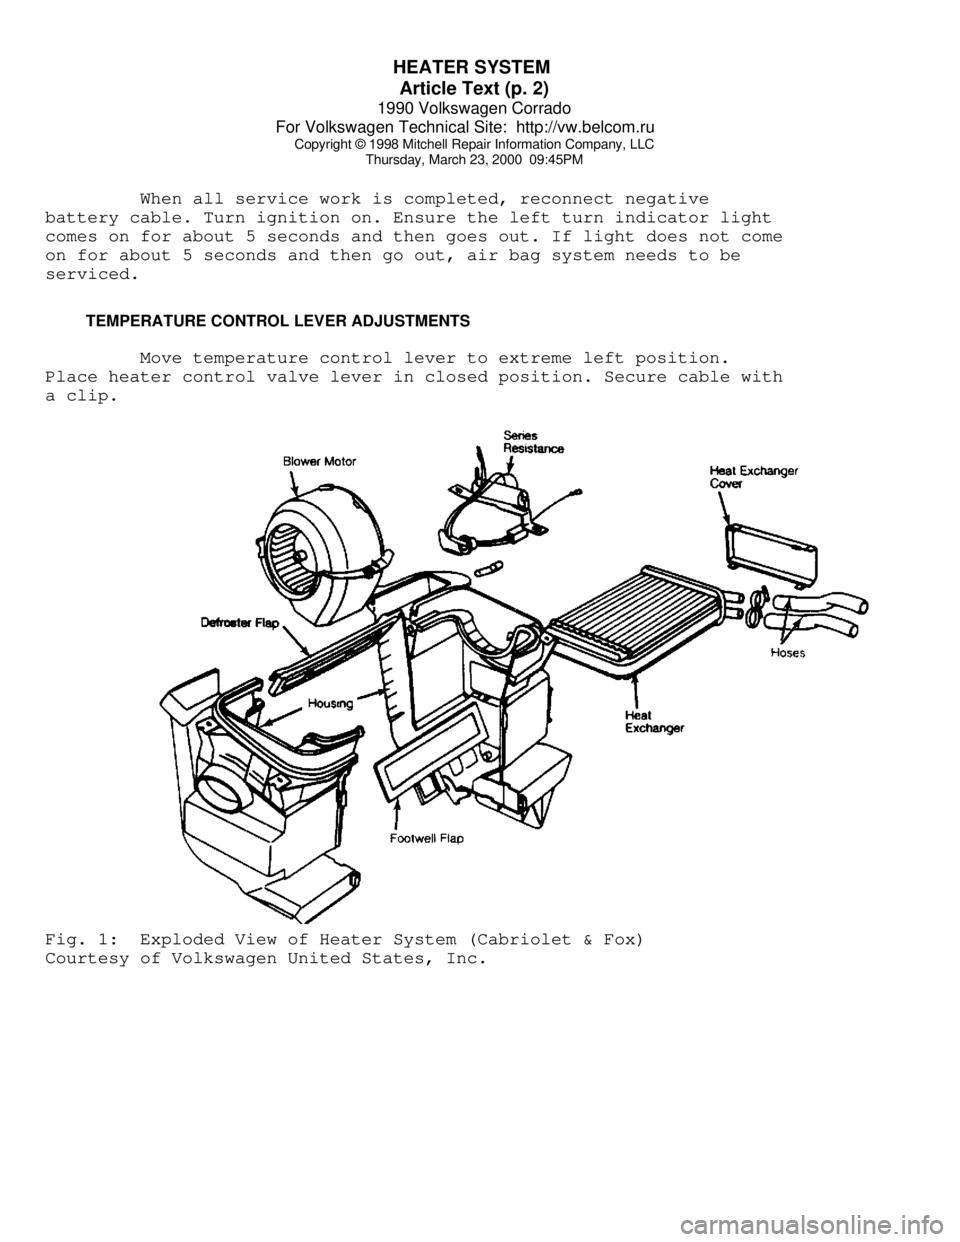
TEMPERATURE CONTROL LEVER ADJUSTMENTS
Move temperature control lever to extreme left position.
Place heater control valve lever in closed position. Secure cable with
a clip.Fig. 1: Exploded View of Heater System (Cabriolet & Fox)
Courtesy of Volkswagen United States, Inc.
Page 589 of 906
I - SYSTEM/COMPONENT TESTS
Article Text (p. 2)
1990 Volkswagen Corrado
For Volkswagen Technical Site: http://vw.belcom.ru
Copyright © 1998 Mitchell Repair Information Company, LLC
Thursday, March 23, 2000 09:46PMÄÄÄÄÄÄÄÄÄÄÄÄÄÄÄÄÄÄÄÄÄÄÄÄÄÄÄÄÄÄÄÄÄÄÄÄÄÄÄÄÄÄÄÄÄÄÄÄÄÄÄÄÄÄÄÄÄÄÄÄÄÄÄÄÄÄÄÄÄÄ CONTROL UNIT (AFC-DIGIFANT II)
NOTE: Before checking ECU terminal voltages, check all terminals
and connections for looseness or presence of corrosion.
Repair as needed, before continuing.
GROUND CIRCUITS
Using Multimeter (US 1119), check resistance of ground
connections for ECU. Remove ECU connector. Check continuity to ground
on terminals No. 13 and 19. See L - WIRING DIAGRAMS for terminal
identification. Resistance should be zero ohms. If resistance is not
zero ohms, repair open or short in wiring.
POWER CIRCUITS
1) Turn ignition off. Disconnect ECU connector. Using a
voltmeter, turn ignition on and check for battery voltage between ECU
connector terminals No. 13 (negative) and No. 14 (positive). See L -
WIRING DIAGRAMS for terminal identification and wire colors. If
battery voltage is not present, repair wiring as required.
2) Check terminals No. 13 (negative) and No. 1 (positive) for
battery voltage. If battery voltage is not present, check fuse No. 18
on fuse block. If fuse is okay, check wiring from ECU connector to
fuse box for open.
CONTROL UNIT (CIS-E)
GROUND CIRCUITS
Using Multimeter (US 1119), check resistance of ground
circuits for ECU. Remove ECU connector. Check continuity to ground on
terminals No. 2 and No. 9. Resistance should be zero ohms. If
resistance is not zero ohms, repair open or short in wiring.
POWER CIRCUITS
Turn ignition off. Disconnect ECU connector. Using a
voltmeter, turn ignition on and check for battery voltage between ECU
connector terminals No. 2 (negative) and No. 1 (positive). See L -
WIRING DIAGRAMS for terminal identification and wire colors. If
battery voltage is not present, check fuse No. 23 on fuse block. If
fuse is okay, check CIS-E ECU connector to fuse box wiring for open.
CONTROL UNIT (CIS-MOTRONIC)
GROUND CIRCUITS
Using Multimeter (US 1119), check resistance of ground
Page 590 of 906
I - SYSTEM/COMPONENT TESTS
Article Text (p. 3)
1990 Volkswagen Corrado
For Volkswagen Technical Site: http://vw.belcom.ru
Copyright © 1998 Mitchell Repair Information Company, LLC
Thursday, March 23, 2000 09:46PM
circuits to ECU. The ECU engine ground is near ignition distributor.
Remove ECU connector. Check resistance to ground on terminal No. 35.
Resistance should be zero ohms. If resistance is not zero ohms, repair
open or short in wiring.
POWER CIRCUITS
Turn ignition off. Disconnect ECU connector. Using a
voltmeter, check terminals No. 12, 14, 19 and 34 for battery voltage.
If battery voltage is not present. Check fuses No. 15, 18 and 24. If
fuses are okay, check for open in wiring between ECU and fuse box. See
L - WIRING DIAGRAMS for terminal identification and wire colors.
ENGINE SENSORS & SWITCHES
AIRFLOW SENSOR (FOX & JETTA GLI)
1) Start engine to pressurized fuel system. Turn engine off
and remove intake boot from top of airflow sensor. Disconnect coil
secondary wire from coil and jumper to ground.
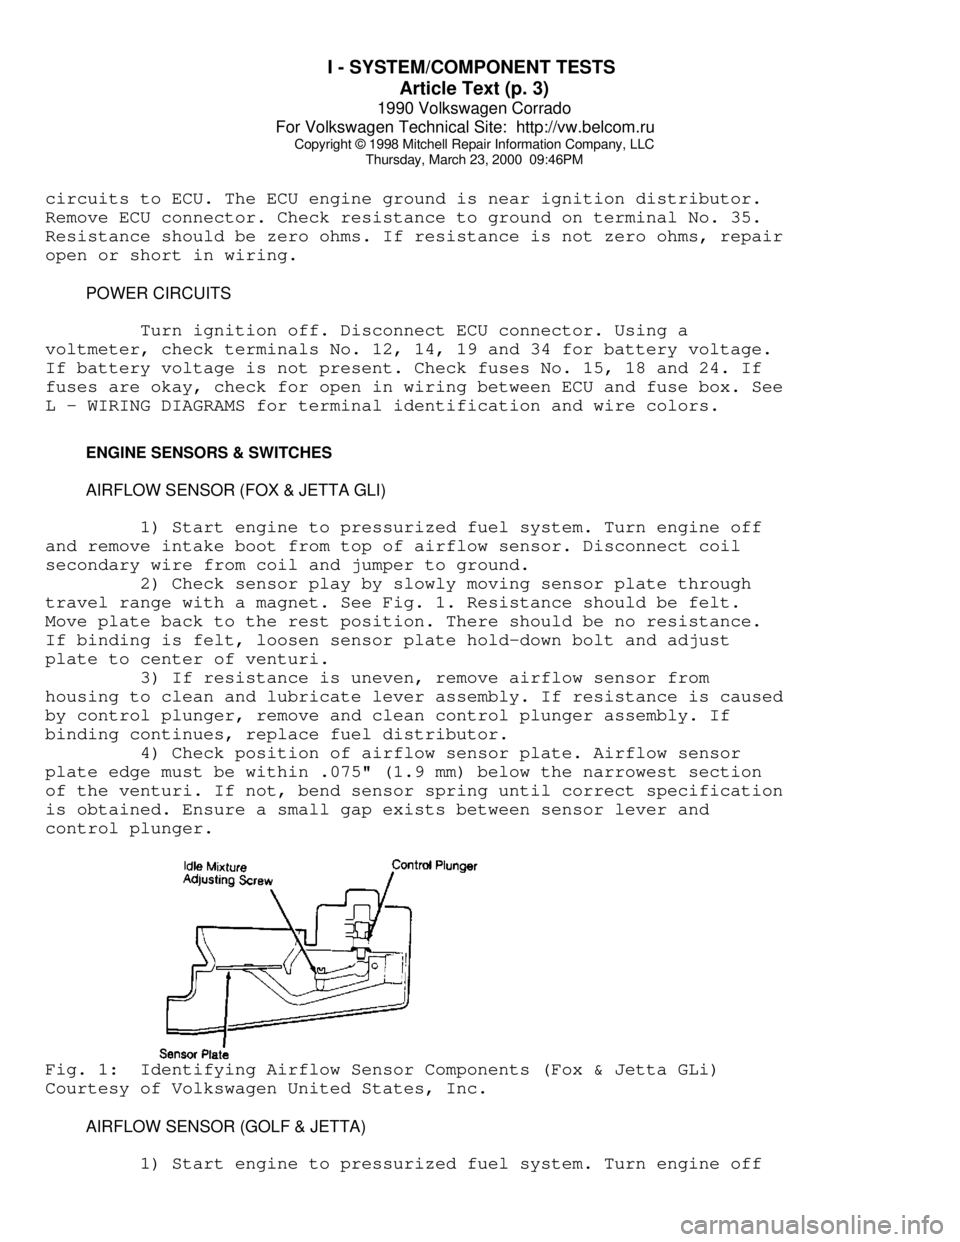
2) Check sensor play by slowly moving sensor plate through
travel range with a magnet. See Fig. 1. Resistance should be felt.
Move plate back to the rest position. There should be no resistance.
If binding is felt, loosen sensor plate hold-down bolt and adjust
plate to center of venturi.
3) If resistance is uneven, remove airflow sensor from
housing to clean and lubricate lever assembly. If resistance is caused
by control plunger, remove and clean control plunger assembly. If
binding continues, replace fuel distributor.
4) Check position of airflow sensor plate. Airflow sensor
plate edge must be within .075" (1.9 mm) below the narrowest section
of the venturi. If not, bend sensor spring until correct specification
is obtained. Ensure a small gap exists between sensor lever and
control plunger.Fig. 1: Identifying Airflow Sensor Components (Fox & Jetta GLi)
Courtesy of Volkswagen United States, Inc.
AIRFLOW SENSOR (GOLF & JETTA)
1) Start engine to pressurized fuel system. Turn engine off
Page 591 of 906
I - SYSTEM/COMPONENT TESTS
Article Text (p. 4)
1990 Volkswagen Corrado
For Volkswagen Technical Site: http://vw.belcom.ru
Copyright © 1998 Mitchell Repair Information Company, LLC
Thursday, March 23, 2000 09:46PM
and remove intake boot from top of airflow sensor. Check sensor plate
by lifting plate through travel cycle with magnet or pliers.
2) Continuous resistance should be felt. Move plate back to
rest position. There should be no resistance. If resistance is felt,
replace airflow sensor. If sensor plate lever is difficult to move
upward but moves freely downward, check sensor plate for correct
centering.
3) Sensor plate should be evenly centered in the housing with
plate edge at the narrowest section of the venturi while at rest
position. If sensor plate adjustment is correct, check control plunger
for sticking. If control plunger is sticking, replace fuel distributor
assembly.
AIRFLOW SENSOR (VANAGON)
1) Turn ignition off. Remove Electronic Control Unit (ECU)
connector. Attach ohmmeter to ECU connector. See Fig. 3. Resistance
should correspond to ECU PIN CHECK in AFC-DIGIFANT II AIRFLOW SENSOR
RESISTANCE table.
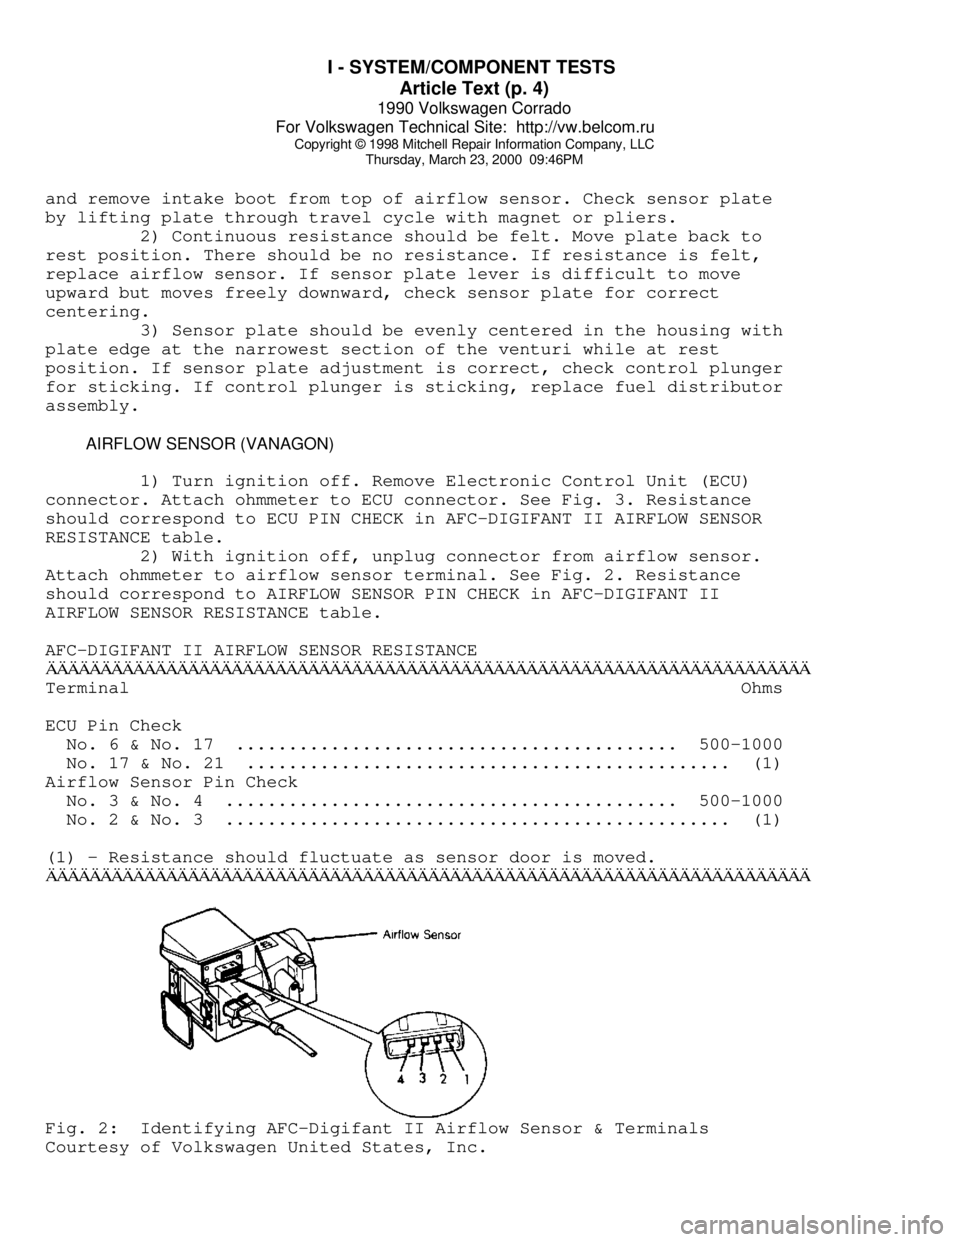
2) With ignition off, unplug connector from airflow sensor.
Attach ohmmeter to airflow sensor terminal. See Fig. 2. Resistance
should correspond to AIRFLOW SENSOR PIN CHECK in AFC-DIGIFANT II
AIRFLOW SENSOR RESISTANCE table.
AFC-DIGIFANT II AIRFLOW SENSOR RESISTANCEÄÄÄÄÄÄÄÄÄÄÄÄÄÄÄÄÄÄÄÄÄÄÄÄÄÄÄÄÄÄÄÄÄÄÄÄÄÄÄÄÄÄÄÄÄÄÄÄÄÄÄÄÄÄÄÄÄÄÄÄÄÄÄÄÄÄÄÄÄÄTerminal Ohms
ECU Pin Check
No. 6 & No. 17 .......................................... 500-1000
No. 17 & No. 21 .............................................. (1)
Airflow Sensor Pin Check
No. 3 & No. 4 ........................................... 500-1000
No. 2 & No. 3 ................................................ (1)
(1) - Resistance should fluctuate as sensor door is moved.
ÄÄÄÄÄÄÄÄÄÄÄÄÄÄÄÄÄÄÄÄÄÄÄÄÄÄÄÄÄÄÄÄÄÄÄÄÄÄÄÄÄÄÄÄÄÄÄÄÄÄÄÄÄÄÄÄÄÄÄÄÄÄÄÄÄÄÄÄÄÄFig. 2: Identifying AFC-Digifant II Airflow Sensor & Terminals
Courtesy of Volkswagen United States, Inc.