VOLVO 240 1990 Owners Manual
Manufacturer: VOLVO, Model Year: 1990, Model line: 240, Model: VOLVO 240 1990Pages: 143, PDF Size: 2.32 MB
Page 111 of 143
Volvo 1990 240 Model
Remove screw holding the light assembly Lift it out to remove.
Replace the bulb.
Reinstall by first inserting the guides into one side, then press ir, th\
e light assembly and install the screw.
Bulb Power Socket
Engine compartment light 15 W S 8.5 - 8
Trunk light 15 W S 8.5 - 8
Instrument and heater control lighting
Due to the location of these bulbs their replacement should be carried o\
ut by a Volvo dealer. pg. 81 Fuses
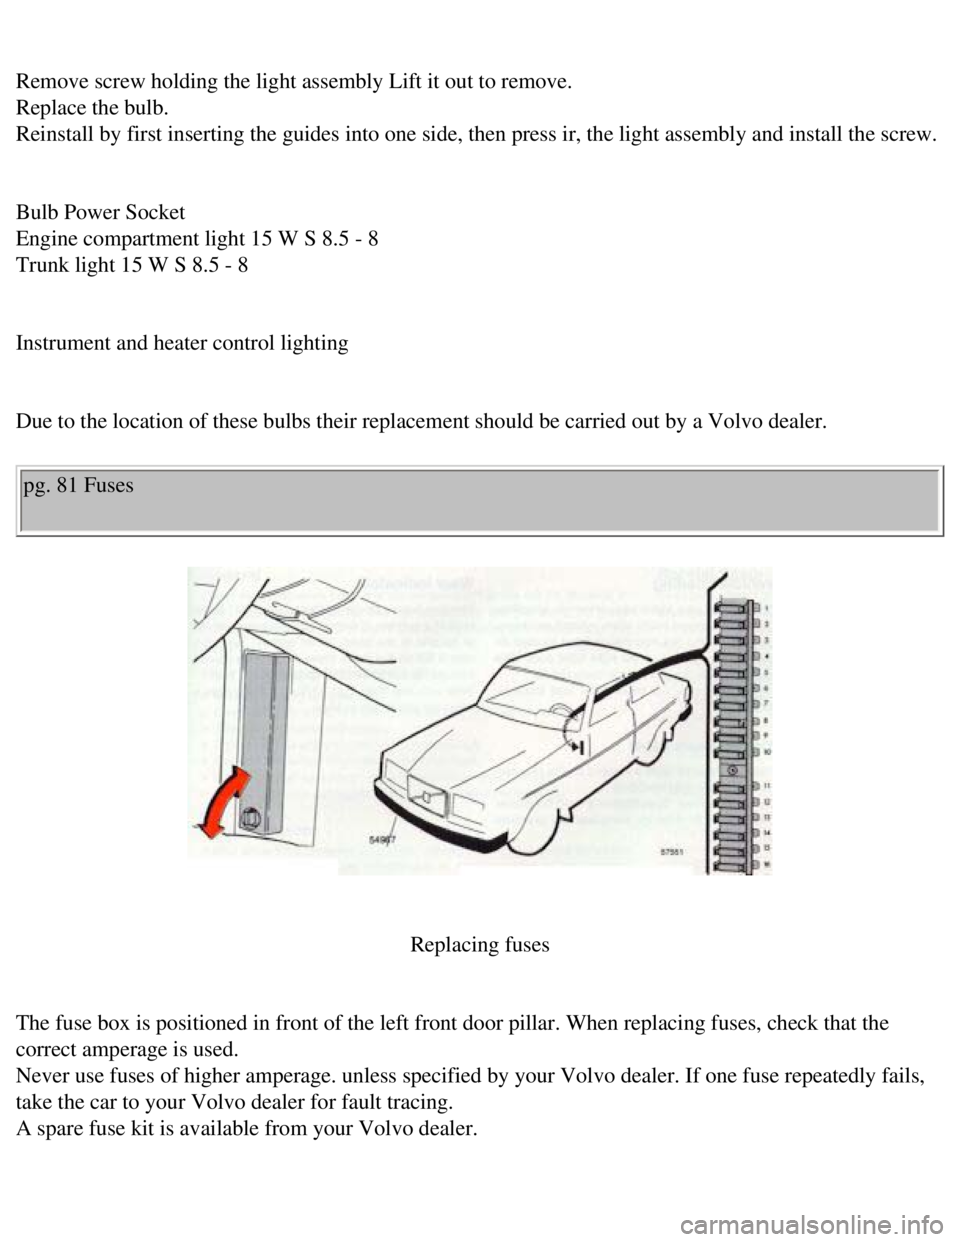
Replacing fuses
The fuse box is positioned in front of the left front door pillar. When \
replacing fuses, check that the
correct amperage is used.
Never use fuses of higher amperage. unless specified by your Volvo deale\
r. If one fuse repeatedly fails,
take the car to your Volvo dealer for fault tracing.
A spare fuse kit is available from your Volvo dealer.
file:///K|/ownersdocs/1990/1990_240/90240_16.htm (9 of 10)12/30/2006 8\
:25:10 AM
Page 112 of 143
Volvo 1990 240 Model
Warning: Turn starting (ignition) switch OFF before replacing fuses. E\
xcessive heat may be created by
a short circuit. Care must be exercised while replacing blown fuses.
Some of the equipment listed below is optional
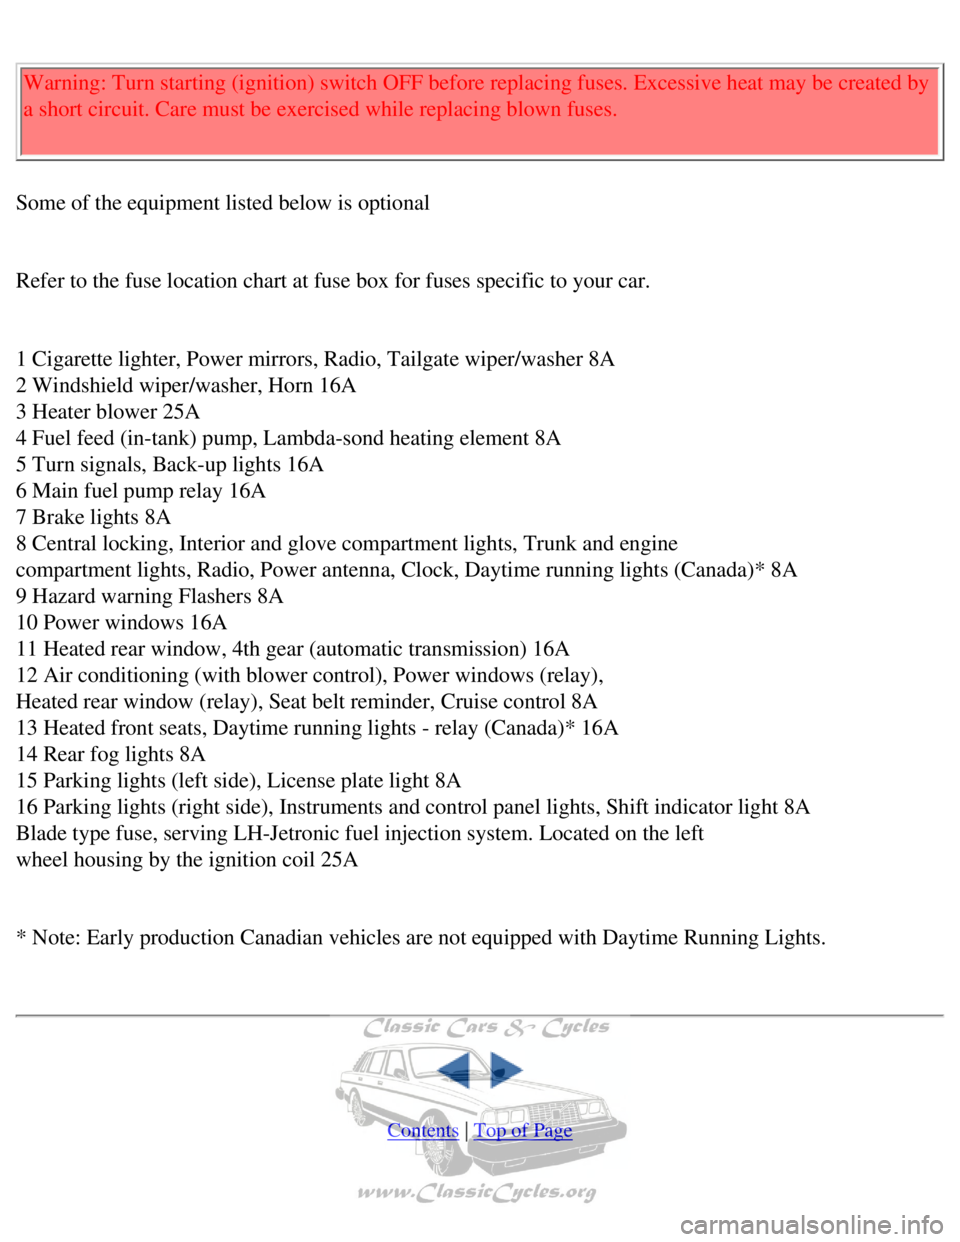
Refer to the fuse location chart at fuse box for fuses specific to your \
car.
1 Cigarette lighter, Power mirrors, Radio, Tailgate wiper/washer 8A
2 Windshield wiper/washer, Horn 16A
3 Heater blower 25A
4 Fuel feed (in-tank) pump, Lambda-sond heating element 8A
5 Turn signals, Back-up lights 16A
6 Main fuel pump relay 16A
7 Brake lights 8A
8 Central locking, Interior and glove compartment lights, Trunk and engi\
ne
compartment lights, Radio, Power antenna, Clock, Daytime running lights \
(Canada)* 8A
9 Hazard warning Flashers 8A
10 Power windows 16A
11 Heated rear window, 4th gear (automatic transmission) 16A
12 Air conditioning (with blower control), Power windows (relay),
Heated rear window (relay), Seat belt reminder, Cruise control 8A
13 Heated front seats, Daytime running lights - relay (Canada)* 16A
14 Rear fog lights 8A
15 Parking lights (left side), License plate light 8A
16 Parking lights (right side), Instruments and control panel lights, \
Shift indicator light 8A
Blade type fuse, serving LH-Jetronic fuel injection system. Located on t\
he left
wheel housing by the ignition coil 25A
* Note: Early production Canadian vehicles are not equipped with Daytime\
Running Lights.
Contents | Top of Page
file:///K|/ownersdocs/1990/1990_240/90240_16.htm (10 of 10)12/30/2006 \
8:25:10 AM
Page 113 of 143
Volvo 1990 240 Model
pg. 82 Wheels and tires
Checking and correcting tire pressure
Check the tire pressure when refueling. The tire pressure should only be\
corrected when the tires are
cold. With warm tires, correct only when the pressure is too low. The ti\
re temperature (and, thus,
pressure) rises after driving just a few miles.
Warning: Improperly inflated tires will reduce tire life, adversely affe\
ct vehicle handling and can
possibly lead to failure resulting in loss of vehicle control without pr\
ior warning.
Vehicle Loading
The tires on your Volvo will perform to specifications at all normal loa\
ds when inflated as
recommended on the tire information label located on the rear facing sid\
e of the right front door. This
label lists both tire and vehicle design limits.
Do not load your car beyond the load limits indicated.
Tire Pressure Label
The tire pressure label is located on the rear facing side of the right \
front door.
See section titled ''Specifications'' and Consumer Information Booklet f\
or complete tire pressure
information.
Wear indicator
The tires have a so-called "wear indicator in the form of a number of na\
rrow strips running across or
parallel to the tread. When approx 1/16 " (1.5 mm) is left on the trea\
d, these strips show up and indicate
the tire should be replaced.
Tires with less than 1/16" (1.5 mm) tread have a very poor grip in rai\
n or snow.
pg. 83 Wheels and tires
file:///K|/ownersdocs/1990/1990_240/90240_17.htm (1 of 2)12/30/2006 8:\
25:10 AM
Page 114 of 143

Volvo 1990 240 Model
General
When replacing worn tires, it is recommended that the tire be identical \
in type (radial) and size as the
one being replaced. Using a tire of the same make (manufacturer) will \
prevent altering the driving
characteristics of the vehicle.
How to improve tire economy
l Maintain correct tire pressure
l Drive smoothly: avoid fast starts, hard braking and tire screeching.
file:///K|/ownersdocs/1990/1990_240/90240_17.htm (2 of 2)12/30/2006 8:\
25:10 AM
Page 115 of 143
Volvo 1990 240 Model
pg. 86 Replacing wiper blades, Washing
Replacing wiper blades
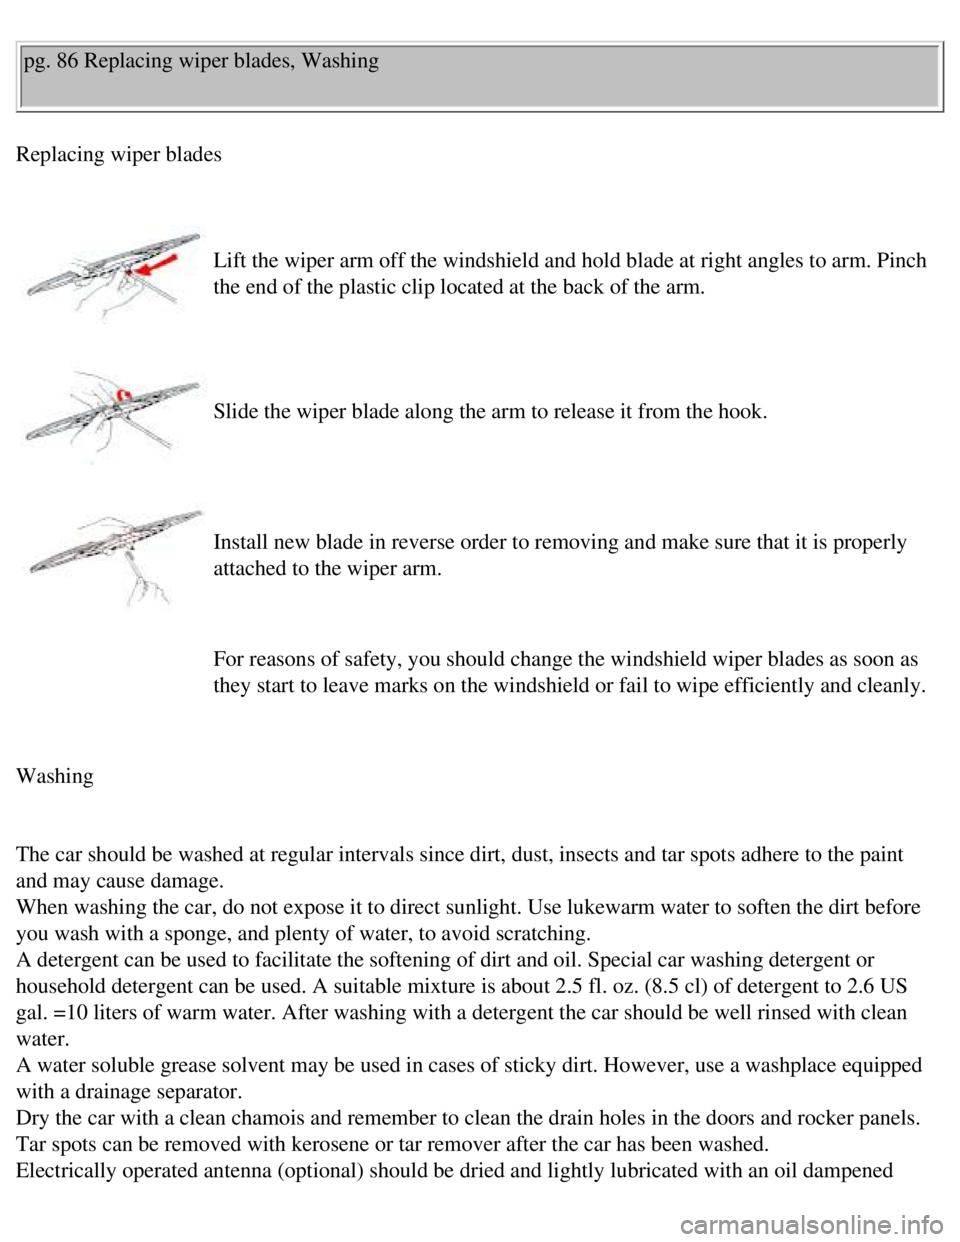
Lift the wiper arm off the windshield and hold blade at right angles to \
arm. Pinch
the end of the plastic clip located at the back of the arm.
Slide the wiper blade along the arm to release it from the hook.
Install new blade in reverse order to removing and make sure that it is \
properly
attached to the wiper arm.
For reasons of safety, you should change the windshield wiper blades as \
soon as
they start to leave marks on the windshield or fail to wipe efficiently \
and cleanly.
Washing
The car should be washed at regular intervals since dirt, dust, insects \
and tar spots adhere to the paint
and may cause damage.
When washing the car, do not expose it to direct sunlight. Use lukewarm \
water to soften the dirt before
you wash with a sponge, and plenty of water, to avoid scratching.
A detergent can be used to facilitate the softening of dirt and oil. Spe\
cial car washing detergent or
household detergent can be used. A suitable mixture is about 2.5 fl. oz.\
(8.5 cl) of detergent to 2.6 US
gal. =10 liters of warm water. After washing with a detergent the car sh\
ould be well rinsed with clean
water.
A water soluble grease solvent may be used in cases of sticky dirt. Howe\
ver, use a washplace equipped
with a drainage separator.
Dry the car with a clean chamois and remember to clean the drain holes i\
n the doors and rocker panels.
Tar spots can be removed with kerosene or tar remover after the car has \
been washed.
Electrically operated antenna (optional) should be dried and lightly l\
ubricated with an oil dampened
file:///K|/ownersdocs/1990/1990_240/90240_18.htm (1 of 8)12/30/2006 8:\
25:11 AM
Page 116 of 143
Volvo 1990 240 Model
cloth.
CAUTION: It is particularly important to wash the car frequently in the \
winter time, to prevent
corrosion, when salt has been used on the roads. Also wash off the dirt \
on the underside (Wheel
housings and fenders etc.)
WARNING: When the car is driven immediately after being washed, carefull\
y apply the brakes
several times in order to remove any moisture from the brake linings.
pg. 87 Washing, Cleaning, Anti-rust treatment
Automatic washing - simple and quick
An automatic wash is a simple and quick way to clean your car, but it is\
worth remembering that it can
never be as thorough as when you yourself go over the car with sponge an\
d water. Keeping the
underbody clean is most important, especially in the winter. Some automa\
tic washers do not have
facilities for washing the underbody.
Before driving into an automatic wash, make sure that side view mirrors,\
auxiliary lamps, etc., are
secure, otherwise there is risk of the machine dislodging them. You shou\
ld also lower the antenna.
We recommend that you do not wash your car in an automatic wash during t\
he first six months (because
the paint will not have hardened sufficiently).
Bird droppings /Tree sap
Remove from paintwork as soon as possible. Otherwise the finish may be p\
ermanently damaged.
Chromed parts
Chromium-plated and anodized parts should be washed with clean water as \
soon as they become dirty.
This is particularly important if you drive on gravel roads or on roads \
where salt is used during the
winter. After the car has been washed, apply wax or an anti-rust prepara\
tion.
Stains on chrome trim can be removed with commercially available chrome \
cleaner. Do not use abrasive
compounds or steel wool.
file:///K|/ownersdocs/1990/1990_240/90240_18.htm (2 of 8)12/30/2006 8:\
25:11 AM
Page 117 of 143

Volvo 1990 240 Model
Polishing (waxing)
Normally, polishing is not required during the first year after delivery\
. Waxing may be beneficial.
Before applying polish or wax the car must be washed and dried. Tar spot\
s can be removed with
kerosene or tar remover. Difficult spots may require a fine rubbing comp\
ound.
After polishing use liquid or paste wax.
Several commercially available products contain both polish and wax. Wax\
ing alone does not substitute
for polishing of a dull surface.
A wide range of polymer based car waxes can be purchased today. The waxe\
s are easy to use and
produce a long lasting high gloss finish which protects the bodywork aga\
inst oxidation, road dirt and
fading.
Cleaning the upholstery
Generally the fabric can be cleaned with soapy water or a detergent. For\
more difficult spots caused by
oil, ice cream, shoe polish, grease, etc., use a stain remover.
The plastic in the upholstery can be washed.
To clean leather upholstery , use soft cloth and mild soap solution, for\
instance common bath soap.
For more difficult spots, consult an expert for the choice of cleaning a\
gent.
On no account must gasoline, naphtha or similar cleaning agents be used \
on the plastic or the leather
since these can cause damage.
When aging, leather changes appearance, but the typical texture remains.\
To preserve smoothness and
appearance, it is recommended to treat the leather with a special leathe\
r preservative after one or two
years of use.
Cleaning the seat belts
Clean only with luke warm water and mild soap solution.
WARNING! Do not use cleaning solvents to clean the seat
belts.
Cleaning floor mats
file:///K|/ownersdocs/1990/1990_240/90240_18.htm (3 of 8)12/30/2006 8:\
25:11 AM
Page 118 of 143
Volvo 1990 240 Model
The floor mats should be vacuumed or brushed clean regularly, especially\
during the winter when they
should be taken out for drying.
Spots on textile mats can be removed with a mild detergent.
Anti-rust treatment
Your Volvo has been rust protected at the factory. On external surfaces \
a heavy coat of wear resistant
material has been used, while on the internal surfaces a lighter rust in\
hibitor is used.
The rust protection should be inspected regularly by your authorized Vol\
vo dealer. Consult the Volvo
Protection Limited Warranty found in your Warranty Information Booklet f\
or additional terms and
conditions.
For further information, see section titled "What causes rust" or see yo\
ur Volvo dealer. pg. 88 Paint touch-up
Paint touch-up
Paint damage requires immediate attention to avoid rusting. Make it a ha\
bit to check the finish regularly,
for instance when washing the car. Touch-up if necessary.
Paint repairs require special equipment and skill. Contact your Volvo de\
aler for any extensive damages.
Minor scratches can be repaired by using Volvo touch-up paint.
Note: When ordering touch-up paint from your Volvo dealer, use the paint\
code indicated on the
service label. The label is located on the wheel housing in the engine c\
ompartment.
Minor stone chips and scratches
Material:
Primer-can
Paint-can or touch-up bottle
file:///K|/ownersdocs/1990/1990_240/90240_18.htm (4 of 8)12/30/2006 8:\
25:11 AM
Page 119 of 143
Volvo 1990 240 Model
Brush
Masking tape
Note: When touching-up the car, it should be clean and dry. The surface \
temperature should be above
60 ° F (+15 ° C).
Scars on the surface
If the stone chip has not penetrated down to the metal and an undamaged \
layer of paint remains, the
touch-up paint can be applied as soon as the spot has been cleaned.
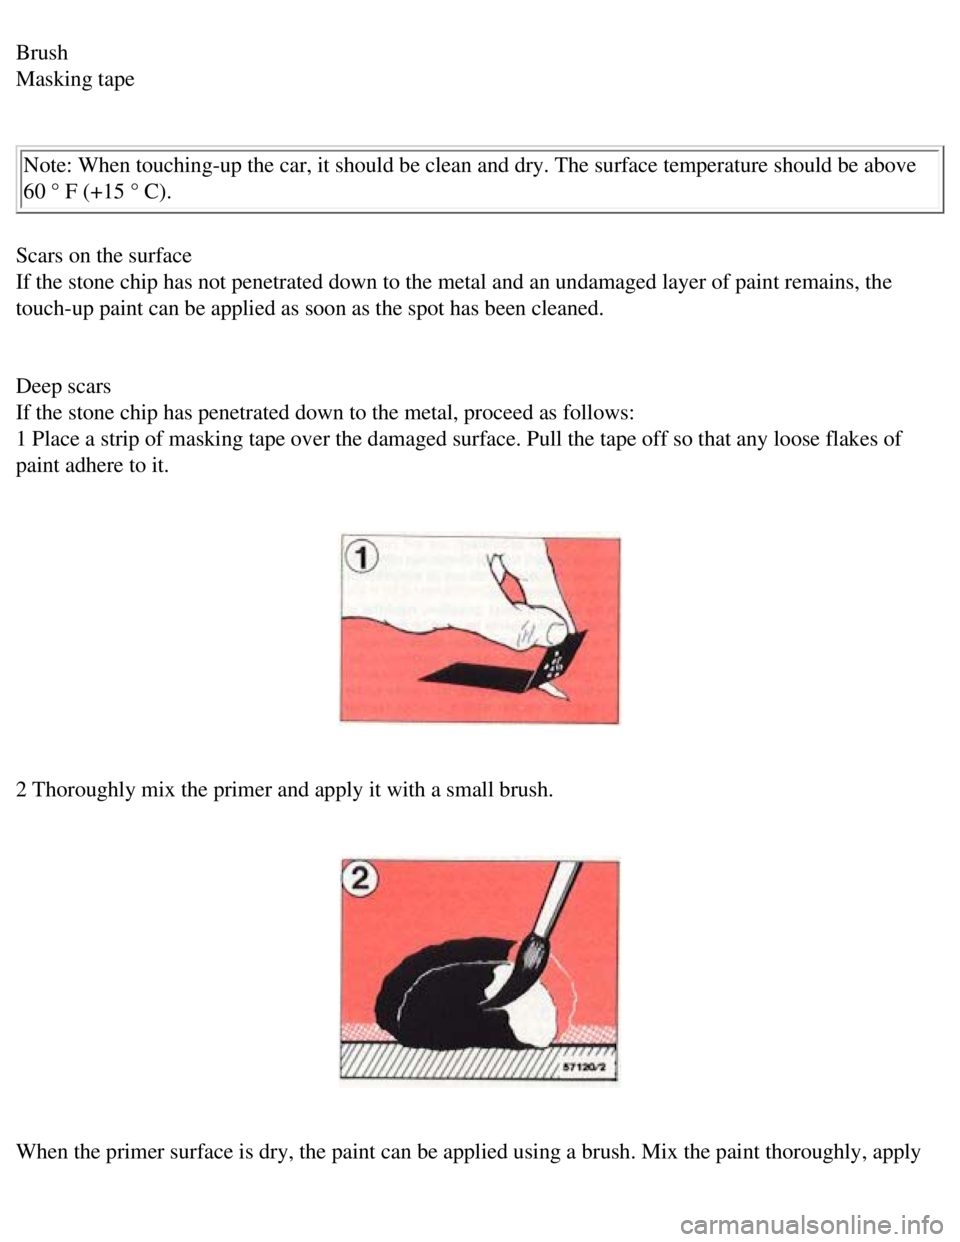
Deep scars
If the stone chip has penetrated down to the metal, proceed as follows: \
1 Place a strip of masking tape over the damaged surface. Pull the tape \
off so that any loose flakes of
paint adhere to it.
2 Thoroughly mix the primer and apply it with a small brush.
When the primer surface is dry, the paint can be applied using a brush. \
Mix the paint thoroughly, apply
file:///K|/ownersdocs/1990/1990_240/90240_18.htm (5 of 8)12/30/2006 8:\
25:11 AM
Page 120 of 143
Volvo 1990 240 Model
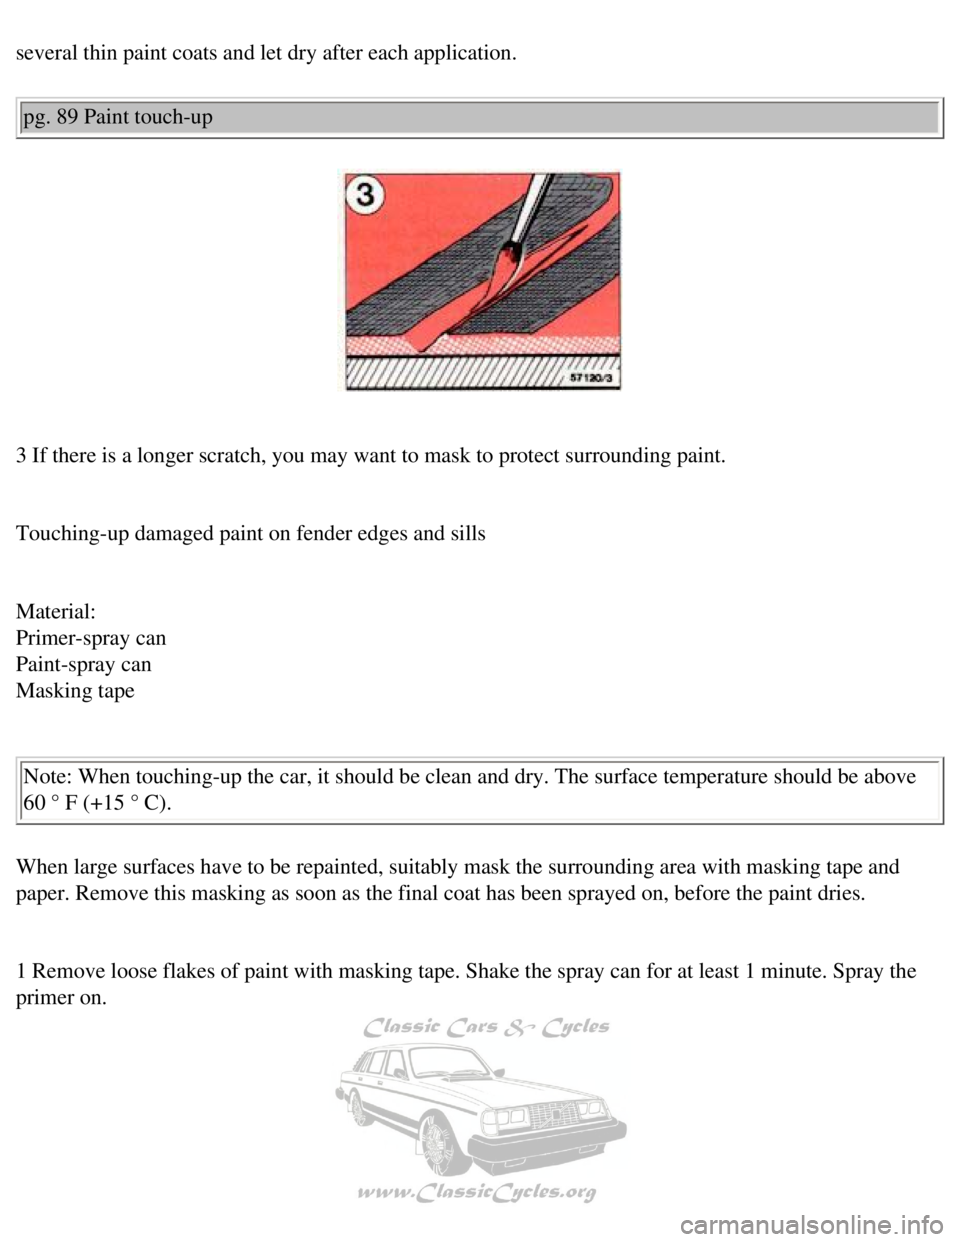
several thin paint coats and let dry after each application. pg. 89 Paint touch-up
3 If there is a longer scratch, you may want to mask to protect surround\
ing paint.
Touching-up damaged paint on fender edges and sills
Material:
Primer-spray can
Paint-spray can
Masking tape
Note: When touching-up the car, it should be clean and dry. The surface \
temperature should be above
60 ° F (+15 ° C).
When large surfaces have to be repainted, suitably mask the surrounding \
area with masking tape and
paper. Remove this masking as soon as the final coat has been sprayed on\
, before the paint dries.
1 Remove loose flakes of paint with masking tape. Shake the spray can fo\
r at least 1 minute. Spray the
primer on.
file:///K|/ownersdocs/1990/1990_240/90240_18.htm (6 of 8)12/30/2006 8:\
25:11 AM