change time VOLVO S90 2020 Quick Guide
[x] Cancel search | Manufacturer: VOLVO, Model Year: 2020, Model line: S90, Model: VOLVO S90 2020Pages: 643, PDF Size: 13.68 MB
Page 6 of 643
4
Opening contextual setting in the center display130
Resetting user data when thevehicle changes owners 131
Resetting center display settings 131
Table of settings in the center display 132
Driver profiles 133
Selecting a driver profile 134
Changing a driver profile's name 134
Protecting a driver profile 135
Linking a remote key to a driver profile 135
Resetting driver profile settings 136
Messages in the center display 137
Handling messages in the centerdisplay 137
Handling messages saved fromthe center display 138
Head-up display *
139
Activating and deactivating the head-up display * 140
Head-up display settings *
141
Voice Control 142
Use voice recognition 143
Voice control for cellular phones 145
Voice control for radio and media 145
Voice control settings 146
LIGHTING
Lighting control and panel148
Adjusting light functions via the center display 149
Parking lights 150
Daytime running lights 150
Low beams 151
Using high beam 152
Active high beam 153
Using turn signals 154
Active Bending Lights *
154
Front fog lights/corner illumination *
155
Rear fog light 156
Brake lights 157
Emergency brake lights 157
Hazard warning flashers 157
Using home safe lighting 158
Welcome Light 158
Interior Lighting 158
Adjusting interior lighting 160
WINDOWS, GLASS AND MIRRORS
Windows, glass and mirrors 162
Pinch protection for windows and sun curtains 162
Reset procedure for pinch protection 163
Power windows 164
Operating the power windows 165
Using sun curtains *
166
Rearview/door mirrors 168
Adjusting the rearview mirror dim-ming function 168
Adjusting the door mirrors 169
Panoramic roof 170
Operating the panoramic roof 172
Auto closing the panoramic roofsun curtain 175
Wiper blades and washer fluid 176
Using the windshield wipers 176
Using the rain sensor 177
Using the rain sensor's memoryfunction 178
Using the windshield and head-light washers 178
Page 23 of 643
OWNER'S INFORMATION
}}
* Option/accessory.21
Volvo Cars support site
Volvo Cars' website and support site contain additional information about your vehicle.
Online supportGo to support.volvocars.com to visit the site. The support site is available in most markets. The site contains support for e.g. Internet- based services and functions, Volvo On Call, the navigation system * and apps. Videos and
step-by-step instructions explain various pro- cedures, such as how to connect the vehicleto the Internet via a cellular phone.
Downloadable information
Maps
For vehicles equipped with Sensus Navigation maps can be downloaded from the supportsite.
Mobile apps
Beginning with model year 2014, the Owner's Manual is available as an app for certain Volvomodels. The Volvo On Call app can also bedownloaded from the support site.
Owner's manuals in PDF format
Owner's Manuals are available for download- ing in PDF format. Select the vehicle modeland year to download the desired manual.
ContactContact information for customer support andyour nearest Volvo retailer are available on thesupport site.
Related information
Contacting Volvo (p. 26)
Volvo ID (p. 26)
Using the Owner's Manual
To get to know your new vehicle, read the Owner's Manual before driving it for the firsttime.
Reading your Owner's Manual is a way to familiarize yourself with new features andfunctions, get advice on how to handle yourvehicle in different situations, and to learn howto take advantage of everything your Volvo hasto offer. Pay particular attention to the safetywarnings provided in the Owner's Manual. The intention of this owner's information is to explain all of the possible features, functions,options and accessories included in a Volvovehicle. It is not intended as an indication orguarantee that all of these features, functionsand options are included in every vehicle.Some terminology used may not exactlymatch terminology used in sales, marketingand advertising materials. Volvo continuously works to develop and improve our products. Modifications can meanthat information, descriptions and illustrationsin the Owner's Manual differ from the equip-ment in the vehicle. We reserve the right tomake changes without prior notice. Do not remove this manual from the vehicle. If a problem should occur, you will not have thenecessary information on where and how toget professional assistance. © Volvo Car Corporation
Page 28 of 643
YOUR VOLVO
26
Contacting VolvoUse the following contact information if you would like to get in touch with Volvo in theUnited States or Canada.
In the USA: Volvo Car USA, LLCCustomer Care Center1 Volvo Drive,P.O. Box 914Rockleigh, New Jersey 076471-800-458-1552www.volvocars.com/us In Canada: Volvo Car Canada Ltd.Customer Care Centre9130 Leslie Street, Suite 101Richmond Hill, Ontario L4B 0B91-800-663-8255www.volvocars.com/ca
Volvo ID Volvo ID is a personal ID that gives you access to a range of services using a singleusername and password.
NOTE
The available services can vary over time and depend on equipment level and mar-ket.
Examples of services: Volvo On Call-app - check your vehicle using your phone. You can check fuellevel, find the nearest gas station and lockthe vehicle remotely.
Send to Car – send addresses from onlinemap services directly to the vehicle.
Send a request for service and repairsdirectly from the vehicle. The booking willthen be completed via email.
NOTE
If the username/password for a service (e.g. Volvo On Call) is changed, the changewill also automatically be applied to otherservices.
The creation of a Volvo ID is initiated through the Volvo On Call app or from the vehicle and then completed by email. When a Volvo ID is registered in the vehicle,additional services are available. MultipleVolvo IDs can be used for the same vehicle,and multiple vehicles can be linked to thesame Volvo ID.
Related information
Creating and registering a Volvo ID(p. 27)
Scheduling service and repairs (p. 547)
Page 88 of 643
||
DISPLAYS AND VOICE CONTROL
* Option/accessory.
86
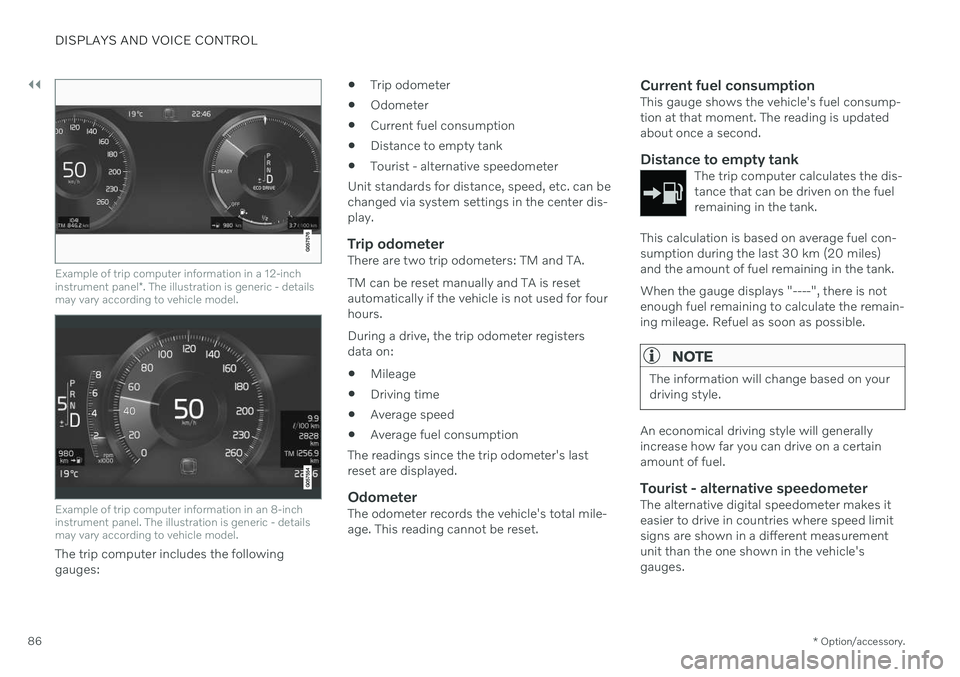
Example of trip computer information in a 12-inch instrument panel *. The illustration is generic - details
may vary according to vehicle model.
Example of trip computer information in an 8-inch instrument panel. The illustration is generic - detailsmay vary according to vehicle model.
The trip computer includes the following gauges:
Trip odometer
Odometer
Current fuel consumption
Distance to empty tank
Tourist - alternative speedometer
Unit standards for distance, speed, etc. can bechanged via system settings in the center dis-play.
Trip odometerThere are two trip odometers: TM and TA. TM can be reset manually and TA is reset automatically if the vehicle is not used for fourhours. During a drive, the trip odometer registers data on:
Mileage
Driving time
Average speed
Average fuel consumption
The readings since the trip odometer's lastreset are displayed.
OdometerThe odometer records the vehicle's total mile-age. This reading cannot be reset.
Current fuel consumptionThis gauge shows the vehicle's fuel consump-tion at that moment. The reading is updatedabout once a second.
Distance to empty tankThe trip computer calculates the dis-tance that can be driven on the fuelremaining in the tank.
This calculation is based on average fuel con- sumption during the last 30 km (20 miles)and the amount of fuel remaining in the tank. When the gauge displays "----", there is not enough fuel remaining to calculate the remain-ing mileage. Refuel as soon as possible.
NOTE
The information will change based on your driving style.
An economical driving style will generally increase how far you can drive on a certainamount of fuel.
Tourist - alternative speedometerThe alternative digital speedometer makes iteasier to drive in countries where speed limitsigns are shown in a different measurementunit than the one shown in the vehicle'sgauges.
Page 90 of 643
||
DISPLAYS AND VOICE CONTROL
883. Scroll down to the option buttons to
choose which information to show in the instrument panel: Odometer
Distance to empty tank
Tourist (alternative speedometer)
Mileage for trip odometer TM, TA or no display of mileage
Current fuel consumption, average fuelconsumption for TM or TA, or no dis-play of fuel consumption
Select or clear a selection using the O but-
ton (4). The change will apply immedi-ately.
Related information
Trip computer (p. 85)
Resetting the trip odometer (p. 88)
Resetting the trip odometer Resetting the trip odometer using the left- side steering wheel lever.
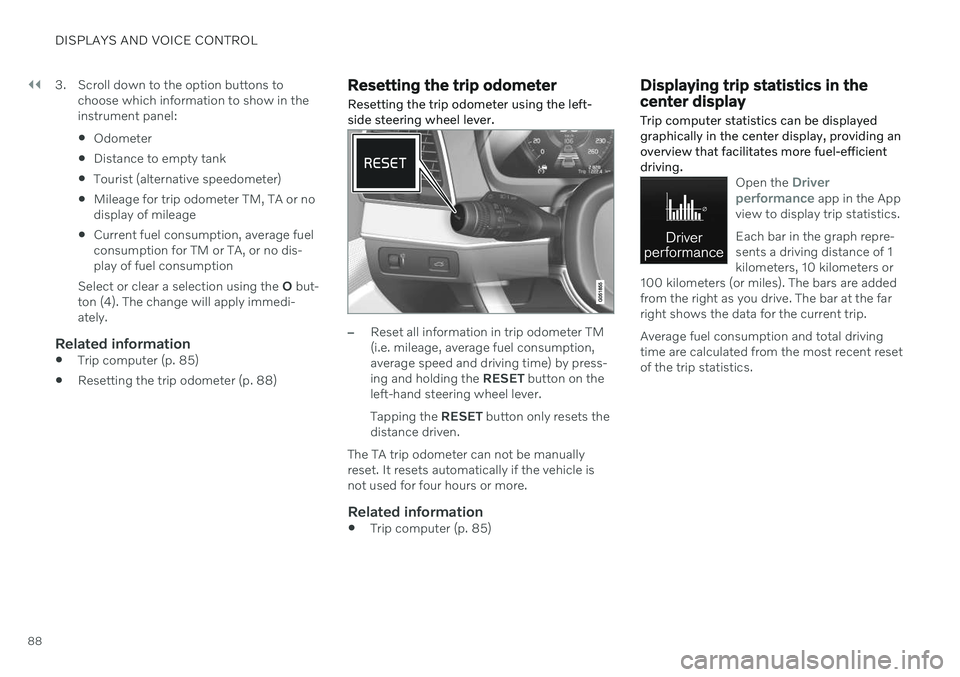
–Reset all information in trip odometer TM (i.e. mileage, average fuel consumption,average speed and driving time) by press-ing and holding the
RESET button on the
left-hand steering wheel lever. Tapping the RESET button only resets the
distance driven.
The TA trip odometer can not be manually reset. It resets automatically if the vehicle isnot used for four hours or more.
Related information
Trip computer (p. 85)
Displaying trip statistics in the center display Trip computer statistics can be displayed graphically in the center display, providing anoverview that facilitates more fuel-efficientdriving.
Open the Driver
performance app in the App
view to display trip statistics. Each bar in the graph repre- sents a driving distance of 1kilometers, 10 kilometers or
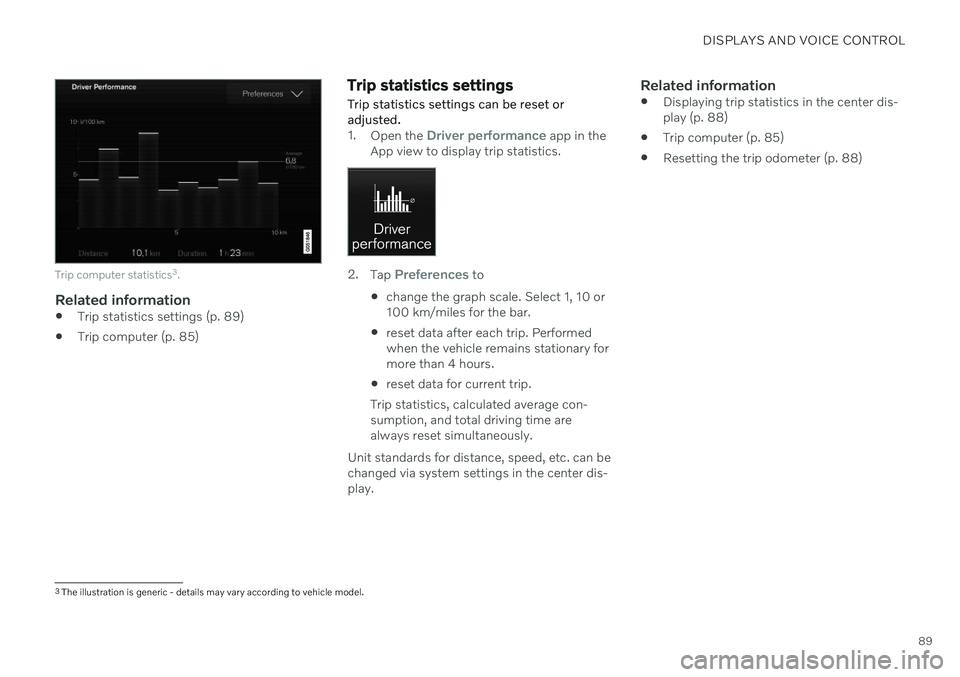
100 kilometers (or miles). The bars are addedfrom the right as you drive. The bar at the farright shows the data for the current trip. Average fuel consumption and total driving time are calculated from the most recent resetof the trip statistics.
Page 91 of 643
DISPLAYS AND VOICE CONTROL
89
Trip computer statistics3
.
Related information
Trip statistics settings (p. 89)
Trip computer (p. 85)
Trip statistics settings Trip statistics settings can be reset or adjusted.
1.
Open the Driver performance app in the
App view to display trip statistics.
2. Tap Preferences to
change the graph scale. Select 1, 10 or 100 km/miles for the bar.
reset data after each trip. Performedwhen the vehicle remains stationary formore than 4 hours.
reset data for current trip.
Trip statistics, calculated average con-sumption, and total driving time arealways reset simultaneously.
Unit standards for distance, speed, etc. can bechanged via system settings in the center dis-play.
Related information
Displaying trip statistics in the center dis-play (p. 88)
Trip computer (p. 85)
Resetting the trip odometer (p. 88)
3
The illustration is generic - details may vary according to vehicle model.
Page 92 of 643
DISPLAYS AND VOICE CONTROL
* Option/accessory.
90
Date and time The clock is displayed in both the instrument panel and the center display.
Location of clock
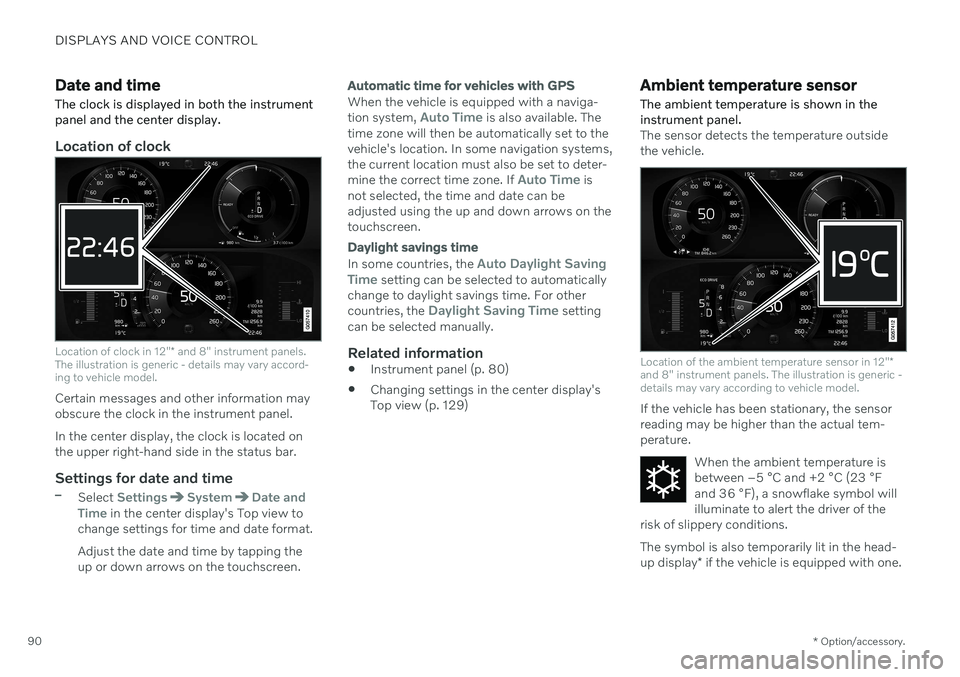
Location of clock in 12" * and 8" instrument panels.
The illustration is generic - details may vary accord- ing to vehicle model.
Certain messages and other information may obscure the clock in the instrument panel. In the center display, the clock is located on the upper right-hand side in the status bar.
Settings for date and time–Select SettingsSystemDate and
Time in the center display's Top view to
change settings for time and date format. Adjust the date and time by tapping the up or down arrows on the touchscreen.
Automatic time for vehicles with GPS
When the vehicle is equipped with a naviga- tion system, Auto Time is also available. The
time zone will then be automatically set to the vehicle's location. In some navigation systems,the current location must also be set to deter- mine the correct time zone. If
Auto Time is
not selected, the time and date can be adjusted using the up and down arrows on thetouchscreen.
Daylight savings time
In some countries, the Auto Daylight Saving
Time setting can be selected to automatically
change to daylight savings time. For other countries, the
Daylight Saving Time setting
can be selected manually.
Related information
Instrument panel (p. 80)
Changing settings in the center display's Top view (p. 129)
Ambient temperature sensor
The ambient temperature is shown in the instrument panel.
The sensor detects the temperature outside the vehicle.
Location of the ambient temperature sensor in 12" *
and 8" instrument panels. The illustration is generic - details may vary according to vehicle model.
If the vehicle has been stationary, the sensor reading may be higher than the actual tem-perature.
When the ambient temperature isbetween –5 °C and +2 °C (23 °F
and 36 °F), a snowflake symbol will
illuminate to alert the driver of the
risk of slippery conditions. The symbol is also temporarily lit in the head- up display * if the vehicle is equipped with one.
Page 123 of 643
DISPLAYS AND VOICE CONTROL
}}
121
Moving apps and buttons in the center display The apps and buttons for vehicle functions can be moved and organized in the App andFunction views.
1. Swipe from right to left12
to access App
view or swipe from left to right 12
to access
Function view.
2. Press and hold an app or button. > The app or button will change size andbecome slightly transparent. It can then be moved.
3. Drag the app or button to an available position in the view.
A maximum of 48 rows can be used to posi-tion apps or buttons. To move an app or but-ton outside the visible view, drag it to the bot-tom of the view. New rows will be added andthe app or button can be placed in one of these. Apps or buttons placed below the view's nor- mal display will not be visible on the screen. Swipe the screen to scroll up or down in the view to display information outside the view.
NOTE
Hide the apps that are rarely or never used by moving them far down, outside of thevisible view. This makes it easier to find theapps used more frequently.
NOTE
Apps and vehicle function buttons cannot be situated at spots already in use.
Related information
Function view in the center display (p. 119)
Apps (p. 436)
Handling the center display (p. 109)
Symbols in the center display status bar
Overview of symbols displayed in the center display status bar.
The status bar shows current vehicle activities and in certain cases, also their status. Due tothe limited space in the status bar, not all sym-bols will be displayed at all times.
Symbol Meaning
Connected to the Internet.
Roaming activated.
Cell phone network signal strength.
Bluetooth device connected.
Bluetooth activated but no device connected.
Information sent to and from GPS.
Connected to Wi-Fi network.
12 Applies for left-hand drive vehicles. For right-hand drive vehicles, swipe in the other direction.
Page 127 of 643
DISPLAYS AND VOICE CONTROL
125
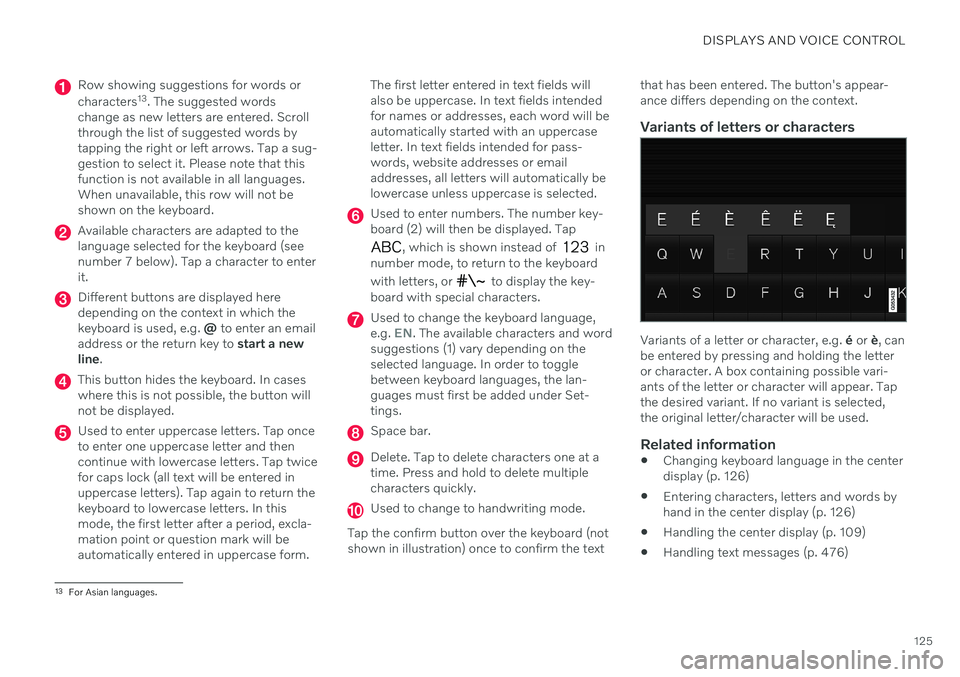
Row showing suggestions for words or characters13
. The suggested words
change as new letters are entered. Scroll through the list of suggested words bytapping the right or left arrows. Tap a sug-gestion to select it. Please note that thisfunction is not available in all languages.When unavailable, this row will not beshown on the keyboard.
Available characters are adapted to the language selected for the keyboard (seenumber 7 below). Tap a character to enterit.
Different buttons are displayed here depending on the context in which thekeyboard is used, e.g. @ to enter an email
address or the return key to start a new
line .
This button hides the keyboard. In cases where this is not possible, the button willnot be displayed.
Used to enter uppercase letters. Tap once to enter one uppercase letter and thencontinue with lowercase letters. Tap twicefor caps lock (all text will be entered inuppercase letters). Tap again to return thekeyboard to lowercase letters. In thismode, the first letter after a period, excla-mation point or question mark will beautomatically entered in uppercase form. The first letter entered in text fields willalso be uppercase. In text fields intendedfor names or addresses, each word will beautomatically started with an uppercaseletter. In text fields intended for pass-words, website addresses or emailaddresses, all letters will automatically belowercase unless uppercase is selected.
Used to enter numbers. The number key- board (2) will then be displayed. Tap
, which is shown instead of in
number mode, to return to the keyboard with letters, or
to display the key-
board with special characters.
Used to change the keyboard language, e.g. EN. The available characters and word
suggestions (1) vary depending on the selected language. In order to togglebetween keyboard languages, the lan-guages must first be added under Set-tings.
Space bar.
Delete. Tap to delete characters one at a time. Press and hold to delete multiplecharacters quickly.
Used to change to handwriting mode.
Tap the confirm button over the keyboard (not shown in illustration) once to confirm the text that has been entered. The button's appear- ance differs depending on the context.
Variants of letters or characters
Variants of a letter or character, e.g.
é or è, can
be entered by pressing and holding the letter or character. A box containing possible vari-ants of the letter or character will appear. Tapthe desired variant. If no variant is selected,the original letter/character will be used.
Related information
Changing keyboard language in the centerdisplay (p. 126)
Entering characters, letters and words byhand in the center display (p. 126)
Handling the center display (p. 109)
Handling text messages (p. 476)
13
For Asian languages.
Page 129 of 643
DISPLAYS AND VOICE CONTROL
}}
127
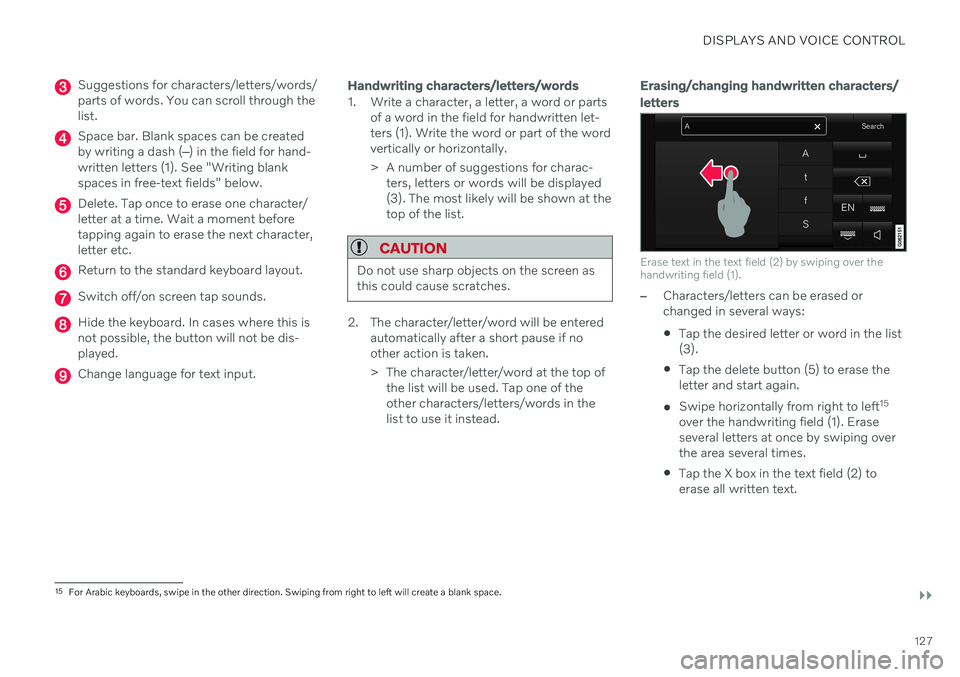
Suggestions for characters/letters/words/ parts of words. You can scroll through thelist.
Space bar. Blank spaces can be created by writing a dash (‒) in the field for hand-
written letters (1). See "Writing blankspaces in free-text fields" below.
Delete. Tap once to erase one character/ letter at a time. Wait a moment beforetapping again to erase the next character,letter etc.
Return to the standard keyboard layout.
Switch off/on screen tap sounds.
Hide the keyboard. In cases where this is not possible, the button will not be dis-played.
Change language for text input.
Handwriting characters/letters/words
1. Write a character, a letter, a word or parts of a word in the field for handwritten let- ters (1). Write the word or part of the wordvertically or horizontally.
> A number of suggestions for charac-ters, letters or words will be displayed (3). The most likely will be shown at thetop of the list.
CAUTION
Do not use sharp objects on the screen as this could cause scratches.
2. The character/letter/word will be entered automatically after a short pause if no other action is taken.
> The character/letter/word at the top ofthe list will be used. Tap one of the other characters/letters/words in thelist to use it instead.
Erasing/changing handwritten characters/ letters
Erase text in the text field (2) by swiping over the handwriting field (1).
–Characters/letters can be erased or changed in several ways: Tap the desired letter or word in the list (3).
Tap the delete button (5) to erase theletter and start again.
Swipe horizontally from right to left 15
over the handwriting field (1). Eraseseveral letters at once by swiping overthe area several times.
Tap the X box in the text field (2) toerase all written text.
15
For Arabic keyboards, swipe in the other direction. Swiping from right to left will create a blank space.