warning lights VOLVO V90 2017 Owners Manual
[x] Cancel search | Manufacturer: VOLVO, Model Year: 2017, Model line: V90, Model: VOLVO V90 2017Pages: 594, PDF Size: 15.07 MB
Page 5 of 594
3
Table for location of i-Size child seats81
Integrated booster cushion *
82
Folding up the integrated booster cushion * 82
Folding down the integrated boostercushion * 84
INSTRUMENTS AND CONTROLS
Instruments and controls, left-hand drive car
86
Instruments and controls, right-handdrive car 87
Driver display 90
Driver display settings 94
Indicator symbols in the driver display 95
Warning symbols in the driver display 97
Outside temperature gauge 98
Clock 99
License agreement for the driver display 99
Application menu in the driver display 105
Using the application menu in thedriver display 105
Messages in the driver display andthe centre display 106
Managing messages in the driverdisplay and the centre display 108
Managing messages saved from thedriver display and centre display 110
Head-up display *
112
Voice recognition 115
Using voice recognition 116
Settings for voice recognition 117
Voice recognition control of the phone 118
Voice recognition control of radioand media 118
Voice recognition control of climate control119
Voice recognition and map navigation 120
Manual front seat 121
Power front seat *
121
Adjusting the power front seat *
122
Using the memory function in the power front seat * 122
Multi-functional front seat *
123
Adjusting functions in the multi-func-tional front seat * 124
Adjusting the passenger seat fromthe driver's seat * 127
Rear seat 128
Adjusting the head restraints in the rear seat 128
Lowering the backrests in the rear seat 130
Steering wheel 131
Adjusting the steering wheel 132
Headlamp control 134
Headlamp levelling 135
Position lamps 136
Daytime running lights 137
Dipped beam 137
Activating/deactivating main beam 138
Active bending lights *
141
Page 6 of 594

4
Adapting the beam pattern from the headlamps141
Front fog lamps/cornering lights *
142
Rear fog lamp 142
Brake lights 143
Hazard warning flashers 143
Using direction indicators 144
Passenger compartment lighting 145
Home safe light duration 148
Approach light duration 148
Using windscreen wipers 148
Activating/deactivating the rain sensor 149
Windscreen and headlamp washers 150
Rear window wiper and washer 151
Power windows 151
Operating power windows 152
Using the sun blind *
153
Adjusting the door mirrors 153
Interior rearview mirror 155
Compass *
156
Calibrating the compass *
157
Panorama roof *
158
Operating the panorama roof *
159
HomeLink ®
* 162
Programming HomeLink®
* 163
Trip computer 165
Show trip data in the driver display 166
Show trip statistics in the centre display 168
Settings view 169
Categories in the settings view 170
Changing system settings in the set- tings view 172
Resetting settings in the settings view 173
Driver profiles 174
Selecting driver profile 174
Editing a driver profile 175
Linking remote control key to driverprofile 176
Importing/exporting a driver profilefrom/to USB 177
Changing settings for apps 178
Resetting user data for change ofownership 179
CLIMATE CONTROL
Climate control
182
Climate control - sensors 183
Perceived temperature 183
Air quality 184
Passenger compartment filter 185
Clean Zone Interior Package *
185
Interior Air Quality System *
185
Climate controls 186
Climate controls in the centre display 187
Climate controls at the rear of the tunnel console * 188
Auto-regulating the climate 189
Activating/deactivating air conditioning 190
Regulating the temperature 190
Regulating the fan level 193
Activating/deactivating defrost of windows and door mirrors 194
Activating/deactivating air recirculation 196
Air distribution 197
Changing the air distribution 198
Opening/closing and aiming the air vents 199
Table of air distribution options 201
Activating/deactivating heating of the seats * 203
Activating/deactivating ventilation ofthe seats * 204
Page 88 of 594
INSTRUMENTS AND CONTROLS
* Option/accessory.
86
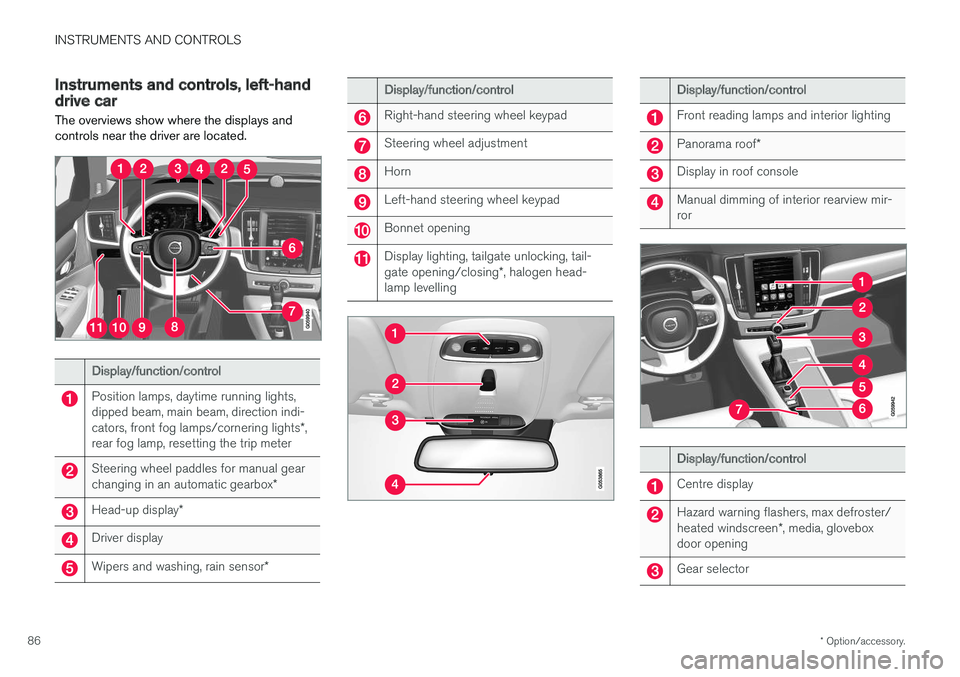
Instruments and controls, left-hand drive car The overviews show where the displays and controls near the driver are located.
Display/function/control
Position lamps, daytime running lights, dipped beam, main beam, direction indi- cators, front fog lamps/cornering lights *,
rear fog lamp, resetting the trip meter
Steering wheel paddles for manual gear changing in an automatic gearbox *
Head-up display*
Driver display
Wipers and washing, rain sensor *
Display/function/control
Right-hand steering wheel keypad
Steering wheel adjustment
Horn
Left-hand steering wheel keypad
Bonnet opening
Display lighting, tailgate unlocking, tail- gate opening/closing*, halogen head-
lamp levelling
Display/function/control
Front reading lamps and interior lighting
Panorama roof *
Display in roof console
Manual dimming of interior rearview mir- ror
Display/function/control
Centre display
Hazard warning flashers, max defroster/ heated windscreen *, media, glovebox
door opening
Gear selector
Page 98 of 594
||
INSTRUMENTS AND CONTROLS
96
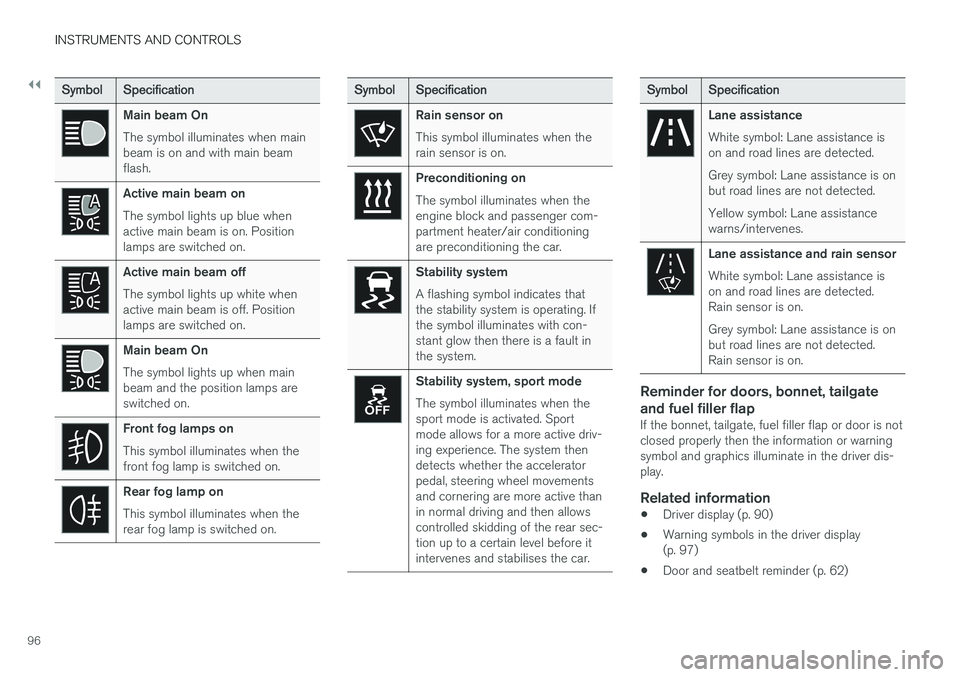
SymbolSpecification
Main beam On The symbol illuminates when main beam is on and with main beamflash.
Active main beam on The symbol lights up blue when active main beam is on. Positionlamps are switched on.
Active main beam off The symbol lights up white when active main beam is off. Positionlamps are switched on.
Main beam On The symbol lights up when main beam and the position lamps areswitched on.
Front fog lamps on This symbol illuminates when the front fog lamp is switched on.
Rear fog lamp on This symbol illuminates when the rear fog lamp is switched on.
SymbolSpecification
Rain sensor on This symbol illuminates when the rain sensor is on.
Preconditioning on The symbol illuminates when the engine block and passenger com-partment heater/air conditioningare preconditioning the car.
Stability system A flashing symbol indicates that the stability system is operating. Ifthe symbol illuminates with con-stant glow then there is a fault inthe system.
Stability system, sport mode The symbol illuminates when the sport mode is activated. Sportmode allows for a more active driv-ing experience. The system thendetects whether the acceleratorpedal, steering wheel movementsand cornering are more active thanin normal driving and then allowscontrolled skidding of the rear sec-tion up to a certain level before itintervenes and stabilises the car.
Symbol Specification
Lane assistance White symbol: Lane assistance is on and road lines are detected. Grey symbol: Lane assistance is on but road lines are not detected. Yellow symbol: Lane assistance warns/intervenes.
Lane assistance and rain sensor White symbol: Lane assistance is on and road lines are detected.Rain sensor is on. Grey symbol: Lane assistance is on but road lines are not detected.Rain sensor is on.
Reminder for doors, bonnet, tailgate and fuel filler flap
If the bonnet, tailgate, fuel filler flap or door is not closed properly then the information or warningsymbol and graphics illuminate in the driver dis-play.
Related information
•Driver display (p. 90)
• Warning symbols in the driver display(p. 97)
• Door and seatbelt reminder (p. 62)
Page 139 of 594
INSTRUMENTS AND CONTROLS
}}
* Option/accessory.137
Daytime running lights The daytime running lights are switched on when the rotating ring on the stalk switch is in position
, or as well as when
the car's electrical system is in ignition position II
or when the car is running. For the
posi-
tion, this only applies in daylight. In weak daylight or darkness, dipped beam is switched oninstead.
Daytime running lights during the day.
DRL
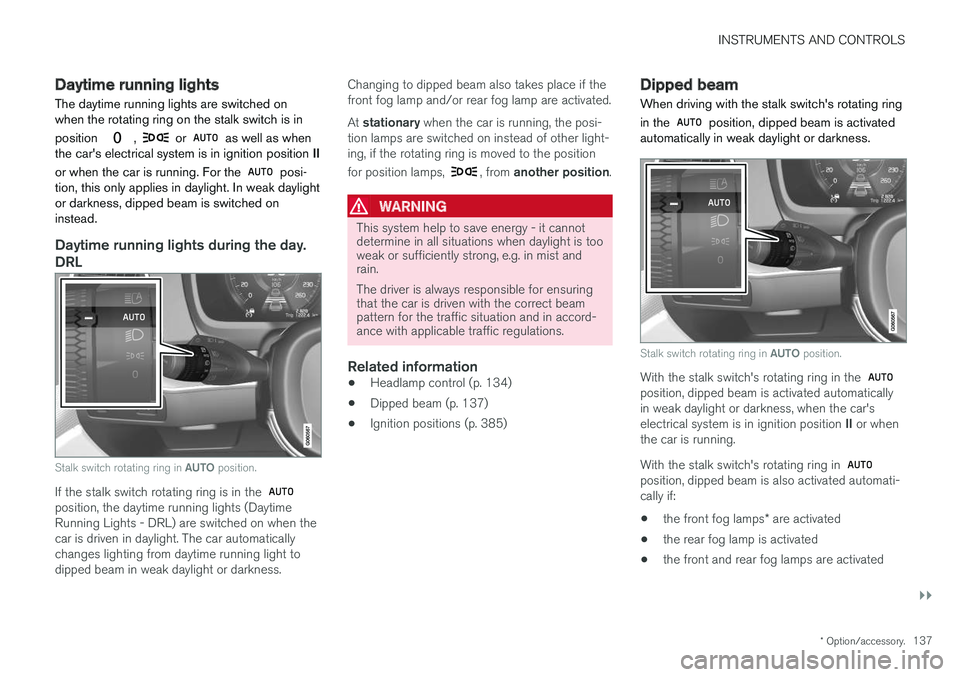
Stalk switch rotating ring in AUTO position.
If the stalk switch rotating ring is in the position, the daytime running lights (Daytime Running Lights - DRL) are switched on when thecar is driven in daylight. The car automaticallychanges lighting from daytime running light todipped beam in weak daylight or darkness. Changing to dipped beam also takes place if thefront fog lamp and/or rear fog lamp are activated. At
stationary when the car is running, the posi-
tion lamps are switched on instead of other light- ing, if the rotating ring is moved to the position for position lamps,
, from another position .
WARNING
This system help to save energy - it cannot determine in all situations when daylight is tooweak or sufficiently strong, e.g. in mist andrain. The driver is always responsible for ensuring that the car is driven with the correct beampattern for the traffic situation and in accord-ance with applicable traffic regulations.
Related information
•Headlamp control (p. 134)
• Dipped beam (p. 137)
• Ignition positions (p. 385)
Dipped beam
When driving with the stalk switch's rotating ring in the
position, dipped beam is activated
automatically in weak daylight or darkness.
Stalk switch rotating ring in AUTO position.
With the stalk switch's rotating ring in the position, dipped beam is activated automatically in weak daylight or darkness, when the car's electrical system is in ignition position II or when
the car is running. With the stalk switch's rotating ring in
position, dipped beam is also activated automati- cally if:
• the front fog lamps
* are activated
• the rear fog lamp is activated
• the front and rear fog lamps are activated
Page 145 of 594
INSTRUMENTS AND CONTROLS
}}
* Option/accessory.143
Press the on/off button. The
symbol in the
driver display illuminates when the rear fog lamp is switched on. The rear fog lamp is switched off automatically when:
• the ignition knob is turned to
STOP or when
the stalk switch's rotating ring is set in posi- tion
• the stalk switch's rotating ring is in position
and the front fog lamps are switched
off.
NOTE
Regulations on the use of rear fog lamps vary from country to country.
Related information
• Headlamp control (p. 134)
• Front fog lamps/cornering lights
* (p. 142)
• Ignition positions (p. 385)
Brake lights The brake light automatically comes on during braking.
The brake light is switched on when the brake pedal is depressed. In addition, it is switched onwhen one of driver support systems Adaptive cruise control
*, City Safety or Rear Collision
Warning brakes the car.
Related information
• Emergency brake lights (p. 408)
• Adaptive cruise control
* (p. 290)
• City Safety (p. 330)
• Rear Collision Warning (p. 340)
Hazard warning flashers
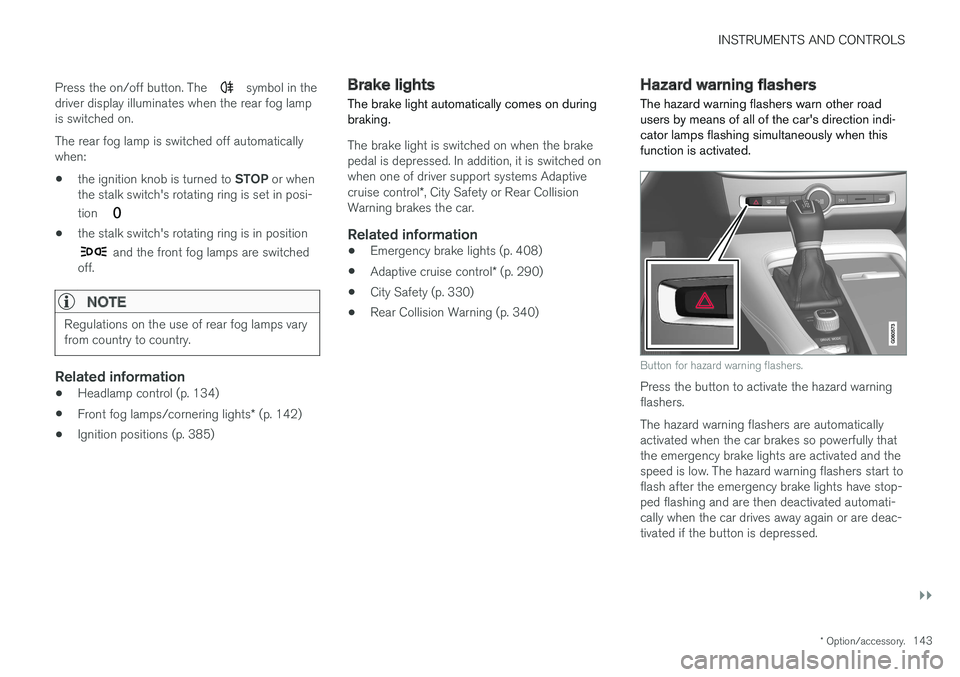
The hazard warning flashers warn other road users by means of all of the car's direction indi-cator lamps flashing simultaneously when thisfunction is activated.
Button for hazard warning flashers.
Press the button to activate the hazard warning flashers. The hazard warning flashers are automatically activated when the car brakes so powerfully thatthe emergency brake lights are activated and thespeed is low. The hazard warning flashers start toflash after the emergency brake lights have stop-ped flashing and are then deactivated automati-cally when the car drives away again or are deac-tivated if the button is depressed.
Page 146 of 594
||
INSTRUMENTS AND CONTROLS
144
Related information
•Using direction indicators (p. 144)
• Emergency brake lights (p. 408)
Using direction indicators
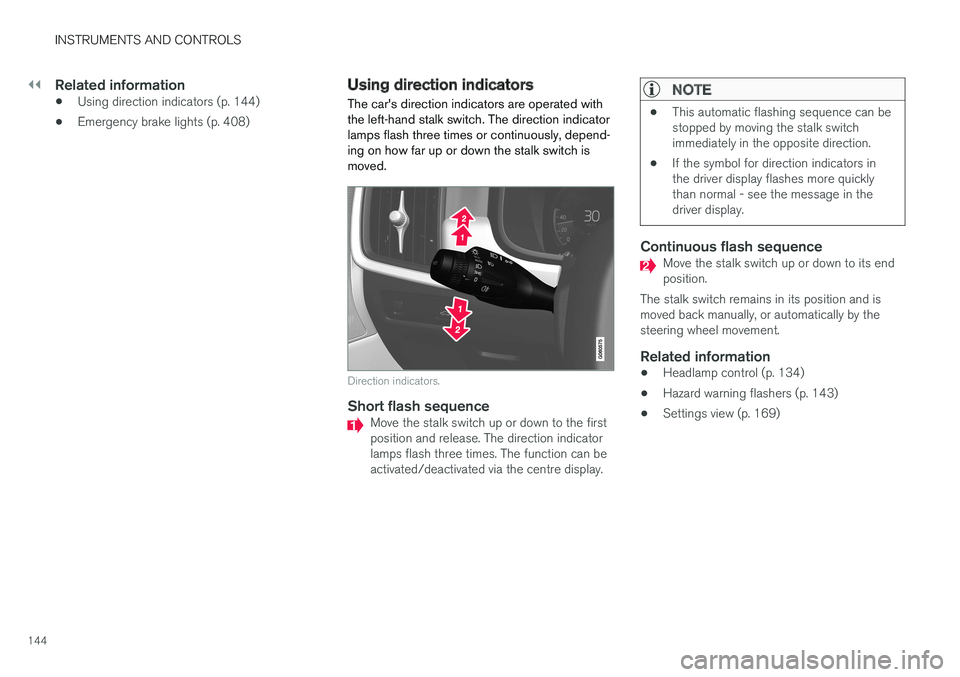
The car's direction indicators are operated with the left-hand stalk switch. The direction indicatorlamps flash three times or continuously, depend-ing on how far up or down the stalk switch ismoved.
Direction indicators.
Short flash sequenceMove the stalk switch up or down to the first position and release. The direction indicatorlamps flash three times. The function can beactivated/deactivated via the centre display.
NOTE
• This automatic flashing sequence can be stopped by moving the stalk switchimmediately in the opposite direction.
• If the symbol for direction indicators inthe driver display flashes more quicklythan normal - see the message in thedriver display.
Continuous flash sequenceMove the stalk switch up or down to its end position.
The stalk switch remains in its position and ismoved back manually, or automatically by thesteering wheel movement.
Related information
• Headlamp control (p. 134)
• Hazard warning flashers (p. 143)
• Settings view (p. 169)
Page 301 of 594
DRIVER SUPPORT
}}
* Option/accessory.299
–Activate the direction indicator. Use the left direction indicator in a car with the steering wheel on the left, or the rightdirection indicator in a car with the steeringwheel on the right.
> Overtaking assistance is started.
LimitationsWhen using Overtaking Assistance the driver should be prepared for sudden changes in condi-tions. In some conditions Overtaking Assistancecan cause unwanted acceleration. Some situations should be avoided for this rea- son. Examples of such situations are:
• the car is approaching an exit road in orderto turn off in the same direction that is nor-mally used for overtaking
• the vehicle in front slows before your car hasentered the overtaking lane
• traffic in the overtaking lane is slowing
• a car designed for right-hand traffic is beingdriven in a country with left-hand traffic (orvice versa).
Situations of this kind can be avoided by tempo-rarily setting ACC or Pilot Assist in standby mode.
Related information
• Pilot Assist
* (p. 304)
• Adaptive cruise control
* (p. 290)
Change of target and automatic braking with the Adaptive CruiseControl
In combination with automatic gearbox, the adaptive cruise control (Adaptive Cruise Control- ACC ) has functionality for change of targetand braking at certain speeds.
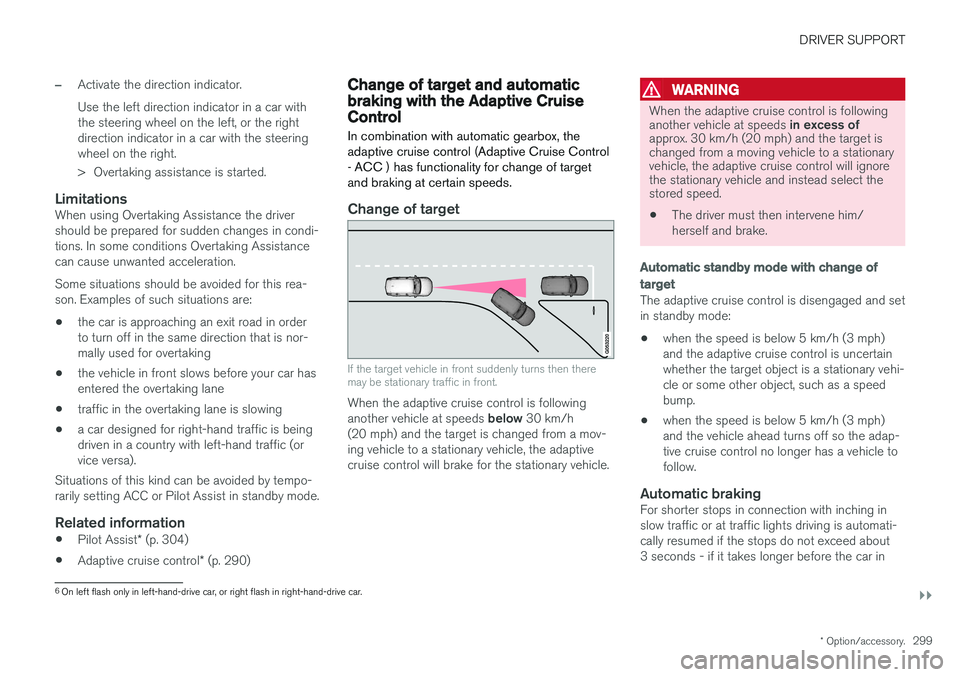
Change of target
If the target vehicle in front suddenly turns then there may be stationary traffic in front.
When the adaptive cruise control is following another vehicle at speeds below 30 km/h
(20 mph) and the target is changed from a mov- ing vehicle to a stationary vehicle, the adaptivecruise control will brake for the stationary vehicle.
WARNING
When the adaptive cruise control is following another vehicle at speeds in excess of
approx. 30 km/h (20 mph) and the target is changed from a moving vehicle to a stationaryvehicle, the adaptive cruise control will ignorethe stationary vehicle and instead select thestored speed.
• The driver must then intervene him/ herself and brake.
Automatic standby mode with change of target
The adaptive cruise control is disengaged and set in standby mode: • when the speed is below 5 km/h (3 mph) and the adaptive cruise control is uncertainwhether the target object is a stationary vehi-cle or some other object, such as a speedbump.
• when the speed is below 5 km/h (3 mph)and the vehicle ahead turns off so the adap-tive cruise control no longer has a vehicle tofollow.
Automatic brakingFor shorter stops in connection with inching inslow traffic or at traffic lights driving is automati-cally resumed if the stops do not exceed about3 seconds - if it takes longer before the car in
6
On left flash only in left-hand-drive car, or right flash in right-hand-drive car.
Page 315 of 594
DRIVER SUPPORT
}}
* Option/accessory.313
Change of target and automatic braking with Pilot Assist *
In combination with automatic gearbox, Pilot Assist has functionality for change of target and braking at certain speeds.
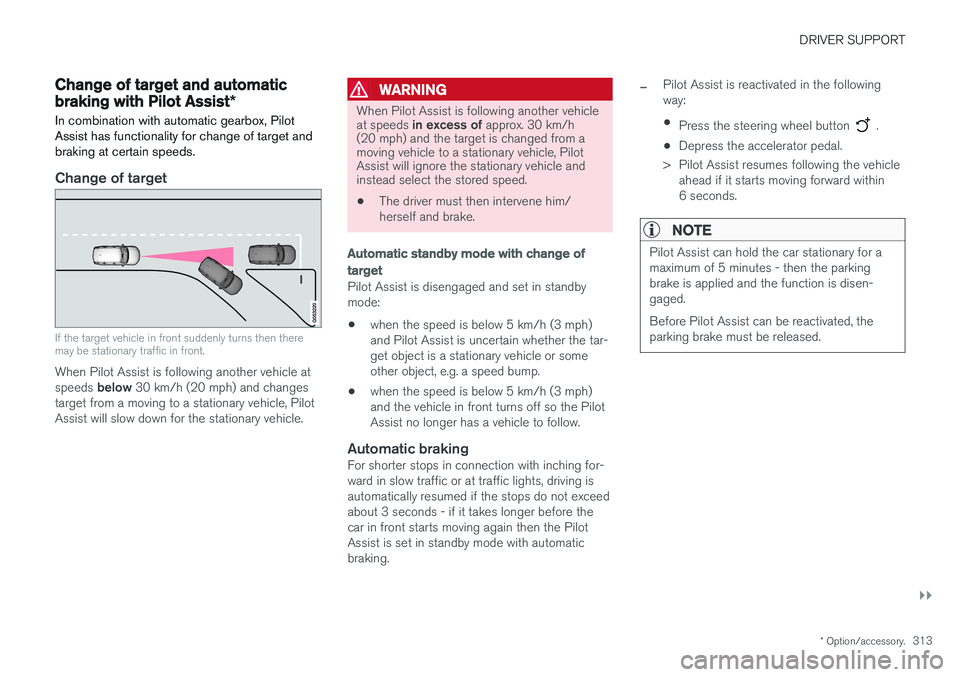
Change of target
If the target vehicle in front suddenly turns then there may be stationary traffic in front.
When Pilot Assist is following another vehicle at speeds below 30 km/h (20 mph) and changes
target from a moving to a stationary vehicle, Pilot Assist will slow down for the stationary vehicle.
WARNING
When Pilot Assist is following another vehicle at speeds in excess of approx. 30 km/h
(20 mph) and the target is changed from a moving vehicle to a stationary vehicle, PilotAssist will ignore the stationary vehicle andinstead select the stored speed.
• The driver must then intervene him/ herself and brake.
Automatic standby mode with change of target
Pilot Assist is disengaged and set in standby mode: •when the speed is below 5 km/h (3 mph) and Pilot Assist is uncertain whether the tar-get object is a stationary vehicle or someother object, e.g. a speed bump.
• when the speed is below 5 km/h (3 mph)and the vehicle in front turns off so the PilotAssist no longer has a vehicle to follow.
Automatic brakingFor shorter stops in connection with inching for-ward in slow traffic or at traffic lights, driving isautomatically resumed if the stops do not exceedabout 3 seconds - if it takes longer before thecar in front starts moving again then the PilotAssist is set in standby mode with automaticbraking.
–Pilot Assist is reactivated in the following way:
• Press the steering wheel button
.
• Depress the accelerator pedal.
> Pilot Assist resumes following the vehicle ahead if it starts moving forward within 6 seconds.
NOTE
Pilot Assist can hold the car stationary for a maximum of 5 minutes - then the parkingbrake is applied and the function is disen-gaged. Before Pilot Assist can be reactivated, the parking brake must be released.
Page 334 of 594
||
DRIVER SUPPORT
332
Auto Brake
The automatic brake function is activated last. If in this situation the driver has not yet started to take evasive action and the risk of collision isimminent then the automatic braking function isdeployed - this takes place irrespective ofwhether or not the driver brakes. Braking thentakes place with full brake force in order toreduce collision speed, or with limited brake forceif it is sufficient to avoid a collision. In connection with automatic braking the seatbelt tensioner may also be activated. For more infor-mation see the "Seatbelt tensioner" section. In some situations, the action of Auto-brake may begin with light braking and then progress to fullbrake action. When City Safety has prevented a collision with a stationary object, the car remains stationary inanticipation of positive action by the driver. If thecar has been braked to avoid collision with aslower vehicle in front, its speed is reduced tomatch that of the vehicle in front.
NOTE
On cars with manual gearbox, the engine stops when the Auto-brake function has stop-ped the car, unless the driver has managed todepress the clutch pedal beforehand.
The driver can always interrupt a braking inter- vention by firmly depressing the acceleratorpedal.
NOTE
When City Safety™ brakes, the brake lights
come on.
When City Safety is activated and brakes the vehicle, the driver display shows a text messageto the effect that the function is/has been active.
WARNING
City Safety must not be used as an excuse for the driver to change his/her driving style. Ifthe driver relies solely on City Safety to do thebraking, there might be a risk of a collisionsooner or later.
Related information
• Setting the warning distance for City Safety (p. 332)
• Detection of obstacles with City Safety
™
(p. 333)
• City Safety when evasive manoeuvres areprevented (p. 336)
• City Safety in cross traffic (p. 335)
• Limitations of City Safety (p. 337)
• Messages for City Safety (p. 339)
• Seatbelt tensioner (p. 59)
Setting the warning distance for City Safety
City Safety is always activated, but it is possible to select the warning distance for the function.
NOTE
The City Safety function cannot be deacti- vated. It is activated automatically when theengine/electric operation is started andremains switched on until the engine/electricoperation is switched off.
The warning distance determines the sensitivity of the system and regulates the distance atwhich the visual, acoustic and haptic warningsshall be triggered. 1. Tap on
Settings in top view in the centre
display.
2. Press
My CarIntelliSafe.
3. Under
City Safety Warning, select Late,Normal or Early to set the desired warning
distance.
If the
Early setting produces too many warnings,
which could be perceived as irritating in certain situations, then use the
Normal or Late warning
distance. If warnings are perceived as being too frequent or disturbing then the warning distance can bereduced. This would lead to the system warning