VOLVO V90 CROSS COUNTRY 2017 Owner´s Manual
Manufacturer: VOLVO, Model Year: 2017, Model line: V90 CROSS COUNTRY, Model: VOLVO V90 CROSS COUNTRY 2017Pages: 552, PDF Size: 13.6 MB
Page 171 of 552
INSTRUMENTS AND CONTROLS
}}
* Option/accessory.169
Related information
•Multifunctional front seats
* (p. 165)
Rear seats
The rear seat has three seating positions and the backrests can be folded down separately. Thisfeature may be optional on certain models.
Related information
• Adjusting the second row head restraints (p. 169)
• Folding down the rear seat backrests(p. 171)
• Turning seat heating
* on and off (p. 194)
Adjusting the second row head restraints
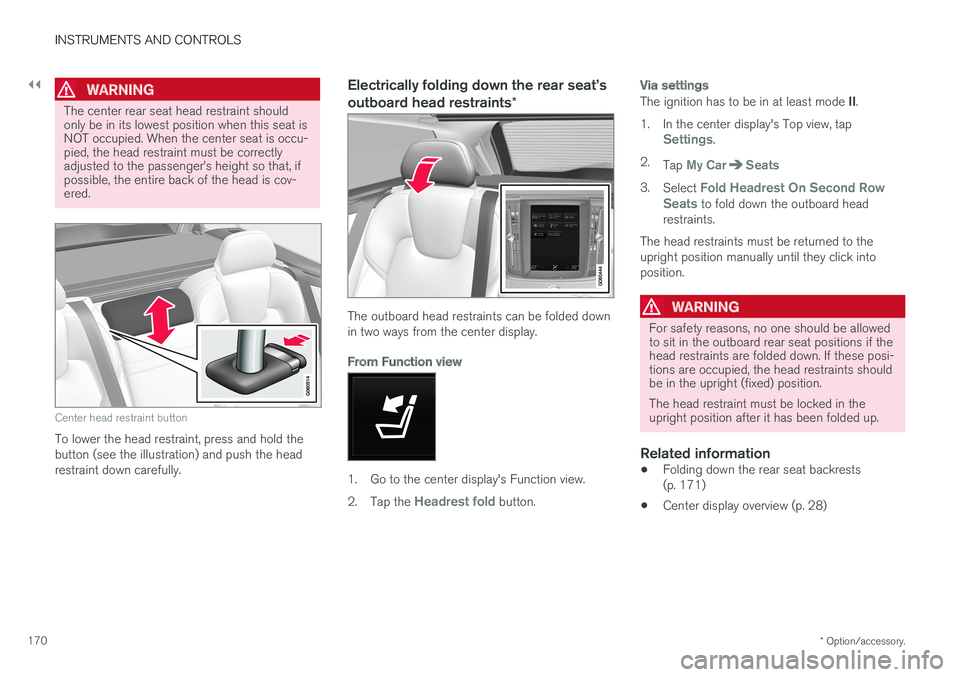
The center head restraint in the second row of seats can be adjusted to suit the height of theseat's occupant. The outboard head restraints can be folded down * for a better rear view.
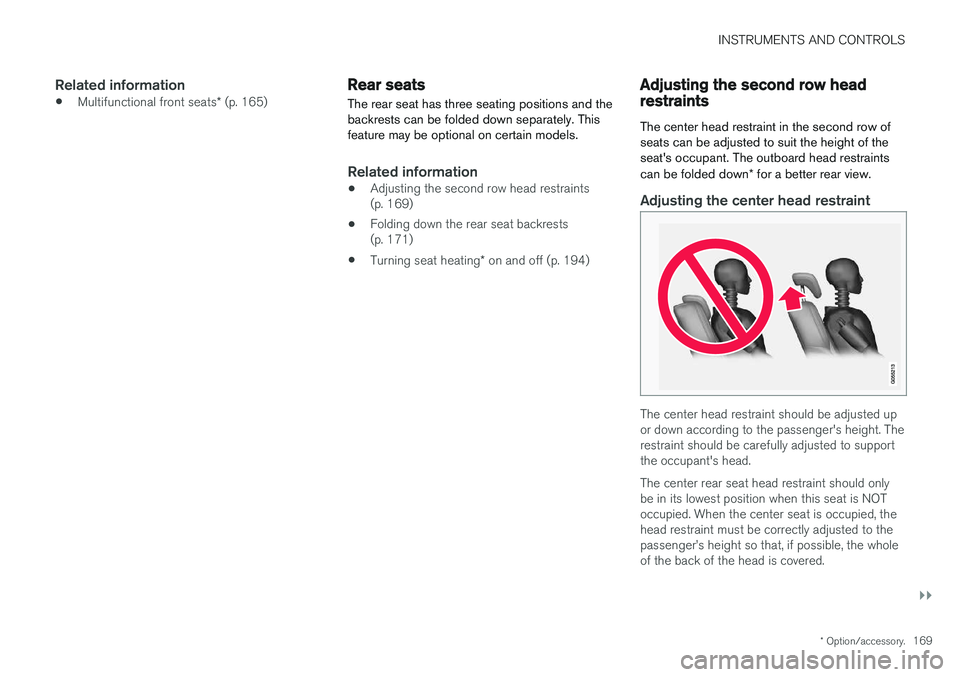
Adjusting the center head restraint
The center head restraint should be adjusted up or down according to the passenger's height. Therestraint should be carefully adjusted to supportthe occupant's head. The center rear seat head restraint should only be in its lowest position when this seat is NOToccupied. When the center seat is occupied, thehead restraint must be correctly adjusted to thepassenger
Page 172 of 552
||
INSTRUMENTS AND CONTROLS
* Option/accessory.
170
WARNING
The center rear seat head restraint should only be in its lowest position when this seat isNOT occupied. When the center seat is occu-pied, the head restraint must be correctlyadjusted to the passenger
Page 173 of 552
INSTRUMENTS AND CONTROLS
}}
* Option/accessory.171
Folding down the rear seat backrests
The rear seat backrests are divided into two sec- tions that can be folded down together or sepa-rately.
CAUTION
To help avoid damage to the upholstery, there should be no objects on the rear seat and theseat belt should not be buckled when thebackrest is folded down.
CAUTION
• The integrated booster cushions
* should
be folded down (in the stowed position) before the backrest(s) are folded down
• The center armrest
* should be folded up
into the rear seat backrest before thatsection of the backrest is folded down
• It may be necessary to move the frontseats forward before the rear seat back-rests can be folded down
WARNING
•
When one or more sections of the back- rest is returned to the upright position,check that it is properly locked in place bypushing and pulling it.
• Return the outboard head restraints tothe upright position.
• Long loads should always be securelyanchored to help avoid injury in the eventof a sudden stop.
• Always turn the engine off and apply theparking brake when loading/unloadingthe vehicle.
• Place the transmission in the Park (
P)
position to help prevent inadvertentmovement of the gear selector.
Folding down a section of the backrest
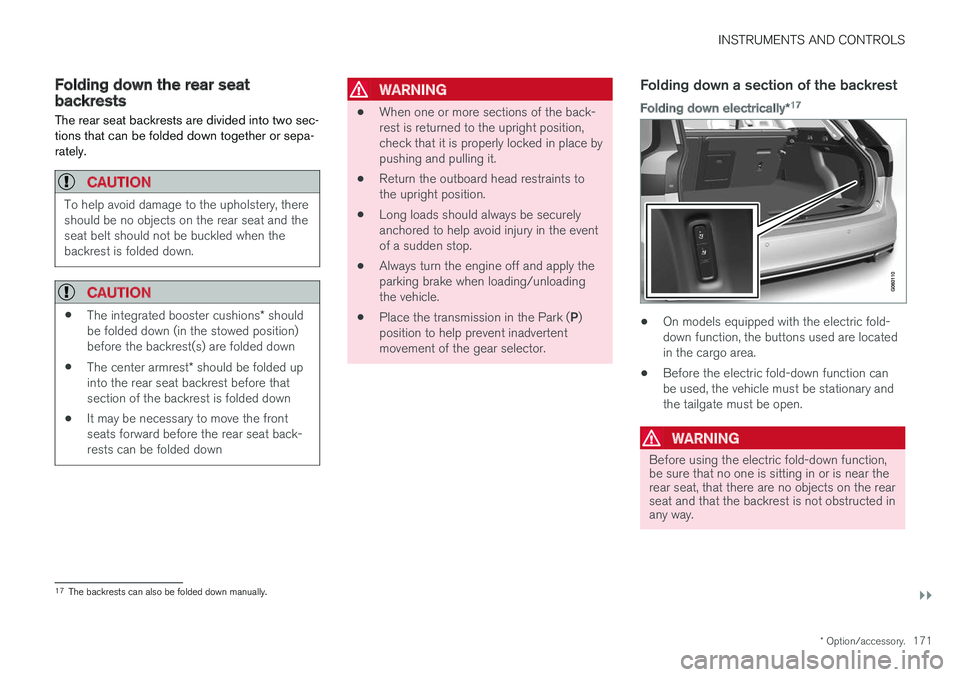
Folding down electrically *17
•
On models equipped with the electric fold- down function, the buttons used are locatedin the cargo area.
• Before the electric fold-down function canbe used, the vehicle must be stationary andthe tailgate must be open.
WARNING
Before using the electric fold-down function, be sure that no one is sitting in or is near therear seat, that there are no objects on the rearseat and that the backrest is not obstructed inany way.
17
The backrests can also be folded down manually.
Page 174 of 552
||
INSTRUMENTS AND CONTROLS
1721. If necessary, manually press down the center
position's head restraint.
2. Press and hold one of the buttons marked (L )eft or ( R)ight to fold down the respective
sections of the backrest.
3. The backrest will fold down automatically. The head restraint will fold down automati- cally.
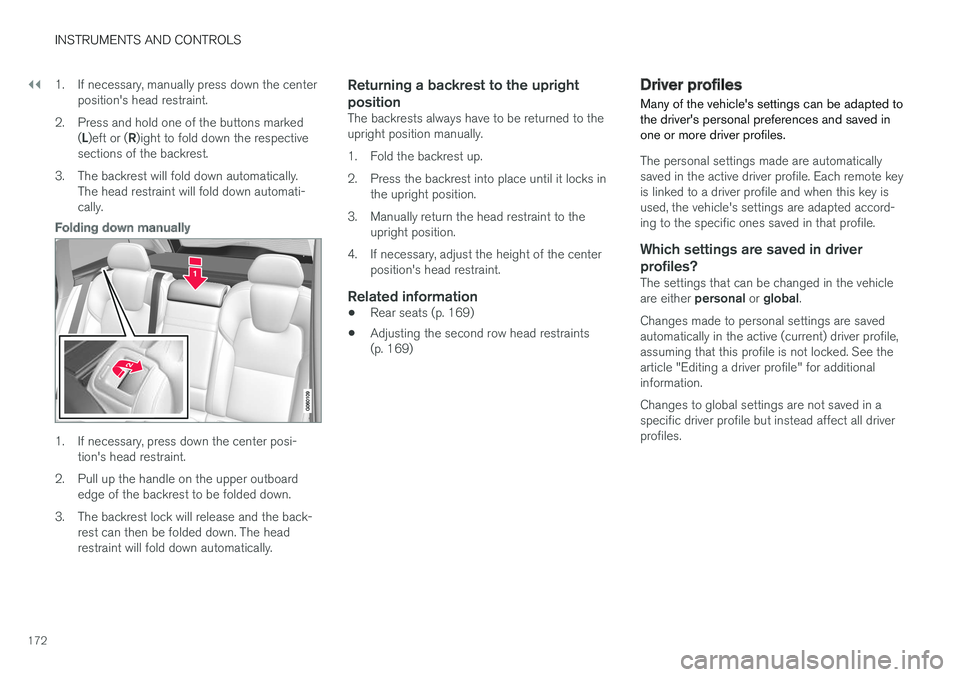
Folding down manually
1. If necessary, press down the center posi-tion's head restraint.
2. Pull up the handle on the upper outboard edge of the backrest to be folded down.
3. The backrest lock will release and the back- rest can then be folded down. The head restraint will fold down automatically.
Returning a backrest to the upright position
The backrests always have to be returned to the upright position manually.
1. Fold the backrest up.
2. Press the backrest into place until it locks inthe upright position.
3. Manually return the head restraint to the upright position.
4. If necessary, adjust the height of the center position's head restraint.
Related information
• Rear seats (p. 169)
• Adjusting the second row head restraints (p. 169)
Driver profiles
Many of the vehicle's settings can be adapted to the driver's personal preferences and saved inone or more driver profiles.
The personal settings made are automatically saved in the active driver profile. Each remote keyis linked to a driver profile and when this key isused, the vehicle's settings are adapted accord-ing to the specific ones saved in that profile.
Which settings are saved in driver
profiles?
The settings that can be changed in the vehicle are either personal or global .
Changes made to personal settings are saved automatically in the active (current) driver profile,assuming that this profile is not locked. See thearticle "Editing a driver profile" for additionalinformation. Changes to global settings are not saved in a specific driver profile but instead affect all driverprofiles.
Page 175 of 552
INSTRUMENTS AND CONTROLS
173
Global settings
Global settings and parameters remain the same regardless of which driver profile is currentlyactive. Keyboard layout is an example of a global setting. If driver profile X is used to add additional key-board languages, these languages will also beavailable even if driver profile Y is used. This typeof global change is not specific to a single driverprofile.
Personal settings
If driver profile X has been used to e.g., set the brightness for the center display, driver profile Ywill not be affected by this setting since it is spe-cific (personal) to driver profile X. See also the article "Categories in Settings view" for an overview of global and personal settings.
Related information
•Editing a driver profile (p. 174)
• Categories in Settings view (p. 110)
Selecting a driver profile The most recently selected driver profile will be used automatically the next time the vehicle isstarted. However, a different driver profile can beselected after the vehicle has started.
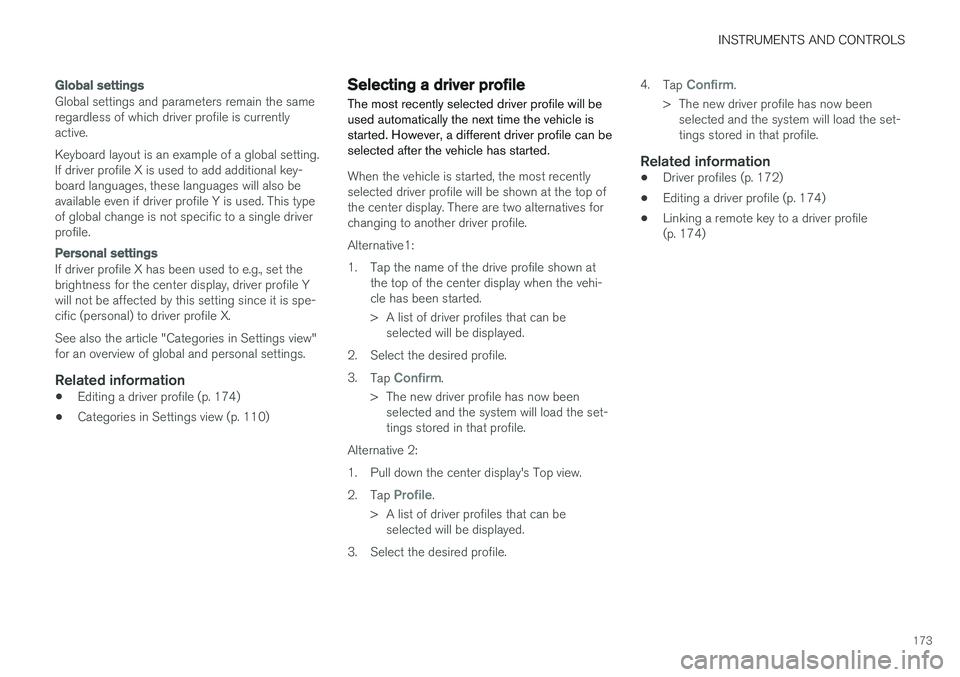
When the vehicle is started, the most recently selected driver profile will be shown at the top ofthe center display. There are two alternatives forchanging to another driver profile. Alternative1:
1. Tap the name of the drive profile shown at
the top of the center display when the vehi- cle has been started.
> A list of driver profiles that can beselected will be displayed.
2. Select the desired profile. 3. Tap
Confirm.
> The new driver profile has now been selected and the system will load the set- tings stored in that profile.
Alternative 2:
1. Pull down the center display's Top view.2. Tap
Profile.
> A list of driver profiles that can be selected will be displayed.
3. Select the desired profile. 4.
Tap
Confirm.
> The new driver profile has now been selected and the system will load the set- tings stored in that profile.
Related information
• Driver profiles (p. 172)
• Editing a driver profile (p. 174)
• Linking a remote key to a driver profile(p. 174)
Page 176 of 552
INSTRUMENTS AND CONTROLS
174
Editing a driver profile
The names of the driver profiles created for the vehicle can be changed.
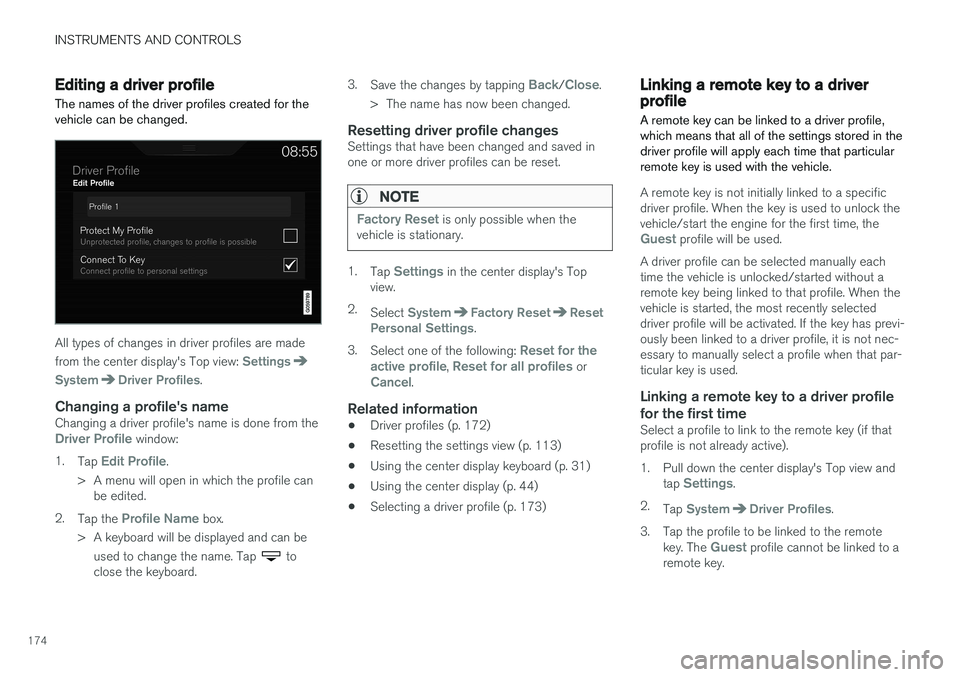
All types of changes in driver profiles are made from the center display's Top view:
Settings
SystemDriver Profiles.
Changing a profile's nameChanging a driver profile's name is done from theDriver Profile window:
1. Tap
Edit Profile.
> A menu will open in which the profile can be edited.
2. Tap the
Profile Name box.
> A keyboard will be displayed and can be used to change the name. Tap
to
close the keyboard. 3.
Save the changes by tapping
Back/Close.
> The name has now been changed.
Resetting driver profile changesSettings that have been changed and saved in one or more driver profiles can be reset.
NOTE
Factory Reset is only possible when the
vehicle is stationary.
1. Tap Settings in the center display's Top
view.
2. Select
SystemFactory ResetReset
Personal Settings.
3. Select one of the following:
Reset for the
active profile, Reset for all profiles orCancel.
Related information
• Driver profiles (p. 172)
• Resetting the settings view (p. 113)
• Using the center display keyboard (p. 31)
• Using the center display (p. 44)
• Selecting a driver profile (p. 173)
Linking a remote key to a driver profile A remote key can be linked to a driver profile, which means that all of the settings stored in thedriver profile will apply each time that particularremote key is used with the vehicle.
A remote key is not initially linked to a specific driver profile. When the key is used to unlock thevehicle/start the engine for the first time, the
Guest profile will be used.
A driver profile can be selected manually each time the vehicle is unlocked/started without aremote key being linked to that profile. When thevehicle is started, the most recently selecteddriver profile will be activated. If the key has previ-ously been linked to a driver profile, it is not nec-essary to manually select a profile when that par-ticular key is used.
Linking a remote key to a driver profile
for the first time
Select a profile to link to the remote key (if thatprofile is not already active).
1. Pull down the center display's Top view and tap
Settings.
2. Tap
SystemDriver Profiles.
3. Tap the profile to be linked to the remote key. The
Guest profile cannot be linked to a
remote key.
Page 177 of 552
INSTRUMENTS AND CONTROLS
}}
175
4. Open Top view in the center display and tap
SettingsSystemDriver ProfilesEdit Profile.
5. Select
Connect key to link the selected pro-
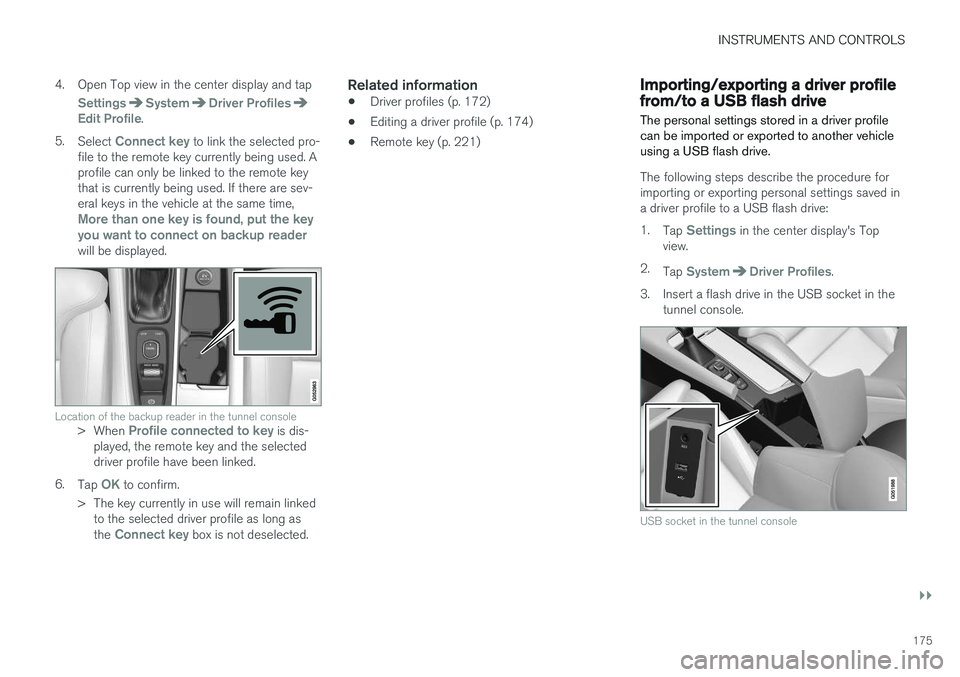
file to the remote key currently being used. A profile can only be linked to the remote keythat is currently being used. If there are sev-eral keys in the vehicle at the same time,
More than one key is found, put the key you want to connect on backup reader
will be displayed.
Location of the backup reader in the tunnel console> When Profile connected to key is dis-
played, the remote key and the selected driver profile have been linked.
6. Tap
OK to confirm.
> The key currently in use will remain linked to the selected driver profile as long as the
Connect key box is not deselected.
Related information
• Driver profiles (p. 172)
• Editing a driver profile (p. 174)
• Remote key (p. 221)
Importing/exporting a driver profile from/to a USB flash drive The personal settings stored in a driver profile can be imported or exported to another vehicleusing a USB flash drive.
The following steps describe the procedure for importing or exporting personal settings saved ina driver profile to a USB flash drive: 1.
Tap
Settings in the center display's Top
view.
2. Tap
SystemDriver Profiles.
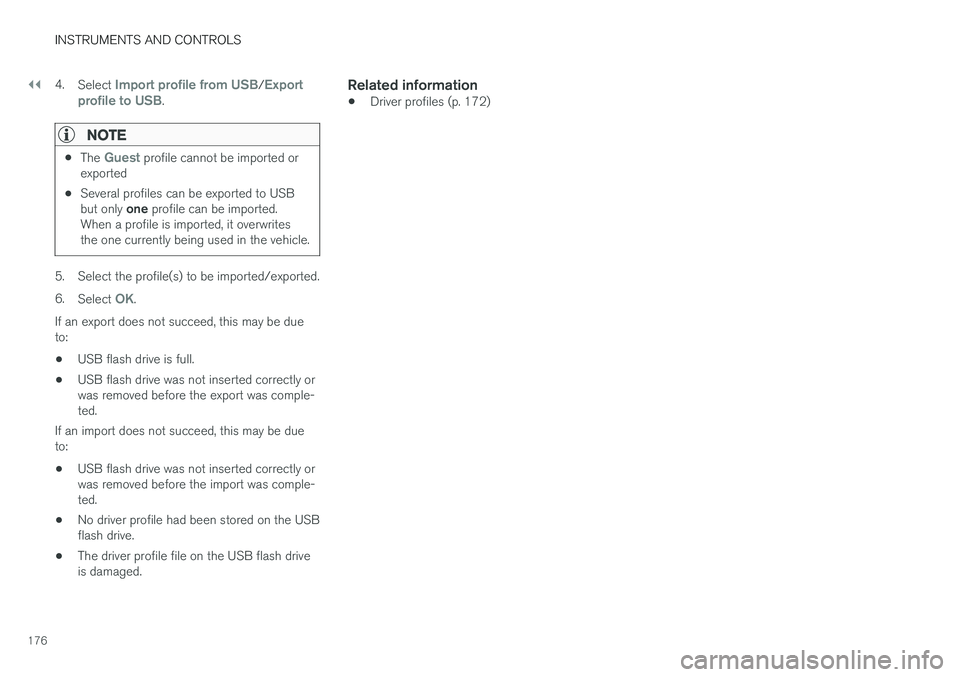
3. Insert a flash drive in the USB socket in the tunnel console.
USB socket in the tunnel console
Page 178 of 552
||
INSTRUMENTS AND CONTROLS
1764.
Select
Import profile from USB/Export
profile to USB.
NOTE
• The Guest profile cannot be imported or
exported
• Several profiles can be exported to USB but only
one profile can be imported.
When a profile is imported, it overwrites the one currently being used in the vehicle.
5. Select the profile(s) to be imported/exported. 6. Select
OK.
If an export does not succeed, this may be due to:
• USB flash drive is full.
• USB flash drive was not inserted correctly orwas removed before the export was comple-ted.
If an import does not succeed, this may be dueto:
• USB flash drive was not inserted correctly orwas removed before the import was comple-ted.
• No driver profile had been stored on the USBflash drive.
• The driver profile file on the USB flash driveis damaged.
Related information
•Driver profiles (p. 172)
Page 179 of 552

C L I M A T E
Page 180 of 552
CLIMATE
* Option/accessory.
178
Climate control system
The vehicle is equipped with Electronic Climate Control (ECC) that cools, heats, dehumidifiesand filters the air in the passenger compartment.
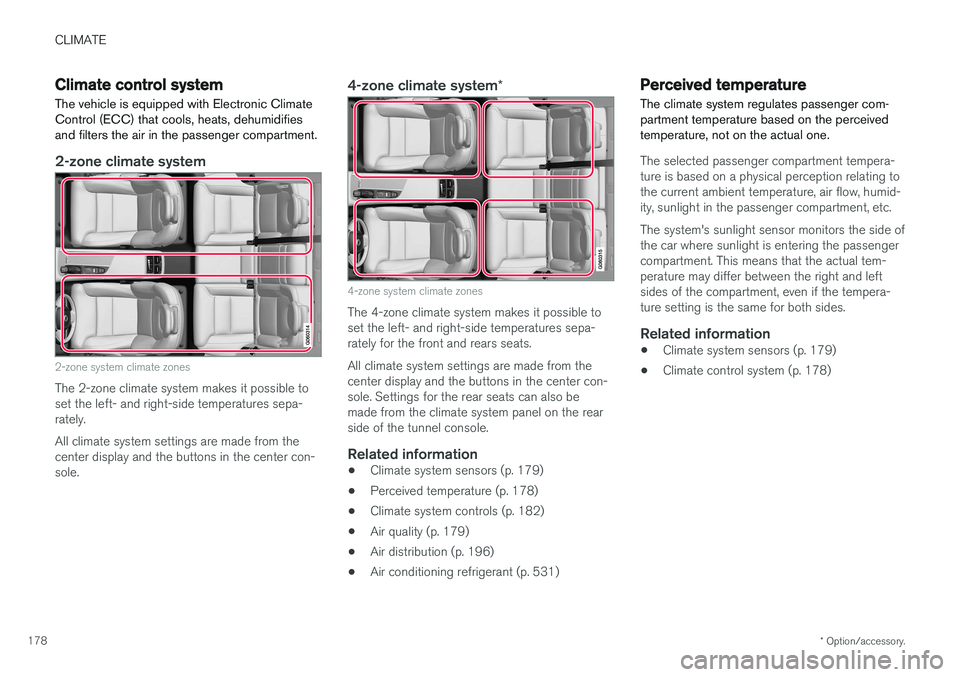
2-zone climate system
2-zone system climate zones
The 2-zone climate system makes it possible to set the left- and right-side temperatures sepa-rately. All climate system settings are made from the center display and the buttons in the center con-sole.
4-zone climate system *
4-zone system climate zones
The 4-zone climate system makes it possible to set the left- and right-side temperatures sepa-rately for the front and rears seats. All climate system settings are made from the center display and the buttons in the center con-sole. Settings for the rear seats can also bemade from the climate system panel on the rearside of the tunnel console.
Related information
•Climate system sensors (p. 179)
• Perceived temperature (p. 178)
• Climate system controls (p. 182)
• Air quality (p. 179)
• Air distribution (p. 196)
• Air conditioning refrigerant (p. 531)
Perceived temperature
The climate system regulates passenger com- partment temperature based on the perceivedtemperature, not on the actual one.
The selected passenger compartment tempera- ture is based on a physical perception relating tothe current ambient temperature, air flow, humid-ity, sunlight in the passenger compartment, etc. The system's sunlight sensor monitors the side of the car where sunlight is entering the passengercompartment. This means that the actual tem-perature may differ between the right and leftsides of the compartment, even if the tempera-ture setting is the same for both sides.
Related information
• Climate system sensors (p. 179)
• Climate control system (p. 178)