VOLVO V90 CROSS COUNTRY 2021 Owners Manual
Manufacturer: VOLVO, Model Year: 2021, Model line: V90 CROSS COUNTRY, Model: VOLVO V90 CROSS COUNTRY 2021Pages: 683, PDF Size: 14.19 MB
Page 431 of 683
STARTING AND DRIVING
}}
* Option/accessory.429
Leveling control * and suspension
Self-leveling and suspension functions are controlled automatically.
Rear leveling control keeps the rear section of the vehicle at the same height regardless ofload. Leveling control may also remain activewhen the vehicle is parked.
Shock absorbers (Four-C)On vehicles equipped with Four-C, the shockabsorbers are adapted to the selected drive mode and the current vehicle speed. Theshock absorbers are normally set to help opti-mize comfort and are adjusted continuouslyaccording to the road surface and the vehicle'sacceleration, braking and cornering.
TransportingWhen transporting the vehicle on a ferry, trainor truck, only secure (lash) the vehicle aroundthe tires, not using any other parts of the chas-sis. Changes in the pneumatic suspension
may occur during transport, which couldadversely affect the lashing and result in dam-age.
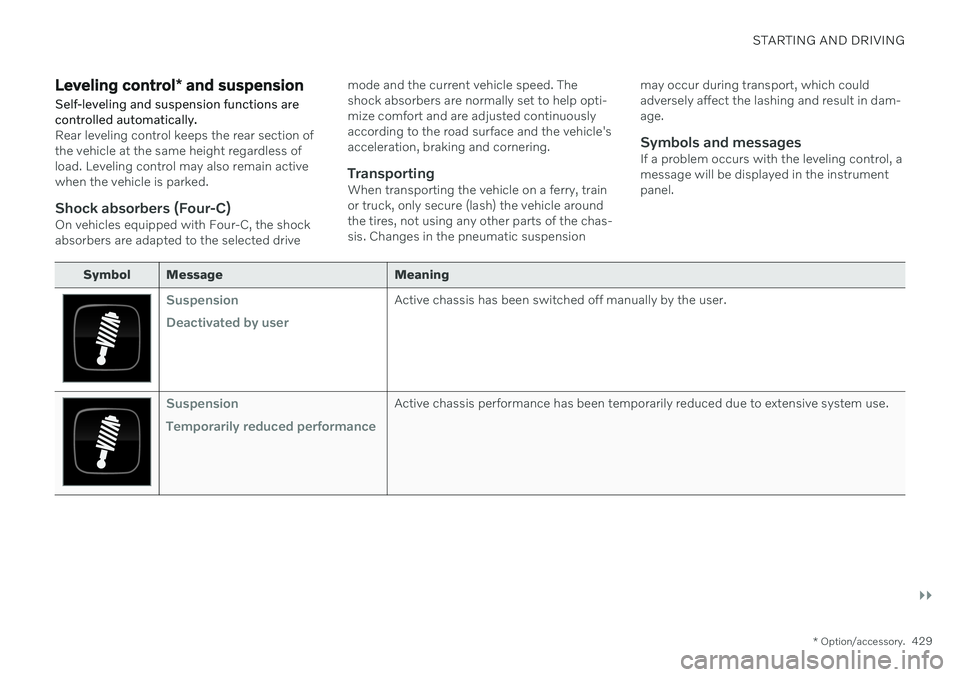
Symbols and messagesIf a problem occurs with the leveling control, amessage will be displayed in the instrumentpanel.
Symbol Message Meaning
Suspension Deactivated by userActive chassis has been switched off manually by the user.
Suspension Temporarily reduced performanceActive chassis performance has been temporarily reduced due to extensive system use.
Page 432 of 683
||
STARTING AND DRIVING
430
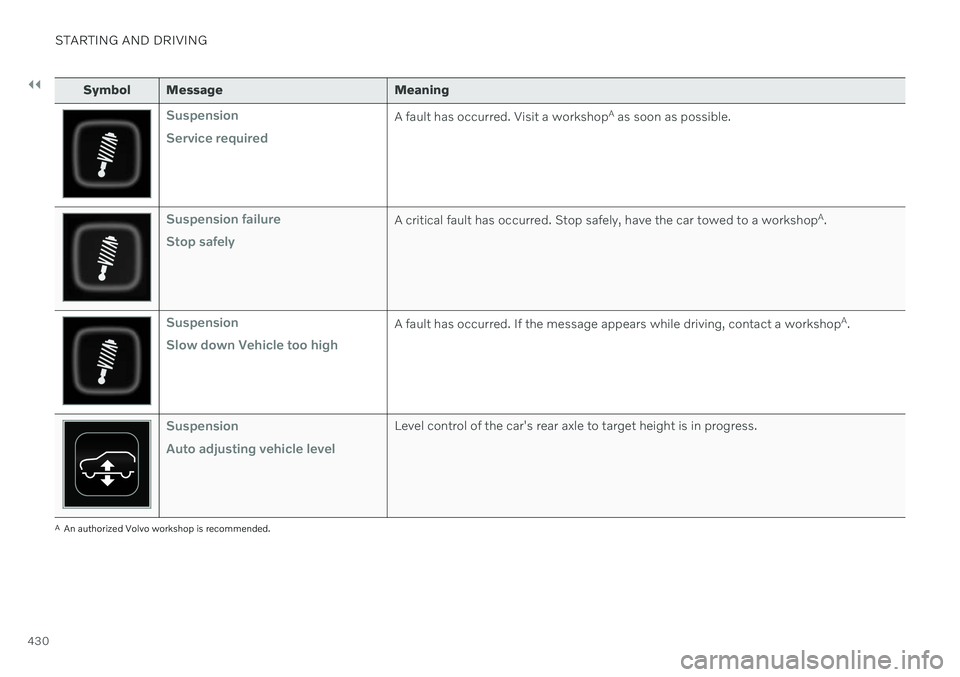
Symbol Message Meaning
Suspension Service requiredA fault has occurred. Visit a workshopA
as soon as possible.
Suspension failure Stop safelyA critical fault has occurred. Stop safely, have the car towed to a workshop A
.
Suspension Slow down Vehicle too highA fault has occurred. If the message appears while driving, contact a workshop A
.
Suspension Auto adjusting vehicle levelLevel control of the car's rear axle to target height is in progress.
A An authorized Volvo workshop is recommended.
Page 433 of 683

STARTING AND DRIVING
* Option/accessory.431
Related information
Leveling control settings
* (p. 432)
Drive modes
* (p. 419)
Page 434 of 683
STARTING AND DRIVING
* Option/accessory.
432
Leveling control settings *
Turn off leveling control before lifting the vehicle with a jack to help avoid problemswith the pneumatic suspension.
Center display settings
Disable Leveling Control
In certain situations this function must be turned off e.g. before the vehicle is raised using a jack *. The level difference caused by
raising the vehicle with a jack could cause problems with the pneumatic suspension. Turning off the function in the center display:1. Tap
Settings in the Top view.
2. Tap
My CarParking Brake and
Suspension.
3. Select
Disable Leveling Control.
Related information
Leveling control
* and suspension (p. 429)
Loading recommendations (p. 570)
Low Speed Control
The low-speed function (LSC 15
) facilitates
and improves control and traction on rough roads and slippery surfaces, e.g. when towinga trailer on grass or up boat ramps. In vehicles equipped with drive mode con- trol *, the function is included in the
Off Roaddrive mode.Low Speed Control is designed for driving on rough roads and when towing trailers at lowspeeds, up to approximately 40 km/h (25mph). Low Speed Control prioritizes low gear posi- tions and traction. If the vehicle is all-wheeldrive, power is automatically distributedevenly to provide as much traction as possibleon all wheels and reduce the risk of wheelspin. The accelerator pedal will be less respon-sive to improve traction and speed control atlow speeds. The function is activated together with Hill Descent Control (HDC 16
), which makes it pos-
sible to control speed going down steep hills using the accelerator pedal and reduces theneed to use the brake pedal. The systemmakes it possible to maintain a low and uni-form speed when driving down steep hills.
NOTE
When LSC with HDC is activated, the feel of the accelerator pedal and engineresponse will change.
NOTE
This drive mode is not designed to be used for normal street driving.
NOTE
The function is deactivated when driving at high speeds and must be reactivated atlower speeds if so desired.
Related information
Activating and deactivating Low Speed Control using the function button (p. 433)
Changing drive mode
* (p. 421)
Hill Descent Control (p. 433)
All Wheel Drive (AWD) (p. 419)
15
Low Speed Control
16 Hill Descent Control
Page 435 of 683
STARTING AND DRIVING
}}
* Option/accessory.433
Activating and deactivating Low Speed Control using the functionbutton There is a function button for driving at low speeds with
Hill Descent Control in the cen-
ter display's Function view if the vehicle is not equipped with a drive mode control in thetunnel console.
Selecting Low Speed Control in the center display's Function view
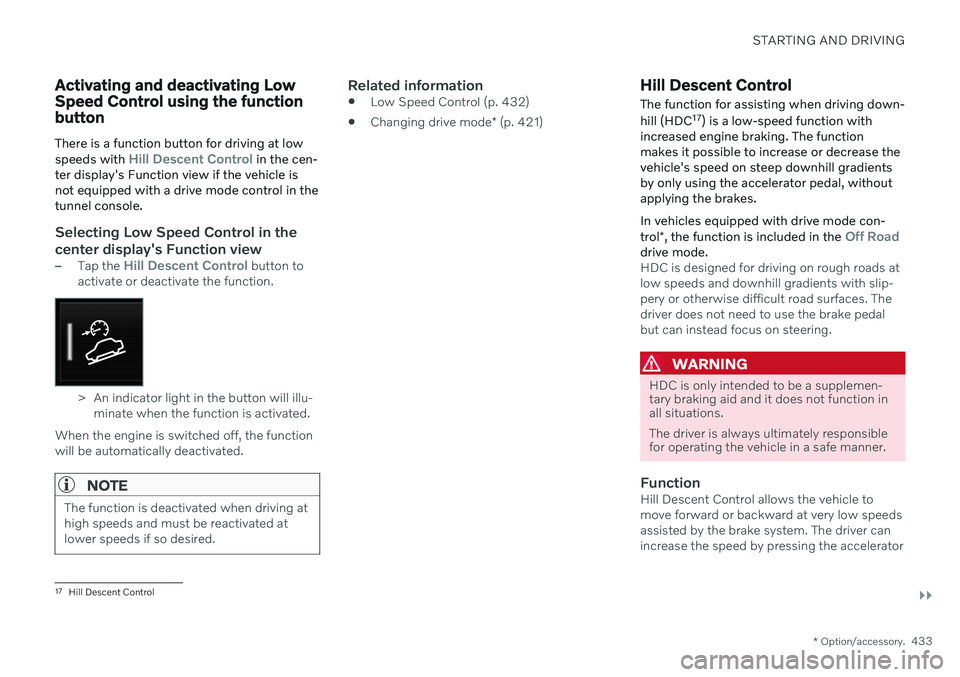
–Tap the Hill Descent Control button to
activate or deactivate the function.
> An indicator light in the button will illu- minate when the function is activated.
When the engine is switched off, the function will be automatically deactivated.
NOTE
The function is deactivated when driving at high speeds and must be reactivated atlower speeds if so desired.
Related information
Low Speed Control (p. 432)
Changing drive mode
* (p. 421)
Hill Descent Control
The function for assisting when driving down- hill (HDC 17
) is a low-speed function with
increased engine braking. The function makes it possible to increase or decrease thevehicle's speed on steep downhill gradientsby only using the accelerator pedal, withoutapplying the brakes. In vehicles equipped with drive mode con- trol *, the function is included in the
Off Roaddrive mode.HDC is designed for driving on rough roads at low speeds and downhill gradients with slip-pery or otherwise difficult road surfaces. Thedriver does not need to use the brake pedalbut can instead focus on steering.
WARNING
HDC is only intended to be a supplemen- tary braking aid and it does not function inall situations. The driver is always ultimately responsible for operating the vehicle in a safe manner.
FunctionHill Descent Control allows the vehicle to move forward or backward at very low speedsassisted by the brake system. The driver canincrease the speed by pressing the accelerator
17
Hill Descent Control
Page 436 of 683
||
STARTING AND DRIVING
* Option/accessory.
434 pedal. When the accelerator pedal is released, the vehicle will return to very low speedregardless of how steep the hill is and withoutthe brakes needing to be applied. The brakelights will illuminate when the function is acti-vated. The driver can brake to stop or slow the vehi- cle at any time by depressing the brake pedal. HDC is activated along with Low Speed Con- trol (LSC
18
), which facilitates and improves
traction and control on rough and slippery sur- faces. The system is intended to be used atlow speeds, up to approximately 40 km/h (25mph).
To keep in mind when using HDC
If the function is switched off while drivingon a steep downhill gradient, brakingeffect will be gradually reduced.
HDC can be used in gear positions
D and
R , and in manual gears 1 or 2.
It is not possible to manually shift to thirdgear or higher when HDC is active.
NOTE
When LSC with HDC is activated, the feel of the accelerator pedal and engineresponse will change.
NOTE
This drive mode is not designed to be used for normal street driving.
NOTE
The function is deactivated when driving at high speeds and must be reactivated atlower speeds if so desired.
Related information
Activating and deactivating Hill Descent Control using the function button (p. 434)
Changing drive mode
* (p. 421)
Low Speed Control (p. 432)
All Wheel Drive (AWD) (p. 419)
Activating and deactivating Hill Descent Control using the functionbutton There is a function button for assistance on steep gradients with
Hill Descent Control in
the center display's Function view if the vehi- cle is not equipped with a drive mode controlin the tunnel console.
Selecting Hill Descent Control in the center display's Function view
HDC only works at low speeds.
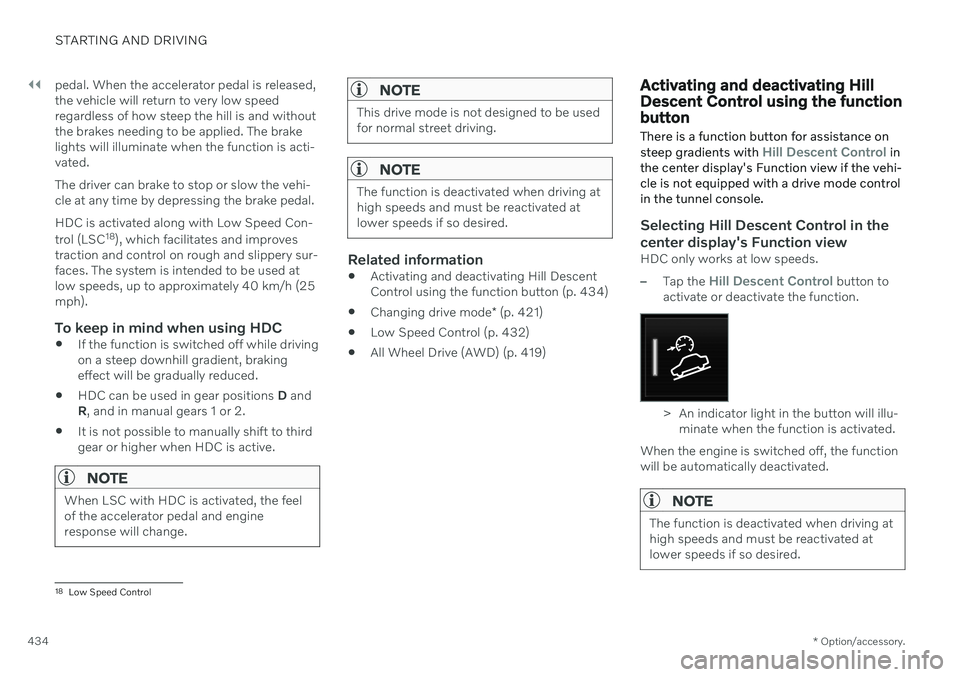
–Tap the Hill Descent Control button to
activate or deactivate the function.
> An indicator light in the button will illu- minate when the function is activated.
When the engine is switched off, the function will be automatically deactivated.
NOTE
The function is deactivated when driving at high speeds and must be reactivated atlower speeds if so desired.
18 Low Speed Control
Page 437 of 683
STARTING AND DRIVING
}}
* Option/accessory.435
Related information
Hill Descent Control (p. 433)
Changing drive mode
* (p. 421)
Economical driving
A more economical driving style can help lower fuel consumption.
Before driving
If possible, precondition the vehicle before driving.
If preconditioning is not possible when itis cold outside, use seat and steeringwheel heating first. Avoid heating theentire passenger compartment to reducethe amount of current being taken fromthe start battery.
Avoid using idling to warm up the vehiclebefore driving.
The type of tires and inflation pressureused could affect energy consumption –consult an authorized Volvo retailer foradvice on suitable tires.
Remove unnecessary items from the vehi-cle - the heavier the load, the higher thefuel consumption.
While driving
Activate Eco drive mode.
Use gear selector position
D as often as
possible.
When using manual gear shifting, drive using the highest possible gear. Use the gear indicator 19
.
Maintain a steady speed and a generous following distance to traffic ahead to mini-mize braking. Use engine braking if possi-ble.
Higher speeds increase energy consump-tion because air resistance increases withspeed.
In a cold climate, reduce heating of thewindshield/rear window, mirrors, seatsand the steering wheel.
Avoid driving with the windows open.
Do not use the accelerator pedal to keepthe vehicle stationary on an uphill gradi-ent. Instead, activate the auto-hold brakefunction at a standstill.
Use trip data to see current fuel consump-tion.
WARNING
Never turn off the engine while the vehicle is moving, e.g. when driving downhill. Thisdeactivates certain important systemssuch as power steering and brakes.
19
Only available in certain markets.
Page 438 of 683
||
STARTING AND DRIVING
* Option/accessory.
436
After driving
If possible, park in a climate-controlled garage.
Related information
Eco drive mode (p. 422)
Starting and stopping preconditioning
*
(p. 234)
Checking tire pressure (p. 541)
Activating and deactivating Auto-hold at astandstill (p. 410)
Start/Stop function (p. 425)
Trip computer (p. 93)
Preparing for a long trip
It is important to have the vehicle's systems and equipment checked carefully before driv-ing long distances.
Check that
the engine is running properly and that fuel consumption is normal
there are no leaks (fuel, oil or other fluid)
the brake pedal is functioning properly
tire tread depth and air pressure are atcorrect levels. Change to snow tires whendriving in areas where there is a risk ofsnowy or icy roads
the start battery is sufficiently charged
the wiper blades are in good condition
Related information
Checking tire pressure (p. 541)
Filling washer fluid (p. 646)
Winter driving (p. 436)
Economical driving (p. 435)
Vehicle modem settings (p. 517)
Loading recommendations (p. 570)
Driving with a trailer (p. 446)
Pilot Assist
*
(p. 304)
Tire sealing system (p. 556)
Winter driving
It is important to check the vehicle before driving in cold/snowy conditions to makesure it can be driven safely.
Before the cold season arrives: Make sure the engine coolant contains 50% antifreeze. This mixture helps pro-tect the engine from frost erosion down toapprox. –35 °C (–31 °F). Do not mix dif-ferent types of antifreeze as this couldpose a health risk.
Keep the fuel tank well filled to preventcondensation from forming.
Check the viscosity of the engine oil. Oilwith low viscosity (thinner oil) improvescold-weather starting and reduces fuelconsumption when driving with a coldengine.
Check the condition and charge level ofthe start battery. Cold weather placesgreater demands on the start battery andreduces its capacity.
Use washer fluid containing antifreeze tohelp prevent ice from forming in thewasher fluid reservoir.
See separate section for engine oil recommen-dations.
Page 439 of 683
STARTING AND DRIVING
437
Slippery driving conditionsTo help optimize traction and roadholding, Volvo recommends using snow tires on allwheels whenever there is a risk of snow or iceon the road.
NOTE
Certain countries require use of winter tires by law. Not all countries permit the use ofstudded tires.
Practice driving on slippery surfaces under controlled conditions to learn how the vehiclereacts.
Related information
Engine oil specifications (p. 658)
Snow tires (p. 554)
Snow chains (p. 555)
Braking on salted roads (p. 405)
Braking on wet roads (p. 405)
Filling washer fluid (p. 646)
Starter battery (p. 600)
Replacing windshield wiper blades(p. 644)
Changing rear window wipers (p. 643)
Refilling coolant (p. 598)
Driving through standing water
It may be necessary to drive the vehicle through standing water e.g. deep puddles orflooding on the road. This must be done withgreat caution.
The vehicle can be driven through water up to a depth of 30 cm (11 in) at no more than walk-ing speed. Be particularly careful when drivingthrough flowing water. When driving through standing water, drive slowly and do not stop the vehicle. When youhave passed the water, press lightly on thebrake pedal and check that the brakes arefunctioning properly. Water, mud, slush, etc.can make the brake linings slippery, resultingin delayed braking effect. If the vehicle is equipped with contacts for an electric heater or trailer coupling, cleanthese after driving in water or mud.
Do not allow the vehicle to stand in waterup to the sills any longer than absolutelynecessary. This could result in electricalmalfunctions.
CAUTION
Engine damage could occur if water enters the air cleaner.
If water enters the transmission, thelubricating ability of the oils is reducedand the service life of these systems isshortened.
Damage to any component, engine,transmission, turbocharger, differentialor its internal components caused byflooding, vapor lock or insufficient oil isnot covered under warranty.
If the engine stalls while the vehicle isin water, do not attempt to restart it.Have the vehicle towed out of thewater to a workshop. An authorizedVolvo workshop is recommended. Riskof engine failure.
CAUTION
Because it can be difficult to determine the water depth, Volvo recommends not driv-ing through standing or running water. Thedriver is always responsible for operatingthe vehicle in a safe manner and adheringto all applicable laws and regulations.
Related information
Recovery (p. 453)
Low Speed Control (p. 432)
Page 440 of 683
STARTING AND DRIVING
* Option/accessory.
438
Opening/closing the fuel filler door
The vehicle must be unlocked before the fuel filler door can be opened 20
.
An arrow next to the fuel pump symbol in the instru-ment panel indicates the sideof the vehicle on which thefuel filler door is located.
1. Open the fuel filler door by pressing lightly
on its rear edge.
2. After refueling, press the fuel filler door lightly to close it.
Related information
Refueling (p. 438)
Refueling
The fuel tank is equipped with a fuel filling system without a cover.
Refueling the vehicle at a service station
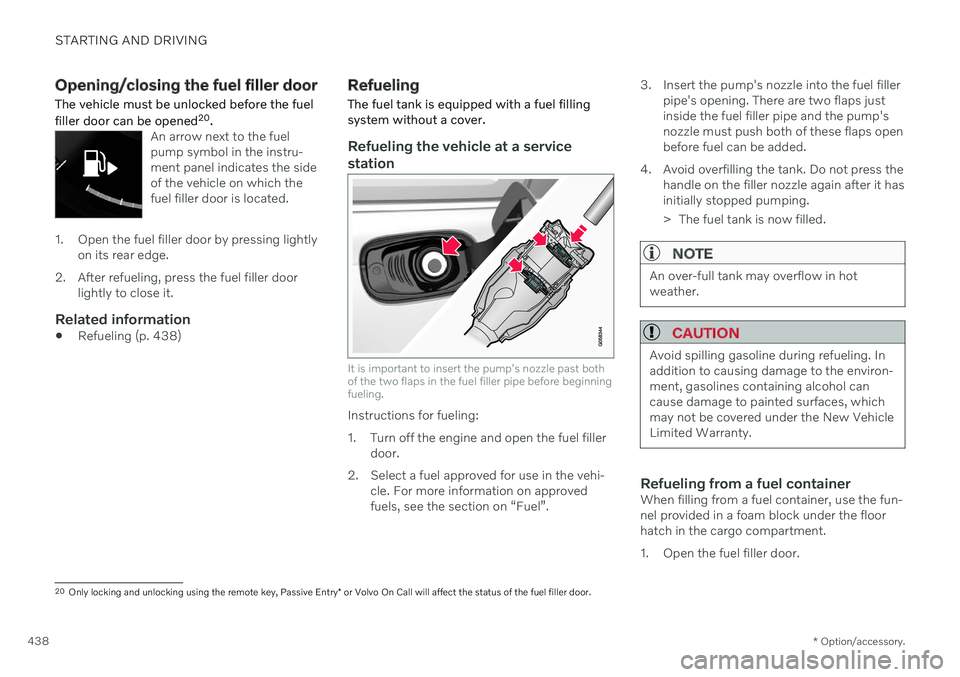
It is important to insert the pump's nozzle past both of the two flaps in the fuel filler pipe before beginningfueling.
Instructions for fueling:
1. Turn off the engine and open the fuel filler door.
2. Select a fuel approved for use in the vehi- cle. For more information on approved fuels, see the section on “Fuel”. 3. Insert the pump's nozzle into the fuel filler
pipe's opening. There are two flaps justinside the fuel filler pipe and the pump'snozzle must push both of these flaps openbefore fuel can be added.
4. Avoid overfilling the tank. Do not press the handle on the filler nozzle again after it hasinitially stopped pumping.
> The fuel tank is now filled.
NOTE
An over-full tank may overflow in hot weather.
CAUTION
Avoid spilling gasoline during refueling. In addition to causing damage to the environ-ment, gasolines containing alcohol cancause damage to painted surfaces, whichmay not be covered under the New VehicleLimited Warranty.
Refueling from a fuel containerWhen filling from a fuel container, use the fun- nel provided in a foam block under the floorhatch in the cargo compartment.
1. Open the fuel filler door.
20Only locking and unlocking using the remote key, Passive Entry * or Volvo On Call will affect the status of the fuel filler door.