mode VOLVO XC90 T8 2017 Owner´s Manual
[x] Cancel search | Manufacturer: VOLVO, Model Year: 2017, Model line: XC90 T8, Model: VOLVO XC90 T8 2017Pages: 580, PDF Size: 10.37 MB
Page 530 of 580
MAINTENANCE AND SERVICING
528
Replacing High Beam headlight bulbs
On models with halogen headlights, the High Beam headlight bulb can be replaced by theowner.
Before the bulb can be accessed, the headlight housing's rectangular cover must be removed,see the article "Removing the rectangular head-light cover."
CAUTION
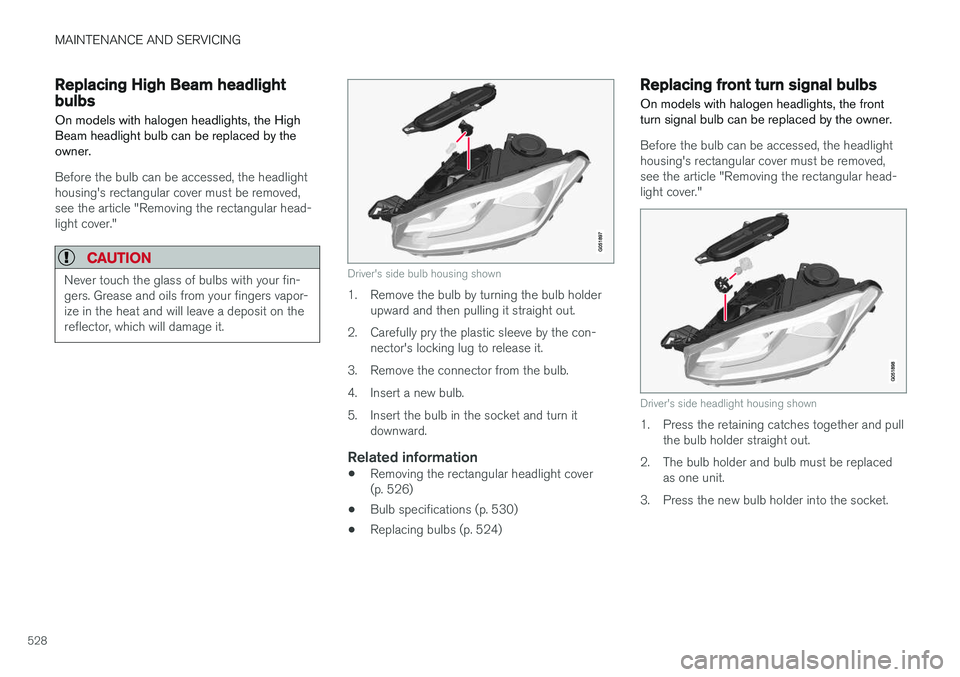
Never touch the glass of bulbs with your fin- gers. Grease and oils from your fingers vapor-ize in the heat and will leave a deposit on thereflector, which will damage it.Driver's side bulb housing shown
1. Remove the bulb by turning the bulb holder upward and then pulling it straight out.
2. Carefully pry the plastic sleeve by the con- nector's locking lug to release it.
3. Remove the connector from the bulb.
4. Insert a new bulb.
5. Insert the bulb in the socket and turn it downward.
Related information
• Removing the rectangular headlight cover (p. 526)
• Bulb specifications (p. 530)
• Replacing bulbs (p. 524)
Replacing front turn signal bulbs On models with halogen headlights, the front turn signal bulb can be replaced by the owner.
Before the bulb can be accessed, the headlight housing's rectangular cover must be removed,see the article "Removing the rectangular head-light cover."
Driver's side headlight housing shown
1. Press the retaining catches together and pull
the bulb holder straight out.
2. The bulb holder and bulb must be replaced as one unit.
3. Press the new bulb holder into the socket.
Page 531 of 580
MAINTENANCE AND SERVICING
529
Related information
•Removing the rectangular headlight cover (p. 526)
• Replacing bulbs (p. 524)
• Bulb specifications (p. 530)
Replacing front parking light bulbs
On models with halogen headlights, the front parking light bulb can be replaced by the owner.
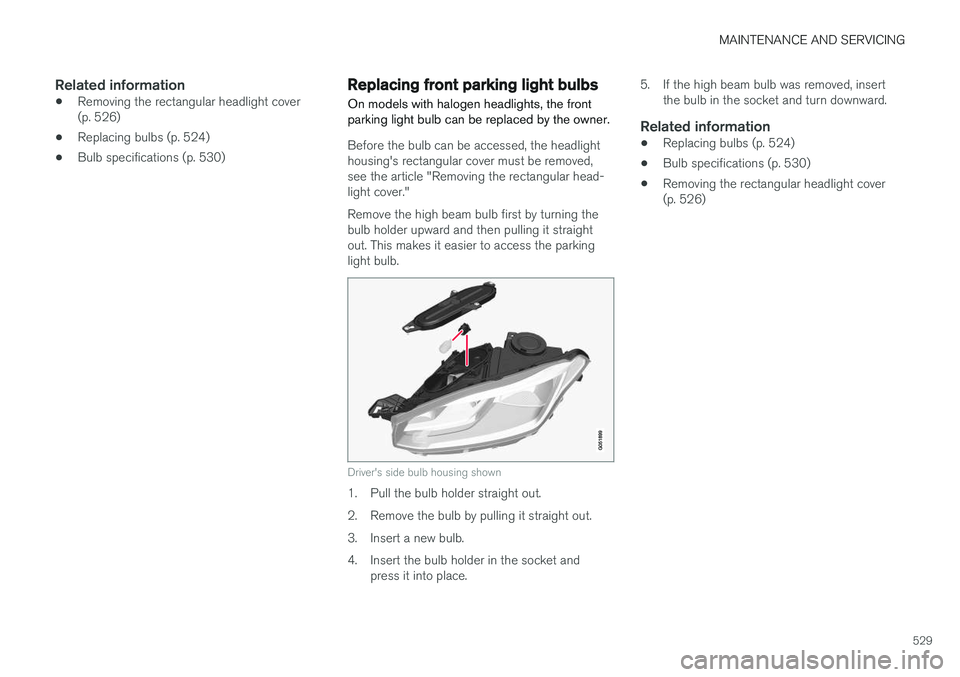
Before the bulb can be accessed, the headlight housing's rectangular cover must be removed,see the article "Removing the rectangular head-light cover." Remove the high beam bulb first by turning the bulb holder upward and then pulling it straightout. This makes it easier to access the parkinglight bulb.
Driver's side bulb housing shown
1. Pull the bulb holder straight out.
2. Remove the bulb by pulling it straight out.
3. Insert a new bulb.
4. Insert the bulb holder in the socket and press it into place. 5. If the high beam bulb was removed, insert
the bulb in the socket and turn downward.
Related information
• Replacing bulbs (p. 524)
• Bulb specifications (p. 530)
• Removing the rectangular headlight cover (p. 526)
Page 532 of 580
MAINTENANCE AND SERVICING
530
Bulb specifications The following specifications apply to models equipped with halogen5
headlights. If other
bulbs need to be replaced, contact a trained and qualified Volvo service technician.
Function [W]A
Type
Low beam 55 H11
High Beam 65 H9
Front turn signal 24 PY24WDaytime running light/ parking light 21/5 W21/5W
A
Watt
Related information
• Replacing bulbs (p. 524)
5
Halogen headlights are not available in all models.
Page 534 of 580
||
MAINTENANCE AND SERVICING
532
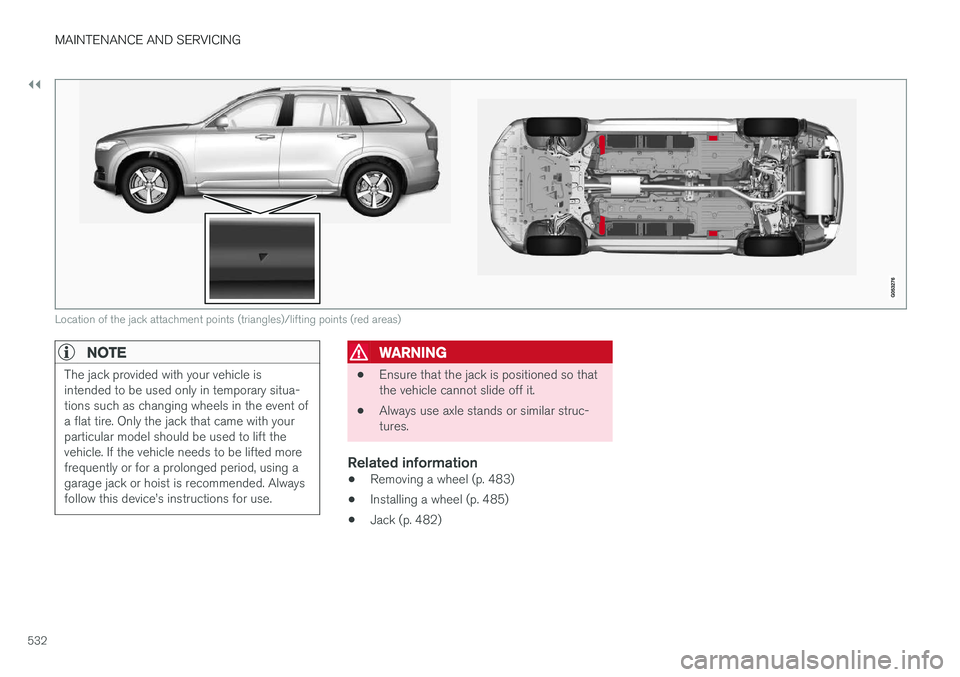
Location of the jack attachment points (triangles)/lifting points (red areas)
NOTE
The jack provided with your vehicle is intended to be used only in temporary situa-tions such as changing wheels in the event ofa flat tire. Only the jack that came with yourparticular model should be used to lift thevehicle. If the vehicle needs to be lifted morefrequently or for a prolonged period, using agarage jack or hoist is recommended. Alwaysfollow this device
Page 536 of 580
||
MAINTENANCE AND SERVICING
534
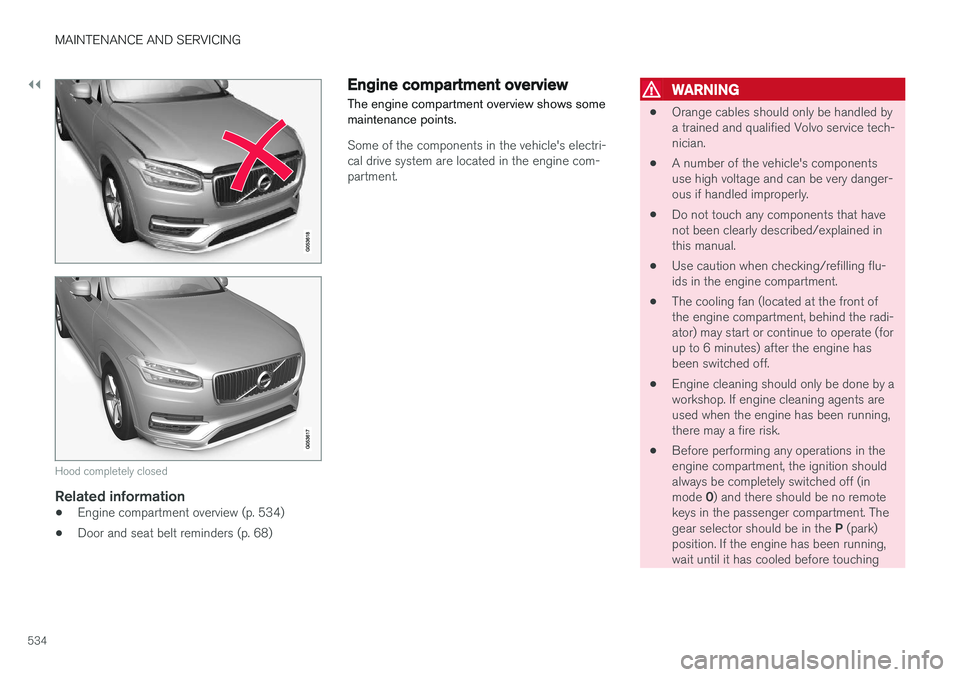
Hood completely closed
Related information
•Engine compartment overview (p. 534)
• Door and seat belt reminders (p. 68)
Engine compartment overview
The engine compartment overview shows some maintenance points.
Some of the components in the vehicle's electri- cal drive system are located in the engine com-partment.
WARNING
• Orange cables should only be handled by a trained and qualified Volvo service tech-nician.
• A number of the vehicle's componentsuse high voltage and can be very danger-ous if handled improperly.
• Do not touch any components that havenot been clearly described/explained inthis manual.
• Use caution when checking/refilling flu-ids in the engine compartment.
• The cooling fan (located at the front ofthe engine compartment, behind the radi-ator) may start or continue to operate (forup to 6 minutes) after the engine hasbeen switched off.
• Engine cleaning should only be done by aworkshop. If engine cleaning agents areused when the engine has been running,there may a fire risk.
• Before performing any operations in theengine compartment, the ignition shouldalways be completely switched off (in mode
0) and there should be no remote
keys in the passenger compartment. Thegear selector should be in the P (park)
position. If the engine has been running, wait until it has cooled before touching
Page 537 of 580
MAINTENANCE AND SERVICING
}}
535
any components in the engine compart- ment.
• The distributor ignition system operatesat very high voltages. Special safety pre-cautions must be followed to prevent injury. Always turn the ignition
off when
replacing distributor ignition components e.g. plugs, coil, etc.
• Do not touch any part of the distributorignition system while the engine is run-ning. This may result in unintended move-ments and body injury.
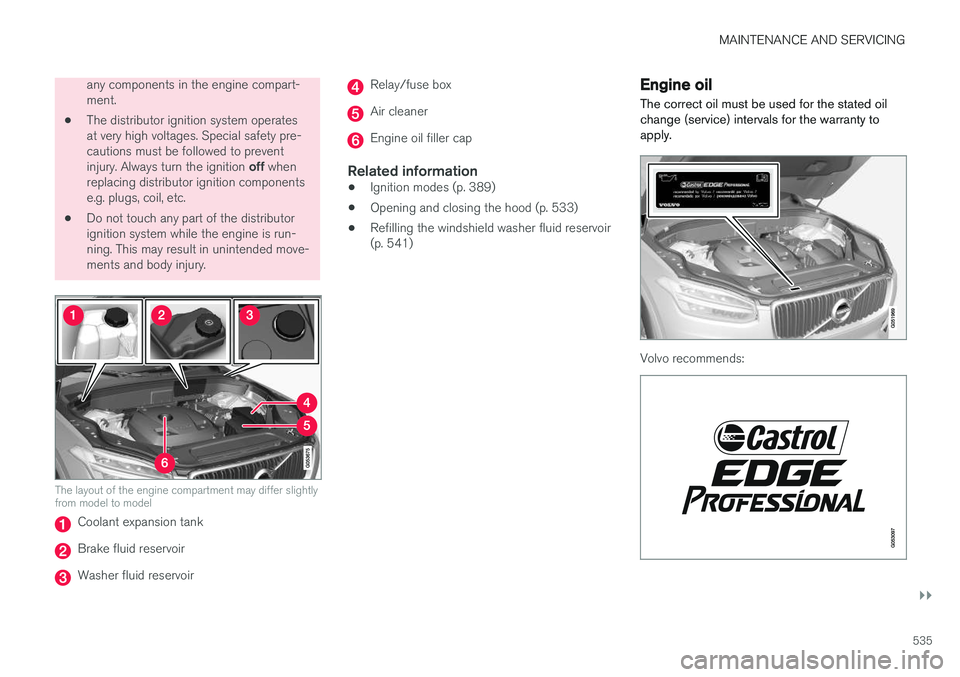
The layout of the engine compartment may differ slightly from model to model
Coolant expansion tank
Brake fluid reservoir
Washer fluid reservoir
Relay/fuse box
Air cleaner
Engine oil filler cap
Related information
•Ignition modes (p. 389)
• Opening and closing the hood (p. 533)
• Refilling the windshield washer fluid reservoir (p. 541)
Engine oil
The correct oil must be used for the stated oil change (service) intervals for the warranty toapply.
Volvo recommends:
Page 538 of 580
||
MAINTENANCE AND SERVICING
536
CAUTION
•Not checking the oil level regularly can result in serious engine damage if the oillevel becomes too low.
• Oil that is lower than the specified qualitycan damage the engine.
• Volvo does not recommend the use of oiladditives.
• Always add oil of the same type and vis-cosity as already used.
• Oil changes should be carried out by atrained and qualified Volvo service techni-cian.
• Using oil of higher than the specifiedquality is permitted and may be neces-sary for demanding driving.
Also, refer to the Warranty and Service Records information booklet for information on oil changeintervals and oil specifications.
Related information
•
Checking and refilling engine oil (p. 536)
• Engine oil specifications and volume(p. 562)
Checking and refilling engine oil The oil level is checked electronically.
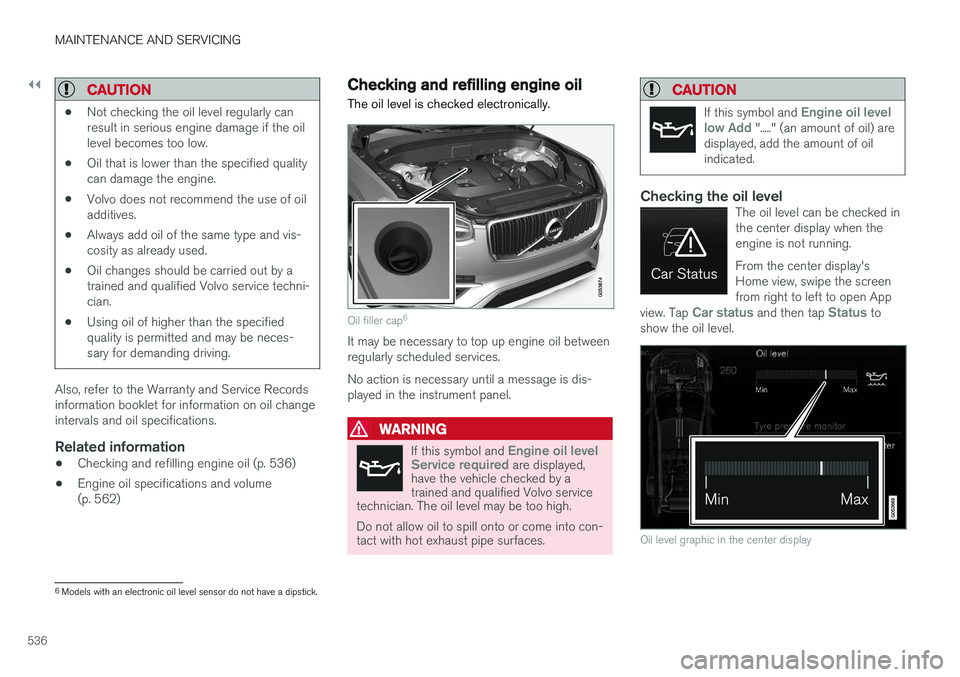
Oil filler cap 6
It may be necessary to top up engine oil between regularly scheduled services. No action is necessary until a message is dis- played in the instrument panel.
WARNING
If this symbol and Engine oil level
Service required are displayed,
have the vehicle checked by a trained and qualified Volvo service
technician. The oil level may be too high. Do not allow oil to spill onto or come into con- tact with hot exhaust pipe surfaces.
CAUTION
If this symbol and Engine oil level
low Add "....." (an amount of oil) are
displayed, add the amount of oil indicated.
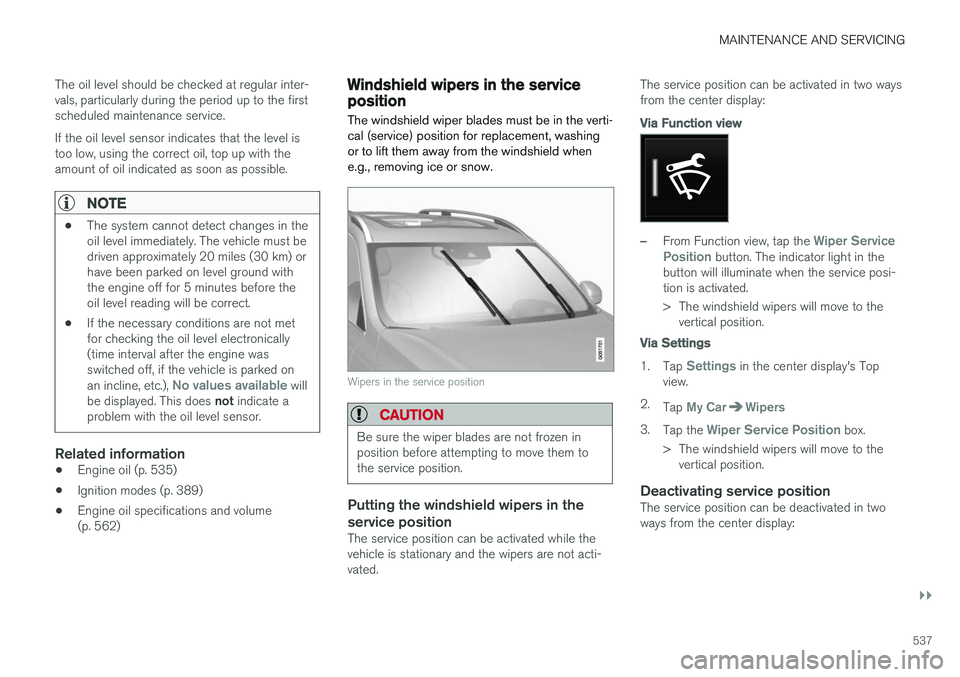
Checking the oil levelThe oil level can be checked in the center display when theengine is not running. From the center display's Home view, swipe the screenfrom right to left to open App
view. Tap
Car status and then tap Status to
show the oil level.
Oil level graphic in the center display
6 Models with an electronic oil level sensor do not have a dipstick.
Page 539 of 580
MAINTENANCE AND SERVICING
}}
537
The oil level should be checked at regular inter- vals, particularly during the period up to the firstscheduled maintenance service. If the oil level sensor indicates that the level is too low, using the correct oil, top up with theamount of oil indicated as soon as possible.
NOTE
•
The system cannot detect changes in the oil level immediately. The vehicle must bedriven approximately 20 miles (30 km) orhave been parked on level ground withthe engine off for 5 minutes before theoil level reading will be correct.
• If the necessary conditions are not metfor checking the oil level electronically(time interval after the engine wasswitched off, if the vehicle is parked on an incline, etc.),
No values available will
be displayed. This does not indicate a
problem with the oil level sensor.
Related information
• Engine oil (p. 535)
• Ignition modes (p. 389)
• Engine oil specifications and volume (p. 562)
Windshield wipers in the service position
The windshield wiper blades must be in the verti- cal (service) position for replacement, washingor to lift them away from the windshield whene.g., removing ice or snow.
Wipers in the service position
CAUTION
Be sure the wiper blades are not frozen in position before attempting to move them tothe service position.
Putting the windshield wipers in the service position
The service position can be activated while the vehicle is stationary and the wipers are not acti-vated. The service position can be activated in two waysfrom the center display:
Via Function view
–From Function view, tap the Wiper Service
Position button. The indicator light in the
button will illuminate when the service posi- tion is activated.
> The windshield wipers will move to the vertical position.
Via Settings
1. Tap Settings in the center display's Top
view.
2. Tap
My CarWipers
3.Tap the Wiper Service Position box.
> The windshield wipers will move to the vertical position.
Deactivating service positionThe service position can be deactivated in two ways from the center display:
Page 543 of 580
MAINTENANCE AND SERVICING
}}
* Option/accessory.541
Refilling the windshield washer fluid reservoir
Washer fluid helps keep the windshield and headlights clean.
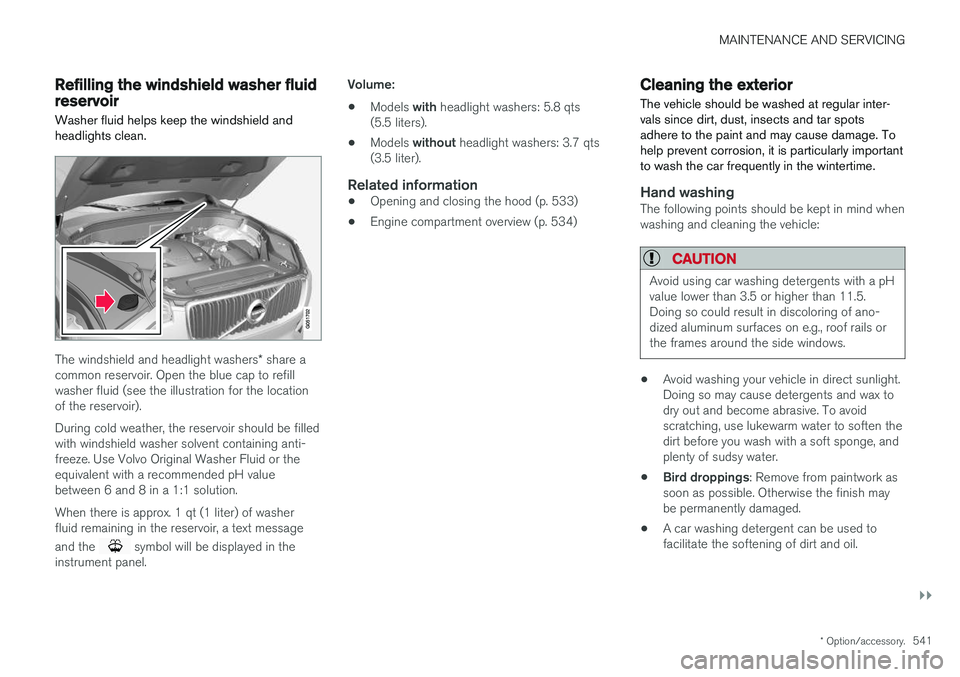
The windshield and headlight washers * share a
common reservoir. Open the blue cap to refill washer fluid (see the illustration for the locationof the reservoir). During cold weather, the reservoir should be filled with windshield washer solvent containing anti-freeze. Use Volvo Original Washer Fluid or theequivalent with a recommended pH valuebetween 6 and 8 in a 1:1 solution. When there is approx. 1 qt (1 liter) of washer fluid remaining in the reservoir, a text message and the
symbol will be displayed in the
instrument panel. Volume:
• Models
with headlight washers: 5.8 qts
(5.5 liters).
• Models
without headlight washers: 3.7 qts
(3.5 liter).
Related information
• Opening and closing the hood (p. 533)
• Engine compartment overview (p. 534)
Cleaning the exterior
The vehicle should be washed at regular inter- vals since dirt, dust, insects and tar spotsadhere to the paint and may cause damage. Tohelp prevent corrosion, it is particularly importantto wash the car frequently in the wintertime.
Hand washingThe following points should be kept in mind when washing and cleaning the vehicle:
CAUTION
Avoid using car washing detergents with a pH value lower than 3.5 or higher than 11.5.Doing so could result in discoloring of ano-dized aluminum surfaces on e.g., roof rails orthe frames around the side windows.
• Avoid washing your vehicle in direct sunlight. Doing so may cause detergents and wax todry out and become abrasive. To avoidscratching, use lukewarm water to soften thedirt before you wash with a soft sponge, andplenty of sudsy water.
• Bird droppings
: Remove from paintwork as
soon as possible. Otherwise the finish maybe permanently damaged.
• A car washing detergent can be used tofacilitate the softening of dirt and oil.
Page 549 of 580
MAINTENANCE AND SERVICING
}}
547
Corrosion protectionYour vehicle is constructed with effective protec- tion against corrosion.
Inspection and maintenanceThe corrosion protection does not normally require maintenance but keeping the vehicleclean helps prevent the onset of corrosion. Theuse of strong alkaline or acidic cleaning fluidsshould always be avoided on shiny body compo-nents. Any stone chips in the paint should betouched up as soon as possible.
Related information
• Paint damage (p. 547)
• Touching up paint damage (p. 548)
Paint damage
Paint damage requires immediate attention to avoid rusting. Make it a habit to check the finishregularly, for instance washing the vehicle.Touch-up if necessary.
Paint repairs require special equipment and skill. Contact your Volvo retailer for any extensive dam-age. Minor scratches can be repaired by using Volvo touch-up paint.
Color code
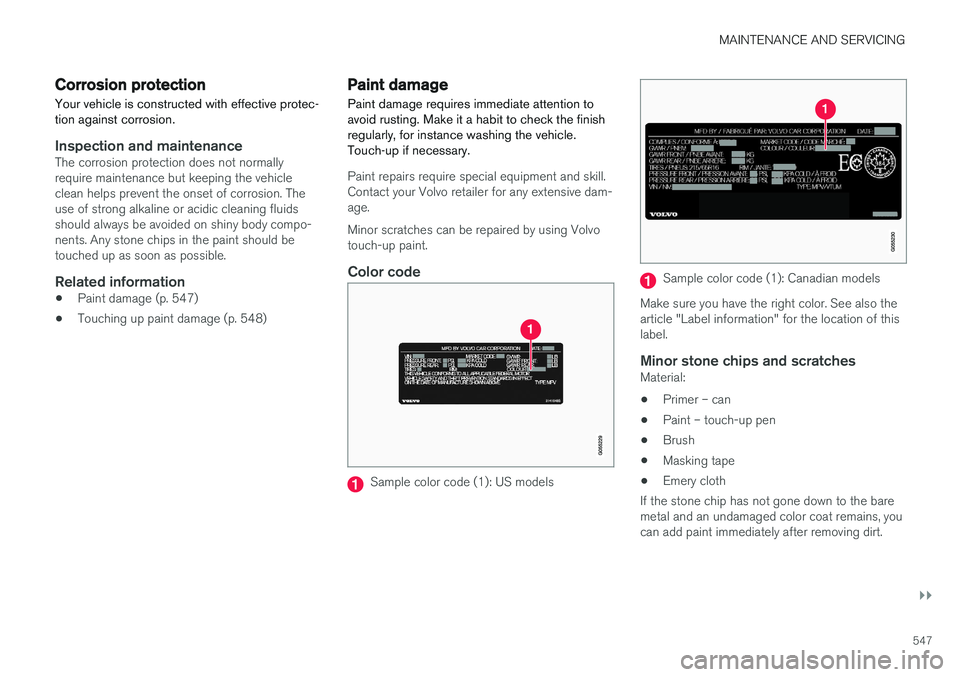
Sample color code (1): US models
Sample color code (1): Canadian models
Make sure you have the right color. See also the article "Label information" for the location of thislabel.
Minor stone chips and scratchesMaterial: • Primer – can
• Paint – touch-up pen
• Brush
• Masking tape
• Emery cloth
If the stone chip has not gone down to the bare metal and an undamaged color coat remains, youcan add paint immediately after removing dirt.