VOLVO XC90 TWIN ENGINE 2020 Owners Manual
Manufacturer: VOLVO, Model Year: 2020, Model line: XC90 TWIN ENGINE, Model: VOLVO XC90 TWIN ENGINE 2020Pages: 693, PDF Size: 13.34 MB
Page 561 of 693
WHEELS AND TIRES
* Option/accessory.559
Action when warned of low tire pressure When the inflation pressure monitoring sys- tem11
detects low inflation pressure in a tire,
immediate action is required.
If the system's indicator symbol illu- minates and the message Tire
pressure low is displayed, check
the tire pressure and inflate if neces-
sary.
1. Switch off the ignition.
2. Check the inflation pressure on all four tires using a tire pressure gauge.
3. Inflate the tire to the correct inflation pres- sure; see the tire pressure placard on the driver's side B pillar for recommendedpressures for factory-mounted tires.
4. After the inflation pressure has been adjusted, always save the new inflationpressure in the system via the center dis-play. Please be aware that the indicator symbol will not go out until the low tire pressurehas been corrected and a storing proce-dure has been started for the new inflationpressure.
NOTE
To help prevent incorrect inflation pressure, pressure should be checked when the tiresare cold. The tires are considered to becold when they have reached the sametemperature as the ambient temperature(about 3 hours after the vehicle was lastdriven). After driving for a few kilometers,the tires will warm up and the pressure willincrease.
NOTE
After inflating a tire, always replace the valve cap to help prevent valve damagecaused by gravel, dirt, etc.
Use plastic valve caps only. Metal capscould corrode and become difficult toremove.
WARNING
Incorrect inflation pressure could lead to tire failure, which could cause thedriver to lose control of the vehicle.
The system cannot predict sudden tiredamage.
Related information
Recommended tire pressure (p. 555)
Adjusting tire pressure (p. 554)
Saving a new inflation pressure in the monitoring system
* (p. 557)
Viewing tire pressure status in the centerdisplay
* (p. 558)
Tire pressure monitoring system
* (p. 555)
Inflate tires with the compressor included in the tire sealing system (p. 573)
11
Tire Pressure Monitoring System (TPMS)
Page 562 of 693

WHEELS AND TIRES
* Option/accessory.
560
When changing wheels
The wheels can be changed, e.g. to switch to snow tires or spare tires. Follow the applica-ble instructions for removing and installingthe wheel.
Changing to tires of another dimension
Make sure that the tire dimension is approved for use on the vehicle.
Related information
Removing a wheel (p. 562)
Installing a wheel (p. 564)
Tool kit (p. 560)
Snow tires (p. 567)
Spare wheel (p. 565)
Wheel bolts (p. 561)
Tool kit
Tools for e.g. towing or changing wheels are provided in the vehicle's cargo compartment.
Jack *
Tool for removing the plastic wheel bolt covers
Funnel for refilling fluids
Wheel bolt key * and towing eyelet
The foam block under the cargo compartment floor contains the towing eyelet, the tire seal-ing system, the tool for removing plastic wheelbolt covers and the tool for removing the lock-ing wheel bolts. If the vehicle is equipped with a spare tire *12
, a
jack and lug wrench are provided.
Related information
When changing wheels (p. 560)
Jack
* (p. 561)
Tire sealing system (p. 568)
Attaching and removing the towing eyelet (p. 469)
12
Not available on all models.
Page 563 of 693

WHEELS AND TIRES
* Option/accessory.561
Jack*
The jack can be used to lift the vehicle to e.g. change a wheel.CAUTION
When not in use, the jack
* should be
kept in its storage compartment under the cargo compartment floor.
The jack provided with your vehicle isintended to be used only in temporarysituations such as changing wheels inthe event of a flat tire. Only the jackthat came with your particular modelshould be used to lift the vehicle. If thevehicle needs to be lifted more fre-quently or for a prolonged period, usinga garage jack or hoist is recommended.Always follow this device's instructionsfor use.
The jack needs to be cranked together to the correct position in order to fit. For vehicles with
Leveling Control*
: If the
vehicle is equipped with the optional pneu- matic suspension, it must be turned off beforethe vehicle is lifted on a jack.
Related information
Tool kit (p. 560)
Hoisting the vehicle (p. 603)
Wheel bolts
The wheel bolts hold the wheel in place on the wheel hub.
Only use rims that have been tested and approved by Volvo and are included in Volvo'soriginal product range. Use a torque wrench to check that the wheel bolts are tightened correctly. Do not grease the wheel bolt threads.
WARNING
The wheel bolts may need to be tightened again several days after a wheel change.Temperature fluctuations and vibrationscan cause them to loosen slightly.
CAUTION
The wheel bolts should be tightened to 140 Nm (103 ft. lbs.). Over-tightening orunder-tightening could damage the threa-ded joints.
Locking wheel bolts *A tool for removing the locking wheel bolts is located in the foam block under the cargocompartment floor.
Related information
Removing a wheel (p. 562)
Installing a wheel (p. 564)
Page 564 of 693
WHEELS AND TIRES
* Option/accessory.
562
Removing a wheel Wheel changes must always be carried out correctly. The following instructions showhow to remove a wheel and what is impor-tant to keep in mind.
CAUTION
When not in use, the jack
* should be
kept in its storage compartment under the cargo compartment floor.
The jack provided with your vehicle isintended to be used only in temporarysituations such as changing wheels inthe event of a flat tire. Only the jackthat came with your particular modelshould be used to lift the vehicle. If thevehicle needs to be lifted more fre-quently or for a prolonged period, usinga garage jack or hoist is recommended.Always follow this device's instructionsfor use.
WARNING
Apply the parking brake and put the gear selector in the Park (
P) position.
Block the wheels standing on theground, use rigid wooden blocks orlarge stones.
Check that the jack is not damaged,the threads are properly lubricated andit is free from dirt.
Be sure the jack is on a firm, level, non-slippery surface and that it is uprightand not leaning.
The jack must correctly engage in thejack attachment.
No objects should be placed betweenthe base of the jack and the ground, orbetween the jack and the attachmentbar on the vehicle.
Never let anyone remain in the vehiclewhen it is raised on a jack.
If a tire must be changed near passingtraffic, make sure all passengers moveto a safe location.
Use a jack intended for the vehiclewhen changing a tire. For any otherjob, use stands to support the vehicle.
Never crawl under or allow any part ofyour body to be extended under a vehi-cle supported by a jack. 1. Turn on the vehicle's hazard warning
flashers if a wheel change must be per-formed in an area with traffic.
2. Apply the parking brake and put the gear selector in P, or first gear if the vehicle has
a manual transmission. For vehicles with
Leveling Control* : If the
vehicle is equipped with pneumatic sus- pension, this must be switched off before the vehicle is lifted with the jack *.
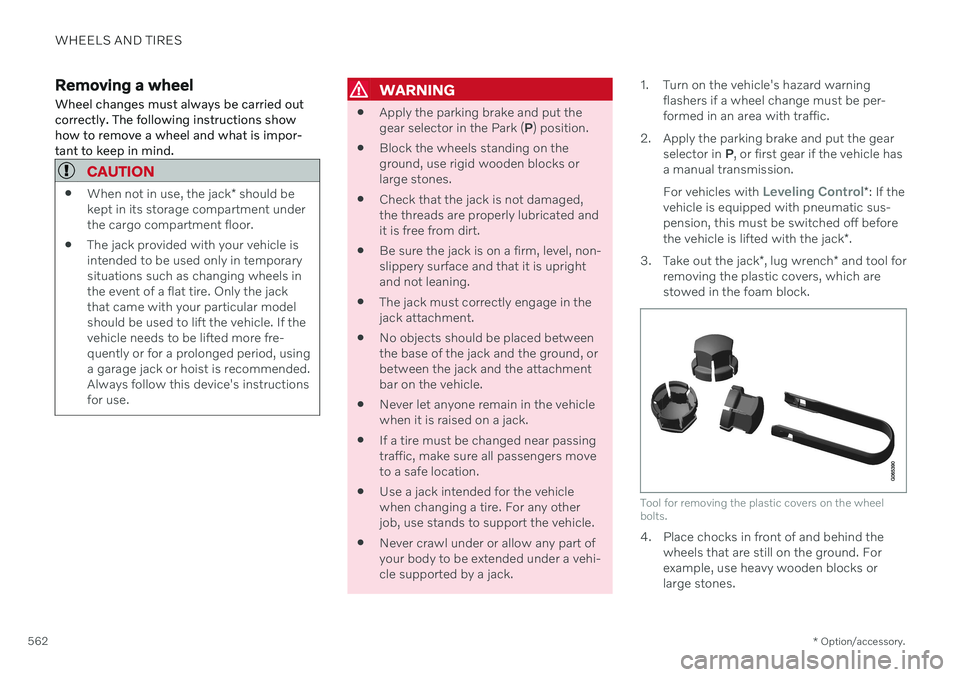
3. Take out the jack *, lug wrench * and tool for
removing the plastic covers, which are stowed in the foam block.
Tool for removing the plastic covers on the wheel bolts.
4. Place chocks in front of and behind the wheels that are still on the ground. For example, use heavy wooden blocks orlarge stones.
Page 565 of 693
WHEELS AND TIRES
* Option/accessory.563
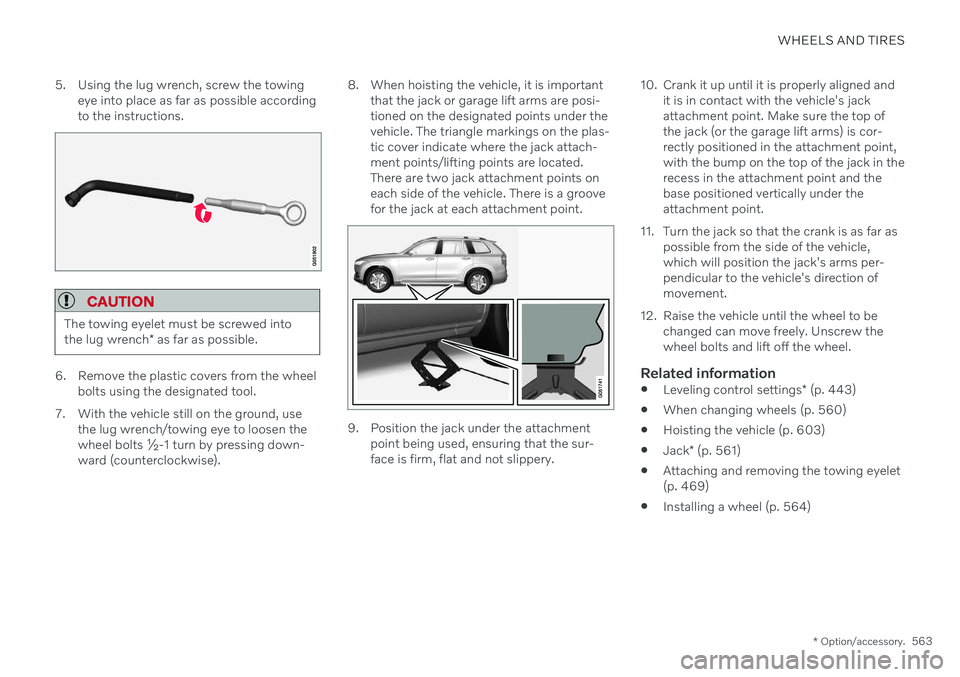
5. Using the lug wrench, screw the towing
eye into place as far as possible according to the instructions.
CAUTION
The towing eyelet must be screwed into the lug wrench * as far as possible.
6. Remove the plastic covers from the wheel
bolts using the designated tool.
7. With the vehicle still on the ground, use the lug wrench/towing eye to loosen the wheel bolts ½-1 turn by pressing down-ward (counterclockwise). 8. When hoisting the vehicle, it is important
that the jack or garage lift arms are posi-tioned on the designated points under thevehicle. The triangle markings on the plas-tic cover indicate where the jack attach-ment points/lifting points are located.There are two jack attachment points oneach side of the vehicle. There is a groovefor the jack at each attachment point.
9. Position the jack under the attachmentpoint being used, ensuring that the sur- face is firm, flat and not slippery. 10. Crank it up until it is properly aligned and
it is in contact with the vehicle's jackattachment point. Make sure the top ofthe jack (or the garage lift arms) is cor-rectly positioned in the attachment point,with the bump on the top of the jack in therecess in the attachment point and thebase positioned vertically under theattachment point.
11. Turn the jack so that the crank is as far as possible from the side of the vehicle,which will position the jack's arms per-pendicular to the vehicle's direction ofmovement.
12. Raise the vehicle until the wheel to be changed can move freely. Unscrew thewheel bolts and lift off the wheel.
Related information
Leveling control settings
* (p. 443)
When changing wheels (p. 560)
Hoisting the vehicle (p. 603)
Jack
* (p. 561)
Attaching and removing the towing eyelet(p. 469)
Installing a wheel (p. 564)
Page 566 of 693
WHEELS AND TIRES
* Option/accessory.
564
Installing a wheel Wheel changes must always be carried out correctly. The following instructions showhow to install a wheel and what is importantto keep in mind.
CAUTION
When not in use, the jack
* should be
kept in its storage compartment under the cargo compartment floor.
The jack provided with your vehicle isintended to be used only in temporarysituations such as changing wheels inthe event of a flat tire. Only the jackthat came with your particular modelshould be used to lift the vehicle. If thevehicle needs to be lifted more fre-quently or for a prolonged period, usinga garage jack or hoist is recommended.Always follow this device's instructionsfor use.
WARNING
Apply the parking brake and put the gear selector in the Park (
P) position.
Block the wheels standing on theground, use rigid wooden blocks orlarge stones.
Check that the jack is not damaged,the threads are properly lubricated andit is free from dirt.
Be sure the jack is on a firm, level, non-slippery surface and that it is uprightand not leaning.
The jack must correctly engage in thejack attachment.
No objects should be placed betweenthe base of the jack and the ground, orbetween the jack and the attachmentbar on the vehicle.
Never let anyone remain in the vehiclewhen it is raised on a jack.
If a tire must be changed near passingtraffic, make sure all passengers moveto a safe location.
Use a jack intended for the vehiclewhen changing a tire. For any otherjob, use stands to support the vehicle.
Never crawl under or allow any part of your body to be extended under a vehi-cle supported by a jack.
The vehicle must be raised high enough sothat the wheel you are removing can turnfreely.
1. Clean the contact surfaces between the wheel and the wheel hub.
2. Lift the wheel into place. Tighten the wheel bolts securely.Do not grease the wheel bolt threads.
3. Lower the vehicle so that the wheel can- not rotate.
Page 567 of 693
WHEELS AND TIRES
}}
* Option/accessory.565
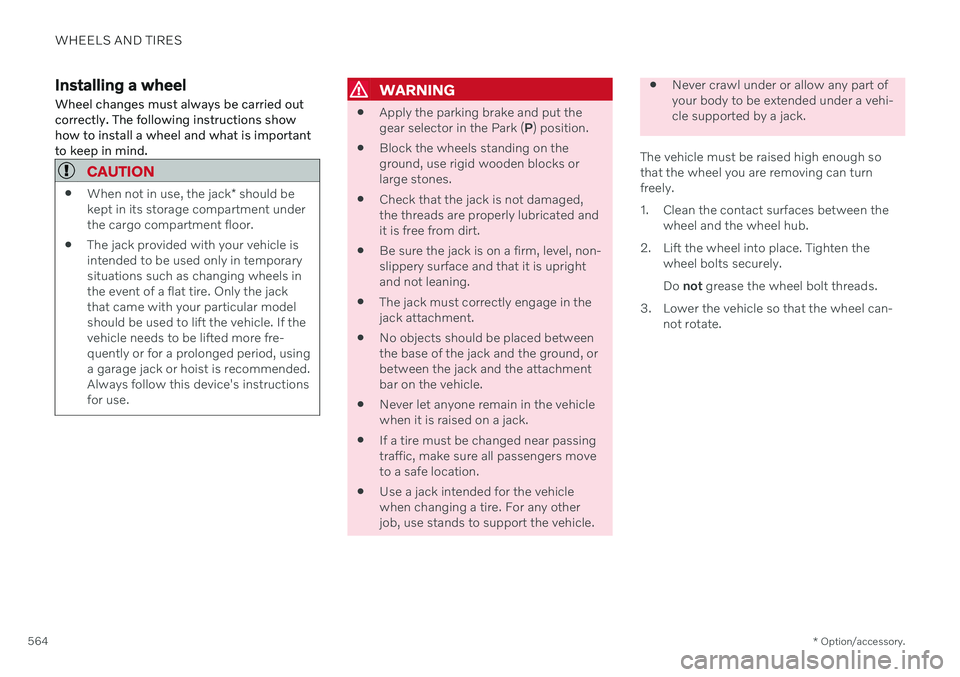
4. Tighten the wheel bolts in a crisscross pat-
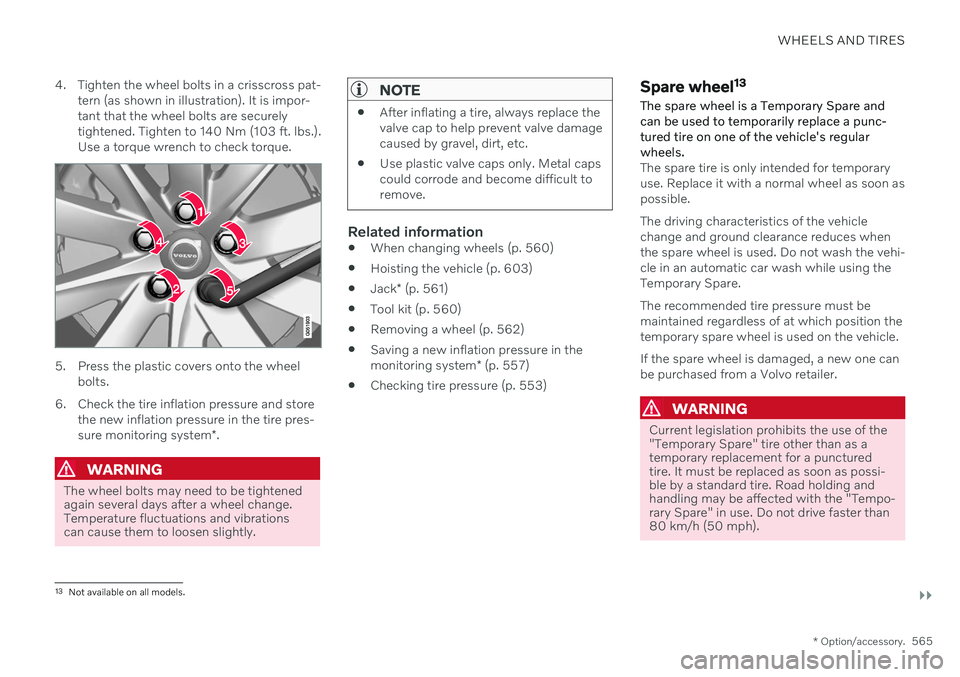
tern (as shown in illustration). It is impor- tant that the wheel bolts are securelytightened. Tighten to 140 Nm (103 ft. lbs.).Use a torque wrench to check torque.
5. Press the plastic covers onto the wheel bolts.
6. Check the tire inflation pressure and store the new inflation pressure in the tire pres- sure monitoring system *.
WARNING
The wheel bolts may need to be tightened again several days after a wheel change.Temperature fluctuations and vibrationscan cause them to loosen slightly.
NOTE
After inflating a tire, always replace the valve cap to help prevent valve damagecaused by gravel, dirt, etc.
Use plastic valve caps only. Metal capscould corrode and become difficult toremove.
Related information
When changing wheels (p. 560)
Hoisting the vehicle (p. 603)
Jack
* (p. 561)
Tool kit (p. 560)
Removing a wheel (p. 562)
Saving a new inflation pressure in the monitoring system
* (p. 557)
Checking tire pressure (p. 553)
Spare wheel 13
The spare wheel is a Temporary Spare and can be used to temporarily replace a punc- tured tire on one of the vehicle's regularwheels.
The spare tire is only intended for temporary use. Replace it with a normal wheel as soon aspossible. The driving characteristics of the vehicle change and ground clearance reduces whenthe spare wheel is used. Do not wash the vehi-cle in an automatic car wash while using theTemporary Spare. The recommended tire pressure must be maintained regardless of at which position thetemporary spare wheel is used on the vehicle. If the spare wheel is damaged, a new one can be purchased from a Volvo retailer.
WARNING
Current legislation prohibits the use of the "Temporary Spare" tire other than as atemporary replacement for a puncturedtire. It must be replaced as soon as possi-ble by a standard tire. Road holding andhandling may be affected with the "Tempo-rary Spare" in use. Do not drive faster than80 km/h (50 mph).
13 Not available on all models.
Page 568 of 693
||
WHEELS AND TIRES
* Option/accessory.
566
WARNING
The vehicle must never be driven with more than one "Temporary Spare" tiremounted.
Driving with a spare wheel may alterthe driving characteristics of the vehi-cle. Replace the spare wheel with anormal wheel as soon as possible.
The spare wheel is smaller than thenormal wheel, which affects the vehi-cle's ground clearance. Watch for highcurbs and do not wash the vehicle inan automatic car wash when a sparewheel is mounted.
Follow the manufacturer's recom-mended tire inflation pressure for thespare wheel.
On all-wheel drive vehicles, the driveon the rear axle can be disconnected.
If the spare wheel is mounted on thefront axle, snow chains must not beused.
The spare wheel must not be repaired.
CAUTION
The vehicle must not be driven with wheels of different dimensions or with a spare tireother than the one that came with the vehi-cle. The use of different size wheels canseriously damage your vehicle's transmis-sion.
Related information
When changing wheels (p. 560)
Recommended tire pressure (p. 555)
Handling spare tires Follow these instructions regarding handling the spare wheel.
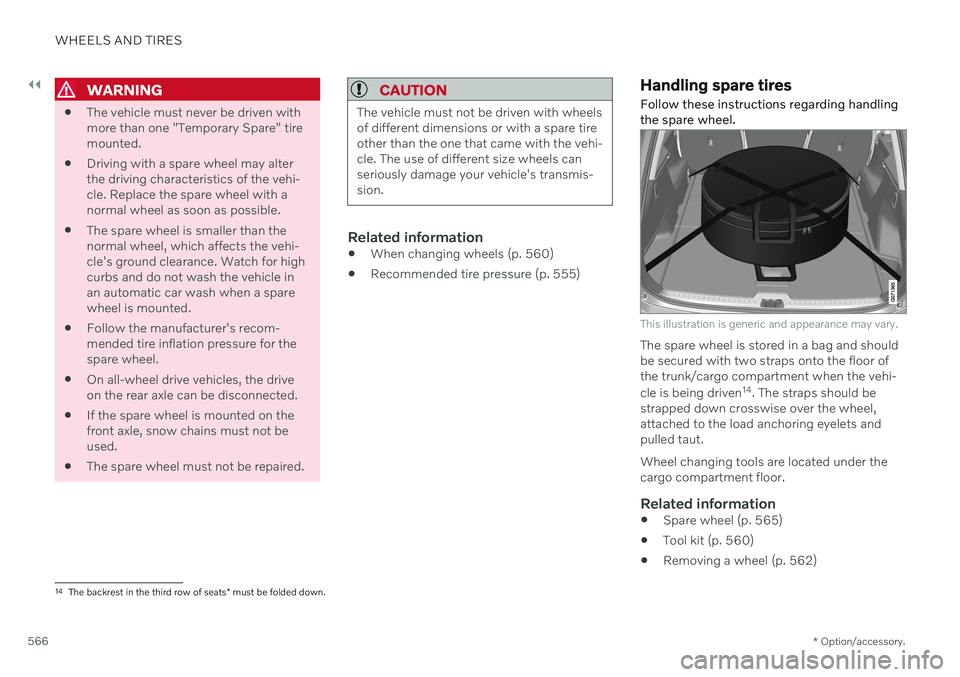
This illustration is generic and appearance may vary.
The spare wheel is stored in a bag and should be secured with two straps onto the floor ofthe trunk/cargo compartment when the vehi- cle is being driven 14
. The straps should be
strapped down crosswise over the wheel, attached to the load anchoring eyelets andpulled taut. Wheel changing tools are located under the cargo compartment floor.
Related information
Spare wheel (p. 565)
Tool kit (p. 560)
Removing a wheel (p. 562)
14
The backrest in the third row of seats * must be folded down.
Page 569 of 693
WHEELS AND TIRES
}}
567
Snow tires
Snow tires are designed for winter driving conditions.
Volvo recommends snow tires with specific dimensions. The tire dimensions vary depend-ing on engine type. When driving with snowtires, the correct type of tires must be moun-ted on all four wheels.
NOTE
Contact a Volvo dealer for advice on the best choice of rims and tires.
Tips for changing snow tiresWhen switching between regular tires and snow tires, mark the tires according to whichside they were mounted on, e.g. L for left and
R for right.
Studded tiresStudded tires should be broken in by driving500–1000 km (300–600 miles) slowly andgently to help the studs settle properly in thetires. This gives the tire, and especially thestuds, a longer service life.
NOTE
Regulations regarding the use of studded tires vary from country to country.
Tread depthRoad conditions with ice, slush and low tem- peratures place considerably higher demandson tires than summer conditions. Volvo there-fore recommends not driving on snow tiresthat have a tread depth of less than 4 mm(0.15 inch).
Related information
When changing wheels (p. 560)
Winter driving (p. 450)
Tread wear indicator (p. 549)
Snow chains
Using snow chains and/or snow tires can help improve traction in winter driving condi-tions.
Volvo does not recommend use of snow chains on wheel dimensions larger than19 inches.
WARNING
Use Volvo genuine snow chains or equiva- lent snow chains that are suitable for thevehicle model and the tire and wheel sizes.Only one-sided snow chains are permit-
ted. If uncertain about snow chains, Volvo rec- ommends contacting an authorized Volvoworkshop. Use of the wrong snow chainscould cause serious damage to the vehicleand result in an accident.
Page 570 of 693
||
WHEELS AND TIRES
568
CAUTION
Snow chains can be used on the vehicle, with the following restrictions:
Always follow the manufacturer'sinstallation instructions carefully. Installchains as tightly as possible andretighten periodically.
Only put snow chains on the frontwheels (also applies to all-wheel drivevehicles).
If accessory, aftermarket or "custom"tires and wheels with different dimen-sions than the original tires and wheelsare used, snow chains in some casesmay NOT be used. Sufficient distancebetween the chains and brakes, sus-pension and body components mustbe maintained.
Check local regulations regarding theuse of snow chains before installing.
Never exceed the snow chain manu-facturer's specified maximum speedlimit. Under no circumstances shouldyou exceed 50 km/h (30 mph).
Avoid bumps, holes or sharp turnswhen driving with snow chains.
Avoid driving on surfaces withoutsnow as this wears out both the snowchains and the tires.
The handling of the vehicle can be adversely affected when driving withchains. Avoid fast or sharp turns aswell as locked wheel braking.
Some types of strap-on chains affectbrake components and therefore mustNOT be used.
Consult a Volvo retailer for more information about snow chains.
Related information
Winter driving (p. 450)
Tire sealing system 15
The temporary tire sealing system can be used to seal a puncture in a tire or to checkand adjust the pressure in the tire. Models equipped with a spare wheel 16
do not
have the tire sealing system.
WARNING
California Proposition 65 Operating, servicing and maintaining a pas- senger vehicle can expose you to chemi-cals including engine exhaust, carbon mon-oxide, phthalates, and lead, which areknown to the State of California to causecancer and birth defects or other reproduc-tive harm. To minimize exposure, avoidbreathing exhaust, do not idle the engineexcept as necessary, service your vehicle ina well ventilated area and wear gloves orwash your hands frequently when servicingyour vehicle. For more information go towww.P65Warnings.ca.gov/passenger-vehicle.
The tire sealing system consists of a compres- sor and a bottle containing sealing compound.The sealing functions as a temporary repair.