suspension VOLVO XC90 TWIN ENGINE HYBRID 2017 Owners Manual
[x] Cancel search | Manufacturer: VOLVO, Model Year: 2017, Model line: XC90 TWIN ENGINE HYBRID, Model: VOLVO XC90 TWIN ENGINE HYBRID 2017Pages: 584, PDF Size: 14.2 MB
Page 10 of 584
8
STARTING AND DRIVING
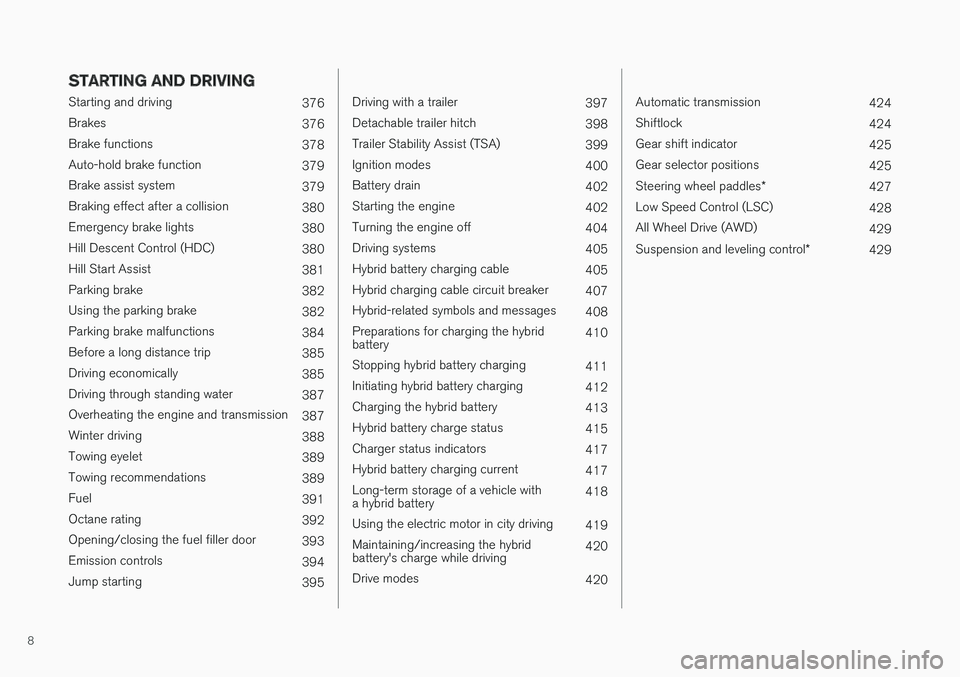
Starting and driving376
Brakes376
Brake functions378
Auto-hold brake function379
Brake assist system379
Braking effect after a collision380
Emergency brake lights380
Hill Descent Control (HDC)380
Hill Start Assist381
Parking brake382
Using the parking brake382
Parking brake malfunctions384
Before a long distance trip385
Driving economically385
Driving through standing water387
Overheating the engine and transmission387
Winter driving388
Towing eyelet389
Towing recommendations389
Fuel391
Octane rating392
Opening/closing the fuel filler door393
Emission controls394
Jump starting395
Driving with a trailer397
Detachable trailer hitch398
Trailer Stability Assist (TSA)399
Ignition modes400
Battery drain402
Starting the engine402
Turning the engine off404
Driving systems405
Hybrid battery charging cable405
Hybrid charging cable circuit breaker407
Hybrid-related symbols and messages408
Preparations for charging the hybridbattery410
Stopping hybrid battery charging411
Initiating hybrid battery charging412
Charging the hybrid battery413
Hybrid battery charge status415
Charger status indicators417
Hybrid battery charging current417
Long-term storage of a vehicle witha hybrid battery418
Using the electric motor in city driving419
Maintaining/increasing the hybridbattery's charge while driving420
Drive modes420
Automatic transmission424
Shiftlock424
Gear shift indicator425
Gear selector positions425
Steering wheel paddles*427
Low Speed Control (LSC)428
All Wheel Drive (AWD)429
Suspension and leveling control*429
Page 119 of 584
INSTRUMENTS AND CONTROLS
* Option/accessory, for more information, see Introduction.117
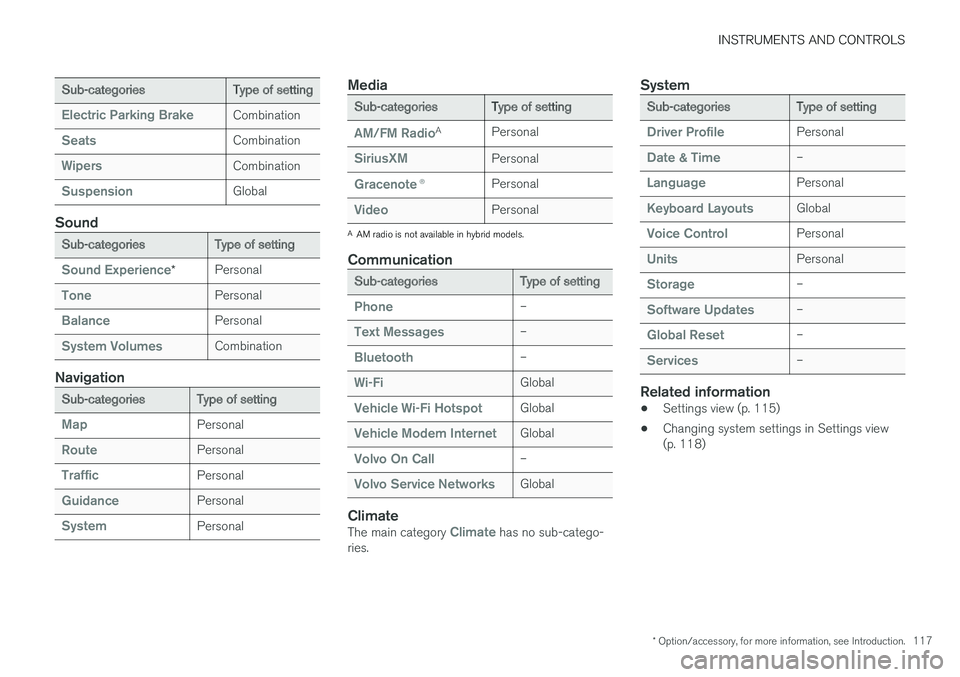
Sub-categoriesType of setting
Electric Parking BrakeCombination
SeatsCombination
WipersCombination
SuspensionGlobal
Sound
Sub-categoriesType of setting
Sound Experience*Personal
TonePersonal
BalancePersonal
System VolumesCombination
Navigation
Sub-categoriesType of setting
MapPersonal
RoutePersonal
TrafficPersonal
GuidancePersonal
SystemPersonal
Media
Sub-categoriesType of setting
AM/FM RadioAPersonal
SiriusXMPersonal
Gracenote®Personal
VideoPersonal
AAM radio is not available in hybrid models.
Communication
Sub-categoriesType of setting
Phone–
Text Messages–
Bluetooth–
Wi-FiGlobal
Vehicle Wi-Fi HotspotGlobal
Vehicle Modem InternetGlobal
Volvo On Call–
Volvo Service NetworksGlobal
Climate
The main category Climate has no sub-catego-ries.
System
Sub-categoriesType of setting
Driver ProfilePersonal
Date & Time–
LanguagePersonal
Keyboard LayoutsGlobal
Voice ControlPersonal
UnitsPersonal
Storage–
Software Updates–
Global Reset–
Services–
Related information
•Settings view (p. 115)
•Changing system settings in Settings view(p. 118)
Page 422 of 584
STARTING AND DRIVING
* Option/accessory, for more information, see Introduction.420
Maintaining/increasing the hybridbattery's charge while driving
In certain situations, it can be useful to controlthe hybrid battery's charge level while the vehicleis being driven. The hybrid battery functionsHold and Charge while driving are available inall drive modes.
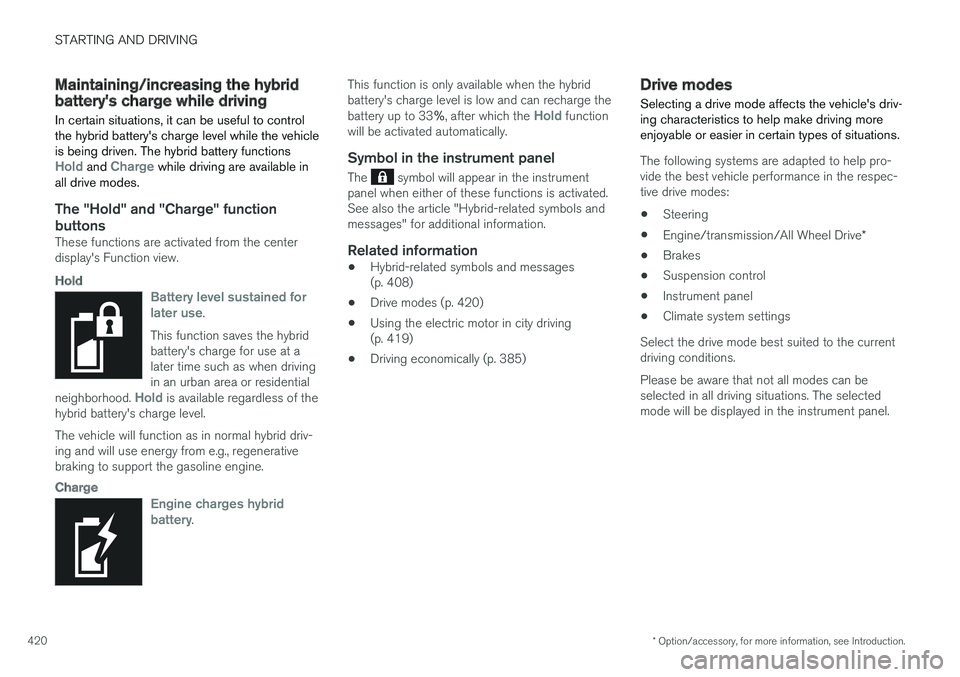
The "Hold" and "Charge" function
buttons
These functions are activated from the centerdisplay's Function view.
Hold
Battery level sustained forlater use.
This function saves the hybridbattery's charge for use at alater time such as when drivingin an urban area or residentialneighborhood. Hold is available regardless of thehybrid battery's charge level.
The vehicle will function as in normal hybrid driv-ing and will use energy from e.g., regenerativebraking to support the gasoline engine.
Charge
Engine charges hybridbattery.
This function is only available when the hybridbattery's charge level is low and can recharge thebattery up to 33%, after which the Hold functionwill be activated automatically.
Symbol in the instrument panel
The symbol will appear in the instrumentpanel when either of these functions is activated.See also the article "Hybrid-related symbols andmessages" for additional information.
Related information
•Hybrid-related symbols and messages(p. 408)
•Drive modes (p. 420)
•Using the electric motor in city driving(p. 419)
•Driving economically (p. 385)
Drive modes
Selecting a drive mode affects the vehicle's driv-ing characteristics to help make driving moreenjoyable or easier in certain types of situations.
The following systems are adapted to help pro-vide the best vehicle performance in the respec-tive drive modes:
•Steering
•Engine/transmission/All Wheel Drive*
•Brakes
•Suspension control
•Instrument panel
•Climate system settings
Select the drive mode best suited to the currentdriving conditions.
Please be aware that not all modes can beselected in all driving situations. The selectedmode will be displayed in the instrument panel.
Page 424 of 584
||
STARTING AND DRIVING
422
When the hybrid battery's charge level is low, thegasoline engine will start more often to help con-serve electrical energy. Charge the battery withthe charging cable as soon as possible.
PURE
This mode activates the electric motor only withas low energy consumption as possible and thelowest possible carbon dioxide emissions.
Ground clearance will be lowered to help reducewind resistance and certain climate system func-tions will be reduced.
Pure mode is available when the hybrid battery issufficiently charged. If the level gets too low, thegasoline engine will start.
The gasoline engine will also start:
•If the vehicle's speed goes above approx.78 mph (125 km/h)
•If the driver wants more response than theelectric motor alone can provide
•If factors such as cold weather, etc., affectthe system or components
To restart the climate system functions that havebeen reduced in the mode, press the AUTO ordefroster buttons.
In order to return to full functionality for all of thesystems that may be affected by Pure mode,select another drive mode or adapt the climatesystem functions using the INDIVIDUAL mode.
OFF ROAD
This mode helps maximize the vehicle's capacityto traverse difficult terrain or poor roads.
In OFF ROAD, ground clearance is maximized,the steering is light, All Wheel Drive and HillDescent Control are activated and a compassand altimeter will be displayed in the instrumentpanel.
This drive mode can only be activated at lowspeeds (the permissible speed range will beshown on the speedometer). At higher speeds,OFF ROAD mode will be cancelled and AWD willbe activated.
This mode is not intended for normal streetdriving.
CAUTION
OFF ROAD drive mode may not be used ifthe vehicle is towing a trailer without an elec-trical connection. This could result in damageto the pneumatic suspension system's bel-lows.
Due to the increased ground clearance, if theOFF ROAD mode was selected when the enginewas switched off, it will also restart in this mode.
AWD
This mode offers improved traction using four-wheel drive and is intended primarily for low-speed driving on slippery surfaces. However, it
also helps increase directional stability at higherspeeds.
In this mode, both the electric motor and the gas-oline engine are used continuously, which resultsin higher fuel consumption.
POWER
Power mode is intended for sportier, more activedriving.
This mode maximizes the combined effects ofthe electric motor and the gasoline engine andprovides power to all four wheels. Response topressure on the accelerator pedal is more imme-diate and the transmission shifts up at higherspeeds. Steering response is also more immedi-ate, the suspension is stiffer and lower groundclearance reduces body roll when cornering.
In this mode, both the electric motor and the gas-oline engine are used continuously, which resultsin higher fuel consumption.
Page 425 of 584

STARTING AND DRIVING
423
INDIVIDUAL
This setting allows you to adapt a driving mode toyour personal preferences.
Select one of the other driving modes as a basisand change the settings to provide the drivingcharacteristics that you prefer. This driving modeis only available if it has been activated in thecenter display.
INDIVIDUAL is only available if it has been acti-vated in the center display.
Settings view5 for INDIVIDUAL driving mode
1.Tap Settings in the center display's Topview.
2.Tap My CarIndividual Drive Mode andtap Individual Drive Mode.
3.Select: Eco, Comfort or Dynamic.
The following settings can be modified:
•Driver Display (instrument panel)
•Steering force
•Powertrain Characteristics
•Brake Characteristics
•Pneumatic suspension and shockabsorbers
•ECO Climate.
Related information
•Adjustable steering force (p. 262)
•Loading (p. 218)
•General information about the XC90 T8 TwinEngine Plug-in Hybrid (p. 16)
•All Wheel Drive (AWD) (p. 429)
•Hill Descent Control (HDC) (p. 380)
•Brakes (p. 376)
5Generic illustration.
Page 431 of 584
STARTING AND DRIVING
}}
* Option/accessory, for more information, see Introduction.429
Activating LSC
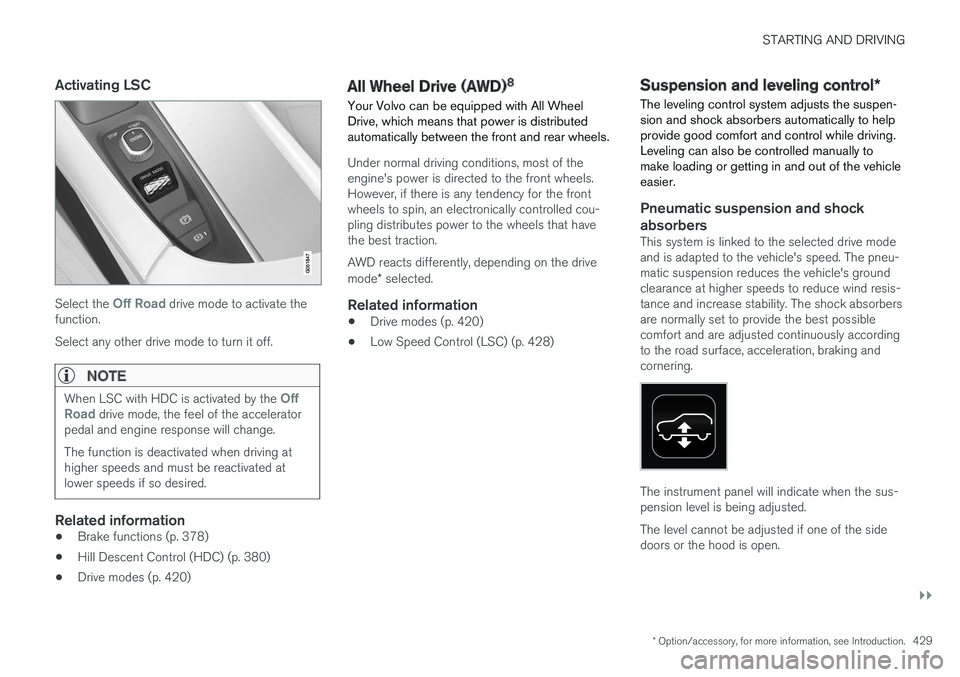
Select the Off Road drive mode to activate thefunction.
Select any other drive mode to turn it off.
NOTE
When LSC with HDC is activated by the OffRoad drive mode, the feel of the acceleratorpedal and engine response will change.
The function is deactivated when driving athigher speeds and must be reactivated atlower speeds if so desired.
Related information
•Brake functions (p. 378)
•Hill Descent Control (HDC) (p. 380)
•Drive modes (p. 420)
All Wheel Drive (AWD)8
Your Volvo can be equipped with All WheelDrive, which means that power is distributedautomatically between the front and rear wheels.
Under normal driving conditions, most of theengine's power is directed to the front wheels.However, if there is any tendency for the frontwheels to spin, an electronically controlled cou-pling distributes power to the wheels that havethe best traction.
AWD reacts differently, depending on the drivemode* selected.
Related information
•Drive modes (p. 420)
•Low Speed Control (LSC) (p. 428)
Suspension and leveling control*
The leveling control system adjusts the suspen-sion and shock absorbers automatically to helpprovide good comfort and control while driving.Leveling can also be controlled manually tomake loading or getting in and out of the vehicleeasier.
Pneumatic suspension and shock
absorbers
This system is linked to the selected drive modeand is adapted to the vehicle's speed. The pneu-matic suspension reduces the vehicle's groundclearance at higher speeds to reduce wind resis-tance and increase stability. The shock absorbersare normally set to provide the best possiblecomfort and are adjusted continuously accordingto the road surface, acceleration, braking andcornering.
The instrument panel will indicate when the sus-pension level is being adjusted.
The level cannot be adjusted if one of the sidedoors or the hood is open.
Page 432 of 584
||
STARTING AND DRIVING
430
Suspension leveling settings
Easy entry
The vehicle can be lowered to entering and exit-ing easier.
In the center display's Top view:
1.Tap Settings.
2.Tap My CarSuspension .
3.Select Easy Entry/Exit Control.
>When the vehicle is parked and theengine is turned off, the level is lowered.Level adjustment will stop if a side door isopened and will resume after a slightdelay when the door has been closed.When the engine is started and the vehi-cle begins to move, the level will be raisedto the height set by the selected drivemode.
If a door has been opened and closed, there maybe a slight delay before the leveling function willresume.
Turning off suspension and leveling control
In certain situations, this function has to beturned off, for example when lifting the vehicle ona jack to help avoid problems created by the dif-ference in levels in the pneumatic suspensionwhen the vehicle is raised.
1.Tap Settings in the center display's Topview.
2.Tap My CarSuspension .
3.Select Deactivate Suspension & LevelingControl.
Loading mode
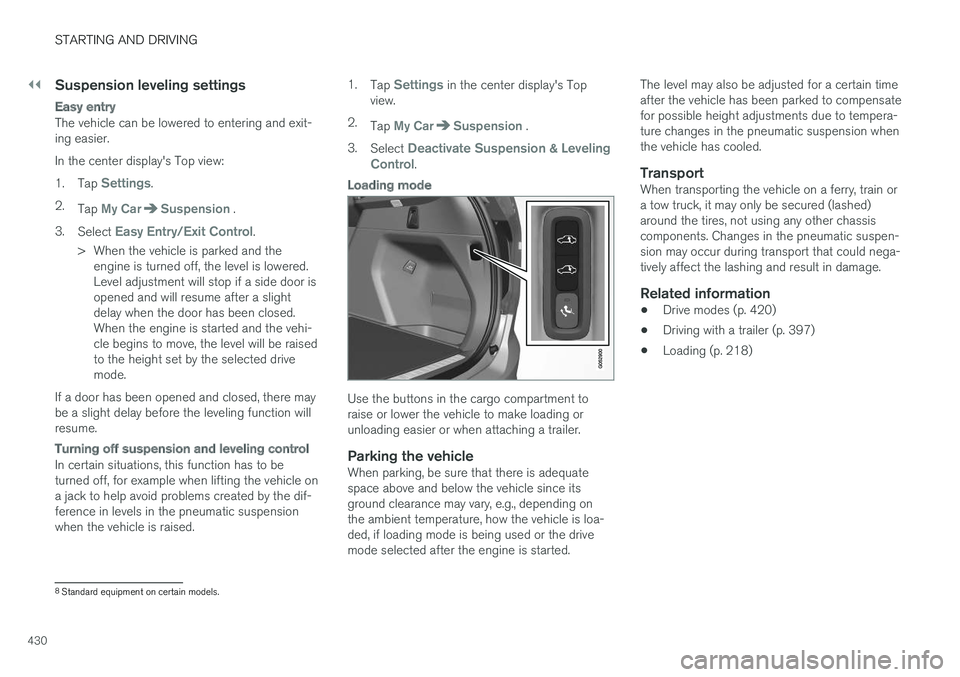
Use the buttons in the cargo compartment toraise or lower the vehicle to make loading orunloading easier or when attaching a trailer.
Parking the vehicle
When parking, be sure that there is adequatespace above and below the vehicle since itsground clearance may vary, e.g., depending onthe ambient temperature, how the vehicle is loa-ded, if loading mode is being used or the drivemode selected after the engine is started.
The level may also be adjusted for a certain timeafter the vehicle has been parked to compensatefor possible height adjustments due to tempera-ture changes in the pneumatic suspension whenthe vehicle has cooled.
Transport
When transporting the vehicle on a ferry, train ora tow truck, it may only be secured (lashed)around the tires, not using any other chassiscomponents. Changes in the pneumatic suspen-sion may occur during transport that could nega-tively affect the lashing and result in damage.
Related information
•Drive modes (p. 420)
•Driving with a trailer (p. 397)
•Loading (p. 218)
8Standard equipment on certain models.
Page 487 of 584
WHEELS AND TIRES
}}
485
Uniform Tire Quality Grading
ALL PASSENGER VEHICLE TIRES MUSTCONFORM TO FEDERAL SAFETY REQUIRE-MENTS IN ADDITION TO THESE GRADES.
Quality grades can be found, where applica-ble, on the tire sidewall between the treadshoulder and maximum section width. Forexample:
Treadwear 200 Traction AA Temperature A
TREADWEAR
The treadwear grade is a comparative ratingbased on the wear rate of the tire when testedunder controlled conditions on a specified gov-ernment test course. For example, a tire graded150 would wear one and one half (1 ½) times aswell on the government course as a tire graded100. The relative performance of tires dependsupon the actual conditions of their use, however,and many depart significantly from the norm dueto variation in driving habits, maintenance practi-ces and differences in road characteristics andclimate.
TRACTION
The traction grades, from highest to lowest, areAA, A, B, and C, as measured under controlledconditions on specified government test surfacesof asphalt and concrete. A tire marked C mayhave poor traction performance. The tractiongrade assigned to this tire is based on braking
(straight-ahead) traction tests and is not a meas-ure of cornering (turning) traction.
WARNING
The traction grade assigned to this tire isbased on braking (straight-ahead) tractiontests and is not a measure of cornering (turn-ing) traction.
TEMPERATURE
The temperature grades are A (the highest), B,and C, representing the tire's resistance to thegeneration of heat and its ability to dissipate heatwhen tested under controlled conditions on aspecified indoor laboratory test wheel. Sustainedhigh temperature can cause the material of thetire to degenerate and reduce tire life, and exces-sive temperature can lead to sudden tire failure.The grade C corresponds to a minimum level ofperformance that all passenger vehicle tires mustmeet under the Federal Motor Safety StandardNo. 109. Grades B and A represent higher levelsof performance on the laboratory test wheel thanthe minimum required by law.
WARNING
The temperature grade for this tire is estab-lished for a tire that is properly inflated andnot overloaded. Excessive speed, under-infla-tion, or excessive loading, either separately orin combination, can cause heat buildup andtire failure.
Snow tires and chains
The use of snow chains and/or winter tires canhelp improve traction in winter driving conditions.
Snow chains can be used on your Volvo with thefollowing restrictions:
•Snow chains should be installed on frontwheels only. Use only Volvo approved snowchains.
•If accessory, aftermarket or "custom" tiresand wheels are installed and are of a size dif-ferent than the original tires and wheels,chains in some cases CANNOT be used.Sufficient clearances between chains andbrakes, suspension and body componentsmust be maintained.
•Some strap-on type chains will interfere withbrake components and therefore CANNOTbe used.
•All Wheel Drive models: Snow chainsshould only be installed on the front wheels.
•Certain size tires may not allow the assemblyof snow chains/traction devices.
Consult your Volvo retailer for additional snowchain information.
Page 491 of 584
WHEELS AND TIRES
}}
* Option/accessory, for more information, see Introduction.489
Wheel bolts
The wheel bolts hold the wheel in place.
CAUTION
Wheel bolts should be tightened to 103 ft.lbs. (140 Nm). Over-tightening could damagethe threads.
Only use wheels/rims that have been tested andapproved by Volvo and are included in Volvo'sproduct range.
Use a torque wrench to check that the wheelbolts are tightened correctly.
Never lubricate the wheel bolts' threads.
Locking wheel bolts *
A tool for removing locking wheel bolts can befound in the foam block under the cargo com-partment floor.
Related information
•Changing tires (p. 487)
•Installing a wheel (p. 491)
Removing a wheel
Wheel changes should always be carried outcorrectly.
1. Turn on the hazard warning flashers if thewheel change has to be done near passingtraffic.
2.Apply the parking brake and put the gearselector in P.
CAUTION
Models with suspension and level con-trol*:
Turn this function off before raising the vehi-cle.
To do so, go to SettingsVehicleDeactivate Suspension & Leveling Controlin the center display's Top view.
WARNING
•The jack must correctly engage the jackattachment.
•Be sure the jack is on a firm, level, non-slippery surface.
•Never allow any part of your body to beextended under a vehicle supported by ajack.
•Use the jack intended for the vehicle whenchanging a tire. For any other job, usestands to support the vehicle.
•Apply the parking brake and put the gearselector in the Park (P) position.
•Block the wheels standing on the ground,use rigid wooden blocks or large stones.
•The jack should be kept well-greased andclean, and should not be damaged.
•No objects should be placed between thebase of jack and the ground, or betweenthe jack and the attachment bar on thevehicle.
Page 531 of 584
MAINTENANCE AND SERVICING
* Option/accessory, for more information, see Introduction.529
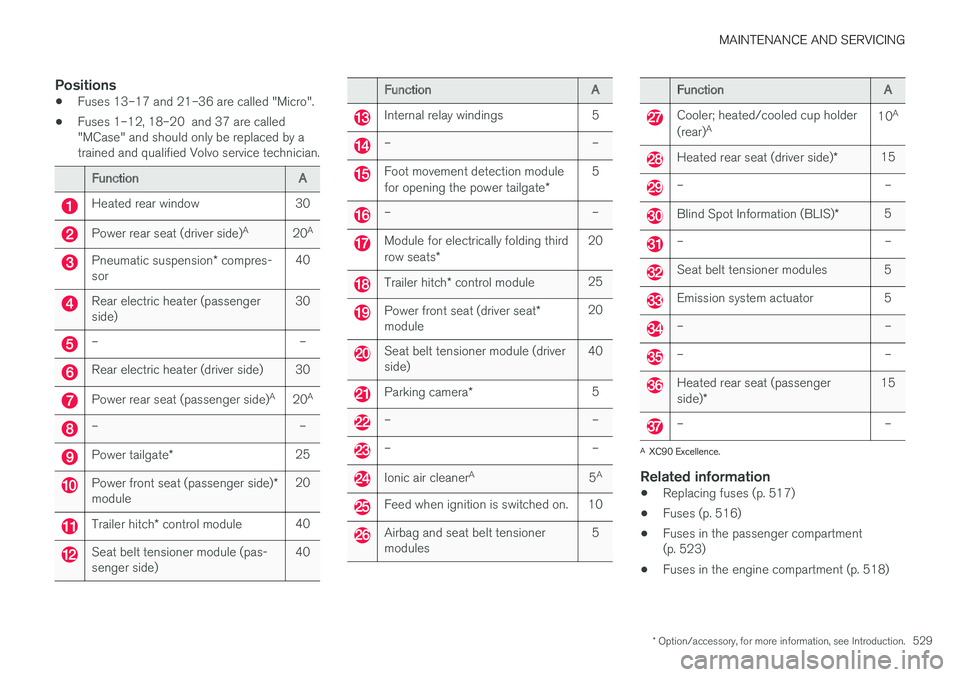
Positions
•Fuses 13–17 and 21–36 are called "Micro".
•Fuses 1–12, 18–20 and 37 are called"MCase" and should only be replaced by atrained and qualified Volvo service technician.
FunctionA
Heated rear window30
Power rear seat (driver side)A20A
Pneumatic suspension* compres-sor40
Rear electric heater (passengerside)30
––
Rear electric heater (driver side)30
Power rear seat (passenger side)A20A
––
Power tailgate*25
Power front seat (passenger side)*module20
Trailer hitch* control module40
Seat belt tensioner module (pas-senger side)40
FunctionA
Internal relay windings5
––
Foot movement detection modulefor opening the power tailgate*5
––
Module for electrically folding thirdrow seats*20
Trailer hitch* control module25
Power front seat (driver seat*module20
Seat belt tensioner module (driverside)40
Parking camera*5
––
––
Ionic air cleanerA5A
Feed when ignition is switched on.10
Airbag and seat belt tensionermodules5
FunctionA
Cooler; heated/cooled cup holder
(rear)A10A
Heated rear seat (driver side)*15
––
Blind Spot Information (BLIS)*5
––
Seat belt tensioner modules5
Emission system actuator5
––
––
Heated rear seat (passengerside)*15
––
AXC90 Excellence.
Related information
•Replacing fuses (p. 517)
•Fuses (p. 516)
•Fuses in the passenger compartment(p. 523)
•Fuses in the engine compartment (p. 518)