fuel YAMAHA DT125R 2002 Owners Manual
[x] Cancel search | Manufacturer: YAMAHA, Model Year: 2002, Model line: DT125R, Model: YAMAHA DT125R 2002Pages: 96, PDF Size: 2.14 MB
Page 6 of 96
EAU00009
TABLE OF CONTENTS
GIVE SAFETY THE RIGHT OF WAY ............... 1-1
DESCRIPTION .................................................. 2-1
Left view ......................................................... 2-1
Right view ....................................................... 2-2
Controls and instruments ............................... 2-3
INSTRUMENT AND CONTROL FUNCTIONS .. 3-1
Main switch ..................................................... 3-1
Indicator and warning lights ............................ 3-1
Speedometer unit .......................................... 3-2
Tachometer .................................................... 3-2
Coolant temperature gauge ............................ 3-3
Handlebar switches ........................................ 3-3
Clutch lever .................................................... 3-4
Shift pedal ...................................................... 3-4
Brake lever ..................................................... 3-5
Brake pedal .................................................... 3-5
Fuel tank cap .................................................. 3-5
Fuel (except for Switzerland and Austria) ...... 3-6
Fuel (for Switzerland and Austria) ................. 3-6
Catalytic converter
(for Switzerland and Austria) ....................... 3-7
2-stroke engine oil .......................................... 3-8
Fuel cock ........................................................ 3-9
Starter (choke) lever ..................................... 3-10Kickstarter .................................................... 3-10
Steering lock ................................................. 3-10
Seat .............................................................. 3-11
Helmet holder ............................................... 3-12
Adjusting the shock absorber assembly ....... 3-12
Carrier .......................................................... 3-14
YEIS handling precautions .......................... 3-14
YPVS ............................................................ 3-14
Sidestand ..................................................... 3-15
Ignition circuit cut-off system ........................ 3-16
PRE-OPERATION CHECKS ............................. 4-1
Pre-operation check list .................................. 4-1
OPERATION AND IMPORTANT
RIDING POINTS ............................................... 5-1
Starting a cold engine .................................... 5-1
Starting a warm engine .................................. 5-2
Shifting ........................................................... 5-2
Recommended shift points
(for Switzerland only) .................................. 5-3
Tips for reducing fuel consumption ................ 5-3
Engine break-in .............................................. 5-4
Parking ........................................................... 5-5
123
45
3MB-9-E8 6/13/01 10:55 AM Page 5
Page 11 of 96
2-1
EAU00026
DESCRIPTION
2
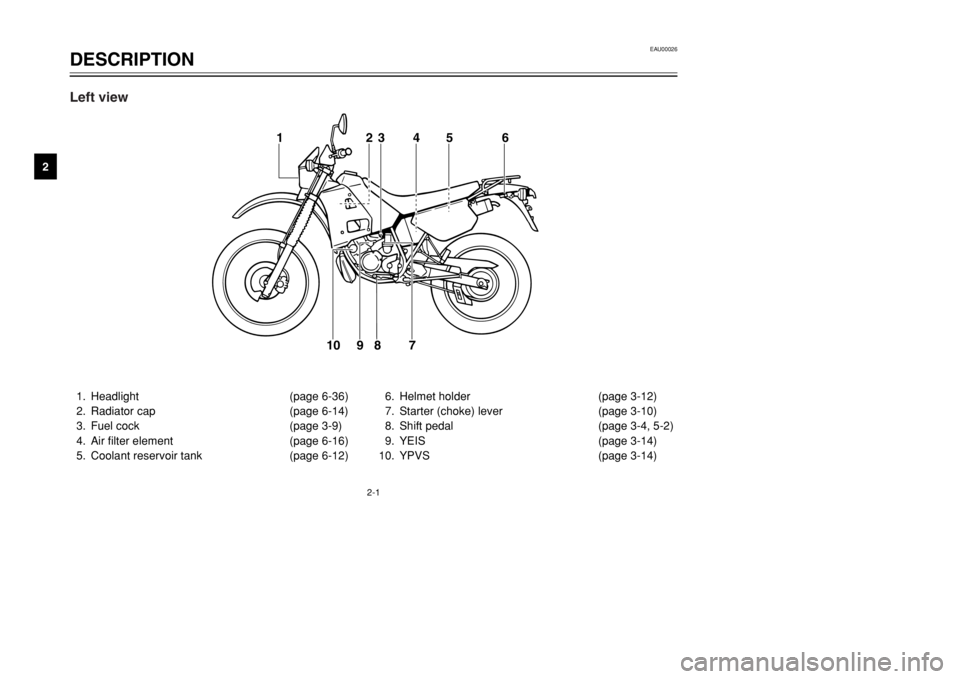
1. Headlight (page 6-36)
2. Radiator cap (page 6-14)
3. Fuel cock (page 3-9)
4. Air filter element (page 6-16)
5. Coolant reservoir tank (page 6-12)6. Helmet holder (page 3-12)
7. Starter (choke) lever (page 3-10)
8. Shift pedal (page 3-4, 5-2)
9. YEIS (page 3-14)
10. YPVS (page 3-14)
1
23 4 5 6
7 8
9 10
Left view
3MB-9-E8 6/13/01 10:55 AM Page 10
Page 13 of 96
2-3
DESCRIPTION
2
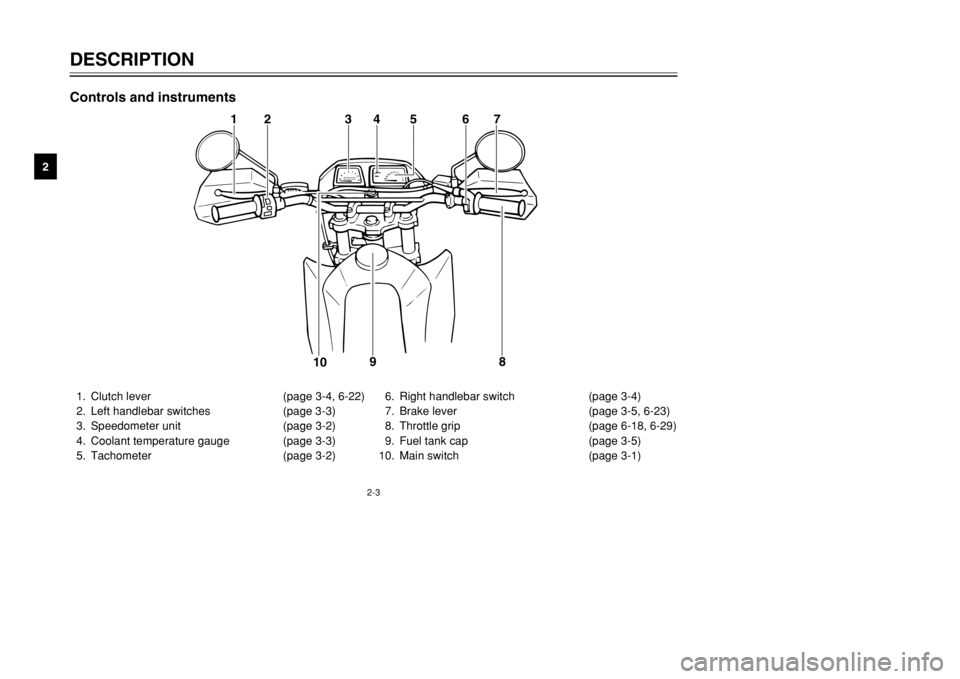
1. Clutch lever (page 3-4, 6-22)
2. Left handlebar switches (page 3-3)
3. Speedometer unit (page 3-2)
4. Coolant temperature gauge (page 3-3)
5. Tachometer (page 3-2)6. Right handlebar switch (page 3-4)
7. Brake lever (page 3-5, 6-23)
8. Throttle grip (page 6-18, 6-29)
9. Fuel tank cap (page 3-5)
10. Main switch (page 3-1)
12 34 5
67
8 9
10
Controls and instruments
3MB-9-E8 6/13/01 10:55 AM Page 12
Page 15 of 96
3-2
EAU01087
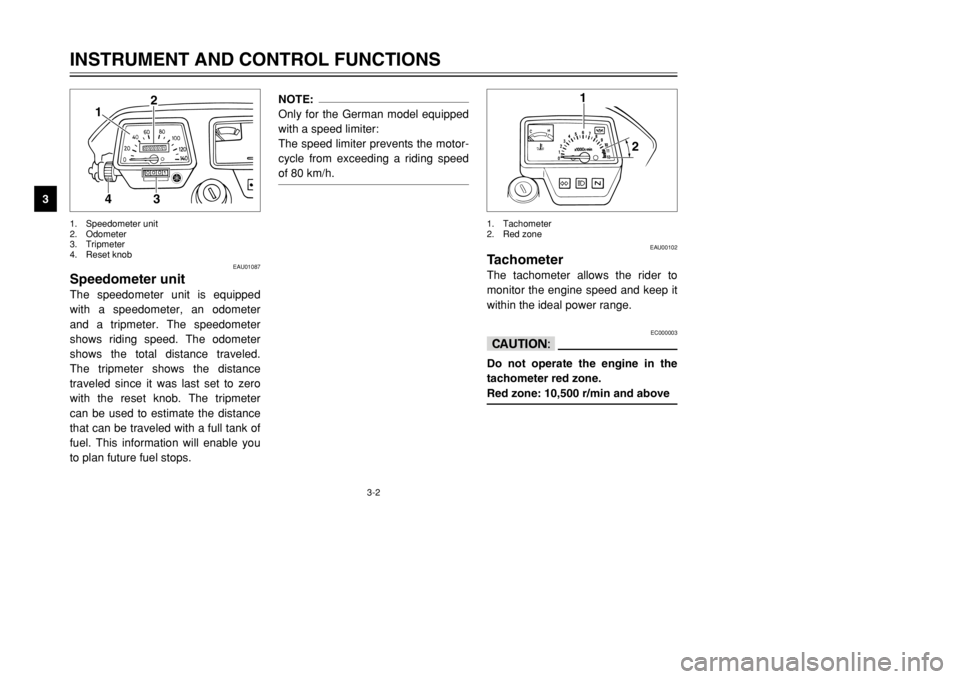
Speedometer unit The speedometer unit is equipped
with a speedometer, an odometer
and a tripmeter. The speedometer
shows riding speed. The odometer
shows the total distance traveled.
The tripmeter shows the distance
traveled since it was last set to zero
with the reset knob. The tripmeter
can be used to estimate the distance
that can be traveled with a full tank of
fuel. This information will enable you
to plan future fuel stops.
NOTE:
Only for the German model equipped
with a speed limiter:
The speed limiter prevents the motor-
cycle from exceeding a riding speed
of 80 km/h.
INSTRUMENT AND CONTROL FUNCTIONS
3
4
2
3
1
1. Speedometer unit
2. Odometer
3. Tripmeter
4. Reset knob
EAU00102
TachometerThe tachometer allows the rider to
monitor the engine speed and keep it
within the ideal power range.
EC000003
cCDo not operate the engine in the
tachometer red zone.
Red zone: 10,500 r/min and above
1
2
1. Tachometer
2. Red zone
3MB-9-E8 6/13/01 10:55 AM Page 14
Page 18 of 96
3-5
INSTRUMENT AND CONTROL FUNCTIONS
3
EAU00158
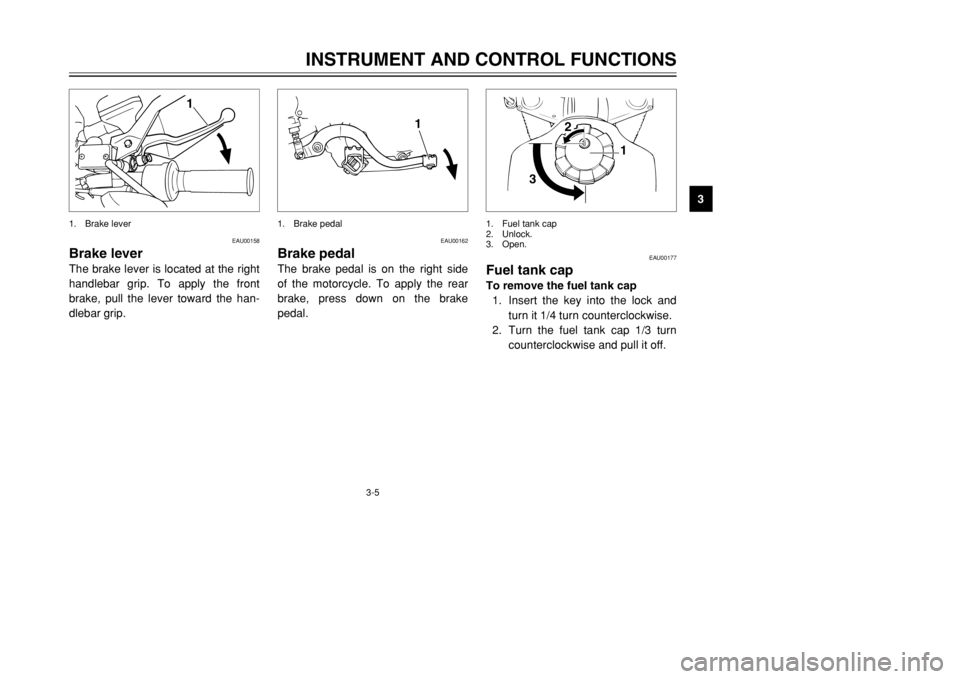
Brake leverThe brake lever is located at the right
handlebar grip. To apply the front
brake, pull the lever toward the han-
dlebar grip.
1
1. Brake lever
EAU00162
Brake pedalThe brake pedal is on the right side
of the motorcycle. To apply the rear
brake, press down on the brake
pedal.
1
1. Brake pedal
EAU00177
Fuel tank capTo remove the fuel tank cap
1. Insert the key into the lock and
turn it 1/4 turn counterclockwise.
2. Turn the fuel tank cap 1/3 turn
counterclockwise and pull it off.
31
2
1. Fuel tank cap
2. Unlock.
3. Open.
3MB-9-E8 6/13/01 10:55 AM Page 17
Page 19 of 96
3-6
INSTRUMENT AND CONTROL FUNCTIONS
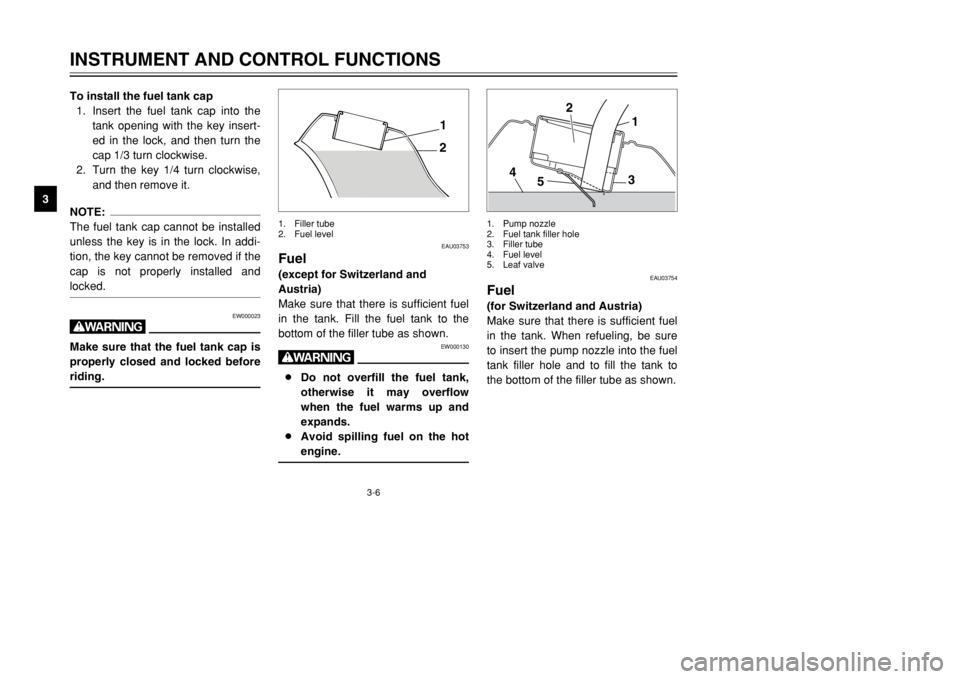
3To install the fuel tank cap
1. Insert the fuel tank cap into the
tank opening with the key insert-
ed in the lock, and then turn the
cap 1/3 turn clockwise.
2. Turn the key 1/4 turn clockwise,
and then remove it.
NOTE:
The fuel tank cap cannot be installed
unless the key is in the lock. In addi-
tion, the key cannot be removed if the
cap is not properly installed and
locked.
EW000023
wMake sure that the fuel tank cap is
properly closed and locked before
riding.
EAU03753
Fuel(except for Switzerland and
Austria)
Make sure that there is sufficient fuel
in the tank. Fill the fuel tank to the
bottom of the filler tube as shown.
EW000130
w8Do not overfill the fuel tank,
otherwise it may overflow
when the fuel warms up and
expands.
8Avoid spilling fuel on the hot
engine.
21
1. Filler tube
2. Fuel level
EAU03754
Fuel(for Switzerland and Austria)
Make sure that there is sufficient fuel
in the tank. When refueling, be sure
to insert the pump nozzle into the fuel
tank filler hole and to fill the tank to
the bottom of the filler tube as shown.
1
3
5 42
1. Pump nozzle
2. Fuel tank filler hole
3. Filler tube
4. Fuel level
5. Leaf valve
3MB-9-E8 6/13/01 10:55 AM Page 18
Page 20 of 96
3-7
INSTRUMENT AND CONTROL FUNCTIONS
3
EW000130
w8Do not overfill the fuel tank,
otherwise it may overflow
when the fuel warms up and
expands.
8Avoid spilling fuel on the hot
engine.
EAU00185
cCImmediately wipe off spilled fuel
with a clean, dry, soft cloth, since
fuel may deteriorate painted sur-
faces or plastic parts.
EAU04206
Your Yamaha engine has been
designed to use regular unleaded
gasoline with a research octane num-
ber of 91 or higher. If knocking (or
pinging) occurs, use a gasoline of a
different brand or premium unleaded
fuel. Use of unleaded fuel will extend
spark plug life and reduce mainte-
nance costs.
EAU01084
Catalytic converter(for Switzerland and Austria)
This motorcycle is equipped with a
catalytic converter in the exhaust
chamber.
EW000128
wThe exhaust system is hot after
operation. Make sure that the
exhaust system has cooled down
before doing any maintenance
work.
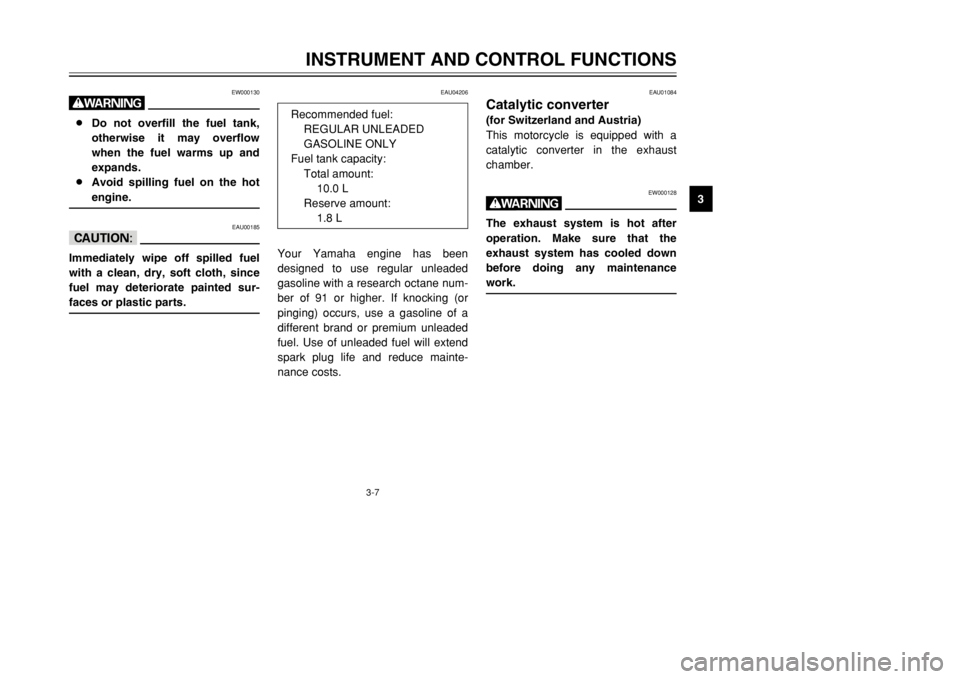
Recommended fuel:
REGULAR UNLEADED
GASOLINE ONLY
Fuel tank capacity:
Total amount:
10.0 L
Reserve amount:
1.8 L
3MB-9-E8 6/13/01 10:55 AM Page 19
Page 22 of 96
3-9
INSTRUMENT AND CONTROL FUNCTIONS
3
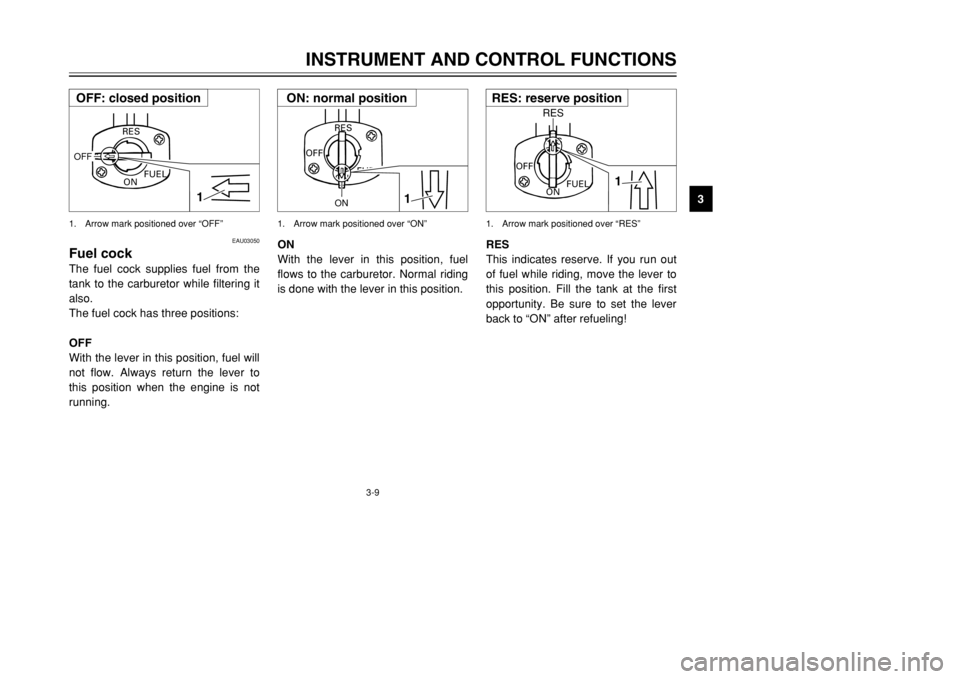
ON
With the lever in this position, fuel
flows to the carburetor. Normal riding
is done with the lever in this position.
ON
FUEL
RES
OFF
1
ON
1. Arrow mark positioned over “ON”
RES
This indicates reserve. If you run out
of fuel while riding, move the lever to
this position. Fill the tank at the first
opportunity. Be sure to set the lever
back to “ON” after refueling!
OFF
ONFUEL RES
1
RES
1. Arrow mark positioned over “RES”
EAU03050
Fuel cockThe fuel cock supplies fuel from the
tank to the carburetor while filtering it
also.
The fuel cock has three positions:
OFF
With the lever in this position, fuel will
not flow. Always return the lever to
this position when the engine is not
running.
RES
ONFUEL
OFF
1
1. Arrow mark positioned over “OFF”OFF: closed position
RES: reserve position
ON: normal position
3MB-9-E8 6/13/01 10:55 AM Page 21
Page 23 of 96
3-10
INSTRUMENT AND CONTROL FUNCTIONS
3
EAU03839
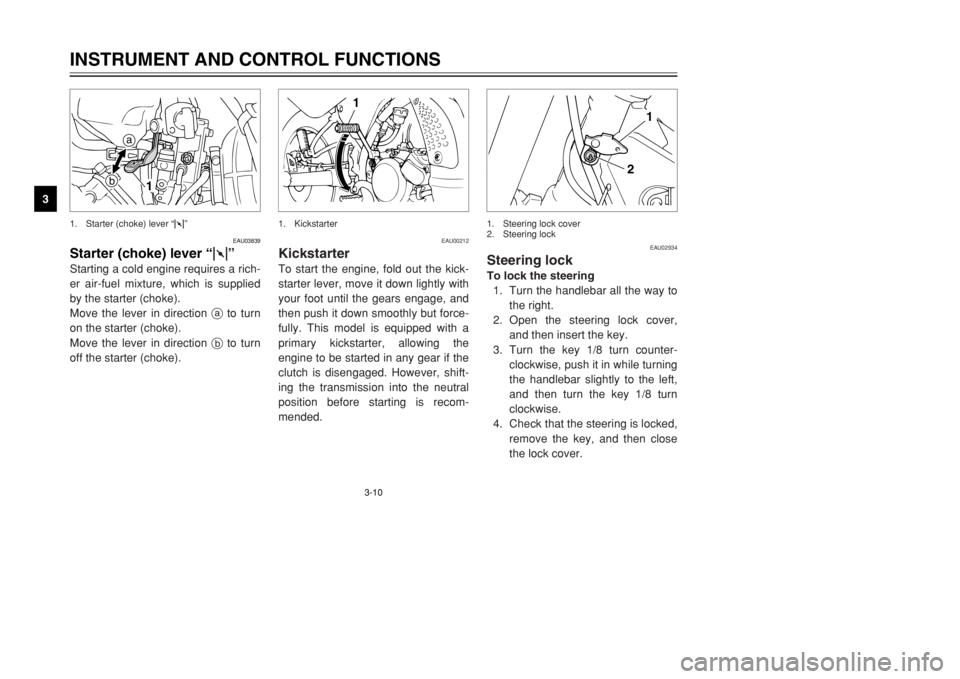
Starter (choke) lever“1”Starting a cold engine requires a rich-
er air-fuel mixture, which is supplied
by the starter (choke).
Move the lever in direction ato turn
on the starter (choke).
Move the lever in direction bto turn
off the starter (choke).
a
b
1
1. Starter (choke) lever “1”
EAU00212
KickstarterTo start the engine, fold out the kick-
starter lever, move it down lightly with
your foot until the gears engage, and
then push it down smoothly but force-
fully. This model is equipped with a
primary kickstarter, allowing the
engine to be started in any gear if the
clutch is disengaged. However, shift-
ing the transmission into the neutral
position before starting is recom-
mended.
1
1. Kickstarter
EAU02934
Steering lockTo lock the steering
1. Turn the handlebar all the way to
the right.
2. Open the steering lock cover,
and then insert the key.
3. Turn the key 1/8 turn counter-
clockwise, push it in while turning
the handlebar slightly to the left,
and then turn the key 1/8 turn
clockwise.
4. Check that the steering is locked,
remove the key, and then close
the lock cover.
2
1
1. Steering lock cover
2. Steering lock
3MB-9-E8 6/13/01 10:55 AM Page 22
Page 31 of 96
4-1
EAU01114
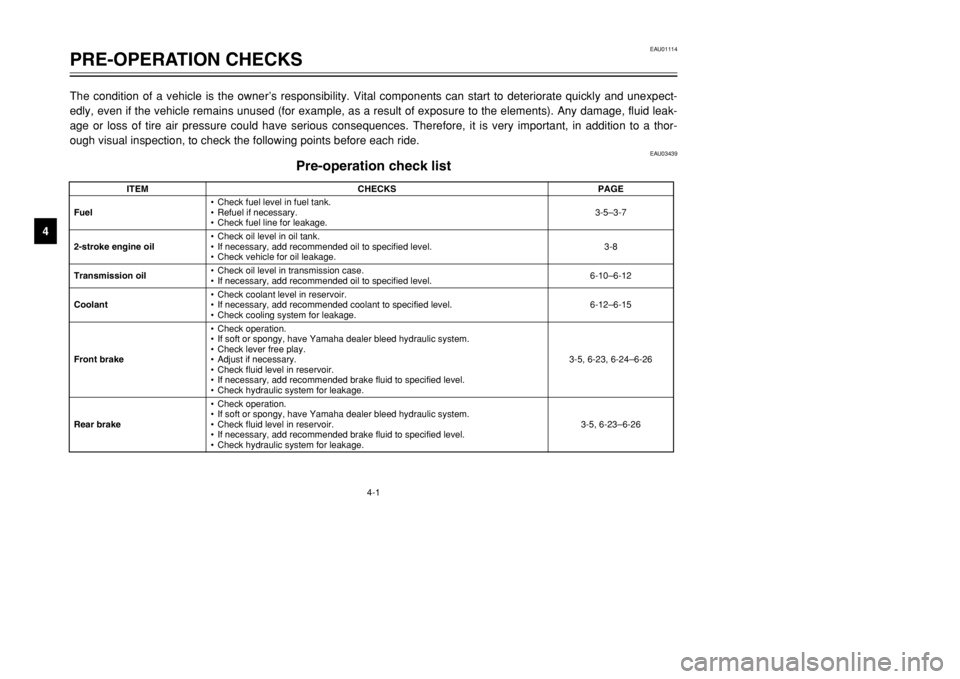
PRE-OPERATION CHECKS
4The condition of a vehicle is the owner’s responsibility. Vital components can start to deteriorate quickly and unexpect-
edly, even if the vehicle remains unused (for example, as a result of exposure to the elements). Any damage, fluid leak-
age or loss of tire air pressure could have serious consequences. Therefore, it is very important, in addition to a thor-
ough visual inspection, to check the following points before each ride.
EAU03439
Pre-operation check list
ITEM CHECKS PAGE
Fuel•Check fuel level in fuel tank.
•Refuel if necessary.
•Check fuel line for leakage.3-5–3-7
2-stroke engine oil•Check oil level in oil tank.
•If necessary, add recommended oil to specified level.
•Check vehicle for oil leakage.3-8
Transmission oil•Check oil level in transmission case.
•If necessary, add recommended oil to specified level.6-10–6-12
Coolant•Check coolant level in reservoir.
•If necessary, add recommended coolant to specified level.
•Check cooling system for leakage.6-12–6-15
Front brake•Check operation.
•If soft or spongy, have Yamaha dealer bleed hydraulic system.
•Check lever free play.
•Adjust if necessary.
•Check fluid level in reservoir.
•If necessary, add recommended brake fluid to specified level.
•Check hydraulic system for leakage.3-5, 6-23, 6-24–6-26
Rear brake•Check operation.
•If soft or spongy, have Yamaha dealer bleed hydraulic system.
•Check fluid level in reservoir.
•If necessary, add recommended brake fluid to specified level.
•Check hydraulic system for leakage.3-5, 6-23–6-26
3MB-9-E8 6/13/01 10:55 AM Page 30