stop start YAMAHA DT125R 2002 Owners Manual
[x] Cancel search | Manufacturer: YAMAHA, Model Year: 2002, Model line: DT125R, Model: YAMAHA DT125R 2002Pages: 96, PDF Size: 2.14 MB
Page 17 of 96

3-4
EAU03890
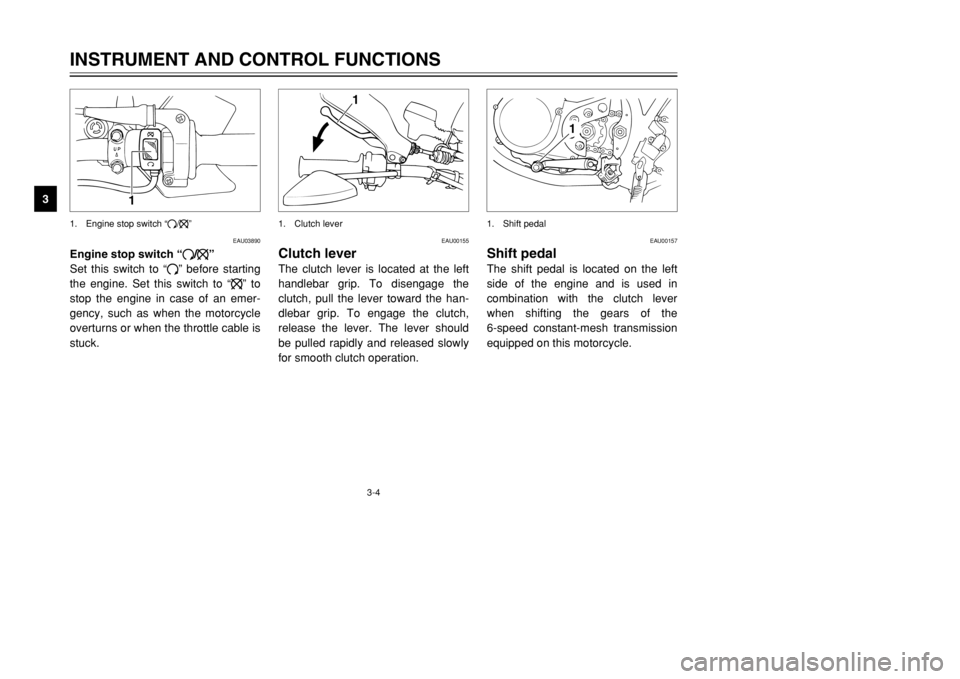
Engine stop switch “#/$”
Set this switch to “#” before starting
the engine. Set this switch to “$” to
stop the engine in case of an emer-
gency, such as when the motorcycle
overturns or when the throttle cable is
stuck.INSTRUMENT AND CONTROL FUNCTIONS
3
1
1. Engine stop switch “#/$”
EAU00155
Clutch leverThe clutch lever is located at the left
handlebar grip. To disengage the
clutch, pull the lever toward the han-
dlebar grip. To engage the clutch,
release the lever. The lever should
be pulled rapidly and released slowly
for smooth clutch operation.
1
1. Clutch lever
EAU00157
Shift pedalThe shift pedal is located on the left
side of the engine and is used in
combination with the clutch lever
when shifting the gears of the
6-speed constant-mesh transmission
equipped on this motorcycle.
1
1. Shift pedal
3MB-9-E8 6/13/01 10:55 AM Page 16
Page 30 of 96

3-17
INSTRUMENT AND CONTROL FUNCTIONS
3
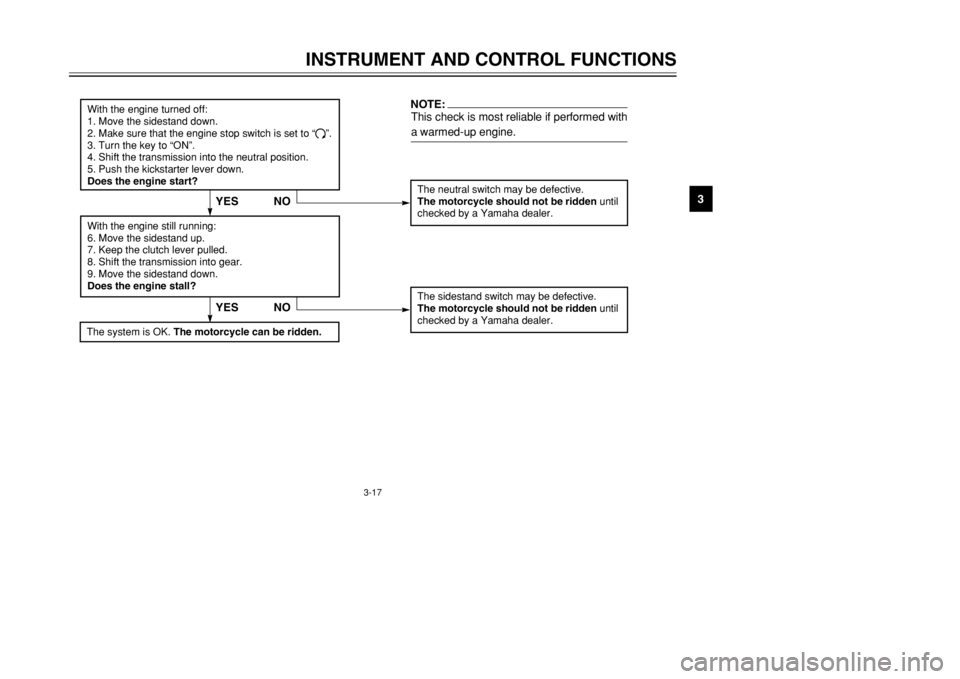
With the engine turned off:
1. Move the sidestand down.
2. Make sure that the engine stop switch is set to “
#”.
3. Turn the key to “ON”.
4. Shift the transmission into the neutral position.
5. Push the kickstarter lever down.
Does the engine start?
The neutral switch may be defective.
The motorcycle should not be ridden until
checked by a Yamaha dealer.
With the engine still running:
6. Move the sidestand up.
7. Keep the clutch lever pulled.
8. Shift the transmission into gear.
9. Move the sidestand down.
Does the engine stall?
The sidestand switch may be defective.
The motorcycle should not be ridden until
checked by a Yamaha dealer.
NO
NOTE:This check is most reliable if performed with
a warmed-up engine.
YESYES NO
The system is OK. The motorcycle can be ridden.
3MB-9-E8 6/13/01 10:55 AM Page 29
Page 34 of 96

5-1
EAU00372
OPERATION AND IMPORTANT RIDING POINTS
5
EAU00373
w8Become thoroughly familiar
with all operating controls and
their functions before riding.
Consult a Yamaha dealer
regarding any control or func-
tion that you do not thorough-
ly understand.
8Never start the engine or oper-
ate it in a closed area for any
length of time. Exhaust fumes
are poisonous, and inhaling
them can cause loss of con-
sciousness and death within a
short time. Always make sure
that there is adequate ventila-
tion.
8Before starting out, make sure
that the sidestand is up. If the
sidestand is not raised com-
pletely, it could contact the
ground and distract the opera-
tor, resulting in a possible loss
of control.
EAU01177
Starting a cold engineIn order for the ignition circuit cut-off
system to enable starting, one of the
following conditions must be met:
8The transmission is in the neutral
position.
8The transmission is in gear with
the clutch lever pulled and the
sidestand up.
EW000054
w8Before starting the engine,
check the function of the igni-
tion circuit cut-off system
according to the procedure
described on page 3-17.
8Never ride with the sidestand
down.
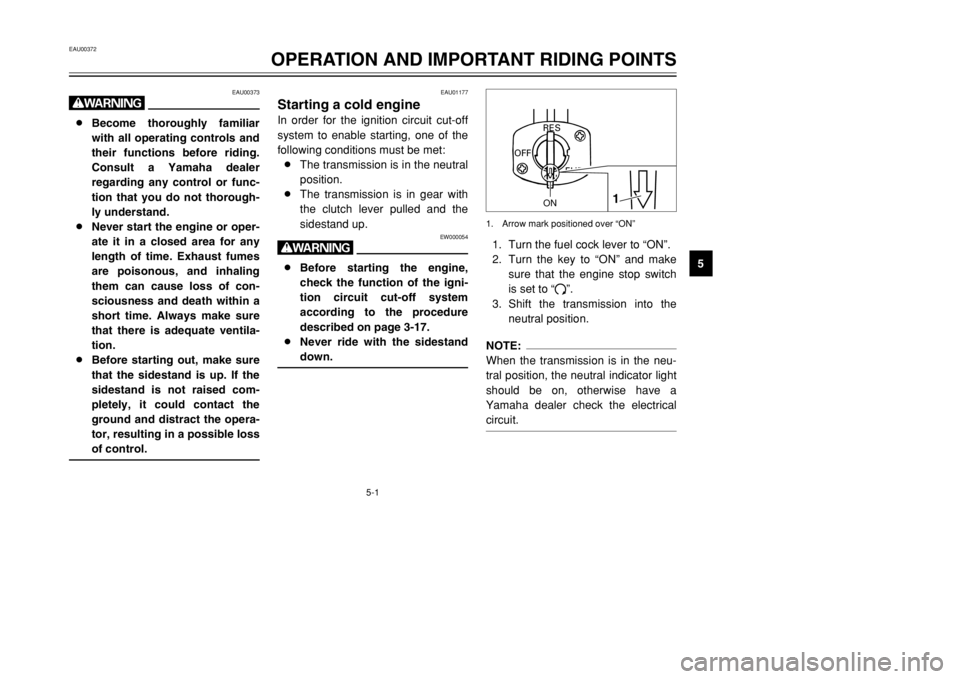
1. Turn the fuel cock lever to “ON”.
2. Turn the key to “ON” and make
sure that the engine stop switch
is set to “#”.
3. Shift the transmission into the
neutral position.NOTE:
When the transmission is in the neu-
tral position, the neutral indicator light
should be on, otherwise have a
Yamaha dealer check the electrical
circuit.
ON
FUEL
RES
OFF
1
ON
1. Arrow mark positioned over “ON”
3MB-9-E8 6/13/01 10:55 AM Page 33
Page 55 of 96

6-17
PERIODIC MAINTENANCE AND MINOR REPAIR
67. Pull the sponge material over the
frame.
8. Install the air filter element onto
the guide, and then tighten the
wing nut.
9. Insert the air filter element into
the case.
10. Install the air filter case cover by
installing the screws.
11. Install the panel.
EC000082
cC8Make sure that the air filter ele-
ment is properly seated in the
air filter case.
8The engine should never be
operated without the air filter
element installed, otherwise
the piston and/or cylinder may
become excessively worn.
EAU00632
Adjusting the engine idling
speedThe engine idling speed must be
checked and, if necessary, adjusted
as follows at the intervals specified in
the periodic maintenance and lubrica-
tion chart.
1. Start the engine and warm it up
for several minutes at 1,000–
2,000 r/min while occasionally
revving it to 4,000–5,000 r/min.NOTE:
The engine is warm when it quickly
responds to the throttle.2. Check the engine idling speed
and, if necessary, adjust it to
specification by turning the throt-
tle stop screw.
EAU00629
Adjusting the carburetorThe carburetor is an important part of
the engine and requires very sophisti-
cated adjustment. Therefore, most
carburetor adjustments should be left
to a Yamaha dealer, who has the
necessary professional knowledge
and experience. The adjustment
described in the following section,
however, may be serviced by the
owner as part of routine mainte-
nance.
EC000094
cCThe carburetor has been set and
extensively tested at the Yamaha
factory. Changing these settings
without sufficient technical knowl-
edge may result in poor perfor-
mance of or damage to the engine.
Recommended oil:
2-stroke engine oil
3MB-9-E8 6/13/01 10:55 AM Page 54
Page 83 of 96

6-45
PERIODIC MAINTENANCE AND MINOR REPAIR
6
Wait until the
Check the coolant level in the
Level is OK.Level is low, check the
NoLeakage.
Ask a Yamaha dealer to inspectAdd coolant. (See NOTE.)
Restart the engine. If the engine overheats again, ask a
engine has cooled.reservoir tank and/or radiator.cooling system for leakage.
Yamaha dealer to inspect and repair the cooling system.leakage.
and repair the cooling system.
4. Engine overheating
EW000070
w8Do not remove the radiator cap when the engine and radiator are hot. Scalding hot fluid and steam may be
blown out under pressure, which could cause serious injury. Be sure to wait until the engine has cooled.
8After removing the radiator cap retaining bolt, place a thick rag, like a towel, over the radiator cap, and then
slowly rotate the cap counterclockwise to the detent to allow any residual pressure to escape. When the
hissing sound has stopped, press down on the cap while turning it counterclockwise, and then remove the
cap.NOTE:
If it is difficult to get the recommended coolant, tap water can be temporarily used, provided that it is changed to the rec-
ommended coolant as soon as possible.
3MB-9-E8 6/13/01 10:55 AM Page 82