lock YAMAHA TRICITY 300 2020 Owners Manual
[x] Cancel search | Manufacturer: YAMAHA, Model Year: 2020, Model line: TRICITY 300, Model: YAMAHA TRICITY 300 2020Pages: 114, PDF Size: 11.27 MB
Page 25 of 114
Smart key system
3-7
3
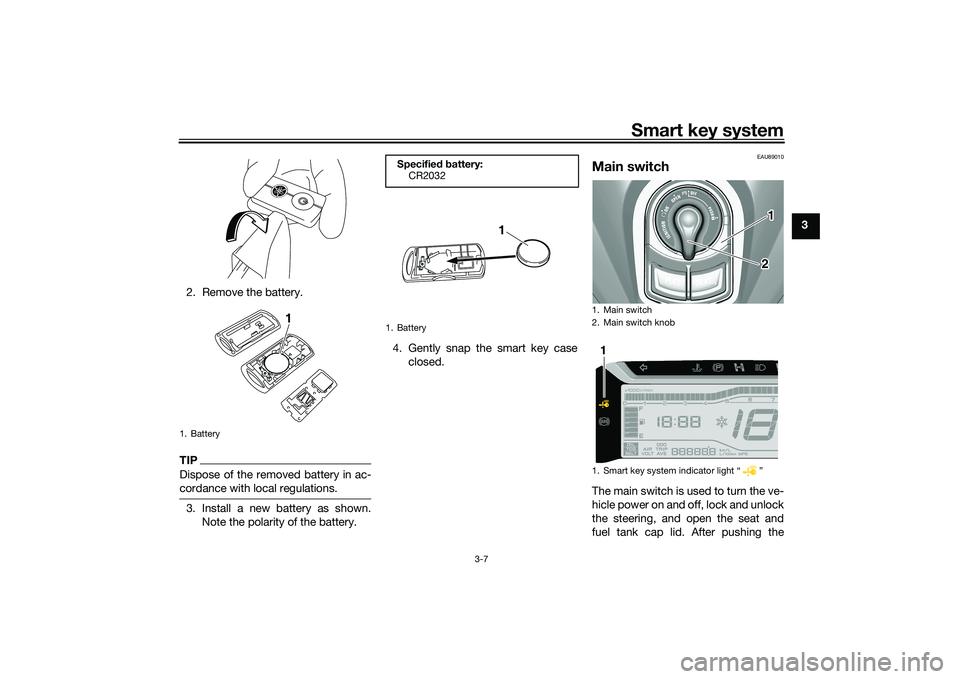
2. Remove the battery.
TIPDispose of the removed battery in ac-
cordance with local regulations.3. Install a new battery as shown. Note the polarity of the battery. 4. Gently snap the smart key case
closed.
EAU89010
Main switchThe main switch is used to turn the ve-
hicle power on and off, lock and unlock
the steering, and open the seat and
fuel tank cap lid. After pushing the
1. Battery
1
Specified b attery:
CR2032
1. Battery
1
1. Main switch
2. Main switch knob
1. Smart key system indicator light “ ”
12
1
UBX9E0E0.book Page 7 Monday, January 20, 2020 10:54 AM
Page 28 of 114
Smart key system
3-10
3
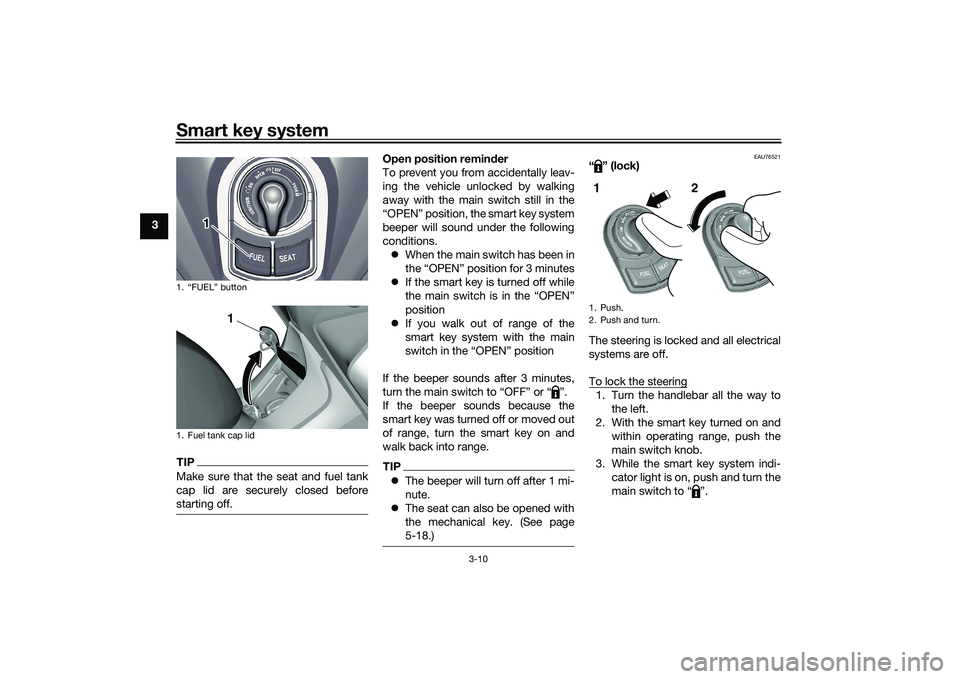
TIPMake sure that the seat and fuel tank
cap lid are securely closed before
starting off.
Open position reminder
To prevent you from accidentally leav-
ing the vehicle unlocked by walking
away with the main switch still in the
“OPEN” position, the smart key system
beeper will sound under the following
conditions. When the main switch has been in
the “OPEN” position for 3 minutes
If the smart key is turned off while
the main switch is in the “OPEN”
position
If you walk out of range of the
smart key system with the main
switch in the “OPEN” position
If the beeper sounds after 3 minutes,
turn the main switch to “OFF” or “ ”.
If the beeper sounds because the
smart key was turned off or moved out
of range, turn the smart key on and
walk back into range.TIP The beeper will turn off after 1 mi-
nute.
The seat can also be opened with
the mechanical key. (See page
5-18.)
EAU76521
“” (lock)
The steering is locked and all electrical
systems are off.
To lock the steering1. Turn the handlebar all the way to
the left.
2. With the smart key turned on and within operating range, push the
main switch knob.
3. While the smart key system indi- cator light is on, push and turn the
main switch to “ ”.
1. “FUEL” button
1. Fuel tank cap lid
1
1
1. Push.
2. Push and turn.1 2
UBX9E0E0.book Page 10 Monday, January 20, 2020 10:54 AM
Page 29 of 114
Smart key system
3-11
3
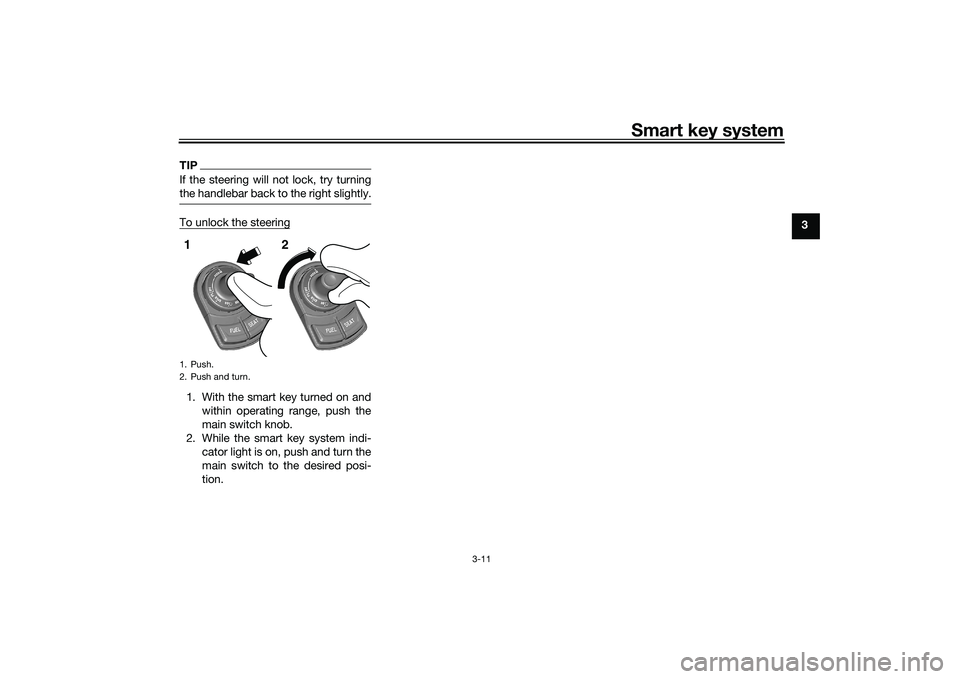
TIPIf the steering will not lock, try turning
the handlebar back to the right slightly.To unlock the steering1. With the smart key turned on andwithin operating range, push the
main switch knob.
2. While the smart key system indi- cator light is on, push and turn the
main switch to the desired posi-
tion.1. Push.
2. Push and turn.1 2
UBX9E0E0.book Page 11 Monday, January 20, 2020 10:54 AM
Page 33 of 114
Instrument and control functions
5-2
5
EAU88890
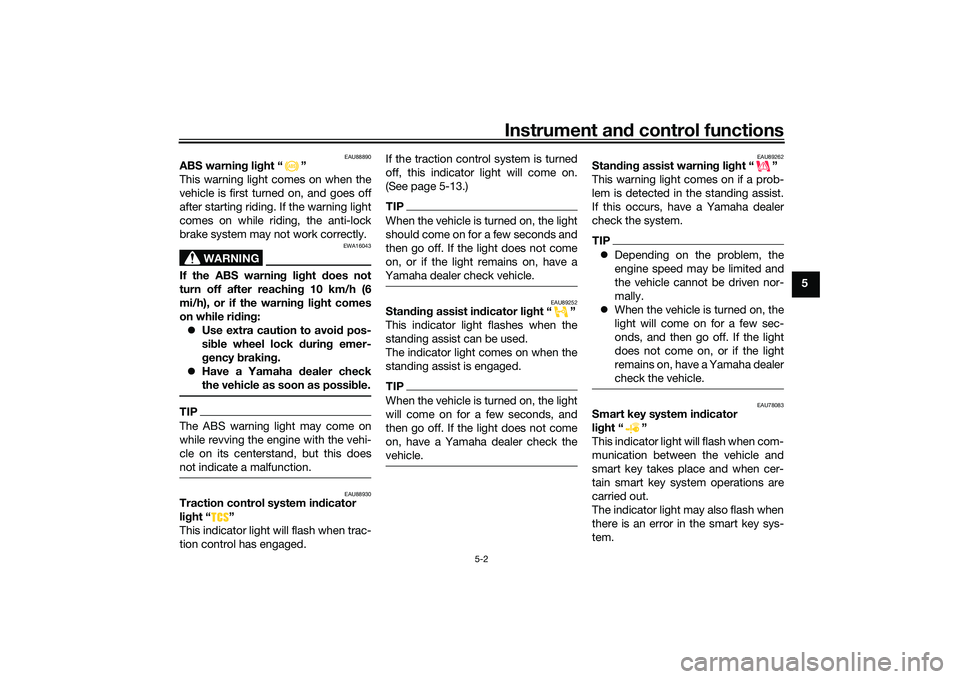
ABS warnin g lig ht “ ”
This warning light comes on when the
vehicle is first turned on, and goes off
after starting riding. If the warning light
comes on while riding, the anti-lock
brake system may not work correctly.
WARNING
EWA16043
If the ABS warnin g li ght does not
turn off after reachin g 10 km/h (6
mi/h), or if the warnin g lig ht comes
on while ri din g:
Use extra caution to avoi d pos-
si ble wheel lock durin g emer-
g ency brakin g.
Have a Yamaha dealer check
the vehicle as soon as possi ble.TIPThe ABS warning light may come on
while revving the engine with the vehi-
cle on its centerstand, but this does
not indicate a malfunction.
EAU88930
Traction control system in dicator
lig ht “ ”
This indicator light will flash when trac-
tion control has engaged. If the traction control system is turned
off, this indicator light will come on.
(See page 5-13.)
TIPWhen the vehicle is turned on, the light
should come on for a few seconds and
then go off. If the light does not come
on, or if the light remains on, have a
Yamaha dealer check vehicle.
EAU89252
Stan
din g assist in dicator li ght “ ”
This indicator light flashes when the
standing assist can be used.
The indicator light comes on when the
standing assist is engaged.TIPWhen the vehicle is turned on, the light
will come on for a few seconds, and
then go off. If the light does not come
on, have a Yamaha dealer check the
vehicle.
EAU89262
Stan din g assist warnin g li ght “ ”
This warning light comes on if a prob-
lem is detected in the standing assist.
If this occurs, have a Yamaha dealer
check the system.TIP Depending on the problem, the
engine speed may be limited and
the vehicle cannot be driven nor-
mally.
When the vehicle is turned on, the
light will come on for a few sec-
onds, and then go off. If the light
does not come on, or if the light
remains on, have a Yamaha dealer
check the vehicle.
EAU78083
Smart key system in dicator
li g ht “ ”
This indicator light will flash when com-
munication between the vehicle and
smart key takes place and when cer-
tain smart key system operations are
carried out.
The indicator light may also flash when
there is an error in the smart key sys-
tem.
UBX9E0E0.book Page 2 Monday, January 20, 2020 10:54 AM
Page 34 of 114
Instrument and control functions
5-3
5
TIPWhen the vehicle is turned on, the light
should come on for a few seconds and
then go off. If the light does not come
on, or if the light remains on, have a
Yamaha dealer check the vehicle.
EAU86811
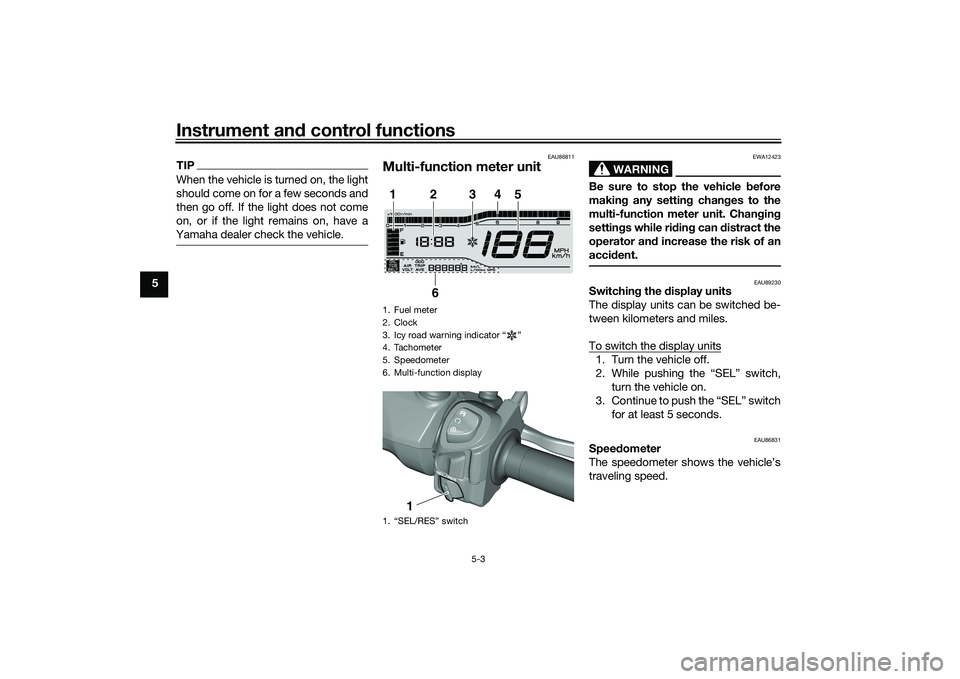
Multi-function meter unit
WARNING
EWA12423
Be sure to stop the vehicle before
makin g any settin g chan ges to the
multi-function meter unit. Chan gin g
settin gs while ri din g can distract the
operator an d increase the risk of an
acci dent.
EAU89230
Switchin g the d isplay units
The display units can be switched be-
tween kilometers and miles.
To switch the display units1. Turn the vehicle off.
2. While pushing the “SEL” switch, turn the vehicle on.
3. Continue to push the “SEL” switch for at least 5 seconds.
EAU86831
Speed ometer
The speedometer shows the vehicle’s
traveling speed.
1. Fuel meter
2. Clock
3. Icy road warning indicator “ ”
4. Tachometer
5. Speedometer
6. Multi-function display
1. “SEL/RES” switch1
2
3
4
5
6
1
UBX9E0E0.book Page 3 Monday, January 20, 2020 10:54 AM
Page 35 of 114
Instrument and control functions
5-4
5
EAU87180
Tachometer
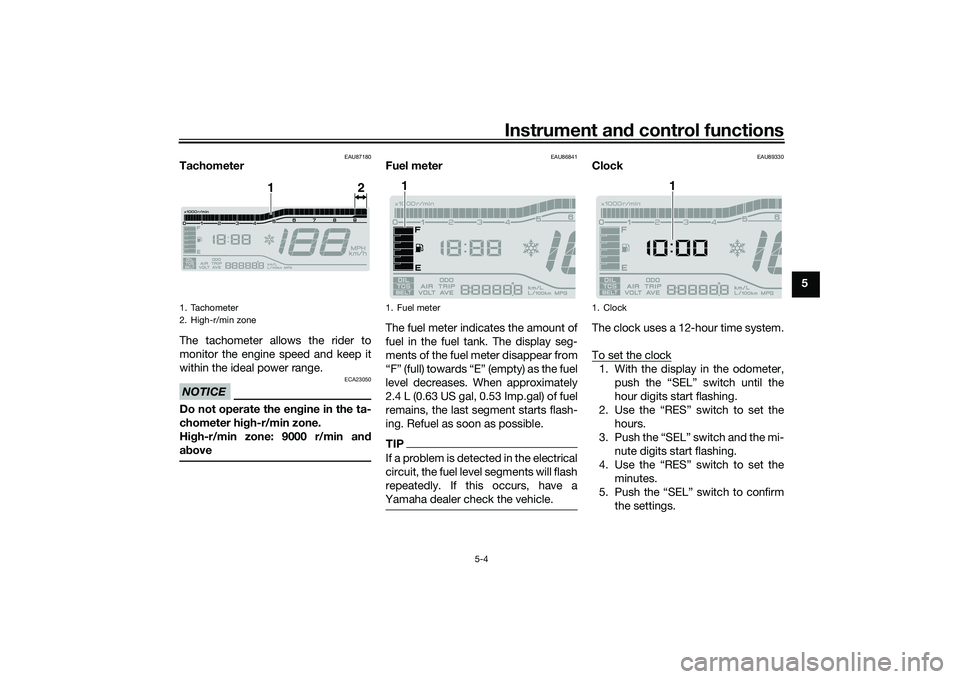
The tachometer allows the rider to
monitor the engine speed and keep it
within the ideal power range.NOTICE
ECA23050
Do not operate the en gine in the ta-
chometer hi gh-r/min zone.
Hi gh-r/min zone: 9000 r/min an d
a b ove
EAU86841
Fuel meter
The fuel meter indicates the amount of
fuel in the fuel tank. The display seg-
ments of the fuel meter disappear from
“F” (full) towards “E” (empty) as the fuel
level decreases. When approximately
2.4 L (0.63 US gal, 0.53 Imp.gal) of fuel
remains, the last segment starts flash-
ing. Refuel as soon as possible.TIPIf a problem is detected in the electrical
circuit, the fuel level segments will flash
repeatedly. If this occurs, have a
Yamaha dealer check the vehicle.
EAU89330
Clock
The clock uses a 12-hour time system.
To set the clock1. With the display in the odometer,
push the “SEL” switch until the
hour digits start flashing.
2. Use the “RES” switch to set the hours.
3. Push the “SEL” switch and the mi- nute digits start flashing.
4. Use the “RES” switch to set the minutes.
5. Push the “SEL” switch to confirm the settings.
1. Tachometer
2. High-r/min zone
1
2
1. Fuel meter
1
1. Clock
1
UBX9E0E0.book Page 4 Monday, January 20, 2020 10:54 AM
Page 36 of 114
Instrument and control functions
5-5
5
EAU89130
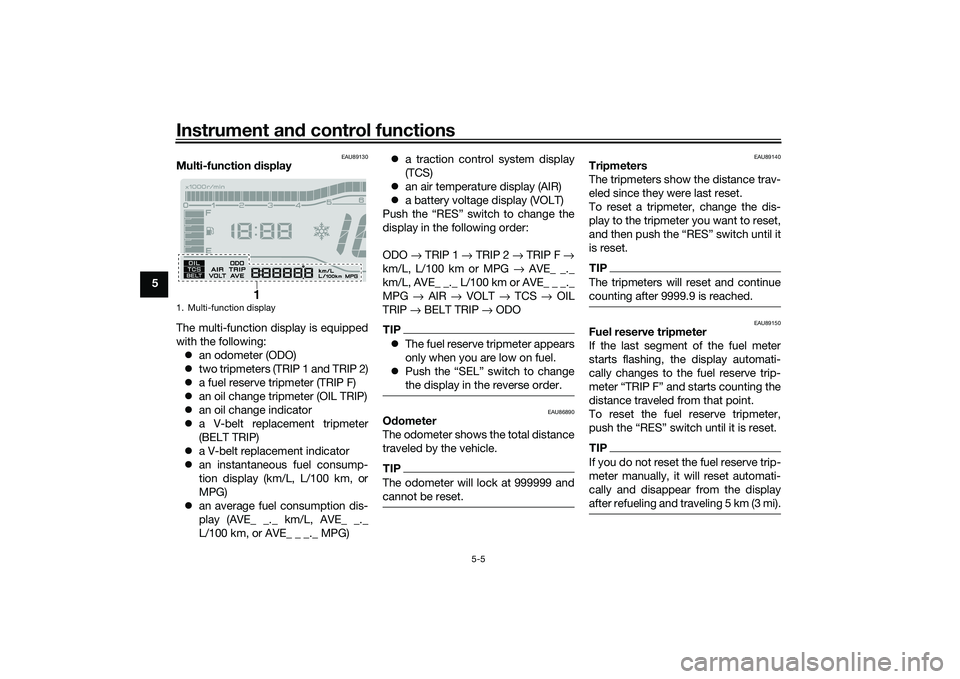
Multi-function display
The multi-function display is equipped
with the following: an odometer (ODO)
two tripmeters (TRIP 1 and TRIP 2)
a fuel reserve tripmeter (TRIP F)
an oil change tripmeter (OIL TRIP)
an oil change indicator
a V-belt replacement tripmeter
(BELT TRIP)
a V-belt replacement indicator
an instantaneous fuel consump-
tion display (km/L, L/100 km, or
MPG)
an average fuel consumption dis-
play (AVE_ _._ km/L, AVE_ _._
L/100 km, or AVE_ _ _._ MPG)
a traction control system display
(TCS)
an air temperature display (AIR)
a battery voltage display (VOLT)
Push the “RES” switch to change the
display in the following order:
ODO → TRIP 1 → TRIP 2 → TRIP F →
km/L, L/100 km or MPG → AVE_ _._
km/L, AVE_ _._ L/100 km or AVE_ _ _._
MPG → AIR → VOLT → TCS → OIL
TRIP → BELT TRIP → ODO
TIP The fuel reserve tripmeter appears
only when you are low on fuel.
Push the “SEL” switch to change
the display in the reverse order.
EAU86890
Odometer
The odometer shows the total distance
traveled by the vehicle.TIPThe odometer will lock at 999999 and
cannot be reset.
EAU89140
Tripmeters
The tripmeters show the distance trav-
eled since they were last reset.
To reset a tripmeter, change the dis-
play to the tripmeter you want to reset,
and then push the “RES” switch until it
is reset.TIPThe tripmeters will reset and continue
counting after 9999.9 is reached.
EAU89150
Fuel reserve tripmeter
If the last segment of the fuel meter
starts flashing, the display automati-
cally changes to the fuel reserve trip-
meter “TRIP F” and starts counting the
distance traveled from that point.
To reset the fuel reserve tripmeter,
push the “RES” switch until it is reset.TIPIf you do not reset the fuel reserve trip-
meter manually, it will reset automati-
cally and disappear from the display
after refueling and traveling 5 km (3 mi).
1. Multi-function display
1
UBX9E0E0.book Page 5 Monday, January 20, 2020 10:54 AM
Page 43 of 114
Instrument and control functions
5-12
5
EAU89340
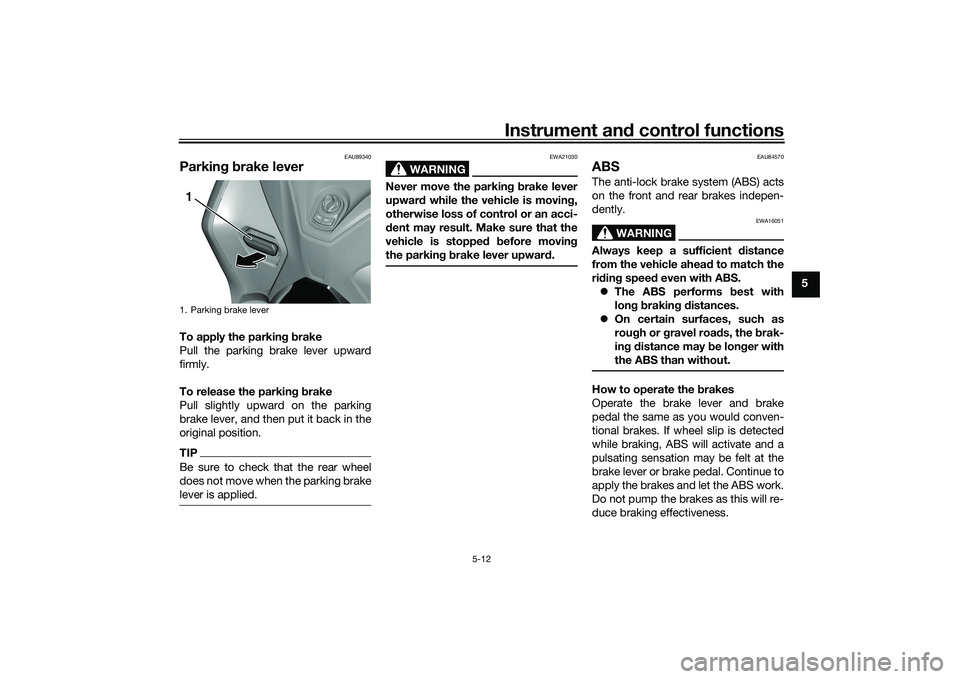
Parkin g b rake leverTo apply the parkin g b rake
Pull the parking brake lever upward
firmly.
To release the parkin g b rake
Pull slightly upward on the parking
brake lever, and then put it back in the
original position.TIPBe sure to check that the rear wheel
does not move when the parking brake
lever is applied.
WARNING
EWA21030
Never move the parkin g b rake lever
upwar d while the vehicle is movin g,
otherwise loss of control or an acci-
d ent may result. Make sure that the
vehicle is stopped before movin g
the parkin g b rake lever upwar d.
EAU84570
ABSThe anti-lock brake system (ABS) acts
on the front and rear brakes indepen-
dently.
WARNING
EWA16051
Always keep a sufficient d istance
from the vehicle ahea d to match the
ri din g speed even with ABS.
The ABS performs b est with
lon g b rakin g d istances.
On certain surfaces, such as
rou gh or g ravel roa ds, the b rak-
in g d istance may be lon ger with
the ABS than without.How to operate the brakes
Operate the brake lever and brake
pedal the same as you would conven-
tional brakes. If wheel slip is detected
while braking, ABS will activate and a
pulsating sensation may be felt at the
brake lever or brake pedal. Continue to
apply the brakes and let the ABS work.
Do not pump the brakes as this will re-
duce braking effectiveness.
1. Parking brake lever1
UBX9E0E0.book Page 12 Monday, January 20, 2020 10:54 AM
Page 46 of 114
Instrument and control functions
5-15
5
TIPWhen the vehicle is on the centerstand,
do not rev the engine for an extended
period of time. Otherwise, the traction
control system will automatically dis-
able and need to be reset.If the traction control system automat-
ically disables, try resetting it as fol-
lows.
1. Stop the vehicle and turn it off completely.
2. Wait a few seconds and then turn the vehicle power on.
3. The “ ” indicator light should turn off and the system be en-
abled.TIPIf the “ ” indicator light remains on
after resetting, the vehicle may still be
ridden; however, have a Yamaha deal-
er check the vehicle as soon as possi-
ble.4. Have a Yamaha dealer check thevehicle and turn off the “ ”
warning light.
EAU89040
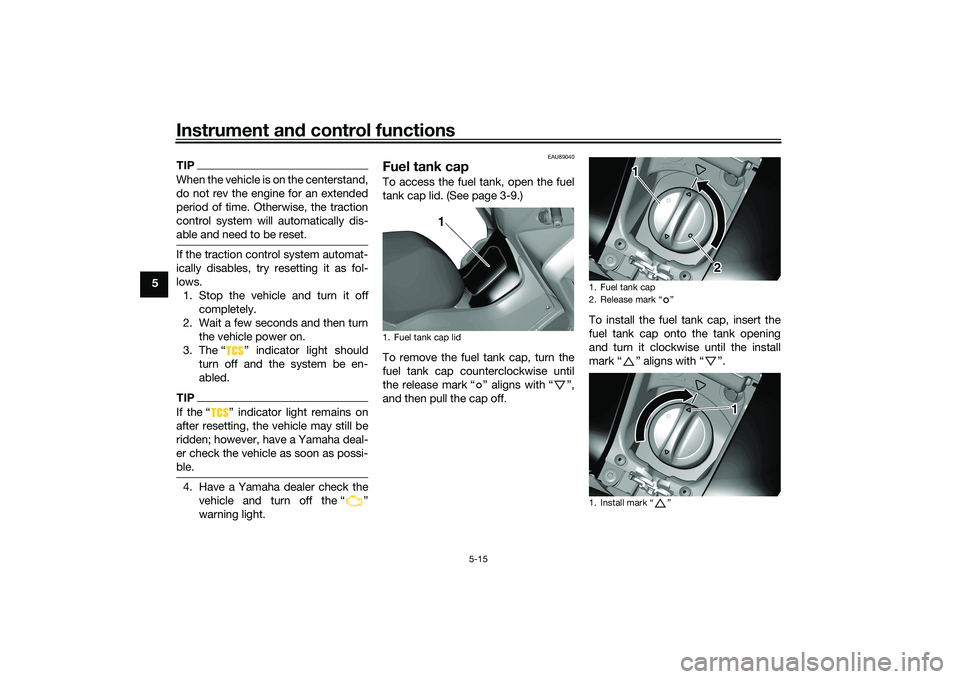
Fuel tank capTo access the fuel tank, open the fuel
tank cap lid. (See page 3-9.)
To remove the fuel tank cap, turn the
fuel tank cap counterclockwise until
the release mark “ ” aligns with “ ”,
and then pull the cap off. To install the fuel tank cap, insert the
fuel tank cap onto the tank opening
and turn it clockwise until the install
mark“” aligns with“”.1. Fuel tank cap lid
1
1. Fuel tank cap
2. Release mark “ ”
1. Install mark “ ”
1
2
1
UBX9E0E0.book Page 15 Monday, January 20, 2020 10:54 AM
Page 49 of 114
Instrument and control functions
5-18
5
EAU80200
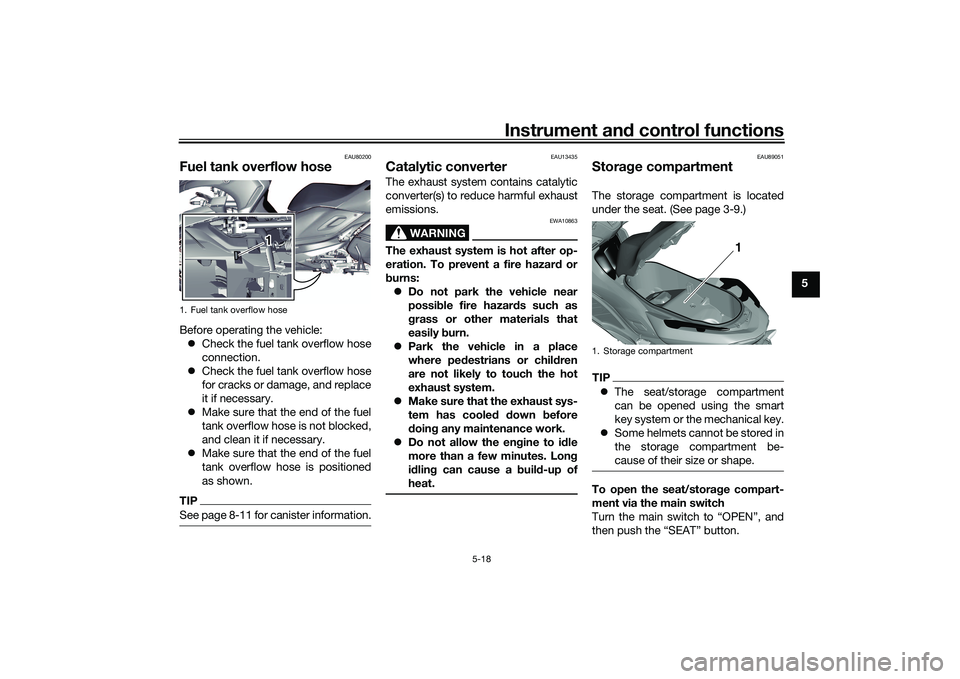
Fuel tank overflow hoseBefore operating the vehicle:
Check the fuel tank overflow hose
connection.
Check the fuel tank overflow hose
for cracks or damage, and replace
it if necessary.
Make sure that the end of the fuel
tank overflow hose is not blocked,
and clean it if necessary.
Make sure that the end of the fuel
tank overflow hose is positioned
as shown.TIPSee page 8-11 for canister information.
EAU13435
Catalytic converterThe exhaust system contains catalytic
converter(s) to reduce harmful exhaust
emissions.
WARNING
EWA10863
The exhaust system is hot after op-
eration. To prevent a fire hazar d or
b urns:
Do not park the vehicle near
possi ble fire hazar ds such as
g rass or other materials that
easily burn.
Park the vehicle in a place
where pe destrians or chil dren
are not likely to touch the hot
exhaust system.
Make sure that the exhaust sys-
tem has cooled down before
d oin g any maintenance work.
Do not allow the en gine to id le
more than a few minutes. Lon g
i d lin g can cause a buil d-up of
heat.
EAU89051
Stora ge compartmentThe storage compartment is located
under the seat. (See page 3-9.)TIP The seat/storage compartment
can be opened using the smart
key system or the mechanical key.
Some helmets cannot be stored in
the storage compartment be-
cause of their size or shape.To open the seat/storag e compart-
ment via the main switch
Turn the main switch to “OPEN”, and
then push the “SEAT” button.
1. Fuel tank overflow hose
1
1. Storage compartment
1
UBX9E0E0.book Page 18 Monday, January 20, 2020 10:54 AM