YAMAHA TRICITY 300 2021 Owner's Manual
Manufacturer: YAMAHA, Model Year: 2021, Model line: TRICITY 300, Model: YAMAHA TRICITY 300 2021Pages: 112, PDF Size: 15.18 MB
Page 21 of 112
Smart key system
3-5
3
To turn the smart key on or off
Push the smart key button for approxi-
mately 1 second to turn the smart key
on or off. When the smart key is turned
off, the vehicle cannot be operated
even if the smart key is within operating
range. To operate the vehicle, turn the
smart key on and bring it within operat-
ing range.
To check whether the smart key is
turne
d on or off
Push the smart key button to confirm
the current operating status of the
smart key.
If the smart key indicator light: Comes on quickly for 0.1 sec-
onds: The smart key is turned on.
Comes on slowly for 0.5 seconds:
The smart key is turned off.
Remote answer- back function
Push the smart key button to operate
the answer-back function remotely.
The beeper will sound twice and all of
the turn signal lights will flash twice.
This feature is convenient for locating
your vehicle in a parking lot and other
areas. Operatin
g ran ge of the answer- back
function
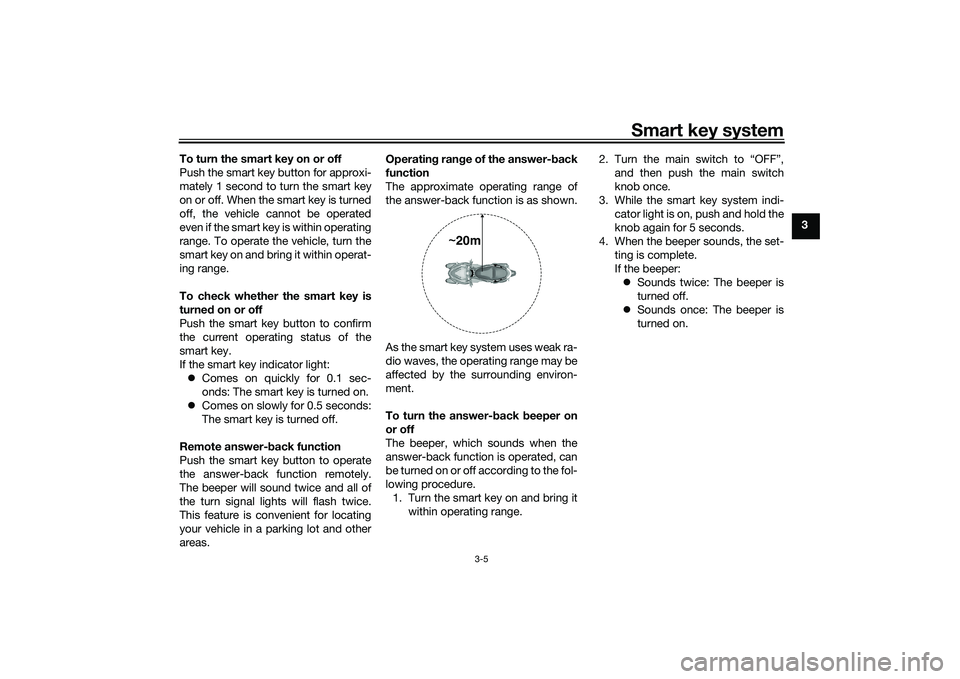
The approximate operating range of
the answer-back function is as shown.
As the smart key system uses weak ra-
dio waves, the operating range may be
affected by the surrounding environ-
ment.
To turn the answer- back beeper on
or off
The beeper, which sounds when the
answer-back function is operated, can
be turned on or off according to the fol-
lowing procedure. 1. Turn the smart key on and bring it within operating range. 2. Turn the main switch to “OFF”,
and then push the main switch
knob once.
3. While the smart key system indi- cator light is on, push and hold the
knob again for 5 seconds.
4. When the beeper sounds, the set- ting is complete.
If the beeper: Sounds twice: The beeper is
turned off.
Sounds once: The beeper is
turned on.
~20m
UBEDE0E0.book Page 5 Thursday, October 1, 2020 1:04 PM
Page 22 of 112
Smart key system
3-6
3
EAU76483
Replacing the smart key bat-
teryReplace the battery in the following sit-
uations.
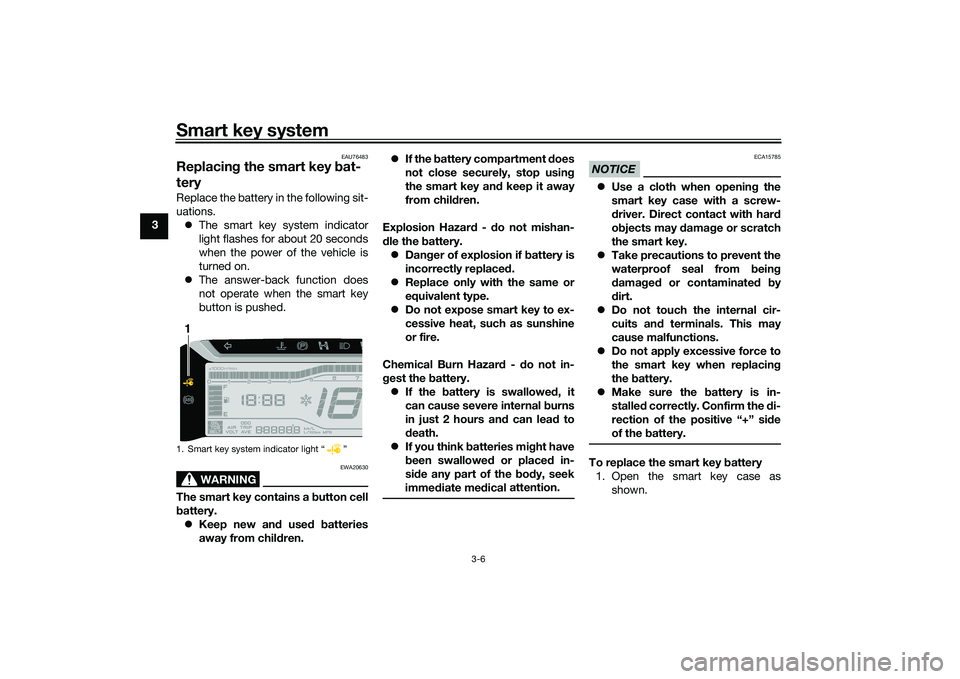
The smart key system indicator
light flashes for about 20 seconds
when the power of the vehicle is
turned on.
The answer-back function does
not operate when the smart key
button is pushed.
WARNING
EWA20630
The smart key contains a button cell
b attery.
Keep new an d use d b atteries
away from chil dren.
If the b attery compartment d oes
not close securely, stop usin g
the smart key an d keep it away
from chil dren.
Explosion Hazar d - d o not mishan-
d le the battery.
Dan ger of explosion if battery is
incorrectly replace d.
Replace only with the same or
equivalent type.
Do not expose smart key to ex-
cessive heat, such as sunshine
or fire.
Chemical Burn Hazar d - do not in-
g est the battery.
If the battery is swallowed , it
can cause severe internal burns
in just 2 hours an d can lea d to
d eath.
If you think batteries mi ght have
b een swallowed or placed in-
si de any part of the body, seek
imme diate me dical attention.
NOTICE
ECA15785
Use a cloth when openin g the
smart key case with a screw-
d river. Direct contact with har d
o bjects may d amage or scratch
the smart key.
Take precautions to prevent the
waterproof seal from bein g
d amag ed or contaminate d by
d irt.
Do not touch the internal cir-
cuits an d terminals. This may
cause malfunctions.
Do not apply excessive force to
the smart key when replacin g
the battery.
Make sure the battery is in-
stalle d correctly. Confirm the di-
rection of the positive “+” si de
of the battery.To replace the smart key battery
1. Open the smart key case as shown.
1. Smart key system indicator light “ ”1
UBEDE0E0.book Page 6 Thursday, October 1, 2020 1:04 PM
Page 23 of 112
Smart key system
3-7
3
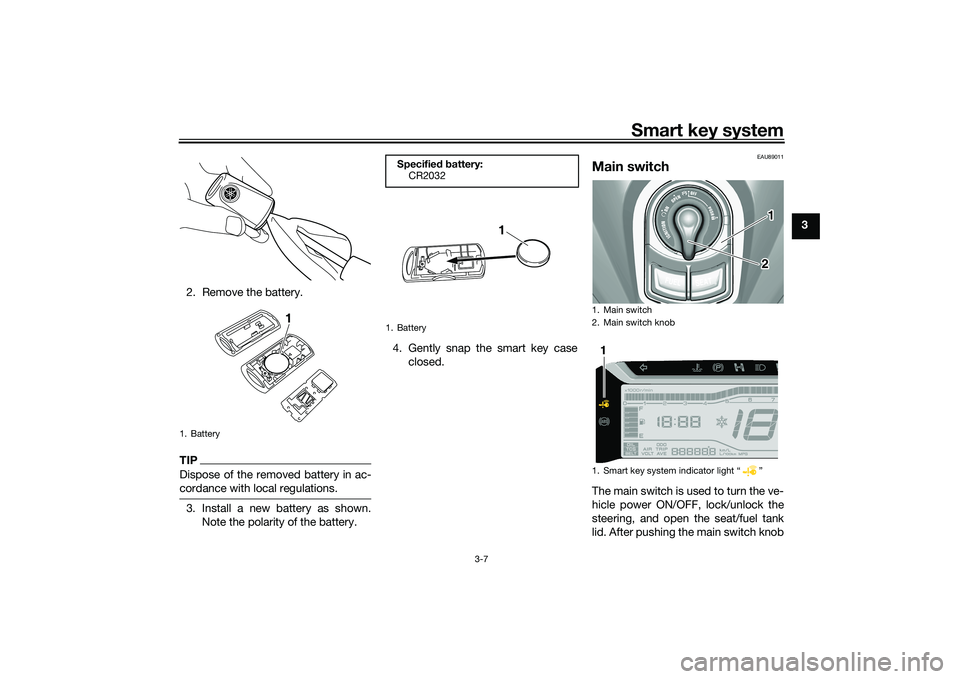
2. Remove the battery.
TIPDispose of the removed battery in ac-
cordance with local regulations.3. Install a new battery as shown. Note the polarity of the battery. 4. Gently snap the smart key case
closed.
EAU89011
Main switchThe main switch is used to turn the ve-
hicle power ON/OFF, lock/unlock the
steering, and open the seat/fuel tank
lid. After pushing the main switch knob
1. Battery
1
Specified b attery:
CR2032
1. Battery
1
1. Main switch
2. Main switch knob
1. Smart key system indicator light Ž
12
1
UBEDE0E0.book Page 7 Thursday, October 1, 2020 1:04 PM
Page 24 of 112
Smart key system
3-8
3and confirmation with the smart key
has taken place, the main switch can
be turned while the smart key system
indicator light is on (approximately 4
seconds).
WARNING
EWA18720
Never turn the main switch to
“OFF”, “ ”, or “OPEN” while the ve-
hicle is movin
g. Otherwise the elec-
trical systems will b e switched off,
which may result in loss of control or
an acci dent.TIPDo not push the main switch knob re-
peatedly or turn the main switch back
and forth beyond normal use. Other-
wise, to protect the main switch from
damage, the smart key system will
temporarily disable and the smart key
system indicator light will flash. If this
occurs, wait until the indicator light
stops flashing before operating the
main switch again.The main switch positions are de-
scribed below.
EAU76502
ON
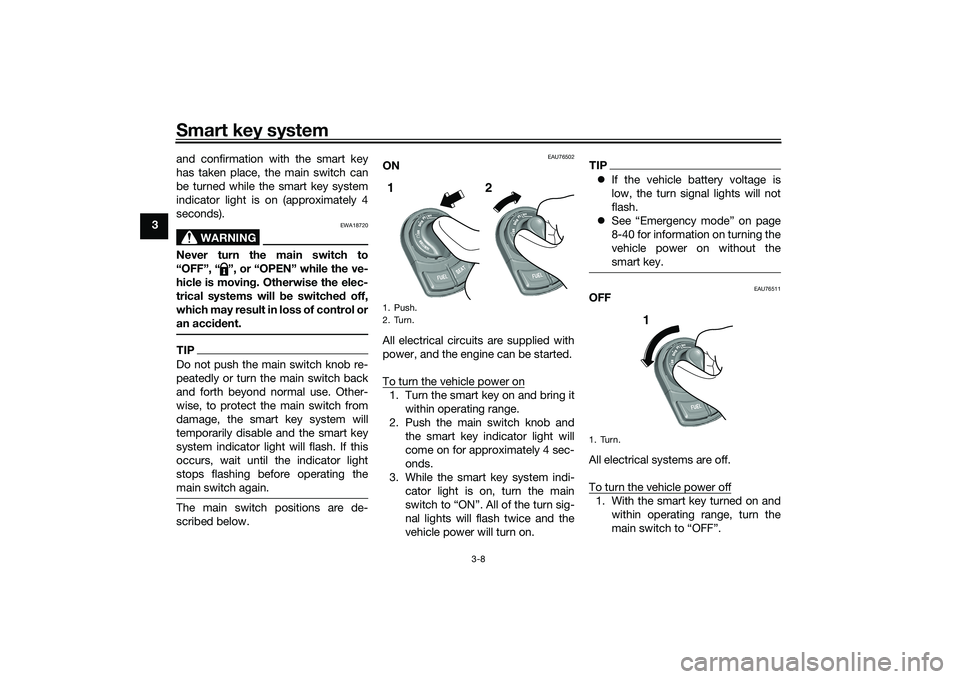
All electrical circuits are supplied with
power, and the engine can be started.
To turn the vehicle power on1. Turn the smart key on and bring it
within operating range.
2. Push the main switch knob and the smart key indicator light will
come on for approximately 4 sec-
onds.
3. While the smart key system indi- cator light is on, turn the main
switch to “ON”. All of the turn sig-
nal lights will flash twice and the
vehicle power will turn on.
TIPIf the vehicle battery voltage is
low, the turn signal lights will not
flash.
See “Emergency mode” on page
8-40 for information on turning the
vehicle power on without the
smart key.
EAU76511
OFF
All electrical systems are off.
To turn the vehicle power off1. With the smart key turned on and
within operating range, turn the
main switch to “OFF”.
1. Push.
2. Turn.1 2
1. Turn.
1
UBEDE0E0.book Page 8 Thursday, October 1, 2020 1:04 PM
Page 25 of 112
Smart key system
3-9
3
2. The turn signal lights flash once
and the vehicle power turns off.
TIPWhen the main switch is turned to
confirmed (the smart key is either out-
side operation range or has been
turned off), the beeper will sound for 3
seconds and the smart key system in-
dicator light will flash for 30 seconds. During this 30 seconds, the main
switch can be freely operated.
After 30 seconds, the vehicle
power will turn off automatically.
To turn the vehicle power off im-
mediately, push the main switch
knob four times within 2 seconds.
EAU89022
OPEN
Power is supplied to the main switch.
The seat and fuel tank cap lid can be
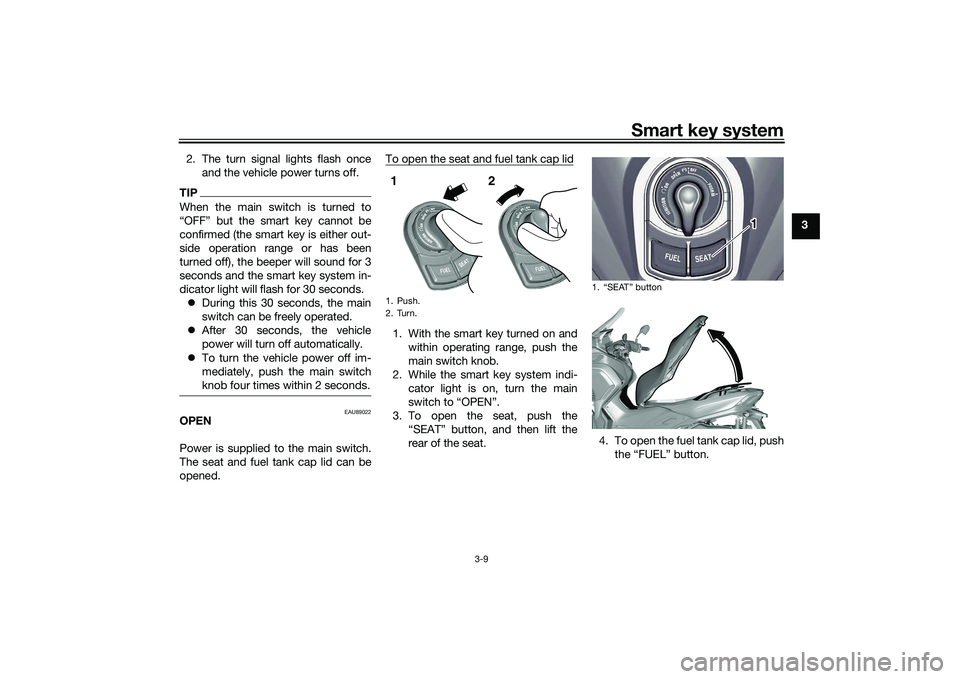
opened. To open the seat and fuel tank cap lid
1. With the smart key turned on and
within operating range, push the
main switch knob.
2. While the smart key system indi- cator light is on, turn the main
switch to “OPEN”.
3. To open the seat, push the “SEAT” button, and then lift the
rear of the seat. 4. To open the fuel tank cap lid, push
the “FUEL” button.1. Push.
2. Turn.1 2
1.
1
UBEDE0E0.book Page 9 Thursday, October 1, 2020 1:04 PM
Page 26 of 112
Smart key system
3-10
3
TIPMake sure that the seat and fuel tank
cap lid are securely closed before
starting off.
Open position reminder
To prevent you from accidentally leav-
ing the vehicle unlocked by walking
away with the main switch still in the
“OPEN” position, the smart key system
beeper will sound under the following
conditions. When the main switch has been in
the “OPEN” position for 3 minutes
If the smart key is turned off while
the main switch is in the “OPEN”
position
If you walk out of range of the
smart key system with the main
switch in the “OPEN” position
If the beeper sounds after 3 minutes,
turn the main switch to “OFF” or “ ”.
If the beeper sounds because the
smart key was turned off or moved out
of range, turn the smart key on and
walk back into range.TIP The beeper will turn off after 1
minute.
The seat can also be opened with
the mechanical key. (See page
5-18.)
EAU76521
“” (lock)
The steering is locked and all electrical
systems are off.
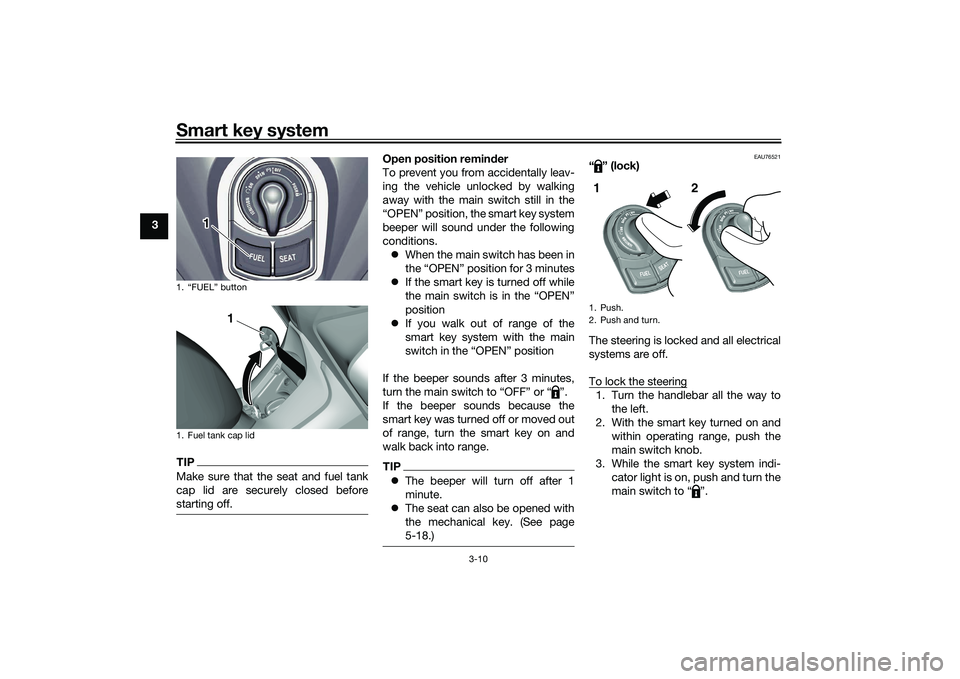
To lock the steering1. Turn the handlebar all the way to
the left.
2. With the smart key turned on and within operating range, push the
main switch knob.
3. While the smart key system indi- cator light is on, push and turn the
main switch to “ ”.
1. “FUEL” button
1. Fuel tank cap lid
1
1
1. Push.
2. Push and turn.1 2
UBEDE0E0.book Page 10 Thursday, October 1, 2020 1:04 PM
Page 27 of 112
Smart key system
3-11
3
TIPIf the steering will not lock, try turning
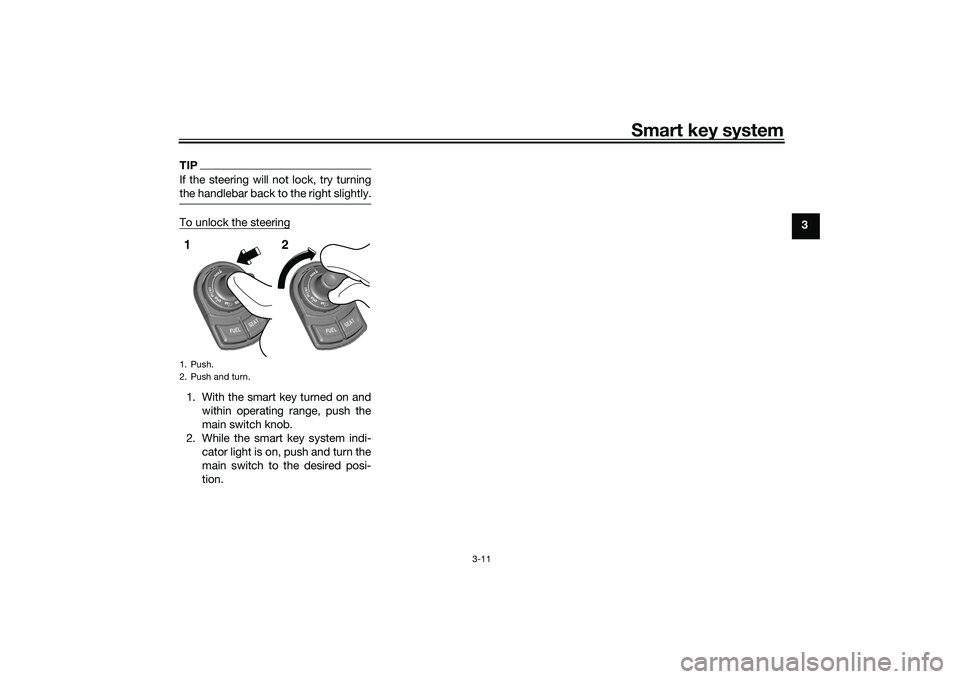
the handlebar back to the right slightly.To unlock the steering1. With the smart key turned on andwithin operating range, push the
main switch knob.
2. While the smart key system indi- cator light is on, push and turn the
main switch to the desired posi-
tion.1. Push.
2. Push and turn.1 2
UBEDE0E0.book Page 11 Thursday, October 1, 2020 1:04 PM
Page 28 of 112
Standin g assist
4-1
4
EAU89245
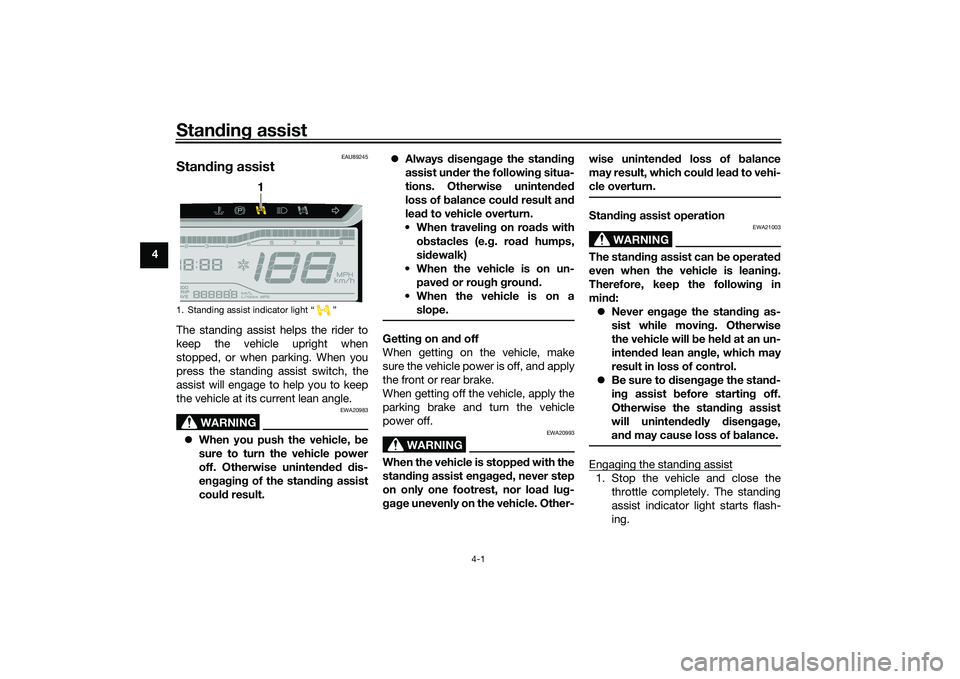
Stan din g assistThe standing assist helps the rider to
keep the vehicle upright when
stopped, or when parking. When you
press the standing assist switch, the
assist will engage to help you to keep
the vehicle at its current lean angle.
WARNING
EWA20983
When you push the vehicle, b e
sure to turn the vehicle power
off. Otherwise uninten ded d is-
en gag in g of the stan din g assist
coul d result.
Always disen gag e the stan din g
assist un der the followin g situa-
tions. Otherwise uninten ded
loss of b alance coul d result an d
lea d to vehicle overturn.
When travelin g on roa ds with
o bstacles (e. g. roa d humps,
si dewalk)
When the vehicle is on un- pave d or rou gh groun d.
When the vehicle is on a slope.
Gettin g on an d off
When getting on the vehicle, make
sure the vehicle power is off, and apply
the front or rear brake.
When getting off the vehicle, apply the
parking brake and turn the vehicle
power off.
WARNING
EWA20993
When the vehicle is stoppe d with the
stan din g assist en gag ed , never step
on only one footrest, nor load lug-
g ag e unevenly on the vehicle. Other- wise uninten
ded loss of b alance
may result, which coul d lea d to vehi-
cle overturn.
Stan din g assist operation
WARNING
EWA21003
The stan din g assist can b e operated
even when the vehicle is leanin g.
Therefore, keep the followin g in
mind :
Never en gag e the stan din g as-
sist while movin g. Otherwise
the vehicle will be hel d at an un-
inten ded lean an gle, which may
result in loss of control.
Be sure to disen gag e the stan d-
in g assist b efore startin g off.
Otherwise the stan din g assist
will uninten ded ly disen gag e,
an d may cause loss of b alance.Engaging the standing assist1. Stop the vehicle and close the
throttle completely. The standing
assist indicator light starts flash-
ing.
1. Standing assist indicator light “ ”
1
UBEDE0E0.book Page 1 Thursday, October 1, 2020 1:04 PM
Page 29 of 112
Standin g assist
4-2
4
2. Press the standing assist switch
once.
3. The standing assist indicator light comes on and the beeper sounds
once. The assist is now engaged.
En gag in g con ditions of the stan din g
assist
The standing assist can be engaged
when the following conditions are met: Vehicle speed is 10 km/h (6 mi/h)
or less with vehicle power on
Engine speed is 2000 r/min or less
Throttle grip is in fully closed posi-
tion with engine running
Standing assist warning light is off
Standing assist switch is on
NOTICE
ECA26993
If the vehicle battery volta ge is low,
the stan din g assist may hol d at its
current position even if the switch is
operated . To prevent this from oc-
currin g, avoi d improper use such as
the followin g:
Pushin g the en gine start switch
an d the stan din g assist switch
at the same time.
Operatin g the stan din g assist
repeated ly when the en gine is
not runnin g.
Disengaging the standing assist1. Stop the vehicle and hold it up-
right.
2. Press the standing assist switch twice.
3. The standing assist indicator light flashes, and the beeper sounds
twice. The assist is now disen-
gaged.
Automatic disen gag in g con ditions
of the stan din g assist
The standing assist disengages auto-
matically when one of the following
conditions is detected. Vehicle speed is over 10 km/h (6
mi/h) with vehicle power on
Engine speed is over 2300 r/min
Throttle grip is turned with engine
running
WARNING
EWA21013
Do not race the en gine when
stoppe d an d the stan din g assist
is en gag ed . Otherwise the stan
din g assist will disen gag e
an d may cause a loss of bal-
ance.
Do not coast with the vehicle
power off. Otherwise, if you turn
the vehicle power on while the
vehicle is coastin g, the stan din g
assist may disen gag e, which
coul d cause a loss of balance.
UBEDE0E0.book Page 2 Thursday, October 1, 2020 1:04 PM
Page 30 of 112
Instrument and control functions
5-1
5
EAU4939P
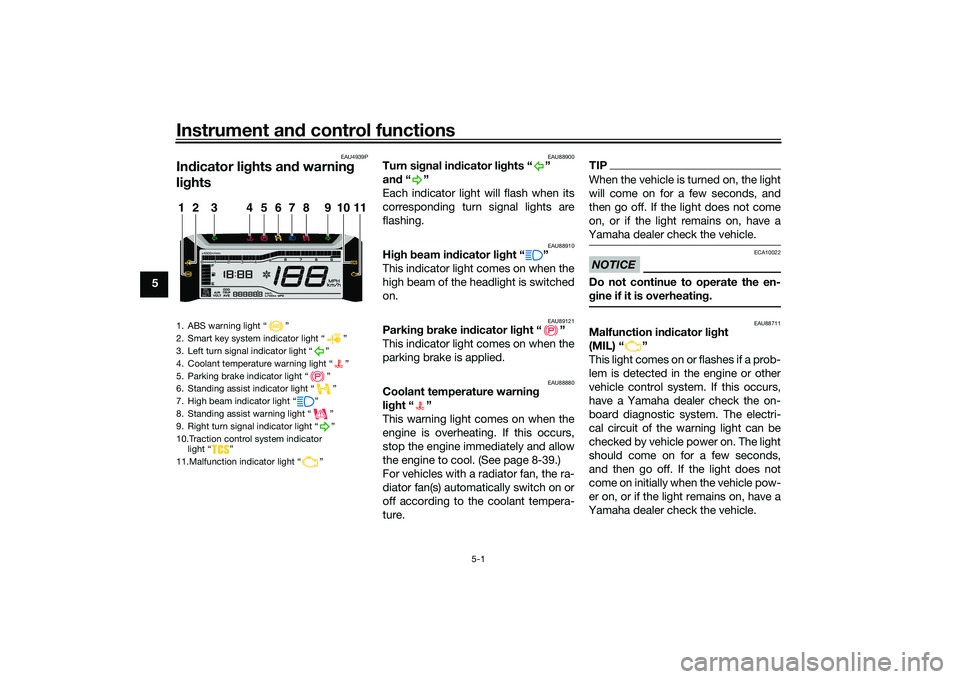
In dicator li ghts an d warnin g
li g hts
EAU88900
Turn si gnal in dicator li ghts “ ”
an d“”
Each indicator light will flash when its
corresponding turn signal lights are
flashing.
EAU88910
Hi gh beam in dicator li ght “ ”
This indicator light comes on when the
high beam of the headlight is switched
on.
EAU89121
Parkin g b rake in dicator li ght “ ”
This indicator light comes on when the
parking brake is applied.
EAU88880
Coolant temperature warnin g
li g ht “ ”
This warning light comes on when the
engine is overheating. If this occurs,
stop the engine immediately and allow
the engine to cool. (See page 8-39.)
For vehicles with a radiator fan, the ra-
diator fan(s) automatically switch on or
off according to the coolant tempera-
ture.
TIPWhen the vehicle is turned on, the light
will come on for a few seconds, and
then go off. If the light does not come
on, or if the light remains on, have a
Yamaha dealer check the vehicle.NOTICE
ECA10022
Do not continue to operate the en-
g ine if it is overheatin g.
EAU88711
Malfunction in dicator li ght
(MIL) “ ”
This light comes on or flashes if a prob-
lem is detected in the engine or other
vehicle control system. If this occurs,
have a Yamaha dealer check the on-
board diagnostic system. The electri-
cal circuit of the warning light can be
checked by vehicle power on. The light
should come on for a few seconds,
and then go off. If the light does not
come on initially when the vehicle pow-
er on, or if the light remains on, have a
Yamaha dealer check the vehicle.
1. ABS warning light “ ”
2. Smart key system indicator light “ ”
3. Left turn signal indicator light “ ”
4. Coolant temperature warning light “ ”
5. Parking brake indicator light “ ”
6. Standing assist indicator light “ ”
7. High beam indicator light “ ”
8. Standing assist warning light “ ”
9. Right turn signal indicator light “ ”
10.Traction control system indicator light “ ”
11.Malfunction indicator light “ ”1
11
2
3
4
5
6
7
8
9
10
UBEDE0E0.book Page 1 Thursday, October 1, 2020 1:04 PM