YAMAHA YFM660R 2001 Notices Demploi (in French)
YFM660R 2001
YAMAHA
YAMAHA
https://www.carmanualsonline.info/img/51/53741/w960_53741-0.png
YAMAHA YFM660R 2001 Notices Demploi (in French)
Trending: clock, engine oil, headlight bulb, wheel alignment, ignition, CD changer, towing capacity
Page 361 of 408
8-108
Yuki_DATA2:HM00G210_YFM660R-60:YFM350-8.frameER
3. Retirer la vis.
4. DĂ©tacher le cache de phare du bloc de phare.
5. Retirer la vis et extraire l’optique de phare de son
support.
N.B.:
Tirer sur l’arrière de l’optique de phare, puis sur l’avant. 3. Extraiga el tornillo.
4. Extraiga la cubierta del faro del conjunto del
faro.
5. Extraiga el tornillo y tire de la unidad del
faro para sacarla de su caja.
NOTA:
Tire hacia fuera de la parte trasera de la unidad
del faro, y luego tire hacia fuera por la parte fron-
tal.
Page 362 of 408
8-109
Yuki_DATA2:HM00G210_YFM660R-60:YFM350-8.frameEL
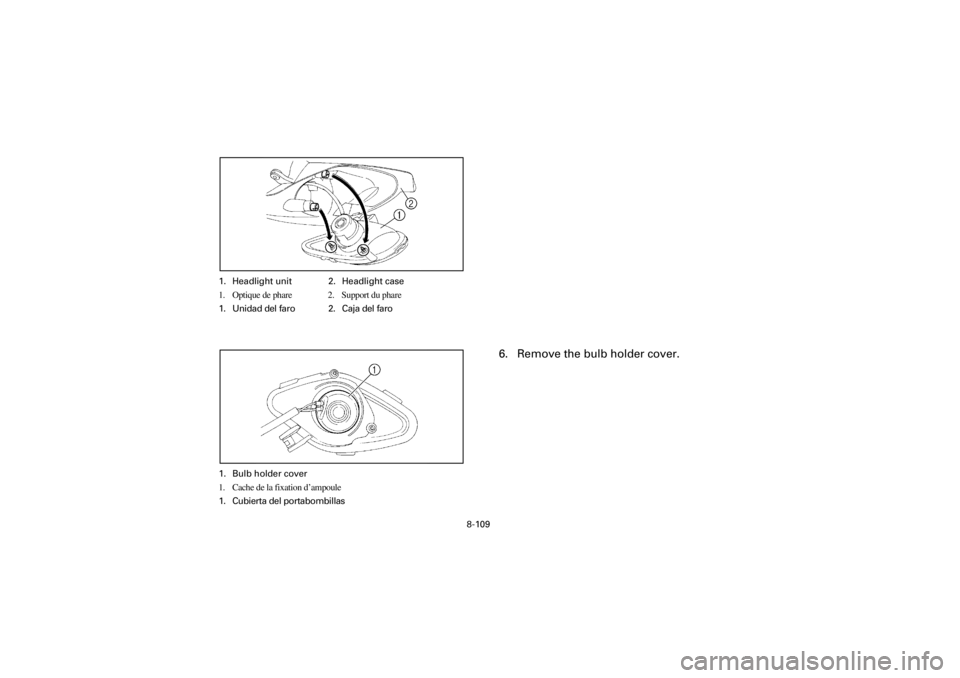
1. Headlight unit 2. Headlight case
1. Optique de phare 2. Support du phare
1. Unidad del faro 2. Caja del faro
1. Bulb holder cover
1. Cache de la fixation d’ampoule
1. Cubierta del portabombillas
6. Remove the bulb holder cover.
Page 363 of 408
8-110
Yuki_DATA2:HM00G210_YFM660R-60:YFM350-8.frameER
6. Déposer le cache de la fixation d’ampoule.6. Extraiga la cubierta del portabombillas.
Page 364 of 408
8-111
Yuki_DATA2:HM00G210_YFM660R-60:YFM350-8.frameEL
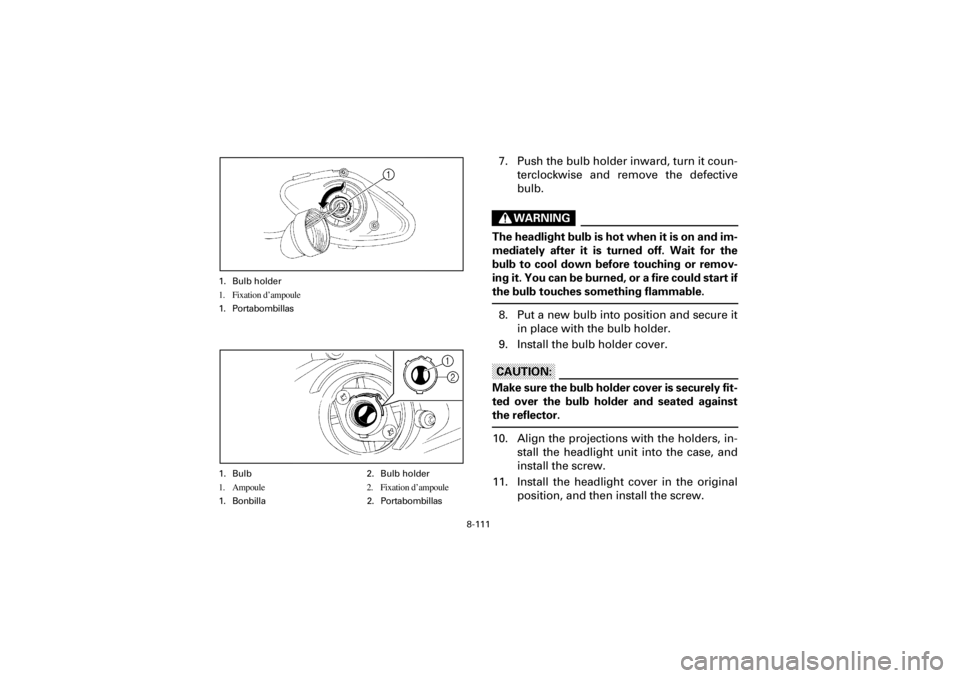
1. Bulb holder
1. Fixation d’ampoule
1. Portabombillas
1. Bulb 2. Bulb holder
1. Ampoule 2. Fixation d’ampoule
1. Bonbilla 2. Portabombillas
7. Push the bulb holder inward, turn it coun-
terclockwise and remove the defective
bulb.
WARNING
The headlight bulb is hot when it is on and im-
mediately after it is turned off. Wait for the
bulb to cool down before touching or remov-
ing it. You can be burned, or a fire could start if
the bulb touches something flammable.
8. Put a new bulb into position and secure it
in place with the bulb holder.
9. Install the bulb holder cover.
CAUTION:
Make sure the bulb holder cover is securely fit-
ted over the bulb holder and seated against
the reflector.
10. Align the projections with the holders, in-
stall the headlight unit into the case, and
install the screw.
11. Install the headlight cover in the original
position, and then install the screw.
Page 365 of 408
8-112
Yuki_DATA2:HM00G210_YFM660R-60:YFM350-8.frameER
7. Appuyer sur la fixation d’ampoule tout en la tour-
nant dans le sens inverse des aiguilles d’une mon-
tre, puis retirer l’ampoule défectueuse.
AVERTISSEMENT
L’ampoule de phare est chaude quand elle est allu-
mée et reste chaude juste après son extinction. Atten-
dre que l’ampoule soit refroidie avant de la toucher
ou de la déposer. Il y a risque de brûlure ou d’incen-
die si l’ampoule entre en contact avec des objets in-
flammables.
8. Mettre une nouvelle ampoule en place et la fixer Ă
la fixation d’ampoule.
9. Mettre le cache de la fixation d’ampoule en place.
ATTENTION:
S’assurer de remettre correctement le cache en place
sur la fixation d’ampoule et veiller à ce qu’il soit bien
assis sur le réflecteur.
10. Aligner les saillies et les supports, puis mettre l’op-
tique de phare en place dans son boĂ®tier et le fixer Ă
l’aide de sa vis.
11. Remettre le cache du phare Ă sa place et le fixer Ă
l’aide de sa vis.7. Empuje el portabombillas hacia dentro, gĂ-
relo hacia la izquierda y extraiga la bombilla
defectuosa.
ADVERTENCIA
La bombilla del faro está caliente cuando está
encendida e inmediatamente después de haber-
se apagado. Espere a que se enfrĂe la bombilla
antes de tocarla o extraerla. PodrĂa quemarse, o
podrĂa producirse fuego si la bombilla tocará
algo inflamable.
8. Ponga una bombilla nueva en su posiciĂłn y
fĂjela en su lugar con el portabombillas.
9. Instale la cubierta del portabombillas.
ATENCION:
AsegĂşrese de que la cubierta del portabombillas
esté fijada con seguridad encima del portabom-
billas y que esté asentada contra el reflector.
10. Alinee los salientes con los portabombillas,
instale la unidad del faro en la caja, e instale
el tornillo.
11. Instale la cubierta del faro en su posiciĂłn
original, e instale entonces el tornillo.
Page 366 of 408
8-113
Yuki_DATA2:HM00G210_YFM660R-60:YFM350-8.frameEL
12. Connect the coupler.
13. Install the headlight assembly in the origi-
nal position and tighten the bolts.
14. Have a Yamaha dealer adjust the head-
light beam.
Page 367 of 408
8-114
Yuki_DATA2:HM00G210_YFM660R-60:YFM350-8.frameER
12. DĂ©connecter le coupleur.
13. Remettre le bloc phare Ă sa place, puis serrer les
boulons.
14. Faire régler le faisceau de phare par un concession-
naire Yamaha.12. Conecte el acoplador.
13. Instale el conjunto del faro en la posiciĂłn
original y apriete los pernos.
14. Solicite a un concesionario Yamaha que
ajuste la orientaciĂłn de la luz del faro.
Page 368 of 408
8-115
Yuki_DATA2:HM00G210_YFM660R-60:YFM350-8.frameEL
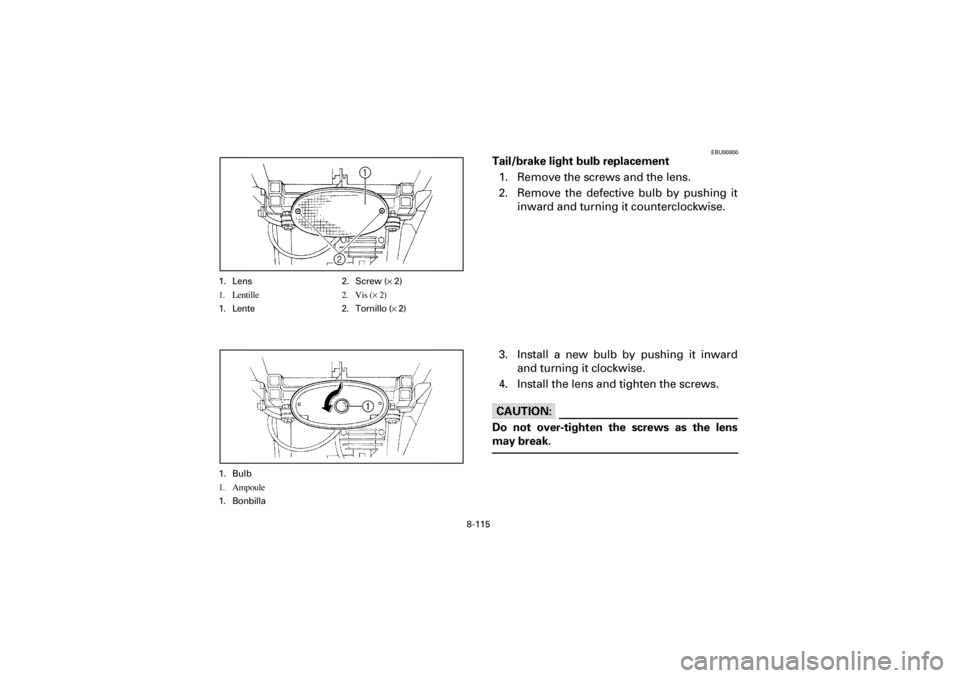
1. Lens 2. Screw (Ă— 2)
1. Lentille 2. Vis (Ă— 2)
1. Lente 2. Tornillo (Ă— 2)
1. Bulb
1. Ampoule
1. Bonbilla
EBU00800
Tail/brake light bulb replacement
1. Remove the screws and the lens.
2. Remove the defective bulb by pushing it
inward and turning it counterclockwise.
3. Install a new bulb by pushing it inward
and turning it clockwise.
4. Install the lens and tighten the screws.
CAUTION:
Do not over-tighten the screws as the lens
may break.
Page 369 of 408
8-116
Yuki_DATA2:HM00G210_YFM660R-60:YFM350-8.frameER
FBU00800
Remplacement d’une ampoule de feu arrière/stop
1. Retirer les vis et la lentille.
2. Retirer l’ampoule défectueuse en appuyant sur cel-
le-ci et en la tournant dans le sens inverse des
aiguilles d’une montre.
3. Mettre l’ampoule neuve en place en appuyant sur
celle-ci et en la tournant dans le sens des aiguilles
d’une montre.
4. Remettre la lentille en place, puis serrer les vis.
ATTENTION:
Veiller Ă ne pas trop serrer les vis, car cela risquerait
de casser la lentille.
SBU00800
Reemplazo de la bombilla de la luz de cola/freno
1. Extraiga el tornillo y la lente.
2. Extraiga la bombilla defectuosa presionán-
dola hacia dentro y girándola hacia la iz-
quierda.
3. Instale una bombilla nueva presionándola
hacia dentro y girándola hacia la derecha.
4. Instale la lente y apriete los tornillos.
ATENCION:
No sobreapriete los tornillos porque podrĂa rom-
perse la lente.
Page 370 of 408

8-117
Yuki_DATA2:HM00G210_YFM660R-60:YFM350-8.frameEL
EBU00413
Troubleshooting
Although Yamaha machines receive a rigid in-
spection before shipment from the factory,
trouble may occur during operation.
Any problem in the fuel, compression, or igni-
tion systems can cause poor starting and loss
of power. The troubleshooting chart describes
a quick, easy procedure for making checks. If
your machine requires any repair, take it to a
Yamaha dealer.
The skilled technicians at a Yamaha dealership
have the tools, experience, and know-how to
properly service your machine. Use only genu-
ine Yamaha parts on your machine. Imitation
parts may look like Yamaha parts, but they are
often inferior. Consequently, they have a short-
er service life and can lead to expensive repair
bills.
WARNING
Do not smoke when checking the fuel system.
Fuel can ignite or explode, causing severe inju-
ry or property damage. Make sure there are no
open flames or sparks in the area, including pi-
lot lights from water heaters or furnaces.
Trending: maintenance, coolant level, clutch, coolant temperature, battery replacement, clock, brakes
