Acura TLX 2017 Navigation Manual
Manufacturer: ACURA, Model Year: 2017, Model line: TLX, Model: Acura TLX 2017Pages: 325, PDF Size: 19.46 MB
Page 151 of 325
150
uuAudio System uAuxiliary Input Jack
Audio
Auxiliary Input Jack
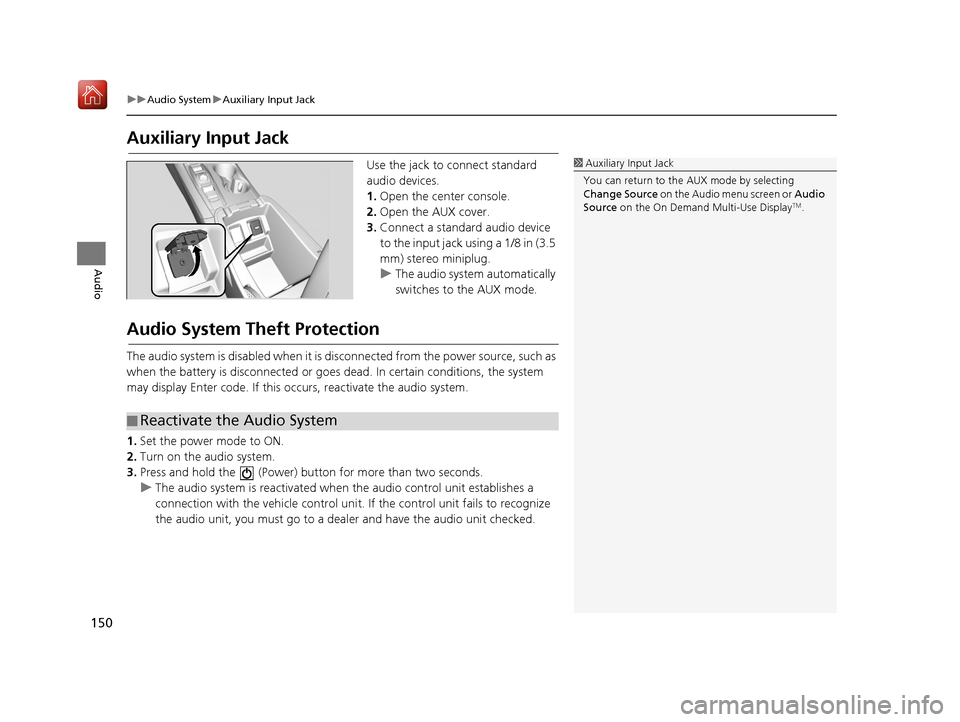
Use the jack to connect standard
audio devices.
1. Open the center console.
2. Open the AUX cover.
3. Connect a standard audio device
to the input jack using a 1/8 in (3.5
mm) stereo miniplug.
u The audio system automatically
switches to the AUX mode.
Audio System Theft Protection
The audio system is disabled when it is di sconnected from the power source, such as
when the battery is disconnected or goes dead. In certain conditions, the system
may display Enter code. If this occurs, reactivate the audio system.
1. Set the power mode to ON.
2. Turn on the audio system.
3. Press and hold the (Power) bu tton for more than two seconds.
u The audio system is reactivated when the audio control unit establishes a
connection with the vehicle control unit. If the control unit fails to recognize
the audio unit, you must go to a deal er and have the audio unit checked.
1Auxiliary Input Jack
You can return to the AUX mode by selecting
Change Source on the Audio menu screen or Audio
Source on the On Demand Multi-Use Display
TM.
■Reactivate the Audio System
16 ACURA TLX NAVI-31TZ38100.book 150 ページ 2015年7月29日 水曜日 午後4時1
1分
Page 152 of 325
151
uuAudio System uSetting Audio Shortcuts
Continued
Audio
Setting Audio Shortcuts
You can store up to six radio stations, and HDD audio album/play lists when playing
AM, FM, SiriusXM ® radio, or HDD audio.
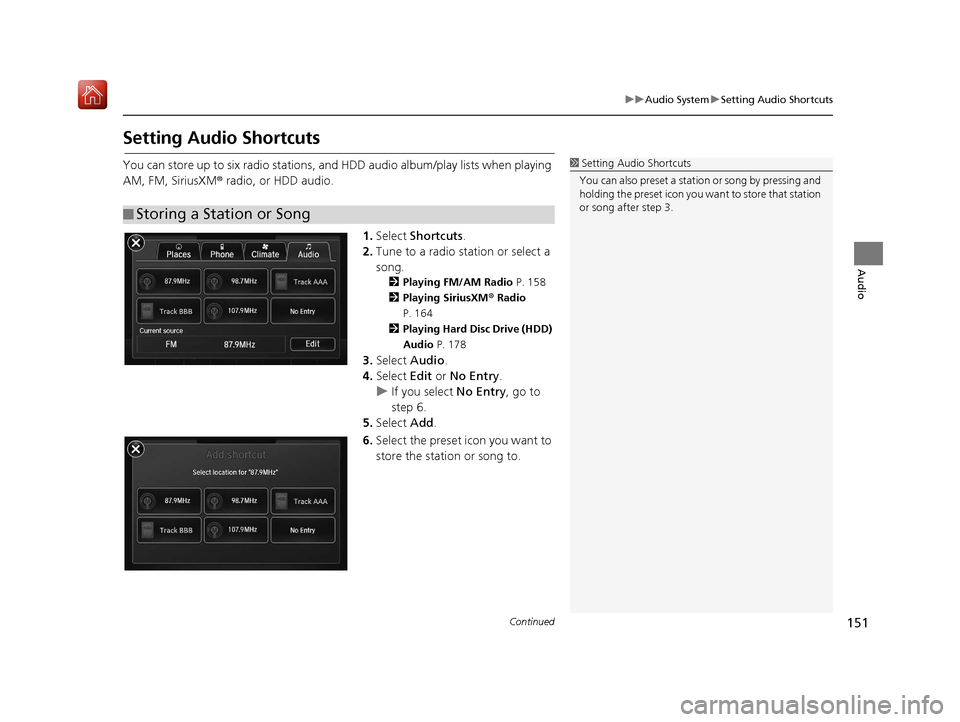
1.Select Shortcuts .
2. Tune to a radio station or select a
song.
2 Playing FM/AM Radio P. 158
2 Playing SiriusXM ® Radio
P. 164
2 Playing Hard Disc Drive (HDD)
Audio P. 178
3.Select Audio .
4. Select Edit or No Entry .
u If you select No Entry, go to
step 6.
5. Select Add.
6. Select the preset icon you want to
store the station or song to.
■Storing a Station or Song
1
Setting Audio Shortcuts
You can also preset a stat ion or song by pressing and
holding the preset icon you want to store that station
or song after step 3.
16 ACURA TLX NAVI-31TZ38100.book 151 ページ 2015年7月29日 水曜日 午後4時1 1分
Page 153 of 325
uuAudio System uCustomizing Audio Source
152
Audio
1. Select Shortcuts .
2. Select Audio .
3. Select Edit.
4. Select Delete.
5. Select the preset icon with the radio station or a song you want to delete.
Customizing Audio Source
You can customize order of the source list icons.
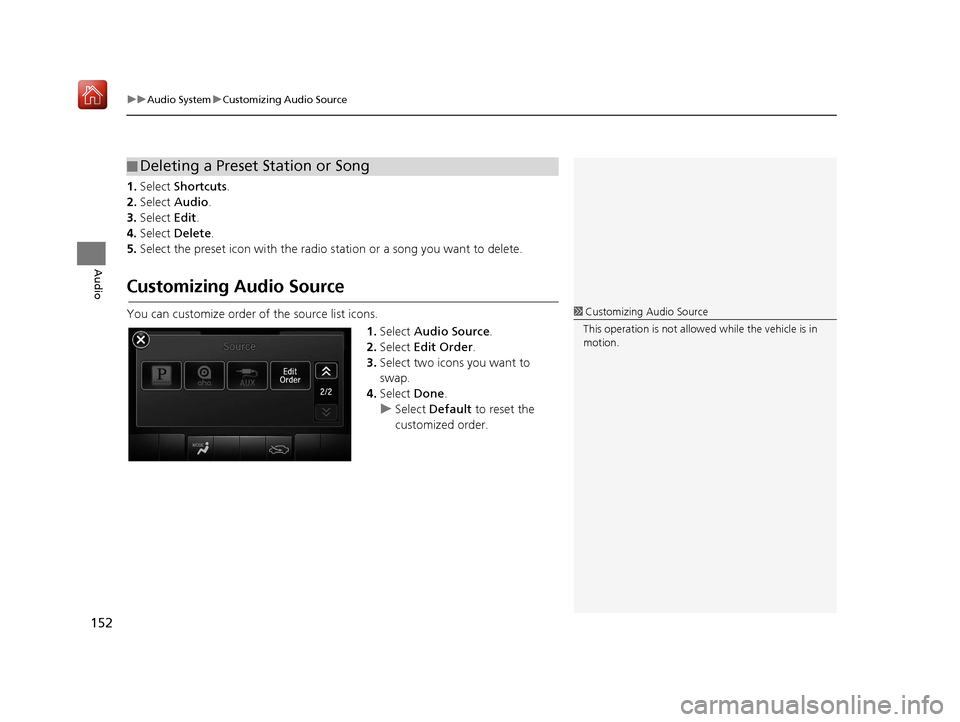
1.Select Audio Source .
2. Select Edit Order .
3. Select two icons you want to
swap.
4. Select Done.
u Select Default to reset the
customized order.
■ Deleting a Preset Station or Song
1
Customizing Audio Source
This operation is not allowe d while the vehicle is in
motion.
16 ACURA TLX NAVI-31TZ38100.book 152 ページ 2015年7月29日 水曜日 午後4時1 1分
Page 154 of 325
153Continued
Audio
Audio Remote Controls
Steering Wheel Controls
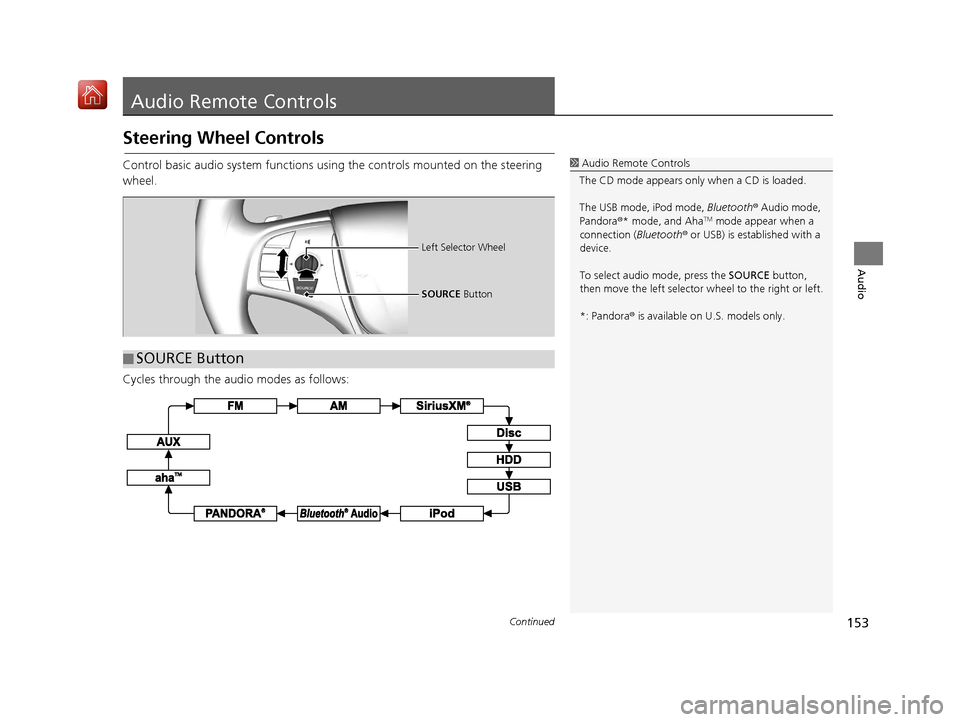
Control basic audio system functions using the controls mounted on the steering
wheel.
Cycles through the audio modes as follows:1Audio Remote Controls
The CD mode appears only when a CD is loaded.
The USB mode, iPod mode, Bluetooth® Audio mode,
Pandora ®* mode, and Aha
TM mode appear when a
connection (Bluetooth ® or USB) is established with a
device.
To select audio mode, press the SOURCE button,
then move the left selector wheel to the right or left.
*: Pandora ® is available on U.S. models only.
■ SOURCE Button
Left Selector Wheel
SOURCE
Button
16 ACURA TLX NAVI-31TZ38100.book 153 ページ 2015年7月29日 水曜日 午後4時1 1分
Page 155 of 325
uuAudio Remote Controls uSteering Wheel Controls
154
Audio
Roll Up to increase the volume.
Roll Down to decrease the volume.
Push to mute. Push again to unmute.
FM/AM, SiriusXM ®
• Move to the right to select the next preset radio station.
• Move to the left to select the previous preset radio station.
• Move to the right and hold to scan to the next strong station.
• Move to the left and hold to scan to the previous strong station.
CD, HDD, iPod, USB flash drive, or Bluetooth® Audio
• Move to the right to sk ip to the next song.
• Move to the left to go back to the beginning of the current or previous song.
• Move to the right and hold to go to the group up. (Bluetooth® Audio only)
• Move to the left and hold to go to the group down. (Bluetooth® Audio only)
CD, HDD or USB flash drive
• Move to the right and hold to skip to the next folder.
• Move to the left and hold to go back to the previous folder.
Pandora ®* or Aha
TM
• Move to the right to sk ip to the next song.
• Move to the right and hold to select the next station.
• Move to the left and hold to select the previous station.
■Left Selector Wheel1
Left Selector Wheel
*: Pandora ® is available on U.S. models only.
16 ACURA TLX NAVI-31TZ38100.book 154 ページ 2015年7月29日 水曜日 午後4時1 1分
Page 156 of 325
155Continued
Audio
Audio Settings
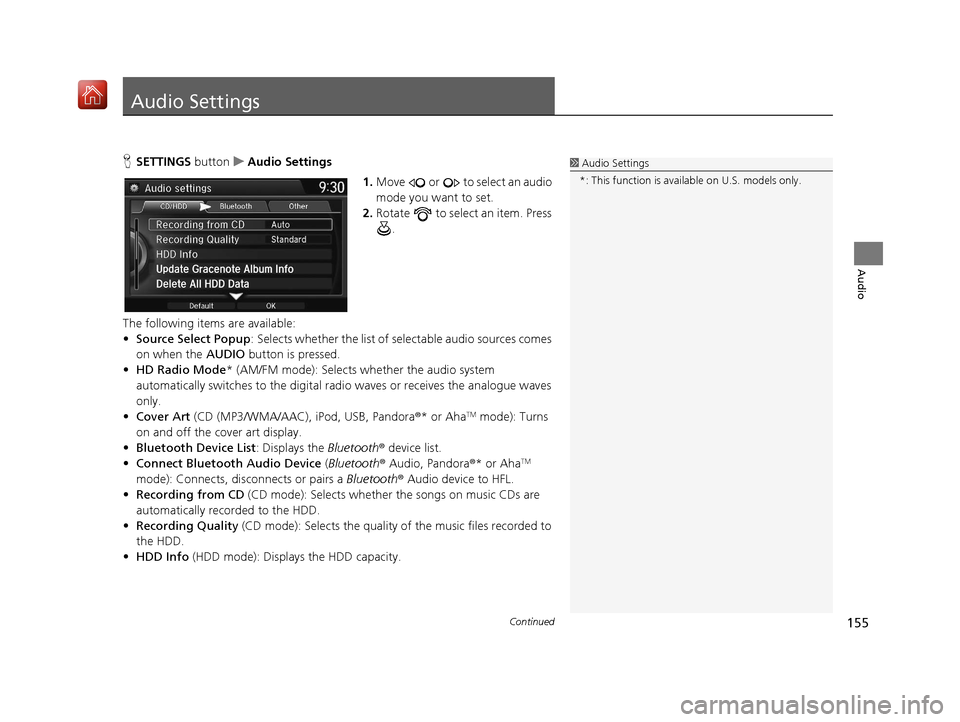
HSETTINGS button uAudio Settings
1.Move or to select an audio
mode you want to set.
2. Rotate to select an item. Press
.
The following items are available:
• Source Select Popup : Selects whether the list of selectable audio sources comes
on when the AUDIO button is pressed.
• HD Radio Mode * (AM/FM mode): Selects whether the audio system
automatically switches to the digital radi o waves or receives the analogue waves
only.
• Cover Art (CD (MP3/WMA/AAC), iPod, USB, Pandora®* or Aha
TM mode): Turns
on and off the cover art display.
• Bluetooth Device List : Displays the Bluetooth® device list.
• Connect Bluetooth Audio Device (Bluetooth® Audio, Pandora®* or Aha
TM
mode): Connects, disconnects or pairs a Bluetooth® Audio device to HFL.
• Recording from CD (CD mode): Selects whether the songs on music CDs are
automatically recorded to the HDD.
• Recording Quality (CD mode): Selects the quality of the music files recorded to
the HDD.
• HDD Info (HDD mode): Displays the HDD capacity.
1Audio Settings
*: This function is availa ble on U.S. models only.
16 ACURA TLX NAVI-31TZ38100.book 155 ページ 2015年7月29日 水曜日 午後4時1 1分
Page 157 of 325

uuAudio Settings uAdjusting the Sound
156
Audio
• Update Gracenote Album Info (CD or HDD mode): Updates the Gracenote ®
Album Info (Gracenote ® Media Database) from CD or from USB.
2Updating Gracenote® Album Info P. 188
•Delete All HDD Data (HDD mode): Resets all the menu and customized
settings, and delete all music data on the HDD.
• Default : Cancels/Resets all customized items in the Audio Settings group as
default.
Adjusting the Sound
H MENU button uSound
Adjust the sound bass, treble, fader, and ba lance. You can also adjust the strength
of the sound coming from the center and subwoofer speakers. In addition, you can
set Speed-sensitive Volume Compensa tion (SVC) and DTS Neural Surround.
1.Rotate to select the sound
mode to adjust. Press .
2. Rotate to adjust the desired
level. Press .1Adjusting the Sound
The SVC has four modes: Off, Low , Mid , and High.
SVC adjusts the volume level based on the vehicle
speed. As you go faster, audio volume increases. As
you slow down, audi o volume decreases.
DTS Neural Surround is a trademark of DTS, Inc.
When available, DTS Neural Surround converts stereo
sound into surround sound.
Interface Dial
16 ACURA TLX NAVI-31TZ38100.book 156 ページ 2015年7月29日 水曜日 午後4時1 1分
Page 158 of 325

157
uuAudio Settings uAdjusting the Sound
Audio
1. Select More.
2. Select Sound .
3. Use , or other icon to adjust
the setting.
u Use the / icons to turn
the page.
u Select to go back to the
previous screen.
1Adjusting the Sound
Select Off, Low , Mid or High for the SVC setting.
You can also adjust the sound to select on the
On Demand Multi-Use Display
TM.
On Demand Multi-Use DisplayTMOn Demand Multi-Use DisplayTM
16 ACURA TLX NAVI-31TZ38100.book 157 ページ 2015年7月29日 水曜日 午後4時1 1分
Page 159 of 325

158
Audio
Playing FM/AM Radio
Selecting FM/AM Mode
1.Press the MENU button. (in AUDIO mode)
2. Rotate to select Change Source. Press .
3. Rotate to select the frequency band (FM, AM). Press .
u The band and frequency are displayed on the navigation screen.
1. Select Audio Source.
2. Select the frequency band (FM, AM) icon.
u The band and frequency are displayed on the On Demand Multi-Use Display
TM.
1Selecting FM/AM Mode
You can control the AM/FM radio using voice
commands. 2 Radio FM Commands P. 317
The ST indicator appears on the display indicating
stereo FM broadcasts.
Stereo reproduction in AM is not available.
The radio can receive the complete AM and FM
bands:
AM band: 530 to 1710 kHz
FM band: 87.7 to 107.9 MHz
You can store 6 AM stations and 12 FM stations into
the preset memory.Interface Dial
On Demand Multi-Use DisplayTM
16 ACURA TLX NAVI-31TZ38100.book 158 ページ 2015年7月29日 水曜日 午後4時1 1分
Page 160 of 325

159
uuPlaying FM/AM Radio uAudio Screen Control
Continued
Audio
Audio Screen Control
Control the audio system through the navigation screen and On Demand Multi-Use
DisplayTM.
Rotate to select a preset station.
Press .
uPress and hold for a few
seconds to store the current
station.
u Press the MENU button to display
the menu items.
2 Audio Menu P. 161
Interface Dial
Frequency band
Preset stations
16 ACURA TLX NAVI-31TZ38100.book 159 ページ 2015年7月29日 水曜日 午後4時1 1分