display Acura ZDX 2012 Repair Manual
[x] Cancel search | Manufacturer: ACURA, Model Year: 2012, Model line: ZDX, Model: Acura ZDX 2012Pages: 370, PDF Size: 10.06 MB
Page 244 of 370
uuWhen Driving uACC (Adaptive Cruise Control)*
242
Driving
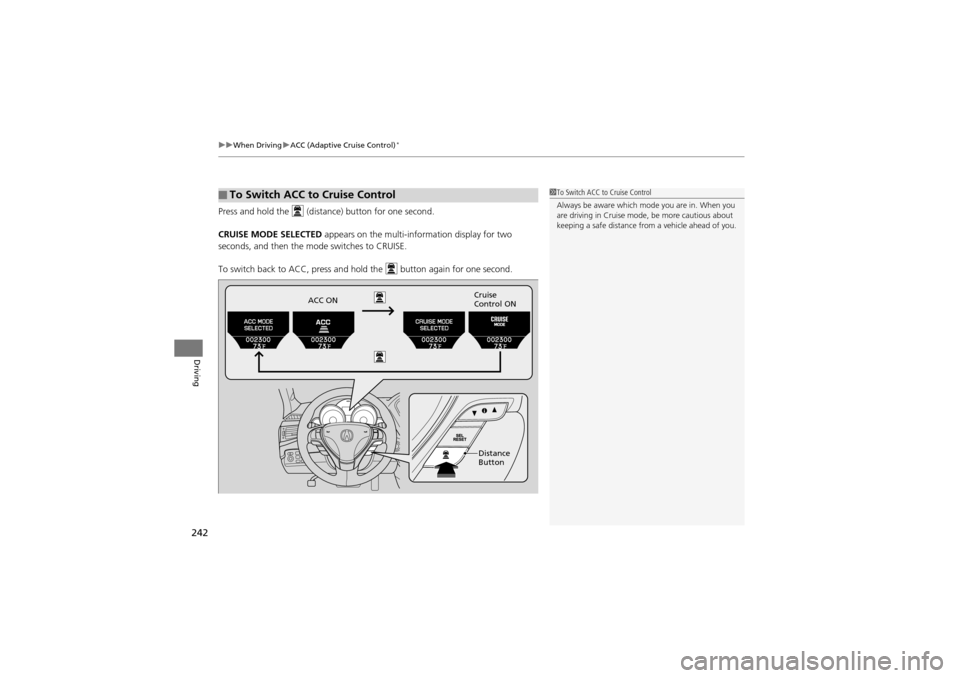
Press and hold the (dista nce) button for one second.
CRUISE MODE SELECTED appears on the multi-information display for two
seconds, and then the mo de switches to CRUISE.
To switch back to ACC, press and ho ld the button again for one second.
■To Switch ACC to Cruise Control1To Switch ACC to Cruise Control
Always be aware which mode you are in. When you
are driving in Cruise mode, be more cautious about
keeping a safe distance fro m a vehicle ahead of you.
ACC ON Cruise
Control ON
Distance
Button
Page 248 of 370
246
uuWhen Driving uBSI (Blind Spot Information)*
Driving
BSI (Blind Spot Information)*
Is designed to detect vehicles in specified alert zones adjacent to your vehicle,
particularly in harder to see areas commonly known as “blind spots.”
When vehicles in adjacent lanes are approaching your vehicle from behind, the
appropriate indicator comes on, providing assistance when you change lanes.
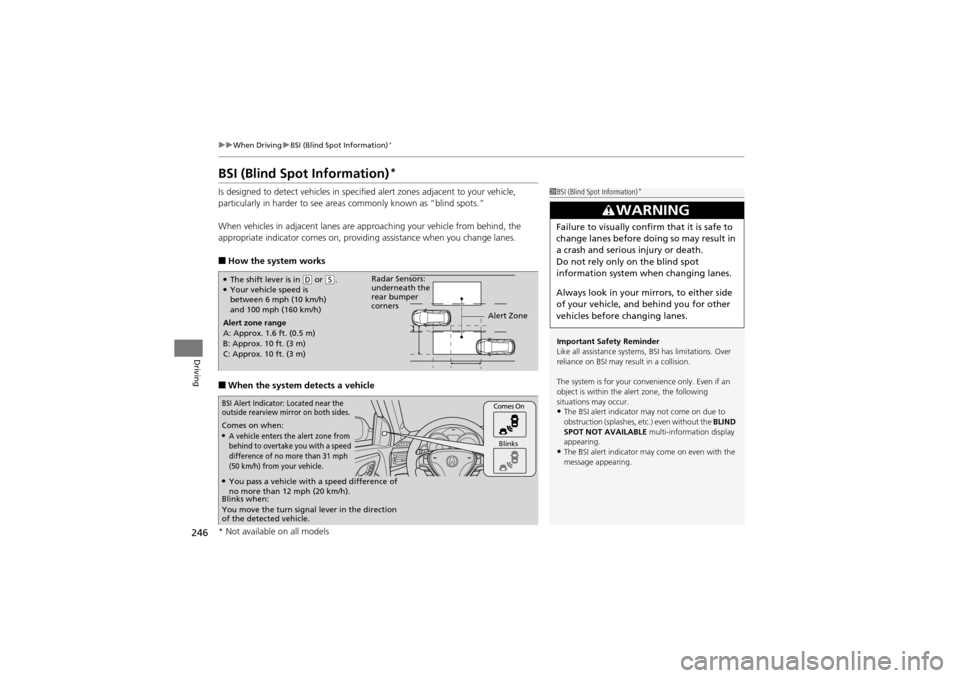
■How the system works
■When the system detects a vehicle
1BSI (Blind Spot Information)*
Important Safety Reminder
Like all assistance systems, BSI has limitations. Over
reliance on BSI may result in a collision.
The system is for your convenience only. Even if an
object is within the alert zone, the following
situations may occur.
•The BSI alert indicator may not come on due to
obstruction (splashes, etc.) even without the BLIND
SPOT NOT AVAILABLE multi-information display
appearing.
•The BSI alert indicator may come on even with the
message appearing.
3WARNING
Failure to visually confirm that it is safe to
change lanes before doing so may result in
a crash and serious injury or death.
Do not rely only on the blind spot
information system when changing lanes.
Always look in your mirrors, to either side
of your vehicle, and behind you for other
vehicles before changing lanes.
●The shift lever is in ( D or (S.●Your vehicle speed is
between 6 mph (10 km/h)
and 100 mph (160 km/h)
Alert zone range
A: Approx. 1.6 ft. (0.5 m)
B: Approx. 10 ft. (3 m)
C: Approx. 10 ft. (3 m) Radar Sensors:
underneath the
rear bumper
corners
Alert Zone
Comes on when:●A vehicle enters the alert zone from
behind to overtake you with a speed
difference of no more than 31 mph
(50 km/h) from your vehicle.
Comes On
Blinks
BSI Alert Indicator: Located near the
outside rearview mirror on both sides.
Blinks when:
You move the turn signal lever in the direction
of the detected vehicle.
●You pass a vehicle with a speed difference of
no more than 12 mph (20 km/h).
* Not available on all models
Page 249 of 370
247
uuWhen Driving uBSI (Blind Spot Information)*
Driving
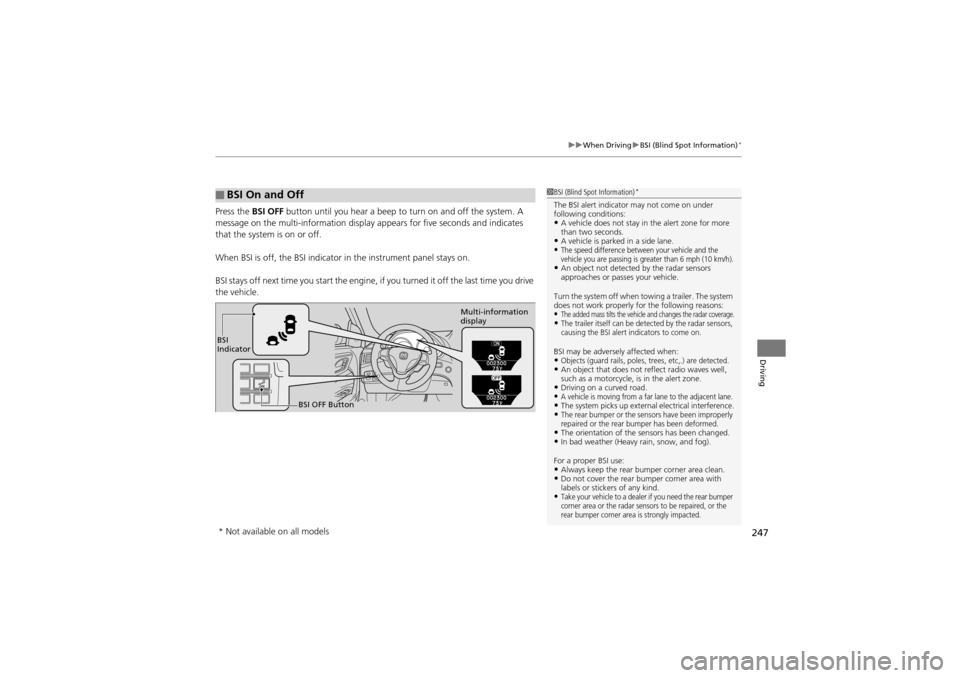
Press the BSI OFF button until you hear a beep to turn on and off the system. A
message on the multi-information display appears for five seconds and indicates
that the system is on or off.
When BSI is off, the BSI indicator in the in strument panel stays on.
BSI stays off next time you sta rt the engine, if you turned it off the last time you drive
the vehicle.
■BSI On and Off1 BSI (Blind Spot Information)*
The BSI alert indicator may not come on under
following conditions:
•A vehicle does not stay in the alert zone for more
than two seconds.
•A vehicle is parked in a side lane.•The speed difference between your vehicle and the
vehicle you are passing is greater than 6 mph (10 km/h).
•An object not detected by the radar sensors
approaches or passes your vehicle.
Turn the system off when towing a trailer. The system
does not work properly for the following reasons:
•The added mass tilts the vehicle and changes the radar coverage.•The trailer itself can be detected by the radar sensors,
causing the BSI alert indicators to come on.
BSI may be adversel y affected when:•Objects (guard rails, poles, trees, etc,.) are detected.•An object that does not reflect radio waves well,
such as a motorcycle, is in the alert zone.
•Driving on a curved road.•A vehicle is moving from a far lane to the adjacent lane.•The system picks up external electrical interference.•The rear bumper or the sensors have been improperly
repaired or the rear bumper has been deformed.
•The orientation of the sensors has been changed.•In bad weather (Heavy rain, snow, and fog).
For a proper BSI use:
•Always keep the rear bu mper corner area clean.•Do not cover the rear bumper corner area with
labels or stickers of any kind.
•Take your vehicle to a dealer if you need the rear bumper
corner area or the radar sensors to be repaired, or the
rear bumper corner area is strongly impacted.
BSI
Indicator
BSI OFF Button Multi-information
display
* Not available on all models
Page 250 of 370
248
uuWhen Driving uTPMS (Tire Pressure Monitoring System)
Driving
TPMS (Tire Pressure Monitoring System)
Monitors the tire pressure while you are driving. If your vehicle’s tire pressure
becomes significantly low, the low tire pressure/TPMS indicator comes on and a
message appears on the mu lti-information display.
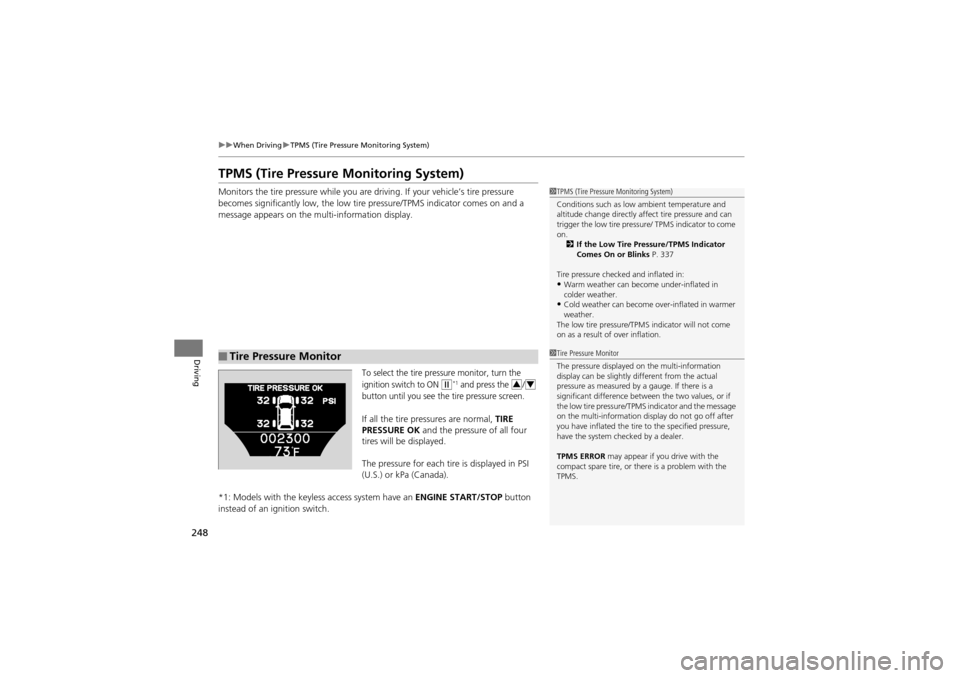
To select the tire pressure monitor, turn the
ignition switch to ON
w*1 and press the /
button until you see the tire pressure screen.
If all the tire pressures are normal, TIRE
PRESSURE OK and the pressure of all four
tires will be displayed.
The pressure for each tire is displayed in PSI
(U.S.) or kPa (Canada).
*1: Models with the keyless access system have an ENGINE START/STOP button
instead of an ignition switch.
■Tire Pressure Monitor
1 TPMS (Tire Pressure Monitoring System)
Conditions such as low ambient temperature and
altitude change directly affect tire pressure and can
trigger the low tire pressure / TPMS indicator to come
on. 2 If the Low Tire Pressure/TPMS Indicator
Comes On or Blinks P. 337
Tire pressure checked and inflated in:
•Warm weather can beco me under-inflated in
colder weather.
•Cold weather can become over-inflated in warmer
weather.
The low tire pressure/TPM S indicator will not come
on as a result of over inflation.
1 Tire Pressure Monitor
The pressure displayed on the multi-information
display can be slightly different from the actual
pressure as measured by a gauge. If there is a
significant difference between the two values, or if
the low tire pressure/TPMS indicator and the message
on the multi-information display do not go off after
you have inflated the tire to the specified pressure,
have the system checked by a dealer.
TPMS ERROR may appear if you drive with the
compact spare tire, or ther e is a problem with the
TPMS.
34
Page 251 of 370
249
uuWhen Driving uTPMS (Tire Pressure Monitoring System)
Driving
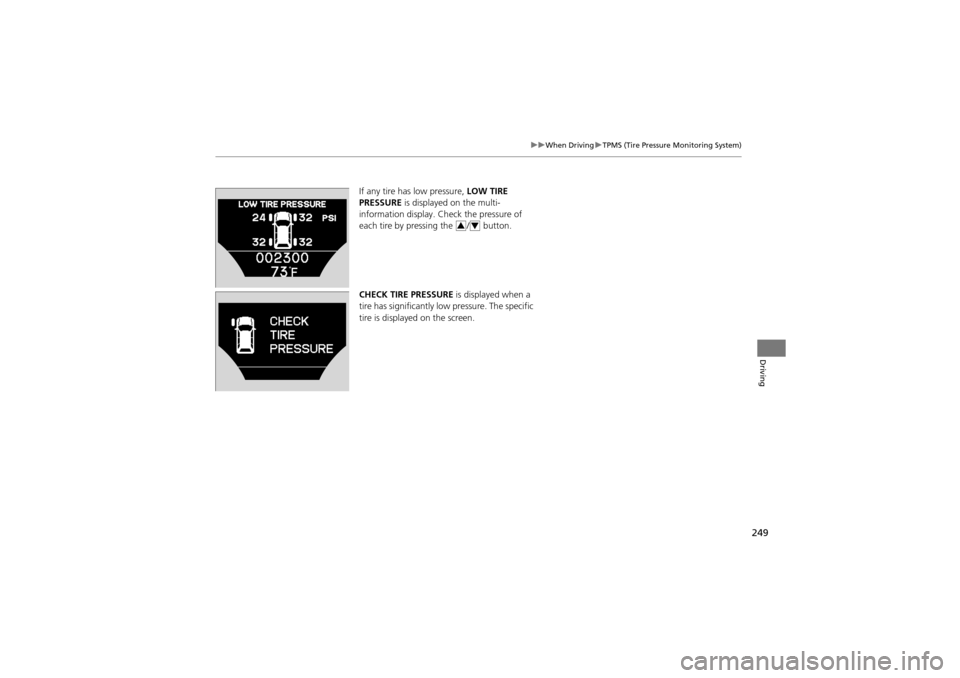
If any tire has low pressure, LOW TIRE
PRESSURE is displayed on the multi-
information display. Check the pressure of
each tire by pressing the / button.
CHECK TIRE PRESSURE is displayed when a
tire has significantly low pressure. The specific
tire is displayed on the screen.
34
Page 255 of 370
253Continued
Driving
Braking
Brake System
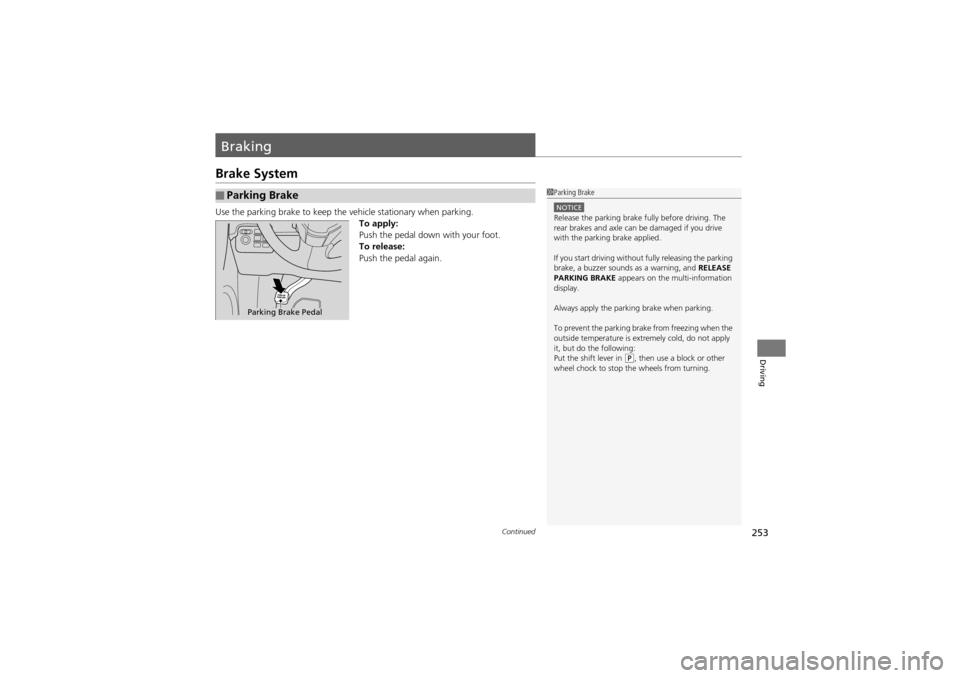
Use the parking brake to keep the vehicle stationary when parking.
To apply:
Push the pedal down with your foot.
To release:
Push the pedal again.
■Parking Brake1 Parking Brake
NOTICERelease the parking brake fully before driving. The
rear brakes and axle can be damaged if you drive
with the parking brake applied.
If you start driving without fully releasing the parking
brake, a buzzer sounds as a warning, and RELEASE
PARKING BRAKE appears on the multi-information
display.
Always apply the parking brake when parking.
To prevent the parking brake from freezing when the
outside temperature is extremely cold, do not apply
it, but do the following:
Put the shift lever in
( P, then use a block or other
wheel chock to stop the wheels from turning.
Parking Brake Pedal
Page 260 of 370
258
uuBraking uCMBSTM (Collision Mitigation Braking SystemTM)*
Driving
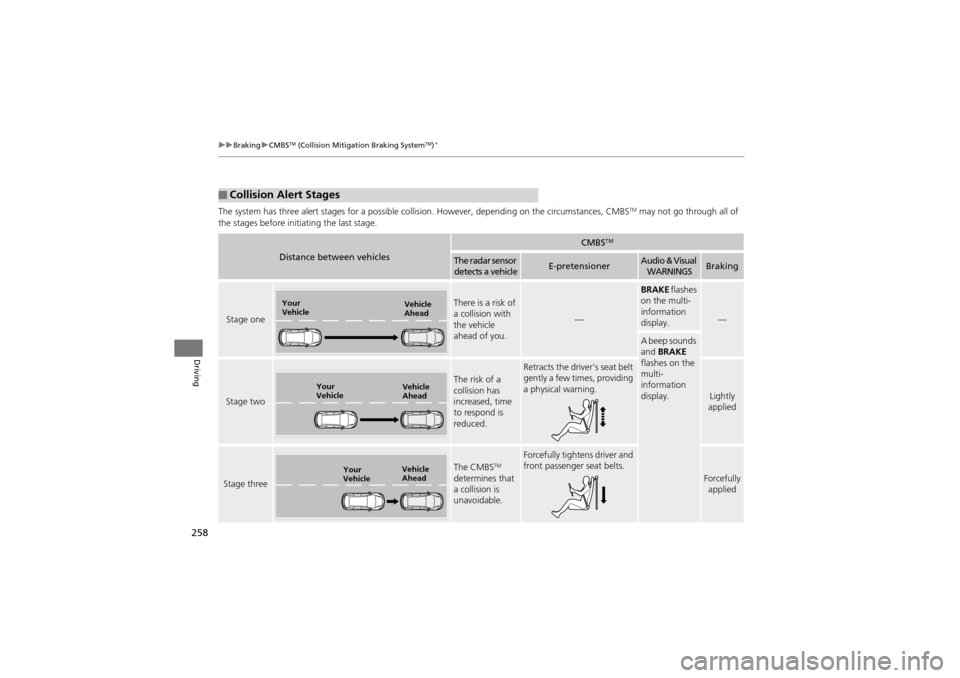
The system has three alert stages for a possible collis ion. However, depending on the circumstances, CMBSTM may not go through all of
the stages before init iating the last stage.
■Collision Alert Stages
Distance between vehicles
CMBSTM
The radar sensor
detects a vehicleE-pretensionerAudio & Visual WARNINGSBraking
Stage one
There is a risk of
a collision with
the vehicle
ahead of you.
—
BRAKE flashes
on the multi-
information
display.
—
A beep sounds
and BRAKE
flashes on the
multi-
information
display.
Stage two
The risk of a
collision has
increased, time
to respond is
reduced.
Retracts the driver’s seat belt
gently a few times, providing
a physical warning.
Lightly
applied
Stage three
The CMBSTM
determines that
a collision is
unavoidable.
Forcefully tightens driver and
front passenger seat belts.
Forcefully applied
Your
Vehicle Vehicle
Ahead
Your
VehicleVehicle
Ahead
Your
VehicleVehicle
Ahead
Page 261 of 370
Continued259
uuBraking uCMBSTM (Collision Mitigation Braking SystemTM)*
Driving
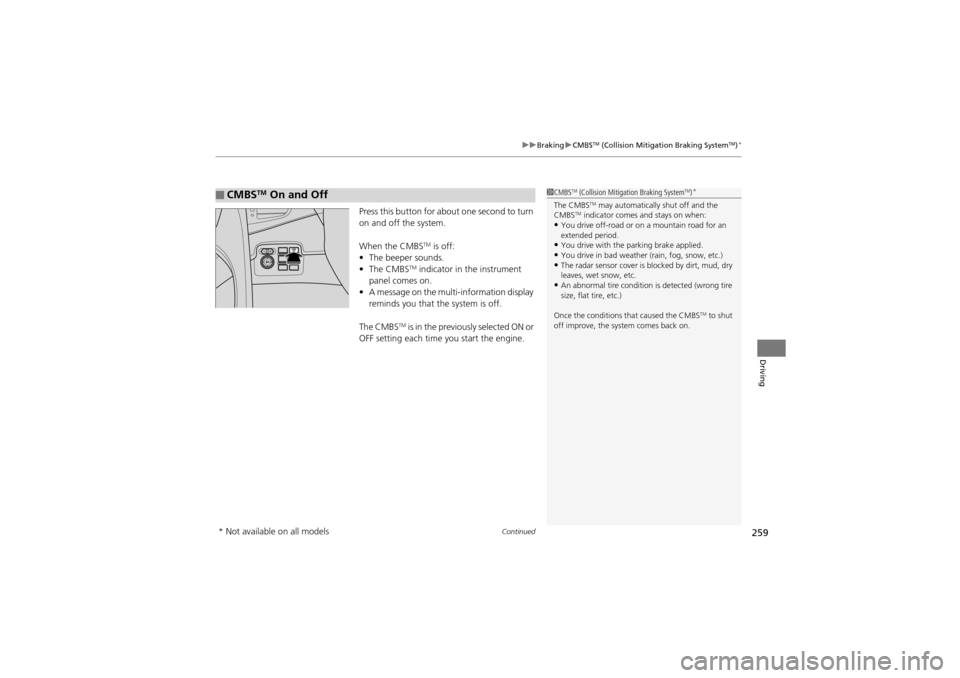
Press this button for about one second to turn
on and off the system.
When the CMBS
TM is off:
• The beeper sounds.
• The CMBS
TM indicator in the instrument
panel comes on.
• A message on the multi-information display
reminds you that the system is off.
The CMBS
TM is in the previously selected ON or
OFF setting each time yo u start the engine.
■CMBSTM On and Off1CMBSTM (Collision Mitigation Braking SystemTM)*
The CMBSTM may automatically shut off and the
CMBSTM indicator comes and stays on when:•You drive off-road or on a mountain road for an
extended period.
•You drive with the parking brake applied.•You drive in bad weather (rain, fog, snow, etc.)•The radar sensor cover is blocked by dirt, mud, dry
leaves, wet snow, etc.
•An abnormal tire condition is detected (wrong tire
size, flat tire, etc.)
Once the conditions that caused the CMBS
TM to shut
off improve, the system comes back on.
* Not available on all models
Page 264 of 370
262
Driving
Rearview Camera
About Your Rearview Camera
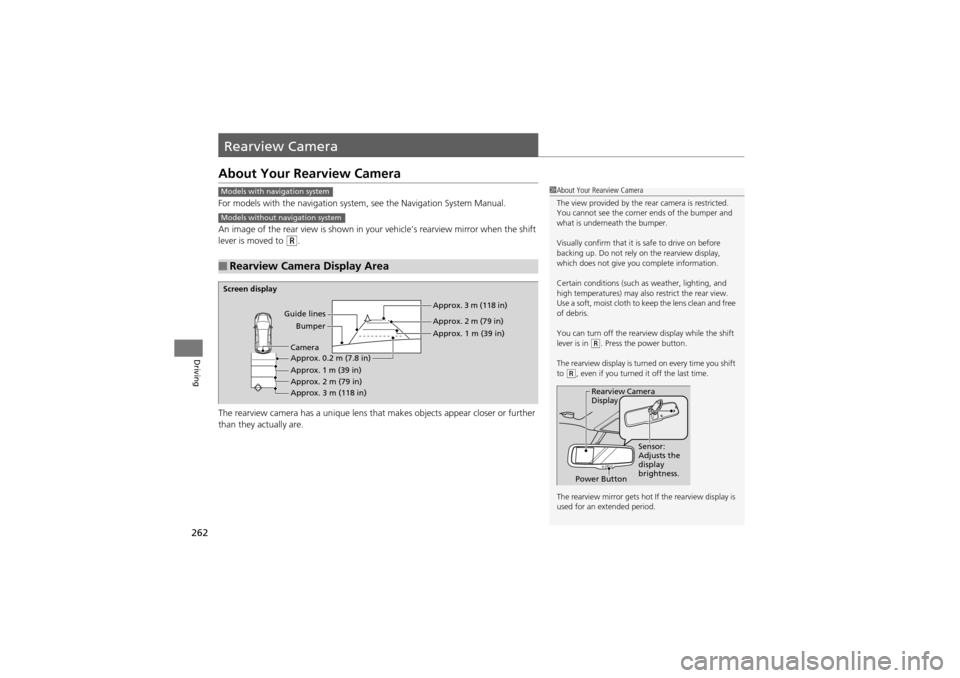
For models with the navigation system, see the Navigation System Manual.
An image of the rear view is shown in your vehicle’s rearview mirror when the shift
lever is moved to
R.
The rearview camera has a unique lens that makes objects appear closer or further
than they actually are.
■Rearview Camera Display Area
Models with navigation system
Models without navigation system
1 About Your Rearview Camera
The view provided by the re ar camera is restricted.
You cannot see the corner ends of the bumper and
what is underneath the bumper.
Visually confirm that it is safe to drive on before
backing up. Do not rely on the rearview display,
which does not give you complete information.
Certain conditions (such as weather, lighting, and
high temperatures) may also restrict the rear view.
Use a soft, moist cloth to ke ep the lens clean and free
of debris.
You can turn off the rearview display while the shift
lever is in
(R. Press the power button.
The rearview display is turned on every time you shift
to
(R, even if you turned it off the last time.
The rearview mirror gets hot If the rearview display is
used for an extended period.
Rearview Camera
Display
Power Button Sensor:
Adjusts the
display
brightness.
Screen display
Guide linesBumper Approx. 3 m (118 in)
Approx. 2 m (79 in)
Approx. 1 m (39 in)
Approx. 0.2 m (7.8 in)
Approx. 1 m (39 in)
Approx. 2 m (79 in)
Approx. 3 m (118 in) Camera
Page 268 of 370
266
Driving
Fuel Economy
Improving Fuel Economy
Fuel economy depends on several conditions, including driving conditions, your
driving habits, the condition of your vehicle, and loading. Depending on these and
other conditions, you may or may not achieve the rated fuel economy of this vehicle.
You can optimize your fuel economy with proper maintenance of your vehicle.
Always maintain your vehicle in accordance with the messages displayed on the
multi-information display.
• Use the recommended viscosity engine oil, displaying the API Certification Seal.
• Maintain the specified tire pressure.
• Do not load the vehicle with excess cargo.
• Keep your vehicle clean. A buildup of snow or mud on your vehicle’s underside
adds weight and increases wind resistance.
■Maintenance and Fuel Economy
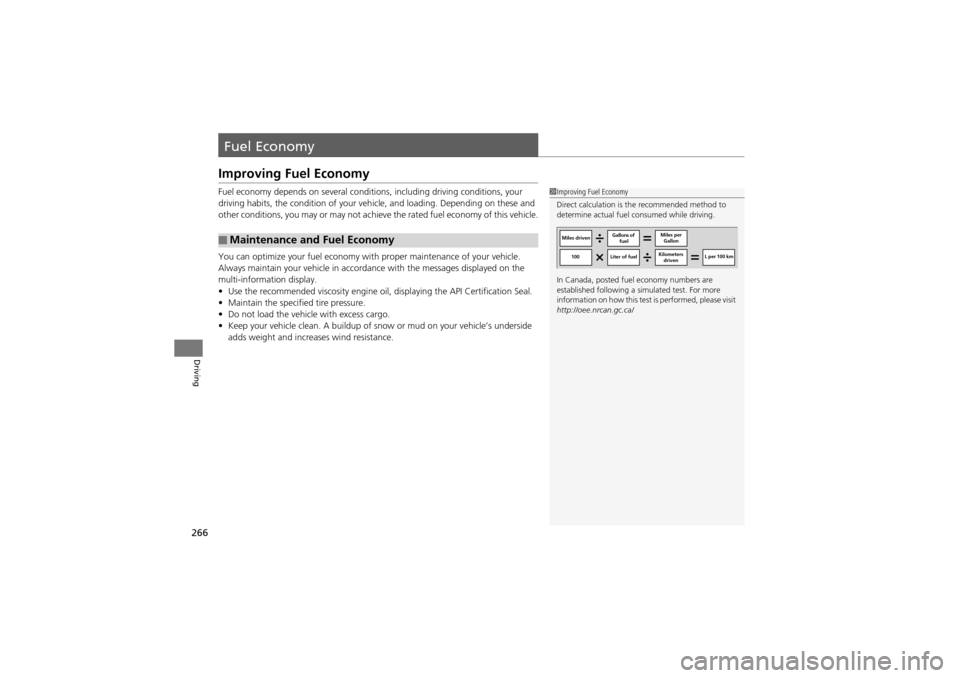
1Improving Fuel Economy
Direct calculation is th e recommended method to
determine actual fuel consumed while driving.
In Canada, posted fuel economy numbers are
established following a si mulated test. For more
information on how this test is performed, please visit
http://oee.nrcan.gc.ca/
Miles driven Gallons of
fuel Miles per
Gallon
100 Liter of fuel Kilometers
driven L per 100 km