transmission ASTON MARTIN V8 VANTAGE 2010 Owner's Manual
[x] Cancel search | Manufacturer: ASTON MARTIN, Model Year: 2010, Model line: V8 VANTAGE, Model: ASTON MARTIN V8 VANTAGE 2010Pages: 947, PDF Size: 43.21 MB
Page 515 of 947

Transmission Cooling (07.02)
Transmission (07.00)
May 2007 Workshop Manual 7-2-3
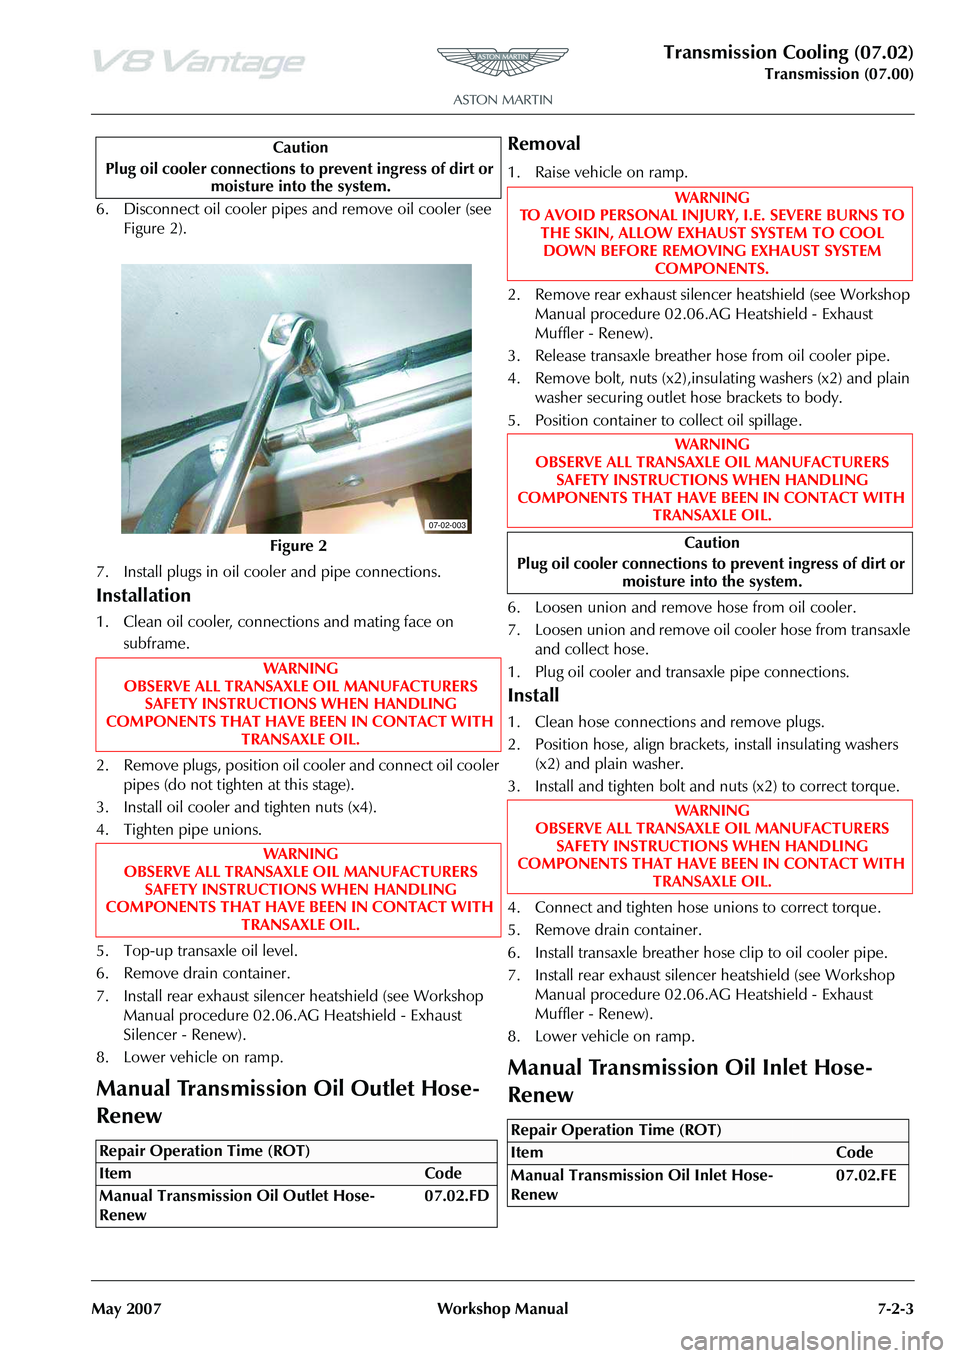
6. Disconnect oil cooler pipes and remove oil cooler (see
Figure 2).
7. Install plugs in oil cooler and pipe connections.
Installation
1. Clean oil cooler, connections and mating face on subframe.
2. Remove plugs, position oil cooler and connect oil cooler pipes (do not tighten at this stage).
3. Install oil cooler and tighten nuts (x4).
4. Tighten pipe unions.
5. Top-up transaxle oil level.
6. Remove drain container.
7. Install rear exhaust silencer heatshield (see Workshop
Manual procedure 02.06.AG Heatshield - Exhaust
Silencer - Renew).
8. Lower vehicle on ramp.
Manual Transmission Oil Outlet Hose-
Renew
Removal
1. Raise vehicle on ramp.
2. Remove rear exhaust silencer heatshield (see Workshop Manual procedure 02.06.AG Heatshield - Exhaust
Muffler - Renew).
3. Release transaxle breather hose from oil cooler pipe.
4. Remove bolt, nuts (x2),insulating washers (x2) and plain washer securing outlet hose brackets to body.
5. Position container to collect oil spillage.
6. Loosen union and remove hose from oil cooler.
7. Loosen union and remove oil cooler hose from transaxle and collect hose.
1. Plug oil cooler and transaxle pipe connections.
Install
1. Clean hose connections and remove plugs.
2. Position hose, align brackets, install insulating washers (x2) and plain washer.
3. Install and tighten bolt and nuts (x2) to correct torque.
4. Connect and tighten hose unions to correct torque.
5. Remove drain container.
6. Install transaxle breather hose clip to oil cooler pipe.
7. Install rear exhaust silencer heatshield (see Workshop Manual procedure 02.06.AG Heatshield - Exhaust
Muffler - Renew).
8. Lower vehicle on ramp.
Manual Transmission Oil Inlet Hose-
Renew
Caution
Plug oil cooler connections to prevent ingress of dirt or moisture into the system.
Figure 2
WA R N I N G
OBSERVE ALL TRANSAXLE OIL MANUFACTURERS SAFETY INSTRUCTIONS WHEN HANDLING
COMPONENTS THAT HAVE BEEN IN CONTACT WITH TRANSAXLE OIL.
WA R N I N G
OBSERVE ALL TRANSAXLE OIL MANUFACTURERS SAFETY INSTRUCTIONS WHEN HANDLING
COMPONENTS THAT HAVE BEEN IN CONTACT WITH
TRANSAXLE OIL.
Repair Operation Time (ROT)
07-02-003
WA R N I N G
TO AVOID PERSONAL INJURY, I.E. SEVERE BURNS TO THE SKIN, ALLOW EXHAUST SYSTEM TO COOL
DOWN BEFORE REMOVING EXHAUST SYSTEM COMPONENTS.
WA R N I N G
OBSERVE ALL TRANSAXLE OIL MANUFACTURERS SAFETY INSTRUCTIONS WHEN HANDLING
COMPONENTS THAT HAVE BEEN IN CONTACT WITH
TRANSAXLE OIL.
Caution
Plug oil cooler connections to prevent ingress of dirt or moisture into the system.
WA R N I N G
OBSERVE ALL TRANSAXLE OIL MANUFACTURERS SAFETY INSTRUCTIONS WHEN HANDLING
COMPONENTS THAT HAVE BEEN IN CONTACT WITH
TRANSAXLE OIL.
Repair Operation Time (ROT)
Page 516 of 947

Transmission Cooling (07.02)
Transmission (07.00)7-2-4 Workshop Manual May 2007
Removal
1. Raise vehicle on ramp.
2. Remove rear exhaust silencer heatshield (see Workshop
Manual procedure 02.06.AG Heatshield - Exhaust
Muffler - Renew).
3. Release transaxle breather hose from oil cooler pipe.
4. Remove bolt and nuts (x 2) that secure inlet hose
brackets to body.
5. Collect pipe insulating washers (x2) and plain washer.
6. Position container to collect oil spillage.
7. Loosen union and remove hose from oil cooler.
8. Loosen union and remove oil cooler hose from transaxle and collect hose.
1. Plug oil cooler and tr ansaxle pipe connections.
Install
1. Clean hose connections and remove plugs.
2. Position hose, align brackets, install insulating washers
and plain washer.
3. Install and tighten bolt and nuts (x2) to correct torque.
4. Connect and tighten hose unions to correct torque.
5. Remove drain container.
6. Install transaxle breather hose clip to oil cooler pipe.
7. Install rear exhaust silencer heatshield (see Workshop
Manual procedure 02.06.AG Heatshield - Exhaust
Muffler - Renew)
8. Lower vehicle on ramp. WAR NI NG
TO AVOID PERSONAL INJURY, I.E. SEVERE BURNS TO THE SKIN, ALLOW EXHAUS T SYSTEM TO COOL
DOWN BEFORE REMOVING EXHAUST SYSTEM COMPONENTS.
WAR NI NG
OBSERVE ALL TRANSAXLE OIL MANUFACTURERS
SAFETY INSTRUCTIONS WHEN HANDLING
COMPONENTS THAT HAVE BEEN IN CONTACT WITH TRANSAXLE OIL.
Caution
Plug oil cooler connections to prevent ingress of dirt or moisture into the system.
WAR NI NG
OBSERVE ALL TRANSAXLE OIL MANUFACTURERS SAFETY INSTRUCTIONS WHEN HANDLING
COMPONENTS THAT HAVE BEEN IN CONTACT WITH TRANSAXLE OIL.
Page 517 of 947

Manual Transmission (07.03)
Transmission (07.00)
Issue 5, January 2010 Workshop Manual 7-3-1
Transmission (07.00)
Manual Transmission (07.03)
Description
The Graziano rear transaxle installed to this vehicle
incorporates a six speed transm ission plus reverse, with
synchromesh on all gears. Gear selection is via an Integrated
Shifter Bellcrack System (Cable Operated).
Cooling
The manual transaxle has an external cooling circuit which
operates continuously by a fixed displacement pump driven
by the input shaft.
The cooler is mounted at the rear attached to the subframe.
Page 518 of 947

Manual Transmission (07.03)
Transmission (07.00)7-3-2 Workshop Manual Issue 5, January 2010
Specifications Maintenance
Transaxle Assembly - Remove for Access
and Install
Removal
1. Disconnect the battery ground cable.
2. Remove the rear undertray (refer to Workshop Manual procedure 01.02.PB - Rear Undertray).
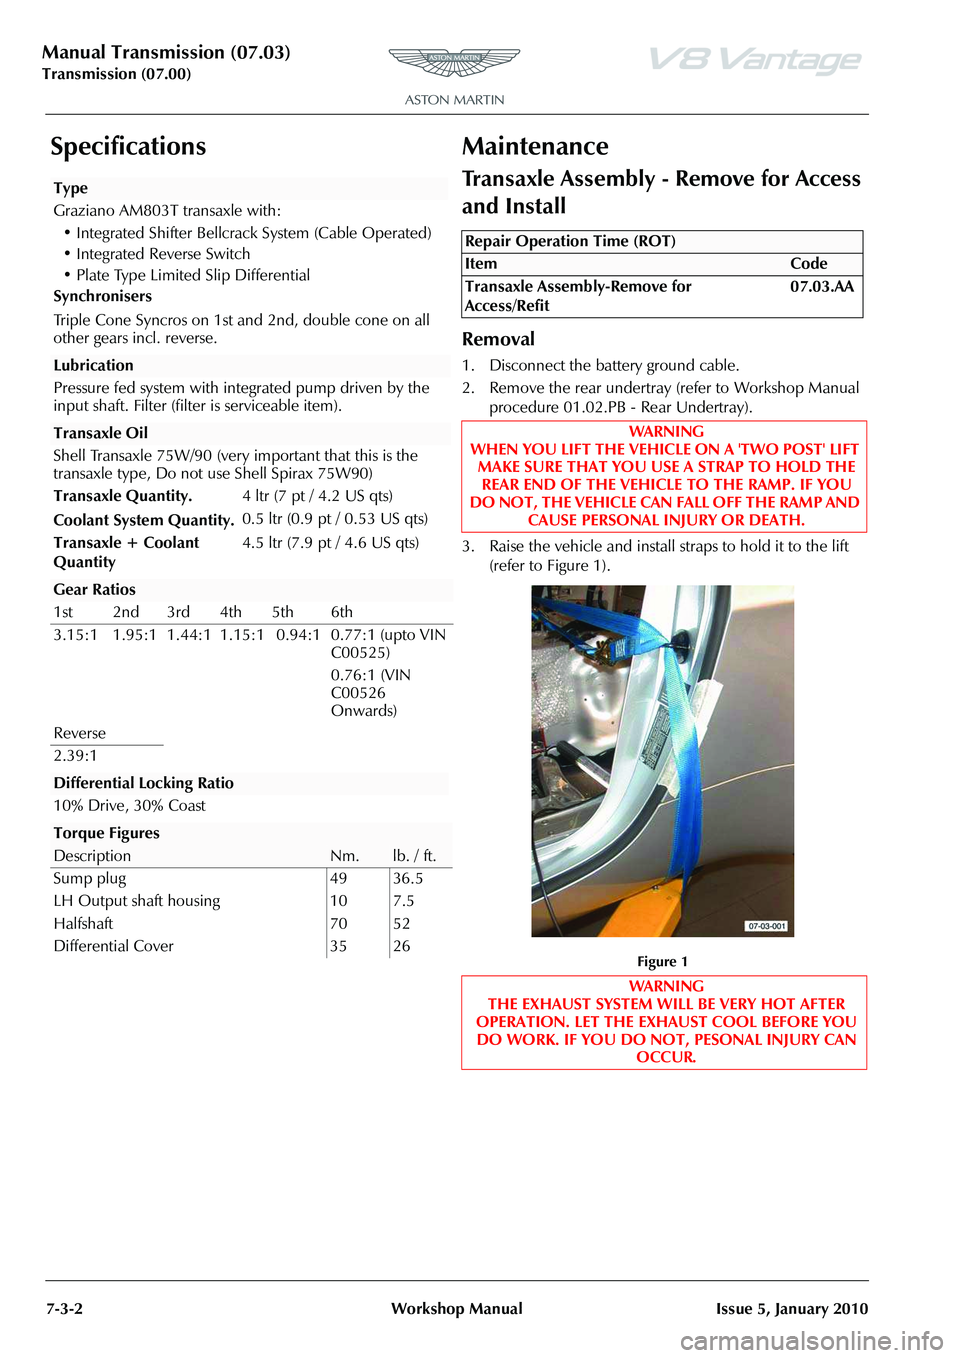
3. Raise the vehicle and install straps to hold it to the lift (refer to Figure 1).
Figure 1
Type
Graziano AM803T transaxle with:
• Integrated Shifter Bellcrack System (Cable Operated)
• Integrated Reverse Switch
• Plate Type Limited Slip Differential
Synchronisers
Triple Cone Syncros on 1st and 2nd, double cone on all
other gears incl. reverse.
Lubrication
Pressure fed system with integrated pump driven by the
input shaft. Filter (filter is serviceable item).
Transaxle Oil
Shell Transaxle 75W/90 (very important that this is the
transaxle type, Do not use Shell Spirax 75W90)
Transaxle Quantity.
Coolant System Quantity. 4 ltr (7 pt / 4.2 US qts)
0.5 ltr (0.9 pt / 0.53 US qts)
Transaxle + Coolant
Quantity 4.5 ltr (7.9 pt / 4.6 US qts)
Gear Ratios
1st 2nd 3rd 4th 5th 6th
3.15:1 1.95:1 1.44:1 1.15:1 0.94:1 0.77:1 (upto VIN
C00525)
0.76:1 (VIN
C00526
Onwards)
Reverse
2.39:1
Differential Locking Ratio
10% Drive, 30% Coast
Torque Figures
DescriptionNm.lb. / ft.
Sump plug 49 36.5
LH Output shaft housing 10 7.5
Halfshaft 70 52
Differential Cover 35 26
Repair Operation Time (ROT)
ItemCode
Transaxle Assembly-Remove for
Access/Refit 07.03.AA
WAR NI NG
WHEN YOU LIFT THE VEHICLE ON A 'TWO POST' LIFT MAKE SURE THAT YOU USE A STRAP TO HOLD THE REAR END OF THE VEHICLE TO THE RAMP. IF YOU
DO NOT, THE VEHICLE CAN FALL OFF THE RAMP AND CAUSE PERSONAL INJURY OR DEATH.
WAR NI NG
THE EXHAUST SYSTEM WILL BE VERY HOT AFTER
OPERATION. LET THE EXHA UST COOL BEFORE YOU
DO WORK. IF YOU DO NO T, PESONAL INJURY CAN
OCCUR.
Page 519 of 947

Manual Transmission (07.03)
Transmission (07.00)
Issue 5, January 2010 Workshop Manual 7-3-3
4. Remove the four bolts that attach the cross-brace to the rear subframe.
Figure 2
5. Remove the cross brace.
6. Remove the four bolts that attach the exhaust centre pipe to the rear silencer.
7. Loosen the two clamps that attach the exhaust centre pipe to the catalytic converters.
8. Move the clamps along the exhaust pipes.
9. Remove the four bolts that attach the exhaust centre pipe to the exhaust front mount.
10. Remove the exhaust centre pipe.
11. Remove the exhaust front mount.
12. Remove the four bolts that attach the floor heat shield to the body.
13. Remove the floor heatshield.
14. Remove the eight screws that attach the tunnel reinforcement plate to the body.
Figure 3
15. Remove the tunnel reinforcement plate. 16. Remove the nut that attaches the ground cable to the
body.
Figure 4
17. Move the ground cable away.
18. Put marks on the driveshaft to transaxle flanges to help align during installation.
19. Remove and discard the six bolts that attach the right
side driveshaft to the transaxle. Collect and keep the
bolt plates.
Figure 5
20. Remove and discard the six bolts that attach the left side driveshaft to the transaxle. Collect and keep the bolt
plates.
WARNING
GET THE AID OF ONE MORE PERSON WHEN YOU REMOVE THE EXHAUST CENTRE PIPE.
THE CENTRE EXHAUST PIPE IS HEAVY
Note: If necessary, turn the dr iveshaft to get access to the
six bolts.
Note: If necessary, turn the dr iveshaft to get access to the
six bolts.
Page 520 of 947

Manual Transmission (07.03)
Transmission (07.00)7-3-4 Workshop Manual Issue 5, January 2010
Figure 6
21. Release the driveshafts from the transaxle.
Figure 7
22. Put an applicable container in position under the oil cooler matrix to collect spilled oil.
23. Disconnect the pipes from the oil cooler matrix.
Figure 8
24. Let the oil drain into the container.
25. Install plugs to seal the pipe connections.
26. Remove the container of used oil.
27. Disconnect the breather pipe from the transaxle (refer
Figure 9).
Figure 9
28. Install sealing plugs into the open ports.
29. Remove the nut that attaches the right side transaxle mount to the rear subframe.
Figure 10
30. Remove the nut that attaches the left side transaxle mount to the rear subframe.
Figure 11
WAR NI NG
TRANSAXLE OIL CAN BE HARMFUL.
OBEY ALL TRANSAXLE OIL MANUFACTURER’S SAFETY INSTRUCTIONS WHEN YOU HANDLE COMPONENTS THAT HAVE TOUCHED TRANSAXLE OIL.
Page 521 of 947

Manual Transmission (07.03)
Transmission (07.00)
Issue 5, January 2010 Workshop Manual 7-3-5
31. Put a transmission jack be low the transaxle (refer to
Figure 12).
Figure 12
32. Adjust the height of the tran smission jack until it holds
the transaxle.
33. Remove and discard the four bolts that attach the right
side transaxle mount bracket to the transaxle. (see
Figure 13).
Figure 13
34. Remove and discard the four bolts that attach the left side transaxle mount bracket to the transaxle.
Figure 14
35. Remove the transaxle mount assemblies.
Figure 15
36. Use an applicable strap to attach the transaxle to the transmission jack.
37. Lower the transaxle on the transmission jack by approximately 420 mm.
38. Release the wiring harness for the reverse lamp switch from the clip.
39. Release the electrical connector for the reverse lamp switch from the mount.
Figure 16
40. Disconnect the electrical connector from the reverse lamp switch.
Page 522 of 947

Manual Transmission (07.03)
Transmission (07.00)7-3-6 Workshop Manual Issue 5, January 2010
41. Use the special tool to release the gear selector cables from the ball joints.
Figure 16
42. Release the gear selector cables from the bracket.
Figure 17
Put a transmission jack in position below the torque tube.
Figure 18
43. Adjust the height of the transmission jack to hold the torque tube. 44. Remove the eight bolts that attach the torque tube to
the transaxle.
Figure 19.
45. Move the transaxle rearward to give clearance between the torque tube and the transaxle
46. Carefully lower the transaxle on the transmission jack to
remove the transaxle from the vehicle.
Figure 20
47. Clean the mating faces of the components.
Install
1. Move the transaxle on th e transmission jack, into
position below the vehicle.
2. Use the transmission jack to adjust the height of the transaxle to align the transaxle with the torque tube.
3. Install and torque the eight bolts that attach the torque tube to the transaxle.
4. Lower the transmission jack away from the torque tube.
5. Connect the gear selector cables to the ball joints.
6. Install the gear selector cables into the bracket.
WAR NI NG
THE TRANSAXLE ASSEMBLY IS VERY HEAVY. GET THE
AID OF ONE MORE PERSON WHEN YOU MOVE THE
TRANSAXLE. IF YOU DO NOT, PERSONAL INJURY CAN OCCUR.
WAR NI NG
THE TRANSAXLE ASSEMBLY IS VERY HEAVY. GET THE AID OF ONE MORE PERSON WHEN YOU MOVE THE
TRANSAXLE. IF YOU DO NOT, PERSONAL INJURY CAN
OCCUR.
Page 523 of 947

Manual Transmission (07.03)
Transmission (07.00)
Issue 5, January 2010 Workshop Manual 7-3-7
7. Connect the electrical connector to the reverse lamp switch.
8. Install the electrical connector for the reverse lamp switch into the mount.
9. Install the wiring harness for the reverse lamp switch to the clip.
10. Adjust the height of the transmission jack to lift the transaxle into the correct position.
11. Remove the strap from the transaxle and the transmission jack.
12. Install the transaxle mount assemblies.
Figure 21
13. Install and torque the four bolts that attach the left side transaxle mount bracket to the transaxle.
Figure 22
14. Install and torque the four bolts that attach the right side transaxle mount bracket to the transaxle.
Figure 23
15. Lower the transmission jack to align the transaxle mounts to the rear subframe.
16. Move the transmission jack away from the vehicle.
17. Install and tighten the nut that attaches the left side transaxle mount to the rear subframe.
18. Install and tighten the nut that attaches the right side transaxle mount to the rear subframe.
19. Remove and the sealing plugs from the transaxle and the breather pipe.
20. Connect breather pipe to the transaxle.
21. Remove and discard the sealing plugs from the oil cooler matrix and the pipes.
22. Connect and tighten the pipes to the oil cooler matrix.
23. Put the driveshafts into position on the transaxle shaft flanges. Align the marks on the flanges that you made
during removal.
24. Install and torque the six new bolts that attach the left side driveshaft flange to the transaxle flange. If
necessary, turn the driveshaft to get access to all of the
bolts.
25. Install and torque the six new bolts that attach the right side driveshaft flange to the transaxle flange. If
necessary, turn the driveshaft to get access to all of the
bolts.
26. Put the ground cable into position.
27. Install and tighten the nut that attaches the ground cable to the body.
28. Install the tunnel reinforcement plate.
29. Install and torque the eight bolts that attach the tunnel reinforcement plate to the body.
30. Install floor heatshield.
31. Install and tighten the four bolts that attach the floor heat shield to the body.
Note: Put the three driveshaft bolt plates in position when
you install the bolts in the step that follows.
Note: Put the three driveshaft bolt plates in position when
you install the bolts in the step that follows.
Page 524 of 947

Manual Transmission (07.03)
Transmission (07.00)7-3-8 Workshop Manual Issue 5, January 2010
32. Install the exhaust front mount.
33. Clean the component mating faces.
34. Apply an applicable sealant to the component mating faces.
35. Install the exhaust centre pipe.
36. Install and tighten the four bolts that attach the exhaust centre pipe to the exhaust front mount.
37. Put the clamps into position on the exhaust pipes.
38. Loosely install the four bolts that attach the exhaust centre pipe to the rear silencer.
39. Align the exhaust assembly.
40. Tighten the two clamps that attach the exhaust centre pipe to the catalytic converters.
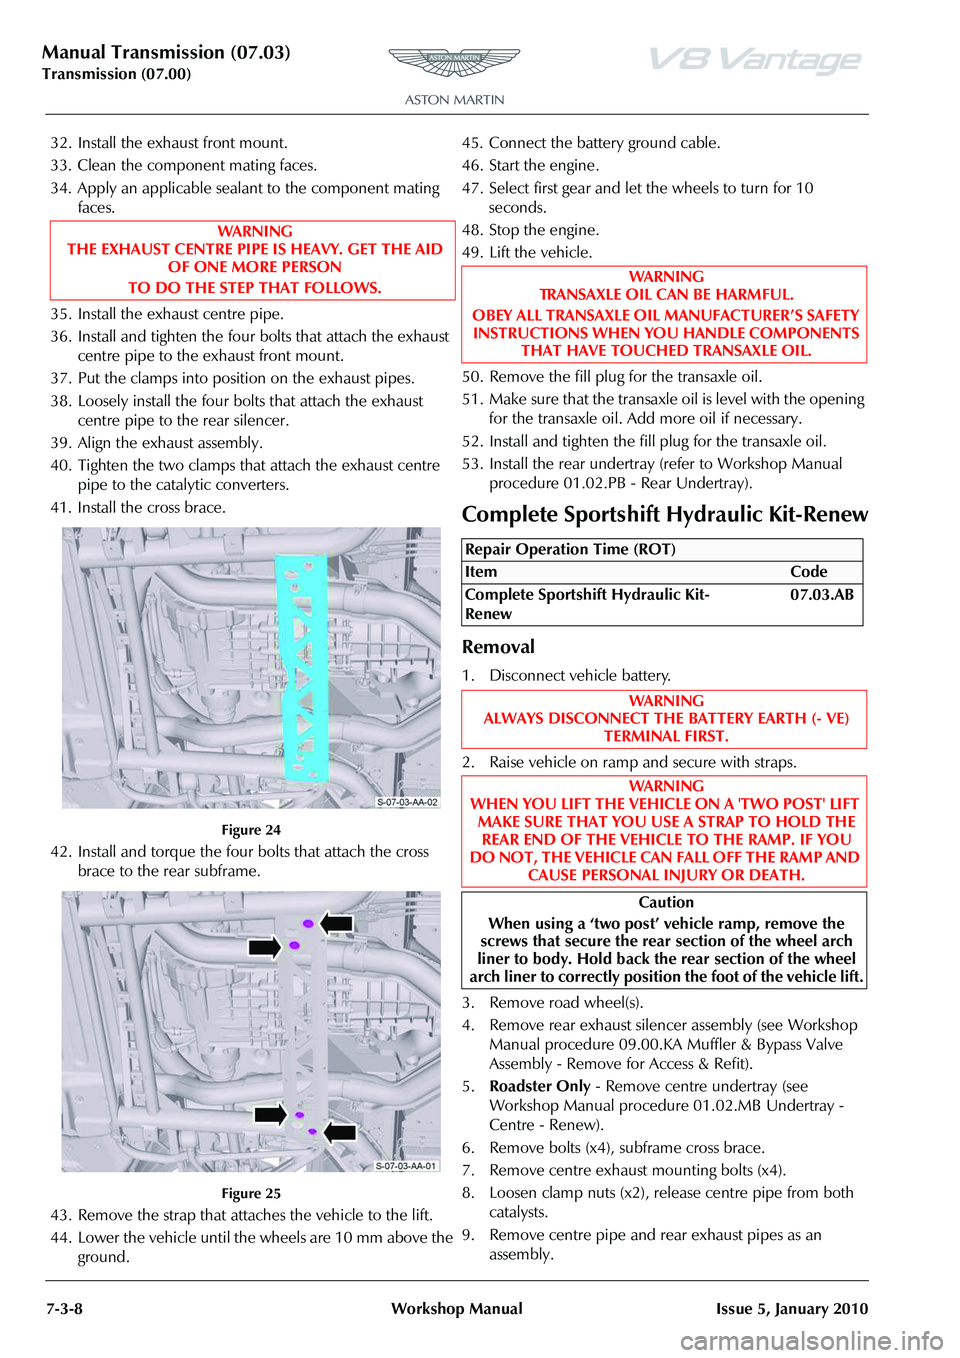
41. Install the cross brace.
Figure 24
42. Install and torque the four bolts that attach the cross brace to the rear subframe.
Figure 25
43. Remove the strap that attaches the vehicle to the lift.
44. Lower the vehicle until the wheels are 10 mm above the ground. 45. Connect the battery ground cable.
46. Start the engine.
47. Select first gear and let the wheels to turn for 10
seconds.
48. Stop the engine.
49. Lift the vehicle.
50. Remove the fill plug for the transaxle oil.
51. Make sure that the transaxle oil is level with the opening for the transaxle oil. Add more oil if necessary.
52. Install and tighten the fill plug for the transaxle oil.
53. Install the rear undertray (refer to Workshop Manual
procedure 01.02.PB - Rear Undertray).
Complete Sportshift Hydraulic Kit-Renew
Removal
1. Disconnect vehicle battery.
2. Raise vehicle on ramp and secure with straps.
3. Remove road wheel(s).
4. Remove rear exhaust silencer assembly (see Workshop Manual procedure 09.00.KA Muffler & Bypass Valve
Assembly - Remove for Access & Refit).
5. Roadster Only - Remove centre undertray (see
Workshop Manual procedure 01.02.MB Undertray -
Centre - Renew).
6. Remove bolts (x4), subframe cross brace.
7. Remove centre exhaust mounting bolts (x4).
8. Loosen clamp nuts (x2), release centre pipe from both catalysts.
9. Remove centre pipe and rear exhaust pipes as an
assembly.
WAR NI NG
THE EXHAUST CENTRE PIPE IS HEAVY. GET THE AID OF ONE MORE PERSON
TO DO THE STEP THAT FOLLOWS.
WAR NI NG
TRANSAXLE OIL CAN BE HARMFUL.
OBEY ALL TRANSAXLE OIL MANUFACTURER’S SAFETY INSTRUCTIONS WHEN YO U HANDLE COMPONENTS
THAT HAVE TOUCHED TRANSAXLE OIL.
Repair Operation Time (ROT)
ItemCode
Complete Sportshift Hydraulic Kit-
Renew 07.03.AB
WAR NI NG
ALWAYS DISCONNECT THE BATTERY EARTH (- VE)
TERMINAL FIRST.
WAR NI NG
WHEN YOU LIFT THE VEHICLE ON A 'TWO POST' LIFT MAKE SURE THAT YOU USE A STRAP TO HOLD THE REAR END OF THE VEHICLE TO THE RAMP. IF YOU
DO NOT, THE VEHICLE CAN FALL OFF THE RAMP AND CAUSE PERSONAL INJURY OR DEATH.
Caution
When using a ‘two post’ vehicle ramp, remove the
screws that secure the rear section of the wheel arch
liner to body. Hold back the rear section of the wheel
arch liner to correctly position the foot of the vehicle lift.