technical data AUDI A6 2011 Owner's Guide
[x] Cancel search | Manufacturer: AUDI, Model Year: 2011, Model line: A6, Model: AUDI A6 2011Pages: 370, PDF Size: 87.15 MB
Page 65 of 370
High beam l[D
-Push the lever forward ® to switch on the high beam.
- Pull the lever back towards you to switch off the high
beam.
H eadlight flasher l[D
- Pull the lever toward the steering wheel© to use the
headlight flasher.
Notes on the se fea ture s
• The turn signals only work with the ignition turned on. The indi
cato r lights ¢ or¢ in the instrument cluster=>
page 12 also blink.
• After you have turned a corner, the turn signal switches off auto
matically.
• The
high beam works only when the headlights are on. The indi
cato r light [D in the instrument cluster illuminates when the h igh
beams are on.
• T he
headlight flasher works only as long as you ho ld the lever -
even if there are no lights turned on. The indicator light~D in the
instrument cluste r illuminates when yo u use the headlight flasher.
0 Note
Do no t use the high beam or head light flasher if you know that these
could blind oncoming traffic .•
Con tro ls a nd e quip
m en t Vehicle
OP-eration
Clear vision
Interior lights
Front interior lights
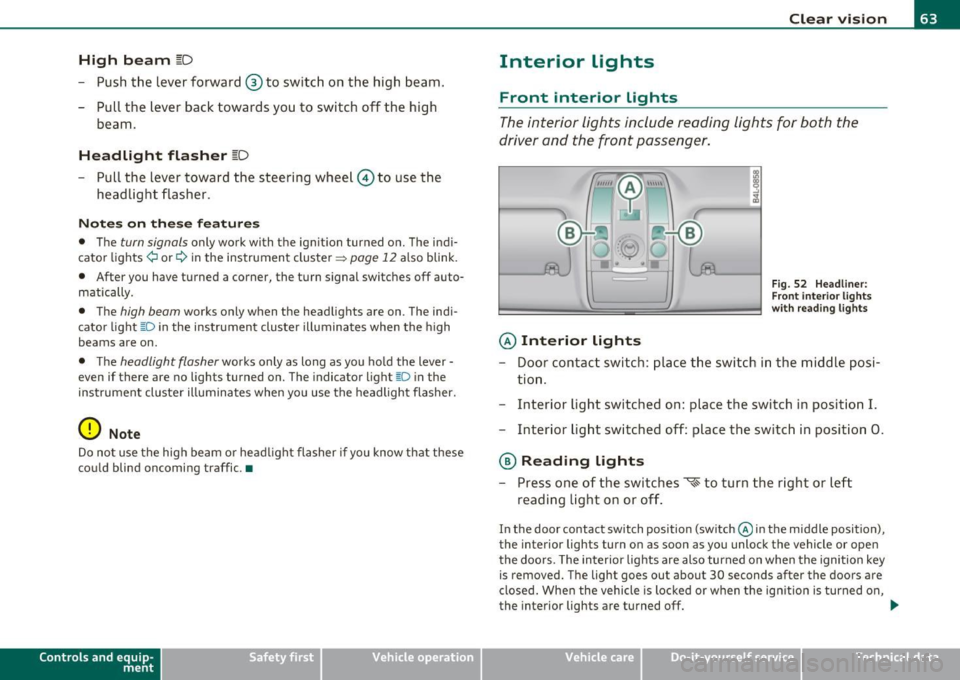
The interior lights include reading lights for both the
driver and the front passenger.
© Interior lights
Fig . 52 Headli ner:
F ron t inte rior lights
wit h rea ding lights
- Door contact switch : place the switch in the middle posi-
tion .
- Interior light switched on: place the switch in position
I.
-Interior light switched off: place the switch in position 0.
® Reading lights
- Press one of the switches '* to turn the right or left
reading light on or off .
In the door contact switch position (switch @in the middle position),
the interior lights turn on as soon as you unlock the vehicle or open
the doors. The interior lights are also turned on when the ignition key is removed. The light goes out about 30 seconds after the doors are
closed . When the vehicle is locked or when the ign ition is turned on,
the interior lights are turned off.
~
Vehicle care Do-it-yourselt service iTechnical data
Page 67 of 370
Make-up mirrors
The vani ty m irrors in the sun visors are equ ipped with lids . When the
lid is open end@, the mirror light in the roof lin ing tu rns on au toma t
ically . It t urns off when the lid is closed or the visor is folded up
agai n.•
App lies to vehicles: wit h sun sha de
Sun shade
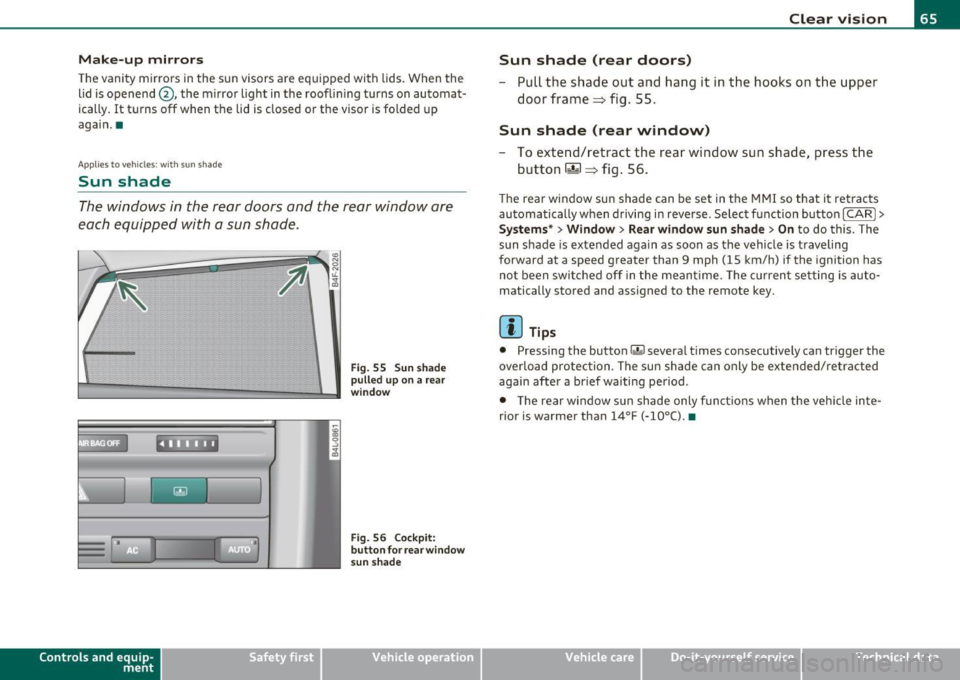
The windows in the rear doors and the rea r window are
each equipped with a sun shade.
Con tro ls a nd e quip
m en t
. l
F ig . 55 S un sh ad e
p ulled up on a rear
w in dow
Fi g. 56 Co ckpit:
b utt on f or rea r wind ow
s un sh a de
Vehicle OP-eration
Clear vision
Sun shade (rear doors)
- Pull the shade out and hang it in the hooks on the upper
doo r frame=> fig. 55.
Sun shade (rear window)
-To extend/retract the rear window sun shade, press the
button
rn => fig. 56.
T he rear window sun shade can be set in t he M MI so that it retracts
au tomatically w hen driving in reve rse . Selec t fu nction bu tton
[CARI >
Systems* > Window > Rear window sun shade > On to do this. The
s u n shade is extended again as soon as the vehi cle is traveling
forward at a speed greater than 9 mph (15 km/h) if the ignition has
no t b een swi tched off in the meant ime . T he c urren t se tting is auto
matically stored and assigned to the remote key.
[ i ] Tips
• Pressing the button r.&I severa l times co nsecutive ly can tr igger the
overlo ad protec tion. The su n shade can only be exte nded/ re tra cted
again after a brief waiting period .
• T he rear window sun sh ade only fun ct io ns when t he ve hicle in te
rior is warmer than
14°F (-10°() . •
Vehicle care Do-it-yourselt service iTechnical data
Page 69 of 370
Rain sensor
The rain sensor operates on ly in the interval wiper position . When it
starts to rain, the interval wiper mode is activated automat ically .
I f the windshield wiper lever is in the interval wipe position with the
ign ition switched off, the rain sensor is not activated until vehicle
speed is above 4 mph (6 km/h) .
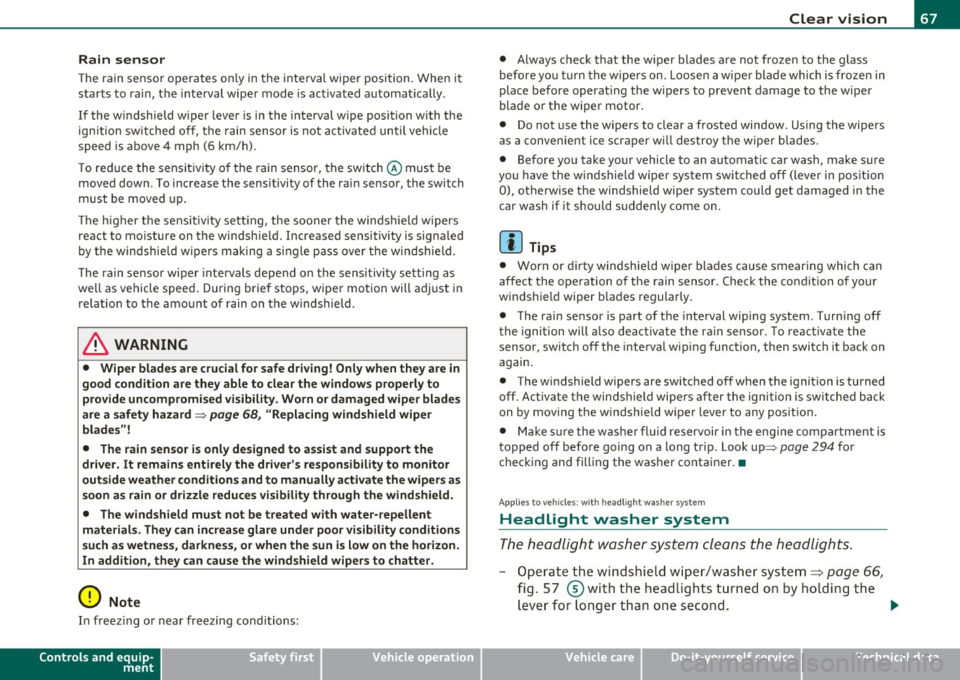
To reduce the sensitivity of the rain sensor, the switch @ must be
moved down . To increase the sensit ivity of the rain sensor, the switch
must be moved up.
The higher the sensitiv ity sett ing, the sooner the windsh ield wipers
react to mo isture on the windshie ld. Increased sensitivity is signa led
by the windshield w ipers making a single pass over the windshie ld.
T he rain sensor wiper intervals depend on the sensitivity setting as
we ll as vehicle speed. During brief stops, wiper motion will adjust in
relation to the amount of rain on the windshield .
& WARNING
• Wiper blades are crucial for safe driving! Only when they are in
good condition are they able to clear the windows properly to
provide uncompromised visibility. Worn or damaged wiper blades
are a safety hazard =>
page 68, "Replacing windshield wiper
blades"!
• The rain sensor is only designed to assist and support the
driver. It remains entirely the driver 's responsibility to monitor
outside weather conditions and to manually activate the wipers as
soon as rain or drizzle reduces visibility through the windshield.
• The windshield must not be treated with water-repellent
materials. They can increase glare under poor visibility conditions
such as wetness, darkness, or when the sun is low on the horizon.
In addition, they can cause the w indshield wipers to chatter.
0 Note
In freez ing or near freezing conditions:
Controls and equip
ment Safety first
Clear vision
•
Always check that the wiper blades are not frozen to the glass
before you turn the wipers on. Loosen a wiper blade which is frozen in
place before operat ing the w ipers to prevent damage to the wiper
blade or the wiper motor.
• Do not use the wipers to clear a frosted window . Us ing the wipers
as a convenient ice scraper will destroy the wiper blades.
• Before you take your vehicle to an automatic car wash, make sure
you have the windshield wipe r system switched off (lever in position
0), otherw ise the windshield wiper system could get damaged in the
car wash if it shou ld suddenly come on.
(I] Tips
• Worn or dirty windshield wiper blades cause smearing which can
affect the operation of the rain sensor . Check the condit ion of your
windshield wiper b lades regularly.
• The rain sensor is part of the interval wiping system . Turn ing off
the ignition will a lso deactivate the rain sensor. To reactivate the
sensor, switch off the interval wip ing function, then switch it back on
again.
• The w indshield wipers are switched off when the ignition is turned
off . Activate the windsh ie ld wipers after the ignition is switched back
on by mov ing the w indshield wiper lever to any pos it ion.
• Make sure the washer fl uid reservoir in the engine compar tment is
topped off before going on a long trip . Look up::::>
page 294 for
checking and filling the washer conta iner. •
App lies to ve hicle s: with headli ght was h er syste m
Headlight washer system
The headlight washer system cleans the headlights.
- Operate the windshield wiper/washer system~ page 66,
fig. 57 ®with the headlights turned on by holding the
lever for longer than one second. _,,,,
Vehicle care Technical data
Page 71 of 370

- Press on both sides of the loc king spring @ on the wiper
blade~
page 68, fig. 58 . Hold t he wiper blade firm ly .
- Remove the wiper blade @.
Installing wiper blade
- Install the new wiper blade in the retainer on the wiper
arm ©~
page 68, fig . 59 u nti l it clicks into place on t he
w iper arm.
- Place the w iper arm bac k against the wi ndsh ield .
Clean yo ur wiper blades regularly with a windshie ld washe r so lution
to prevent streaking . If the blades are very dirty, for example with
insects, caref ully clean the blades with a sponge or a so ft brush.
If the w iper blades begin to st reak the windshield, this could be
caused by res idue left on the windsh ie ld by automatic car washes.
Fill the windshie ld washe r con tainer w it h a specia l solu tion ava ilab le
at your authori zed Audi dealer to remove the residue .
& WARNING
Be sure to inspect the condition of your w iper blades regularly. See
your authorized Audi d ealer f or r epla cement blade s.
0 Note
To preven t da mage to the wipe r system:
• To help prevent damage to the wiper system, always loosen
blades which are frozen to the wi nds hield before operati ng wipers.
• T o help prevent damage to w iper blades, do not use gasoline,
kerosene, paint thinner, or other solvents on or near the wipe r
blades .
• T o help prevent damage to wipe r arms or other components, do
not attempt to move the wipers by hand.
Controls and equip
ment Safety first
Clear v
ision
• The windshield wiper blades must only be replaced when in the
service positio n =>
page 68! Otherw ise, you risk dam ag ing the pain t
on the hood or the windshie ld w iper motor .
(I) Tips
Commercial hot waxes applied by automatic car washes affect the
cleanability of the win dsh ield. •
Mirrors
Manual anti-glare adjustment
Standard setting
-Move the small lever (located on t he bottom edge of the
mirror) to t he front.
Anti-glare setting
- Move th e small lever (locate d on t he bo ttom edge of the
m irror) to the rear .•
Vehicle care Technical data
Page 73 of 370
• Do not attach any st ickers to the w indshield in front of the light
sensor, as this would inte rfe re with the a utomat ic operat ion of the
headlights and the automat ic dimming of the ins ide mir ror.
• Be aware that a utomatic dimming o f the in si de mir ror can on ly
operate proper ly if the rear w indow s un b lin d* is retracted . •
Outside mirrors
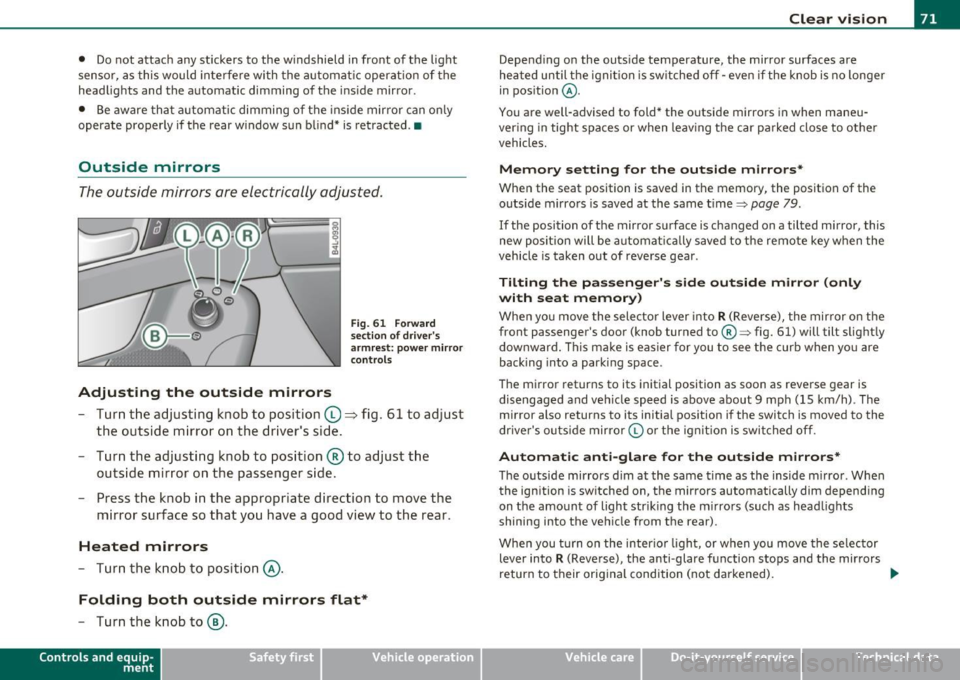
The outside mirrors are elec trically ad jus ted.
Adjusting the outside mirrors
F ig . 6 1 Forward
sec tion of dri ve r's
a rmr est: p ow er mirr or
con tro ls
- Tur n th e adjus ting k no b to position (0 ~ fig. 61 to ad just
the outsi de mi rror on the drive r's sid e.
- Turn the adjusting knob to position ® to adjust the
outside mir ror on the passenger side .
- Press the knob in the appropriate direction to move the
mirror surface so that you have a good view to the rear .
Heated mirrors
- Turn the knob to position @.
Folding both outside mirrors flat*
-Turn the knob to@ .
Con tro ls a nd e quip
m en t Vehicle
OP-eration
Clear vision
Depend ing on the outs ide temperature, the mirror surfaces are
heated un til t he ignit ion is sw itched off -eve n if the knob is no longe r
in pos ition
@ .
You are well-advised to fold* the o utside mirrors in when maneu
ver ing in tight spa ces or when leav ing t he car parked close to ot her
vehicles.
Memory setting for the outside mirrors *
When the seat position is saved in the memory, the position of the
outs ide mirro rs is saved at the same time~ page 79.
If the position of the mirro r su rface is changed on a tilted mirror, this
new posit io n wi ll be automat ically saved to the rem ote key w hen the
vehicle is taken out of reverse gear .
Tilting the passenger's side outside mirror (only
with seat memory )
When yo u move the selector lever into R (Reverse), the mir ror on t he
front passenger 's door (knob turned to@ ~ fig. 61) will tilt slight ly
downward . Th is ma ke is eas ier for you to see t he curb when you are
back ing into a parki ng space .
T he mirror returns to its initial position as soon as reverse gear is
disengaged and ve hicle speed is above about 9 mph (15 km/h) . The
mirro r also returns to its initia l position if the switch is moved to the
dr ive r's o uts ide mirro r© or th e ig ni tion is swit ched off .
Automatic anti-glare for the outside mirrors*
The o utside mirrors dim at the same t ime as the inside m irro r. When
the ign it ion is sw itched on, the mirrors automatically dim depend ing
on the amo unt of light str iking the m irro rs (su ch as head lights
shining into the vehicle from the rear).
When you turn on the inter io r li ght, or w hen you move the se lec tor
lever into
R (Reverse), the anti-glare f unction stops and the mirrors
return to their orig inal condition (not darkened).
~
Vehicle care Do-it-yourselt service iTechnical data
Page 75 of 370

Digital compass
Applies to veh icles: wit h digita l co mp ass
Activating or deactivating the compass
The direction is displayed on the interior rear view mirror.
Fig. 62 Inside rear
view mirror: digital
compass activated
To activate or deactivate, hold the@ button down until
the red display appears or disappears .
The digital compass only works with the ignition turned on. The direc
tions are displayed as initials:
N (North), NE (Northeast), E (East), SE
(Southeast), S (South) , SW (Southwest), W (West), NW (Northwest).
(I) Tips
To avoid inaccurate directions, do not allow any remote controls ,
electr ical systems, or metal parts close to the mirr or.•
Con tro ls a nd e quip
m en t Vehicle
OP-eration
Clear vision
Applies to veh icles : w ith d ig ita l compass
Setting the magnetic deflection zone
The correct magnetic deflection zone must be set in order
to display the directions correctly .
.
,_ ,;=.~a,, I I
I I
I I
I ' I I
I I
1 ! ©
l 4
l
l
I ' I ,,
l ----
'
'
'
®
\, ,, ...... _______ ,.,.
©
@
Fig. 63 North America: magnetic deflection zone boundaries
-Hold the@=> fig . 62 button down until the number of
the set magnetic deflection zone appears on the interior rear view mirror .
- Adjust the magnetic deflection zone by repeatedly pressing on the@ button . The set mode automatically
deactivates after a few seconds. •
Vehicle care Do-it-yourselt service iTechnical data
Page 77 of 370
Seats and storage
General recommendations
Why is your seat adjustment so important?
The safety belts and the airbag system can only provide
maximum protection if the front seats are correctly
adju sted.
Th ere a re various ways of adjusting t he front seats to provide safe and
comfortable support for the driver and the front passenger . Ad just
your seat properly so that :
• you can easily and quickly reach a ll the switc hes and contro ls in the
ins trumen t pa nel
• your body is properly supported thus reducing phys ica l stress and
fatigue
• the safety be lts and airbag system can offer maximum protection
=>
page 197 .
In the following sections, you w ill see exact ly how you can best ad just
your sea ts .
Th ere are special regulations a nd instr uctions for install ing a child
safety seat on the front passenger's sea t. Always follow the informa
tion regarding child safety p rovided in=>
page 219, "Child Safety ".
& WARNING
Incorrect seating posit ion of the dri ver and all other passengers
can result in seriou s personal injury.
• Always keep your feet on the floor when the vehicle is in
motion -never put your feet on top of the instrument panel, out
of the window o r on top of the seat cush ion. This applies especially
to the passengers.
If your seating po sition is incorrect, you
increase the ri sk of injury in the case of sudden braking or an acci-
Controls and equip
ment Safety first
Seats and storage
& WARNING
(con tinu ed)
dent . If the airbag inflates and the seating position is incorrect ,
this could result in per sonal injury or even death .
• It is important for both the dri ver and front passenger to keep
a distan ce of at least 10 inche s (25 cm) between themselves and
the steering wheel and /or instrument panel. If you 're sitting any
closer than this , the airbag system cannot protect you properly. In
addition, the front seats and head restraints must be adjusted to
your body height so that they can give you maximum protection .
• Always try to keep as much distance as possible between your
self and the steering wheel or instrument panel.
• Do not adjust the driver's or front passenger 's seat while the
vehicle is moving. You r seat may move unexpectedly , causing
sudden loss of vehicle control and personal injury . If you adjust
your seat while the vehicle is moving , you are out of position. •
Driver's seat
The correct seat position is important for saf e and
re lax ed driving.
W e recomme nd that you a djust the drive r's sea t in the
f ollowing man ner :
- Ad just the seat in fore and aft direction so that you can
easily pus h the pedals to the floor w hile keeping your
knees slightly bent=>
& in "Why is yo ur seat a djus tme nt
so importa nt?" .
- Adjust the seatback so that when yo u sit with yo ur back
agai nst t he seatback , you can st ill grasp t he top of the
steering w heel. ..,
Vehicle care Technical data
Page 79 of 370

& WARNING (co ntinued )
• Be careful when adjusting the seat height. Check to see that no
one is in the way, or serious injury could re sult!
• Becau se the seats can be ele ctrically adjusted with the ignition
key removed, never leave children unattended in the v ehicle.
Unsupervised use of the electric seat adjustments may cau se
serious injury .•
Seat adjustment
Fi g. 65 P ower s ea t:
Swit ch f or sea t adjust·
ment
Moving the seat forward and backward ©
- Press th e switc h forwa rd or backward horizonta lly=>& .
Adjusting the seat height@ and ® together
-Pull the switch evenly at both ends to raise th e seat=> &.
-Push the switch evenly at both ends to lower the seat
=> & .
Angling the seat cushion up and down@ or®
-To a ngle t he seat c ushio n up, pull the switch at the front
only =>& .
Cont rols a nd e quip
m en t Vehicle
OP-eration
Seats and storage
-Alternative ly, push the sw itch at the rear only=>& .
-To angle t he seat cushion down, push the switch at the
front only=>& .
-Alternative ly, pull the sw itch at the rear only=>& .
& WARNING
• Never adjust the driver' s or front passenger's seat while the
vehicle is moving . If you do this while the vehicle is moving , you
will be out of position. Always adjust the dri ver's or front
pa ssenger 's seat when the vehicle is not moving.
• Be careful when adjusting the seat he ight. Check to see that no
one i s in the way , or seriou s injury could result!
• Be cause the seats can be ele ctrically ad justed with the ignition
key removed, never leave children unattended in the veh icle.
Unsupervised use of the electric seat adjustments may cause
serious injury. •
Adjusting the seatback
,.._
----:-:----:--=-=-=-=-1~ jg
Fig. 66 Power s eat:
Sw itch for sea t bac k
an gle
- Push the switch => fig . 66 forward or to the rear i n the
direction of the arrow to adjust the angle of the seat back
=> & . ...
Vehicle care Do-it-yourselt service iTechnical data
Page 81 of 370

Seat memory
Applies to veh icles: with seat memory
Driver's seat memory
The seat adjustment settings for two drivers can be
stored using the memory buttons in the driver's door.
-...... SET 1 2 ,,..,
Fig. 68 Driver's door:
Seat memory
In addition to the setting for the driver's seat, the settings for the
steering column* and both exterior mirrors can be stored.
Storing and r ecalling setting s
Using the memory buttons 1 and 2, you can store and recall the
settings for two different drivers~ fig . 68 .
T he current settings are also automatically stored on the remote
control key being used when the vehicle is locked. When the vehicle is
unlocked, the settings stored on the remo te contro l key being used
are automatically recalled. This function has to be activated in the
MMI
~ page 80, " Activating remote cont rol key memo ry" .
Tur ning seat m em ory o n and off
If the [ ON/OFF I switch is depressed , the seat memo ry is inoperative .
The word
OFF next to the [ ON/OFF ) switch illuminates.
All the stored settings are retained. We recommend using the
I ON/OFF ) switch and deact ivat ing the seat memory if the vehicle is
Controls and equip
ment Safety first
S
eats and storage
only going to be used temporarily by a driver whose settings are not
going to be stored .•
App lies to veh icles : w it h seat memo ry
Storing and recalling a seat position
Before you can store or recall your seat position, the
[ON/OFF) button must be engaged (down) .
Storing settings
-Adjust the driver 's seat => page 76.
- Adjust the steering column*=>
page 107.
-Adjust both outside mirrors=> page 71. In the ti lt-down
position, the passenger mirror can be adjusted to the
preferred position and saved in the seat memory.
- Press the
[SETI button and hold it down. At the same
time, press one of the memory buttons for at least one
second .
- Release the buttons. The settings are now stored under the corresponding memo ry bu tton.
Recalling settings
- Driver's door open -press the des ired memory button.
- Driver's door closed - press the corresponding memory
button unt il the stored position is reached .
Su ccessfu l storage is confirmed audib ly and by the light in the [SET )
button illuminat ing .
When the vehicle is
locked , the current settings are stored and
assigned to the remote control key. But the settings sto red on
memory buttons 1 and 2 are not deleted. They can be recalled at any ..,
Vehicle care Technical data
Page 83 of 370

Head restraints
Front head restraints
Head restraints that are adjusted according to body size,
along with the seat belt, offer effective protection.
Fig. 69 Fro nt seat:
Adjus tin g the head
r est rai nt
The head restraints on the front seats can be adjusted to
provide safe support to head and neck at the optimum
height. When optimally adjusted, the top of the restraint
should be level with the top of the head=>
page 181, "Proper
adjustment of head restra ints".
R ai sing the head restr aint
- Grasp the sides of the head restraint with both hands.
- Lift the head restraint.
Lowering the head restraint
- With one hand push down on the middle of the head
restraint .
- With the other hand press the release knob:::;, fig. 69 and
push the head restraint down .
Contro ls a nd e quip
m en t Vehicle
OP-eration
Seats and storage
Refer to::::;, page 181, "Proper adjustment of head restraints" for
guidelines on how to adj ust the height of the front head restraints to
suit the occupant's body size .
& WARNING
• Drivin g w ith out hea d res traints or w ith hea d r estra ints th at a re
n ot prop erl y a dju st e d inc reases the risk of seri ou s o r fa tal nec k
i n ju ry dram atically.
• Rea d an d h eed all W ARNINGS ::::;,
page 1 8 1 .
(I] Tip s
Correctly adjusted head restraints and safety belts are an extremely
effective combination of safety features. •
Rear head restraints
Passengers may only be carried if the head restraints has
been raised to its uppermost position.
Fig. 70 Rear seats:
h ead res train ts
The rear head restraints mus t be raised fully upward when
passengers ride in the rear seats . _,,
Vehicle care Do-it-yourselt service iTechnical data