technical data AUDI A6 2011 Owners Manual
[x] Cancel search | Manufacturer: AUDI, Model Year: 2011, Model line: A6, Model: AUDI A6 2011Pages: 370, PDF Size: 87.15 MB
Page 5 of 370
Airbag system ................ 197
Important things to know ...... 197
Front airbags ......... ........ 201
Monitoring the Advanced A irbag
System ...................... 208
Side airbags .................. 213
Side curtain a irbags . . . . . . . . . . . . 216
Child Safety ................... 219
Impor tant things to know ..... .
Child safety seats ............ .
Installing a child safety seat ... .
LATCH Lowe r anchorages and
tethers for children ........... .
Add it ional Informat ion 219
224
229
232
239
Vehicle operation
...... 24 2
Intelligent technology . . . . . . . . 242
Notice abou t data recorded by
vehicle control modules . . . . . . . . 242
E lectronic Stab iliza tion Program
(ESP) ........................ 242
Braking . . . . . . . . . . . . . . . . . . . . . . 245
Servo tronic® -advanced power
steering system .......... ..... 247
Driving with your quattro® . . . . . . 248
Energy management . . . . . . . . . . . 249
Driving and environment ...... 251
T he first 1,000 miles (1,500 km)
and afterwards . ............. . 251
Avoid damaging the vehicle . . . . . 252
Driving through water on roads . 252
Catalytic converter . . . . . . . . . . . . 252
Operate your veh icle econom ically
and minimize pollution . . . . . . . . . 253
Trailer towing ................. 256
Driving with a trailer . . . . . . . . . . . 256
T railer towing tips . . . . . . . . . . . . . 258
Controls and equip
ment Safety first
Vehicle care
.............. 260
Cleaning and protection ...... 260
General informa tion . . . . . . . . . . . 260
Care of exterior . . . . . . . . . . . . . . . 260
Care of interior . . . . . . . . . . . . . . . 267
Fuel supply and filling your fuel
tank ..........................
273
Gasoline . . . . . . . . . . . . . . . . . . . . . 273
Fuel tank ..................... 274
Checking and filling . . . . . . . . . . . 278
Engine hood . . . . . . . . . . . . . . . . . . 278
Engine oil . . . . . . . . . . . . . . . . . . . . 281
Engine cooling system . . . . . . . . . 286
Brake fluid . . . . . . . . . . . . . . . . . . . 289
Battery . . . . . . . . . . . . . . . . . . . . . . 290
Windshield/headlight washer container . . . . . . . . . . . . . . . . . . . . 294
Tires and wheels . . . . . . . . . . . . . . 295
T ires ........................ 295
T ire pressure monitoring system 314
Do-it-yourself service . 318
What do I do now? ........... 318
T runk escape handle ........... 318
Jack, tools and spare wheel ..... 318
Changing a wheel . . . . . . . . . . . . . 320
Fuses and bulbs . . . . . . . . . . . . . . 327
E lectrical fuses ............... 327
Bulbs ........................ 330
Emergency situations . . . . . . . . . 332
General . . . . . . . . . . . . . . . . . . . . . . 332
Starting by pushing or towing 332
Starting with jumper cables . . . . 332
Use of jumper cables . . . . . . . . . . 333
Table of contents
Eme rgency towing with
commercial tow truck ........ .
Lift ing vehicle ............... .
Technical data
General information
Explanation of technic al data .. .
Vehicle ident ification ......... .
Weights ................... . .
Dimensions ............... .. .
Data ......................... .
300 hp, 3.0 lite r, 6-cylinder
engine .................... .. .
265 hp, 3.2 liter , 6-cylinder
engine .. .......... .......... .
350 hp, 4.2 liter, 8-cylinder
engine ...... .............. .. .
Consumer Information ...... .
Warranty coverages .......... .
Operating your vehicle outside the
U.S.A. or Canada ............. .
Audi Service Repair Manuals and Li terature ................... .
Maintenance ........... ..... .
Additional accessories, modifications and parts
replacement ............... . .
Declaration of Compliance,
Telecommun ications and
E lectronic Systems .......... . .
Alphabetical index ... .
335
337
340
340
340
340
341
341
343
343
344
345
346
346
346
346
346
348
349
3S2
Vehicle operation Vehicle care Do-it-yourself service Technical data
Page 7 of 370
About this Owner's Manual
This owner's manual contains important information, t ips, sugges
tions, an d warnings fo r the use of yo ur ve hicle.
Make s ure that this owne r's manua l is a lways located in the vehicle.
This is especia lly important if you allow other peop le to drive the
vehicle, or if you sell i t.
Th is owner's manual descr ibes the
equipment range specified for
this model at the editorial deadline date. Some of the equipment
described here will only be ava ilable at a later date, or only in spec ific
ma rkets .
Some se ctions in t his owne r's m an ual do no t app ly to a ll vehi cles. In
that case, the
range of applicability is given at the beginning of the
se ct io n, e.g. "Applies to vehicles: with A udi Parking System". In addi
tion, optiona l equipment is indicated by an asterisk"*".
Th e detai ls in the
illust rations may be different from those in your
vehicle, and a re intended to be viewed as a bas ic gu ide.
You w ill find a
table of contents at the beginn ing of this book, which
display s all t opi cs described in this m anu al in o rde r of a ppear ance.
You will find an alphabetica l
index at the end of this book.
All
directions , such as "left", "right", "front", "back", are re lative to
the d irec tion of travel.
* optional eq uipment
.,. Th is section continues on the next page.
• Indicates the
end of a section .
® Registered trademarks are ident ified with a®. If this symbol is
m issi ng, i t is no guarantee that t he te rms c an be used freely.
=> & Cross-reference to a "WARNI NG!" within a sect io n. For indica
tion with a page number, the correspon ding "WARN ING!" can be
found outside of the sect ion .
Controls and equip
ment Safety first Vehicle operation
About this Owner's Manual
& WARNING
Tex
t with this symbol contains important information on safety
and how to redu ce the risk of pers onal injury or death .
0 Note
Text with this symbol draws your attentio n to potential sources of
damage to yo ur vehicle.
ci' For the sake of the environment
Text w ith th is symbol contai ns information about the environment
and how you can help protect it.
[I) Tips
Text w it h this symbol contains spec ia l tips and other information
abou t gett ing the mo st out o f yo ur vehi cle and its fea tures. •
Vehicle care Do-it-yourself service Technical data
Page 9 of 370
Instruments and controls
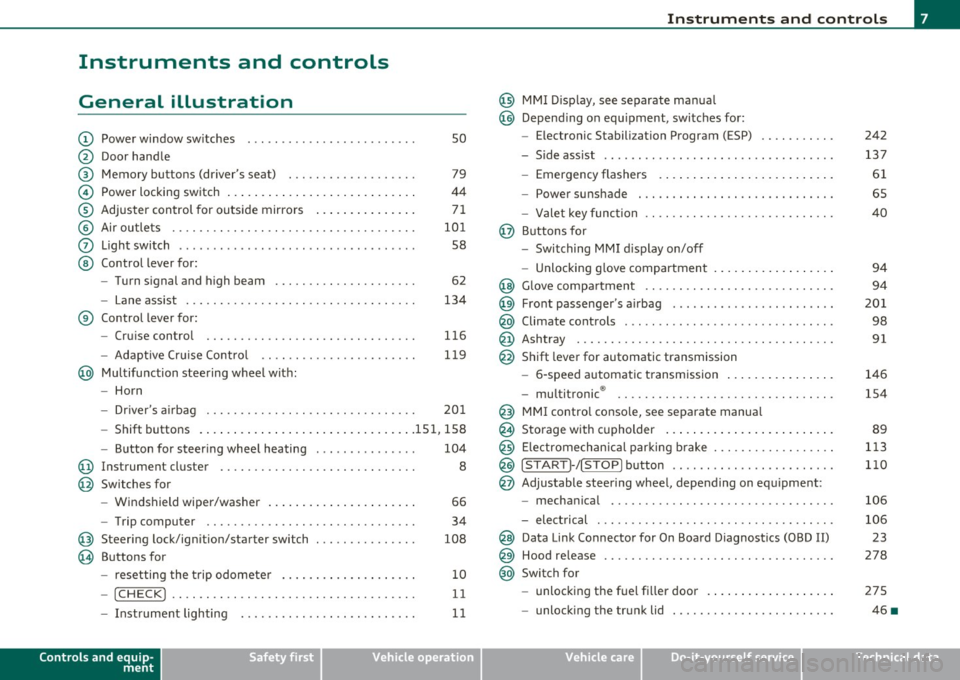
General illustration
(D Power window switches . . . . . . . . . . . . . . . . . . . . . . . . . 50
@ Door handle
@ Memory buttons (driver's seat) . . . . . . . . . . . . . . . . . . . 79
© Power locking switch . . . . . . . . . . . . . . . . . . . . . . . . . . . . 44
® Adjuster control for outside mirrors . . . . . . . . . . . . . . . 71
© Air outlets . . . . . . . . . . . . . . . . . . . . . . . . . . . . . . . . . . . . 101
0 Light switch . . . . . . . . . . . . . . . . . . . . . . . . . . . . . . . . . . . 58
@ Control lever for:
- Turn signal and high beam . . . . . . . . . . . . . . . . . . . . . 62
- Lane assist . . . . . . . . . . . . . . . . . . . . . . . . . . . . . . . . . . 134
® Control lever for:
- Cruise control . . . . . . . . . . . . . . . . . . . . . . . . . . . . . . . 116
- Adaptive Cruise Control . . . . . . . . . . . . . . . . . . . . . . . 119
@ Multifunction steering wheel with:
- Horn
- Driver 's airbag . . . . . . . . . . . . . . . . . . . . . . . . . . . . . . . 201
- Shift buttons ...... .. .. .... ........ .......... 151, 158
- Button for steering wheel heating . . . . . . . . . . . . . . . 104
@ Instrument cluster . . . . . . . . . . . . . . . . . . . . . . . . . . . . . 8
@ Switches for
- Windshield wiper/washer . . . . . . . . . . . . . . . . . . . . . . 66
- Trip computer ............... .. .. .. .. ....... .
@ Steering lock/ignition/starter switch ... .. ......... .
@ Buttons for
- resetting the trip odometer .......... .. .. .. ... .
- !CHECK] .... .... .. .... .. .... ............... .
-Instrument lighting . ....... .... .. .. .... .. .. . .
Controls and equip
ment Safety first
34
108
10
11
11
Instruments and controls
@ MMI Display, see separate manua l
@ Depending on equipment, switches for:
- Electronic Stabili zation Program (ESP)
- Side assist .. ... . .... .. .. .. .. .. .... .. .. .. ... .
- Emergency flashers .. .... .. .. .. ............. .
- Power sunshade . ... ... .. .. .. .. .... .. .. ... .. .
- Valet key function .. .. .. .. .... ....... ...... .. .
@ Buttons for
- Switching MMI display on/off
- Unlocking glove compartment
@ Glove compartment ...... .. .. .. .... .. ......... .
@ Front passenger 's airbag ............... ... .. .. . .
@ Climate controls ... .. .. .. .. .. .... .......... ... .
@ Ashtray .............. .. .... .. .. .. .. .... ..... .
@ Shift lever for automatic transmission
- 6-speed automatic transmission ....... .. ... ... .
- multitronic ® ....................... .. .... .. .
@ MMI contro l console, see separate manua l
@ Storage with cupholder ... .. ... .............. .. .
@) Electromechanical parking brake .............. .. . .
@ ISTAR T]-/ISTOP] button ........ .. ... .......... .
@ Adjustable steering wheel, depending on equipment :
- mechanical ............. .. .. .. ............. .
- electrical . ... ... .. .. .. .. .. .. .. .. .. ....... .. .
@ Data Link Connector for On Board Diagnostics (OBD II)
@ Hood release .......... .. .... .. .. .. .. ......... .
@ Switch for
unlocking the fuel fi ller door .............. .... .
- unlocking the trunk lid . .. ........ .. ... .. .. .. . .
Vehicle care
242
137
61
65
40
94
94
201
98
91
146
154
89
113
110
106
106 23
278
275
46 •
Technical data
Page 11 of 370
If the needle is well in the upper area of the gauge, the coolant
tempe rat ure is too high.
Stop the vehicle , switch the engine off and
allow the engine to cool.
If the warning light comes on again after
driving a short distance, contact an authorized dealer.
& WARNING
• Alway s observe th e warning in => page 271, "Engine comp art
ment ", before opening the hood and checking the engine coolant
level.
• Never open the engine hood if you see or hear steam, or if you
s ee engin e coolant dripping from the engine compartment. You
could burn yourself. Let the engine cool off first so that you cannot
hear or see any steam or engine coolant .
0 Note
• Mounting additiona l lights or accessories in fron t of the a ir inlets
reduces the cooling effect of the radiator . At high outside tempera
t ur es o r high engine load, the engine could overheat.
• The front spo iler has bee n des igned to prope rly d istribute the
coo ling air when the vehicle is moving.
If the spoiler is damaged, this
cou ld reduce the coo ling effect and the eng ine could then overheat .
Ask your author ized A udi dealer for assistance .•
Tachometer (engine rev counter)
The tachometer indicat es th e engine RPM (revolutions
per minutes).
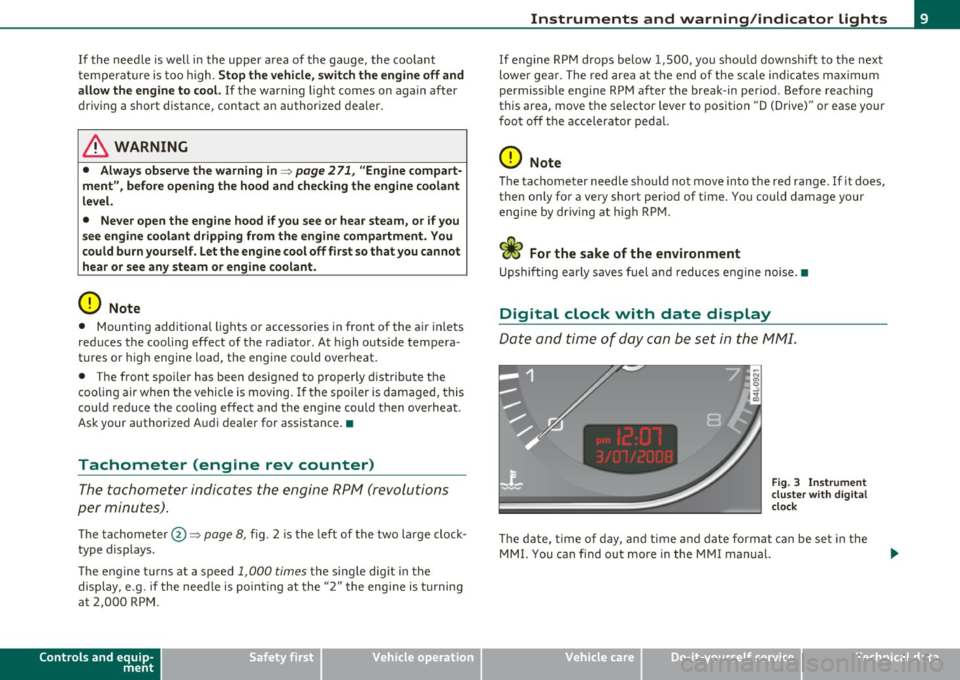
Th e tac home ter @ => page 8, fig. 2 is the left of the two large cloc k
type displays.
Th e engine tu rns at a speed
1,000 times the si ng le dig it in the
display, e.g. if the need le is po int ing at the "2 " the engi ne is t urning
at 2,000 RP M.
Controls and equip
ment Safety first
Instruments and warning
/indicator lights
If e ngine RPM drops below 1,500, you s hould dow nsh ift to t he next
lower ge ar. T he re d area at t he e nd of the s cale i ndic ates m aximum
permissible e ngine RPM after the break-in per iod . Before reaching
this area, move the selector lever to posit ion "D (Drive)" or ease yo ur
foot off the accelerator pedal.
0 Note
T he tachome ter needle s houl d not move into the red range. If it does,
then only fo r a very short period of time . You could damage your
e n g in e by driv ing at h igh RPM .
c£> For the sake of the environment
Upshifting early saves fuel a nd reduces e ngine noise. •
Digital clock with date display
Date and time of day can be set in the MM I.
Fig. 3 Instrumen t
cluster with digital
clock
Th e d ate, t ime o f day, and time and date fo rmat c an be se t in the
MMI. You can find o ut more in the MMI manual.
Vehicle care Technical data
Page 13 of 370
0 Note
Never run the tan k comp letely d ry . An irregular s upply of f ue l can
cause engine misfiring and fue l cou ld enter the ex ha ust system . T he
c ata lytic co nve rter co ul d the n overhea t and be damaged .•
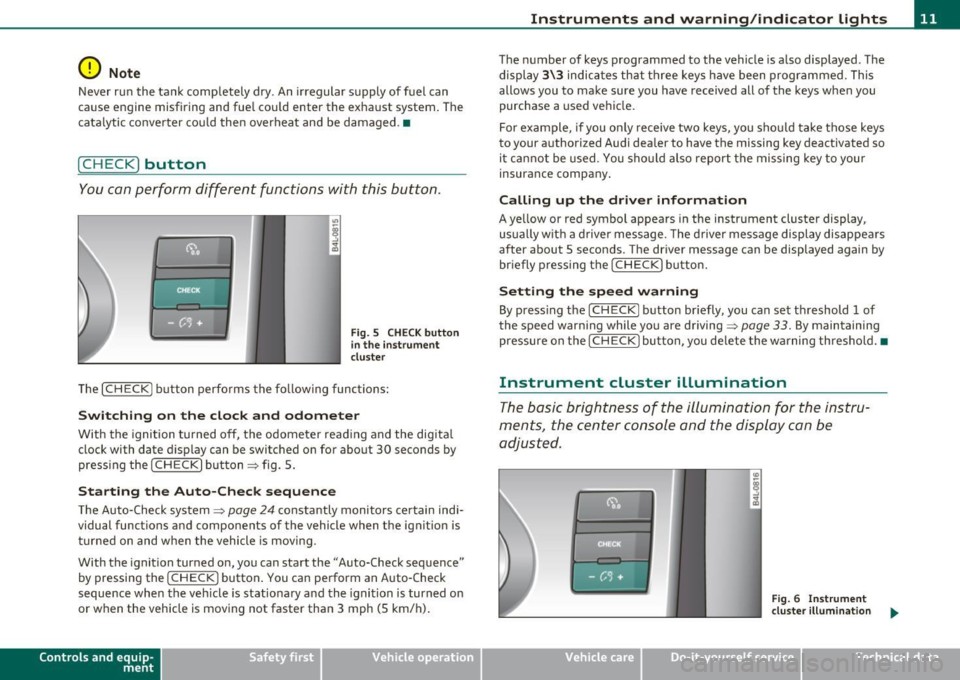
[ C HECK ) button
You can per form differen t functions wi th this button.
Fig . 5 CHE CK button
i n the in strume nt
clu ste r
Th e [ C H ECK] bu tton perfo rms the fo llowing func tions :
Switching on the clock and odometer
With the ignition tu rned off, the odome ter read ing and the dig ita l
clock with date d isplay can be switched on for abo ut 30 seconds by
pressin g the [
CHECK ] button ~ fig . 5.
Starting the Auto-Check sequence
The Auto-Check system~ page 2 4 constantly monitors ce rtain indi
vidual functions and components of the vehicle when the ignit ion is
tur ned on and w hen the vehicle is movi ng.
With the ignition turned on, yo u can sta rt the "A uto-Check sequence"
by pressing the
!CHECK ] button. You can perform an Auto -Check
sequence whe n the veh icle is st ationa ry a nd the ignition is turned on
or when the vehicle is moving not faster than 3 mph (5 km/h) .
Control s and equ ip
m ent Vehicle OP-eration
Instruments and warning /indicator lights
The nu mber of keys programmed to the vehicle is a lso displayed . The
di splay
3\3 indic ates th at three keys have been programmed . T his
allows you to make sure you have received all of the keys w hen you
purc hase a used ve hicle.
For example, if you o nly receive two keys, yo u sho uld ta ke tho se keys
to your a uthorized Audi dealer to have the missing key deactivated so
i t ca nn ot be used. You sh ould also re port the mis sing key to you r
insurance compa ny.
Calling up the driver information
A ye llow or red symbol appears in the instrument cluster display,
us ua lly w it h a dr ive r mes sage . T he driver message display di sappe ars
after about 5 seco nds. The driver message can be displayed again by
br iefly p ressing t he
[CHECK ] but to n.
Setting the speed warning
By press ing t he I CH ECK] button br iefly, you can set t hreshold 1 of
the speed warning while yo u are driving ~
page 33. By maintaining
pressure on the
I CHECK ] button, you de lete the warning th reshol d.•
Instrument cluster illumination
The basic brig htness of the illumination for the inst ru
ments, the center console and the display can be
a dju sted.
Fig. 6 Instrument
clu ste r illum inat ion .,,_
Vehicle care Do-it-yourselt service iTechnical data
Page 15 of 370
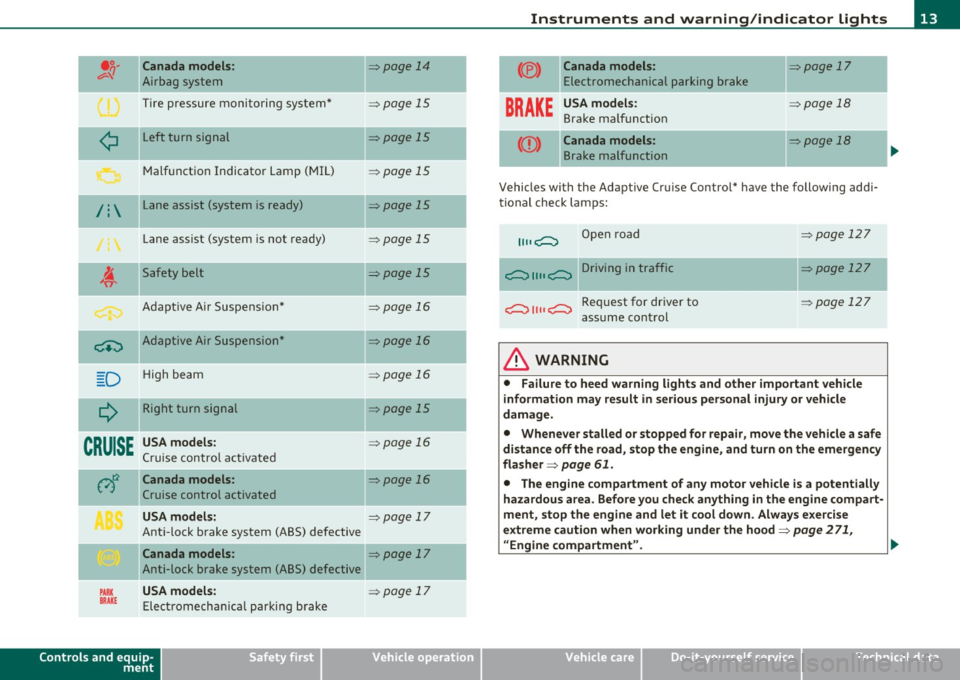
Canada models:
Airbag system
Tire pressure monitoring system*
L eft turn signal
Malfunct ion Indicator Lamp (MIL)
/ : Lane assist (system is ready)
Lane assist (system is not ready)
Safety belt
Adapt ive A ir Suspe nsio n*
-~ Adaptive Air Suspension"
D H igh beam
--
Q Right turn signal
CRUISE USA models:
Cruise contro l a ct ivate d =>page
14
=> page 15
=>page 15
=> page 15
=> page 15
=> page 15
=>page 15
=> page 16
=> page 16
=> page 16
=> page 15
=>page 16
Canada models: => page 16
Cruise control activated
USA models: => page 17
Ant i-lock brake system (ABS) defective
Canada models : => page 17
Anti-lock brake system (ABS) defective
USA models: PARK BRAKE Elect romecha nica l parki ng b rake
Controls and equip
ment Safety first
=:::, page 17
-
-
-
Instruments and warning
/indicator lights
(®)
BRAKE
--
Canada models: => page 17
E lectromechanical parking brake
USA model s: => page 18
Brake ma lf u nct ion
-Canada models: => page 18
B rake malfunction
Vehicles with the Adaptive Cru ise Control* have the following addi
ti onal check lamps:
Open road
i;:;::::::, 1111 i;:;::::::, D ri vi n g i n traffic
i;:;::::::, 1111 i;:;::::::, Request for dr iver to
assume con trol
& WARNING
=> page 12 7
=:::, page 127
=> page 127
• Failure to heed warning light s and other important vehicle
information may result in s erious personal injury or vehicle
damage.
• Whenever stalled or stopped for repair, move the vehicle a safe
distan ce off the road, st op the engine, and turn on the emergency
flasher =>
page 61.
• The engine compartment of any motor vehicle i s a potentially
hazardous area . Befo re you check anyth ing in the engine compart
ment, stop the engine and let it cool down. Always exercise
extreme caution when working under the hood=>
page 2 71,
"Engine compartment". .,.
Vehicle care Technical data
Page 17 of 370
App lies to vehicl es: wi th t ir e pr essure mon it o ring system
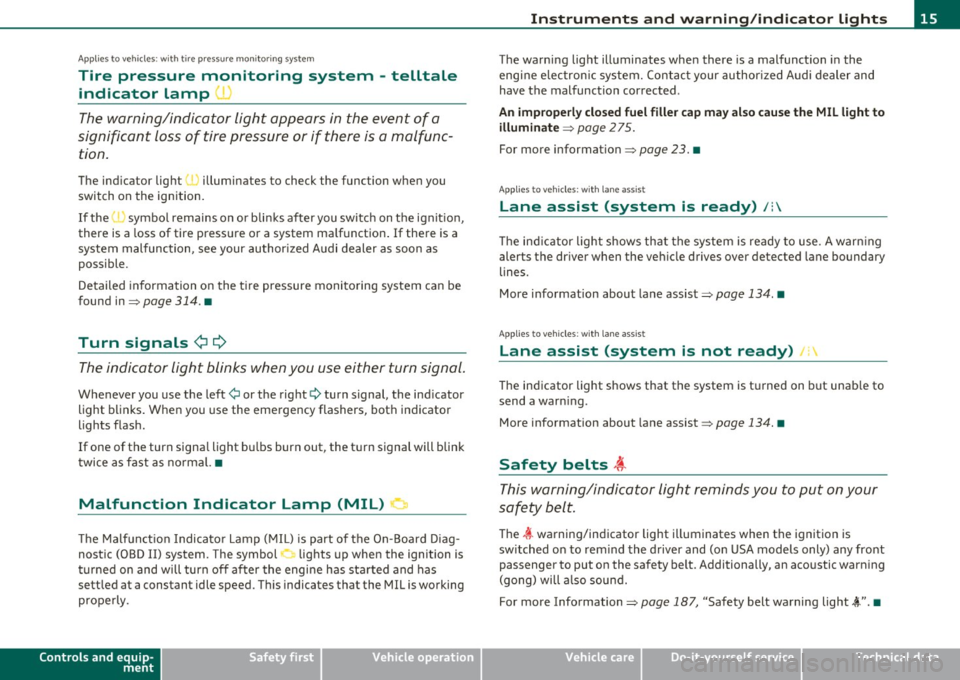
Tire pressure monitoring system - telltale
indicator Lamp '
The warning/indicator light appears in the event of a
significant loss of tire pressure or if there is a malfunc
tion .
The indicator light 'J illuminates to check the func tion when you
switch on the ignition.
If the
I symbol remains on or blinks after you sw itch on the ignit ion,
there is a loss of tire pressure or a system malfunction . If there is a
system malfunction, see your author ized Audi dealer as soon as
possible.
Detailed information on the tire pressure monitoring system can be
found in=>
page 314. •
Turn signals ¢ ¢
The indicator light blinks when you use either turn signal.
Whenever you use the left¢ or the right¢ turn signal, the indicator
light blinks. When you use the emergency flashers, both indicator
lights flash .
If one of the turn signa l light bu lbs burn out, the turn signal will blink
twice as fast as normal. •
Malfunction Indicator Lamp (MIL) !'.I
The Malfunct ion Indicator Lamp ( MIL) is part of the On-Board Diag
nostic (OBD II) system . The symbol lights up when the ignition is
t u rned on and will turn off after the engi ne has started and has
sett led at a constant idle speed. This indicates that the MIL is working
properly .
Controls and equip
ment Safety first
In
strum ents and warning /indicator lights
The warning light illuminates when there is a malfunction in the
engine electron ic system. Contact your author ized Audi dealer and
have the malfunction corrected .
An imp rope rly clo sed fu el fille r cap ma y al so cau se the M IL l ight to
illum in ate =>
page 2 75.
For more information=> page 23. •
App lies to vehicles : w ith lane ass ist
Lane assist (system is ready) /:
T he ind icator light shows that the system is ready to use . A warn ing
aler ts the driver when the veh icle drives over de tected lane boundary
lines.
More information about lane assist=>
page 134. •
Applies to vehi cles : wit h lane assis t
Lane assist (system is not ready) I
The indicator light shows that the system is turned on but unab le to
send a warn ing .
Mo re information about lane assist =>
page 134. •
Safety belts ,i
This warning/indicator light reminds you to put on your
safety belt.
The 4t warning/indicator light illuminat es when th e ignition is
switched on to rem ind the d river and (on USA models only) any front
pass enger to put on the safety b elt. Add itionally, an acoustic wa rning
(gong) will a lso sound.
For more Information=>
page 187, "Safety belt warning light~".•
Vehicle care Technical data
Page 19 of 370

Anti-lock brake system (ABS)
A ...
.j {USA models) /..., {Canada models)
This warning/indicator light monitors the ABS and the
electronic differential lock (EDL) .
The warning/indicator light will come on for a few seconds when the
ign ition is switched on . The light w ill go out after an a utomat ic check
sequence is comp leted .
There is a malfunction in the ABS when: • Th e warn ing/ indic ator light does not ill uminate when you swi tch
on the ig nit io n.
• Th e warn ing/ in dic ator lig ht does not go out a fter a few se conds .
• The warning/ind icator light illuminates while d riving.
The brake sy stem will still re spond even without the a ssistance of
the ABS system . See your authorized Audi dealer as soon as
possible to restore full braking performance.
For more i nformat ion
regarding the ABS=>
page 246.
The ABS warning l ight and the brake warning light come on
together. The ABS will not work and you will noti ce a change in
brak ing response and performance.
Malfunction in the brake system
If the brake warning light=> page 18 and the ABS warning ill uminate
together there may be a malfu nction in t he A BS, a nd there may a lso
be a malfunction in the brake system itself=>& .
In the even t of a
malfunction in the b rake system the warning/ indi
ca tor light
BRAKE (U SA mode ls)/ ((])) (Canada models) in the instrume nt
cl uster flashes . By p ressing the
I C H ECK ) button, you ca n bring up a
dr iver message w hic h explains the malfunc tion in mo re de tail. Please
not e=>
pag e 26 .
Controls and equip
ment Safety first
Instruments and warning
/indicator lights
Malfunction in the electroni c differential lock (EDL)
Th e ED L wor ks toge ther w it h the ABS . The A BS wa rning light will
come on if t he re is a malfunction in the EDL system=>
page 243. See
your authorized Aud i dea le r as soon as poss ible.
& WARNING
• If the ... Is~ (USA models)/ d (Canada models ) warning light
does not go out , o r if it comes on while driving, the ABS system is
not working properly . The vehicle can then be stopped only with
the standard brakes (without ABS ). You w ill not have the protec
tion ABS provide s. Contact your Aud i dealer as soon as pos sible.
• USA models: If the BRAKE warning light and the 9 warning
light come on together, the rear wheel s could lock up fir st under
hard braking. Rear wheel lock-up can cau se los s of vehicle control
and an accident . Have your vehicle repaired immediately by you r
authorized Audi dealer or a qualified work shop. Drive slowly and
avoid sudden, hard brake applications.
• Canada models : If the brake warning light «D> and the ABS
warning light come on together , the rear wheels could lock up
first under hard braking . Rear wheel lock -up can cause loss of
vehicle control and an accident. Have your vehicle repaired imme
diately by your authorized Audi dealer or a qualified work shop.
Drive slowly and a void sudden, hard brake applications. •
Electromechanical parking brake
~E {USA models) /(®) {Canada models)
The warning/indicator light monit ors the electromechan
ical parking brake.
With the parking bra ke app lied and the ignition turned o n, t he
warning/indicator light illum inates. After the ign ition has been
t u rned
off, the wa rni ng/ind icator light co nti nu es to i llumi nate for
abou t 30 seconds . If the parki ng brake is applied w it h the ignition _,,
Vehicle care Technical data
Page 21 of 370
Driver information display
Introduction
General notes
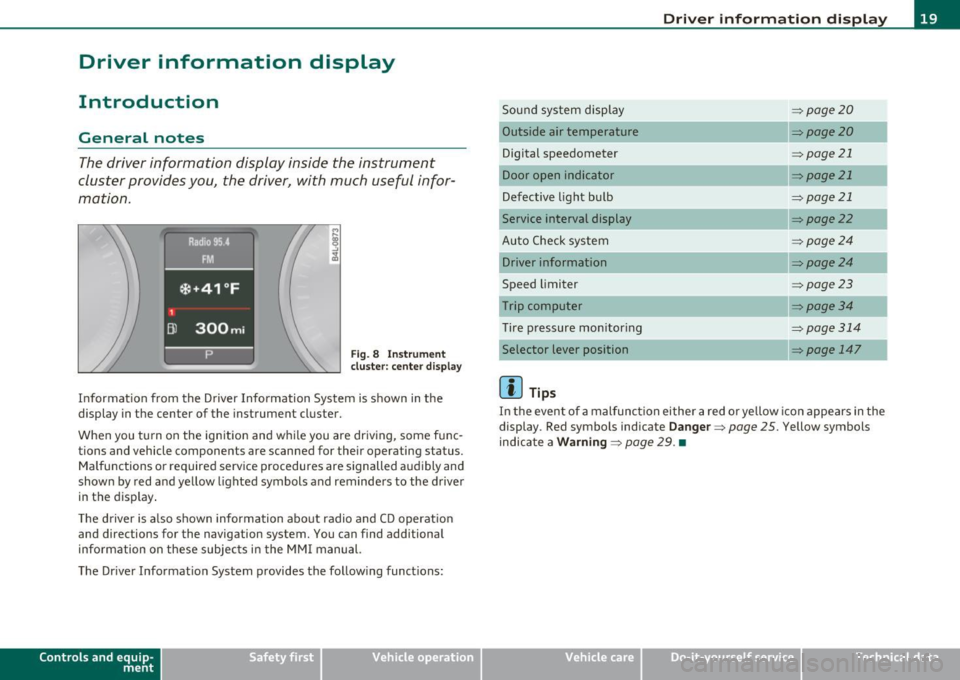
The driver information display inside the instrument
cluster provides you, the driver, with much useful infor
mation .
Fig. 8 Instrument
cluster: center display
Informat ion from the Driver Information System is shown in the
display in the center of the instrument cluster.
When you tu rn on the ignition and while you are driving, some func
tions and vehicle components are scanned for their operating status.
Malfunctions or required service procedures are signalled audibly and
shown by red and yellow lighted symbols and reminders to the driver
in the display .
Th e driver is also shown information about radio and CD operat ion
and directions for the navigation system. You can find additional
information on these subjects in the MMI manual.
The Driver Information System provides the follow ing functions:
Con tro ls a nd e quip
m en t Vehicle
OP-eration
Driver information display
Sound system display ~page20
Outside a ir temperature ~page20
Digital speedometer ~ page21
Door open indicator ~page21
Defective light bulb ~page21
Service interval display ~page22
Auto Check system ~page24
Driver information ~page24
Speed limiter ~page23
Trip computer ~ page3 4
Tire pressure monitoring ~page314
Selector lever position ~ page 147
(I] Tips
In the event of a malfunction either a red or yellow icon appears in the
display . Red symbols indicate
Danger ~ page 25. Yellow symbols
indicate a
Warning ~ page 29. •
Vehicle care Do-it-yourselt service iTechnical data
Page 23 of 370
Digital speedometer
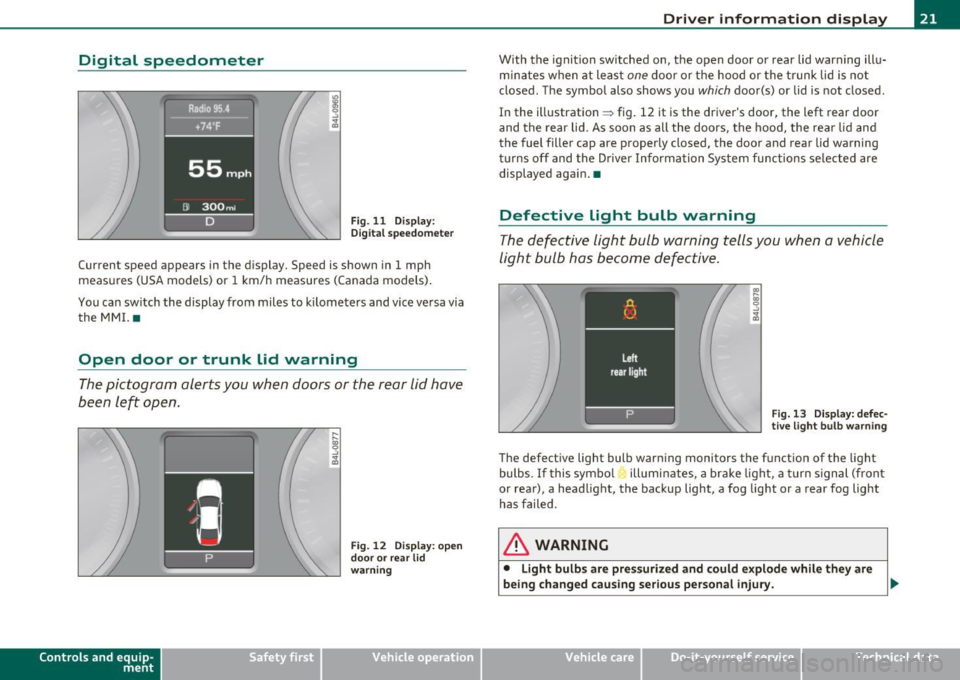
Fig. 11 Display:
Digital speedomete r
Current speed appears in the display. Speed is shown in 1 mph
measures (USA models) or 1 km/h measures (Canada models) .
You can switch the display from miles to kilometers and vice versa via
the MMI. •
Open door or trunk lid warning
The pictogram alerts you when doors or the rear lid have
been left open.
Con tro ls a nd e quip
m en t
Fig . 12 Display: open
door or rear lid
warning
Vehicle OP-eration
Driver information display
With the ignition switched on, the open door or rear lid warning illu
minates when at least
one door or the hood or the trunk lid is not
closed . The symbol also shows you
which door(s) or lid is not closed.
In the illustration ~ fig. 12 it is the driver's door, the left rear door
and the rear lid. As soon as all the doors, the hood, the rear lid and
the fuel filler cap are properly closed, the door and rear lid warning
turns off and the Driver Information System functions selected are
displayed again. •
Defective Light bulb warning
The defective light bulb warning tells you when a vehicle
light bulb has become defective.
Fig. 13 Display: defec
tive light bulb warning
The defective light bulb warning monitors the function of the light
bulbs.
If this symbol illuminates, a brake light, a turn signal (front
or rear), a headlight, the backup light, a fog light or a rear fog light
has failed .
& WARNING
• Light bulbs are pressurized and could explode while they are
being changed causing serious personal injury. .._
Vehicle care Do-it-yourselt service iTechnical data