technical data AUDI A6 2011 User Guide
[x] Cancel search | Manufacturer: AUDI, Model Year: 2011, Model line: A6, Model: AUDI A6 2011Pages: 370, PDF Size: 87.15 MB
Page 25 of 370
On-Board Diagnostic system (OBD)
Malfunction Indicator Lamp (MIL)
The Malfunction Indicator Lamp (MIL) in the instrument cluster
~ page 12, fig. 7 is part of the On-Board Diagnostic (OBD II) system.
The warn ing/ind icator light illuminates when the ignition is switched
on and goes out after the engine starts and the idle has stabilized.
This indicat es that the MIL is working properly.
If the light does not go out after the engine is started, or illuminates
while you are driving , a malfunction may exist in the engine system.
If the light illuminates, the catalytic co nverter could be damaged .
Continue driving
with reduced power (avoiding sustained high
speeds and/or rapid accelerations) and have the condition corrected.
Contact your authorized Audi dealer .
If the light illuminates, the electronic speed limiter may also be
malfunctioning. For more information~
page 23, "Electronic speed
limiter".
An improperly closed fuel filler cap may also cause the MIL light to
illuminate ~
page 275. •
On-Board Diagnostics
Contro ls a nd e quip
m en t
Fig . 15 Locat ion of
Data Link Connector ( DLC )
Vehicle OP-eration
Driver information display
On-Board Diagnostics monitors the components of your emission
control system. Each monitored component in your engine system
has been assigned a code. In case of a malfunction, the component
will be identified and the fault stored as a code in the control module
memory .
The MIL light may also illuminate if there is a leak in the on-board fue l
vapor recovery system. If the light illuminates after a refuelling, stop
the vehicle and make sure the fuel filler cap is properly closed
~ page 275 .
In order to make an accurate diagnosis, the stored data can only be
displayed using specia l diagnostic equipment (generic scan too l for
OBD).
In order to connect the special diagnostic equipment, push the plug
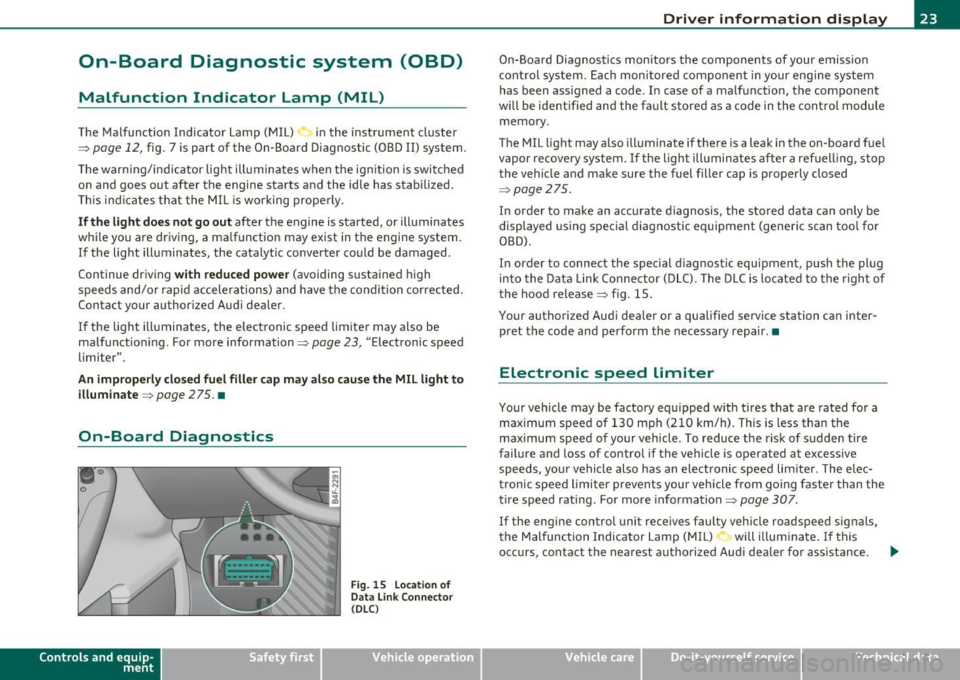
into the Data Link Connector (DLC). The DLC is located to the right of
the hood release~ fig . 15.
Your authorized Audi dealer or a qualified service station can inter
pret the code and perform the necessary repair.•
Electronic speed limiter
Your vehicle may be factory equipped with tires that are rated for a
maximum speed of 130 mph (210 km/h). This is less than the
maximum speed of your vehicle . To reduce the risk of sudden tire
failure and loss of control if the vehicle is operated at excessive
speeds, your vehicle also has an electronic speed limiter. The elec
tronic speed limiter prevents your vehicle from going faster than the
tire speed rating. For more information ~
page 307.
If the engine con trol unit receives faulty vehicle roadspeed signals,
the Malfunction Indicator Lamp (MIL) will illuminate. If this
occurs, contact the nearest authorized Audi dealer for ass istance . .,.
Vehicle care Do-it-yourselt service iTechnical data
Page 27 of 370
Driver m essages and yellow symbols
If a y ellow symbol appears in the display, a dr iver message is a lso
displayed automatically .
For example, the symbo l appears in the display, ind icating low
windshield washer flu id level. The following message also appea rs:
Please refill washer fluid
Th e d river message d isappears after a few seconds . The d rive r
message can be displayed again by briefly press ing the
I CHECK ]
button.•
Red symbols
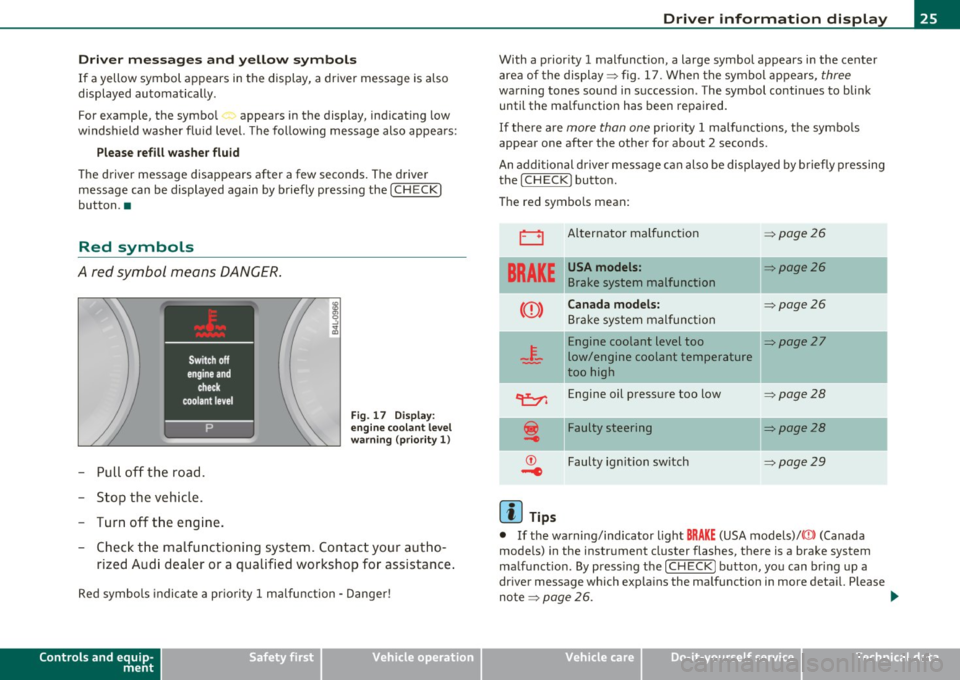
A red symbol means DANGER.
-Pu ll off the road.
- Sto p the veh icle.
- Turn off t he eng ine.
Fi g. 1 7 Disp lay:
e ngine c oolan t le vel
warn in g { priority 1 )
- Check th e ma lfu nct ioning system . Contac t your au tho-
rized A ud i dea ler or a qualified works hop fo r assistance .
Red symbo ls indi ca te a pr io rit y 1 malfu nction - D ange r!
Controls and equip
ment Safety first
Driver information display
With a prior
ity 1 malfunction , a large symbol appears i n the center
area of the display :::> fig . 1 7 . When the symbol app ears,
three
warning tones sound in s uccession . The symbol conti nues to bli nk
until the ma lfunction has been repaired.
If the re a re
more than one pr io rit y 1 ma lf u nctions, t he sy mbols
appear one after the other for about 2 seconds.
An addi tion al dr iver mes sage can also be displayed by b rie fly pressing
the [
CHECK ] button.
T he red symbols mean:
0
BRAKE
Al ternator malf unc tion
USA models:
Brake system malfunction
Canada models:
Bra ke system malfu nction
=:> page 2 6
=:> page 26
=:> page 26
Engine coolant level too I[:::> page 2 7
low/engine coolant temperature
too high
c:e::,, Engine oil press ure too low
Faulty steering
Faulty ignit ion sw itch
(I] Tips
=:> page 28
=:> page 28
=:> page 29
• If the wa rning/ind icator ligh t BRAKE (USA models)/ {(])) (Canada
mode ls) in the instrument cluster flashes, there is a b rake system
ma lfunction . By p ress ing t he
I CHECK] button, yo u can br ing up a
dr iver message which exp la ins the ma lfunction in mo re deta il. Please
no te :::,
page 26. ~
Vehicle care Technical data
Page 29 of 370
& WARNING
• Always observe the warnings in~ page 2 71, "Engine compart
ment ", before opening the hood and che cking the brake fluid.
• Driving w ith low brake fluid is a safety haza rd. Stop the car and
get profe ssional a ssistan ce.
• USA models : If the BRAKE warning light and the warning
light come on tog ether, the rear wheel s could lock up fir st under
hard b raking. Rear wheel lock -up can cause loss of vehicle cont rol
and an a ccident . Have your vehicle repaired immediately by your
authorized Audi dealer or a qualified workshop. Drive slowly and
avoid sudden, hard brake application s.
• Canada models : If the brake warning light((])) and the ABS
warning light come on together , the rear wheel s could lock up
first under hard braking. Rear wheel lock-up can cause loss of
vehicle control and an accident. Have your vehicle repaired imme diately by your authorized Audi dealer or a qualified workshop.
Drive slowly and avoid sudden , hard brake applications. •
Engine cooling system malfunction _t_
A malfunction in the engin e cooling system must be
repaired as soon as possible.
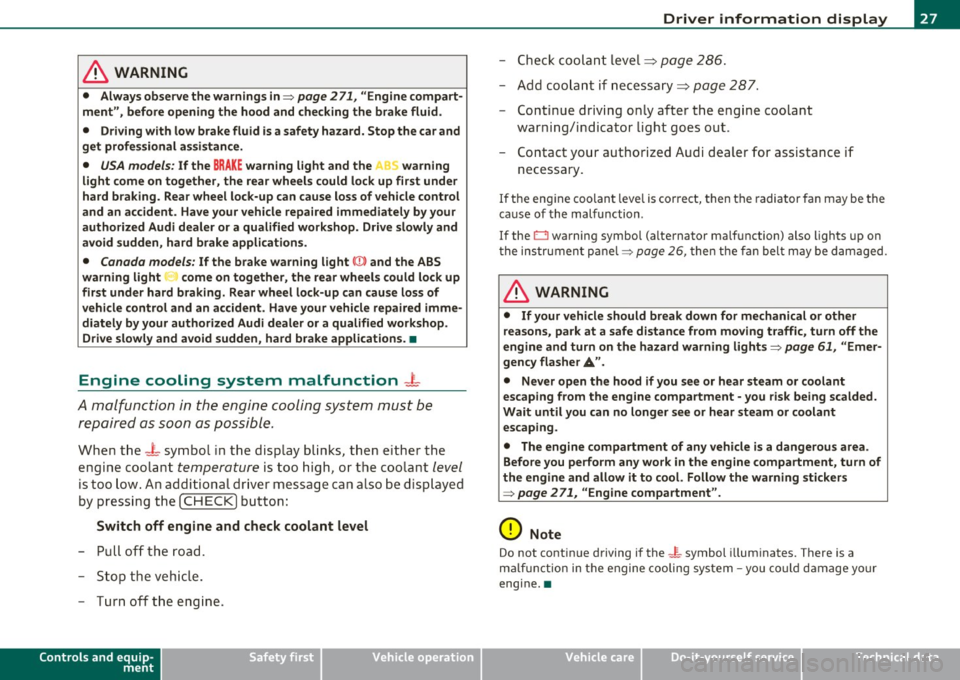
When t he J_ symbol in the disp lay blinks , th en e ither the
engine coola nt
temperature is too high, or t he coolan t level
is too low. A n add itiona l dr iver messa ge ca n also be d isp layed
by pressing t he
[CHECK) bu tton :
Switch off engine and check coolant level
-Pull off the road.
- S to p the v ehicl e.
- Turn off the eng ine .
Controls and equip
ment Safety first Driver information display
- Ch
eck coolant level => page 286 .
- Add coola nt if necessa ry=> page 287.
- Continue driv ing on ly after the eng ine coolant
war ning/i ndica tor light goes ou t.
- Contact your authorized Audi dea ler for assistance if
necessary.
If the eng ine coolan t leve l is correct, then the radiator fan may be the
cause of the malfu nction .
If the
D wa rning symbol (alternator ma lfunction) also lights up on
t he ins trumen t pa ne l~
page 2 6, the n th e fan b elt may be d amaged .
& WARNING
• If your vehicle should break down for mechanical or other
reasons, park at a safe distance from moving t raffic , turn off the
engine and turn on the hazard warning lights~
page 61, "Emer
gency fl asher
A ".
• Never open the hood if you see or hear steam or coolant
escaping from the engine compartment -you risk being scalded.
Wait until you can no longer see or hear steam or coolant escaping .
• The engine compartment of any vehicle is a dangerous area. Before you perform any wo rk in the engine compartment, turn of
the engine and allow it to cool. Follow the warning stickers
~ page 2 71, "Engine compartment" .
0 Note
Do not continue driving if the -F-symbol illum inates. There is a
m alfu nct ion in the engine cooling system -yo u co uld da mage yo ur
engine. •
Vehicle care Technical data
Page 31 of 370
Ignition Lock malfunction ~
A malfunction in the ignition lock must be repaired immediately .
If the .Pe symbol in the display blinks, there is a malfunction
in the electronic ignition lock. An additional driver message
can also be displayed by pressing the
[CHECK ] button:
Ignition lock defecti ve . Contact wor kshop!
- Do not turn the engine off.
- Drive immediately to an authorized Audi dealer to have
the malfunct ion correc ted.
If the re is a malfunction in the e lectronic ignition lock, the ignit ion
cannot be turned
off . Drive immediately to an authori zed Audi dealer
to have the cause of the mal function corrected.
On vehicles with Convenience key* , the eng ine should not be switched
off using the [STOP] button because the engine cannot be started
again afte r the ign ition is switched off .•
Yellow symbols
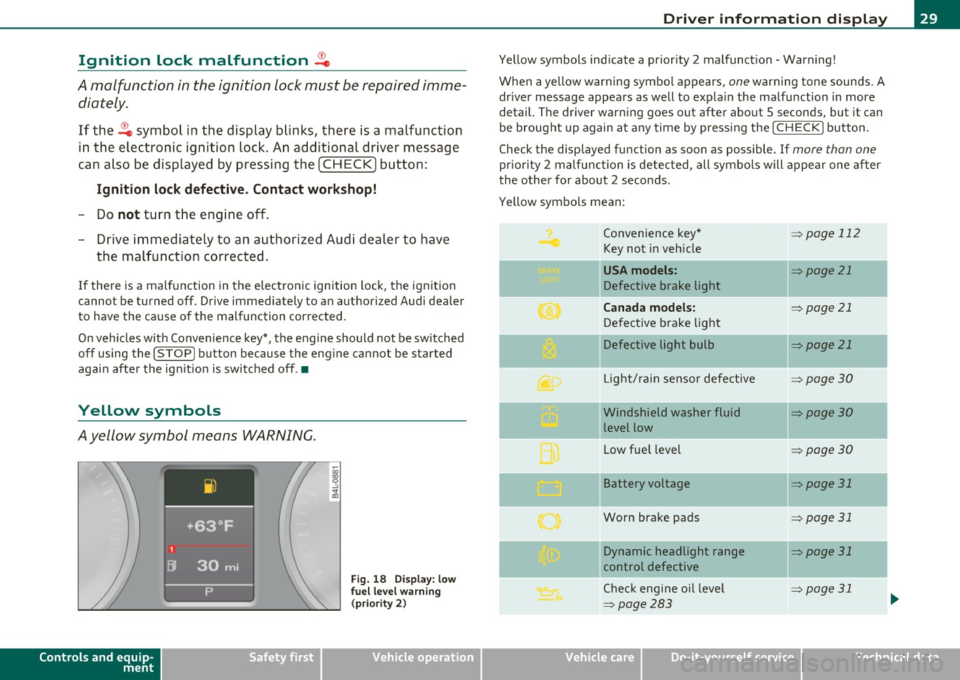
Ayellow symbol means WARNING.
Controls and equip
ment Safety first
Fig.
18 Disp la y : lo w
f u el l evel warning
(p rio ri ty 2)
Dri ver information display
Yellow symbols ind icate a prior ity 2 malfunct ion - Warning!
When a yellow warning symbo l appears,
one warning tone sounds. A
dr iver message appears as well to expla in the malfunction in more
detail. The driver warning goes out after about 5 seconds, but it can
be brought up again a t any time by pressing the
I CHECK] button .
Check the displayed function as soon as possible . If
more than one
pr iori ty 2 malfunction is detected, all symbo ls will appear one after
the other for about 2 seconds.
Yellow symbols mean:
Convenience key*
=> page 112
Key not in vehicle
-
USA models : => page 21
Defective brake light
Canada models : => page 21
Defective brake light
Defective light bulb
=> page 21
L ig ht/rai n sensor defective :::>page 30
Windshield washer fluid =:>page 30
level low
Low fue l level
=:> page30
II Battery voltage => page 31
-
Worn brake pads => page 31
II Dynamic headlight range => page 31
control defective
-
Check engine oil leve l => page 31
=>page 283
...
Vehicle care Technical data
Page 33 of 370
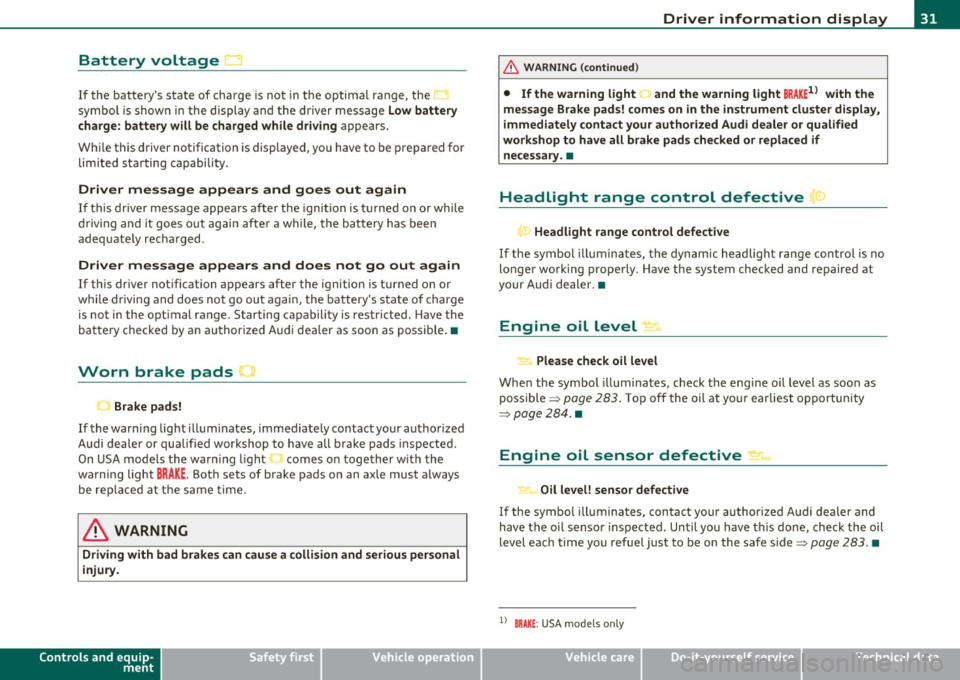
Battery voltage 1• i
If the battery's state of charge is not in the optima l range, the
symbo l is show n in the di splay and the d river me ssage
Low battery
charge: battery will be charged while dri ving
appears.
Whi le this d river notification is displayed, you have to be prepared for
limited starting capability .
Driver message appears and goes out again
If this driver message appears after the ignition is turned on or while
driving and it goes o ut again afte r a while, the ba ttery has been
adequate ly recharged.
Driver me ssage appears and does not go out again
If th is dr iver notification appears after the ignition is turned on or
wh ile driving and does not go ou t aga in, the battery 's state o f charge
is not in the opt imal range . Starting capability is restricted. Have the
bat tery checked by an au thor ized A udi dea le r as soon as possible. •
Worn brake pads U
._ Brake pads!
If the war ning lig ht ill um inates, immediately co ntact your au tho rized
Audi dea ler or qualified wor kshop to have all brake pads inspected.
On USA mode ls the warn ing light comes on together w it h the
warning light
BRAKE . Both sets of brake pads on an axle must a lways
be re placed at th e same time.
& WARNING
Driving with bad brakes can cause a collision and serious personal
injury .
Controls and equip
ment Safety first
Driver information display
& WARNING
(co ntinued )
• If the warning light... and the warning light BRAKE1l with the
mes sage Brake pads! comes on in the instrument cluster di splay,
immediately contact your authorized Audi dealer or qualified
workshop to have all brake pads checked or replaced if necessary. •
Headlight range control defective ((
~ ~ Headlight range control defective
If the symbo l illumina tes, the dynam ic he adlig ht r an ge con tro l is no
longer working properly. Have the system checked and repaired at
your Audi de aler. •
Engine oil Level~
Please che ck oil level
Whe n the symbol i llumina tes, check t he engine o il level as soo n as
poss ible => page 283 . Top off the oil at yo ur earlies t oppor tunity
=>page284 .•
Engine oil sensor defective _t..
Oi l level! sensor defective
If the symbo l illuminates, contact your author ized A udi dealer and
have the oi l senso r inspected. Un til you have t his don e, check the oil
level each time you refue l just to be on the safe side => page 283. •
ll BRAKE : USA mode ls only
Vehicle care Technical data
Page 35 of 370
Speed warning 2
Storing war ning 2 is recommended i f you o/woyswantto be reminded
of a certain speed, fo r example when you are travel ing in a country
that has a genera l maximum speed limit, or if you do not want to
exceed a specified speed fo r winter tires .
The speed warning 2 symbol,
8 , (USA mode ls)/ 8, (Canada models)
appears in the display when you exceed the stored speed limi t. Unlike
warning 1, it will not go out until the vehicle speed drops below the
sto red speed limi t.
Setting speed warn ing 2
=> page 33 .
(I) Tips
Even though your ve hicle is eq uipped with a speed war ning system,
you should st ill watch the speedometer to make sure you are no t
dr iv ing faste r th an the speed lim it. •
Speed warning 1: setting a speed Limit
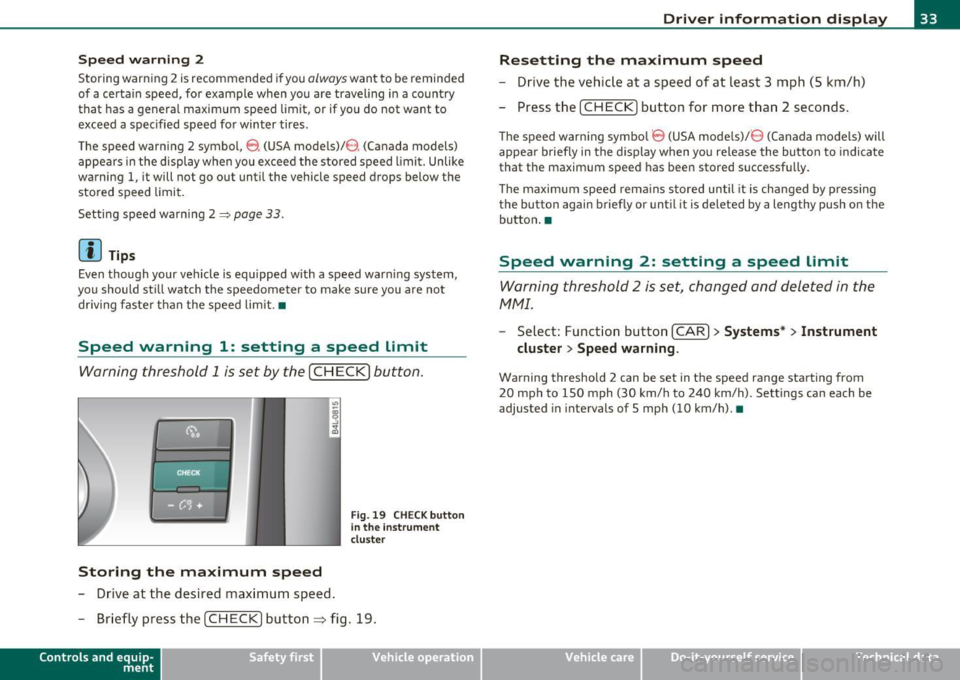
Warning threshold 1 is set by the [ CH ECK] button .
Storing the maximum speed
-Drive at the desired max imum speed .
Fig. 19 CHE CK butt on
in the i nstrument
clu ste r
- Briefly pre ss the [CHECK] button ~ fig. 19.
Con tro ls a nd e quip
m en t Vehicle
OP-eration
Driver information display
Resetting the maximum speed
- Drive the vehic le at a speed of at leas t 3 mph (S k m/h)
- Press the [ CH EC K] button for more t han 2 seconds .
The speed warning symbo l 8 (USA models)/ 8 (Canada models) will
appea r briefly in the d ispl ay when you release the bu tton to indica te
that the maximum speed has been stored successf ully.
Th e maximum spee d rema ins s tored until it is cha nged by p ressing
the button again briefly or until it is deleted by a lengthy push o n the
bu tton .•
Speed warning 2: setting a speed Limit
Warning threshold 2 is set, changed and deleted in the
fv1fv1l.
- Select: Funct io n button [CAR ]> Systems* > Instrument
cluster > Speed warning .
Warning threshold 2 can be set in the speed range starting from
20 mph to 150 mph (30 km/ h to 240 km/h). Settings can each be
adjusted in intervals of 5 mph (10 km/h). •
Vehicle care Do-it-yourselt service iTechnical data
Page 37 of 370
Memories
The trip computer is equipped with two fully automatic
memories .
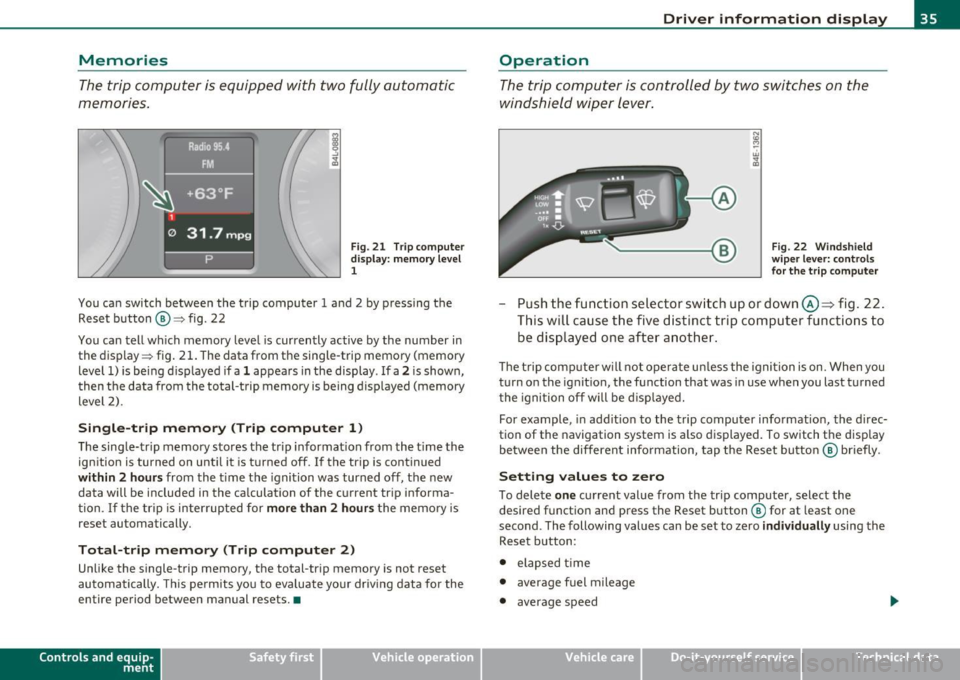
Fig. 21 T rip c omput er
di spl ay : m emory l evel
1
You ca n switch be twee n the t rip computer 1 a nd 2 by p ressing the
Rese t button @=> fig. 22
You can tell wh ich memory level is currently active by the number in
the display => fig . 21 . The data from t he single-trip memory (memory
level 1) is be ing d isp layed if a
1 appea rs in the display . If a 2 is shown,
then t he data from the total-trip memory is being displayed (memory
level 2) .
Single-trip memory (Trip computer 1 )
The sing le-tr ip memory sto res the trip informat ion from the t ime the
ign ition is turned on unt il it is t urned off .
If the trip is cont inued
within 2 hour s from the time the ignition was turned off, the new
data will be included in the ca lculation of the current tr ip informa
tion .
If the tri p is interrup ted for more than 2 hours t he memory is
reset automatically.
Total-trip memory (Trip computer 2)
Unlike the single-trip memory, the total-tr ip memory is not reset
au tomatically. This pe rmit s you to eva luate yo ur driv ing data fo r the
entire period between manual resets. •
Contro ls a nd e quip
m en t Vehicle
OP-eration
Driver information display
Operation
The trip comp uter is controlle d by two swit che s on the
w ind shield wi per lev er.
Fig . 22 W indsh ield
w ipe r lev er: co nt rol s
fo r the trip compute r
-Push the fu nctio n se le ctor sw itch up or down @~ fig . 22 .
Thi s will cause th e five d ist inc t trip c om puter func tion s to
be dis played o ne aft er anoth er.
The trip com puter w ill not oper ate u nless the igni tion is on. When you
turn o n the ignit ion, the function that was in use when you last turned
t he igni tion off w ill be dis played.
For example , in add it ion to the trip compu ter informat io n, the direc
tion of the navigation system is a lso d is p layed . To switch t he display
be tween the different info rmation, tap the Reset butt on @ briefly .
Setting values to zero
To dele te one c ur rent value from the tr ip computer, select the
desired f unct io n an d press the Reset b utton ® for at least one
second . The following values can be set to zero
individually using the
Reset b utton :
• elapsed time
• average fuel mileage
• average speed
Vehicle care Do-it-yourselt service iTechnical data
Page 39 of 370
Opening and closing
Keys
Key set
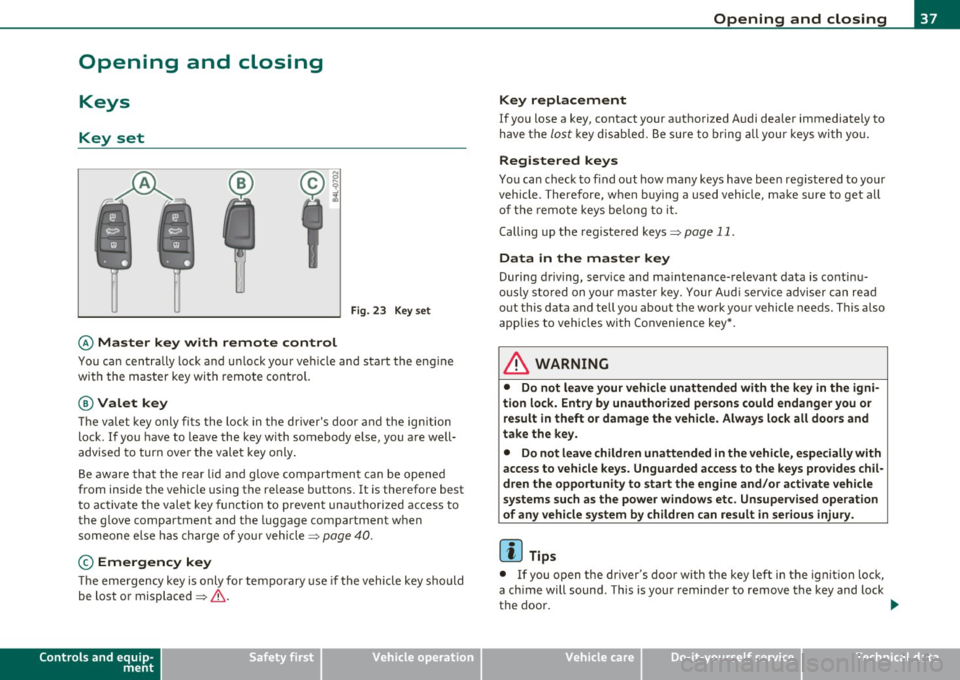
Fig. 23 Key set
© Ma ster key with remote control
You can centrally lock a nd u nlock your ve hicle and start the eng ine
with the master key with remote contro l.
@Valet key
The va let key only fi ts the lock in the d river's door and the ig nition
lock . If you have to leave the key with somebody e lse, you are well
advised to turn over the vale t key only .
Be aware tha t the rear lid a nd g love compartment can be opened
from inside the vehicle using the re lease buttons. It is therefore best
t o activa te the vale t key function to preven t una uth o rized access to
the glove compartment and the luggage compartment when
someone else h as charge of your vehicle::::>
page 40.
© Emergency key
The emergency key is only for tempo rary use if the vehicle key should
be lost or misplaced =>
&.
Controls and equip
ment Safety first
Opening and closing
Key replacement
If you lose a key, contact your a
uthorized A udi dea ler immediately to
have t he
lost key d isab led. Be sure to bring all you r keys wi th yo u.
Registered keys
You can chec k to f ind out how many keys have been reg iste red to yo ur
vehicle . Therefore, w hen b uy ing a used vehicle, make sure to get all
of the remote keys be long to it .
Calling up the registered keys=>
page 11.
Da ta in the master key
During driving, serv ice and ma intenance- relevant data is continu
o u sly sto red on yo ur maste r key. Your Aud i serv ice adviser c an re ad
out this data and tell you about the work your vehicle needs. This a lso
applies to vehicles wi th Co nvenience key *.
& WARNING
• Do not leave your vehicle unattended with the key in the igni
tion lock. Entry by unauthorized persons could endange r you or
re sult in theft or dam age the vehicle. Alway s lock all doors and
take the key.
• Do not leave children unattended in the vehicle, especially with
access to vehicle keys. Unguarded access to the keys p rovides chil
dr en the opportunity to start the engine and /or activate vehicle
systems such as the power windows etc . Unsupervised operation
of any vehicle system by children can result
in serious injury.
[ i ] Tips
• If you open t he dr iver 's door wi th the key left in the ignit ion lo ck,
a ch ime will sound . This is your reminde r to remove the key and lock
the doo r.
IJ),,,
Vehicle care Technical data
Page 41 of 370
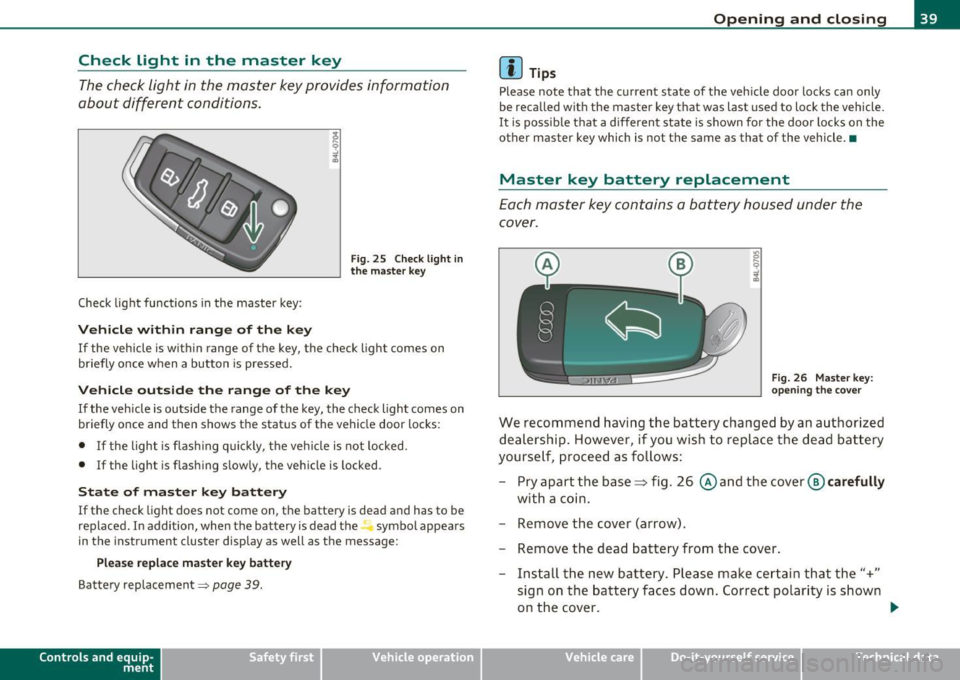
Check Light in the master key
The check light in the master key provides information
about different conditions.
Check light functions in the master key :
Vehicle within range of the key
Fig . 25 C heck lig ht in
the m aster k ey
If the vehicle is w ith in range of the key, the check light comes on
briefly once w hen a button is pressed.
Vehicle outside the range of the key
If the veh icle is outside t he range of the key, the c hec k light comes on
briefly once and then shows the status of the vehicle door locks:
• If the light is fl as hi ng q uickly, the veh icle is not locked.
• If the light is f lashing slow ly, the vehicle is locked .
State of master key battery
If the check light does not come on, the battery is dea d and has to be
replaced . I n addition, when the battery is dead the symbol appea rs
i n the instrument cluste r display as well as the message :
Please replace ma ster ke y battery
Battery replacement~ page 39.
Con tro ls a nd e quip
m en t Vehicle
OP-eration
Opening and closing
(I) Tips
Please note that the c urrent state of the vehicle doo r locks can only
be recalled wit h the master key t hat was last used to lock the vehicle.
It is poss ib le tha t a d ifferen t state is shown fo r the door lo cks on the
other master key which is not the same as that of the vehicle .•
Master key battery replacement
Each mas ter key contains a battery hous ed under th e
cover.
Fi g. 26 Master key:
o pe ning the c ove r
We reco mmend having the ba ttery chang ed by an au thori zed
dealer ship . However , if you wi sh to replace th e dead b atte ry
yourse lf, proc eed as follows :
- Pry apart the base~ fig. 26 @and the
cover @carefully
with a c oin.
- Remove the cover (arrow).
- Remove the dead battery from the cover .
- Install th e new ba ttery . Please make c ertain that the"+"
sign on t he ba ttery faces down . Correct po lar ity is shown
o n the cover. .,,.
Vehicle care Do-it-yourselt service iTechnical data
Page 43 of 370

When the function is switched on, the buttons for opening the rear lid
and glove compartment have no function. However, please note the
following except ions:
Exceptions
If the ignition has been switched on using the master key, you can
st ill open the g love compartment.
As long as the ign it ion is switched off, you can st ill open the rear lid
using the rear lid button on the
master key c:s . The same holds true
for using the rear lid release handle in co njunction w ith the Conve
nience key*.
For this reason, be sure to only hand over the
valet key to the person
who will take charge of your vehicle .
[ i ] Tips
Be sure to activate the function before handing over the valet key to
someone e lse. The va let key on ly fits the lock in the driver's door and
the ignition lock.•
Power locking system
General description
The power locking system locks or unlocks all doors and
the rear lid simultaneously .
The power locking system in your vehicle incorporates the following
functions :
• Centra l locking function
• Selective unlock feature:::::;,
page 44
• Remote control feature:::::;,
page 38
• Convenience key*:::::;, page 47
• Anti-theft alarm system:::::;, page 49
Controls and equip
ment Safety first
Opening and closing
All the doors and the rear lid are
locked by the central locking system
when you lock the veh icle. Yo u can set whether generally only the
dr iver's door or all doors and the rear lid should be unlocked when you
open the vehicle in the MMI menu
Central locking to suit your indi
vidual desires:::::;,
page 44 .
Unlocking the vehicle
You can unlock the vehicle from outside either by using the remote
control
or by inserting and turning the key in the driver's door lock.
When you
unlock your vehicle:
• The anti-theft alarm system is deactivated briefly .
• Th e vehicle interior lights illuminate for approximately 30
seconds .
• All turn signal lights will flash twice when the car is unlocked .
• After un locking the veh icle, you have 60 seconds to open a door or
the rear lid. After 60 seconds, the vehicle automatically locks and the
anti-theft alarm system activates again.
The rear lid can be locked or unlocked e ither by using the remote
control
or by inserting and turning the key in the driver's door lock.
Unlocking the vehicle with the remote control will only
unlock the
rear lid, to
open it, the lid handle needs to be pressed.
Locking the vehicle
You can lock the vehicle from outside either by using the remote
cont rol
or by inserting and turning the key in the drivers's door lock .
When you
lock the vehicle:
• All doors and the rear lid are locked .
• All turn signal lights will flash once when the car is locked.
• Th e anti-theft alarm system is activated. The horn of the anti
theft a larm system wi ll sound and the anti-theft a larm system readi
ness light, located in the upper part of the driver's door panel, w ill
start to blink.
• T he vehicle interior lights turn off.
Vehicle care Technical data