AUDI A8 2018 Service Manual
Manufacturer: AUDI, Model Year: 2018, Model line: A8, Model: AUDI A8 2018Pages: 356, PDF Size: 54.71 MB
Page 41 of 356
lL t:0 ....
"' ......
"' .... 0 0 :c -
Applies to: vehicles with sliding/tilting sunroof
If the sunroof detects an object in its path when
it is clos ing, it w ill open again automatically. In
this case, you can close the roof w ith the power
emergency closing function.
.. Within five seconds after the sunroof opens au
tomat ically, pull the switch unt il the roof
closes.
Panorama glass roof
Opening/closing the roof
Applies to: vehicles with panorama glass roof
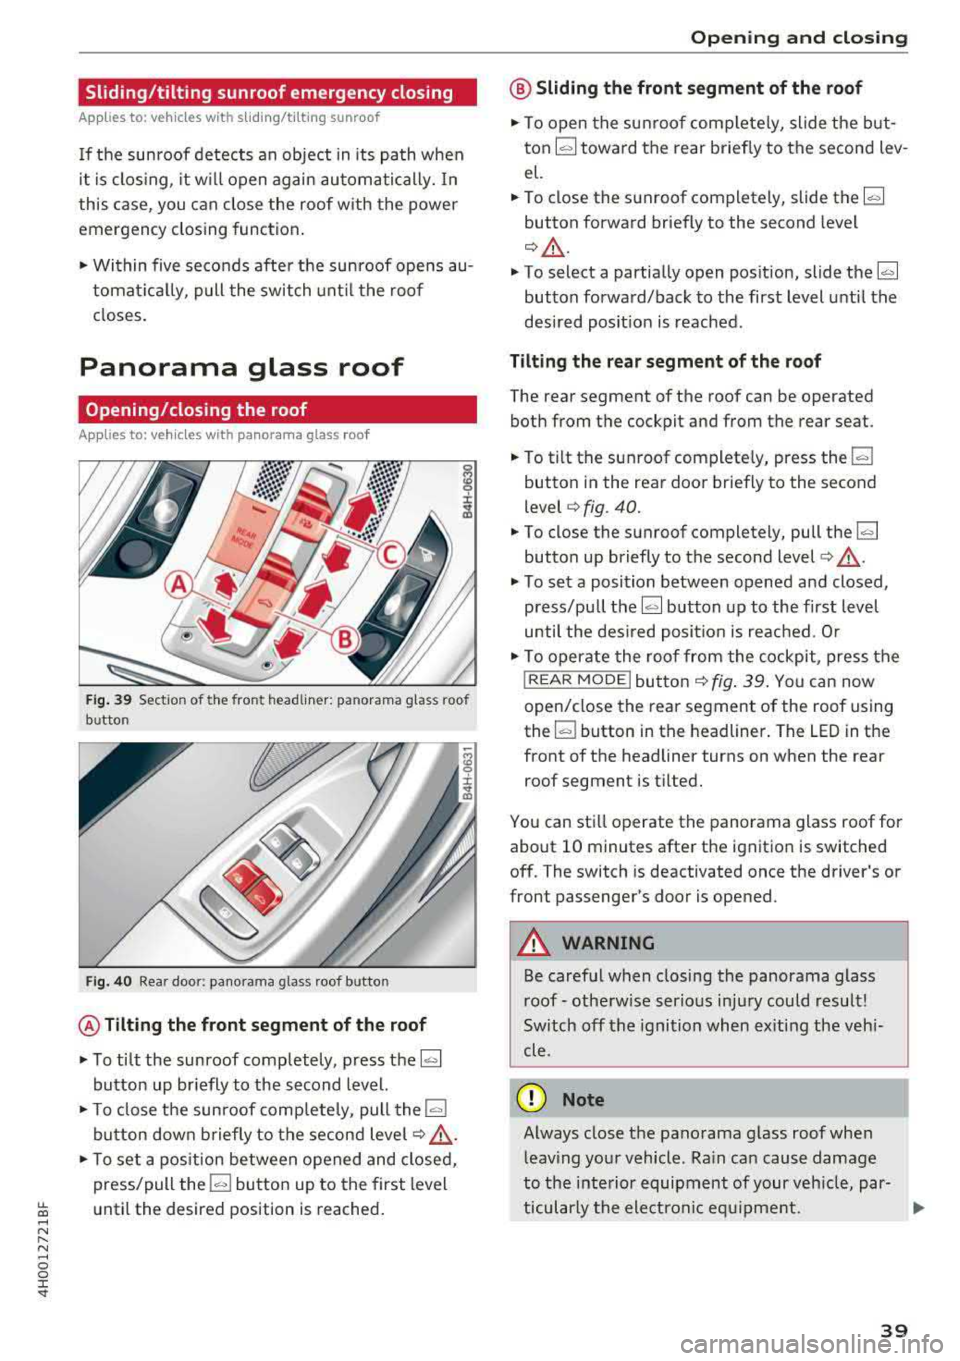
Fig. 39 Sect io n of the front headliner: pa norama g lass roof
b utton
Fig. 40 Rear door : panorama g lass roof bu tto n
@ Tilting the front segment of the roof
.. To tilt the sunroof completely, press the~
button up briefly to the second level.
.. To close the sunroof comp letely, pull the la.I
button down briefly to the second level¢ ,&.
.. To set a pos ition between opened and closed,
press/pull the
la.I button up to the first level
until the desired position is reached.
Opening and closing
@ Sliding the front segment of the roof
.. To open the sunroof completely, slide the but
ton~ toward the rear briefly to the second lev
el.
.. To close the sunroof completely, slide the ~
button forward briefly to the second level
¢ &_ .
.. To select a partially open position, slide the~
button forward/back to the first level until the
desired posit ion is reached .
Tilting the rear segment of the roof
The rear segment of the roof can be operated
both from the cockpit and from the rear seat .
.. To tilt the sunroof completely, press the l""'I
button in the rear door briefly to the second
level ¢ fig. 40 .
.. To close the sunroof completely, pull the ~
button up briefly to the second level c> A_ .
.. To set a position between opened and closed,
press/pu ll
the~ button up to the first level
until the des ired posit ion is reached . O r
.. To operate the roof from the cockpit, press the
!REAR MODE !button ¢ fig. 39. Yo u can now
open/close the rear segment of the roof using
the~ button in the headliner. The LED in the
front of the headliner turns on when the rear
roof segment is tilted.
You can sti ll operate the panorama glass roof for
about 10 minutes after the ignition is switched
off. The switch is deactivated once the driver's or
front passenger's door is opened .
A WARNING ,_
Be careful when closing the panorama glass
roof
-otherw ise serious injury could result!
Sw itch off the ignition when ex iting the veh i
cle .
(D Note
Always close the panorama glass roof when
leaving your vehicle . Rain can cause damage
to the interior equipment of your vehicle, par-
ticularly the electron ic equ ipment.
.,..
39
Page 42 of 356
Opening and clo sin g
@ Tips
- The panorama roof will on ly open down to
·4°F (·20°).
- To prevent both roof segments from co llid ·
ing with one another, you do not need to
- tilt the rear roof segment if the front roof
segment is already open.
- close the front roof segment if the rear
roof segment is already tilted.
Opening/closing the sunshade
Applies to: vehicles w ith panorama glass roof
© Front sunshade
.,. To open the sunshade completely, slide the G;J
button back to the second level ¢ page 39,
fig. 39 .
.,. T o close the sunshade comp lete ly, sl ide the G;J
swi tch forward briefly to the second level.
.. To se lect a pa rtially open position, slide the l:c.i.l
button to the first level until the sunshade has
reached the desired position.
© Rear sunshade
.,. T o open the sunshade comp lete ly, press the~
button in the rear door briefly down to the sec
ond leve l¢
page 39, fig . 40.
.. To close the sunshade comp lete ly, pull the ~
button up to the second level ¢,& .
.,. To se lect a partially open position, press/pull
the
G;J button to the f irst level until the desired
pos ition is reached. Or
.. To ope rate the sunshade from the cockpit,
press the
I REAR MODEi b utton 9 page 39,
fig. 39.
You can now open/close the rear su n
shade using
th e~ button in the headliner.
A WARNING
Be careful when closing the panorama g lass
roof
-otherwise serious injury could result!
Switch off the ignition when exiting the vehi
cle.
40
Roof segments/sunshade emergency
closing
Applies to: vehicles with panorama glass roof
If the roof segment or s unshade detects an ob
j ect in its path when it is closing, it will open
again automatically . In this case, you can then
close it w ith the power emergency closing func
tion.
.. Withi n five seconds after the roof segment or
sunshade opens automatically, pull t he switch
until it closes.
Valet parking function
Applies to: vehicles with valet parking function
The valet parking function protects the luggage
compartment from unauthorized access.
F ig. 4 1 Glove compartment: valet parking functio n button
You can switch the va let parking f unction on
whe n someo ne else is parking your vehicle. When
the function is switched on, the vehicle can be
driven, locked and unlocked using the master
key, but access to the luggage compartment is
not permitted.
.. Remove the integrated mechanical key
Qpoge 29 .
.. Open the glove compartment.
.,. Press the !VALET I button to switch the valet
parking function on. The LED in the button
t u rns on.
.,. Lock the glove compartment with the mechani
cal key .
.,. O nl y give the remote cont ro l key to the se rvice
personnel parking your car and keep the
re-
moved mechanical key wit h you. ..,.
Page 43 of 356
lL t:0 ....
"' ......
"' .... 0 0 :c '
va let parking function is switched on :
-1""'1 button in the driver's door
-I ""' I button on the remote control key
- Handle in the rear lid
When the valet parking function is switched on,
the message
Valet parking activated appears in
the instrument cluster display when you switch
the ignition on.
Garage door opener (Homelink)
Description
Ap plies to: vehicl es with garage door opener (Homeli nk)
Fig. 42 Garage door opene r: examples o f usage for differ
ent systems
W ith the garage door opener (Homel ink), you
can activate systems such as the garage doors,
security systems or house lights from ins ide your
vehicle. Three buttons are integrated in the head
liner that can be programmed to up to three re
mote controls.
To be able to operate systems using the garage
door opener, the buttons in the headliner must
first be programmed .
A WARNING
When operating or programming the garage
door opener, make sure that no people or ob
jects are in the area immediately surrounding
the equipment. People can be injured or prop erty can be damaged if struck when closing.
Opening and closing
(D Tips
-For security reasons, we recommend that
you clear the programmed buttons before selling the vehicle.
- For add itiona l information about Homelink,
visit www.homelink.com.
- For an explanation on conformity with the
FCC regulations in the United States and the
Industry Canada regulations, see
¢page 339.
Programming buttons
App lies to: vehicles with garage door opener (Home link)
Fig. 43 Headliner: controls
You can program both fixed code and rolling code
systems using this procedure.
Programming/reprogramming buttons
.. Switch the ignit ion on.
.. Press and hold the button in the headliner that
you would like to program for at least 10 sec
onds. Or
.. Select: ! CAR ! function button> Car systems
control button > Vehicle settings > Garage
door opener > Program garage door opener.
.. Follow the instr uctions in the Infotainment sys-
tem.
Deleting button programming
The programmed buttons cannot be deleted indi
vidually. They must be deleted all at once. Repro
gram the buttons if necessary .
.. Select: the ICAR !function button> Car systems
control button > Vehicle settings > Garage
door opener > Clear program settings
> Yes.
41
Page 44 of 356
Opening and closing
Displaying the version/status /country code
.,. Se lect: ICARI f u n ct io n bu tton> Car systems
contro l bu tton > Vehicle setting s > Garage
door opener
> Version information .
(D Tips
The garage door opene r may nee d to be
synchronized with t he system motor after the
programmin g. Follow the manufacture r's in
structions for doing this.
Operation
Applies to: ve hicles w ith garage doo r opener (Homeli nk)
Req uirements: the button in the headliner must
be programmed
c> page 41 and the vehicle must
be w it hi n range of the system, such as the garage
door .
.,. Press the button to open the ga rage door. T he
LED @ c> page 41, fig. 43 blin ks or tu rns on .
.,. P ress the b utton again to open the garage
doo r.
(0 Tips
When opening o r closing the garage door, do
no t press and hold the bu tton longer ten sec
onds o r th e ga rag e door opene r will switch to
pr ogr ammin g mode.
42
Page 45 of 356
lL t:0 .-,
"' ......
"' .-, 0 0 :c "
Exterior Lighting
Switching the headlights on and off
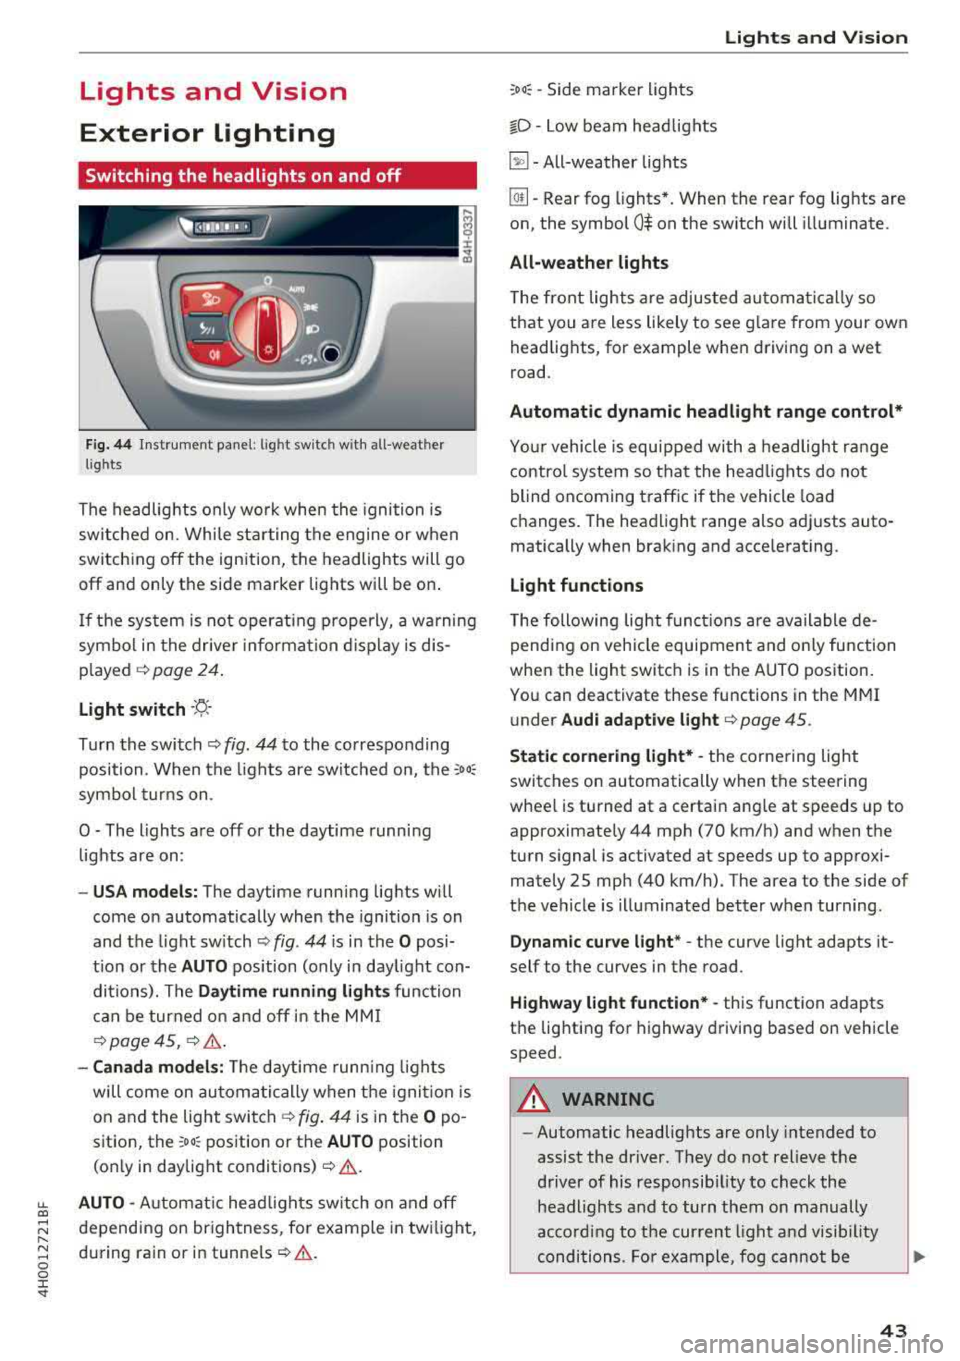
F ig . 44 Instrument panel: l ig ht switc h w ith all -weather
l ig hts
The headlights only wo rk when the ignition is
switched on. While sta rting the engine or when
switch ing off the ign ition, the headlights will go
off and only the side marker lig hts will be on .
I f the sys tem is not operating p roperly, a w arning
symbol in the dr ive r informa tion d isplay is dis
p layed .::>
page 24.
Light switch --r;_-
T u rn the switch .::> fig. 44 to the co rresponding
position . When the lights are switched on, the
:o o:
sym bol turn s on .
0 - The lights a re off or the daytime runni ng
lights are on :
-USA models: The daytime running lig hts will
come on automatically when the ignition is on
and the light sw itch .::>
fig. 44 is in the O posi
t ion or the
AUTO position (only i n day light con
di tions). The
Daytime running lights function
c an be turned o n and off i n the MM I
¢ page 45, i=> &..
-Canada model s: The dayt ime runn ing lights
will come on au toma tic ally when the igni tion is
on and the light swi tch .::>
fig. 44 is in the O po
s ition, the
:oo: pos ition or the AUTO position
(o nly in daylig ht
conditions) .::>&. .
AUTO -Automat ic head lig hts sw itch on and off
depend ing on br ightness, for example in tw ilight,
d uring rain or in
tunne ls ¢ &. .
Lights and V ision
:oo: -Side marker ligh ts
io -Low beam head lights
~ -All-weather lig hts
lw -Rear fog lights*. When the rear fog lights are
on, the symbol
0$ on the sw itch will i lluminate.
All-weather lights
The front lights are adjus ted au toma tica lly so
that you are less likely to see g lare from your ow n
head lig hts, for example when driving on a wet
road.
Automatic dynamic headlight range control*
Yo ur vehicle is equ ipped with a headlight r ange
contro l system so tha t the head lig hts do not
blind oncoming t raffic if the vehicle load
changes . T he hea dlight range also adj usts auto
matically when brak ing and acce lerating .
Light functions
The following light funct io ns are available de
pending on veh icle equipment and o nly fu nction
whe n the light switc h is in t he AUTO position.
You can deactivate these functions in the MMI
under
Audi adaptive light ¢ page 45.
Static cornering light* -the corne ring light
switches on automatically when the steering
wheel is turned at a certai n angle at s peeds up to
approximately 44 mph (70 km/h) and when the
turn s ignal is activated at speeds up to approxi
mately 25 mp h (40 km/h) . The area to t he side of
t h e ve hicle is illuminated better w hen turning.
Dynamic curve light * -the curve light adapts it
self to the curves in the road .
Highway l ight function* -this function adapts
t h e lig hting for highway driving based on vehicle
speed .
A WARNING ~ --Automatic headlights are only intended to
assist the driver. They do no t relieve the
driver of his responsib ility to check the
headligh ts and to turn them on manually
ac co rding to t he cur rent light a nd vis ib ili ty
conditions . Fo r example, fog cannot be
43
Page 46 of 356
Lights a nd Vis ion
detected by the light sensors. So a lways
switch on the headlights
§.D under these
weather conditions and when driving in the
dark .
- Crashes can happen when you cannot see
the road ahead and when you cannot be
seen by other motorists . Always turn on the
headlights so that you can see ahead and so
that others can see your
car from the back.
- The rear fog lights should only be turned on in accordance with traffic regulat ion, as the
lights are bright for following traffic.
- Please observe legal regulations when using
the light ing systems described .
@ Tips
-The light sensor* for automatic dynam ic
headlight range control* is located in the
rear view mirror mount . You should there
fore not apply any st ickers to the w indshield
i n this area in order to prevent malfunctions
or fail ures .
- In the event of a ligh t sensor malfunct ion,
the driver is not ified in the instrument clus
ter
d isplay~ page 25.
- You w ill hear a wa rning tone if you open the
driver door when the exter ior lights are
switched on .
- In cool or damp weather, the inside of the
headlights, turn s ignals and tail lights can
fog over due to the temperature difference between the inside and outside . They will
clear short ly after switching them on . This
does not affect the service life of the light
i ng .
44
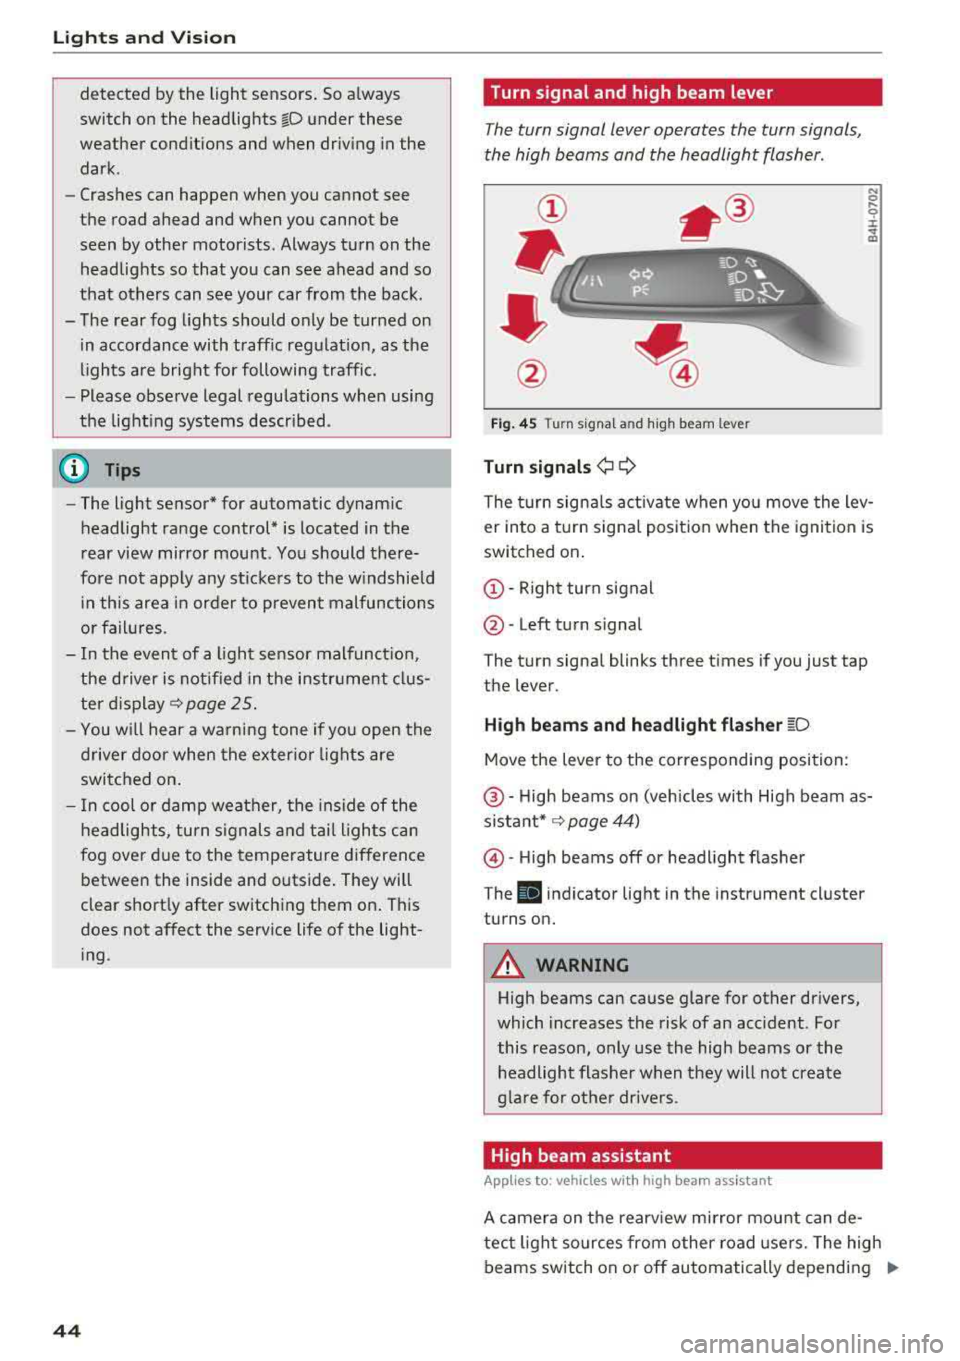
Turn signal and high beam lever
The turn signal lever operates the turn signals,
the high beams and the headlight flasher .
Fig. 45 T urn signa l an d high beam leve r
Turn signa ls¢ Q
N 0 .... 0 :i:
"' m
The t urn signa ls act ivate when you move the lev
er into a turn signa l position when the ignit ion is
switched on.
(D -Right turn signal
@ -Left turn signal
The turn signa l blinks three times if you just tap
the lever.
H igh be ams and h eadlight fla sh er ~D
Move the lever to the corresponding position:
@ -High beams on (vehicles with High beam as
sistant* ~ page 44)
@-High beams off or headl ight flasher
T he
El indicator light in the instrument cluster
turns on.
A WARNING
High beams can cause glare for other drivers,
which increases the risk of an accident . For
this reason, only use the high beams or the
headlight flasher when they will not create
g la re for othe r drive rs .
High beam assistant
App lies to: vehicles with high beam ass istant
A camera on the rearv iew mirror mount can de-
tect light sources from other road use rs. The high
beams switch on or off automatically depending
IJI>
Page 47 of 356
u. co .... N
" N .... 0 0 :c '
coming vehicles, the vehicle speed and other en
vironmenta l and traffic conditions.
Activating high beam assistant
Requirement: the light switch must be set to the
AUTO position and the high beam assistant must
be switched on in the Infotainment system
~ page 45 .
.,. To activate the high beam assistant , tap the
l ever forward @. T he
II ind icator light ap
pears in the instrument cluster display and the
high beam headlights are switched on/off auto
matically. The
ii indicator light also turns on if
the high beams are switched on.
Switching the high beams on/off manually
If the high beams did not switch on/off automat
ica lly as expected, you may switch them on or off
manually instead:
.,. To switch the high beams on manually, tap the
lever forward @. T he
ii indicator light turns
on .
.,. To switch the hig h beams off manua lly, pull the
lever
back @. The high beam assistant is deac
t ivated.
Operating the headlight flasher
.,. T o operate the headlight flasher when the high
beam assistant is activated and high beams are
switched off, pull the lever
back @. The high
beam assistant rema ins active.
Messages in the instrument cluster display
Headlight assist: System fault
Drive to an authorized Aud i dea ler or authorized
Audi Service Fac ility immediately to have the
malfunction corrected. You can still switch the
high beams on or off manually.
Headlight assist: Unavailable No camera view
The camera view is blocked, for example by a
sticker or debris .
The sensor is located between the interior rear
view mirror and the windshield. Do not place any
stickers in this area on the windshield.
Lights and Vision
A WARNING
--
High beam assistant is only intended to assist
the driver. The driver is still respons ible for
controlling the headlights and switching
them manually depend ing on light and visibil
it y conditions. It may be necessary to operate
them manually in situations such as:
- I n adverse weather conditions such as fog,
heavy rain, blowing snow or spraying water.
- On roads where oncom ing traffic may be
pa rtiall y obscured, such as expressways.
- When there are road users that do not have
sufficient lighting, such as b icyclers or
vehicles with dirty tail lamps.
- I n tight curves and on steep hills.
- In poorly lit areas.
- With strong reflectors, such as signs.
- If the area of the w indshield near the sensor
is fogged over, dirty, icy or covered with a
sticker .
Adjusting the exterior lighting
The functions are adjusted in the Infotainment
system.
.,. Select: I CAR ! function button > Car systems
control button > Vehicle settings > Exterior
lighting .
Automatic headlights
You can adjust the following sett ings in the Au
tomatic headlights
menu:
Headlights activation time -you can adjust if the
headlights switch on
Early, Medium or Late ac
cording to the sensitivity of the light sensor.
Auto-dimming high beams* -you can switch the
high beam assistant*
On and Off .
Daytime running lights*
USA models :
the daytime running lights can be
switched on/off. Select
On or Off.
Canada models:
this function cannot be switched
off. They activate automatically each time the ig -
nition is switched on .
IIJ>-
45
Page 48 of 356
Lights and Vision
Coming home, Leaving home
The coming home function illuminates the area
outside the vehicle when you turn the ignition off
and open the driver's door. To turn the function
on, select
Lights when leaving car > On.
The leaving home illuminates the area outside
the vehicle when you unlock the vehicle. To turn
the function on, select
Lights when unlocking
car> On.
The coming home and leaving home functions
only operate when it is dark and the light switch
is in the
AUTO position.
Emergency flashers
~ ~--·I
~ :cc-~--t
Fig. 46 Center console: emergency flasher button
The emergency flashers makes other drivers
aware of your vehicle in dangerous situations.
• Press the ~ button to switch the emergency
flashers on or off.
You can indicate a lane change or a turn when the
emergency flashers are switched on by using the
turn signal lever. The emergency flashers stop
temporarily.
The emergency flashers also work when the igni
tion is turned off.
46
Interior lighting
Front and rear interior lighting
Fig. 47 Front headliner: interio r light ing contro ls
Fig. 48 Rear headl iner : Reading light
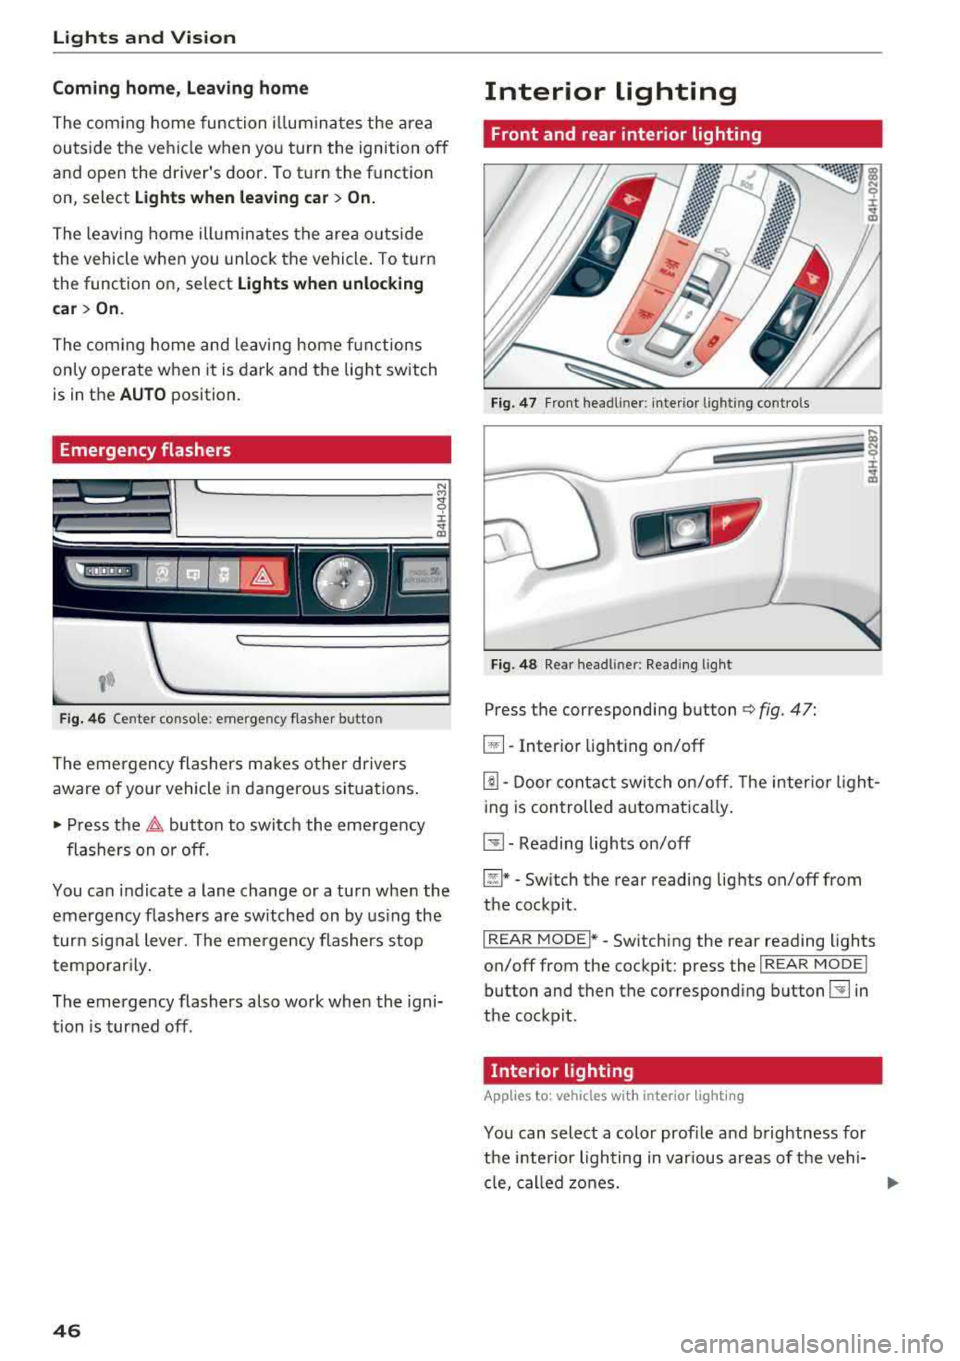
Press the corresponding button ¢ fig. 47:
~ -Interior lighting on/off
[!J. Door contact switch on/off . The interior light
ing is controlled automatically.
~-Reading lights on/off
~* -Switch the rear reading lights on/off from
the cockpit.
I REAR MODEi* -Switching the rear reading lights
on/off from the cockpit: press the
I REAR MODE !
button and then the corresponding button~ in
the cockpit.
· Interior lighting
App lies to: vehicles wit h interior light ing
You can select a color profile and brightness for
the interior lighting in various areas of the vehi- cle, called zones.
ll>
Page 49 of 356
lL t:0 ....
"' " "' .... 0 0 :c '
.,. Select in the M MI: !CAR ! func tion button > Car
sy stems
cont rol button > Vehicle setting s > In
terior lighting
> On.
Adjusting the brightness /turning off
You can adj ust the brightness for the four zones
Front top , Front footwell , Rear top and Rear
footwell
or fo r All zone s at the same t ime .
.,. In the I nfota inment system, se lect: ICA Rlfunc
t io n button >
Car system s control b utton > Ve
hicle settings
> Interior lighting > Brightnes s .
.,. Turn the knob to the desi re d veh icle area and
press the knob . The bar that appears indicates
t h e se lected br ightness .
... To increase or red uce the br ightness, turn the
knob and p ress it.
Selecting a color profile*
You can se lect from the Ivory , Pol ar and Rub y/
Polar
color profi les .
.,. Se lect in the M MI: !CAR I func tion button> Car
systems
cont rol b utton > Vehicle s etting s > In
terior lighting
> Color profile.
The interior lig hti ng turns on when this function
i s t urned on in the Info tainmen t sys tem, and the
l ow be ams are tu rned on whe n the ign ition is
switched on.
(D Tips
T he set tin gs are autom atically store d and as
sig ned to the remo te con tro l key th at is i n
use.
Lights and V ision
Instrument lighting
The brightness of the illumination for the instru
ments, display and head-up display* can be ad
justed .
Fig. 4 9 Instrume nt illumin ation
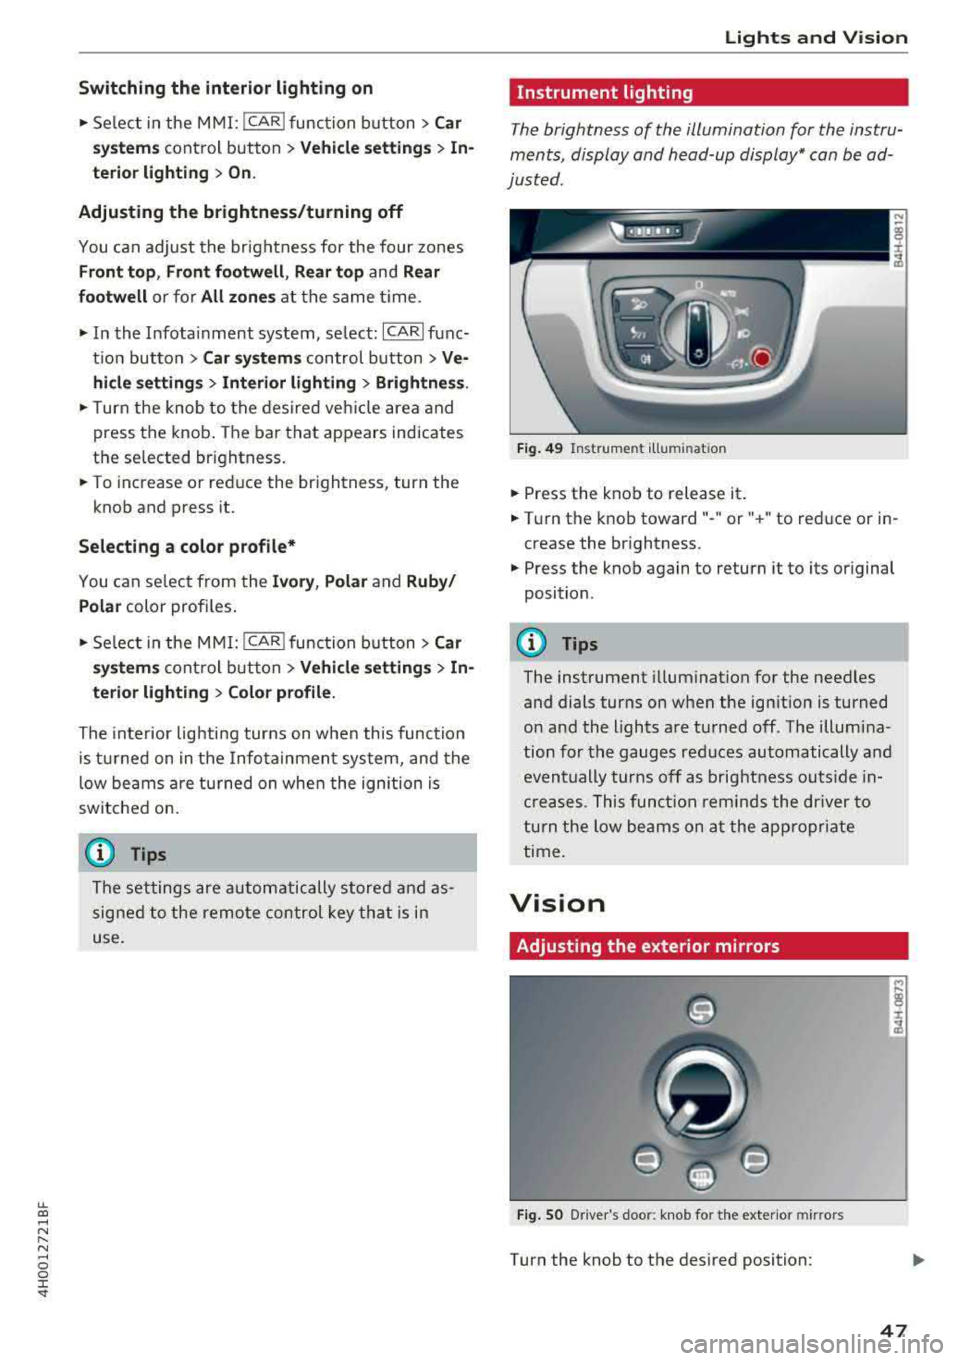
... Press the knob to release it .
... Tur n the knob toward" -" or" +" to reduce or in
crease the br ightness.
... P ress the knob again to return it to its or iginal
position .
(D Tips
The instrument illum ination for the needles
and dials turns on when the ign ition is turned
o n and the lights are tu rned off . The illum ina
tion for the gauges red uces automatically and
even tually turns off as brig htness ou ts ide in
cre ases. T hi s f unct ion remind s the dr ive r to
t urn the low beams on at the app ro priate
time.
Vision
Adjusting the exterior mirrors
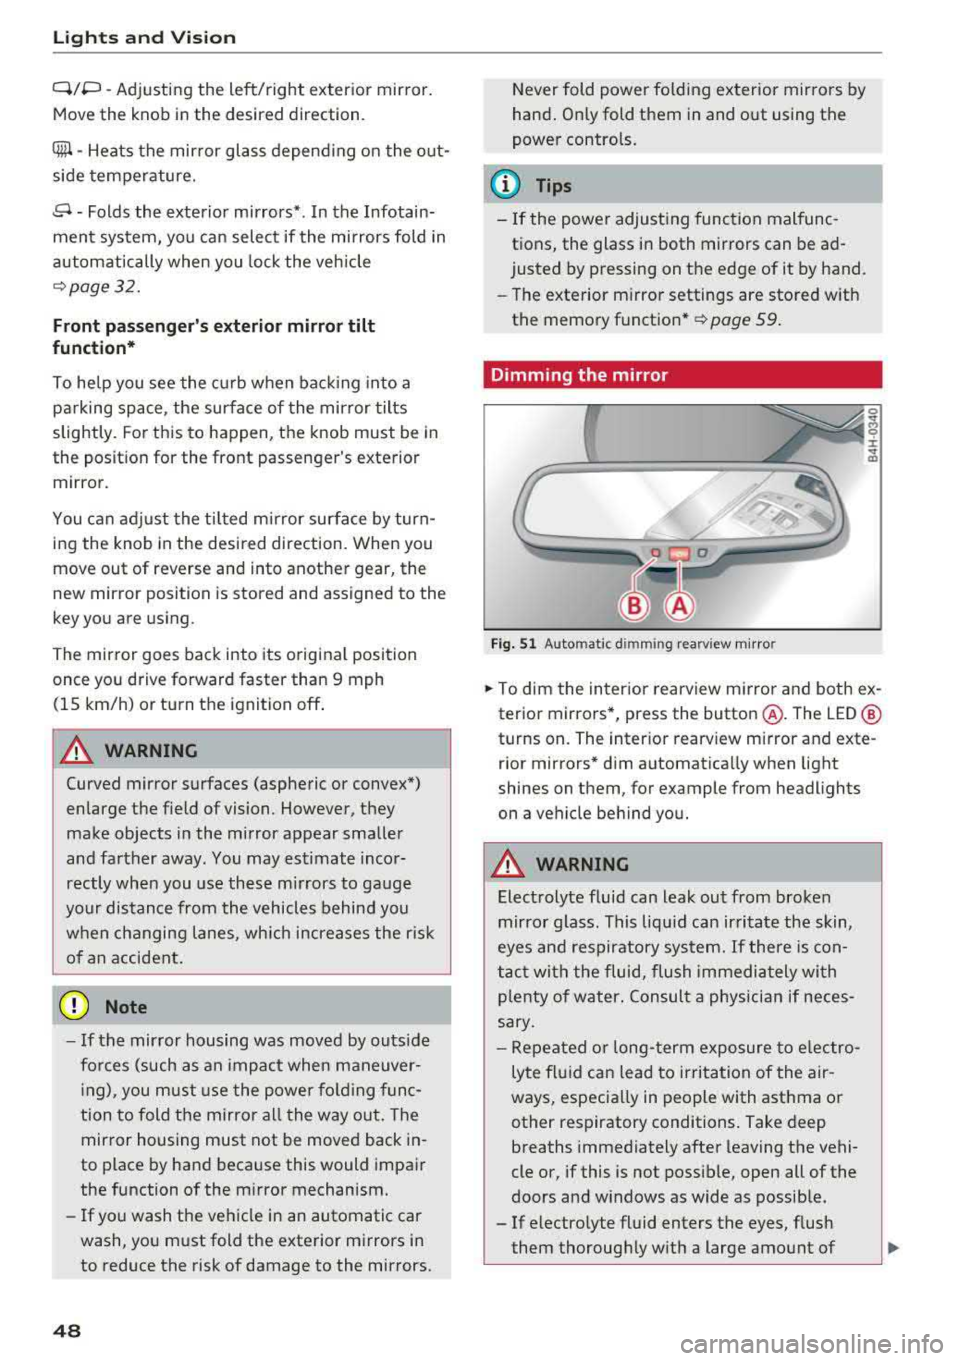
Fig. SO Driver 's doo r: k nob fo r the exter io r mir rors
Turn the knob to the des ired position:
47
Page 50 of 356
Lights and Vision
Q/P -Adjusting the left/right exterior mirror.
Move the knob in the desired direction.
4lll -Heats the mirror glass depending on the out
side temperature.
8 - Folds the exterior mirrors* . In the Infotain
ment system, you can select if the mirrors fold in
automatically when you lock the vehicle
¢page 32.
Front passenger's exterior mirror tilt
function*
To help you see the curb when back ing into a
parking space, the surface of the mirror tilts
slightly. For this to happen, the knob must be in
the position for the front passenger's exterior mirror.
You can adjust the tilted mirror surface by turn
ing the knob in the desired direction. When you
move out of reverse and into another gear, the
new mirror position is stored and assigned to the
key you are using.
The mirror goes back into its original position
once you drive forward faster than 9 mph
(15 km/h) or turn the ignition off .
A WARNING
Curved mirror surfaces (aspheric or convex*)
enlarge the field of vision. However, they
make objects in the mirror appear smaller
and farther away . You may estimate incor
rectly when you use these mirrors to gauge
your distance from the vehicles behind you
when changing lanes, which increases the risk
of an accident.
(D Note
- If the mirror housing was moved by outs ide
forces (such as an impact when maneuver
in g), you must use the power folding func
tion to fold the mirror all the way out. The
mirror housing must not be moved back in-
to place by hand because this would impair
the function of the m irror mechanism.
-If you wash the vehicle in an automatic car
wash, you must fold the exterior mirrors in
to reduce the risk of damage to the mirrors.
48
Never fold power fold ing exterior mirrors by
hand . Only fold them in and out using the
power controls.
(D Tips
-If the power adjusting function malfunc
tions, the glass in both mirrors can be ad
justed by pressing on the edge of it by hand.
-The exterior mirror settings are stored with
the memory function* ¢
page 59.
Dimming the mirror
Fig. 51 Automat ic d imming rearv iew m irro r
0
~ 0 :i: ~ m
.. To dim the interior rearview mirror and both ex
terior mirrors*, press the button @. The LED @
turns on. The interior rearview mirror and exte
rior mirrors* dim automatically when light
shines on them, for example from headlights
on a vehicle behind you.
A WARNING
Electrolyte fluid can leak out from broken
mirror glass. This liquid can irritate the skin,
eyes and respiratory system. If there is con
tact with the fluid, flush immediately with
p lenty of water . Consult a physician if neces
sary.
-
-Repeated or long-term exposure to electro
lyte fluid can lead to irritation of the air
ways, especially in people with asthma or
other respiratory conditions. Take deep
breaths immediately after leaving the vehi
cle or, if this is not possible, open all of the
doors and w indows as wide as possible.
-If electrolyte fluid enters the eyes, flush
them thoroughly with a large amount of