seat AUDI Q7 2012 Owner´s Manual
[x] Cancel search | Manufacturer: AUDI, Model Year: 2012, Model line: Q7, Model: AUDI Q7 2012Pages: 342, PDF Size: 86.42 MB
Page 85 of 342
Lo adin g
"' Fo ld the center seatback forward
r=> page 79.
"' Remove the sack from the luggage com
partment and unfold it.
"' Place the empty sack over the lowered seat
back so that the end wi th the z ip fastener is
i n the luggage compartment.
"' Load objects from the luggage compart
ment into the sk i sack
r=> &, .
Securin g
"' Insert the ski sack strap @ r=> fig. 94 into
the center seat belt buckle @.
"' Pull the securing strap t ight by the free end
of the belt @.
"' Vehicles with 6 seats* : The ski sack has two
straps with hooks on the unders ide . Hang
the hooks into the luggage compartment by
the rear fastening eyes and pull the secur ing
strap tight by the free end @.
Storage
"' Re lease the securing strap for the sack .
"' Pull the sack to the rear over the folded
down seatback.
"' Raise the seatback unti l it is securely latch
ed .
"' Fo ld up the empty sack.
"' Stow the ski sack in the luggage compart
ment so that it cannot slide around.
_&. WARNING
-
- The ski sack is intended only for the
transportation of skis, snowboards and
other light objects. To reduce the risk of
serious persona l injury never transport
heavy or po inted ob jects in the ski sack .
- When bra king rapidly o r during an acci
dent the load cou ld be displaced and
ca use inj ury to occupants.
- Sharp edges on the load must be cove red
for protect ion. Always fas ten the belt
t igh tly around the sack and its contents
r=> fig. 94. S
eat s an d sto rage 8 3
(D Tips
Never stow the ski sack away if it's wet or
damp (for examp le, snow me lting from
skis). Let it dry complete ly before you stow
i t away.
Roof rack
First things first
A roof rack can be fitted to carry additional
luggage on the roof.
"' Always read and follow the instructions pro
vided by the roof rack manufacturer when the roof rack system must be installed .
If you are transporting luggage or other ob
jects on the roof, p lease note the following:
- Your vehicle has spec ially designed aerody-
namic roof rails. Only install a roof rack spe
cifically designed for your model. Contact
the nearest authorized Aud i dealer fo r infor
mation on approved modu lar roof racks for
your vehicle.
- These approved roof racks are the bas is for a
complete roof rack system. Additional at
t achments for the basic roof rack a re neces
sary to safely transpo rt luggage, bicycles,
surf boards, skis or sma ll boats. All necessa
ry hardware for these systems is available at
your authorized Audi dealer.
- We recommend that you keep the installa
tion instructions for your roof rack system
together with your Owner's literature in the
veh icle.
When sh ould the roof rac k be remov ed?
- Before going through an automatic car wash
(it is best to ask the car wash operator for
advice) .
- When not in use, to reduce fuel cons ump
tion, wind noise and to guard against theft.
_&. WARNING
- Use of an unapproved roof rack or incor
rect mounting of an approved roof rack
Page 86 of 342
84 Seats and storage
can cause the roof rack or the items at
tached to it to fall off the roof onto the
road.
- Objects falling from the roof of a vehicle
can cause a crash and personal injury.
- Only mount the system between the
markings shown in~
page 84, fig. 95 .
-The roof rack system must be installed
exactly according to the instructions pro
vided.
(D Note
- Your vehicle warranty does not cover any damages to the vehicle caused by using roof racks or mounting structures not
approved by Audi for your vehicle . The
same applies to damage resulting from incorrect roof rack installation .
- Always check the roof rack mountings
and hardware before each trip and dur
ing a trip to make sure everything is se
curely tightened . If necessary, retighten
the mountings and check the entire sys
tem from time to time.
- After mounting a roof rack system, or
when you transport objects on the roof
of your vehicle, the height of the vehicle
is naturally increased. Be careful when
driving under low bridges or in parking
garages for example. This could cause
damage to the load and even the vehicle
itself.
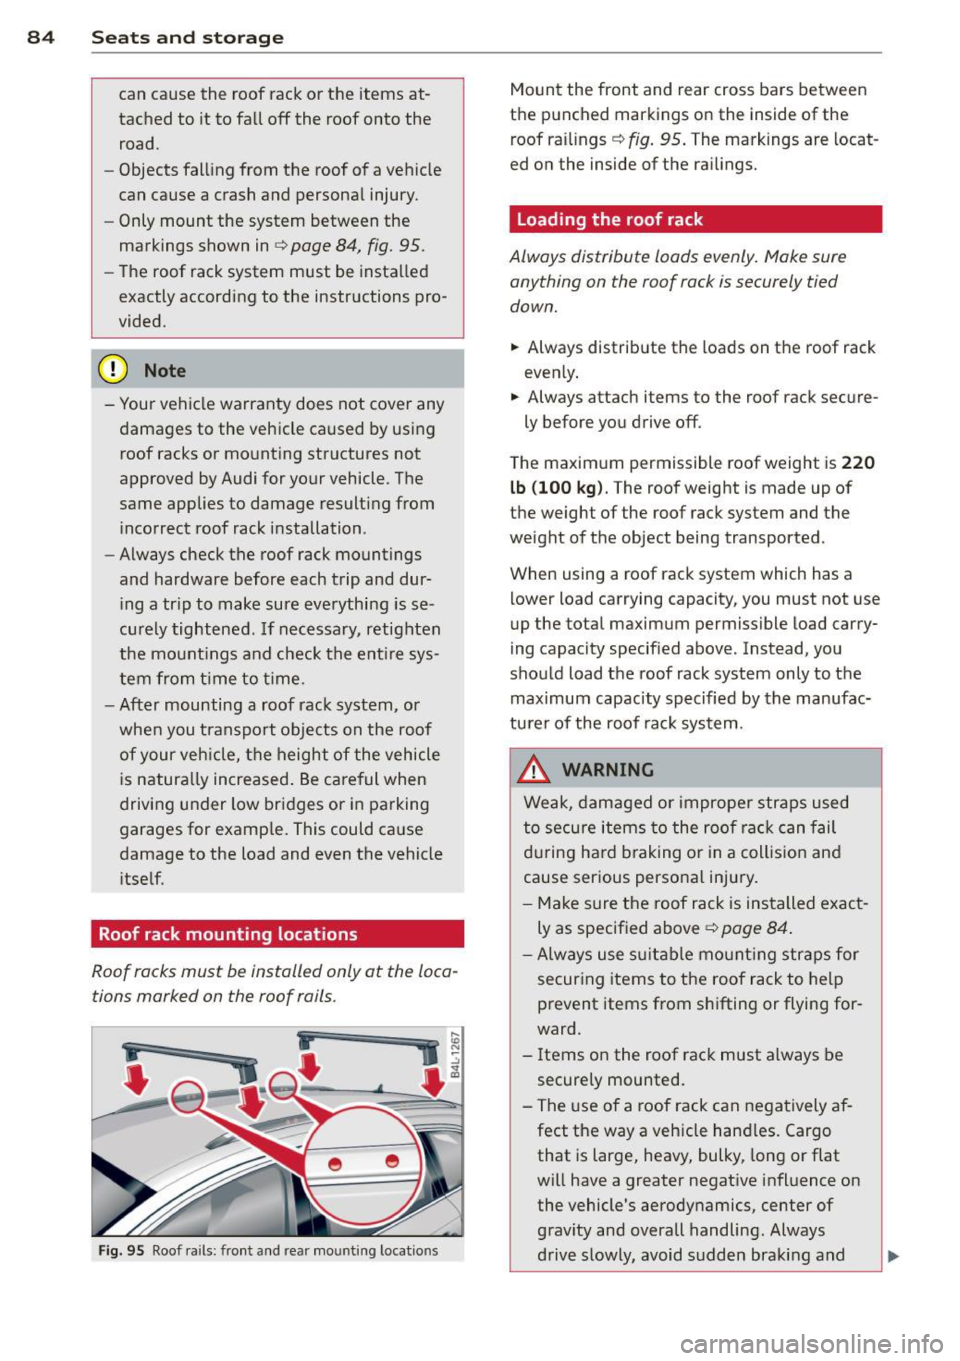
Roof rack mounting locations
Roof racks must be installed only at the loca
tions marked on the roof rails .
i
-
Fig. 95 Roof rails: front and rea r mo unting locatio ns
Mount the front and rear cross bars between
the punched markings on the inside of the
roof railings ~
fig. 95. The markings are locat
ed on the inside of the railings.
Loading the roof rack
Always distribute loads evenly. Make sure
anything on the roof rack is securely tied
down.
.,. Always distribute the loads on the roof rack
evenly .
.,. Always attach items to the roof rack secure -
ly before you drive off .
The max imum permissible roof weight is
220
lb (100 kg).
The roof weight is made up of
the weight of the roof rack system and the
weight of the object being transported .
When using a roof rack system wh ich has a
lower load carrying capacity, you must not use
up the total maximum permissible load carry
ing capacity specified above. Instead, you
should load the roof rack system only to the maximum capacity specified by the manufac
turer of the roof rack system .
.&_ WARNING
Weak, damaged or improper straps used
to secure items to the roof rack can fail
during hard braking or in a collision and
cause serious personal injury.
- Make sure the roof rack is installed exact
ly as specified above~
page 84.
-Always use suitable mounting straps for
securing items to the roof rack to help
prevent items from shifting or flying for
ward .
- Items on the roof rack must always be
securely mounted.
- The use of a roof rack can negatively af
fect the way a vehicle handles. Cargo that is large, heavy, bulky , long or flat
will have a greater negative influence on the vehicle's aerodynamics, center of
gravity and overall handling. Always
drive slowly, avoid sudden braking and .,,.
Page 87 of 342
maneuvers when transporting cargo on
the roof of your vehicle.
- Never exceed the maximum permissible
load carrying capacity of the roof of your
vehicle, the permissible axle weights and
the permissible total weight of your vehi cle¢
page 314, Weights.
CD Note
Make sure that the opened rear lid does
not come in contact with the cargo on the
roof.
@ For the sake of the environment
As a resu lt of the increased wind resist
ance created by a roof rack, your vehicle is
using fuel unnecessarily. So remove the
roof rack after using it.
Cupholder
Front cupholders
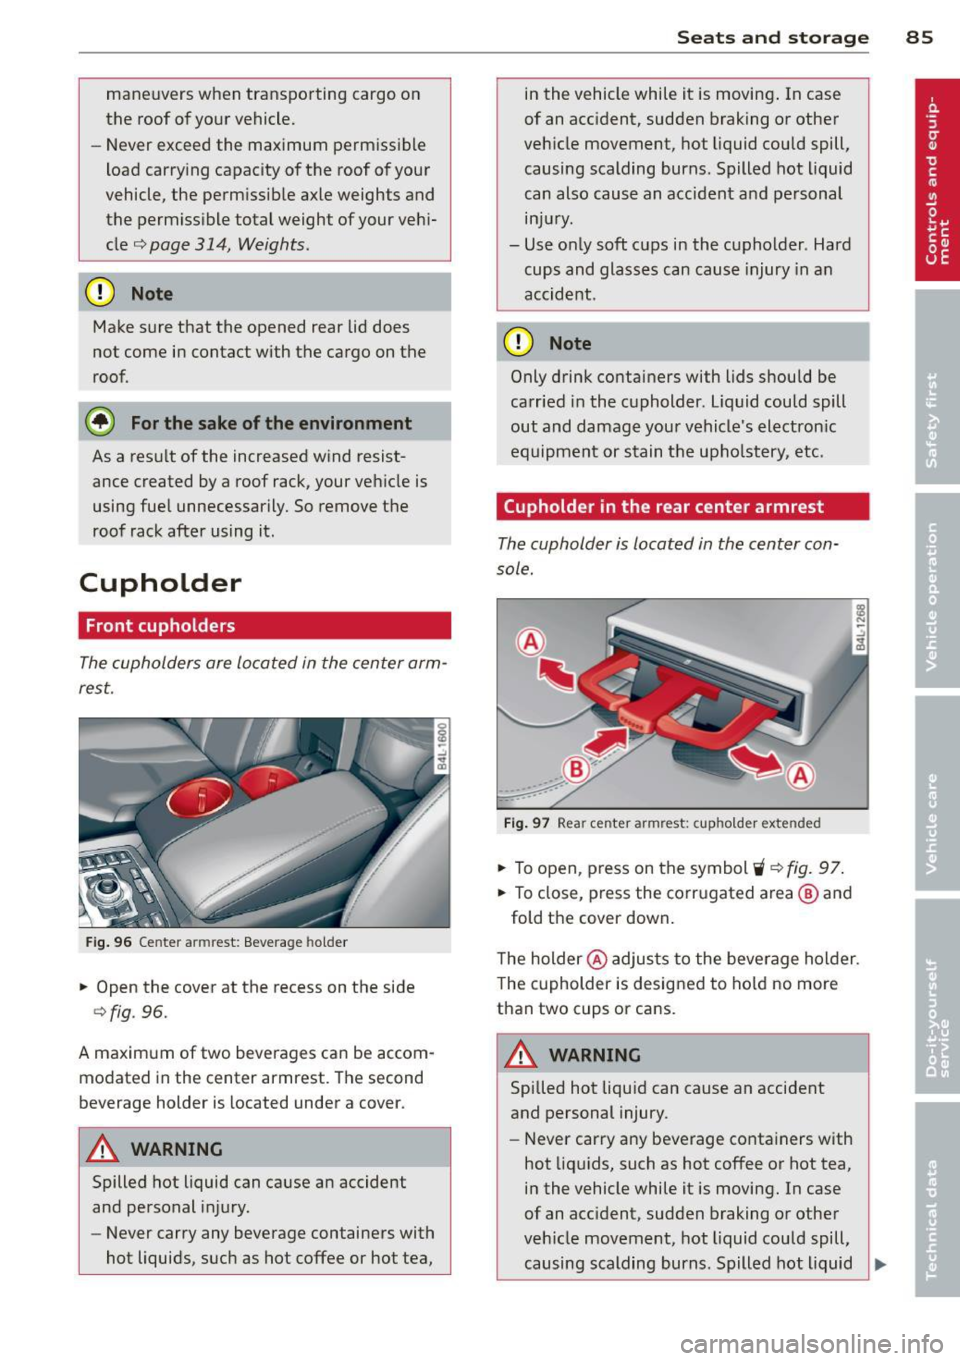
The cupholders are located in the center arm
rest.
Fig. 96 Center armrest: Beverage holder
.. Open the cover at the recess on the side
¢fig. 96.
A maximum of two beverages can be accom
modated in the center armrest. The second
beverage holder is located under a cover.
A WARNING
Spilled hot liquid can cause an accident
and personal injury.
- Never carry any beverage containers with
hot liquids, such as hot coffee or hot tea,
Seats and storage 85
in the vehicle while it is moving . In case
of an acc ident, sudden braking or other
vehicle movement, hot liquid could spill,
causing scalding burns. Spilled hot liquid
can also cause an accident and personal injury.
- Use only soft cups in the cupholder. Hard cups and glasses can cause injury in an
accident.
CD Note
Only drink containers with lids should be
carried in the cupholder. liquid could spill
out and damage your vehicle's electron ic
equipment or stain the upholstery, etc.
(upholder in the rear center armrest
The cupholder is located in the center con
sole.
Fig. 97 Rear center armrest: cupholder extended
.. To open, press on the symbol 'i ¢fig. 97 .
.. To close, press the corrugated area @ and
fold the cover down.
The holder @adjusts to the beverage holder.
T he cupholder is designed to hold no more
than two cups or cans.
A WARNING
Spilled hot liqu id can cause an accident
and personal injury.
-
-Never carry any beverage containers with
hot liquids, such as hot coffee or hot tea,
in the vehicle while it is moving. In case
of an acc ident, sudden braking or other
veh icle movement, hot liquid could spill,
causing scalding burns. Spilled hot liquid ..,.
Page 88 of 342
86 Seats and storage
can also cause an accident and personal
injury .
- Use only soft cups in the cupholde r. Hard
c u ps and g lasses can ca use inj ury in an
acc ident.
CD Note
On ly drink containers with lids should be
carried in the cupho lder. Liqu id could sp ill
out and damage your veh icle's e lectronic
equipment or stain the upholstery, etc.
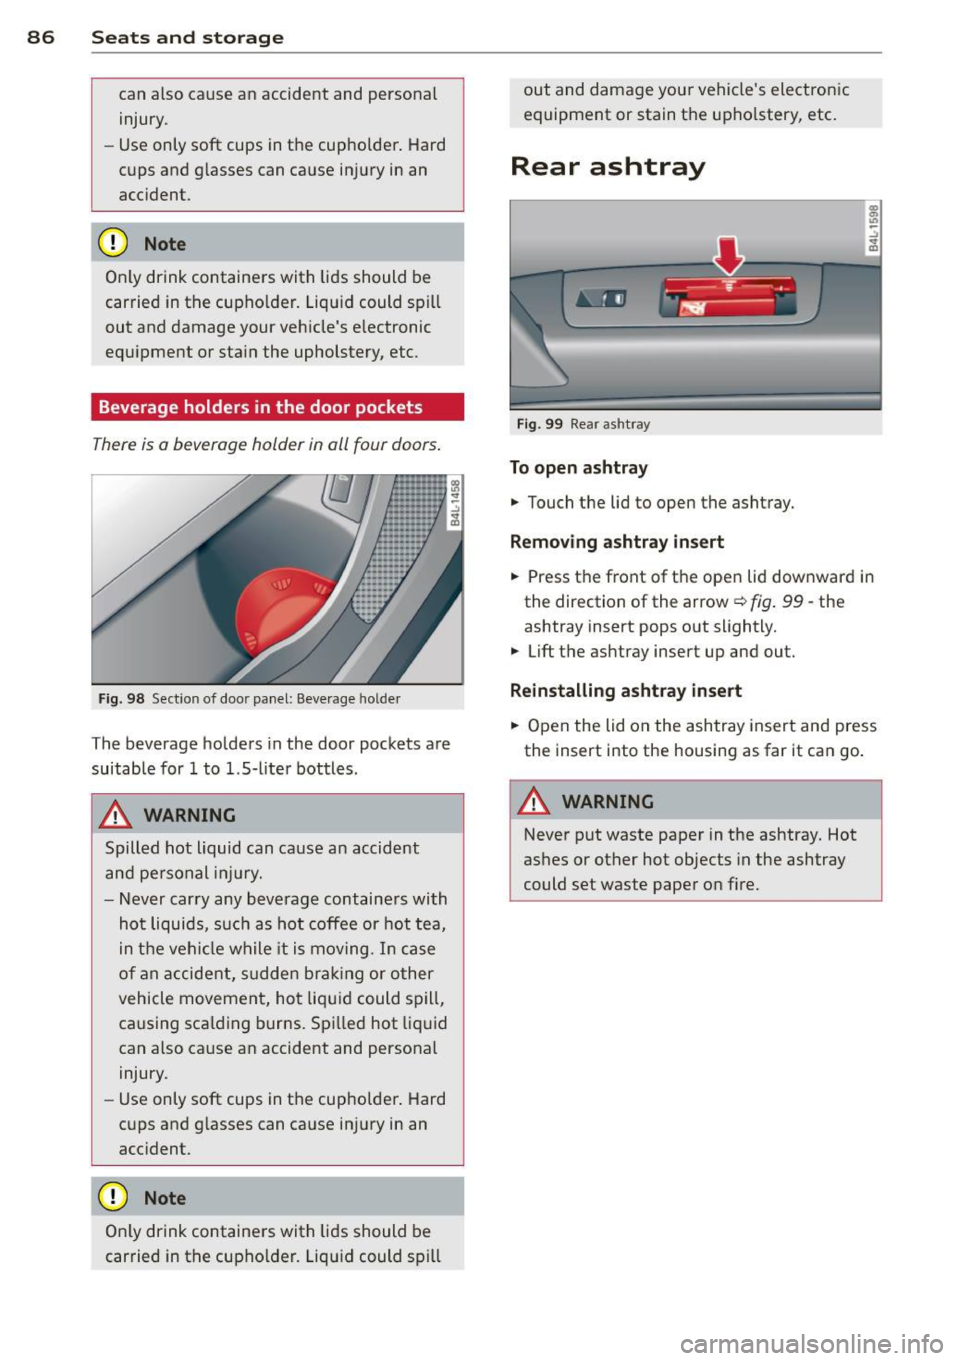
Beverage holders in the door pockets
There is o beverage holder in oll four doors .
Fig. 98 Sect io n of doo r panel: Beve rage holde r
The beverage holders in the door pockets are
suitab le for 1 to 1.5-liter bottles .
A WARNING
Spilled hot liquid can cause an accident
and personal i njur y.
-
-Never carry any beve rage containers with
hot liquids, such as hot coffee or hot tea,
in t he veh icle w hile it is moving. I n case
of an accident, s udden bra king or other
vehicle movement, hot liqu id could spill,
causing sca lding burns. Spi lled hot liq uid
can also ca use an accident and personal
injury .
- Use only soft cups in the cupholde r. Hard
c u ps and g lasses can ca use in jury in an
acc ident.
CD Note
On ly drink containers with lids should be
carried in the cupho lder. Liqu id could sp ill out and damage your vehicle
's elect ron ic
equipment or stain the upho lstery, etc.
Rear ashtray
F ig . 99 Rea r as htray
To open ashtra y
.,. Touch the lid to open the asht ray.
Removing a shtray insert
.,. Press the front of the open lid downward in
the direction of the arrow
c:::> fig . 99 -the
ashtray insert pops out slightly .
.,. Lift the ashtray insert up and out.
Reinstalling asht ray inse rt
.,. Open the lid on the ashtray insert and press
the insert into the housing as far it can go .
A WARNING
Never put waste paper in the ashtray. Hot
ashes or other hot objects in the ashtray
could set waste paper on f ire.
Page 89 of 342
Outlet
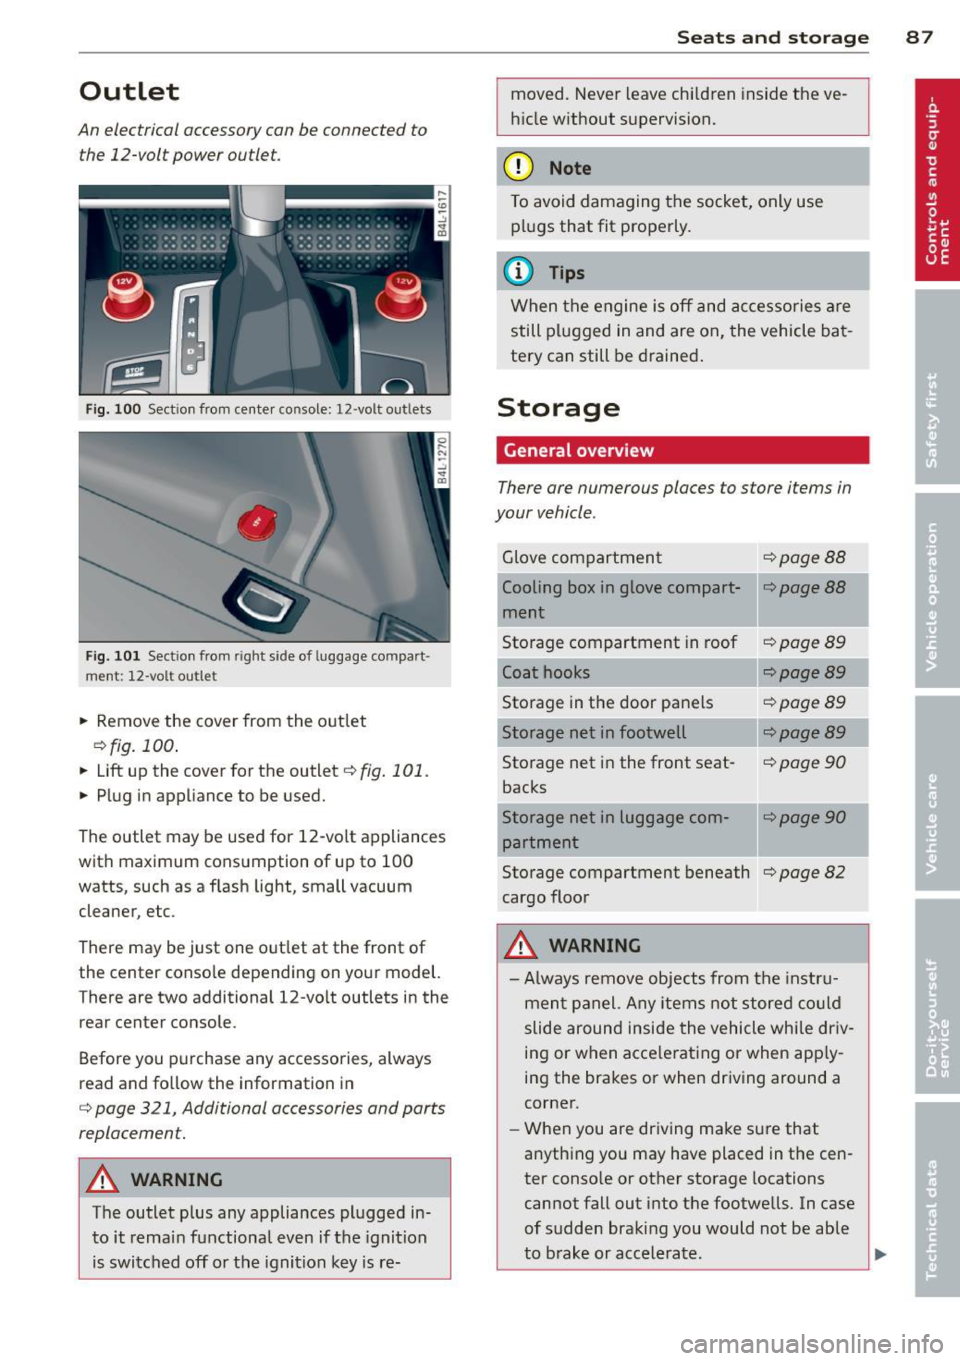
An electrical accessory can be connected to
the 12-volt power outlet.
Fig. 100 Section from center console: 12 -volt outlets
Fig. 101 Sect ion from right side of luggage compart·
ment: 12-volt ou tlet
.. Remove the cover from the outlet
c::>fig. 100.
.. Lift up the cover for the outlet c::> fig. 101.
.. Plug in appliance to be used.
The outlet may be used for 12-vo lt appliances
with maximum consumption of up to 100
watts, such as a flash light, small vacuum
cleaner, etc.
There may be just one out let at the front of
the center conso le depending on your model.
There are two additional 12-volt outlets in the
rear center console.
Before you purchase any accessories, always
read and follow the information in
c:;, page 321, Additional accessories and parts
replacement.
A WARN ING
The outlet plus any appliances plugged in
to it remain functional even if the ignition
is switched off or the ignition key is re-
Sea ts a nd s to rage 87
moved. Never leave chi ldren inside the ve
hicle without supervision.
(D Note
To avoid damaging the socket, only use plugs that fit properly.
@ Tips
When the engine is off and accessories are
still plugged in and are on, the vehicle bat
tery can still be drained.
Storage
General overview
There are numerous places to store items in
your vehicle .
Glove compartment c::>page88
Cooling box in glove compart-c:;.page 88
ment
Storage compartment in roof
c::>page89
Coat hooks <=:>page 89
Storage in the door panels c::>page 89
Storage net in footwell <=:>page 89
Storage net in the front seat-c::> page 90
backs
Storage net in luggage com-
c::>poge90
partment
Storage compartment beneath
c::> page 82
cargo floor
A WARNING
- Always remove objects from the instru-
ment panel. Any items not stored co uld
slide around inside the vehicle while dr iv-
ing or when acce lerating or when app ly-
ing the brakes or when dr iving around a
corner.
- When you are driving make sure that
anything you may have placed in the cen
ter conso le or other storage locations
cannot fall out into the footwells. In case
of sudden braking you would not be able
I
-
to brake or accelerate. Ill>-
Page 90 of 342
88 Seats and storage
-Any articles of clothing that you have
hung up must not interfere with the driv
er's view. The coat hooks are designed
only for lightweight clothing. Never hang any clothing with hard, pointed or heavy
objects in the pockets on the coat hooks .
Dur ing sudden braking or in an a ccident -
especi ally if the airbag is deployed -
these objects could injure a ny passe n
gers inside the vehicle.
Glove compartment
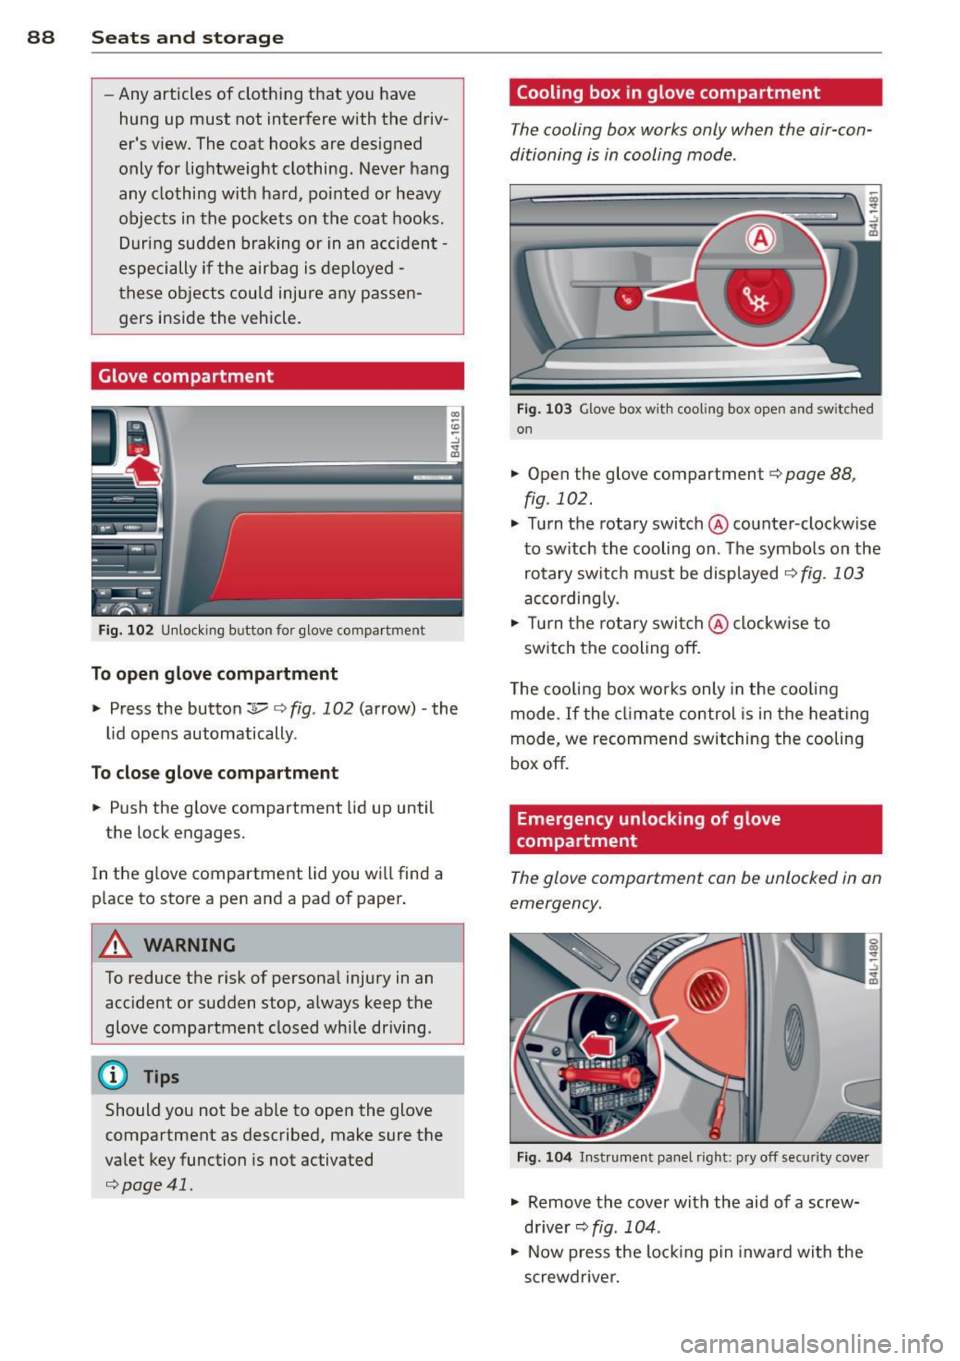
F ig . 102 U nlocki ng button for glove compa rtment
To open glove compartment
• Press the button :::!l.....-¢ fig . 102 (arrow) -the
lid opens automatically .
To close glove compartment
• Push the glove compartment lid up until
the lock engages.
In the g love compartment lid you wi ll find a
p lace to store a pen and a pad of paper .
A WARNING
To reduce the risk of personal injury in an
accident or sudden stop, a lways keep the
glove compartment closed wh ile driving.
@ Tips
Should you not be ab le to open the glove
compartment as described, make sure the
valet key function is not activated
¢page 41.
Cooling box in glove compartment
The cooling box works only when the air-con
ditioning is in cooling mode.
F ig . 1 03 Glove box with coo ling box open and sw itched
on
• Open the glove compartment¢ page 88,
fig. 102.
• Turn the rotary switch @counter-clockwise
to sw itch the cooling on. The symbo ls on the
rotary switch must be displayed
¢ fig . 103
according ly.
• Tur n the rotary swi tch@ clockw ise to
switch the cooling off.
T he cooling box wor ks only in the coo ling
mode. If the cl imate control is in the hea ting
mode, we recommend switching the cooling
box off.
Emergency unlocking of glove
compartment
The glove compartment can be unlocked in an
emergency.
F ig. 10 4 In strument panel right: pry off secur it y cover
• Remove the cover with the aid of a screw
driver~
fig . 104 .
• Now press the lo cking p in inwa rd with the
screwdrive r.
Page 91 of 342
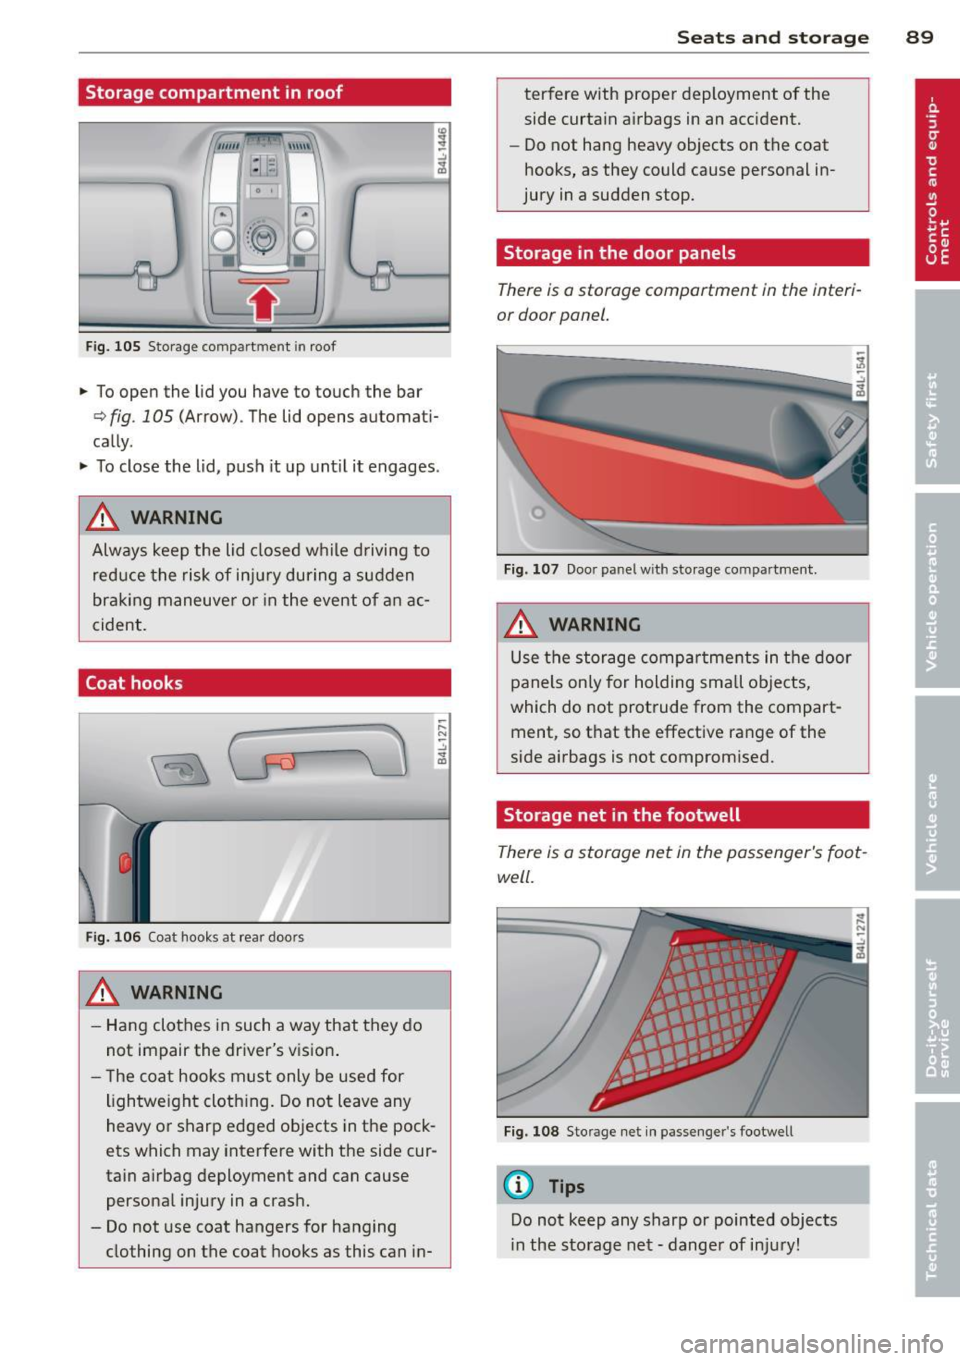
Storage compartment in roof
""'' \\\ \\
:1 :-1
F ig. 105 S torage co mpar tm en t in roof
.. To open the lid you have to touch the bar
¢ fig . 105 (Arrow) . The lid opens automati
cally .
.. To close the lid, push it up unt il it engages .
A WARNING
Always keep the lid closed while driving to
reduce the risk of injury during a sudden
braking maneuve r or in the event of an ac
cident.
Coat hooks
Fig. 106 Coat hooks at rear doors
A WARNING
- Hang clothes in such a way that they do
not impair the driver's vision .
- The coat hooks must only be used for
lightwe ight cloth ing. Do not leave any
heavy or sharp edged objects in the pock
ets which may interfere with the side cur
tain airbag deployment and can cause
persona l injury in a crash.
- Do not use coat hangers for hanging
clothing on the coat hooks as this can in-
;::: N ~ -" "' ID
Seats and storage 89
terfere with proper deployment of the
side curtain a irbags in an acc ident.
- Do not hang heavy objects on the coat
hooks, as they could cause personal in
jury in a sudden stop.
Storage in the door panels
There is a storage comportment in the interi
or door panel.
Fig. 107 Door pa nel w it h sto rage co mpartment.
A WARNING
Use the storage compartments in the door
panels only for holding sma ll objects,
which do not protrude from the compart
ment, so t hat the effective range of the
side airbags is not compromised.
Storage net in the footwell
There is a storage net in the passenger's foot
well.
Fig. 108 Storage net in passenge r's footwell
(D Tips
Do not keep any sharp or pointed objects
in the storage net - dange r of injury!
Page 92 of 342
90 Seats and storage
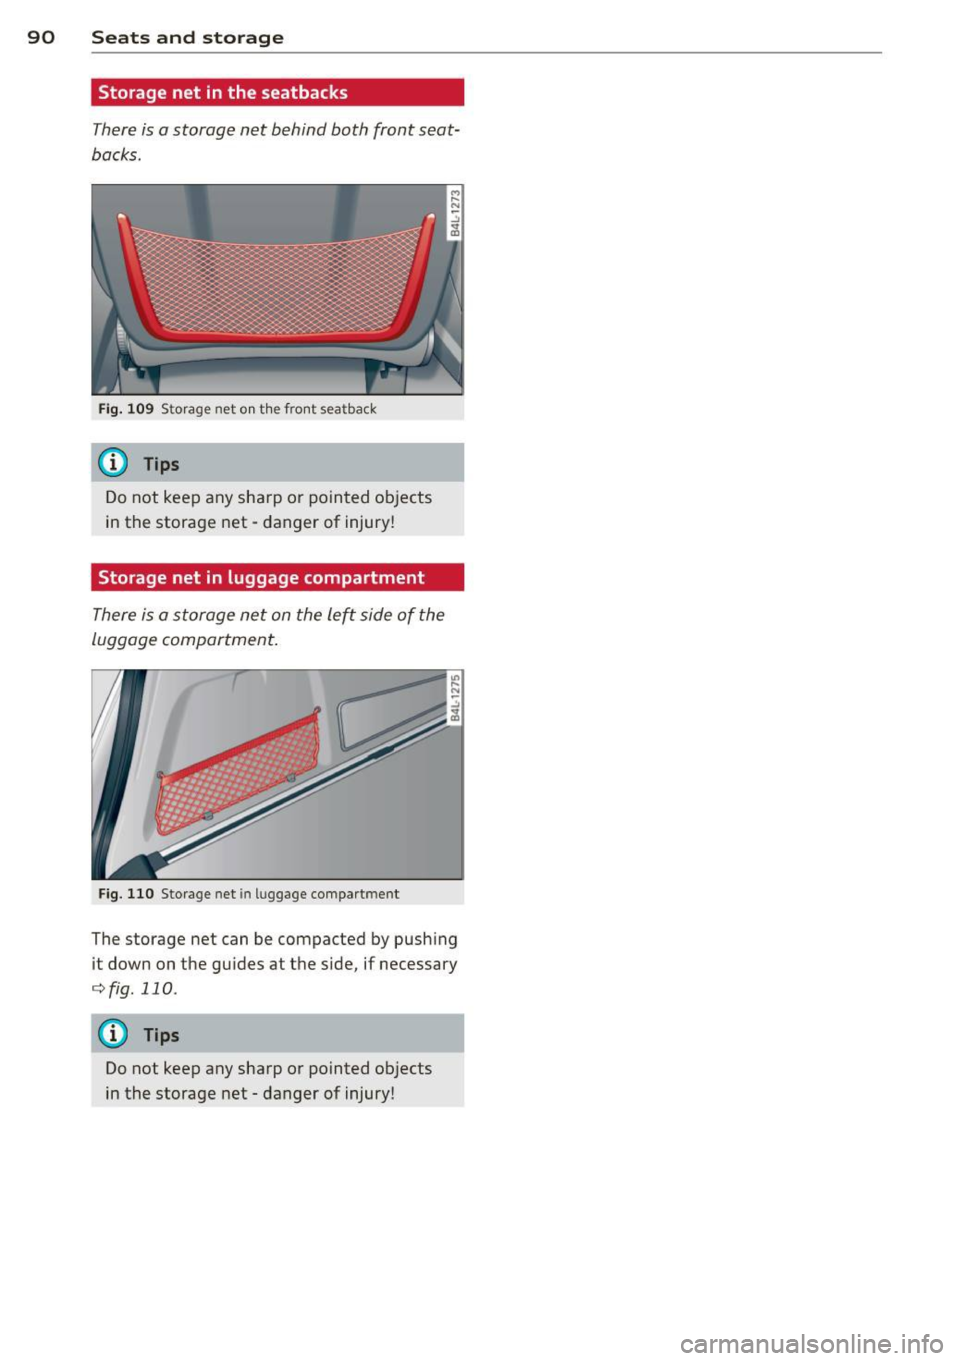
Storage net in the seatbacks
There is a storage net behind both front seat
backs.
Fi g. 10 9 Storage net on th e front seatback
@ Tips
Do not keep any sha rp o r pointed objects
in the storage net -danger of injury!
Storage net in luggage compartment
There is a storage net on the le~ side of the
luggage compartment.
F ig. 1 10 Storage net in luggage compartment
The storage net can be compacted by pushing
it down on the guides at the side, if necessary
¢fig.110 .
(D Tips
Do not keep any sharp or pointed objects
in the storage net -danger of injury!
Page 93 of 342
Warm and cold Climate control
Description
The air conditioner is fully automatic and is
designed to maintain a comfortable and uni
form climate inside the vehicle .
We recommend the following settings:
~ Set the temperature to 72 °F (+22 °C).
~ Press the !AUTO I button.
With this setting, you attain maximum com
fort in the least amount of time. Change this
setting, as desired, to meet your personal
needs.
The climate controls are a combination of
heating, ventilation and cooling systems,
which automatica lly reduce humidity and cool
the air inside your vehicle.
The air temperature, air flow and air distribu
tion are automatica lly regu lated to achieve
and maintain the desired passenger compart
ment temperature as quickly as possible.
The system automatically compensates for
changes in outside temperature and for the
intensity of the sunlight entering the ve hicle.
We recommend you use the
Automatic mode
¢ page 94 for year-round comfort.
Please note the following:
Turn on the air conditioner to reduce humidity
in the vehicle. This also prevents the windows
from fogging up .
When the outside temperature is high and the
air is very hum id,
condensation from the
evaporator may drip under the vehicle. This is
normal and does not indicate a leak.
If the outside temperature is low, the fan nor
mally only switches to a h igher speed once
the engine coolant has warmed up sufficient
l y.
The a ir conditioner temporarily switches off
when you drive off from a standstill using full
throttle to save engine power.
Warm and cold 91
The compressor also switches off if the cool
ant temperature is too high , so that the en
gine can be adequately cooled under extreme
loads .
Air pollutants filter
The air pollutants filter (a combined particle
filter and activated charcoa l filter) reduces or
prevents outside air pollution (dust, or pollen)
from entering the vehicle. The air is a lso fil
tered in a ir recirculation mode.
The air pollutants filter must be changed at
the interva ls specified in your Warranty
&
Maintenance booklet, so that the a ir cond i
tioner can properly work.
If you drive your vehicle in an area with high
air pollution, the filter may need to be
changed more frequently than specified in
your Audi Warranty
& Maintenance booklet. If
in doubt, ask your authorized Audi Serv ice Ad
visor for advice .
Key coded settings
The air conditioner settings selected are auto
matically stored and assigned to the key be ing
used. When the vehicle is started, the air con
ditioner automa tically selects the settings as
s igned to that key . This way every driver w ill
mainta in his/her own personal settings and
does not have to reset them manually.
If a different dr iver uses your key and changes
the air cond itioner settings, the latest adjust
ments will erase and replace the sett ings you
have stored.
Energy management
To prevent the battery from being discharged
and to restore the balance of energy, compo
nents which require large amounts of energy
are temporarily cut back or switched off
¢ page 225. Heat ing systems in particular re
quire a great deal of ene rgy. If you notice , fo r
example, that the seat* or rear window hea t
ing is not heating, they have been temporarily
cut back or switched off by
energy manage
ment .
These systems are availab le aga in as
soon as the energy balance has been restored . .,.
Page 95 of 342
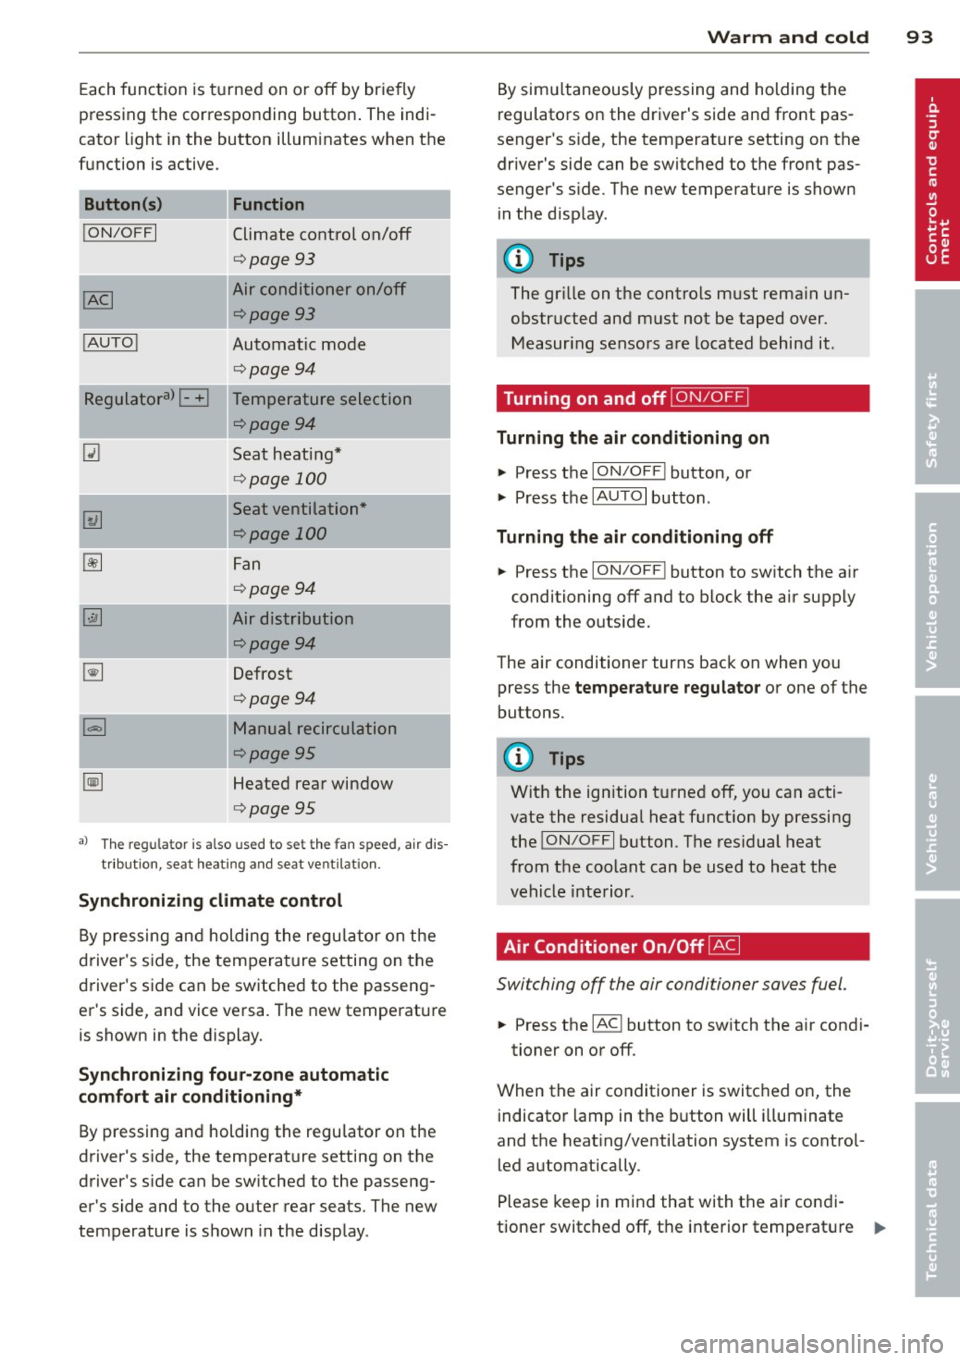
Each function is turned on or off by briefly
pr essing the corresponding button . The indi
cator light in the button illuminates when the
func tion is ac tive.
Button (s )
!ON/OFFI
! AUTO !
Function
Climate control on/off
<=>page 93
Air conditioner on/off
<=>page 93
Automatic mode
<=>page94
-~~~,--
Regulatora) G Temperature selection
~
I
<=>page94
Seat heating*
<=> page 100
Seat ventilation*
<=>page 100
Fan
<=> page94
Air distribution
<=>page94
Defrost
<=>page94
Manual recirculation
¢page95
Heated rear window
<=>page95
al Th e regulat or is also used to set t he fa n speed, air dis
tributio n, seat he ating and sea t ve ntilat io n.
Synchronizing climate control
By pressing and holding the regu lator on the
d river's side , the tempera ture setting on the
d river's side can be switched to the passeng
er's side, and vice versa . The new temperature
is shown in the display.
Synchroniz ing fou r-zone automatic
comf ort air c ond iti oning*
By pressing and holding the regu lator on the
drive r's side, the temperature setting on the
drive r's s ide can be sw itched to the passeng
er's side and to the ou ter rear seats. The new
temperature is shown in the display .
Warm and c old 93
By sim ultaneously pressing and holding the
regulators on the driver 's s ide and front pas
senger 's s ide, the temperat ure setting on the
driver's side can be switched to the front pas
senge r's s ide. T he new temperature is shown
in the d isp lay .
@ Tips
The gr ille on the controls must rema in un
obstructed and must not be taped over.
Measur ing senso rs are located behind it .
Turning on and off~
Turning the air conditioning on
"' Press the ION/O FF! button, or
"' Press the
IAUTO I button.
Turning the air conditioning off
"' Press the ION/O FF! button to sw itch the a ir
conditioning off and to block the air supply
from the ou tside.
The air conditioner turns back on when yo u
press the
temper atu re regulator or one of the
buttons.
(D Tips
Wit h the ignition t urned off, you can acti
vate the residual heat funct ion by pressing
the
! ON/O FF I button . The res idual heat
from the coolant can be used to heat the
vehicle interior .
Air Conditioner On/Off~
Switching off the air condi tioner saves fuel .
"' Press the IAC ! button to sw itch the a ir condi-
tioner on or off .
When the air conditioner is switc hed on, the
indicator lamp in the b utton will illuminate
and the heat ing/venti lation system is control
led automatically .
Please keep in mind that with the air condi
tione r switc hed off, the interior temperat ure
1JJ>