change time AUDI Q7 2017 Owner´s Manual
[x] Cancel search | Manufacturer: AUDI, Model Year: 2017, Model line: Q7, Model: AUDI Q7 2017Pages: 402, PDF Size: 100.39 MB
Page 18 of 402
Cockpit over view
Fuel consumption
The current fue l cons umption can be shown us
ing a bar graph¢
fig. 12. The ave rage cons ump
tion stored in the short-term memory is also dis
p layed . If the ba r is green, your vehicle is saving
fue l through the following function:
- Recuperati on: electrica l energy can be stored in
the ve hicle battery when t he vehicle is coasting
or driving downhi ll. The bar will move toward
0 .
@ Tips
The date, time of day and t ime and date for
mat can be set in the Infotainment system
¢page 249 .
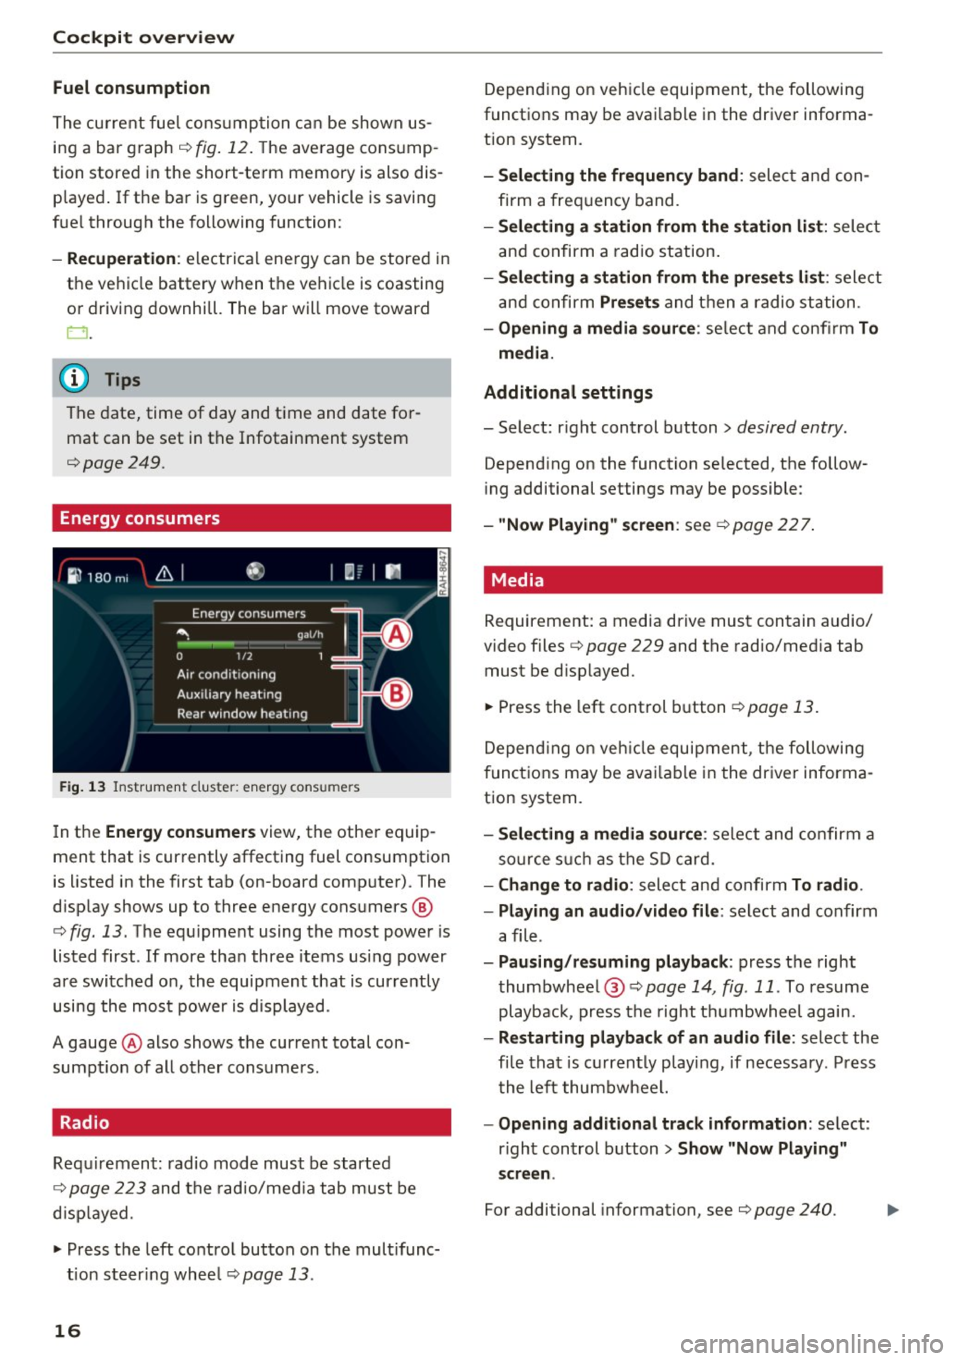
Energy consumers
Fig . 1 3 Instrument cluste r: energy cons umers
I n the Energ y consume rs view, the othe r equip
ment that is currently affecting fuel consumption
is listed in the first tab (on-board computer) . The
d isplay shows up to three energy consumers @
¢
fig. 13 . The equ ipment using the most power is
listed first . If more tha n three items us ing power
are switched on, the equipment that is currently
using the most power is d isplayed.
A gauge @also shows the current total con
sumpt io n of all other consumers.
Radio
Requ irement: radio mode must be started
¢
page 223 and the radio/med ia tab must be
d isp layed .
.. Press the left control button on the mult ifunc
tion steer ing whee l
¢page 13.
16
Depend ing on veh icle equipment, the following
functions may be avai lable in the driver informa
t ion system.
- Selecting the frequen cy band : select and con
firm a freq uency band .
-Selecting a station fr om the station li st: select
and confirm a rad io station.
- Selecting a station from the pre set s list: select
and confirm
Pre set s and then a radio station .
-Opening a media sour ce : se lect and confi rm To
media .
Addition al sett ings
- Select: r ight control button> desired entry.
Depend ing on the function selected, the follow
i ng additional settings may be possible :
-"Now Pla ying" screen : see ¢page 227.
' Media
Requirement: a media drive must contain audio/
video files¢
page 229 and the radio/med ia tab
must be d isp layed .
.. Press the left control button
r=;, page 13.
Depend ing on veh icle equipment, t he following
f unct ions may be ava ilable in the dr iver informa
tion system.
- Selecting a media sour ce : select and confirm a
so urce s uch a s the S D card.
- Change to radio : select and confirm To radio.
- Playing an audio /video file :
select and confirm
a file .
-Paus ing /resuming playback : press the right
thumbwhee l@ ¢page
14 , fig .11. To resume
playback, press the right t humbwheel again.
-Restarting p la y back of an audio fi le: select the
fi le that is currently playing , if necessary . Pr ess
t he left thumbwheel.
- Opening additional tra ck information : select:
r ight control button >
Show "Now Pl aying"
s creen .
For additional information , see ¢ page 240.
Page 21 of 402
u (0 ...... N r--. N ...... 0
0
:E
Applies to: vehicles with navigation system and map view
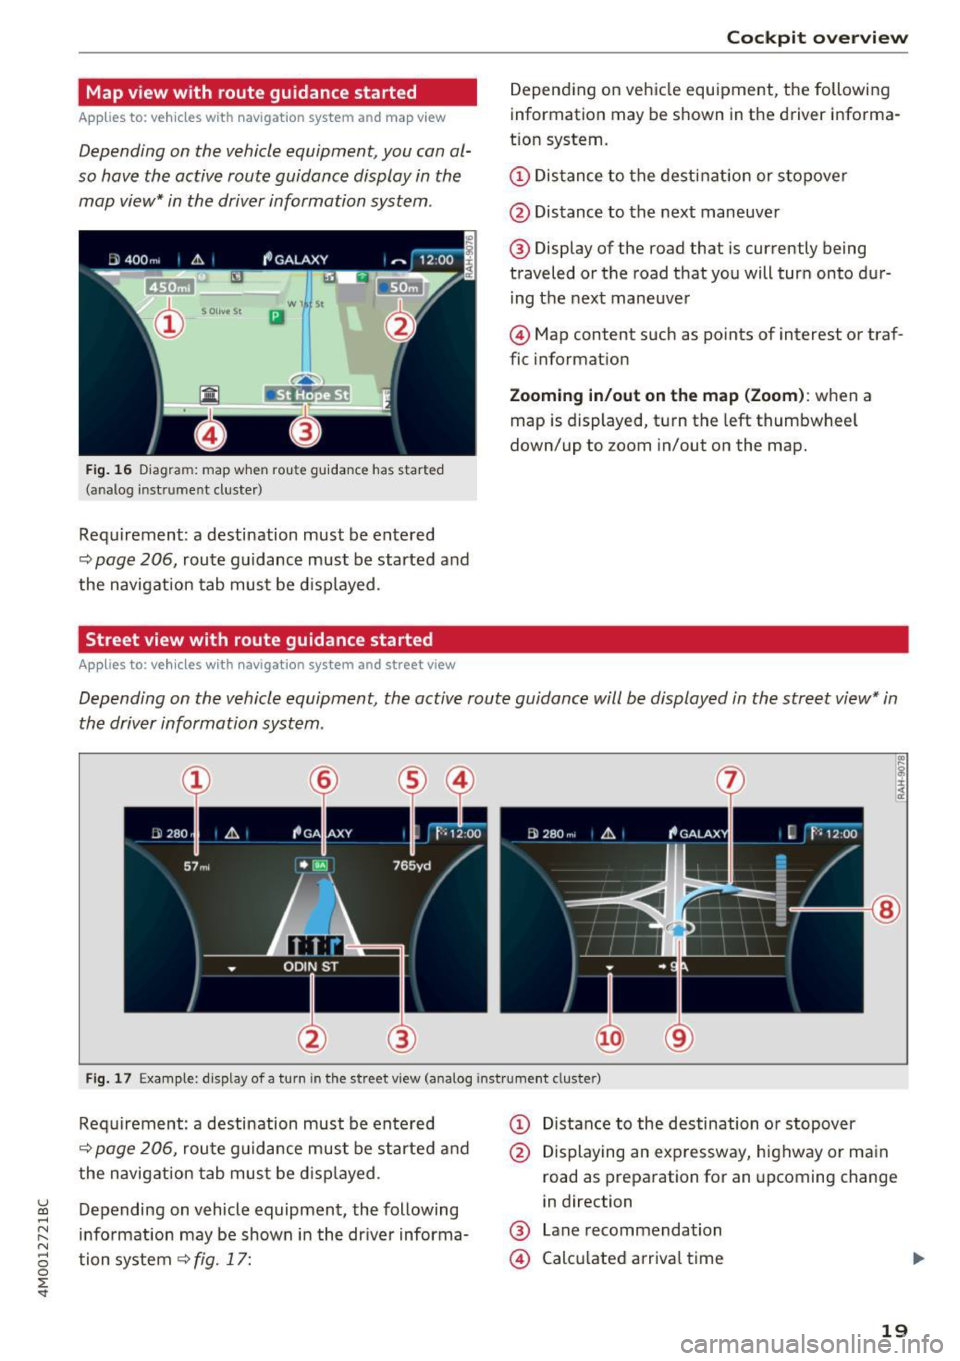
Depending on the vehicle equipment, you can al
so have the active route guidance display in the
map view* in the driver information system .
W 1 St
Ill
Fig. 16 Diagra m: map when rou te guidanc e has started
(ana log inst ru me nt cluster )
Requirement : a destination must be entered
q page 206, route guidance must be started and
the navigation tab must be displayed.
Street view with route guidance started
Applies to: vehicles with navigation system and street view
Cockpit overview
Depending on vehicle equ ipment, the following
information may be shown in the driver informa
t ion system .
(D Distance to the destination or stopover
@ Distance to the next maneuver
® Display of the road that is currently being
traveled or the road that you will turn onto dur
ing the next maneuver
@ Map content such as points of interest or traf
fic information
Zooming in/out on the map (Zoom): when a
map is displayed, turn the left thumbwheel
down/up to zoom in/out on the map.
Depending on the vehicle equipment, the active route guidance will be displayed in the street view* in
the driver information system .
I~ lg !:r;
:~
@
Fig. 17 Example: display of a turn in the street vi ew (analog instr ument clus te r)
Requirement: a destination must be entered
q page 206, route guidance must be started and
the navigation tab must be displayed.
Depending on vehicle equipment, the following
information may be shown in the driver informa
tion system
9 fig. 17:
(D Distance to the destination or stopover
@ Displaying an expressway, highway or main
road as preparation for an upcoming change
in direction
® Lane recommendation
@ Calculated arrival time
19
Page 33 of 402
u co ...... N r-... N ...... 0
0
:E: '
RPM range.
~ .... Engine oil sensor
• Oil le vel sy ste m: malfunction! Please co n
tact Service
The sensor to check the engine oil leve l has
fa iled. Drive to an authorized Audi dealer or au
thorized Audi Service Facility immediate ly to have
the ma lfunction corrected .
• Oil le vel sen sor : o il change nece ssary. Plea se
contact Service
Fu el has en tered the eng ine oi l as a res ult of fre
q uent short dr ives . Avoid hig h engine speeds, full
acceleration and heavy engine loads . Drive to an
authorized Audi dealer or authoriz ed Audi Service
Facility immediately to have the oil changed .
• Oil pre ssure se nso r: malfunction ! Please
contact Service
There is a malfunction in the oil p ressure sensor.
D rive to an autho rized Aud i dea le r o r a uthorized
Audi Service Facility immediately to have the
malfunct ion corrected.
f Engine warm-up request
n Plea se w arm up eng ine
Fu el has entered the engine oi l, either from low
outside temperat ures or freq uent short drives.
Drive unti l the engine is warm so that the fue l in
the eng ine oil will evaporate. Avoid high engine
speeds, full acce lerating and heavy eng ine loads
when doing this.
Bil Tank system
ID'J Plea se r efuel
If the indicator light turns on for the f irst time
and the message appea rs, there are about 2.6
gal lons (10 liters) of fuel left in the tank .
li}'J Please refuel immediately
If the indicator lig ht turns on the message ap
pears, the fue l tank is almost empty. Re fuel the
vehicle immediate ly.
Coc kpit o ve rv iew
li}'J Tank system : malfunction! Please cont act
Ser vic e
T he re is a m alfu nction in the f uel tank system.
Drive to an author ized Audi dealer or authorized
Audi Service Facility immed iate ly to have the
malfunction corrected.
(D Tips
For more information on fuel ing, see
c:;, page 316.
~ Washer fluid level
m Plea se ad d wa sher fluid
Fill the washer fluid for the windsh ield washer
system and the headlight washer system * when
the ignit ion is switched off
9 page 331.
~ , Windshield wipers
$ vVindshield wipers : malfun ction ! Please con
tact Service
The re is a ma lf u nction w ith the windshield wip
ers .
Drive to an author ized Audi dealer or authorized
Audi Service Fac ility immed iately to have the
malfunction corrected .
~ Driver's door
IJI Driver's door: malfun ction! Shif t to P before
leaving vehicle . See owner' s manual
The re is a ma lfunction in the d rive r's door . Select
t h e P selector leve r pos ition to secure the vehicle.
Drive to an au thorized Audi dealer or authorized
Audi Service Facility immed iately to have the
malfu nction corrected.
-:cp:-Bulb failure indicator
If the II ind icator light tu rns o n, a bulb has
failed. The message indica tes the location of the
bulb. Replace the bulb immediately.
Vehicle light s: m alfunction! Please contact
Servi ce
31
Page 50 of 402
Lights and Vision
Lights and Vision
Exterior lighting
Switching the lights on and off
M
::== === =----======= ~!
:,
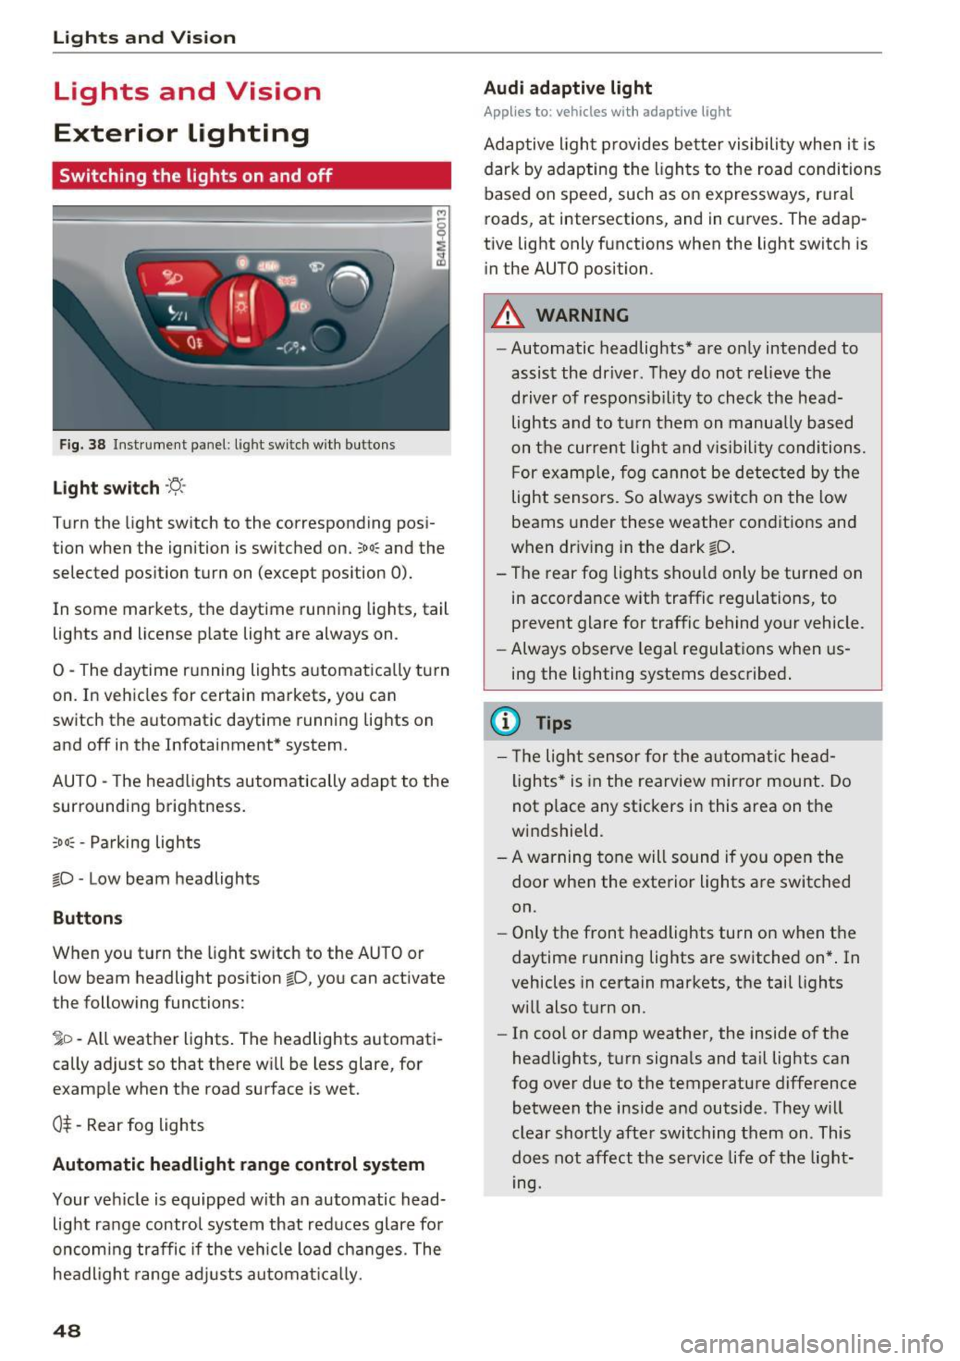
Fig. 38 Instrument panel : lig ht sw it c h w ith buttons
Li ght switch ·ti:
Turn the light switch to the corresponding posi
tion when the ignition is switched on.
;oo: and the
selected pos ition turn on (except pos ition 0).
In some markets, the daytime running lights, tail lights and license p late light are always on .
0 -The daytime r unning lights a utomatica lly turn
on. In veh icles for certain markets, you can
sw itch the automatic daytime runn ing lights on
and off in the Infotainment* system.
AUTO - The headlights automatically adap t to the
surrounding brightness.
;o o: -Pa rking lights
tD -Low beam headlights
Buttons
When you t urn the light sw itch to the AUTO or
low beam headlight position
tD , yo u can activate
the following functions:
jD -All weather lights . The headlights automati
cally ad just so that there w ill be less glare, for
example when the road surface is wet.
0$ -Rear fog lights
Automatic headlight range control system
Your vehicle is equipped with a n automatic head
light range contro l system that red uces glare for
oncom ing traffic if the veh icle load changes. The
headligh t range ad justs a utoma tically .
48
Audi adaptive light
App lies to: vehicles with adaptive light
Adaptive ligh t provides be tter visibility when i t is
dark by adapting the ligh ts to the roa d conditions
based on speed, such as on expressways, r ura l
roads, at intersections, and in curves. The adap
tive light only functions when the light switch is
i n the AUTO position .
A WARNING
-Automatic headlig hts* are on ly intended to
assist the driver . They do not relieve the
driver of responsib il ity to check the head
lights and to t urn them on manua lly b ased
on t he curre nt ligh t and v is ibility conditions.
F or exa mple, fog cannot be detec ted by the
light sensors. So always switch on the low
beams under these weather condit ions and
when dr iv ing in the dark
tD .
- T he rear fog lights shou ld only be turned on
in acco rdance w ith traffic regulations, to
prevent glare for traffic behind your vehicle.
- Always observe le g al regulat ions when us
ing the lighting systems desc ribe d.
{l) Tips
- Th e light sensor for the a utomat ic he ad
ligh ts * is in the rearview mir ror mount. Do
not p lace any stickers in this area on the
w indshield .
- A warning tone will sound if yo u ope n the
door when the exte rior Lights a re switched
on.
- Only the front headlights turn on when t he
daytime running lights are switched on* . In
vehicles in certain markets, t he tail lights
w ill also t urn on .
- In cool or damp weather, the inside of t he
head lights, t urn signa ls and ta il lig hts can
fog over due to the temperature difference
between the inside and outside . They w ill
clear shortly afte r swi tching them on . This
does not affect the service life of t he light
mg.
Page 52 of 402
Lights and Vision
Ir.a Head light a ssista nt: malf unction! See own
er' s manual
Drive to an a utho rized Aud i de aler or authorized
Aud i Serv ice Facility immediately to have the
malfunction corrected . You can still switch the
high beams on or off manually .
II Headlight assi stant : currently unavail able .
Camera view re stricted due to surroundings .
See owner's manual
The camera view is b lo cked , fo r example by a
s t icker o r debr is.
The sensor is located between the interior rear
view mir ror and the windshield . Do not p lace any
stickers in th is area on the windshield .
_& WARNING
High beam assistant is only i ntended to assist
t he driver. The dr iver is still res ponsible for
cont ro lling the headlights and may need to
switch them on and off manually depend ing
on light and visib ility co nditions . It may be
necessary to ope rate them manua lly in s itua
tions such as:
- In adve rse weathe r cond itions such as fog,
heavy ra in, b low ing snow or sp raying water .
- On roads where oncoming traffic may be
partia lly obscured, s uch as exp ressways .
- When there a re road users that do not have
s uf ficient lighting, s uch as bicyclers o r
vehicles with dirty ta il lamps.
- In tight curves and o n steep hills .
- In poorly lit areas .
- Wi th stro ng reflecto rs, such as s igns.
- If the area of the windsh ield near the senso r
is fogged ove r, dirty, i cy or covere d with a
st icker .
Adjusting the exterior lighting
The functions ar e adjust ed in the Infotainm ent
system.
• Se lect in the Infotainment system: I M ENU I but
ton
> Vehi cle > left contro l button > Vehicle
setting s
> Exterior lighting .
50
Automatic headlights
You can adjus t the following se ttings in the Au
to-dimming high beam s
menu:
Activation time -you can adjust if the headlights
swi tch on
Early , Medium or Late accor ding to t he
sens itivity of t he lig ht sen sor .
Headlight assistant * -you can switch the high
bea m assis tant* on and off.
Entry/exit lighting
When it is dark, the Ent ry /exit lighting ill umi
nates the area a round the vehicle when unlocking
the veh icle and after switch ing off the ig nition
and opening the dr ive r's door .
The
Entry /e xit lighting only works when it is
dark and the light sw itch is in the
AUTO posit ion.
Daytime running lights
USA models :
the daytime r unning lights can be
switch ed on/off . S elect
On or Off.
Canada models: this f unction canno t be sw itched
off. They activate automatically each time the ig
nit ion is switched on.
Emergency flas hers
--- ---~
·--~~ ~-~-~
·----- -- --___ , ~ - ::..- -- ,,.. A .. 'l-"'.A - - -~
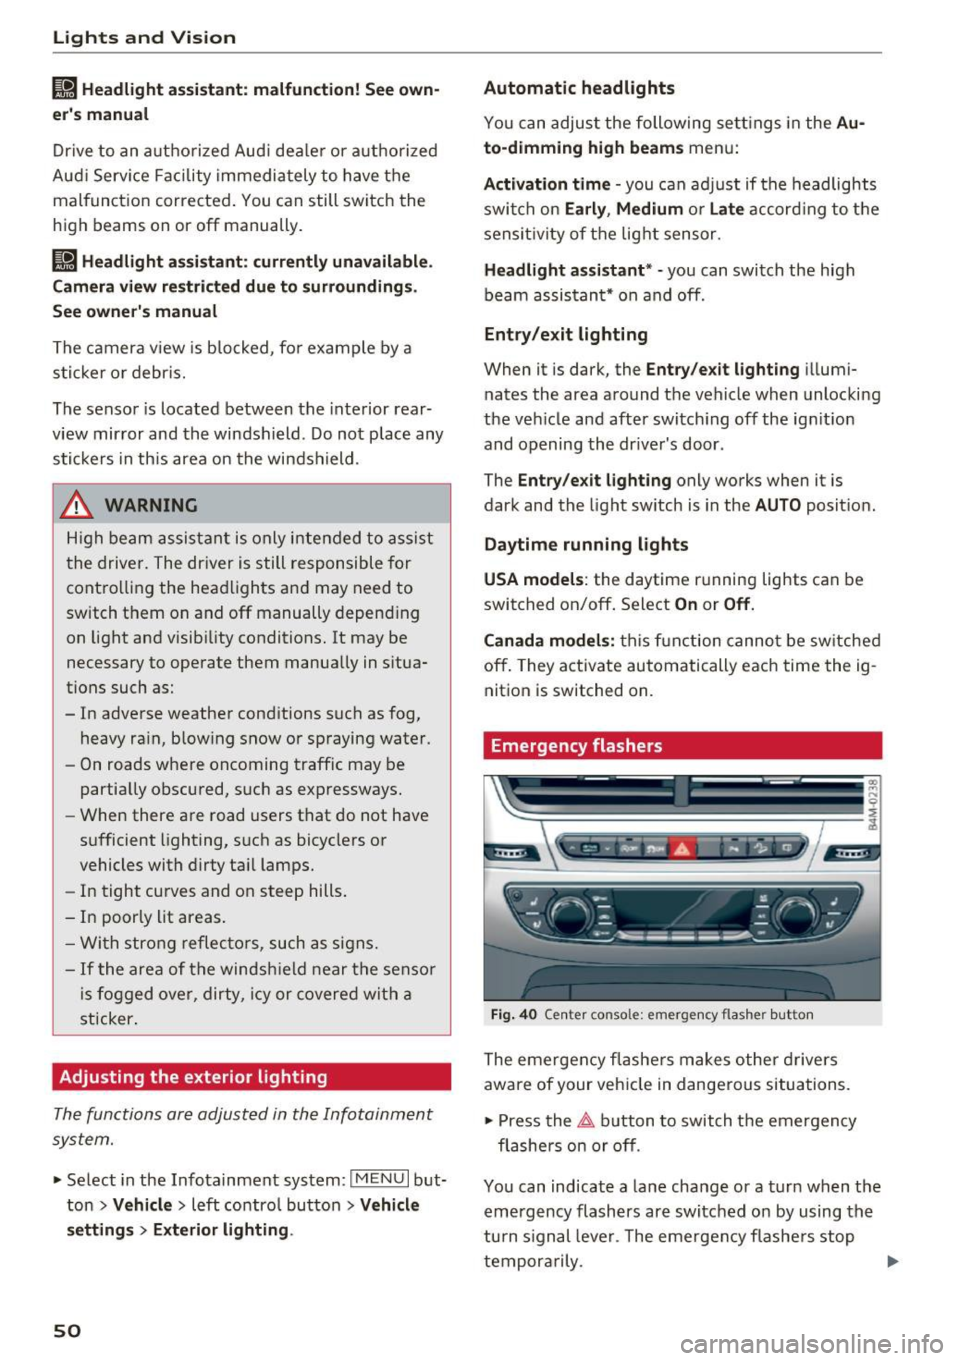
Fig. 4 0 Center conso le: emerge ncy flashe r bu tt o n
The emergen cy fl ashe rs m akes ot her d rivers
aware of your veh icle in dangerous situations.
• Press the
~ button to switch the emergency
flashe rs on or off .
Yo u can indicate a la ne change or a turn when the
eme rgency flashers are switched o n by using the
turn s ignal leve r. T he eme rgency f lashe rs stop
tempor arily .
ll-
Page 79 of 402
u co ...... N r-... N ...... 0
0
:E: '
Use the rocker switch(;) to select the funct io n.
When synchronization is switched on, the set
tings for the driver's side are applied to the front
passenger's side and the rear (except for seat
heating/ventilation*). When the settings on the
front passenger 's side or in the rear are changed,
the synchron izat ion is automatically sw itched off
and
4-zone appears in the display .
SET REAR
function
Use the rocker switch (D to select the funct ion .
When the function is switched on, you can adjust
all settings for the rear using the climate control
system controls in the cockpit . The rear climate
control system controls cannot be operated at
the same time. This function switches off auto
matically after a certain period of time or after
l eaving the menu.
Vents
You can open or close the center and rear vents in
the cockpit and the vents in the rear center con
sole and door pillars using the ridged thumb
wheels. The levers adjust the direct io n of the air
flow from the vents. The w ide ven t is opened and
closed using the~ button ~
page 8, fig. 2@ .
Residual heat
You can activate the residual heat funct ion when
the ignition is switched off by pressing the knob
@ (left side). The residual heat from the coolant
is used to heat the vehicle inter io r. The resid ual
heat function switches off automatically after
about 15 min utes.
& WARNING
- You should not use the recirculation mode
for an extended period of time, because no
fresh a ir is drawn in and the windows can
fog when coo ling mode is switched off . This
increases the risk of an accident .
- Individuals with reduced sensitivity to pain
or temperature could develop burns when
using the seat heating function . To reduce
the risk of injury, these ind iv iduals should
not use seat heating.
Warm and cold
(D Note
To avoid damage to the heating elements in
the seats, do not kneel on the seats or place
heavy loads on a small area of the seat.
(D Tips
It is not possible to operate the rear climate
control system controls when the power ch ild
safety lock is switched on. With With the
SET REAR function, you can apply all settings
to the rear using the climate control system
controls in the cockpit
~ page 43.
Setup
Applies to: vehicles with 4 -zone deluxe automat ic climate
contro l
The climate control system basic settings are ac
cessed in the Infotainment system .
.. Select in the Infotainment system: I MENU! but
ton
> Vehicle > l eft control b utton > Air condi
tioning
Seat heating/seat ventilation*
You can adjust the seat heating/ventilation bal
ance fo r the driver, front passenger and rear pas
sengers .
Footwell temperature
You can adjust the footwell temperature so that
it is cooler or warmer.
Auto recirculation
When switched on, automat ic rec irculat ion con
trols the recirculation mode automatically . You
must press the
® MAX button if fog forms on
the windows.
Automatic auxiliary heater*
The aux iliary heater he lps to warm the vehicle in
terior more quickly.
Steering wheel heating
Applies to: vehicles with stee ring wheel heating
The steering wheel rim can be heated .
.. Press the button on the multifunction steering
wheel to switch the steering wheel heating on ..,_
77
Page 97 of 402
u co ...... N r-... N ...... 0
0
:E: '
when the engine speed is wit hin the permitted
range .
(D Tips
-If you s hift to the next lowest gear, the
transm ission w ill only shift if the en gine w ill
not be over-rewed.
- With kick-down , th e tran smission shifts to a
l ower gear, dep end ing on vehicle s peed and
engine speed .
- tiptronic does not wo rk if the t ransmiss ion
i s r unning in eme rge ncy mo de.
Kick-down
Kick -down enables maximum acceler ation .
When you press the a ccele rator ped al down be
yon d the resis tance poin t, the au tom atic trans
miss ion downshifts into a lower gear and t he en
g ine utilizes its fu ll power, depend ing on veh icle
speed and engine RPM . It shifts up into t he next
h igher gea r once the maximum spec ified engine
RP M is reached .
A WARNING
Please note that the wheels could s pin o n
slic k or slippery roads when kick-down is ac
ti ve .
Transmission malfunction
-
• Transmission : malfunction! Please stop ve
hicle and shift to P
Do not cont inue driv ing. Select the P se lector lev
e r p osition and contact an autho rized Aud i dea le r
or author ized A udi Se rvice Fac ility for assistance .
rm Selector lever: malfunction! You may contin
ue driving. Please contact Service
There is a system malfunct ion in the t ransmis
sion. D rive to a n author ized Audi dealer or au
thor ized Audi Se rvice Fac ility immed iate ly to have
the ma lf u nction co rrected.
rm P button: malfunction! Auto P when engine
off. Please contact Service D
riving
T he re is a ma lf u n ct ion in the P but ton on these
l ector lever . The transmission automatically en
gages in P when yo u sw itch off the engine . Dr ive
to an autho rized Aud i dea le r or authori zed Aud i
Se rvice Facility immed iate ly to have the ma lfunc
t ion corrected .
rm Transmission: malfunction! Gear change on
ly possible using both paddle levers. Please con
tact Service
T he re is a system malfunction in the transmis
s io n. You can continue dr iv ing with restr icted
funct ion. The se lector lever is not work ing . Gea rs
can on ly be selected by tapping both shift pad
dles at t he same time whe n the vehicle is stat ion
ary ~
page 94, fig . 94. Pay atte ntion to these
l ected transmission position in t he i nstr um ent
cl uster d isp lay. The pa rking lo ck eng ages auto
m ati cally when yo u turn off the eng ine. Drive to
an a uth orize d Au di dealer o r auth orized Aud i
Se rvice Facility immed iate ly to have the ma lfunc
t ion corrected .
rm Transmission: Please pre ss brake pedal and
select gear again
Pr ess t he b rak e peda l and select the desired se
l ector lever position again. Yo u ca n then co nt inu e
dr iv ing.
rm Transmission: too hot . Please adapt driving
style
The transmission temperature has i ncreased sig
nificantly due to t he sporty dr iv ing ma nner . Drive
i n a less s port y m anne r unt il the tempera tu re re
tu rns to t he norma l ra nge and t he i ndi cator lig ht
swi tches of.
rm Transmission: malfunction! You can contin
ue driving. See owner's manual
There is a system malfunction in the transmis
s io n. You may contin ue d riving. Dr ive to an a u
t h orized Au di dea ler or a uthorized Audi Service
Fac ility soon to have the mal func tion corrected .
rm Transmission: malfunction! You can contin
ue driving in
D until engine off
T he re is a system malfu nction in the transmis -
s ion. The transmission is switc hing to eme rgency
mode. If you turn the engine off, you w ill not be ..,.
95
Page 109 of 402
u (0 ...... N r--. N ...... 0
0
:E
Description
Applies to: vehicles with Audi adaptive cruise control
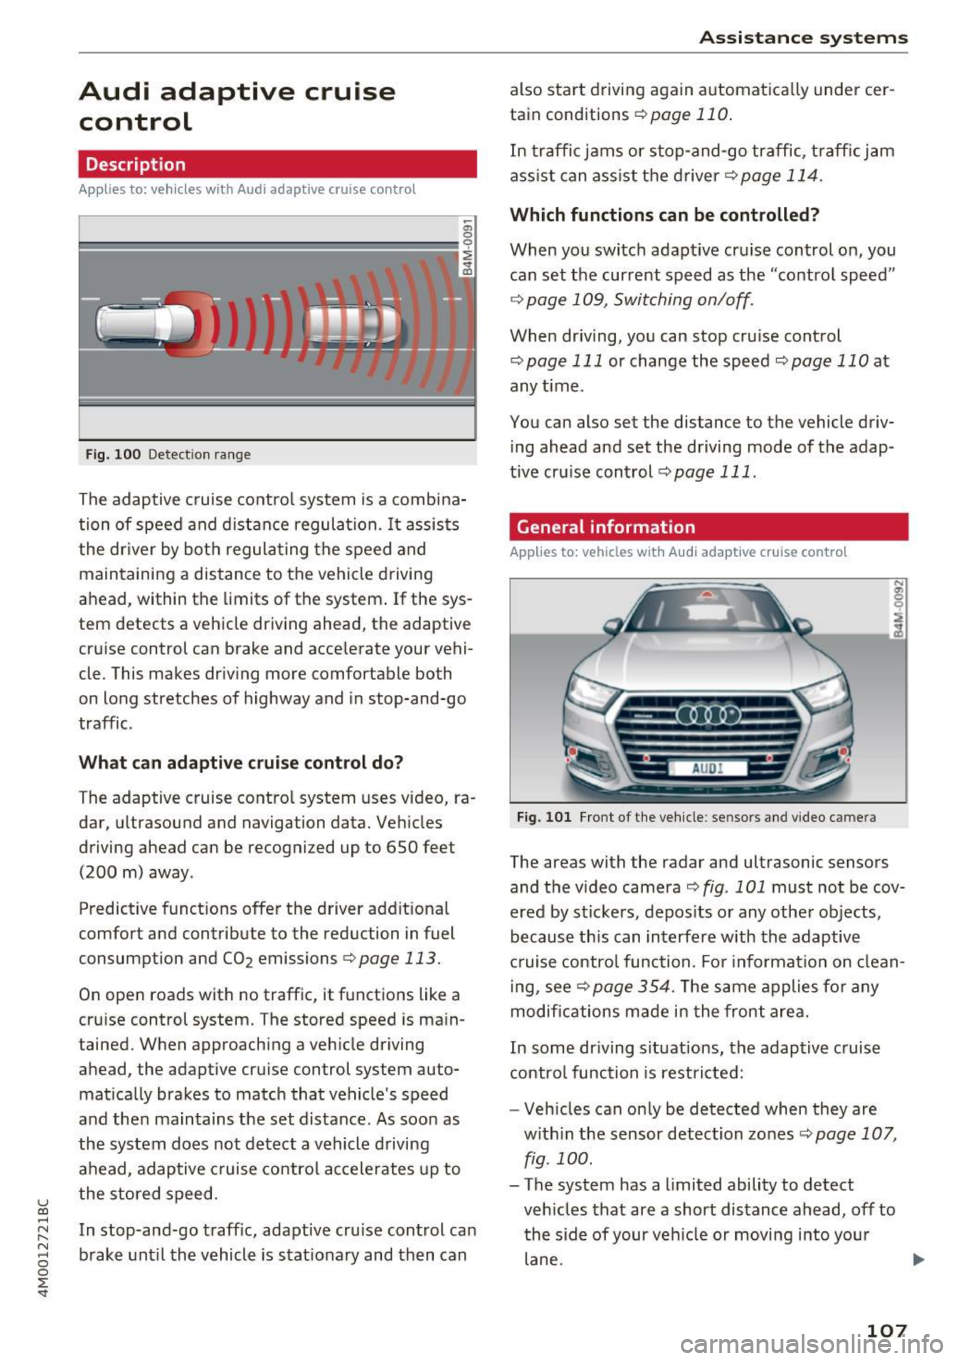
Fig. 100 Detect ion range
The adaptive cruise control system is a combina
tion of speed and distance regulation.
It assists
the dr iver by both regulat ing the speed and
maintaining a distance to the vehicle driving
ahead, within the limits of the system .
If the sys
tem detects a vehicle driving ahead, the adaptive
cruise control can brake and accelerate your vehi
cle. This makes dr iving more comfortable both
on long stretches of highway and in stop-and-go
traffic.
What can adaptive cruise control do?
The adaptive cruise control system uses video, ra
dar, ultrasound and navigation data. Vehicles
driving ahead can be recognized up to
650 feet
(200 m) away.
Predictive funct ions offer the driver additional
comfort and contribute to the reduction in fuel
consumption and CO2 emissions
¢page 113.
On open roads with no traffic, it functions like a
cruise control system. The stored speed is main
tained. When approaching a vehicle driving
ahead, the adaptive cruise control system auto
matically brakes to match that vehicle's speed
and the n maintains the set distance. As soon as
the system does not detect a vehicle driving
ahead, adaptive cruise control accelerates up to
the stored speed.
In stop-and-go traffic, adaptive cru ise control ca n
brake until the vehicle is stationary and then can
Assistance systems
also start driving again automatically under cer
tain conditions
¢page 110.
In traffic jams or stop-and-go traffic, traffic jam
ass ist can assist the driver¢
page 114.
Which functions can be controlled?
When you switch adapt ive cruise control on, you
can set the current speed as the "control speed"
¢page 109, Switching on/off.
When driving, you can stop cruise control
¢page 111 or change the speed <::;>page 110 at
any time.
You can also set the distance to the vehicle driv ing ahead and set the driving mode of the adap
tive cruise control¢
page 111.
General information
Applies to: vehicles with Audi adaptive cruise control
Fig. 101 F ront of the vehicle : sensors and video camera
The areas with the radar and ultrasonic sensors
and the video camera
i::> fig . 101 must not be cov
ered by stickers, depos its or any other objects,
because this can interfere with the adaptive
cruise control function. For informat io n on clean
ing, see<::;>
page 354. The same applies for any
modifications made in the front area.
In some driving situations, the adaptive cruise
control function is restricted:
- Vehicles can only be detected when they are
with in the sensor detection zones<::;>
page 107,
fig . 100.
- The system has a limited ability to detect
vehicles that are a short distance ahead, off to
the side of your veh icle or moving into your
lane .
107
Page 112 of 402
Ass is tance sy stems
fall below the se lected distance, the distance
bars become red from the bottom upward.
A WARNING
--:-- ~~ If you press the ISETI button when driving at
speeds below 20 mph (30 km/h), the vehicle
accelerates automat ica lly up to 20 mph (30
km/h), which is the m inimum speed that can
be set.
(D Tips
- If you switch the ignition or the adapt ive
cruise control system off, the set speed is
erased for safety reasons.
- The electronic stabilization control (ESC)
and the anti-slip-regulation (ASR) are auto
matically sw itched on when the adaptive
cruise control is switched on .
Changing the speed
Applies to: vehicles with Audi adaptive cruise contro l
0
f
J
0
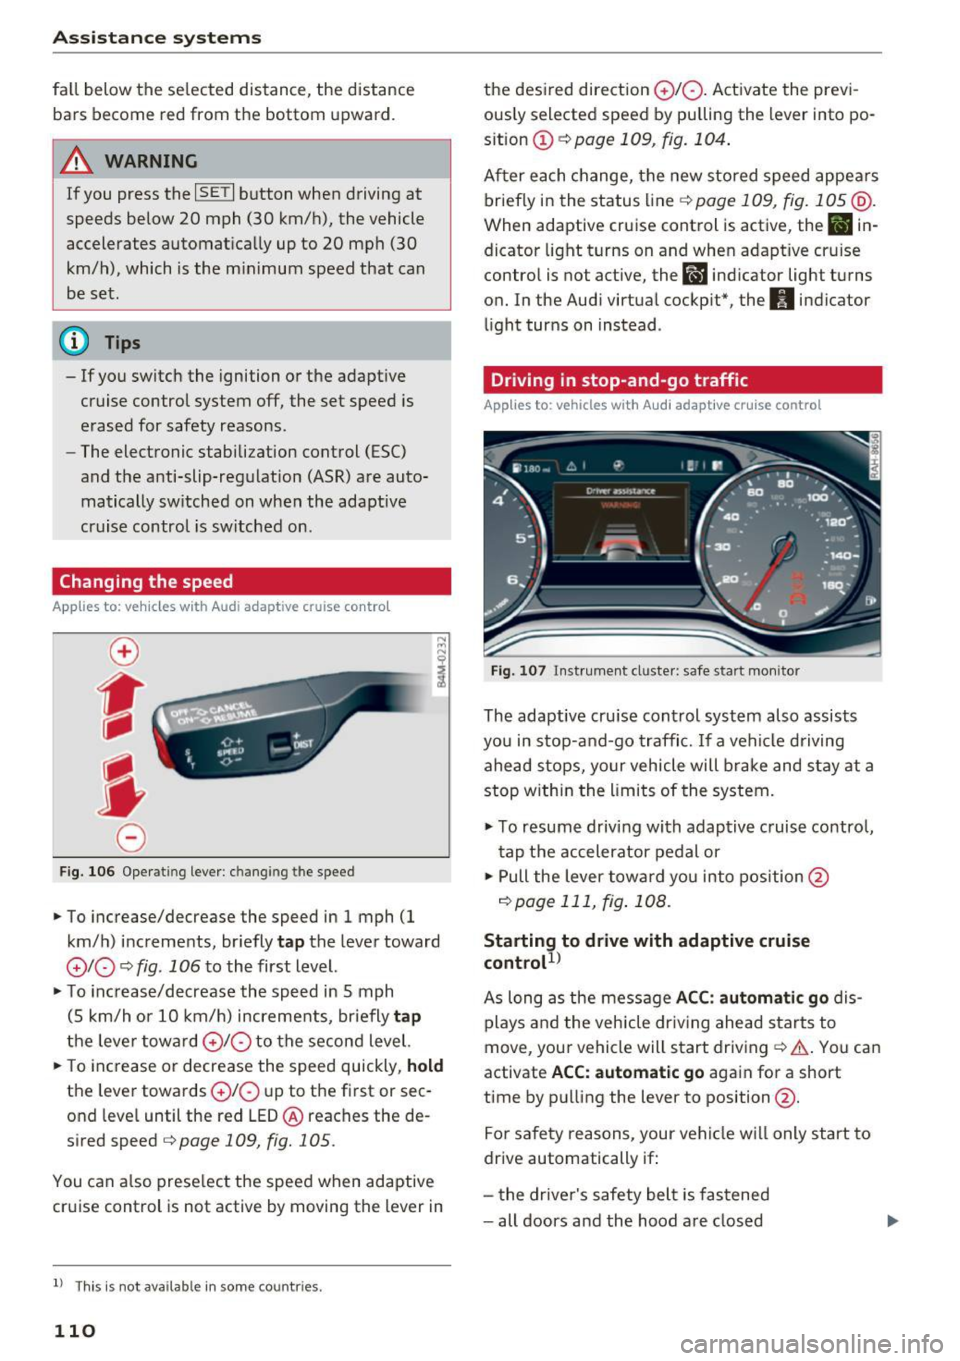
F ig. 106 Operat ing lever: c hanging th e speed
"To increase/decrease the speed in 1 mph (1
km/ h) increments, br iefly
tap the lever toward
0 10 ¢ fig . 106 to the first level.
• To increase/decrease the speed in S mph
(5 km/h or 10 km/h) increments, briefly
tap
the leve r toward 0 10 to the second level.
" To increase or decrease the speed quickly, hold
the lever towards
0 10 up to the first or sec
ond level until the red LED@ reaches the de
sired speed
¢ page 109, fig. 105.
You can a lso prese lect the speed when adaptive
cruise control is not active by moving the lever in
l) Th is is not ava ilab le in some countries.
110
the desired direction G) !Q . Activate the previ
ously selected speed by pulling the lever into po
s ition (I)¢
page 109, fig. 104 .
After each change, the new stored speed appears
briefly in the status line ¢
page 109, fig. 105 @.
When adaptive cruise control is active, the B in
dicator light turns on and when adapt ive cruise
contro l is not active, the
ii ind icator light turns
on. In the Aud i virtual cockp it*, the
II indicator
light turns on instead .
Driving in stop-and-go traffic
Applies to: vehicles with A udi adapt ive cr uise control
F ig. 107 Instrument cl uster: safe start monitor
The adaptive cru ise control system also assists
you in stop-and-go traffic. If a vehicle driving
ahead stops, yo ur vehicle will brake and stay at a
stop within the limits of the system.
" To resume driving with adaptive cruise contro l,
tap the accelerator pedal or
• Pull the lever toward yo u into position @
¢page 111, fig. 108.
Starting to dr ive with adaptive cruise
control
1 )
As long as the message A CC: aut omati c go dis
plays and the veh icle dr iv ing ahead starts to
move, your vehicle will start driving¢& . You can
activate
ACC: automatic go again for a short
time by pulling the lever to position @.
Fo r safety reasons, your vehicle w ill only start to
drive automatically if:
- the drive r's safety belt is fastened
- all doors and the hood are closed
Page 114 of 402
Ass is tance sy stems
again. The distance between the two vehicles
will change in the instrument cluster disp lay.
When approach ing a veh icle driving ahead, the
adaptive cr uise control system brakes to match
that vehicle's speed and then adjusts to the set distance.
If the vehicle driving ahead accelerates,
then the adaptive cruise control will also acceler
ate up to the speed that you have set.
The higher the speed, the greater the distance
c::> ,&. . The Distan ce 3 setting is recommended .
That is equal to the general recommendation of
"half the speed shown on the speedometer".
The distances provided are specified values . De
pending on the driving situation and how the ve hicle ahead is driving, the actual distance may be
more or less than these target distances.
I f you change the time gaps, the new ly set value
appears briefly in the instrument cluster display
I ii for Di st a nc e 3. This only occurs if the Driver
ass ista nce
display is not currently shown in the
disp lay
c::> page 109, fig. 105 .
Distance 1 : this setting corresponds to a d istance
of 92 feet (28 meters) when traveling at 62 mph
(100 km/h), or a time distance of 1 second.
Di stance 2 : this setting corresponds to a d istance
of 118 feet (36 meters) when traveling at 62
mph (100 km/h), or a time distance of 1.3 sec
onds.
Di stance 3 : this setting corresponds to a d istance
of 164 feet (SO meters) when traveling at 62
mph (100 km/h), or a time distance of 1.8 sec
onds.
Di stance 4 : this setting corresponds to a d istance
of 219 feet (67 meters) when traveling at 62
mph (100 km/h), or a time distance of 2.4 sec
onds.
Di stance 5 : this setting corresponds to a d istance
of 328 feet (100 meters) when traveling at 62
mph (100 km/h), or a time distance of 3.6 sec
onds.
112
A WARNING
When setting the distance, the driver is re
sponsible for adheri ng to any applicable legal
regulations.
@ Tips
- Depending on the selected driving mode in
dr ive se lect* and the set distance, the driv
ing behav ior will vary from dynamic to com
fortab le when accelerating
c::, page 135.
- Distan ce 3 is set automatically each time
you switch the ignition on. If you would like
to set anothe r distance as the default set
t ing, you can have the
adaptive crui se con
trol menu enabled by an autho rized Aud i
deale r or author ized Audi Service Fa cility.
- Your settings are a utomat ica lly stored and
assigned to the remote con trol key be ing
used .
Driver intervention request
Applies to: vehicles with Audi adaptive cruise control
Fig . 110 Instr ument cluster: req uest for driver interven
t ion
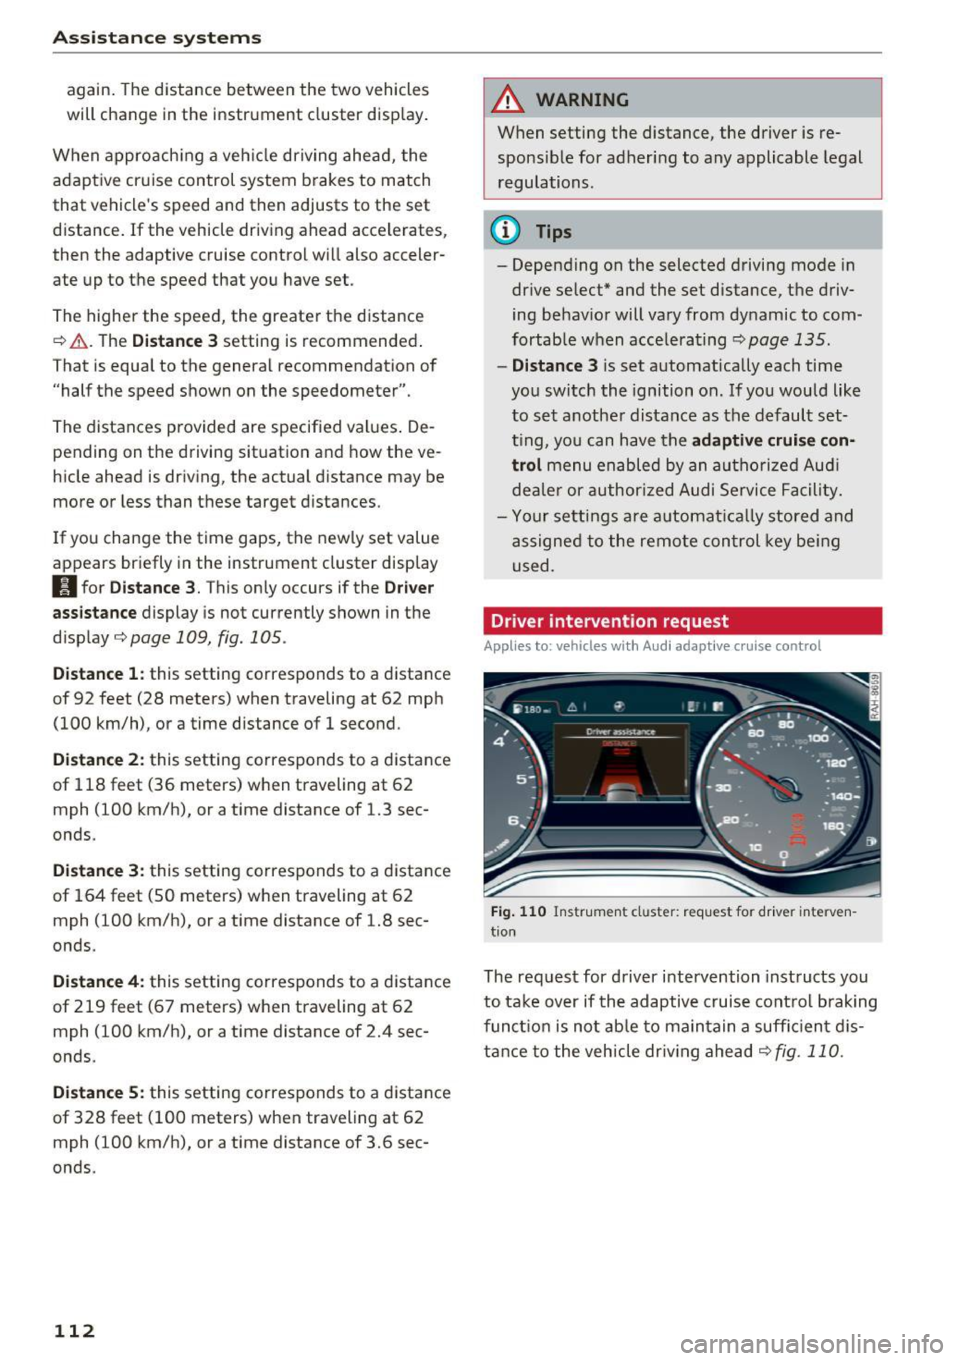
The request for driver intervention instructs you
to take over if the adaptive cruise control brak ing
funct ion is not ab le to ma in tain a suff ic ient d is
tance to the vehicle dr iv ing ahead
c::,fig. 110.